
In this tutorial you’ll learn how to paint muzzle-flash effect pieces for bolters or similar weaponry in a bright, cinematic way. Find out more in this post.
This tutorial assumes you have a good understanding of how to paint Warhammer miniatures. Underneath each picture is the corresponding instruction. Each step shows the paint(s) I used. I have a rather eclectic paint collection, so when I use a paint that’s not from Games Workshop or out of production, I’ll try to provide you with suitable alternatives from the current Citadel paint range [in brackets]. However, if you want to achieve the exact same result as shown, you might want to expand your paint collection with the specific colour. You’ll find a list of all the paints used in this tutorial at the end of the post.
The effect pieces painted for this tutorial are from Tablehammer.com, check out our review here. There are other companies out there who also do cinematic effect pieces, for example, Anvil Industries or Armorcast.
How to paint muzzle-flashes

Basecoat the effect piece with Wraithbone primer (if you paint it separately) or a few thin coats of Wraithbone base paint.
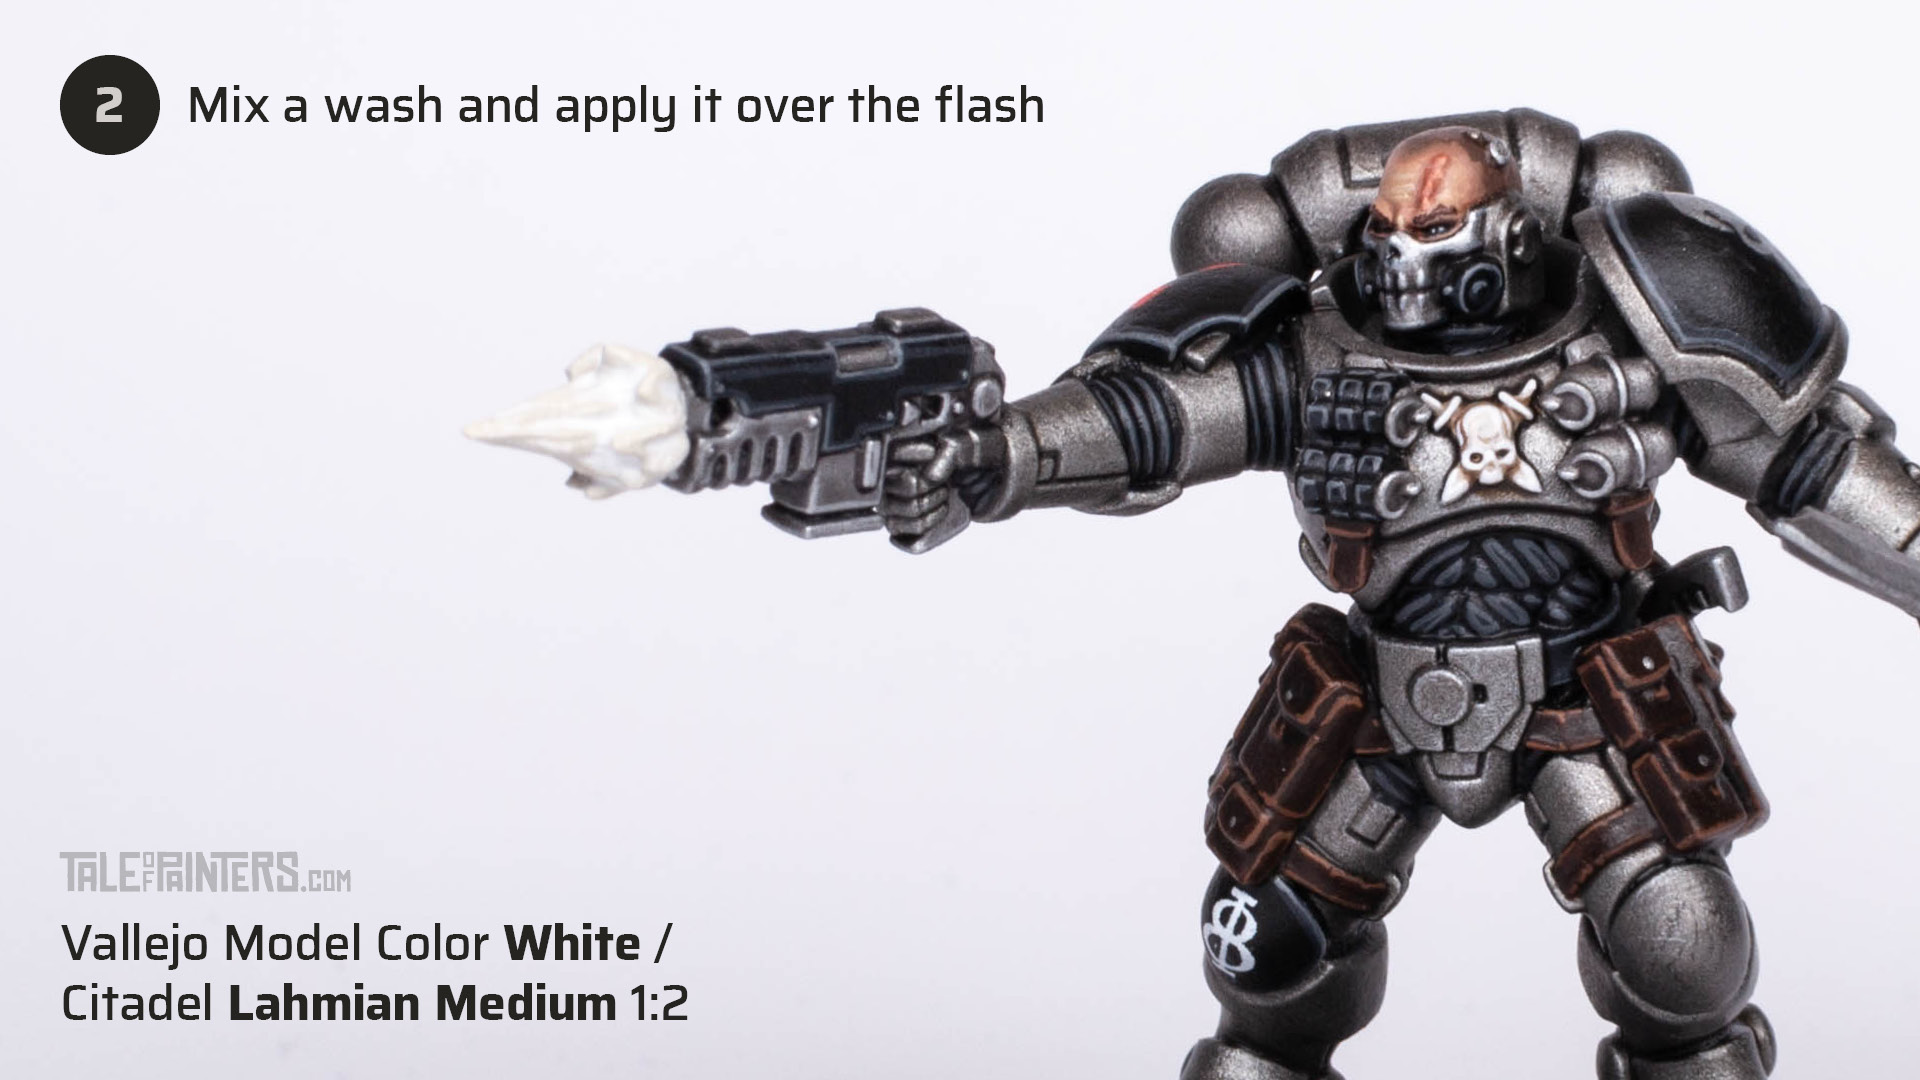
Mix Vallejo Model Color White [or White Scar or any white you prefer] with Lahmian Medium about 1:2 to create a wash and apply it all over the muzzle-flash.
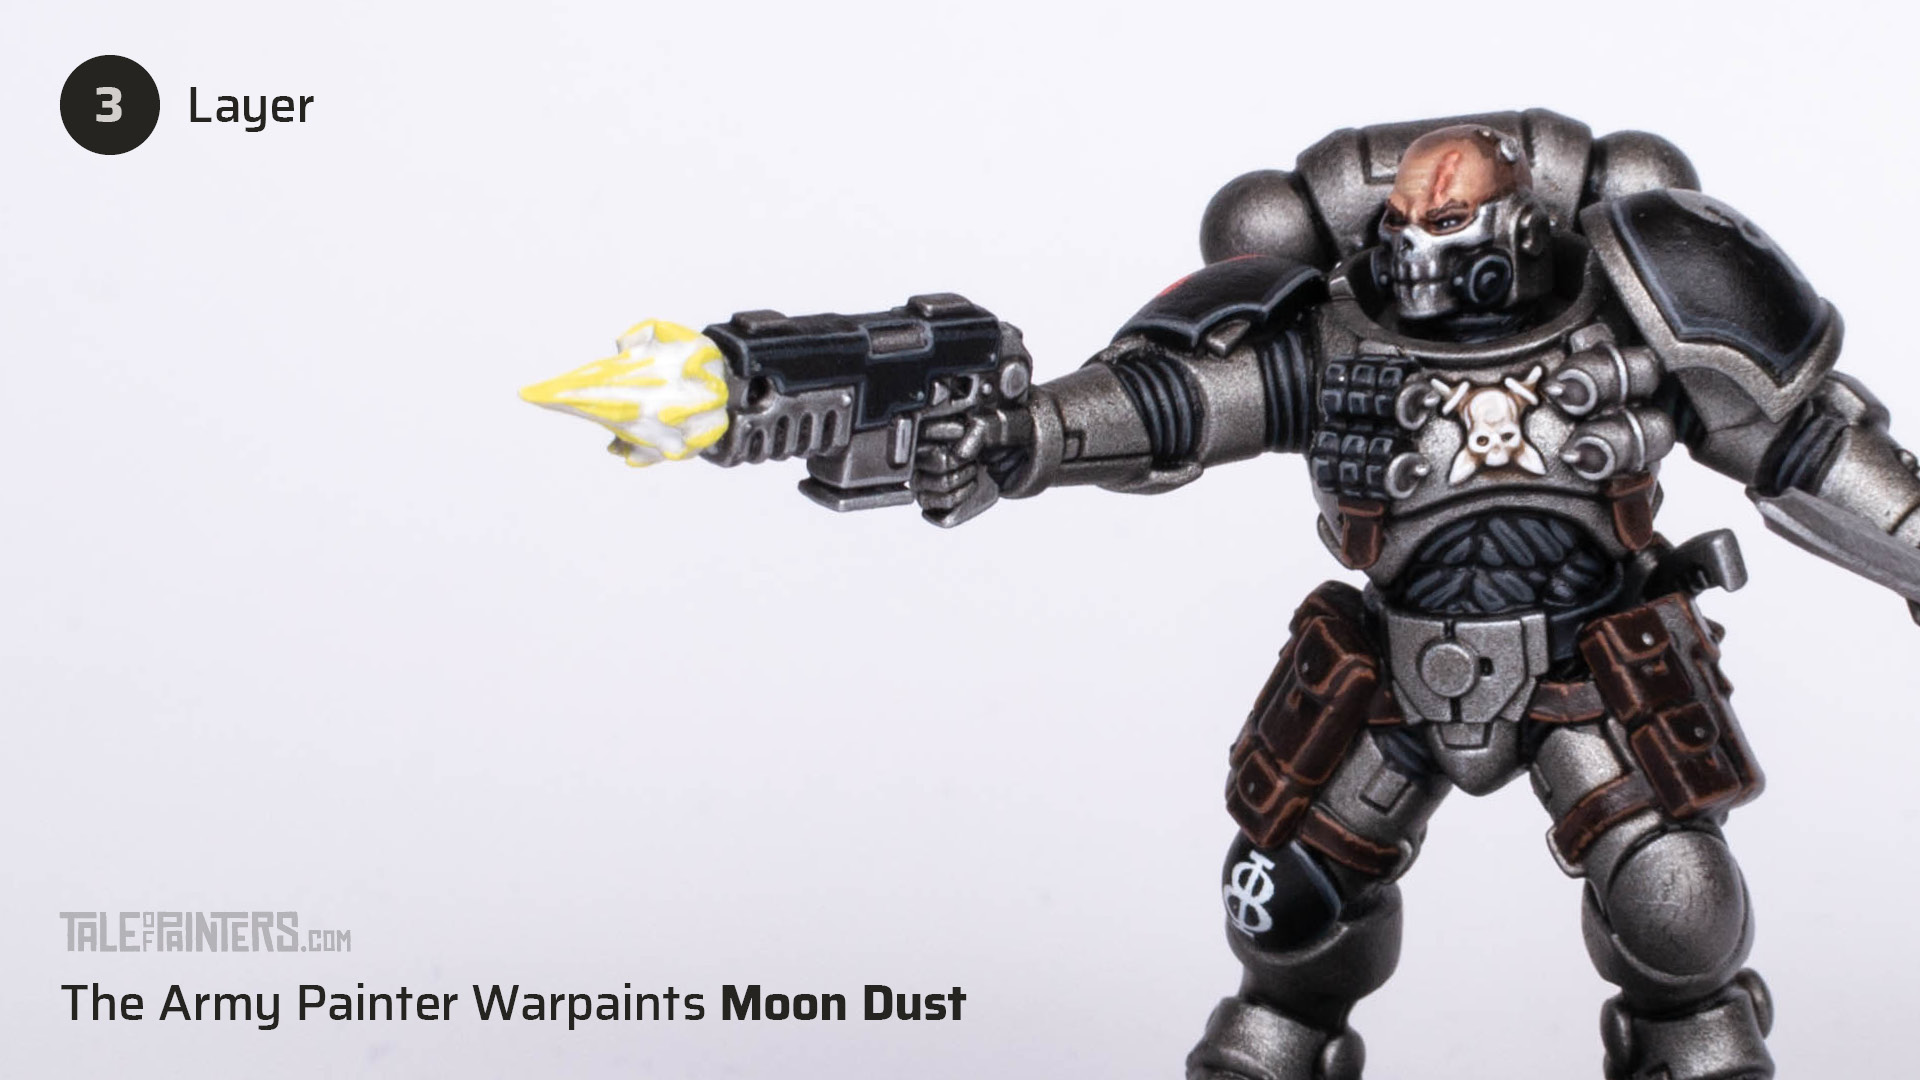
Once dry, layer Moon Dust [or Phalanx Yellow or Flash Gitz Yellow with a little bit of White Scar added] on the muzzle-flash, leaving the white wash showing through in the recessed areas.


Highlight the most prominent features with Yriel Yellow, which starts to create a gradient from light to dark.

Complete the effect by highlighting only the tips with Vallejo Game Color Orange Fire [or Fire Dragon Bright].
And there we have the finished muzzle-flash. I went for a very bright look, though with using the technique above, it’s easy to paint a darker flash if you prefer. Start with a basecoat of Yriel Yellow for step 1, create a wash with Dorn Yellow and Lahmian Medium for step 2, layer with Fire Dragon Bright in step 3, highlight with Wild Rider Red for step 4, and finally Mephiston Red for step 5.

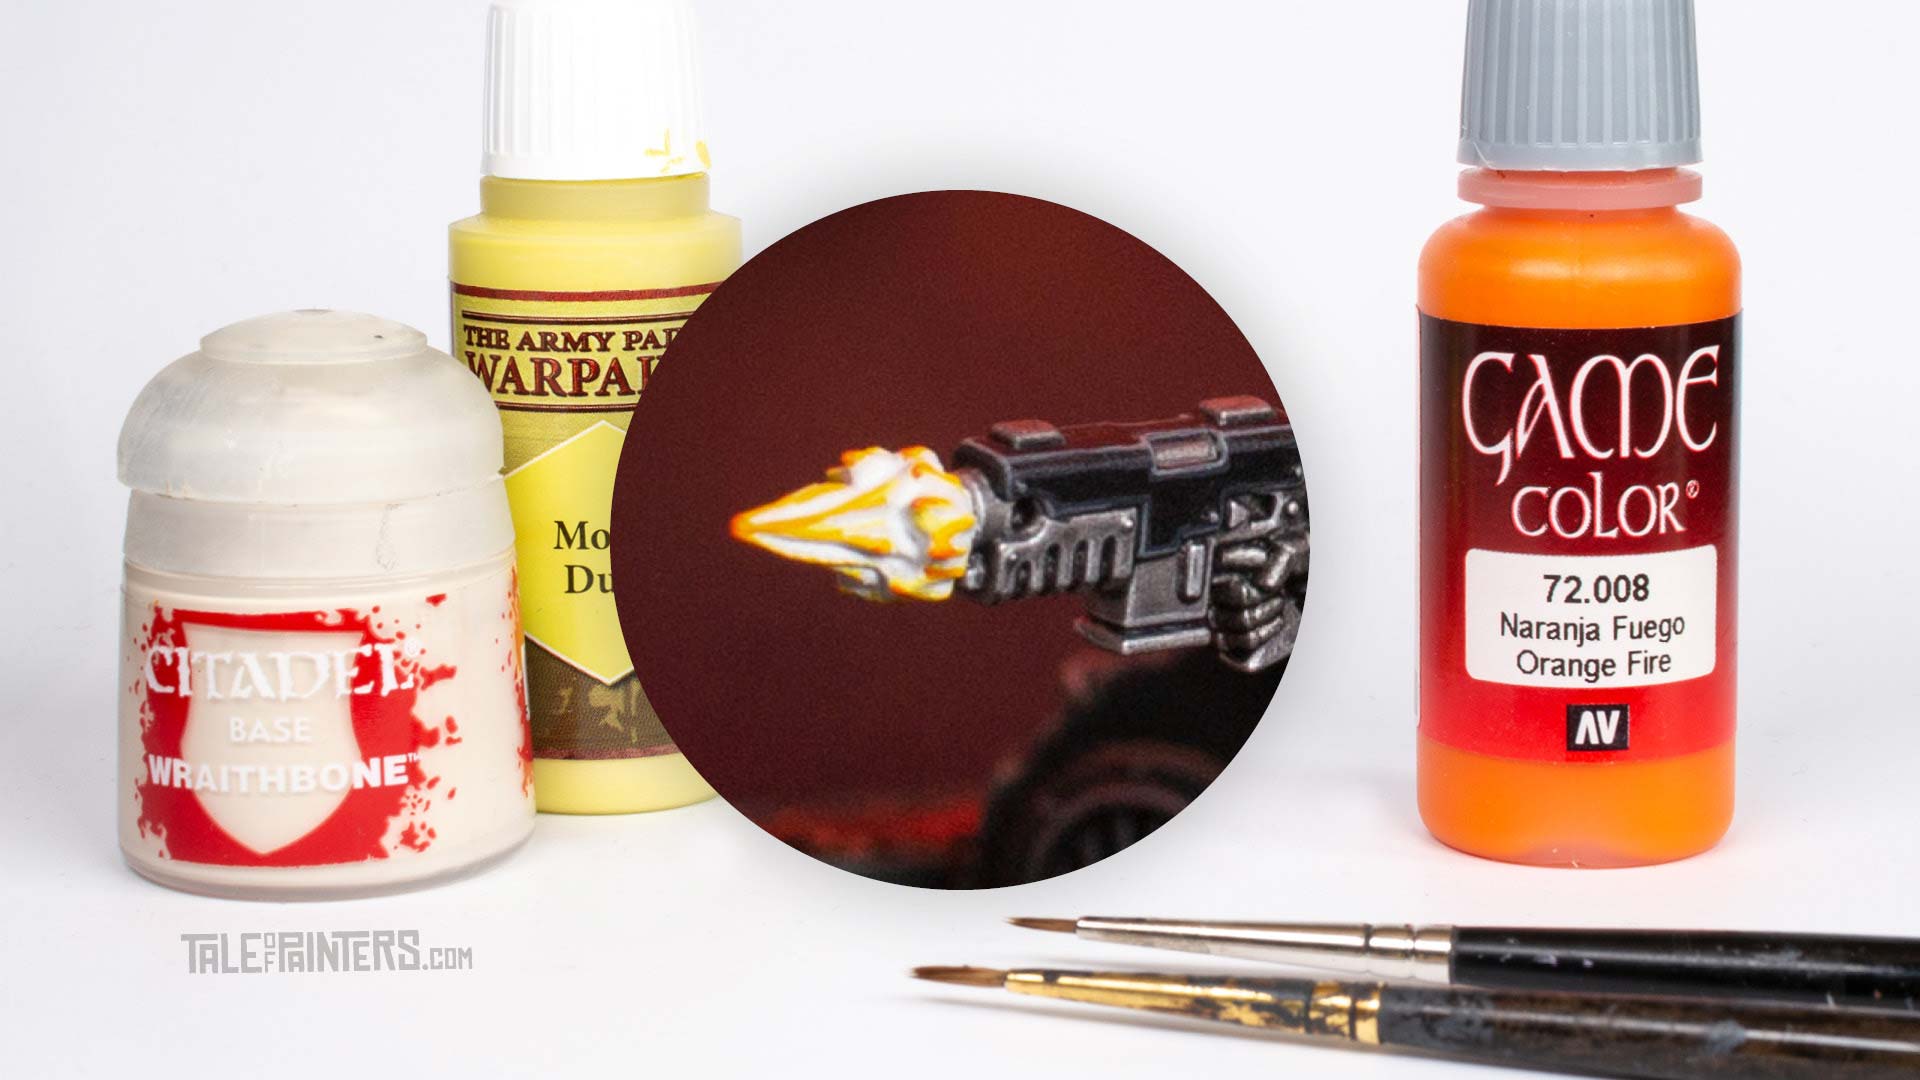
Paints you will need for this tutorial:
Citadel (Games Workshop)
Wraithbone Spray / Base paint
Yriel Yellow
Lahmian Medium
The Army Painter Warpaints
Moon Dust [or Phalanx / Flash Gitz Yellow mixed with White Scar]
Vallejo
Game Color Orange Fire [or Fire Dragon Bright]
Model Color White [or White Scar]
If you need to expand your paint collection to follow the tutorial, check out our partner stores Wayland Games and Element Games, which offer an amazing range of paints at a discount.
Hope you enjoyed this tutorial. If so, leave a comment or reaction below, and if you got any questions, leave them here so I can answer them for you.
Tale of Painters is the unofficial Warhammer hobby magazine run by hobbyists like you. Support our work by using the affiliate links from our 🇺🇸 / 🇨🇦 partner stores for your next orders so we can continue to bring you fantastic FREE content every day:


Or support us directly:


