
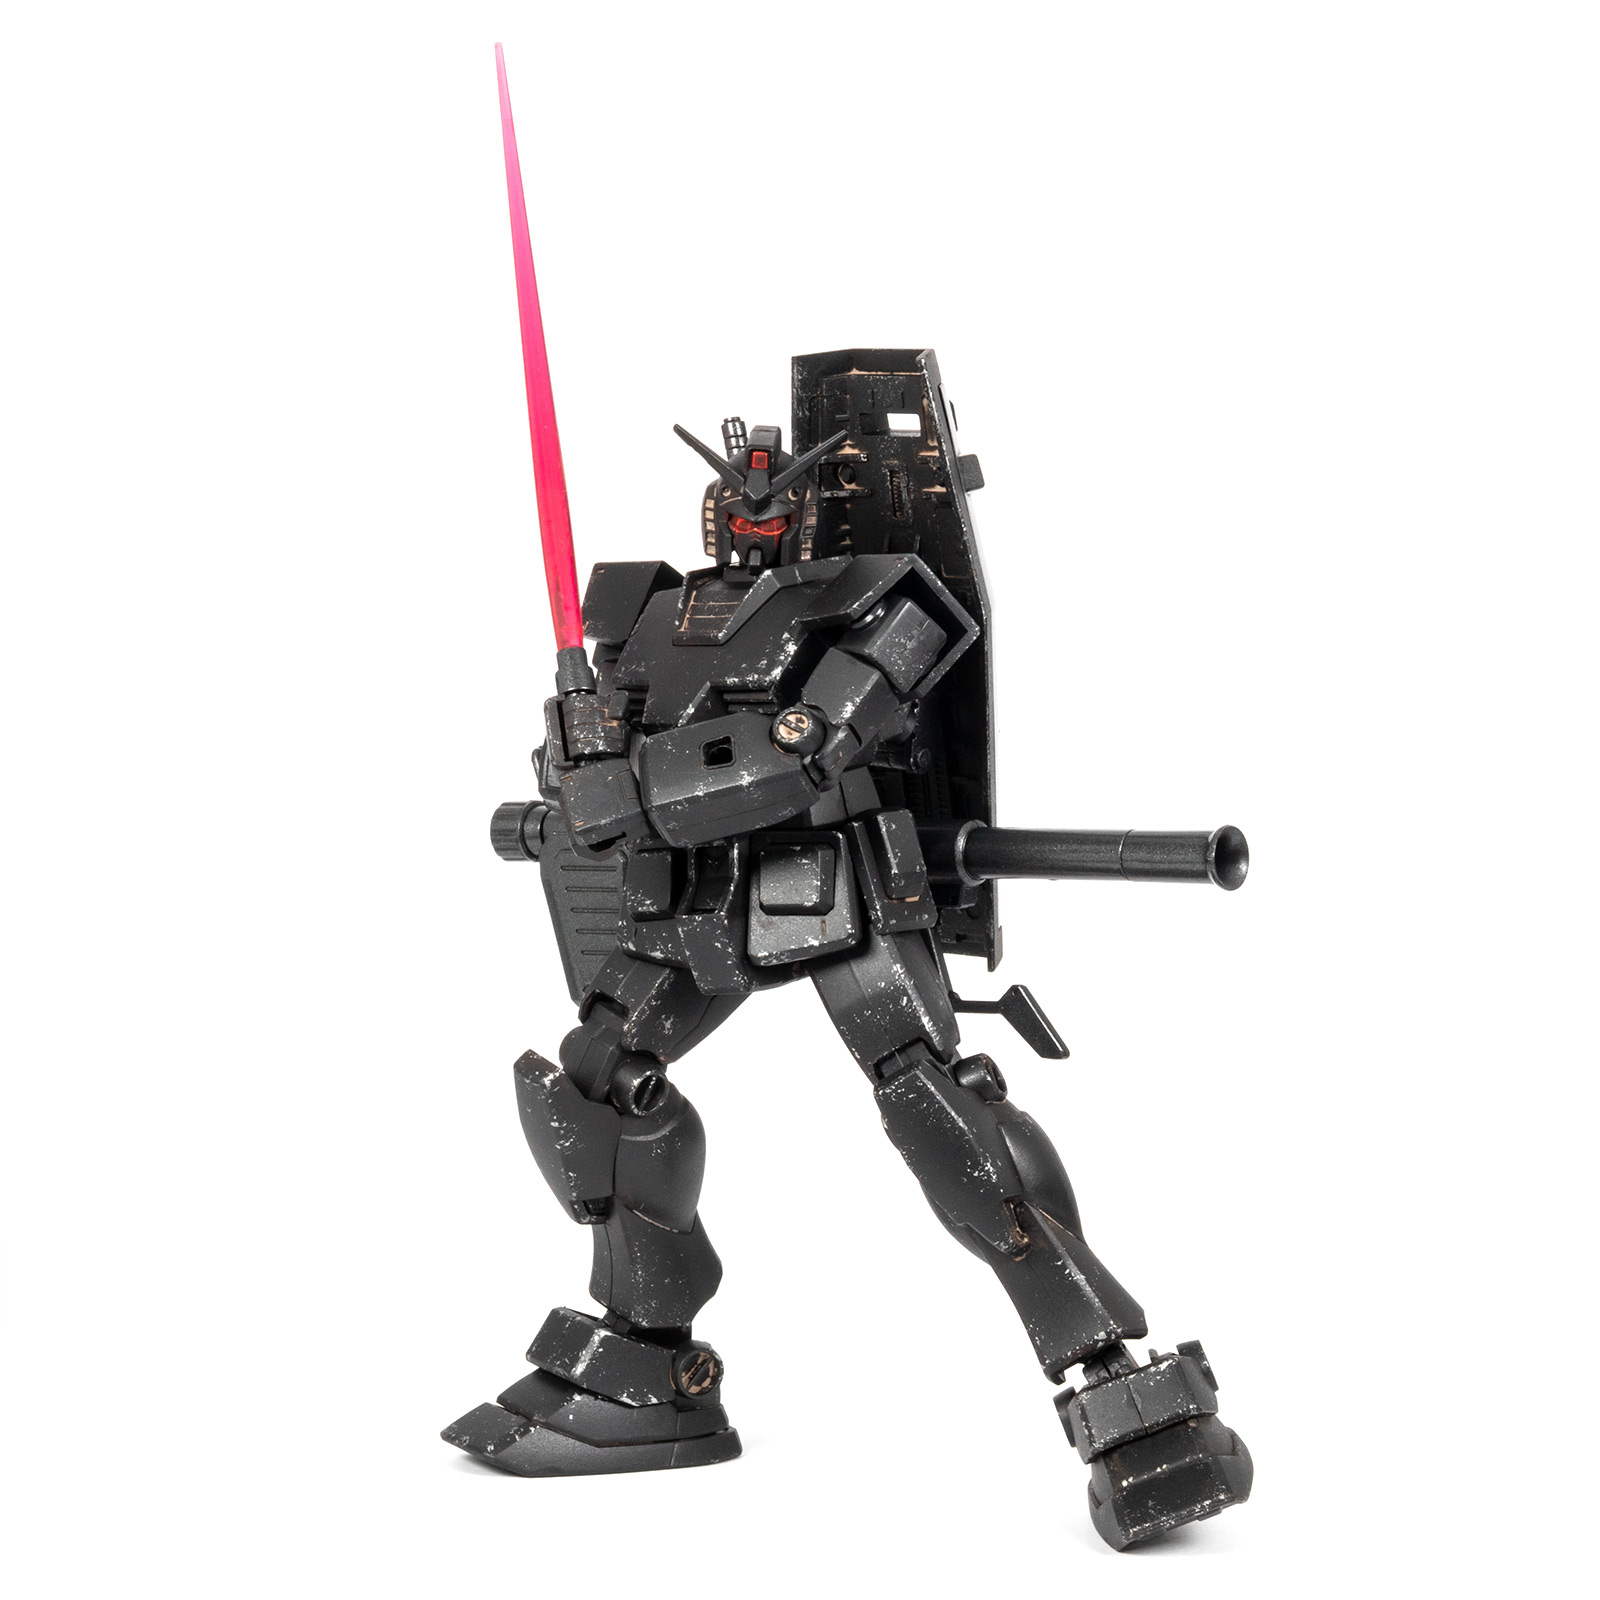
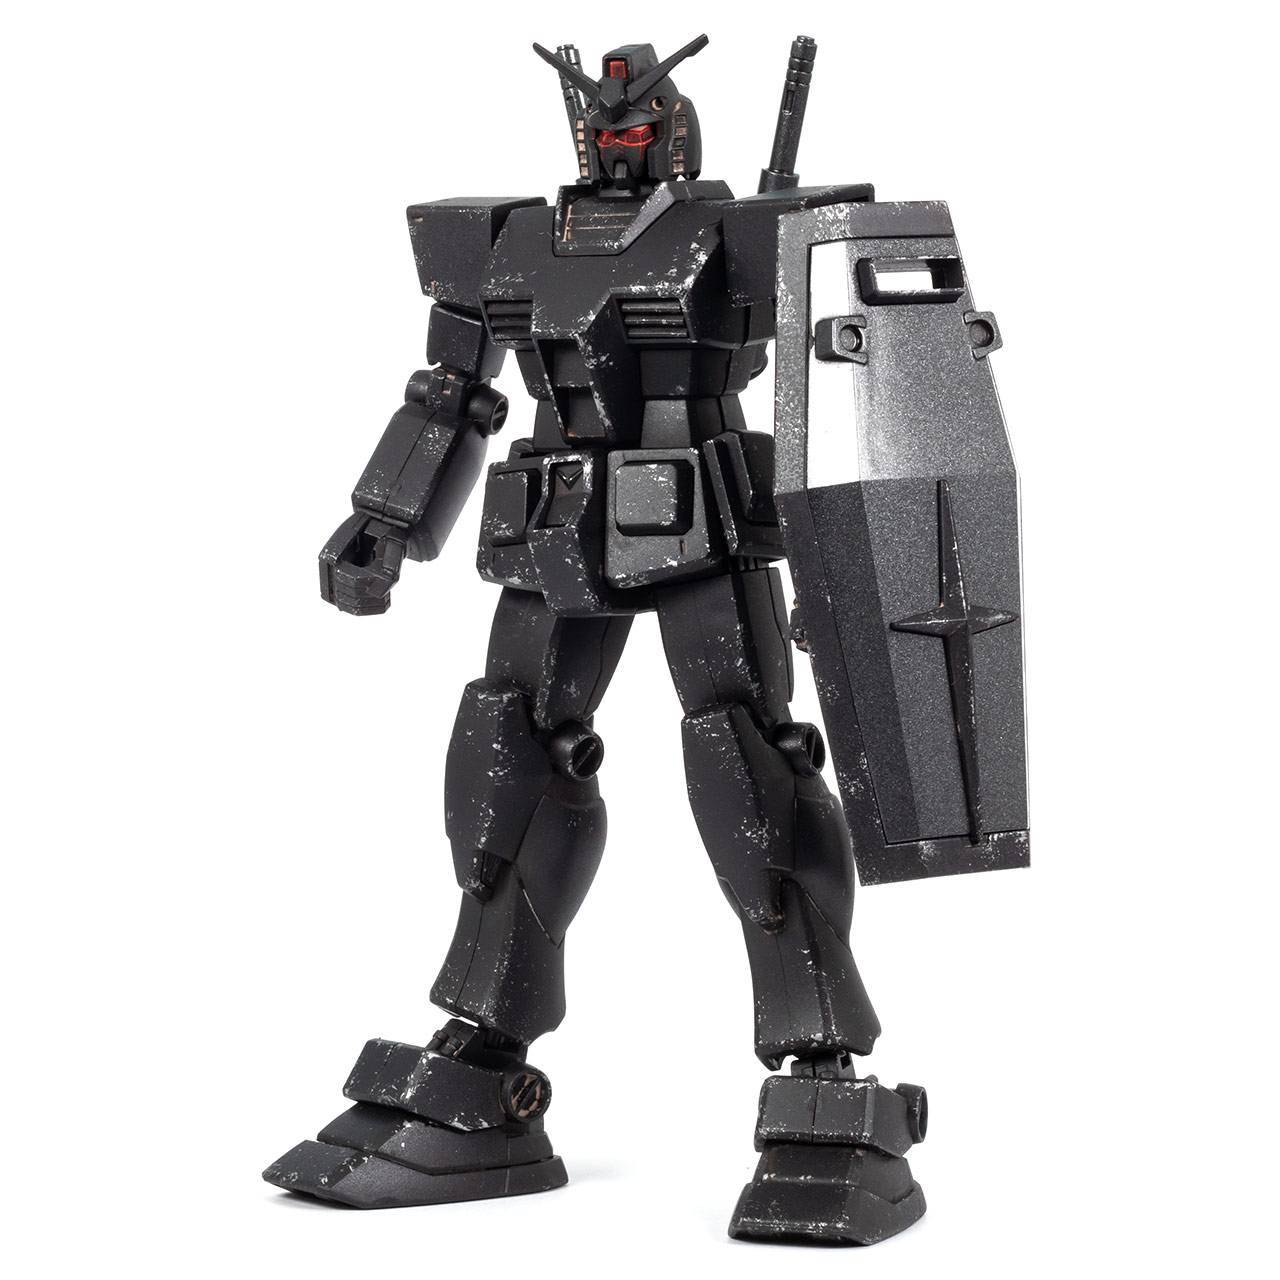
Today, for a change, we have not Warhammer but a new Gundam model from my collection: the iconic RX-78-2 in High Grade, in the black Ecopla version. I’ve enhanced this kit with weathering effects and hand-painted glow effects. How I did this, I’ll show you in this post.
What is the RX-78-2 Gundam?
The RX-78-2 is the first and original Gundam mecha, from the 1979 Mobile Suit Gundam anime series. It’s the “poster boy” of the franchise, in the same way as Space Marines (and Ultramarines in particular) are. Normally it’s known for its white design with yellow, red and blue accents, but Bandai occasionally releases kits in alternative colours. Such as this version in HG 1/144 scale in “Ecopla” black. Gundam kits come in various scales and complexity levels. One of the most popular and beginner-friendly levels is HG (High Grade).
My Gundam Base Yokohama experience
I bought the kit in 2023 on a Japan trip when I visited the Gundam Factory in Yokohama (which sadly no longer exists), and marvelled at the life-size RX-78-2 replica. Japan is currently super popular as a travel destination, and I’ve compiled my best tabletop & GUNPLA hobby spots in Tokyo in this post.
The black Ecopla version uses mould of a quite old HG rendition of the RX-78-2, and the level of detail and quality of the kit can’t keep up with more modern kits. However, the monochrome black with the pink lightsabres immediately fueled my imagination. Bandai’s Gundam kits consist of coloured plastic and theoretically don’t need to be painted, but I had the idea to give the model a battle-worn “grimdark” look with additional weathering effects.
Weathering the RX-78-2 with enamel washes
After assembly, I first applied a dark brown enamel wash, AK Wargame Enamel Liquid Pigment Chaos Dirt. After it had dried somewhat, I removed most of it with cotton buds soaked in white spirit. Then I applied a light brown wash more selectively in the recesses, AK Enamel Liquid Pigment Rubble Dust, which I also corrected with cotton buds. After that, I sponge weathered the edges of the Mobile Suit with Vallejo Mecha Color Steel.
Painting glow effects on Gundam eyes and sensors
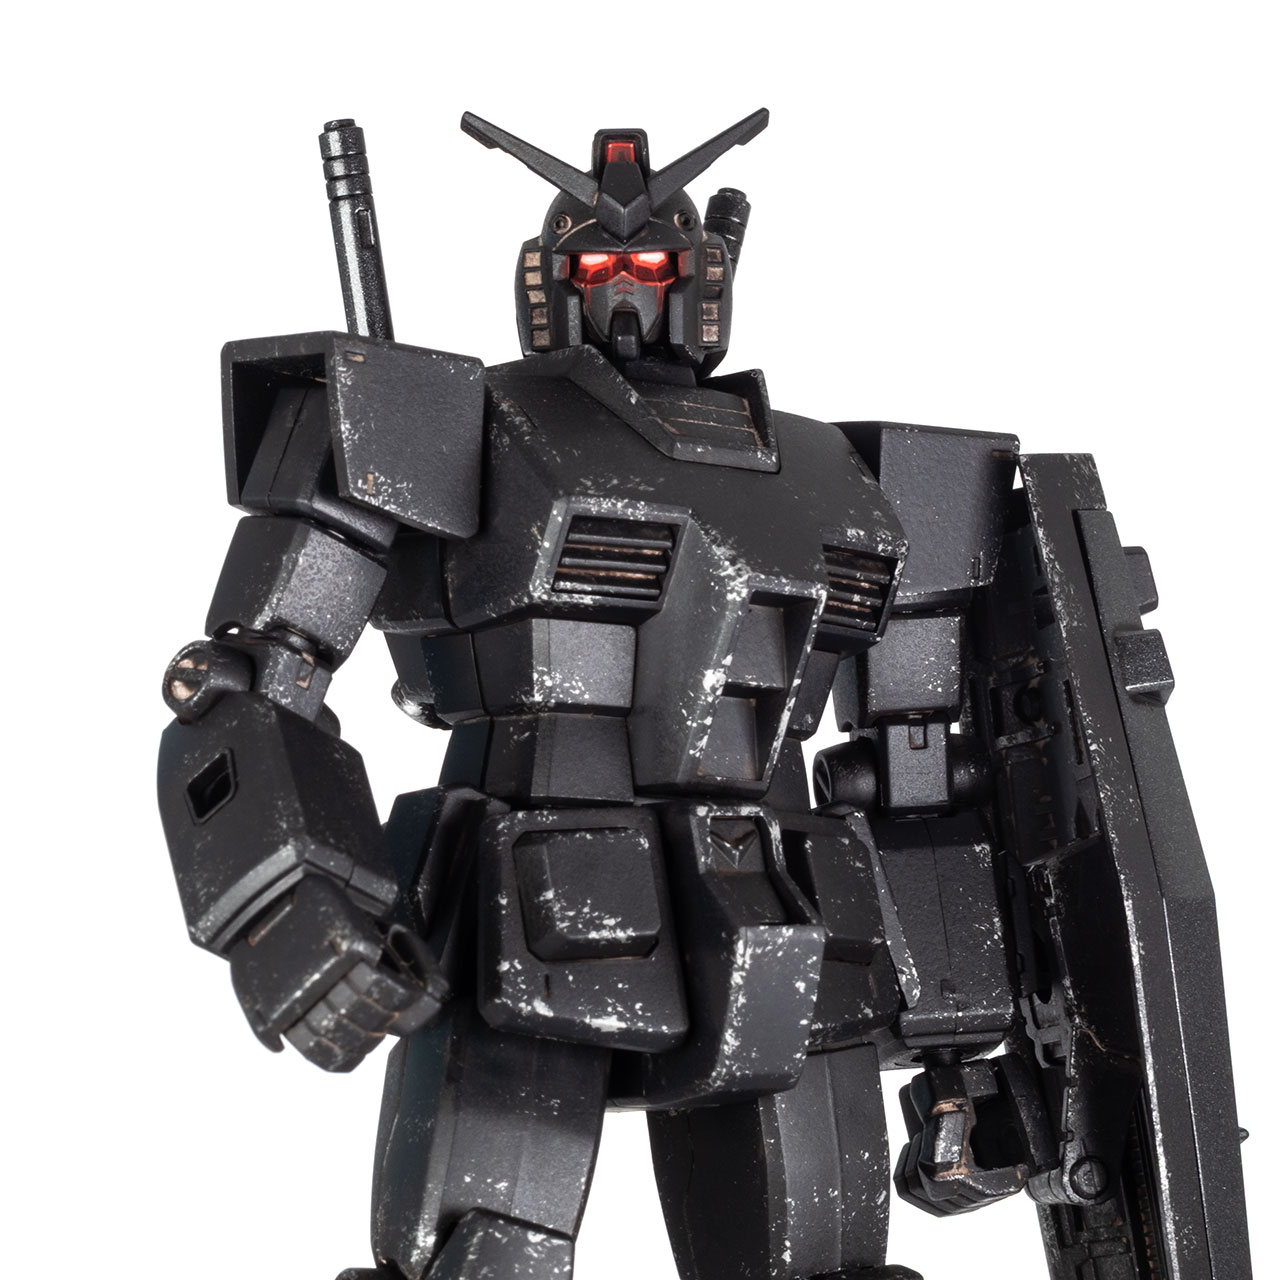
As a contrast to the black of the mech, I airbrushed the weapons and part of the shield with Mr. Hobby Gundam Color U.N.T.’s MS Gray, a black-grey metallic paint, and then applied gloss varnish. After that, I sprayed the model with Mr Topcoat Premium Flat for a matt finish. The varnish also gave the model enough “grip” so I could paint the eyes and sensors on the helmet with regular acrylic paints. For the glow effect I used the vibrant red tones from the Mini Colour range by Artis Opus and Cult of Paint (my impression of the prototypes here), which I mixed with Vallejo Game Color Dead White.
Lessons learned: was this dated Gundam kit worth picking up?
All in all, I’m satisfied with the result, and the weathering wasn’t difficult at all. Only the dark brown wash is unfortunately barely visible after varnishing, just the light brown remains. I’ll have to try something different next time. And yes, measured against today’s HG standards, the kit is genuinely poor. The joints barely hold, there are many parts that can break easily, and the level of detail is very minimalist, with endless seam lines. Nevertheless, as a memento of my Japan trip in 2023, it looks nice in my display cabinet.

Would you like to see more GUNPLA models here on Tale of Painters? Or do you have questions about the techniques used? Then feel free to discuss with me on our friendly hobby Discord server or leave a comment below. Thanks a lot, and happy hobbying!

1 Comment
Leave a Reply
Tale of Painters is the unofficial Warhammer hobby magazine run by hobbyists like you. Support our work by using the affiliate links from our partner stores for your next orders so we can continue to bring you fantastic FREE content every day:


![]()
![]()
Or support us directly:


As a gunpla modeler just starting out in 30K, those eyes are AMAZING. I would love to know how you made them look like that (even though it’s probably basic to mini painters).