
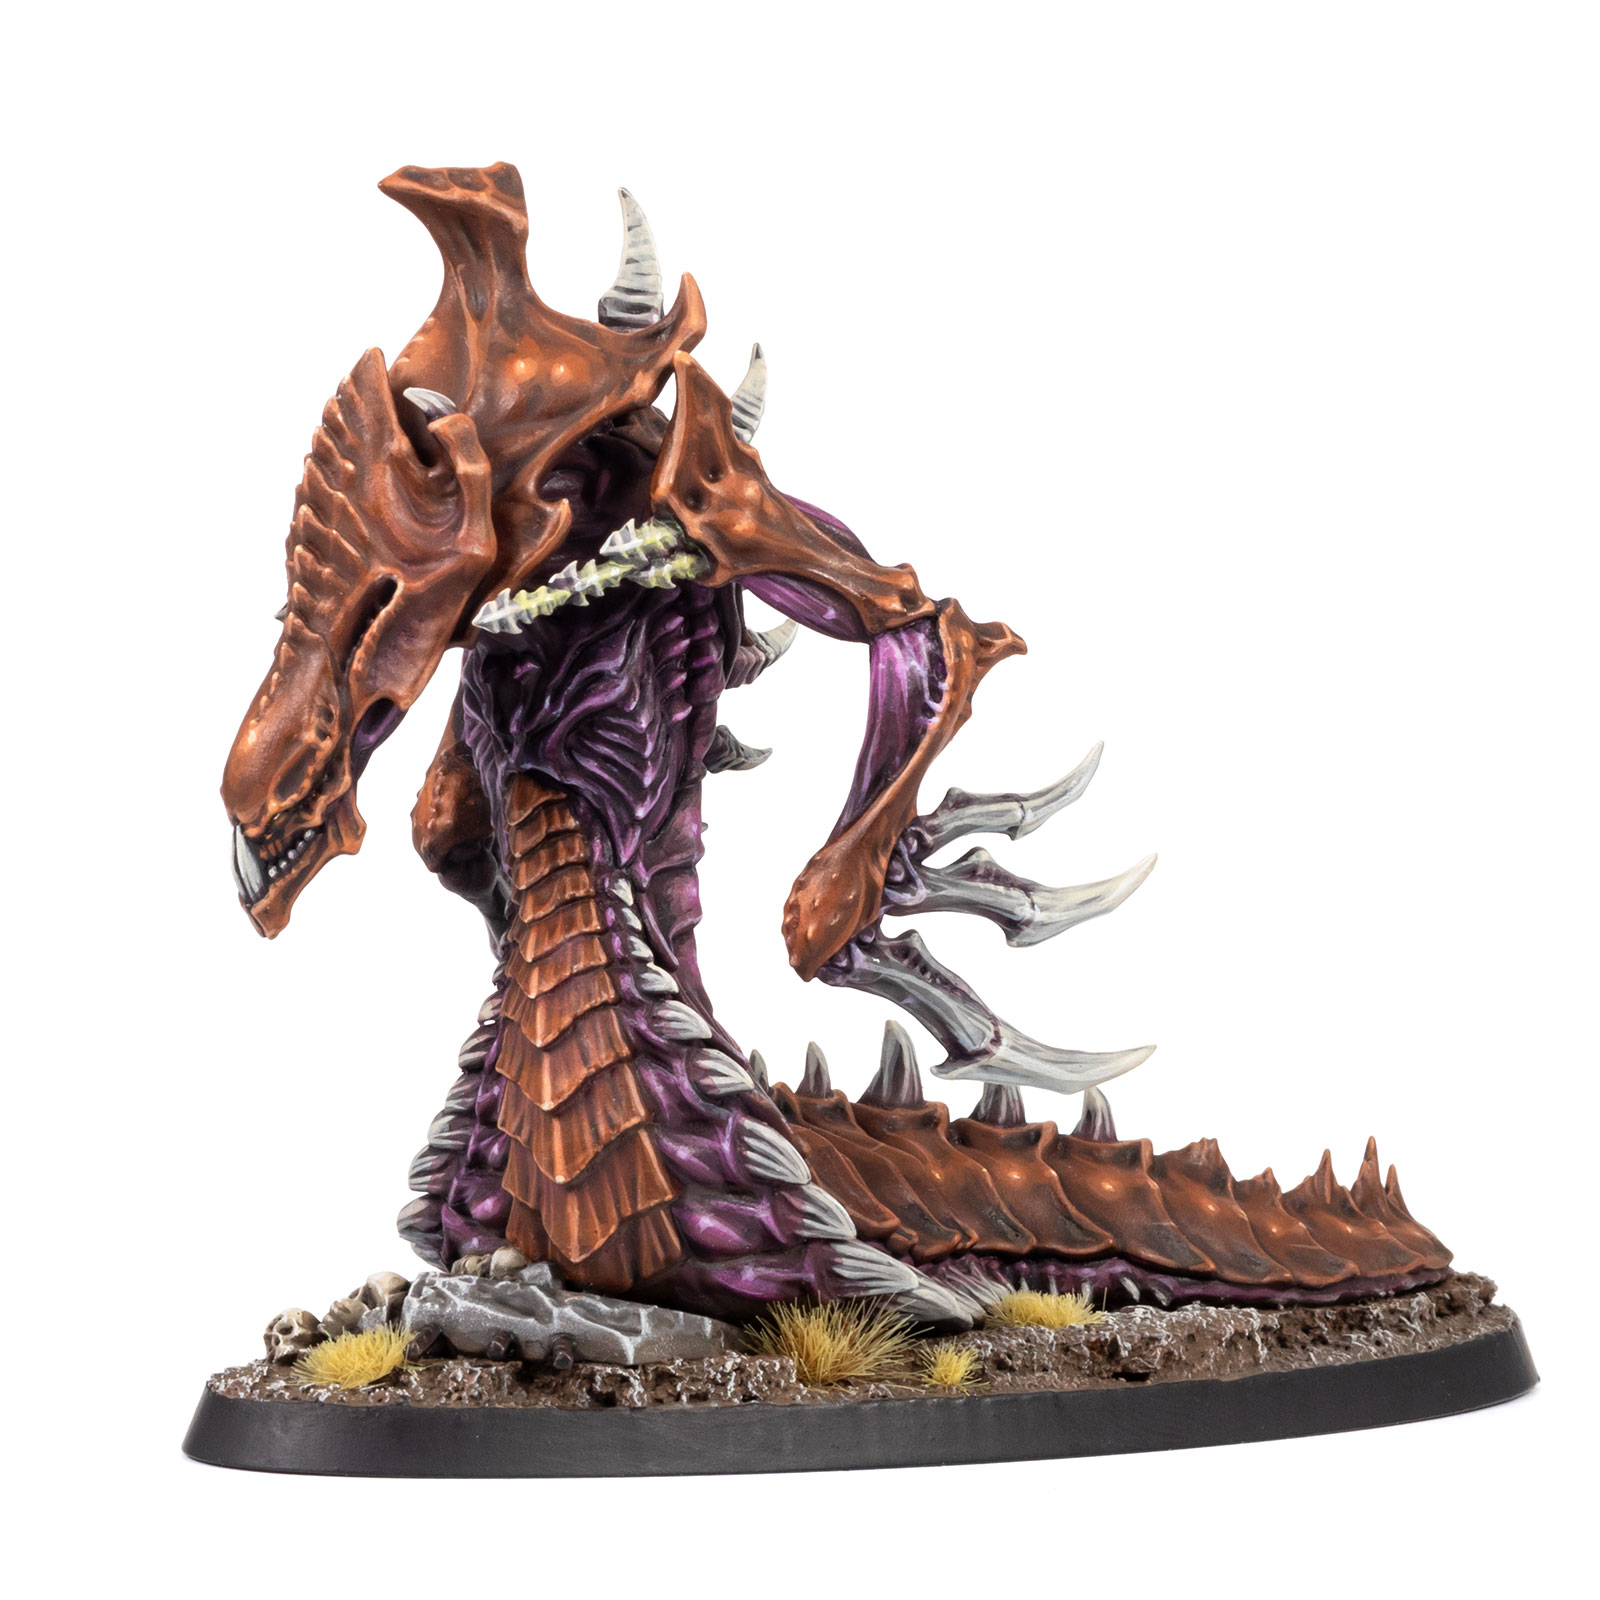
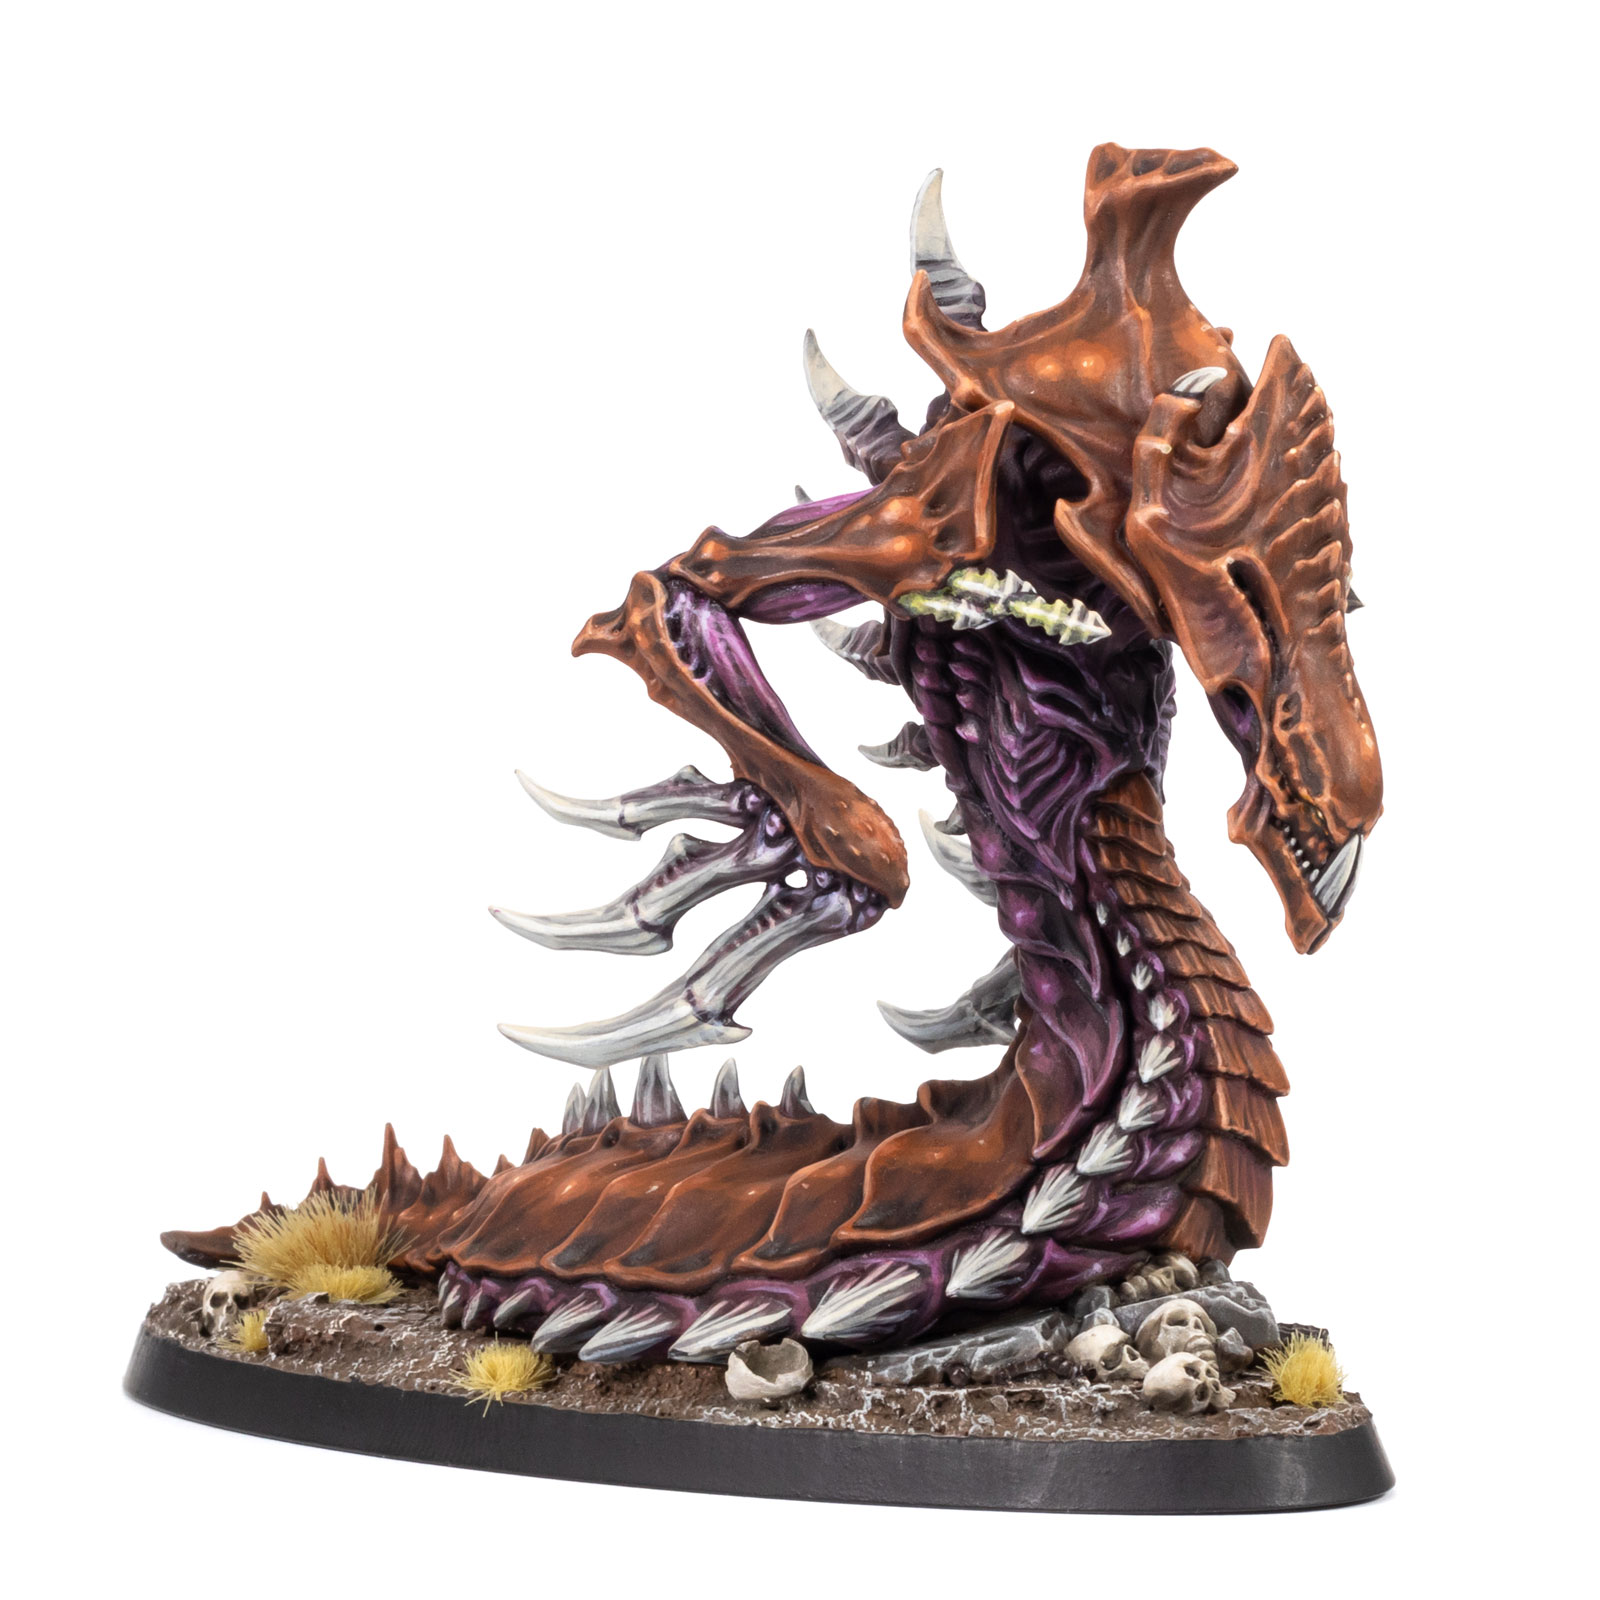
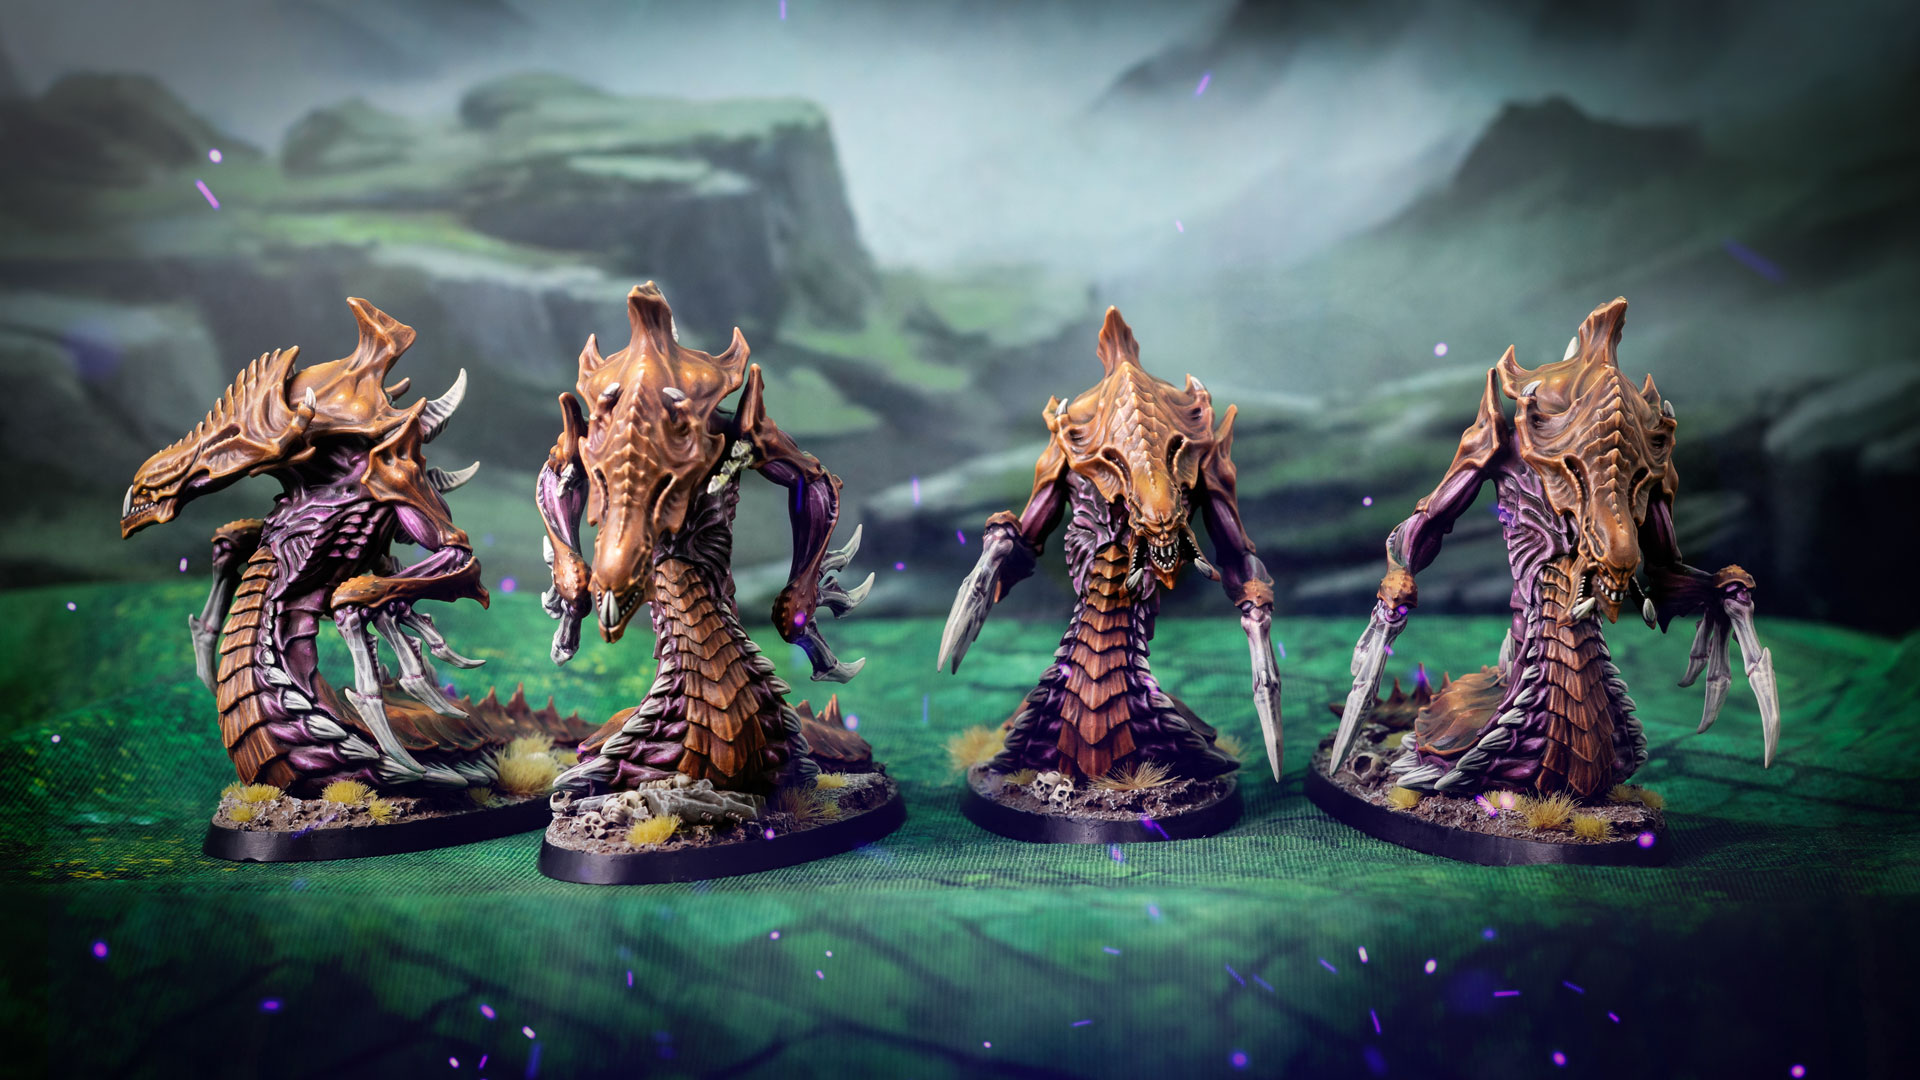
I managed to snag the Hydralisks early and so this project became a test bed for what I wanted my Zerg to look like (thanks again to Stahly for securing these for me at Salute!) Having been a huge fan of the StarCraft games since my youth, I wanted to really enjoy the nostalgia as I got to grips with these models. So I took my time reviewing old artwork and screenshots, even replaying some of the campaigns, trying to identify what felt truest to my personal, very subjective memory.
Hi all, Michael AKA whiskerspaints here. It’s an exciting time for StarCraft fans. With StarCraft: Tabletop Miniatures Game (see our unboxing of the Founders Edition with HQ sprue images here), we’re finally getting a miniatures range dedicated to goings-on in the Koprulu sector.
Going back to the StarCraft source material
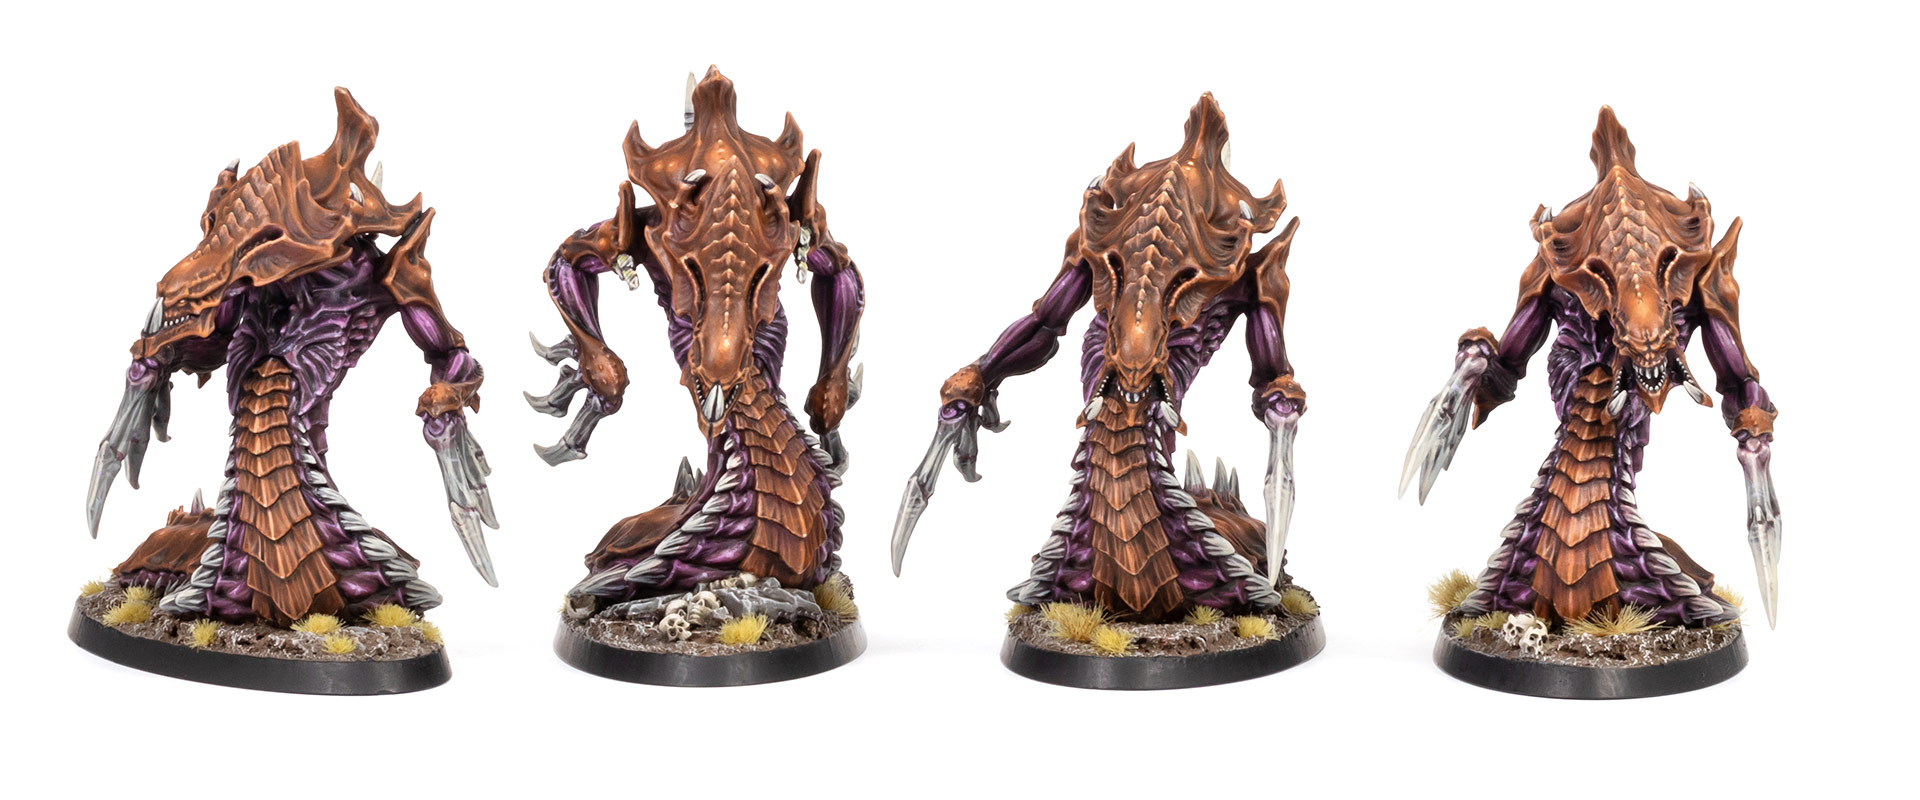
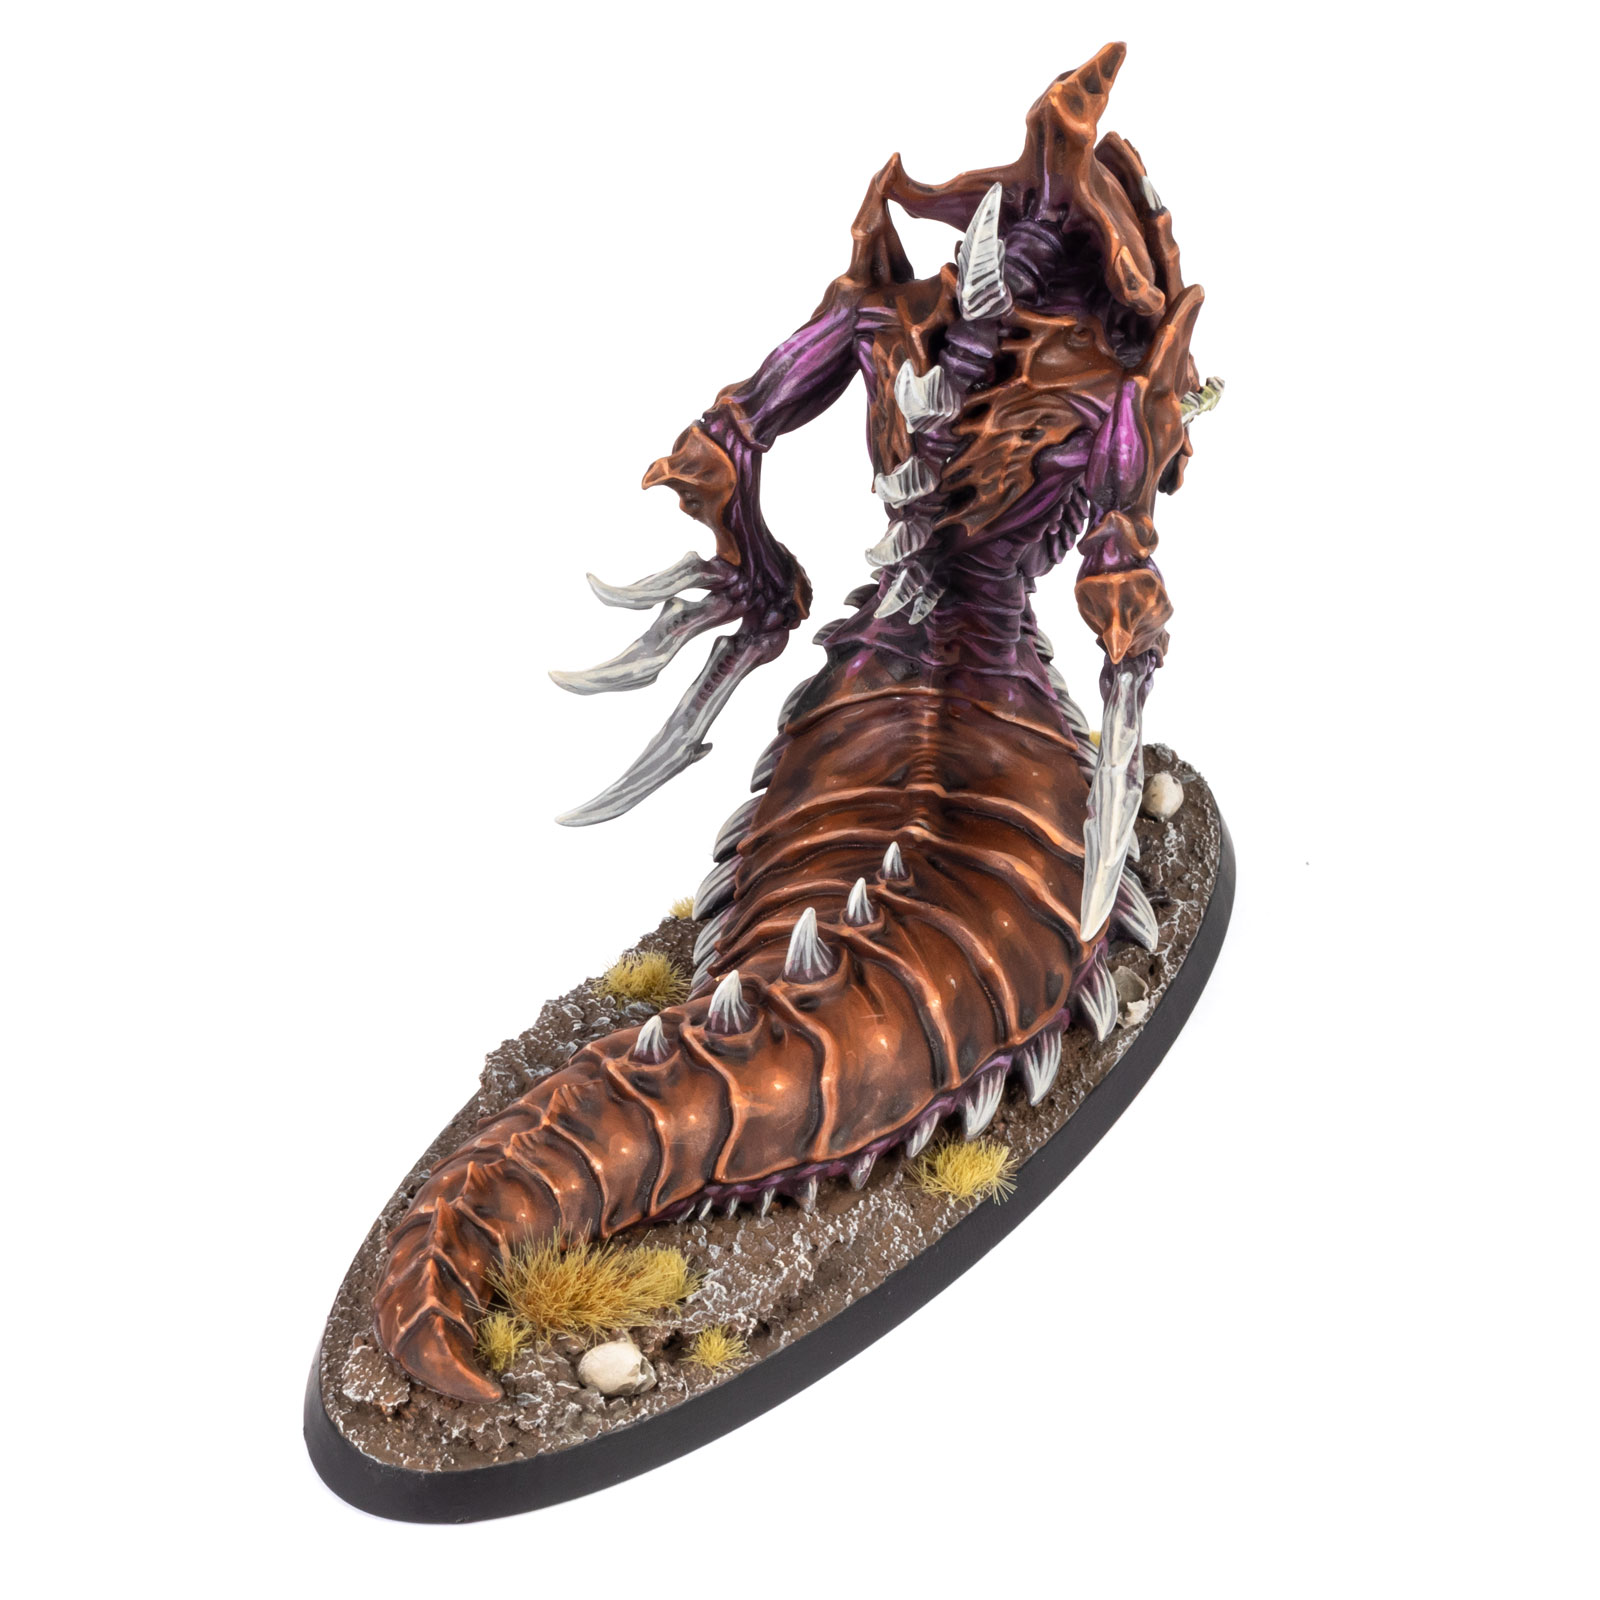
My deep dive into old StarCraft content complete, I landed on a mix of SC2 in-game models and concept art, specifically Mr Jack’s Zerg concepts. The concepts have an incredible vibrancy and texture, really emphasising hard chitin and glossy flesh. That gave me a really warm, saturated brown for the carapace, and a deep, equally saturated magenta for the flesh. As it turned out in testing, having both materials be highly saturated, hot midtones didn’t create the most striking result, so I shifted the magenta cooler with blue-grey highlights to make the models more legible.
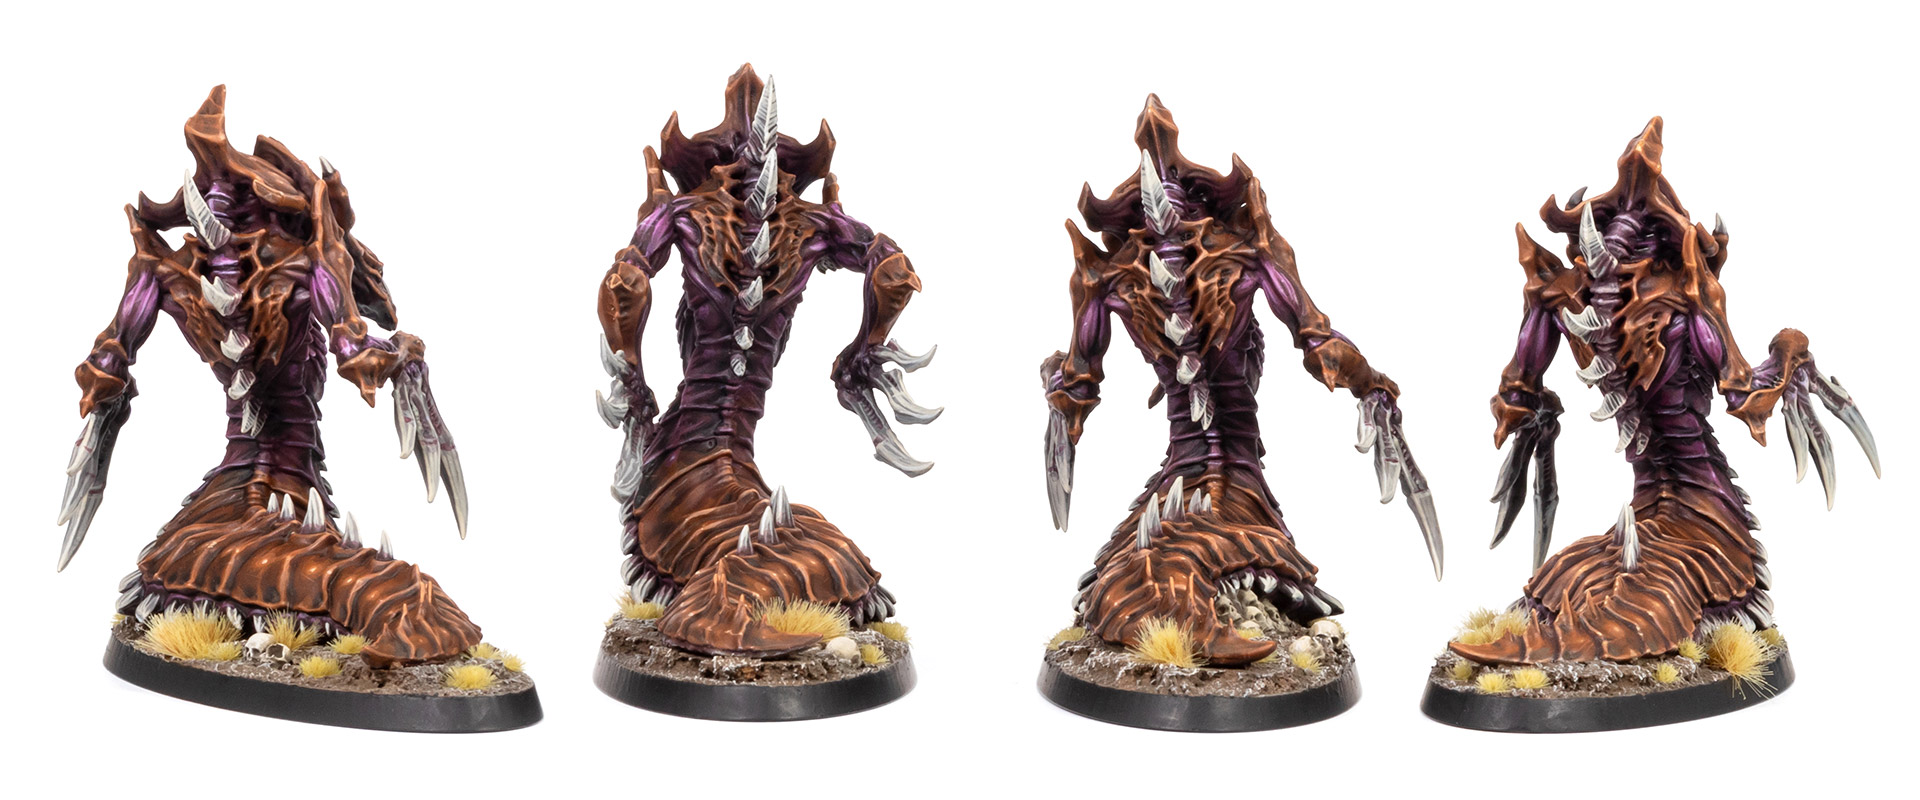
Developing my Zerg colour scheme
Testing all done, I ended up with a fairly standard approach of basecoats, washes and several highlights, with some glazing to keep transitions soft. I focused on specular highlights and sharp dot highlights, emphasising the glossiness of the organic materials. Here’s a list of all the paints I used in this project:
Saturated brown flesh
- Base: Mournfang Brown
- Wash: Vallejo Xpress Color Wicked Purple
- Layer: Mournfang Brown
- Highlight: Skrag Brown
- Highlight: Deathclaw Brown
- Finish: add VMC Ice Yellow to Deathclaw Brown for edge and dot highlights
Note: I used glazes of Mournfang Brown to smoothen transitions and make sure the final tone remained saturated.
Fleshy purple
- Base: WPF Blanched Berry
- Wash: VXP Wicked Purple
- Highlight: WPF Moldy Wine
- Highlight: WPF Wicked Pink
- Finish: add VMC Pale Blue to Wicked Pink for dot highlights
Note: Glazes of Blanched Berry prevented the sharper highlights from becoming too stark. The same glaze also tied the bone (below) in with the purple flesh.
Light bone (claws, teeth and spikes)
- Base: Stormvermin Fur
- Highlight: Scale 75 Rainy Grey
- Highlight: AK Vampiric Flesh
- Recess Glaze: WPF Blanched Berry
- Finish: VMC Ivory dot highlights
Yellow eyes
- Base: 1:1 Averland Sunset / Yriel Yellow
- Layer: Yriel Yellow
- Highlight: 1:1 Yriel Yellow / AK Ice Yellow
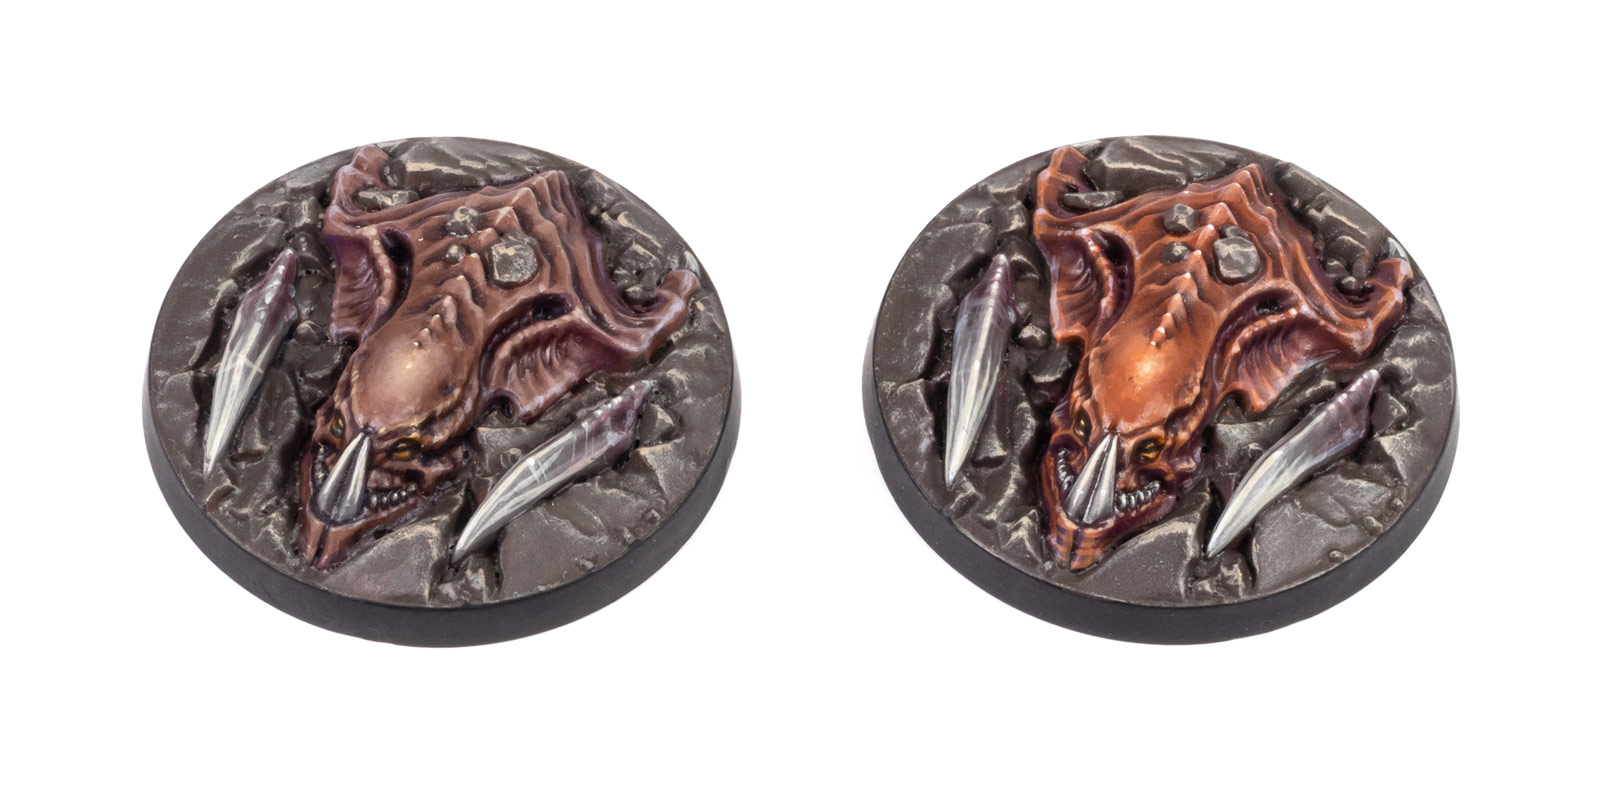
Soil (base texture)
- Base: GSW Dark Earth Liquid Pigment
- Drybrush: Dawnstone
- Drybrush: Screaming Skull
Rocks
- Drybrush: Dawnstone
- Drybrush: Administratum Grey
- Drybrush: AK Ivory
Skulls
- Base: AK Vampiric Flesh
- Wash/Effect: Abt 502 Grime (Gouache)
- Highlight: AK Ivory
Base rim
- AK Real Color Marker Rubber Black
Abbreviations: AK = AK 3rd Gen, COM = TT Combat, GSW = Greenstuff World, P3 = Privateer Press Formula P3, RMS = Reaper Master Series, TAP = The Army Painter Warpaints (OoP), TTC = Two Thin Coats, VGC = Vallejo Game Color, VGA = Vallejo Game Air, VMC = Vallejo Model Color, VMA = Vallejo Model Air, VMechaC = Vallejo Mecha Color, WPA = Warpaints Air, WPF = Warpaints Fanatic
Painting the Zerg Hydralisks was surprisingly time consuming due to their size, so I’m looking forward to switching it up with some Roaches soon. Thank you, Stahly, for inviting me to write about my space slugs. 🙂 For the Swarm!
Tale of Painters is the unofficial Warhammer hobby magazine run by hobbyists like you. Support our work by using the affiliate links from our 🇦🇺 partner stores for your next purchases so we can continue to bring you fantastic FREE content every day:


![]()
![]()
Or support us directly:


