


Can’t figure out how to take sharp and well-lit pictures of your models for Instagram? Your desk lamp or DIY solutions just won’t cut it? Don’t worry. All you need for taking great pictures of your models is a sheet of white paper, your phone or camera, and cheap LED photo lights for about 40 £/€/$. Find out more in this post.
“Mastering miniature photography” is an ongoing multipart series here on Tale of Painters. We explain how to get into professional miniature photography on a limited budget. Take your paint job presentation to the next level, make an impact on Instagram and social media, and/or improve your chances at submitting your miniatures to White Dwarf. Part 1 covers light, part 2 will focus on DSLR cameras, lenses, and tripods, part 3 on editing, and part 4 on making your photos more cinematic.
Why light matters more than your camera
Let me tell you a secret: The first step to great photography is not an expensive camera or lens, but mastering light. You can take great pictures with just your phone when the light is right. However, daylight is inconsistent depending on the weather, and most desk lamps are also not suitable for photography. They produce too harsh a light and the colour temperature usually isn’t right either. And those photo light tents you can buy on Amazon and elsewhere are also unnecessary: too bulky and inflexible.
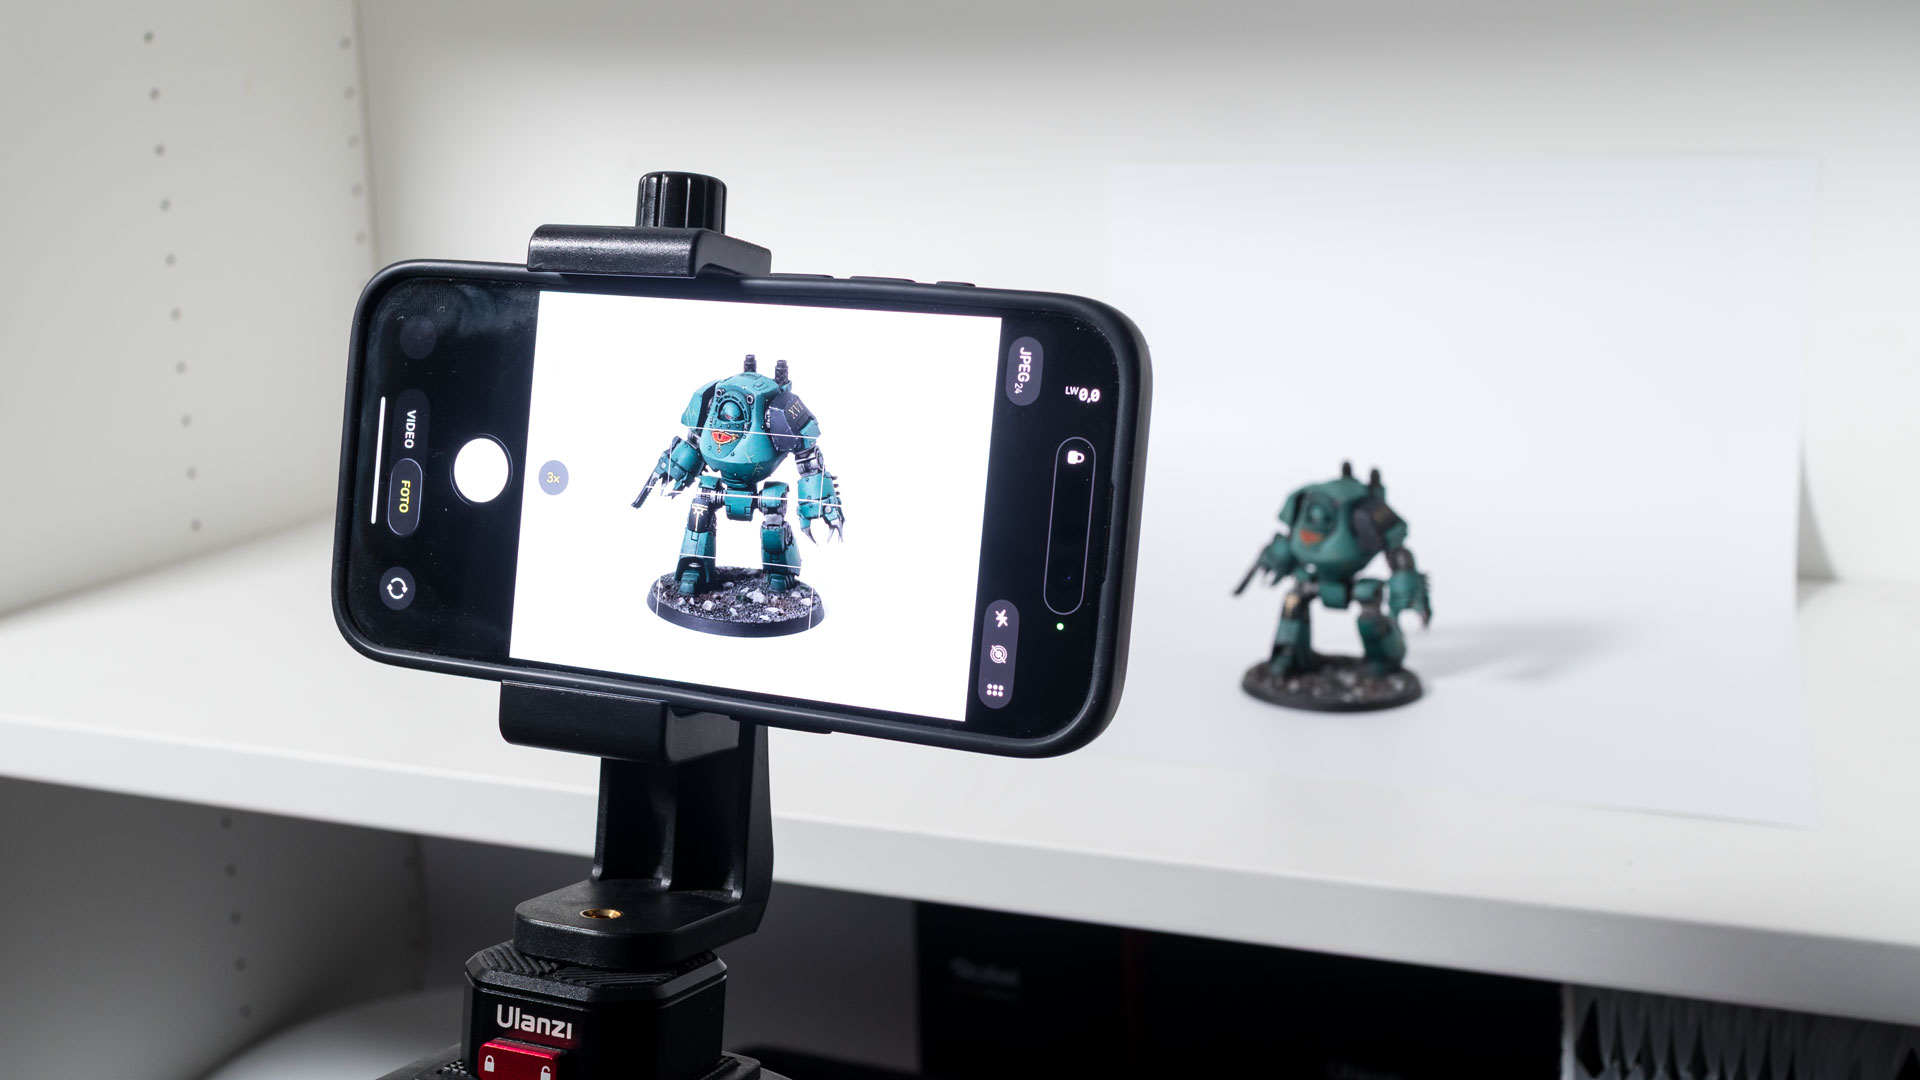
My budget LED panel setup
Here is what I use instead: LED panels from Raleno, which I’ve attached to a clamp. They have a good size for character models and small units, are dimmable, and you can set the colour temperature between 3200K and 5600K. 5600K is the sweet spot, it’s neutral, neither too warm nor too cold. The panels are also mobile, as you can charge them with USB-C or Micro USB. The only downside is that the batteries eventually degrade with heavy use after a few years.
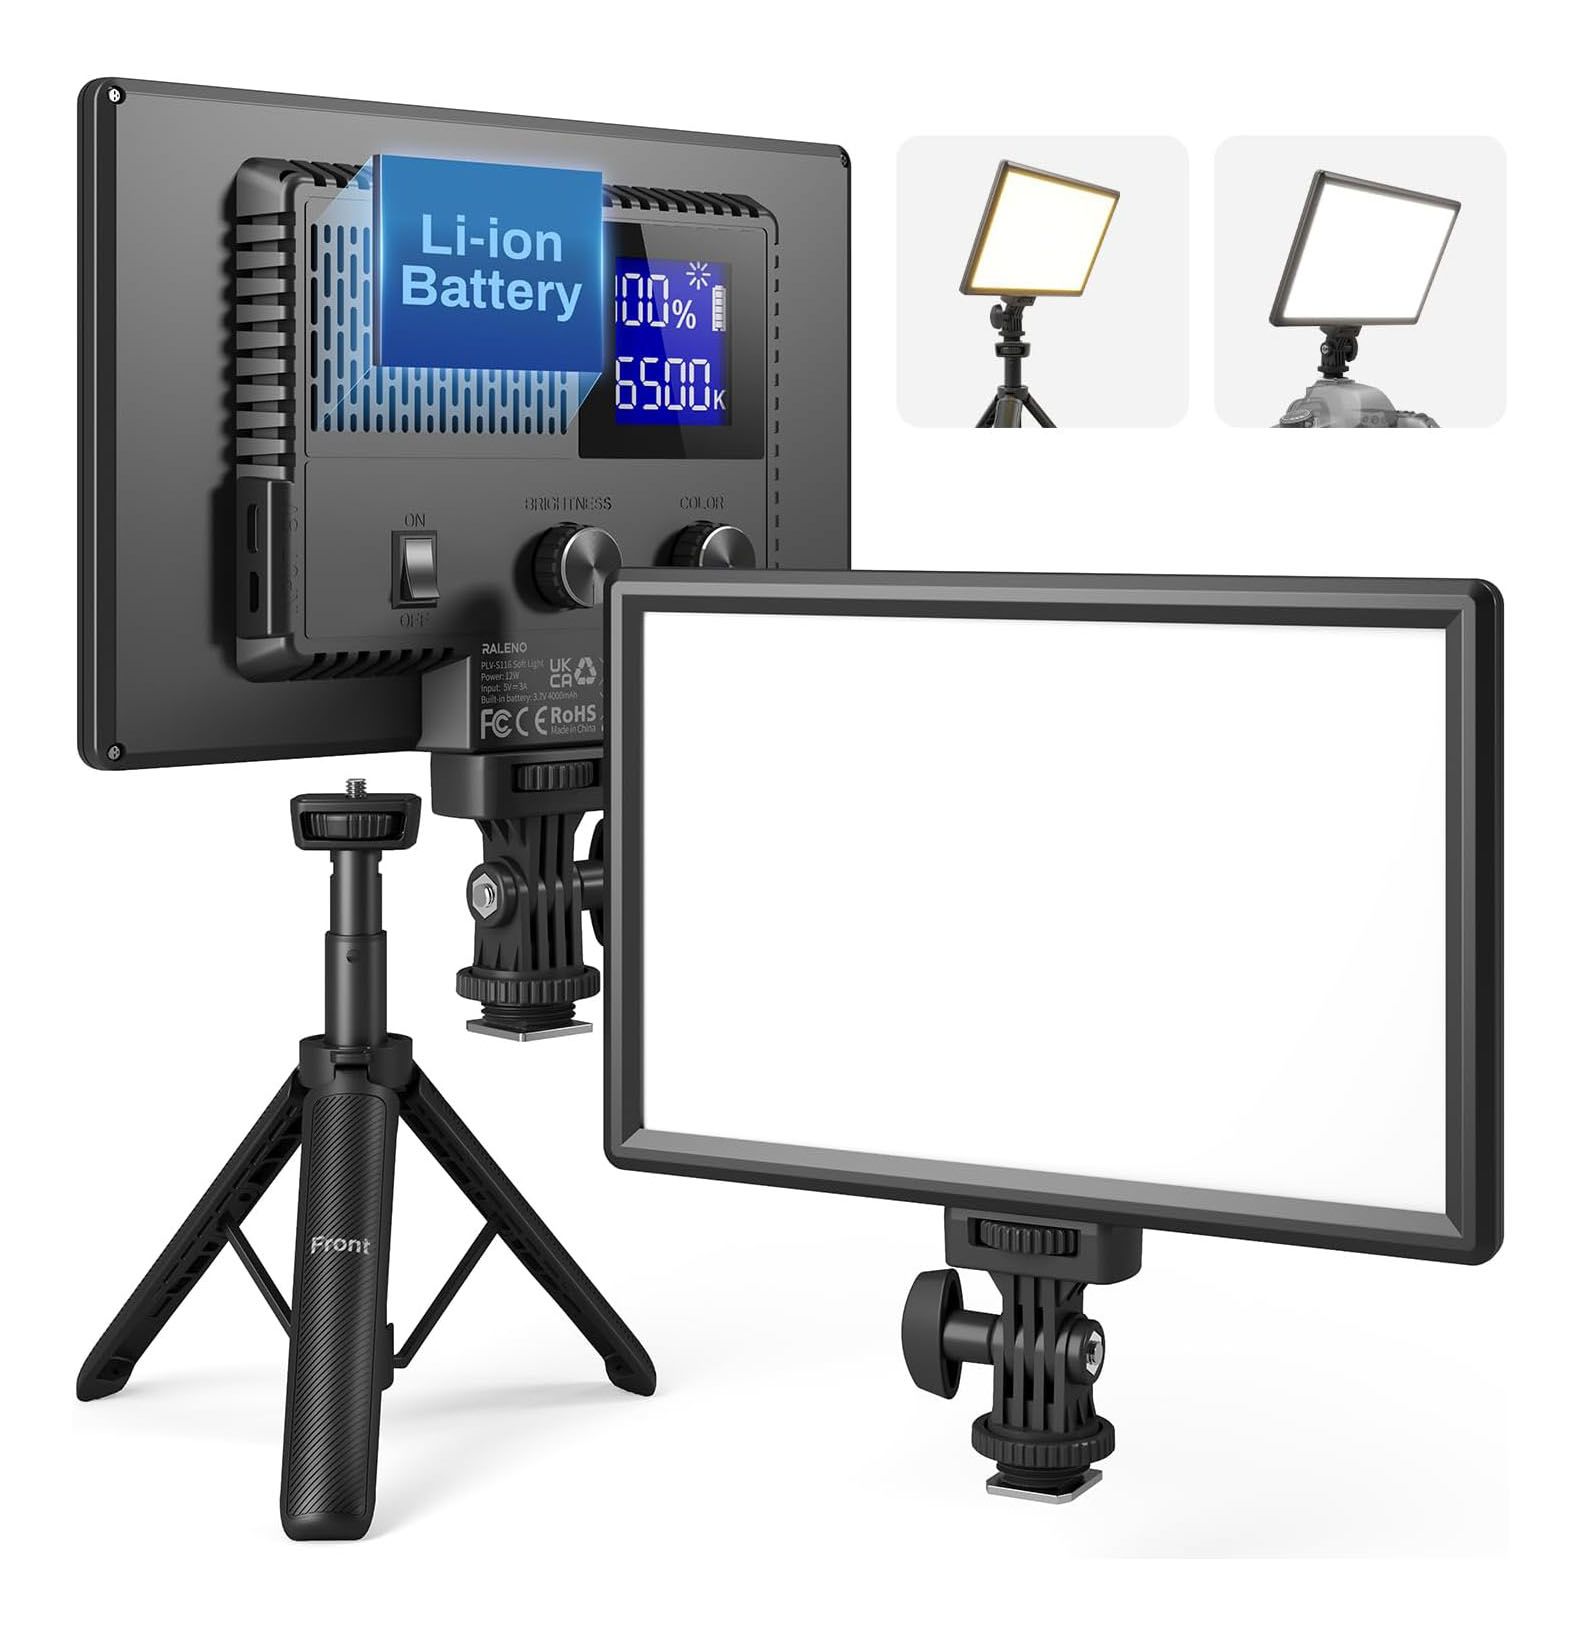
I bought mine from Amazon, they’re about £35 / 40 €/ $45 Euro each. Sometimes there are also promotions where you can get a small discount. Alternatively, you could also look at the Neewer LED 9″ NL-116AI (and the larger 13″ and more powerful NL-192B) panels. They are pretty much identical in terms of size, brightness, and quality.
The panels come in two sizes. The smaller 9″ size is sufficient for single models and smaller units. If you want to photograph larger units and armies, you should go for the larger 13″ variant and perhaps order a second panel as well.

Additionally, I bought clamps with a universal 1/4 inch screw thread adapters for photo equipment. I attach the panels to these so I can clamp the clamps onto my shelf. Alternatively, you can also buy the LED panels with small tripod stands.
Setting up your mini photo studio
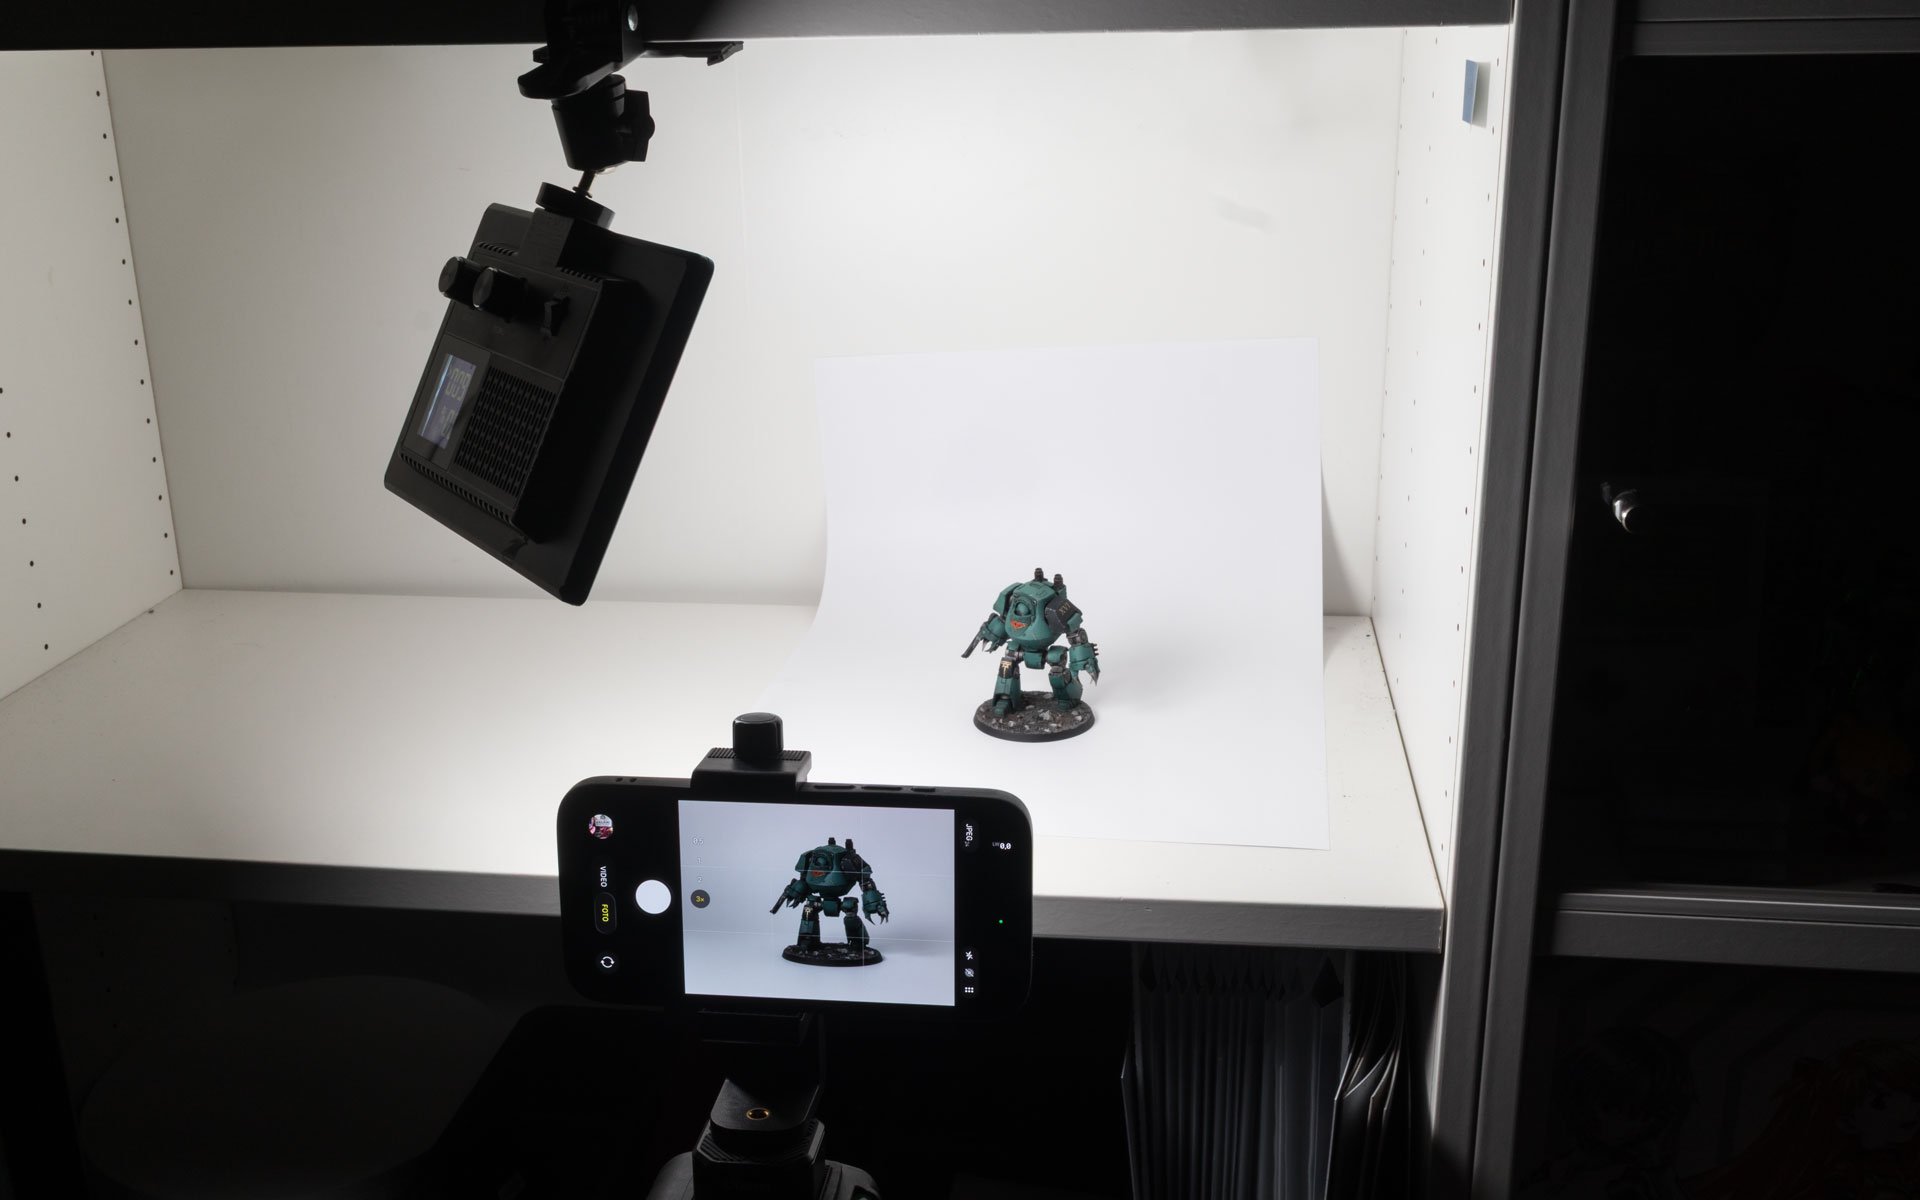
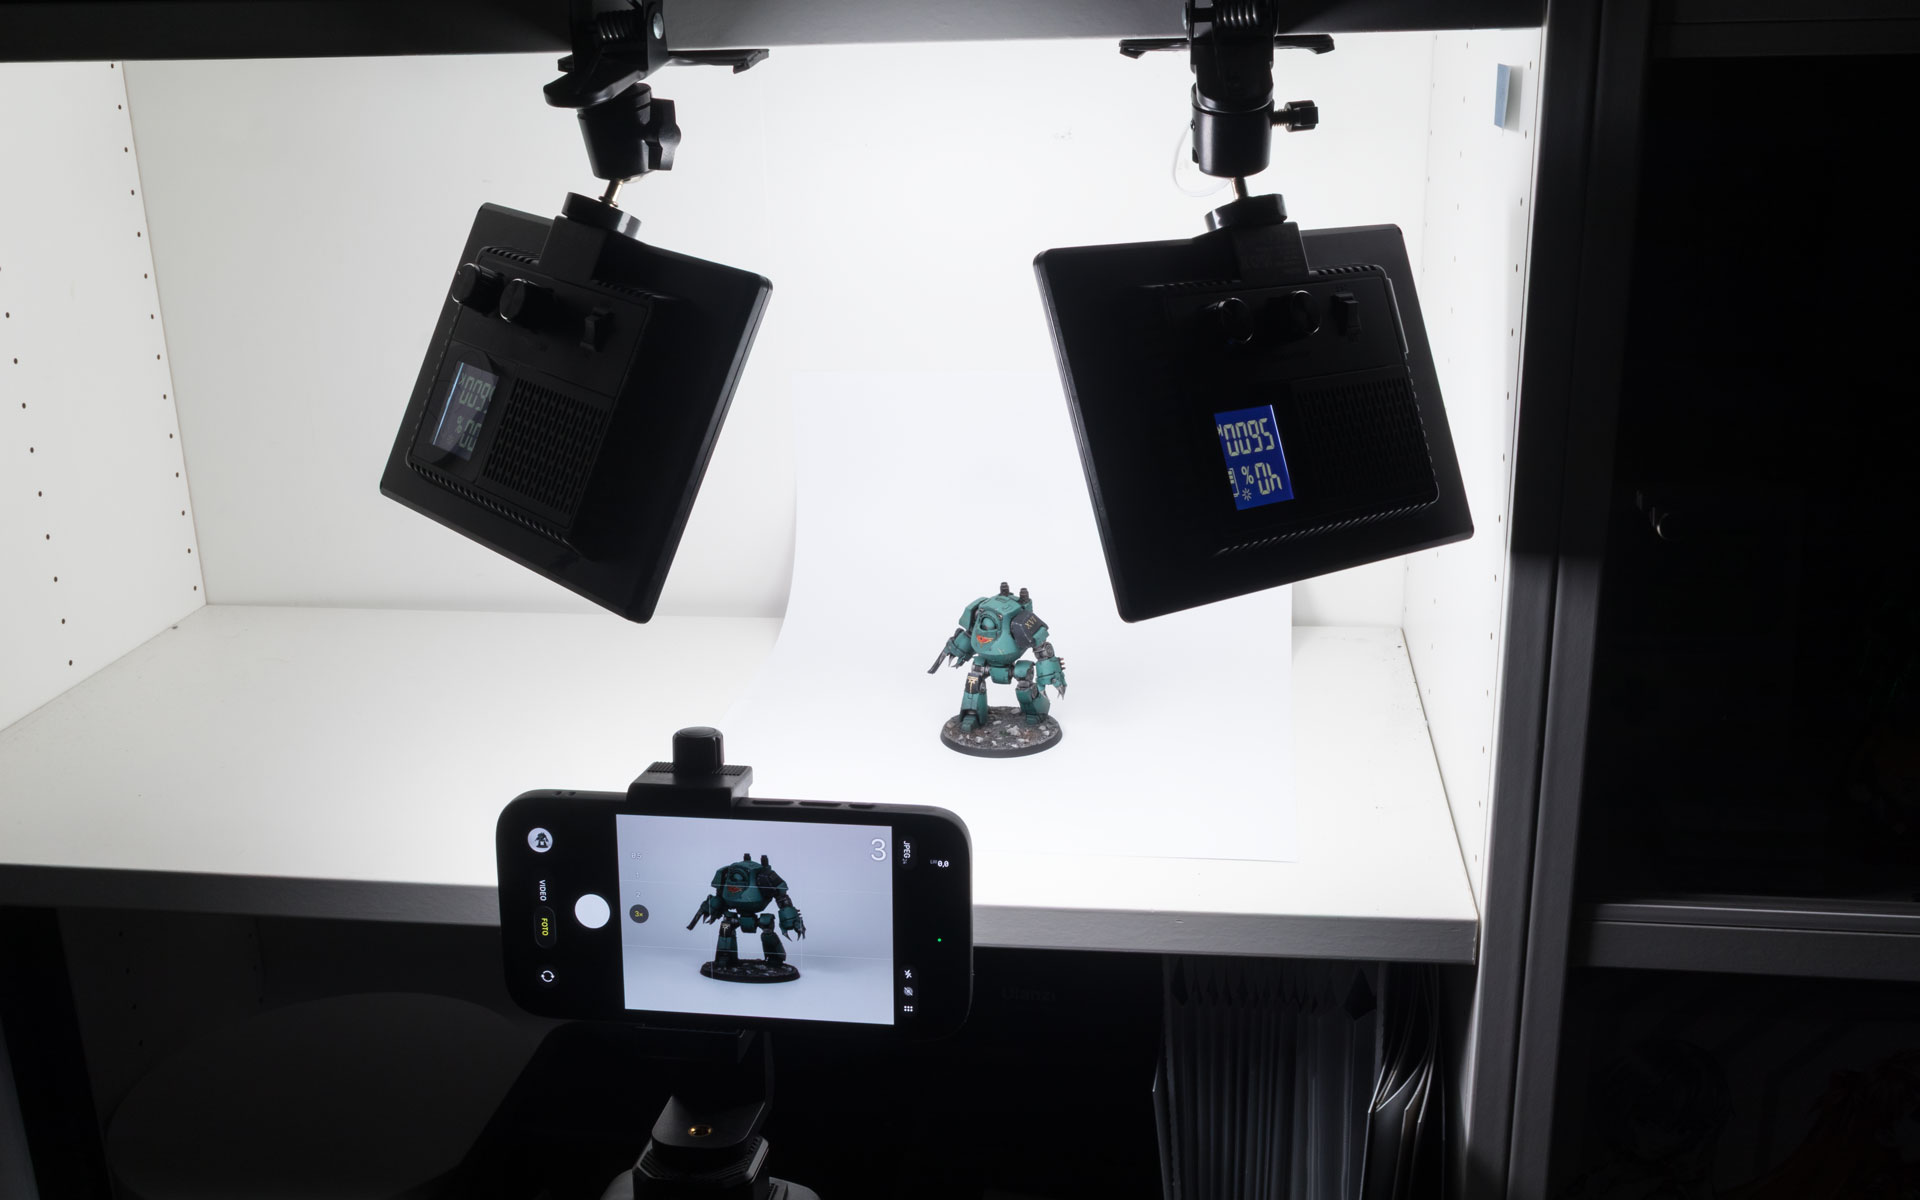
Here is my setup. I’ve set up an empty compartment in my shelf as a photo corner. Important: close the curtains or blinds, and turn off all other light sources, so no “light pollution” or reflections from other light sources occur. Then I’ve set up a simple seamless background with a large sheet of paper. I’ve clamped the Raleno LED panel to a shelf at the top left with the clamp, so it shines onto the model diagonally from above. To the right of the model the white finish of the shelf will bounce the light (if you don’t have a white shelf, you can also use another sheet of white paper or cardboard). This brightens dark, shadowed areas of the model and prevents them from “getting lost” in the darkness.
Taking the actual photo
For this tutorial I’m using my smartphone, which I’ve placed on a cheap tripod to avoid camera shake. Normally I use a DSLR camera for the photos here on Tale of Painters. I’ll go into more detail about cameras and tripods in the next part of the “Mastering miniature photography” series. But with good light, you can also take great pictures with a reasonably modern smartphone. The light panel is set at 100% and 5600K, and I’m using my iPhone’s camera app with auto settings and the self-timer activated so my phone can stay still.
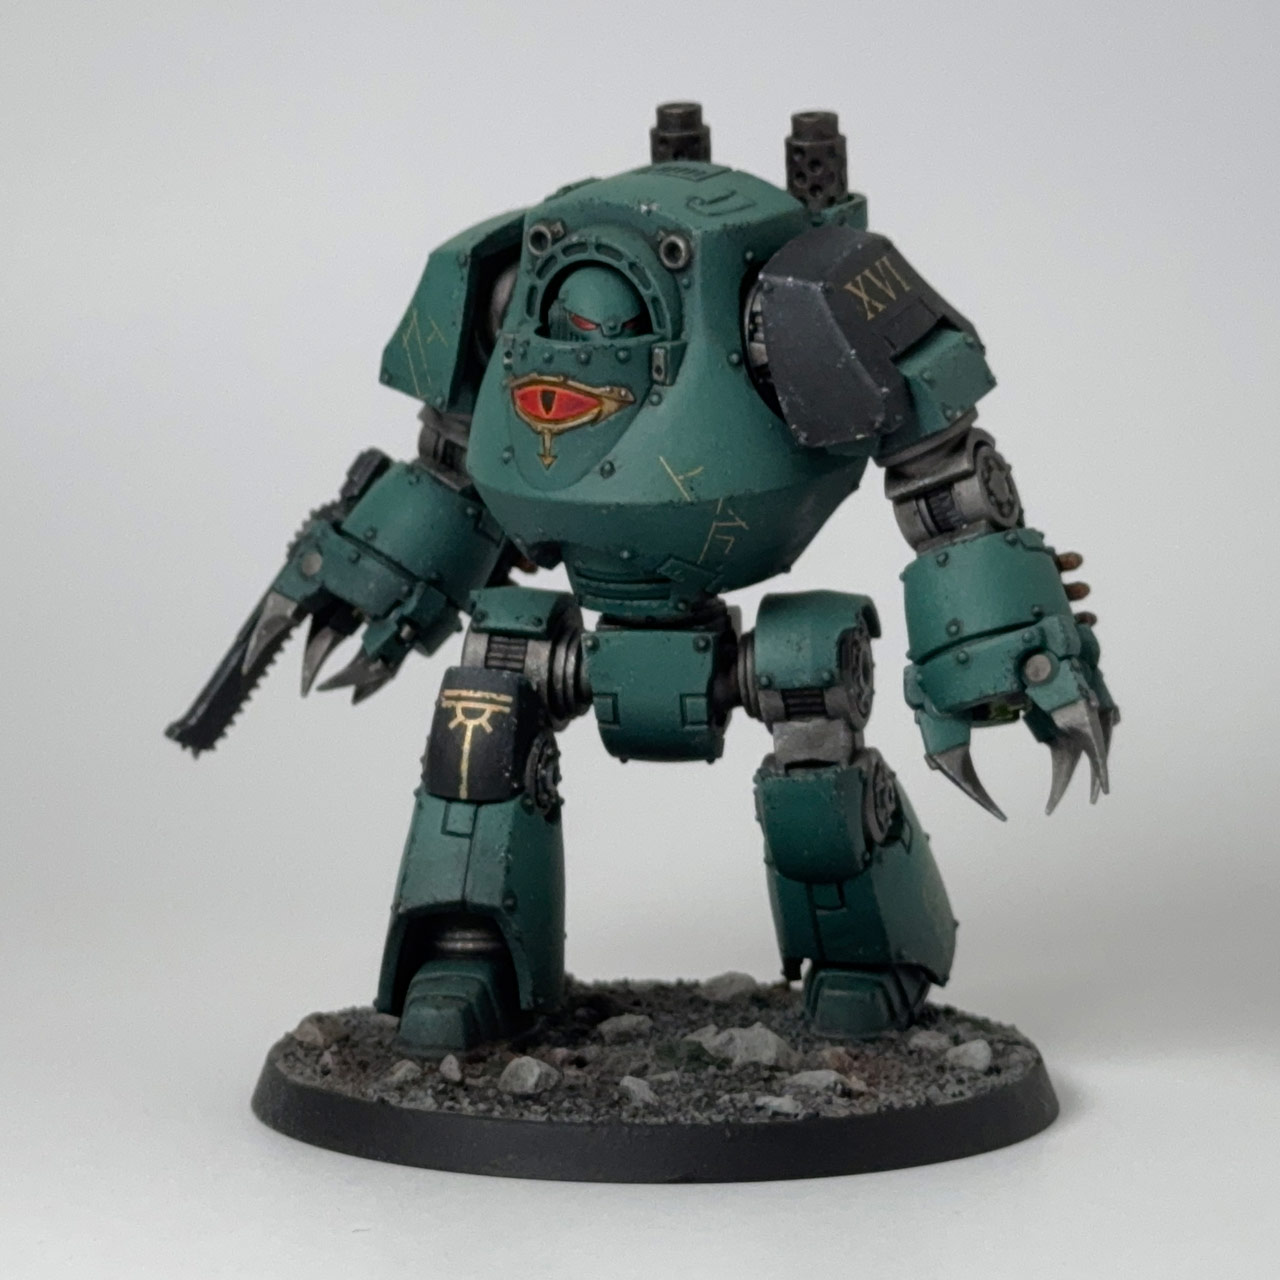
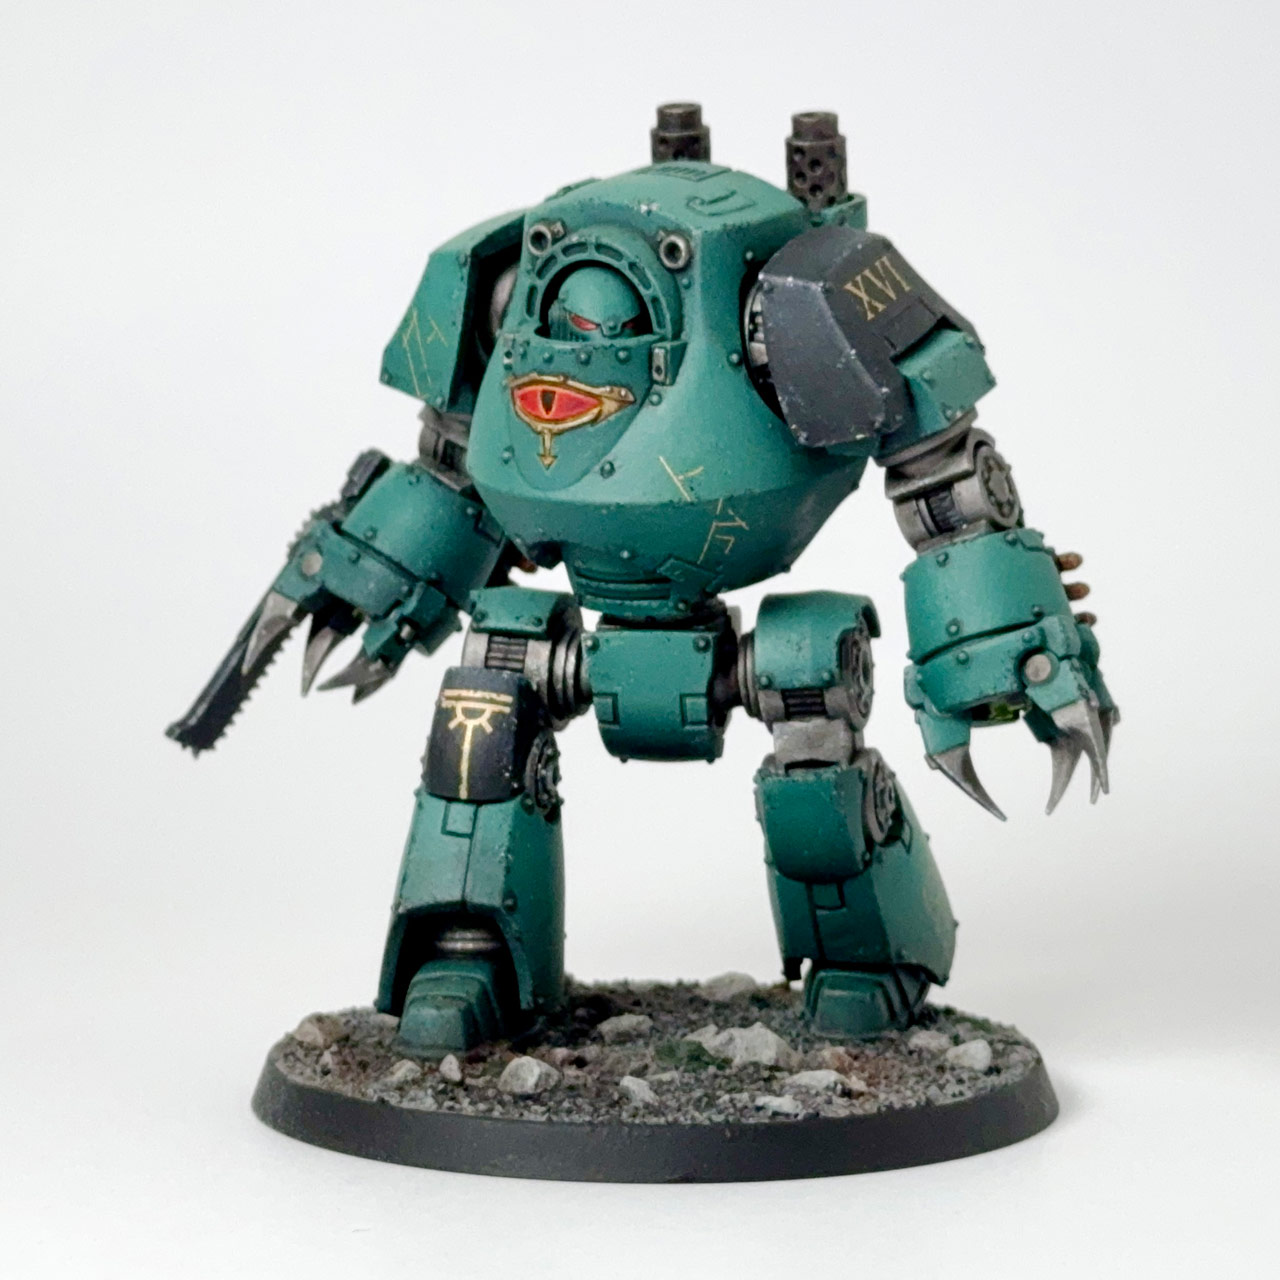
Left is the image straight from the camera app. Right is the same photo with minimal post-processing via the built-in app. I use the auto-balance feature, then increased the exposure and contrast slightly more to make the picture brighter and the colours more punchy, and that’s it.
Expanding your setup
The next upgrade I would recommend would be a second LED panel. With two light sources, you mount one at the top left and one at the top right, so they shine diagonally down onto the model. One panel then becomes the “key light”: set this to 100%. The other panel becomes your “fill light” and effectively replaces the white shelf or sheet of paper, although a bit of extra bounce never hurts. You can dim the fill light to around 30% to 50% depending on taste. The purpose of the fill light is to slightly brighten the side of the model not lit by the key light, achieving more three-dimensional lighting on the model. With two panels, the light output also increases, and more light is always better, especially for larger models or units. For this reason, you should consider getting the larger version of the Raleno/Neewer LED panel as your second panel. This can then become the stronger key light, and you can use the smaller panel as fill light.
Desk lamp alternatives worth considering
Earlier I wrote that most desk lamps aren’t suitable for photographing miniatures. Generally, the colour temperature doesn’t match the ideal 5600K, and the lamps usually don’t have a built-in diffuser, which makes the light very harsh and creates hard shadows on the miniatures.
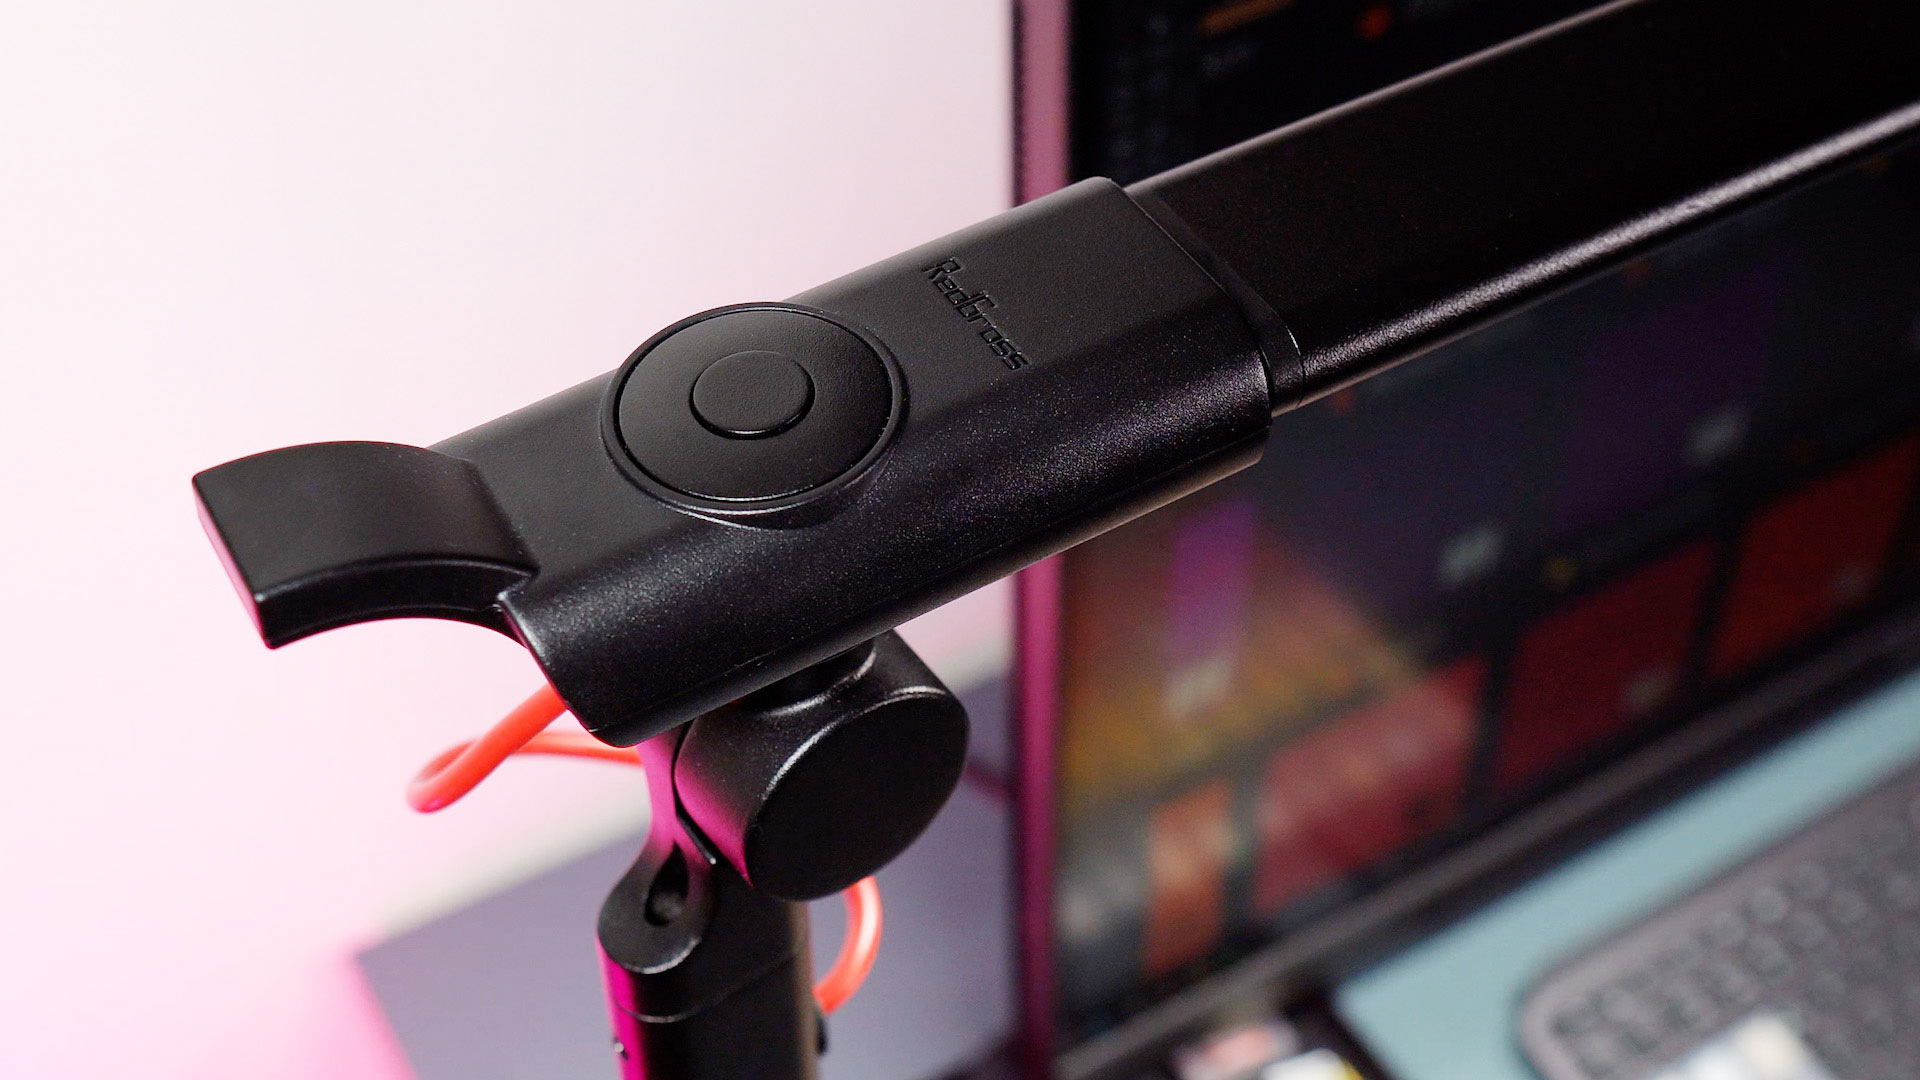
However, there are exceptions. The professional desk lamps from Redgrass, like the R9 and R9 Solo, have the ideal colour temperature, produce soft light, and are dimmable. The XL hobby desk lamp from Neatfi recommended by Squidmar, is also well suited. These lamps are significantly more expensive than the Raleno LED panels, but they’re also a genuine upgrade for your desk, and perhaps you already have one anyway.
To perfectly light your miniatures with a desk lamp, you’ll also need a white sheet of paper set up as a seamless background. Then position the lamp so it stands 10 to 15cm in front of the miniature and shines diagonally downward, with the lamp arm parallel to the miniature and the miniature centred.
What’s next in the series
In the next part of Mastering miniature photography (on a budget), we’ll look at DSLR cameras and tripods, and then move on to professional editing of RAW images. Don’t miss it, and bookmark Tale of Painters if you haven’t already. We bring you new hobby content multiple times a week, plus unboxings and reviews of the latest Warhammer releases every Saturday!
Feel free to drop a comment below, I’m also happy to answer any questions on our friendly hobby Discord server. Thanks a lot, and happy hobbying!

Tale of Painters is the unofficial Warhammer hobby magazine run by hobbyists like you. Support our work by using the affiliate links from our partner stores for your next orders so we can continue to bring you fantastic FREE content every day:




Or support us directly:
