
Big guns never tire, but Garfy does… painting large models can be a real struggle but in today’s post I’m going to explain how I made painting the Space Marine Gladiator Lancer in Blood Angel colours easy… but be warned, it could all go horribly wrong!

If you’ve been following my Blood Angels series of posts on Tale of Painters then you’ll know all the units I’ve been painting have been for a 2000pt game against Dunk. That game is now only 2 days away and the Lancer is the final piece of the puzzle needed to blow Adam’s whopping 8 Imperial Guard tanks away.
Starting a large project like a tank can be daunting. Just opening the box and being met with pages and pages of instructions and several sprues can be enough to want you to close the box back up. The first thing you need to do is work out your colour scheme and roughly plan out what colours will go where. Once you know this you can group model components into sub-assembly groups.
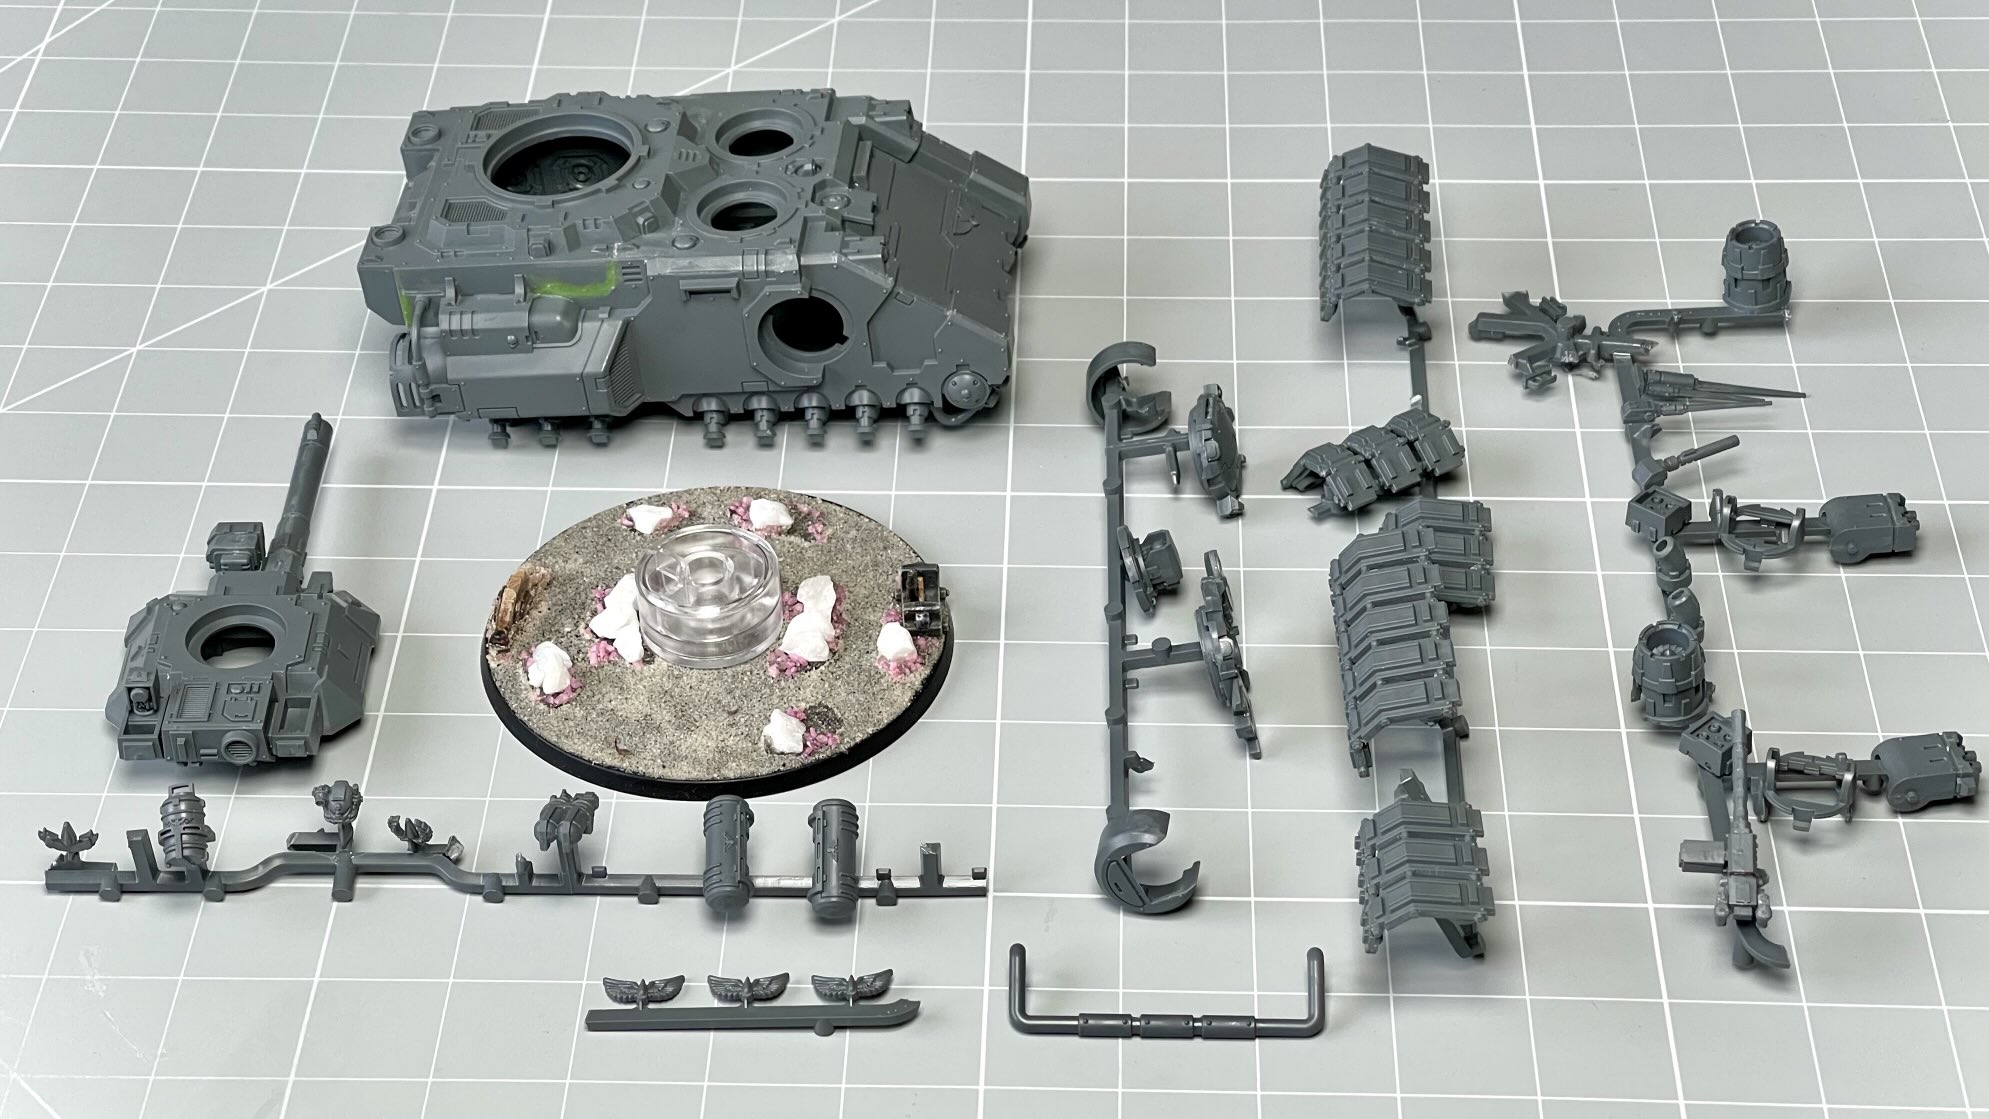
Above, in the first picture you can see not only have I grouped all my sub-assemblies, I’ve also glued them to sprue offcuts. When gluing parts to sprues, make sure you apply glue on contact area that won’t be seen, or is mating surface that will be glued to the model anyway. That way when you cut the piece off the sprue, you won’t have to repaint areas. Gluing all these small components to lengths of sprue has a couple of benefits; it’s easier to hold and you won’t rub off highlights by handling the pieces directly, it’s also easier to undercoat and basecoat pieces at once and finally, you won’t lose small pieces.

In the picture above, you can see I’ve undercoated some pieces white and some black. Things like metal tracks/grav plates look better on a black undercoat. Where as painting bright reds and yellows look better on a white undercoat.

Sometimes you’ll have a part that you can’t decide if it should be a white or black undercoat like my Lancer’s turret. In these situations you can do both if you use masking tape. I recommend Tamiya Masking Tape, you get very little bleeding with it and it produces sharp lines. The next stage is to apply paint to our undercoated pieces. I used an airbrush for this, but you can use aerosol spray cans or even a large brush. For my turret, I airbrushed on the Wild Rider Red base coat, once dry I then used the masking tape to cover the main turret area leaving the barrel exposed. Then I sprayed the barrel black.
With everything base coated, I then painted every part to completion, in this sense it’s like batch painting a squad of models, but instead of models it’s sub-assemblies. If I was having an off day and wanted to feel like I achieved something I’d paint something small like a yellow fuel tank to completion. It wouldn’t take long and I’d feel like I was another step closer to finishing it. Sometimes, painting the model’s base first can make you feel like you’re nearly finished.
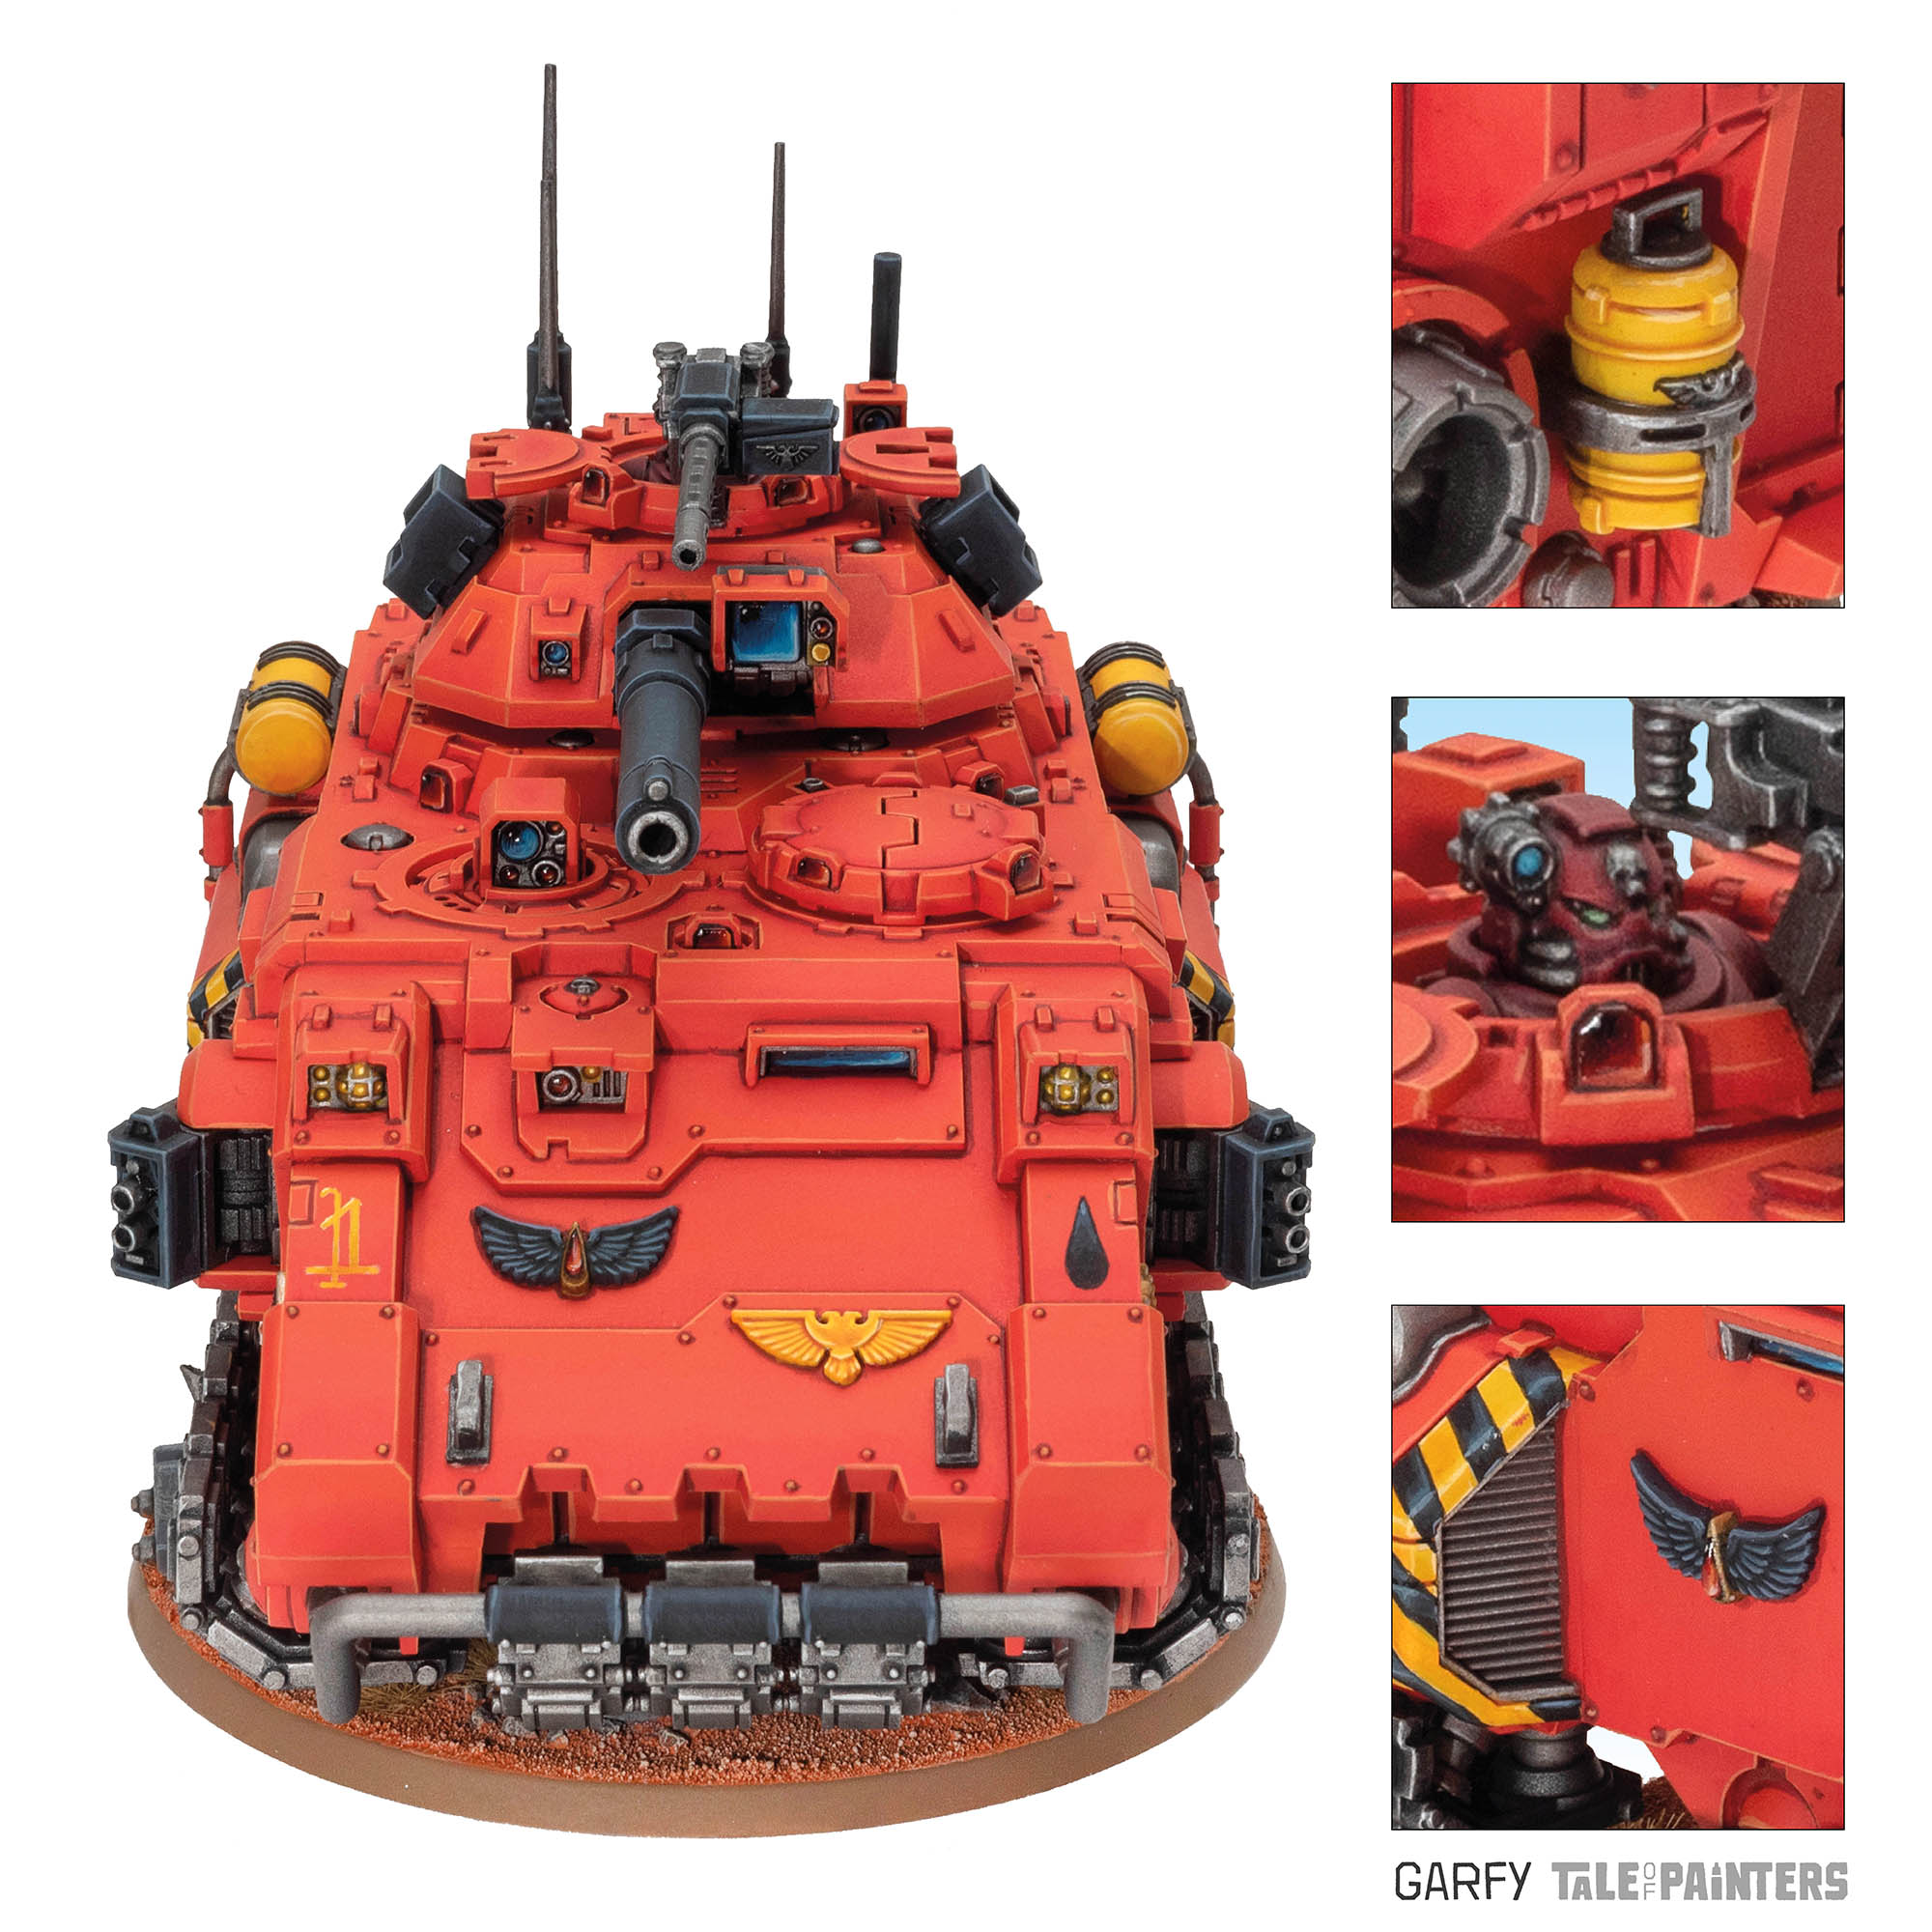
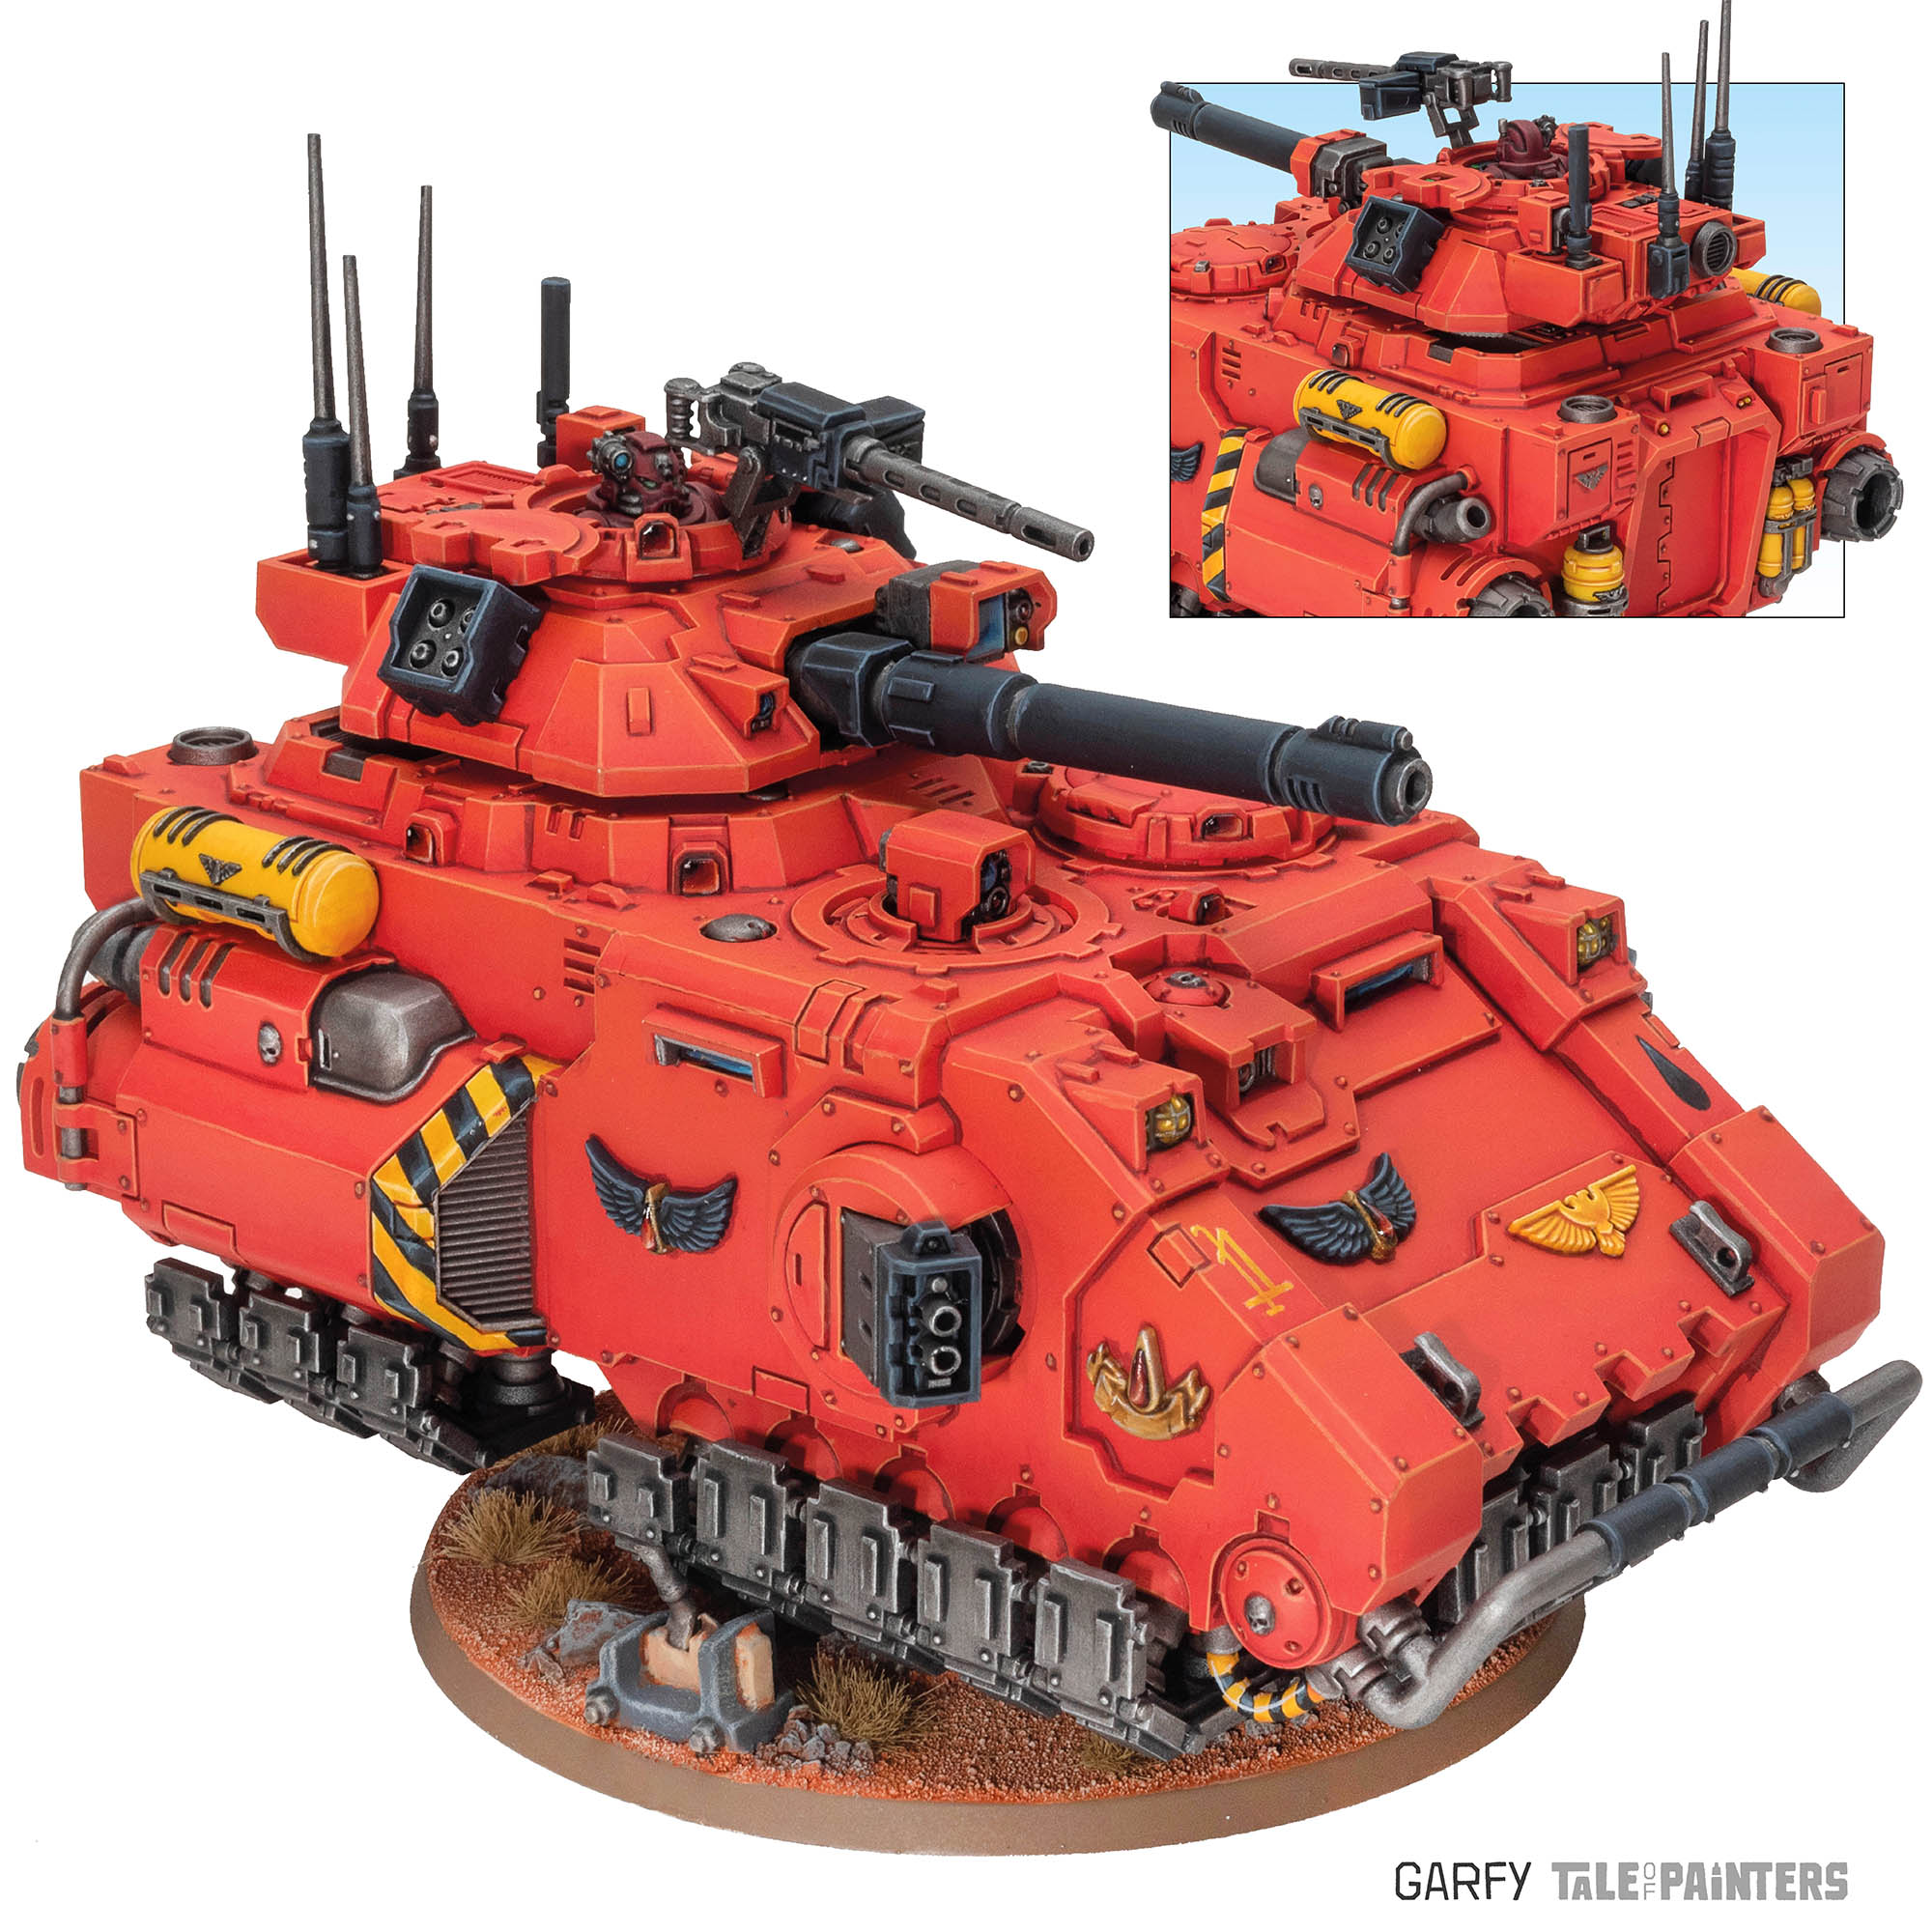
Check out the link to my Blood Angel Tutorial above if you’d like to know how to paint orangey Red classic Blood Angels. It’s exactly how I painted the Gladiator Lancer, just with larger brushes.
Stick it altogether
Once all the sub-assemblies were painted to completion it was time to glue the pieces together. This is the only downside to this approach. You will want a sharp scalpel and plastic glue with a needle nose applicator. What you’ll want to do is use the scalpel to carefully cut your pieces from your sprue offcuts. Once all the pieces are removed you need to work out where on the parts are the surfaces to be glued, once located, you’ll need to scrape the paint off that area with your scalpel. This goes for the small part and the hull of the tank, both mating surfaces. Be careful not to remove too much it’s ok to leave a little paint you don’t want scratched away areas showing when the parts are in place.
Use the needle nose plastic glue to apply the smallest amount possible to each mating surface, you don’t want loads of glue, that when the part is pushed down the glue squidges out of the sides and melts areas of your paint job. You’ll also want to go slow, take your time and be careful not to get any on your fingers, a gluey finger print on your beautiful paint job will be a nightmare to fix.
Do you like my approach to painting large models? Or do you just glue it together completely and paint it as a whole? Let me know in the comments below.

Tale of Painters is the unofficial Warhammer hobby magazine run by hobbyists like you. Support our work by using the affiliate links from our 🇺🇸 / 🇨🇦 partner stores for your next orders so we can continue to bring you fantastic FREE content every day:


Or support us directly:


