
This is a guide on how to take pictures indoors with no specialist lighting kit. I’m always asked how I take my photographs. Sadly, this guide isn’t how I take my photographs. I prefer to use flash photography. Flash photography isn’t a good start for beginners because it takes up room and costs more money. So with some basic kit, I’ll show you how to take clear photographs of your miniatures.
What is a good photo?
We all love looking at pictures of painted models. A good photograph can really show off a paint job and present the miniature in the best possible way. So what makes a good photo? I would say a good photograph is one that is completely in focus, the colours are represented correctly, it’s well lit with no obscurring shadows and the picture clarity is pin sharp (no noise or grain).
What kind of photographic equipment do I need?
For this tutorial you will need a camera that is capable of adjusting the Shutter Speed, Aperture, ISO and White Balance. Typically these cameras are DSLRs (Digital Single Lens Reflex) or Bridge (a hybrid between a point-and-shoot and a DSLR). You will also need a photographic grey card and a tripod.
What are all these words you’re using?
Shutter Speed is how fast the shutter opens and closes. It can be really slow or really fast. A slow Shutter Speed lets in loads of light. A fast Shutter Speed doesn’t let in as much light. Shutter Speed is represented on the camera by numbers. 1 is 1 second. 1/60 is 1/60th of a second. There are a whole range of incremental steps. You can even leave the shutter open indefinitely if you set it to BULB and it’ll only close when you release the shutter button.
Aperture is the opening at the back of the lens that can change it’s opening diameter (think James Bond opening credits). It’s represented on the camera by a number, usually with an ‘f’ in front of the number. f3.5 is wide open, while f22 is a small hole. Just like Shutter Speed the Aperture is another way of controlling how much light gets into the camera.
ISO is derived from the Greek isos, meaning equal. It’s used by The International Organisation for Standardisation. They are based in Geneva, Switzerland and set international standards for manufacturing and engineering, one of which is film sensitivity in photography. Digital Cameras don’t use film anymore, instead of exposing film, it exposes a sensor. The ISO setting changes the sensitivity of the sensor. A low number like 100 will be crisp but will require a lot of light to expose the picture correctly. An ISO of 3000 will not require that much light to expose correctly however it will be extremely grainy. Try not to go over ISO400. The lower the better though.
White Balance button is a series of built in presets that allow you to change how the camera perceives colour temperature. Low-temperature lighting is progressively warmer (more red/yellow), while high-temperature lighting grows progressively colder (more blue). These built in presets allow you to select a White Balance that suits the light in your shooting environment. You can set it to Daylight, Tungsten Lights, Shade and lot more (depending on your camera).
Lets get started.
Set up: Set up a large piece of white paper and tape the top of it to the wall or a box to make a nice curve. If you only have one light, set it up behind and above the camera shining onto the subject, don’t get too close. If you have two lights, set them up at 45º degree angles in front of the subject. Try to pair lights. Use the same light bulbs/bedside lamps, painting lights etc. Don’t use fluorescent lights because they create a flicker and are unpredictable. You can leave the room’s main light on as well. The key is to just try and bath the subject in light evenly, so shadows cancel each other out. You don’t have to have the lights close at all. If you’re getting shadow to one side, you can use a piece of white card opposite your light source as a reflector to bounce the light onto the shadowed area.

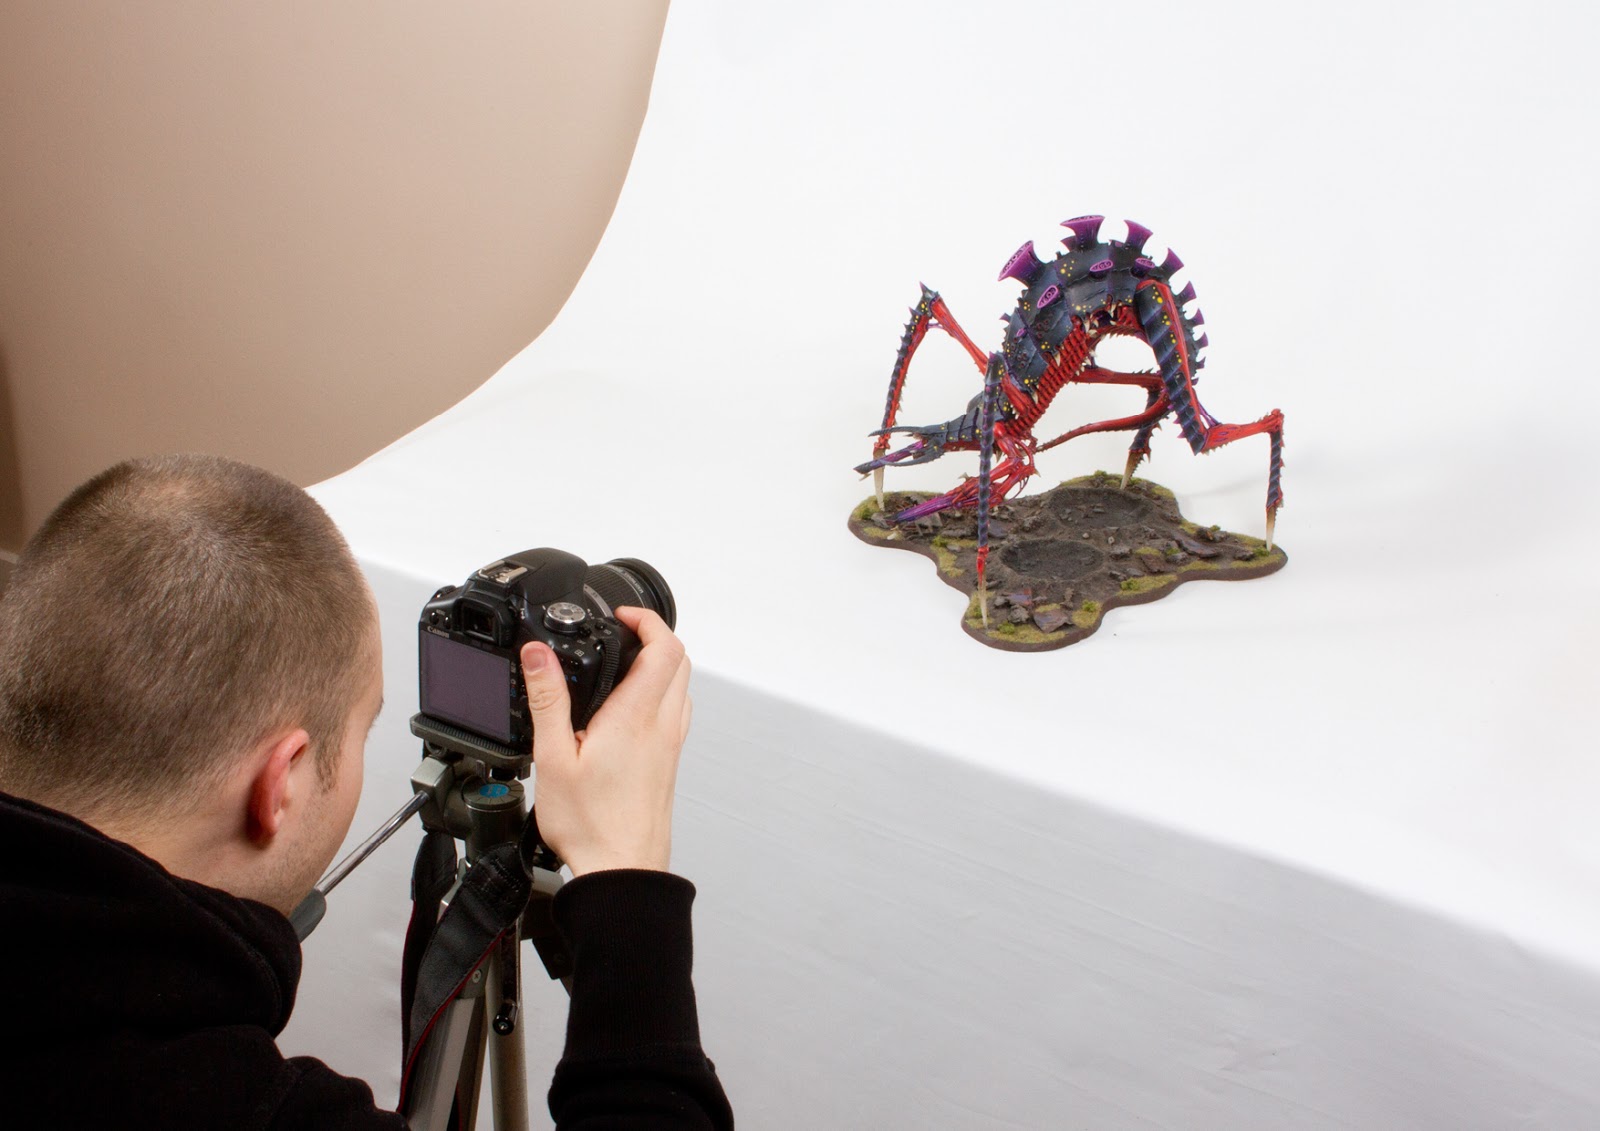
Mount your camera on a tripod and set it to Full Auto. It’s usually represented by a green rectangle. You’re probably thinking “what a lousy tutorial” but seriously this is to show you why you shouldn’t use Full Auto. Look through the view finder and half press and hold the shutter button. You should hear the lens move as it auto focusses, it might beep when it’s in focussed. Continue pressing the shutter button all the way down to take the picture.

Ok, let’s see what we have here. I’ve actually overlaid some close ups and text over the photo. Ignore those for a second and just look at the Bio Titan. At the beginning I mentioned some criteria that I believe ‘makes a good picture’. Lets judge the above picture on those merits.
Completely in focus: Sadly this photo isn’t totally in focus. As you can see from the close up the back leg it is blurry. This is to do with the depth of field. This picture would be described as having short depth of field because only the front objects are in focus. Open Apertures (such as f3.5) produce short depth of field, whilst closed Apertures (like f22) have longer depths of fields with everything in focus.
The colours are represented correctly: This is another fail. Auto White Balance (AWB) has given us a really warm orangey white. This is partly to do with the lights I’m using and how the camera is seeing that.
It’s well lit with no obscurring shadows: The subject is too dark. It’s really difficult to make out details. It has underexposed the subject because it didn’t want to over expose the background. It’s trying to work out the correct exposure of the whole picture so it’s compromising.
The picture clarity is pin sharp: This isn’t bad actually, the camera must have selected a low ISO number so we’re not getting any grain/noise. if you’re getting noise or grain try bringing your light source closer.

Full Auto was rubbish, let’s take back control and set the camera to Manual. It’s usually the M on the dial on the top. On the display you can see lots of information. At the top of the screen from left to right we have Shutter Speed, Aperture and ISO. The large M on the left is to remind you you’re in Manual. The -2..1..0..1..+2 is the exposure meter. AWB is Auto White Balance. We don’t need to worry about the icons (spot metering, shot count, battery, file size etc).
The first thing I want to fix is the depth of field so everything is in focus. So I set the aperture to a smaller hole (high number) f22. I’ve set the ISO to 400 which is nice and low. Anything under this is good. I then watch the exposure meter (-2..1..0..1..+2). I change the shutter speed setting until the cursor is on 0 for a perfect exposure. Because the Aperture is really small and not much light is getting into the camera the shutter speed needs to be open for longer to expose the sensor correctly. If the ISO was 100 and not 400 the shutter speed would have to be open for even longer. As you can see the Aperture, Shutter Speed and ISO are intrinsically linked.
The downside to this is the long shutter speed. If we were holding the camera the picture would be blurry because of all the camera shake. We’re ok though because we’re using a tripod. Generally speaking if you’re shooting handheld the rule of thumb is nothing slower than 1/60th of a second. You won’t get camera shake with that but you will have to open your aperture or make your ISO higher.

Turn the camera’s timer on. The reason why you should use a timer with a long shutter speed is because pressing the button even on a tripod can move the camera. Even the slightest jolt can create a camera shake blur. The timer eliminates that.

Right, lets see how the Manual settings have come out. The good news is we’ve fixed the depth of field and the whole subject is in focus. We’ve also got a good exposure on the subject and the details are well lit and with our ISO no higher than 400 we still have good clarity with no grain.

Our whites aren’t white though, so now we have to fix the White Balance. For this I’m going to share a professional tip. Custom White Balance.

Remember in the list of ‘items you will need’, I mentioned a grey card. Well here it is. I bought this one on eBay for £8. The reason we need a grey card is to trick the camera. Cameras aren’t great at seeing white, they compensate the white and it looks grey. Look at any photos you’ve taken of snow, I bet the snow is grey. The grey card will also sort out the colour temp.

Keepint the Manual settings the same from earlier take another photograph, this time of the grey card.

Press your camera’s menu button and find the Custom WB option and select it.

Set the last picture you took of the grey card as the WB data. Press OK.

Return to the main screen and then go into your White Balance Presets (It’s the button labelled WB) and select Custom.
We are now ready to take another picture of the Bio-Titan.

Would you look at the difference! The picture is totally transformed. We now have a picture that meets all the criteria I listed earlier. It’s fully in focus, the colours are perfectly represented, there are no shadows obscuring the picture and it has good clarity.
I didn’t use any specialist lights, just a couple of bedside table lamps and the room’s light. I made sure the lamps weren’t too close creating shadows and were quite high up. Your shutter speed will vary depending on how much light you can get. It might be slower if you only have one light source. The important thing is not to worry about buying daylight bulbs, photo light boxes, diffusers or filters. You just need an inexpensive grey card and you can use what ever lights you like.
You also might want to over exposure on the exposure metre a click or two if your white is a touch grey still. Taking a photo then changing the aperture or shutter speed a click, then taking another Photo and repeating this several times is called bracketing. When you view your pictures on a computer you will have several to choose from from slightly under exposed through to slightly over exposed.
The camera to take the pictures of the Hierophant is an entry level DSLR. It’s a Canon 500D with an 18-55mm kit lens. I don’t think you can buy it new anymore, but I see it second hand for around £220 with lens. The camera I used to take photos of me using the 500D is a Canon 7D with a 24mm prime lens. When I’m shooting flash photography I use my 7D with a 60mm macro prime lens.
Remember, spending more money doesn’t mean better photos. It just means more options and settings. Which will be wasted without knowledge.
If enough people ask I might do a smart phone / point and shot camera guide which focuses more on post production using cheap/free image software.
Do you like our tutorials and reviews? Here is what you can do to support us: Check out the websites of our sponsors, place your next orders at Wayland Games by clicking here or on the banner on the right. Thank you very much, we appreciate any help to keep us going.

70 Comments
Leave a Reply
Tale of Painters is the unofficial Warhammer hobby magazine run by hobbyists like you. Support our work by using the affiliate links from our 🇺🇸 / 🇨🇦 partner stores for your next orders so we can continue to bring you fantastic FREE content every day:


Or support us directly:


Over the last years, I read your article over and over again.
Surely one of the most important tutorials in my hobby life.
THANKS 1000 fold for it!
My pleasure. This is great to hear.
FxFoto's standard edition is one of many photo editing programs that does most things that the casual photographer would like to correct in their pictures. Included in the standard edition for FxFoto are tools like lighting and image adjustment, red eye correction, blemish correction, smoothing, cropping, photo frames, and text enhancement. remove image background
I will try to go through this again while I'm taking a photo. Super helpful, thanks so much. I even hat to photograph MY Heirophant back in May so I was familiar with a lot of that!
Thank you for a great tutorial!! Would love to see a smart phone photo tutorial!
very helpful, much appreciated, thank you
Thank you!
No problem.
Would be very interested in knowing if and how this info translates to video of miniatures -more specifically, the Filmic app for iPhone if possible. It seems to this total newbie that your info would be perfect! At any rate, thank you so very much for your time and effort. Such a great tutorial, my friend!
Please do the phone camera tutorial ?
http://taleofpainters.blogspot.co.uk/2015/02/tutorial-how-to-photograph-miniatures.html
It's very awesome to see your post, i really enjoyed your article actually i'm your regular reader and love your posts. Everytime you write something beneficial with a unique idea and explanation. It is very difficult to explain one product but your way of explanation is authentic and understandable. As i'm also running a photography blog with ecommerce platform named TRD Electronics, you can use it as a tutor because i often post posts likes "How to use Digital Cameras", "Best Lens for Wildlife Photography", "Essential Tips for Street Photography" and also you can purchase Photography Products and Electronics Gadgets.
Having just been gifted a very nice DSLR and now photographing miniature in a slightly more serious way I have just been paying serious attention to this tutorial and am desperately looking forward to testing it out (later when the wife goes to work and my daughter is snoring in bed – that's when hobby time happens). Here's to some publication quality photos for my own blog in the near future (as opposed to my somewhat amateur point and press pictures that have been the reality thus far), I have everything except the grey card and that will not take me long to produce one.
Thanks for the tutorial. This is an area where I need a lot more experience. The article helps.
Thank you for this tutorial! I was so inspired that I tried it myself. You can find the results under: http://ontopofthetables.blogspot.de/2016/01/ausprobiert-wie-fotografiere-ich.html. I am not 100% satisfied but it is way better then before! And I'm on fire now. Maybe you can do also a little tutorial about RAW edititing?
Thank You! Your post has really improved my pictures! Although, i now have to do a lot of corrections, now that you can see every little mistake in the pics 😉
I'm ten times better at taking miniature photos after reading your tips, playing around, and reading them again. Thanks!
Excellent tips, please do a smart phone one!
It's already done. http://taleofpainters.blogspot.co.uk/2015/02/tutorial-how-to-photograph-miniatures.html
So many replies haha but this was very informative! My girlfriend will be using her pretty nice camera to aid me in taking pictures of my army someday (once its all painted up)
Hi, would like to see the smartphone tutorial. I'm not a camera buff, only take pics for my blog on an iPad so consequently struggle to showcase properly some of the minis.
http://taleofpainters.blogspot.co.uk/2015/02/tutorial-how-to-photograph-miniatures.html
Brilliant article and great seeing how you do things. I was wondering if you were to take a photo with a darker background as opposed to a white one how would you go about it? As I find this quite difficult to do myself.
Why is this "new" now?
Where does it say it's new?
Sometimes we don't have a post scheduled. When this happens we will post an old popular post giving new readers an opportunity to see it. It's our own version of re-runs.
Awesome – thank you so much for these articles 🙂
Really well written! I've had photography lessons eons ago with 35mm SLR's but have seemingly forgotten the basics due to lazy smart phone use and DSLR auto-mode. Thanks for making it feel so much easier to pick up again! Can't wait to reshoot my minis & see the difference!!
Make sure you send me pictures over on my Facebook page. I'd love to see them.
https://www.facebook.com/Garfy.taleofpainters
This was a great tutorial. Thank You! I have done a couple of these things, but need to try the others. Don't think my camera can do the grey card trick, but I have been using a grey background. Not sure if that would help the tinting issue.
super,awesome
nice work
Great Tutorial, Clear and nicely done!
Love the article. Picked up a grey card to try it out. Would love to see a phone version as well.
Very nice and simple tutorial, I have just one point – don't overdo it with the F number, because sharpness suffers. Most lenses have a sweet spot at around F8-F11. Beyond that, image quality starts to degrade, especially on cheap lenses. F11 will still give enough depth of field, while utilizing the optical system to the max and letting you set an even lower ISO.
Garfy you are crazy…in the good way!!
Just what I needed. I've been messing around with a Canon 1100d for ages on the macro settings and getting nowhere; this article is absolutely superb for a camera novice such as myself and has made a massive difference to my photography. Thanks a million, Garfy.
Really happy to have helped so many people.
Id love to see that camera phone tutorial! My Galaxy S5 has a pretty good camera but i dont know if I should use the default camera app or get a better one. Also, i cant really figure out all the settings… Some help would be awesome!
Incredible article, very useful, GRATZ!! I've been thinking of buying a reflex camera but didn't know how to start using it. Now I do 🙂 But, please, make the smartphone tutorial!! Most of us can't afford a camera (for the moment) and the smartphone is the only tool we have at hand.
Thanks for posting this – it may even be time for me to move to a grownup camera! In the meantime a smartphone tutorial would certainly be of interest.
Best article I have read in a while. Thankyou.
From humble beginnings this blog has become the best in the community. Great content, great tutorials and always very high standards. For people with day jobs you guys do a smashing job. I remember finding this blog when it was part of the From the Warp blog roll. It's grown into something really awesome and articles like this really show it.
Keep up the great work.
Once again, above and beyond! Kudos to you!
StevePhy
Great article, I have a Nokia 1020 with iso/shutter/white balance so I'm looking forward to trying some of this out!
Thanks everyone, I'm totally overwhelmed by the response of this.
Great tut! One of the easiest to follow I have ever seen.
A tut for phones would be amazing too, so I'll vote for that!
Great article. I need to bookmark this for later use!
Outstanding article! Thanks for doing the write up.
Really enjoyed reading this, it was most informative!
As an earlier commenter has said, I'd love to see a smart phone tutorial, as I also can only borrow a decent camera/tripod.
Really handy article and even though I've only got my smart phone it's already giving me ideas to help improve my pics and get more consistent results. A smart phone Tutorial would be great to see.
Just what I needed, thanks Garfy. I'm really struggling whit my miniature photos even as I've been photographing for 5+ years with DSLR and consider myself somewhat good in other areas of photographing. I've been wondering for a long time now about the colour differences of Nikon and Canon, it seems that Canon has more pure and realistic colours. WB options with Nikon (which I have) are really crappy imo, and I wonder if it might be a part of my problems with miniature photographing… A quick question: do you use RAW or JPEG format when photographing miniatures?
I always shoot in raw. I didn't want to over complicate this tutorial so left it out.
I shoot with a Nikon and have no issues. Canon isn't better with color, nor is Nikon. They're different but similar tools and you just have to learn their differences. My custom white balance works nothing like Garfy's tutorial (I don't have to take a picture on my D7100 to set custom WB), but it works like a charm nonetheless. Don't use the preset WB options, they're not going to work for you in a studio setting.
DEET you should do a Nikon version of this guide 🙂
I agree about WB presets, no good under studio conditions (as the first few pictures proved).
Thanks for the answers. Deet, any good tips for finding the right balance with a Nikon?
Sorry I missed this last year, but as Garfy's reposted, I get another shot. You'll just have to look up how to set a custom WB on your particular model. Not all Nikons do it the same way (older vs newer). A quick google search should have you up and running in no time!
Omg that was a great article. I had a SLR camera for years and knew what all those settings were I just didn't understand how they really affected the picture and how to adjust them until I read your article. Please do one for point and shoot and cell phones. Thanks
Excellent and long awaited (for me at least!) article that I thoroughly enjoyed reading. I can already feel my photography skill increasing.
Will try to replicate your methods once I get home to my DSLR!
This was a great article. My photos have been really weak for a long time and some of these points go precisely to my troubles. Thanks!
Garfy, got any recommendations on what lamp to use? I always had trouble finding proper lighting for any pics I've taken. My standard painting lamp doesn't seem to have enough power to light the whole space.
Best,
Kenza
It has enough light. You just need to expose for longer.
Great tutorial, thanks!
That is a very good article Garfy. I always enjoy reading how others take photos and I learned a few thing's as we have very similar cameras. I have even ordered a grey card for white balancing. Good stuff and very well written.
Please do the one on smart phone too! This was very informative and clear. I think I got it at last. But I can only borrow DSLR while I always have thee smarotphone at hand. And it is quite capable being Sony Xperia Z1
The problem with smartphones is that they don't have the same manual controls. Auto settings just aren't up to the task of taking really good miniature photos. There are things that you can do to help, but keep in mind that there are real limitations:
https://www.youtube.com/watch?v=Yipi-1_2_TE
In my article I said I'd probably do a smart phone guide that concentrated on post production using cheap or free image software.
Amazing, loving the details and such
Very cool tutorial – thanks a lot. A smart phone tutorial would be even better (as I don't possess a real camera, but a licensed Creative Suit from Adobe). 🙂
btw: Commenting via WordPress seems to be buggy on the blog. :/
Ok, WordPress does work, although the "Reply as" field said otherwise.^^
Saw this over facebook, very helpful. I've always wondered how I can improve my miniature photography and there are some great tips here
Really nice Tutorial! I will try that for my next miniatures!