

Please excuse the classic miniature that I’ve used for this tutorial. It does translate perfectly to the new modern sculpts and covers, rusty metals, dirty wood, black and red cloth, brown leather and green skin. This tutorial can also be used for Warhammer Fantasy Orcs, just replace shoota for shield. Read on for the full comprehensive guide to painting Orks / Orcs.
This tutorial assumes you have a basic understanding of how to paint. For the beginners, I will explain the techniques as I go along. Each picture below shows four chronological steps. Underneath each picture are the corresponding instructions. Each step shows the paint I used during that step.
Paints you will need for this tutorial:
Black Undercoat
Rhinox Hide (base)
Ryza Rust (dry)
Ironbreaker (layer)
Nuln Oil (shade)
Khorne Red (base)
Evil Sunz Scarlett (layer)
Eshin Grey (layer)
Dawnstone (layer)
Mournfang Brown (base)
Skrag Brown (layer)
Baneblade Brown (layer)
Karak Stone (layer)
Waargh Flesh (base)
Warboss Green (layer)
Straken Green (layer)
Rakarth Flesh (base)
Bloodletter (glaze)
Blood for the Blood God (technical)
Ironbreaker (layer)
Steel Legion Drab (base)
Armageddon Dust (texture)
In case you need to expand your paint collection, head over to Wayland Games, who stock a huge selection of paints at competitive prices.

1. Undercoat the model black. You can do this by using a black undercoat
spray or use Vallejo Black Surface Primerand an airbrush.
2. Using stipple brush, dab on Rhinox Hide to any areas that are to be metal. This can be rough. Don’t worry about being neat and tidy at this point. If you don’t own a stipple brush just take a large knackered brush and trim the bristles down using scissors.
3. Repeat the stippling process with Ryza Rust. Try to leave some of the Rhinox Hide showing through. If you do this a couple of times it really builds up the vibrance of the orange in places creating several different tones of orange.
4. More stippling, this time with Ironbreaker. Go lightly at this stage, you don’t want to over do it. Concentrate the Ironbreaker on places that would have natural wear and tear like the edge of the choppa.
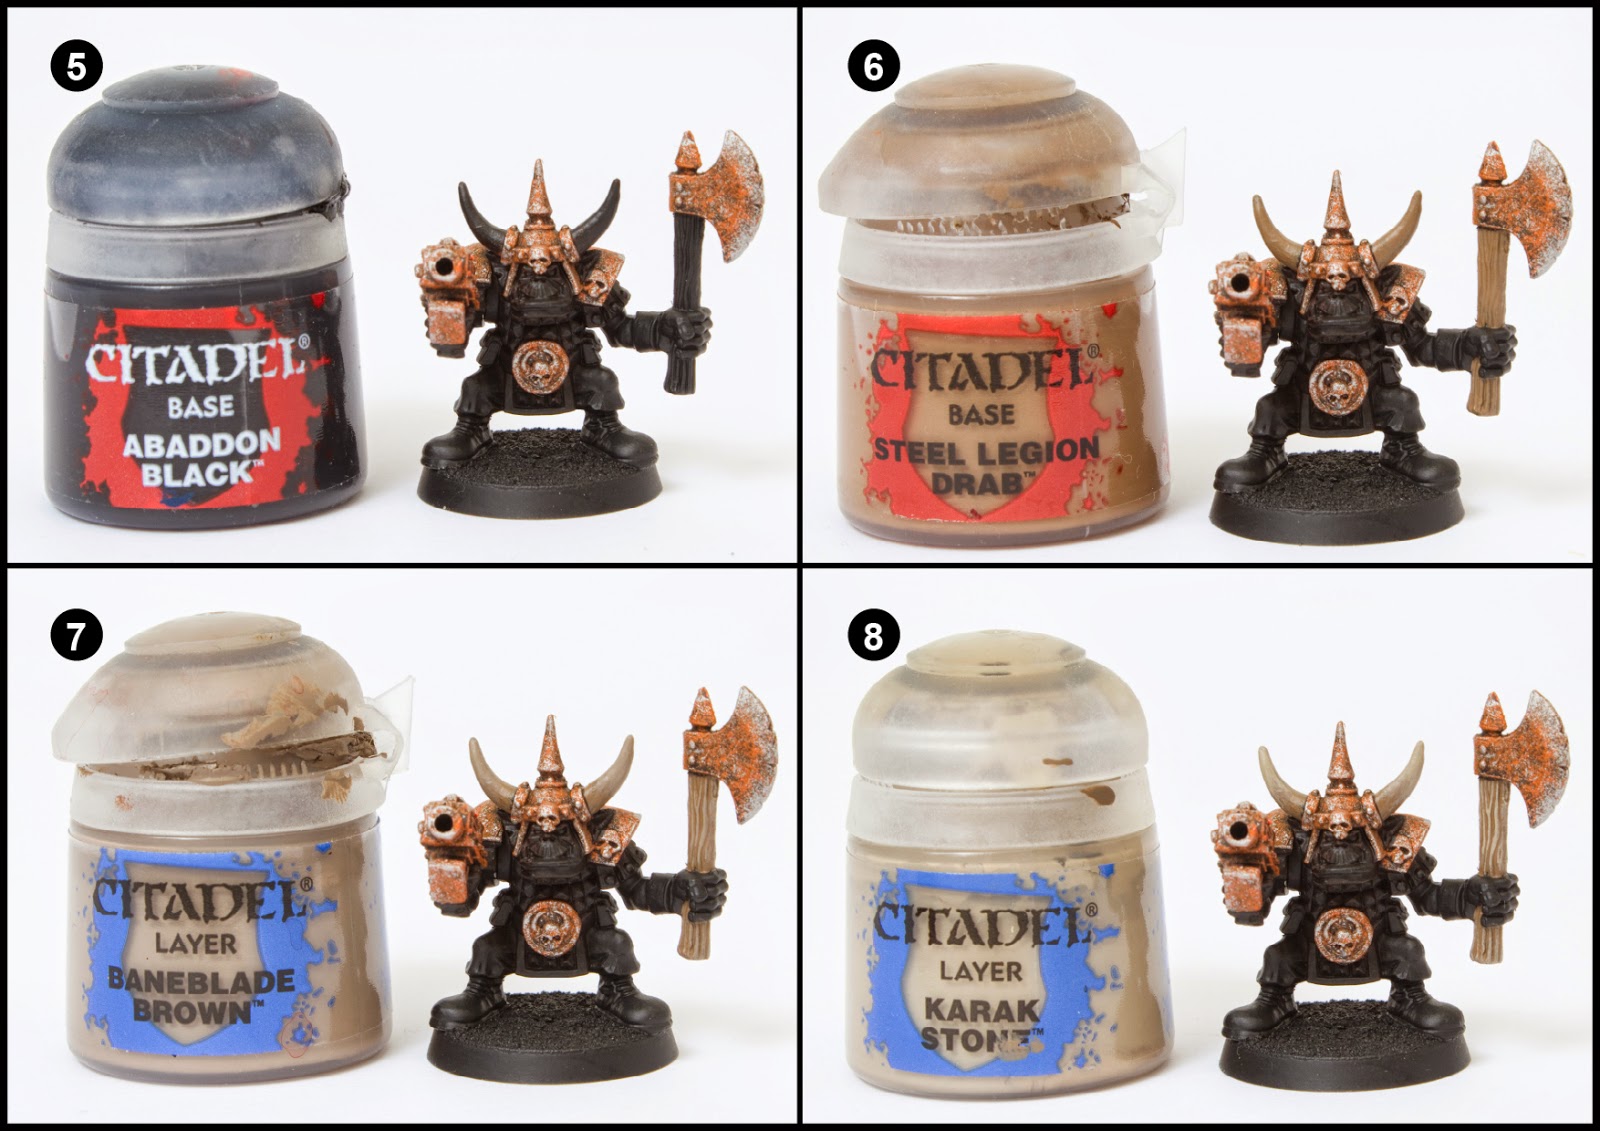
5. Use Abaddon Black to tidy up any areas that got accidentally stippled.
6. Paint any bone horns or wood with Steel Legion Drab.
7. Highlight the bone and wood with Baneblade Brown. For the horns highlight the upper two thirds and the for the wood just paint the raised grain. If the wood is smooth highlight the length.
8. Further highlight the bone and wood using Karak Stone. Highlight the upper third of the horn and continue to the highlight the raided grain on the wood.
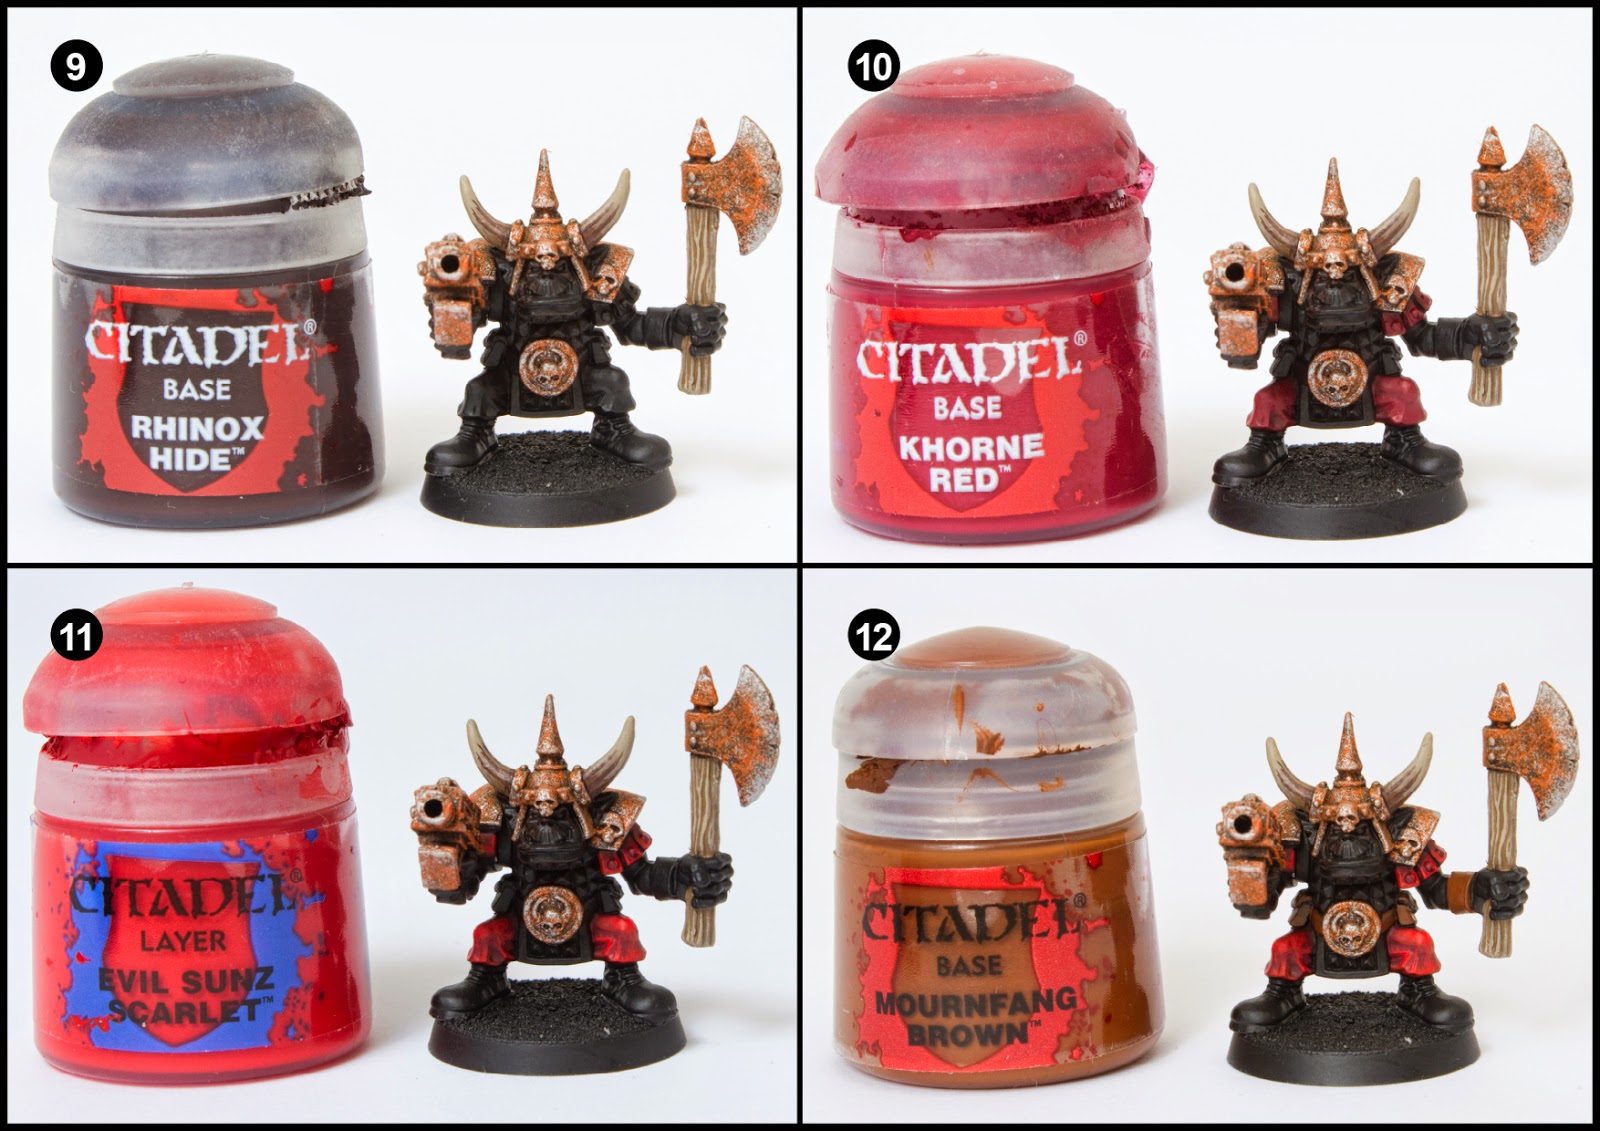
9. Add some water to Rhinox Hide on a mixing palette (ratio two parts paint to one part water). Using the watered down mix paint some thin stripes along the length of the horns from the base towards the tip. You don’t have to go all the way to the tip.
10. Paint some of the cloth areas with Khorne Red.
11. Highlight the red cloth with Evil Sunz Scarlett. Make sure you leave the Khorne Red showing through in the creases and folds to represent shading.
12. Paint any belts and pouches with Mournfang Brown to represent leather.
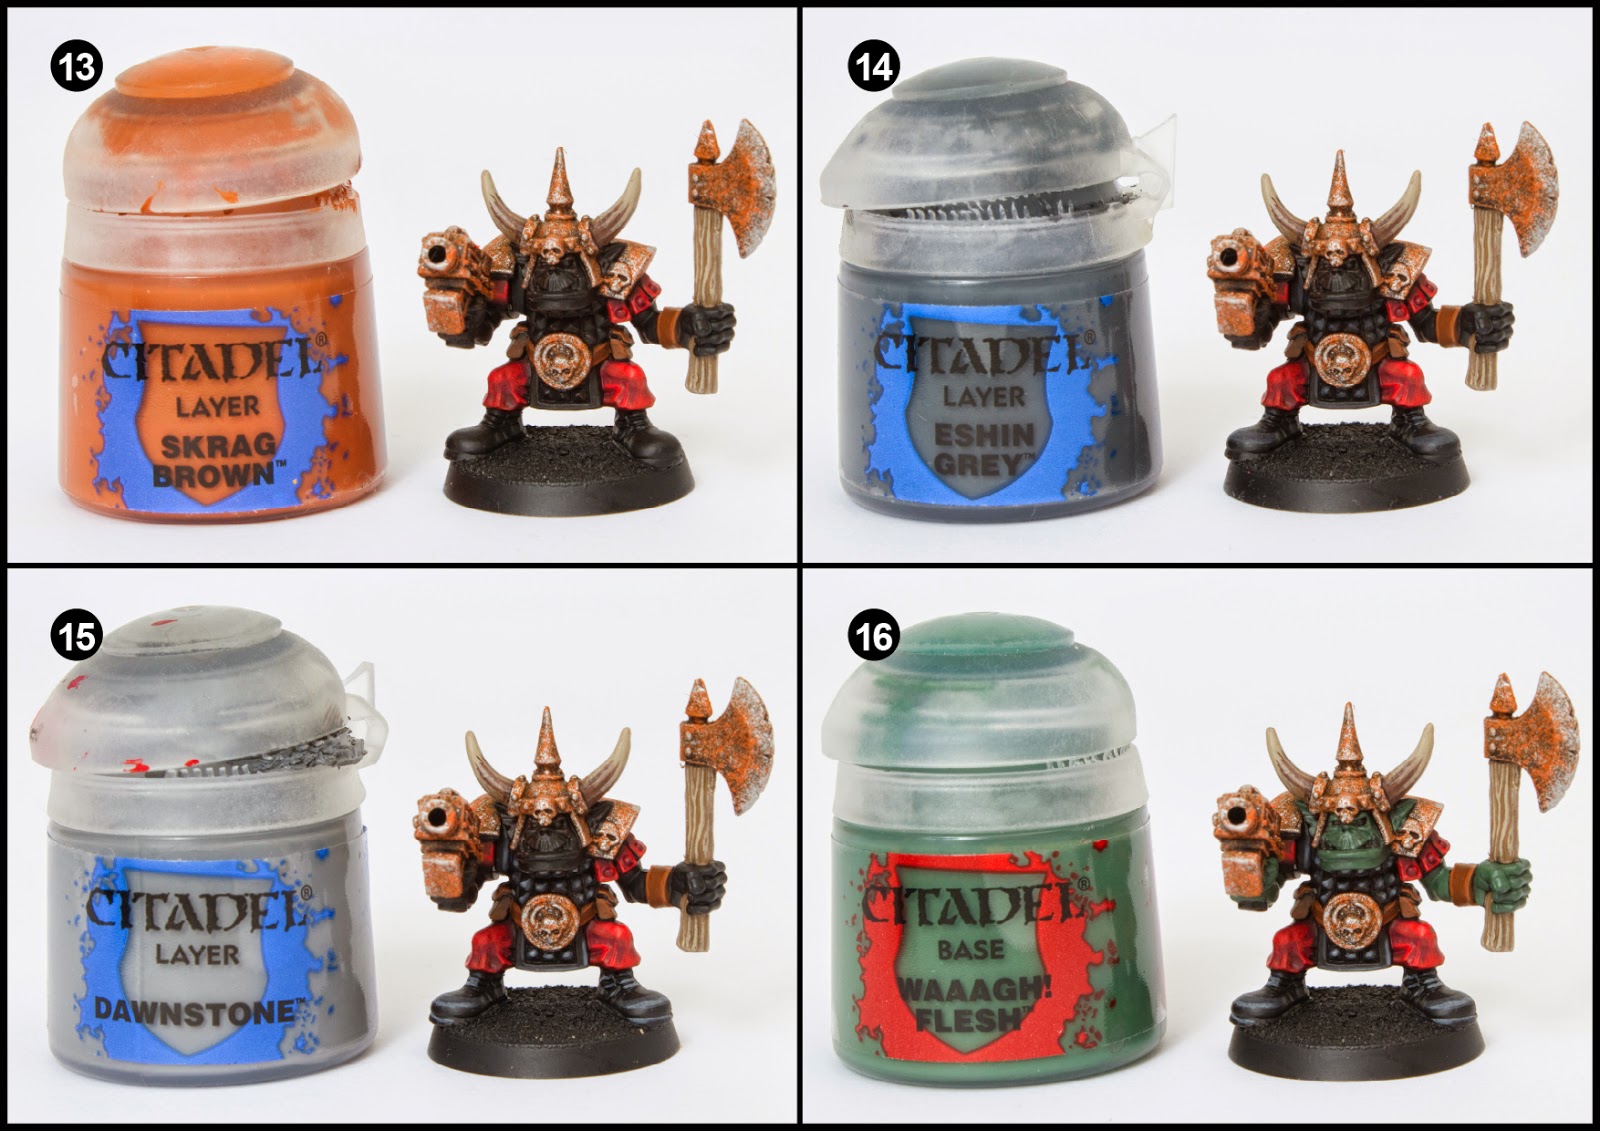
13. Highlight the edges of the leather with Skrag Brown.
14. Highlight the black cloth/leather areas with Eshin Grey. Highlights are added to anywhere where natural light would brighten an area or catch an edge. So ends of the boots, or each of the tips of the square segmentsof flak armour.
15. Increase the highlighting of the black by repeating the process with Dawnstone. Leave some of the Eshin Grey showing by painting thinner lines of Dawnstone.
16. Paint all the Ork skin with Waargh Flesh.

17. Mix two parts Nuln Oil with one part Lamian Medium (or water, if you don’t have medium) and wash over the whole model to dull down the colours and increase the shading. The watery wash will run into all the gaps, leaving your highlights light and your shading darker. Don’t apply this to the bone horns.
18. Highlight the skin using Warboss Green. Make sure you leave the darker green colour showing through in the creases.
19. Bring the highlighting up another level this time with Straken Green.
20. Paint the teeth and eyes with Rakarth Flesh.
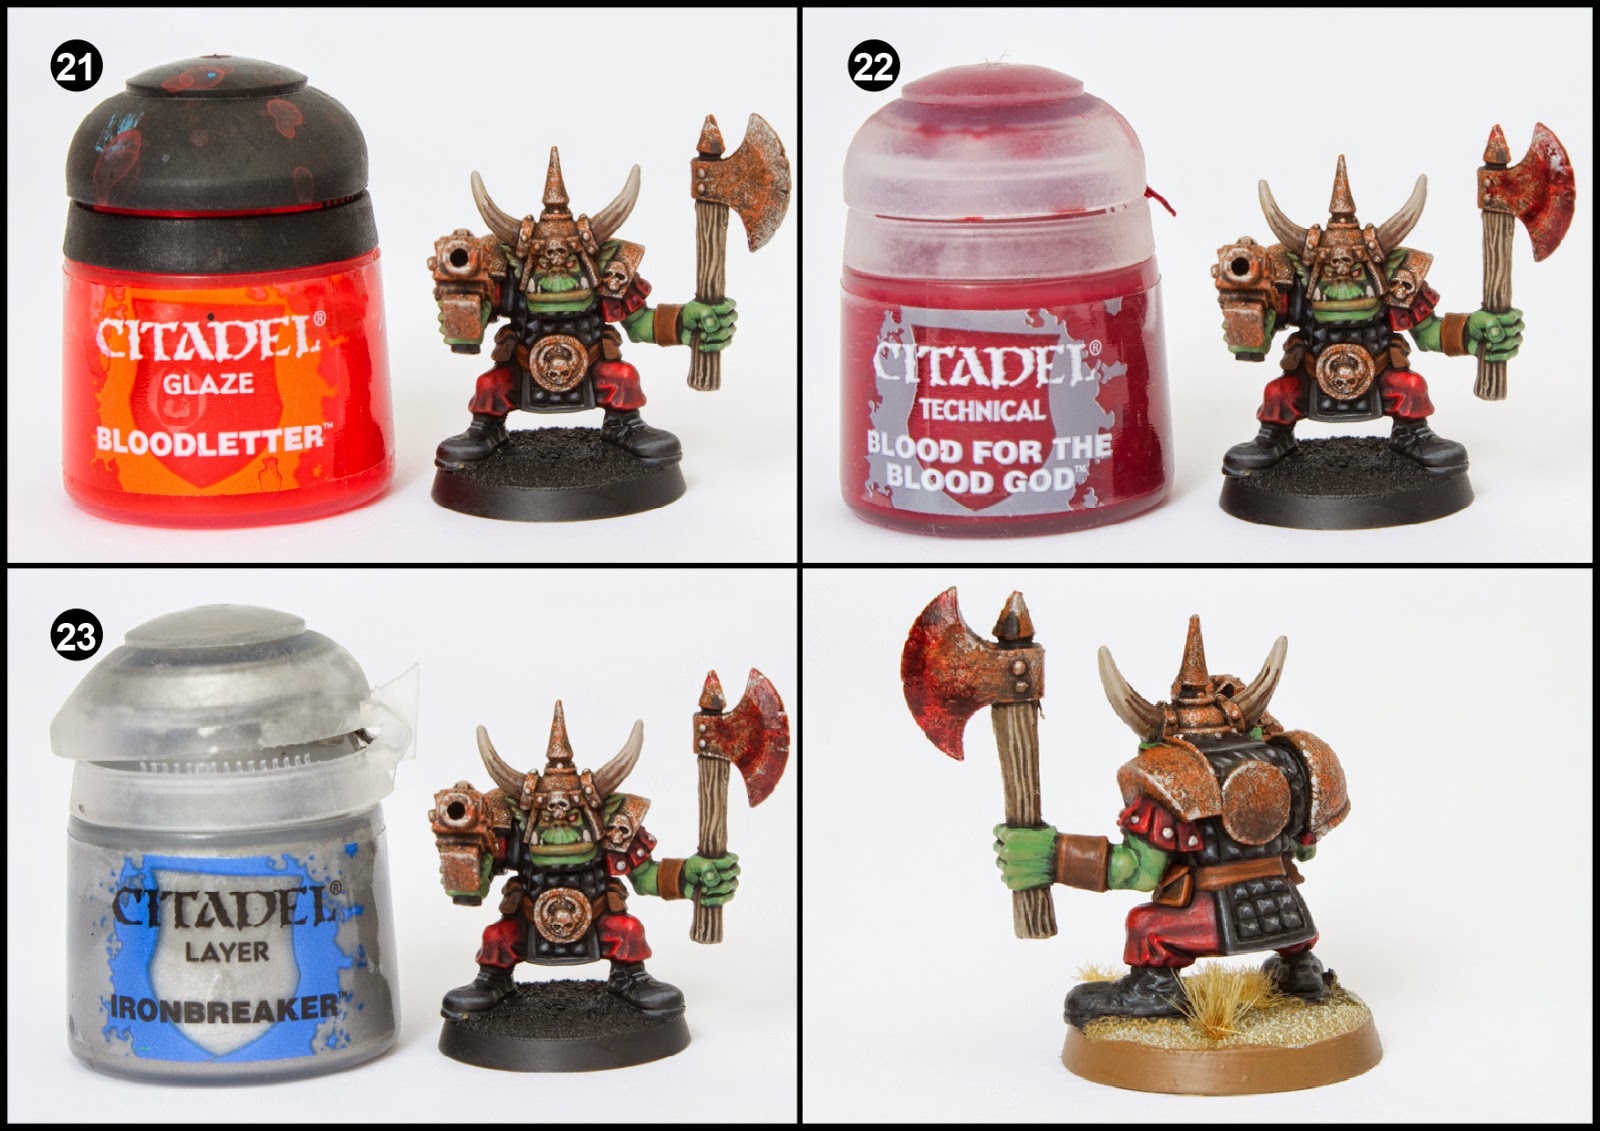
21. Use the Bloodletter Glaze to paint a thin layer over the lip, nose, eyeballs and around the eyes.
22. This is optional. If you want to paint some blood onto your choppa then you just need to paint on some Blood for the Blood God technical paint onto the business end of the weapon. There is more advice on painting gore effects in this link.
23. Use some Ironbreaker to pull out the details on the rusty metals such as rivets
Finally base the model in a way which fits in with your collection. I used Armageddon Dust texture paint highlighted with Screaming Skull and the base edge was painted with Steel Legion Drab.

8 Comments
Leave a Reply
Tale of Painters is the unofficial Warhammer hobby magazine run by hobbyists like you. Support our work by using the affiliate links from our 🇺🇸 / 🇨🇦 partner stores for your next orders so we can continue to bring you fantastic FREE content every day:


Or support us directly:


I'm not even painting orcs and I love this tutorial. Clear and extremely well made. Best on the internet! Ever thought of doing a patreon so we could contribute with more than just orders to wayland?
I want to see how my youtube channel takes off before I venture into patreon accounts. At the moment I just do it for the love and there is no need for anyone to contribute anything.
The wayland link at the bottom isn't my idea. I've never liked it, but it's not my site.
+1 Love these guides. Most clear and concise tutorials on the web!
great tutorial, experimenting with the rust effects at the moment, quick question how would you paint black orcs skin.
Probabaly Caliban Green base, highlight with Waaargh Flesh, wash with Nuln Oil and then highlight with Loren Forest sparingly.
This comment has been removed by the author.
I have to say, I keep coming back to this site, it is an amazing fount of great tutorials. You guys continue to inspire me to go to my painting table! Thanks!
I have a confession to make. Your tutorials are so amazing! I really enjoy them.