
In this post, I’ll show you how to paint an Ork Wurrboy from the Kill Rig box set. I painted this model in 30 easy to follow steps. You’ll learn how I paint Beast Snagga Ork skin, dirty metals, power cables and more. This tutorial is perfect for any models from the Ork range. Find out how in this tutorial.
This tutorial assumes you have a good understanding of how to paint Warhammer miniatures. With each picture is the corresponding instruction. Each step shows the Citadel paint(s) I used. You’ll find a list of all the paints used in this tutorial at the end of the post.
How to paint Ork Beast Snaggas

Undercoat your model with black undercoat spray. I used the Army Painter one.

Pick out all the metal areas carefully with Leadbelcher. Add a touch of water or Lahmian medium to thin the paint and apply two coats to get a solid finish.

Apply a couple of thinned coats of Retributor Armour to the lightning glyphs.

Create a mix of 50:50 Basilicanum Grey and Lahmian Medium and cover all the metal and gold areas with a generous coat.

Create a mix of 50:50 Gore-Grunta Fur and Lahmian Medium and cover all the metal and gold areas with a generous coat.
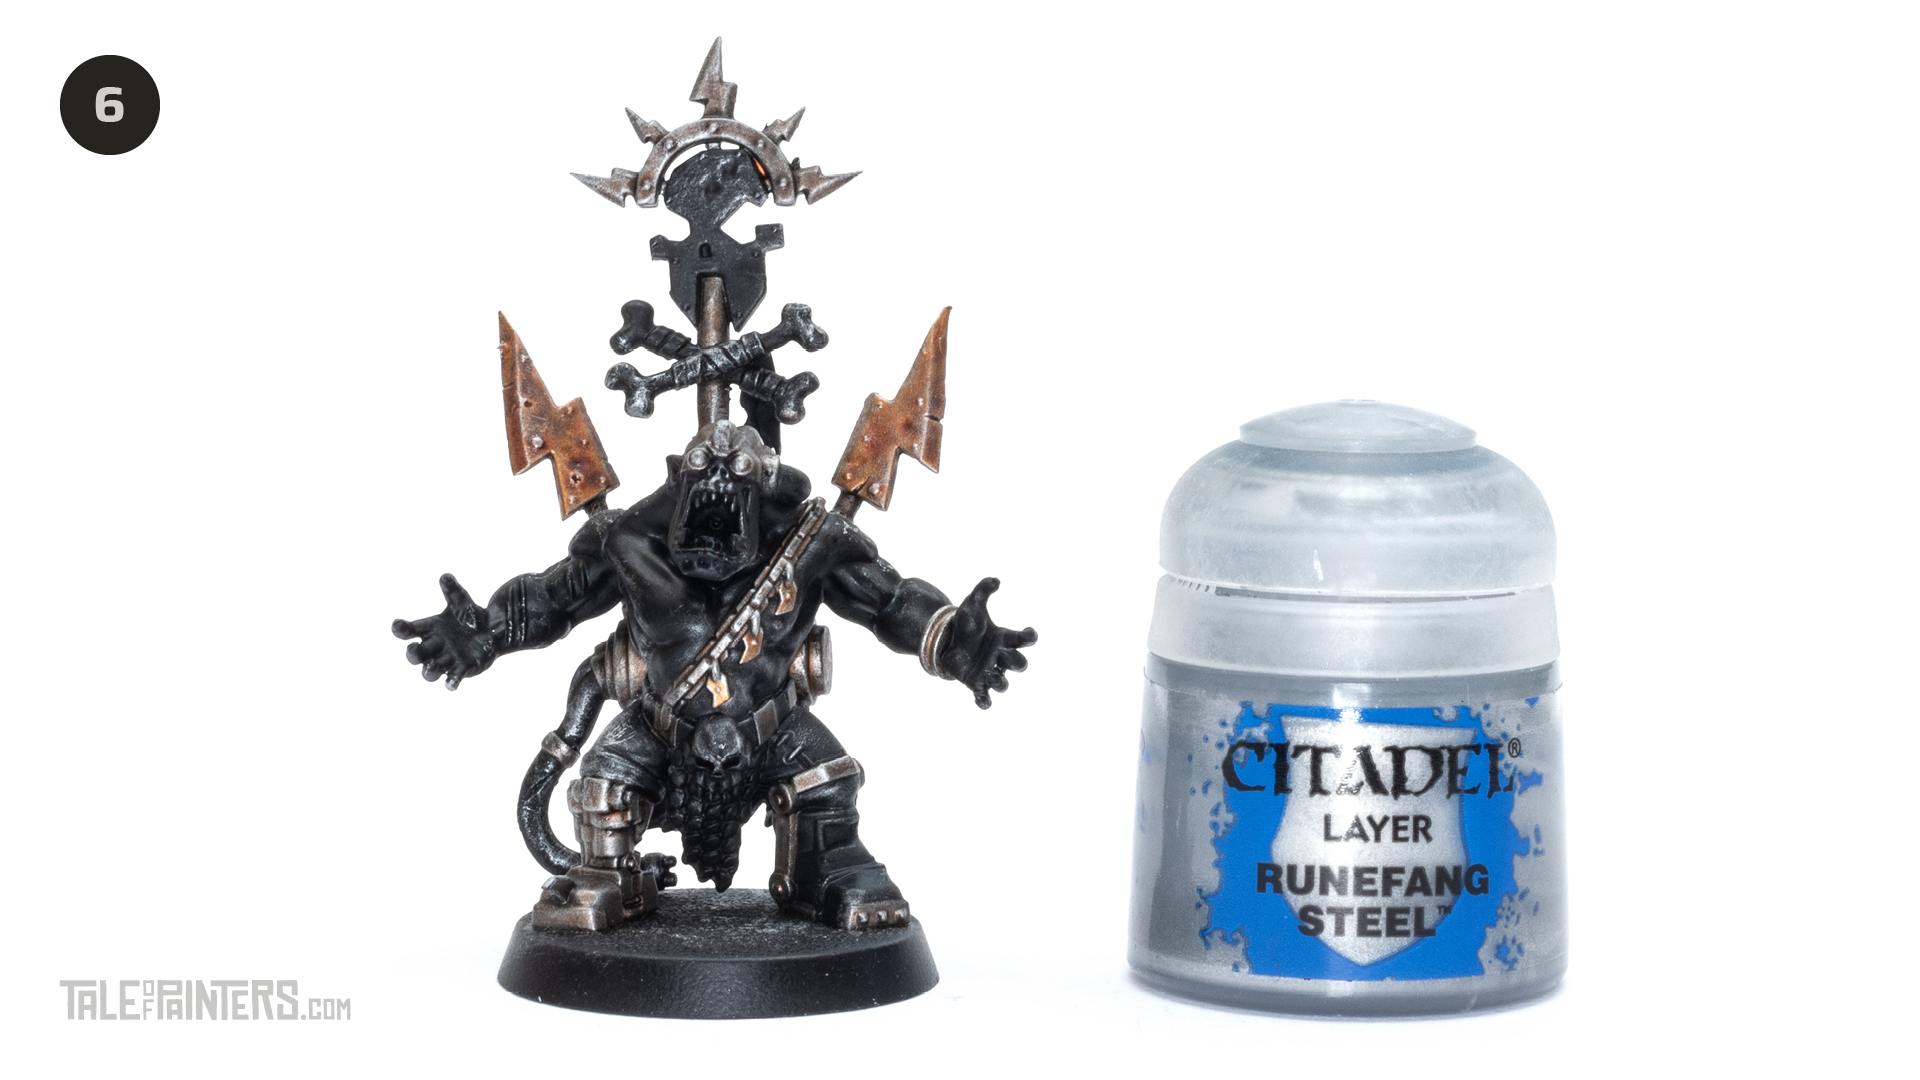
Take a medium to large sized brush that you don’t mind getting wrecked, or a specific dry brush and dip the tip into Runefang Steel. Then repeatedly wipe the paint off onto a tissue leaving very little on the brush. Then drybrush the metals and golds on the Wurrboy allowing the edges to catch the Runefang pigment.

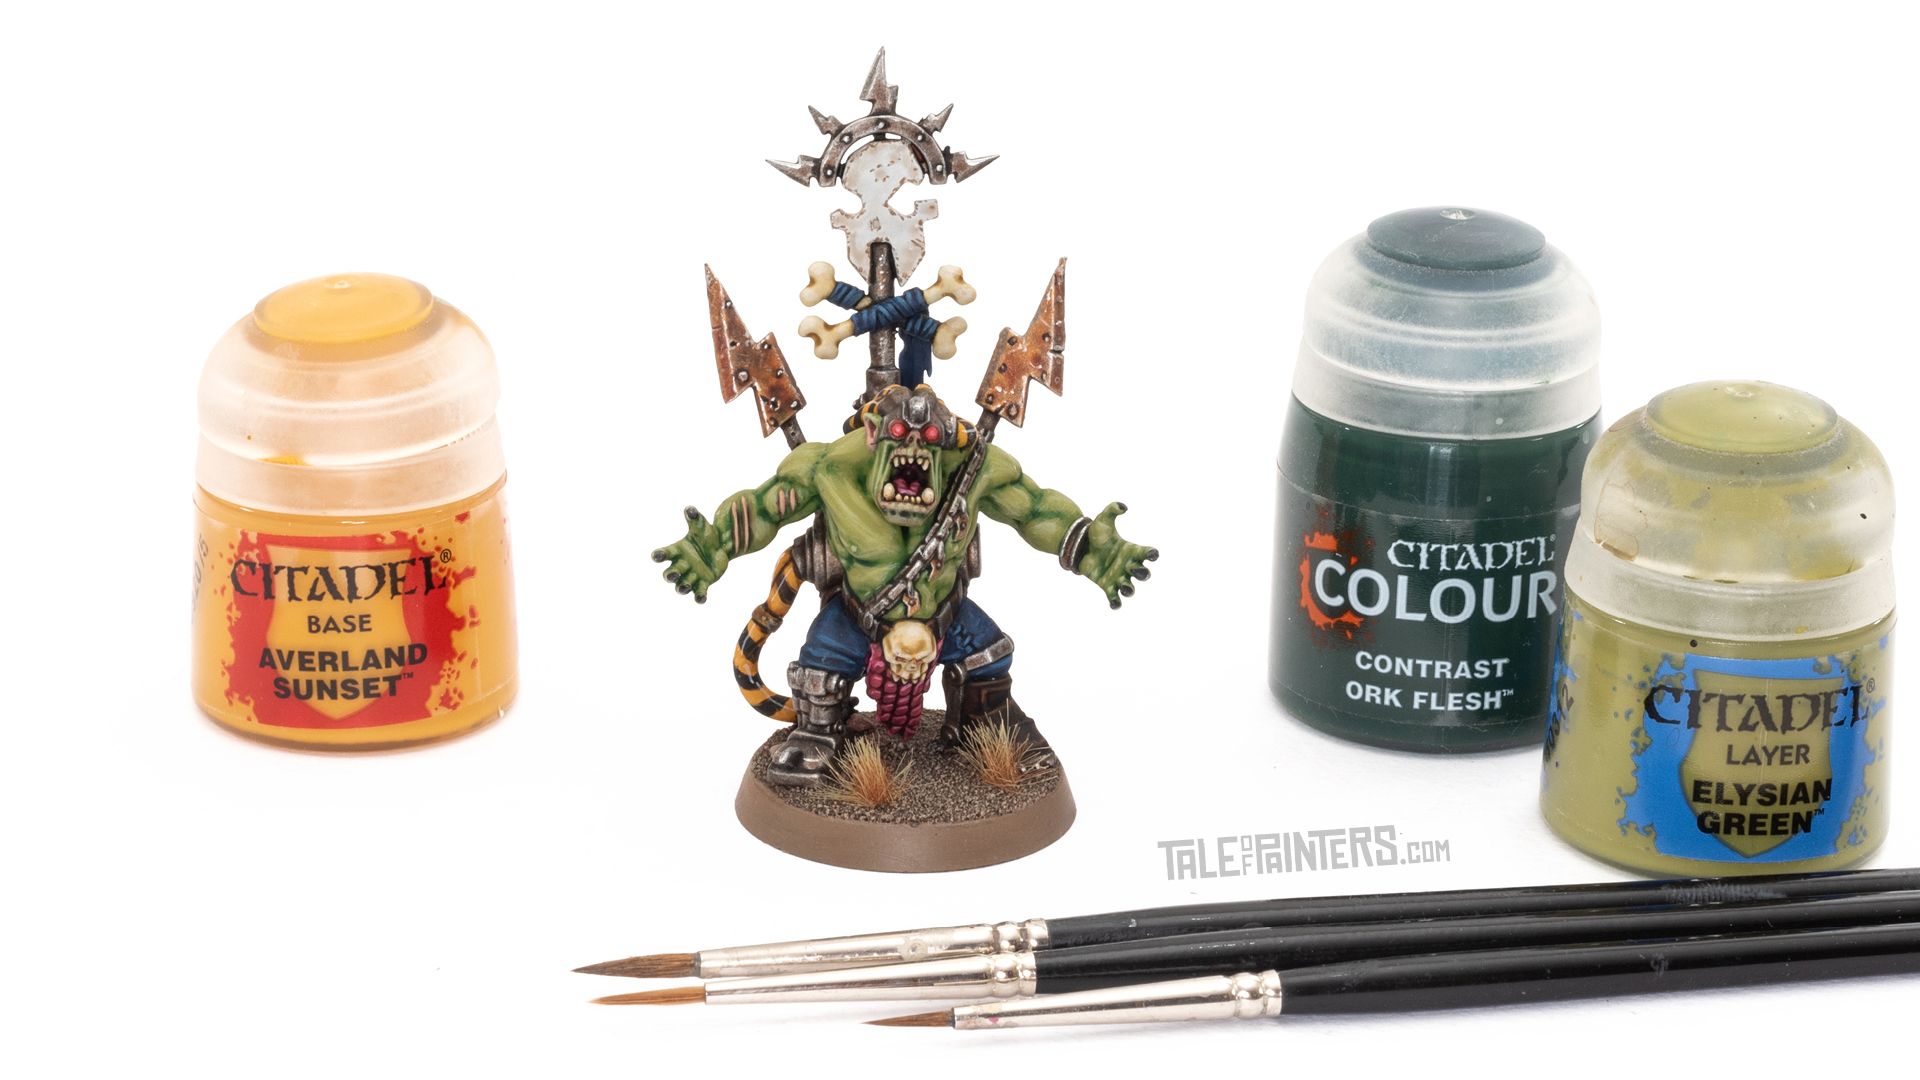
Apply three thinned coats of Elysian Green to the Ork skin.

Create a mix of 50:50 Ork Flesh and Lahmian Medium and cover the skin areas with a generous coat. If it starts to pool on the raised areas quickly wick it away with a spare brush.

Lightly thin some Elysian Green with a touch of water and apply it to the raised areas of the Ork skin making sure you leave the previous layer showing through in the recesses.

Apply some highlights of Nurgling Green to the skin. If these look a bit stark, then mix 4 parts Lahmian Medium with 1 part Elysian Green and paint a thin translucent glaze over the highlight to help blend it in.

Paint the lips, ears and scars with Kislev Flesh.

Paint the tongue and scaly pelt with Pink Horror.

Wash the tongue and scaly pelt with Carroburg Crimson.

Paint the trousers and wraps on the bones with Kantor Blue.

Apply some wide highlights of Alaitoc Blue to the trousers and wraps.

Wash the trousers and wraps with Leviadon Blue.

Paint the belt and boot with Doombull Brown.

Wash the belt and boot with Contrast Wyldwood.

Apply thin edge highlights of Skrag Brown to the previous step. Adding water to thin your Skrag Brown will help it flow from the bristles. It’s that flow that helps paint thin lines. If you have to drag the paint off the brush you get wobbly thick lines.

Apply two lightly thinned coats of Averland Sunset to all the power cables. If it looks patchy, apply a third coat.

Wash the cables with a light coat of Naxdreg Yellow. You may want to thin it with Lahmian Medium.

Now the tricky part, painting the hazard stripes on the cables. Don’t be overwhelmed by this. Just concentrate on one at a time. Getting the first one neat will help line up the second and so on. Start by thinning some Abaddon Black on your mixing palette with some water. The using your smallest thinnest brush paint a thin line around the cable somewhere. The paint another thin line parallel to the first. Now paint black in between those lines. Repeat this for the rest of the bands ensuring the gap between the bands and the width of the bands remains consistent.

Thin some Corax White with water and paint the teeth, skull buckle, bones and icon glyph. Repeat with a second coat if needed.

Now to paint the glyph. Create a mix of 1 part Rakarth Flesh and 5 parts Contrast Medium And carefully apply it to the glyph, directing the wash into the dents and the edges. This is to make the white look dirty.

Using Steel Legion Drab and a small detail brush, paint tiny chips and scratches around the edge of the glyph. Smaller the better. This adds to the damaged weathered look but more importantly defines the edge. You can’t easily highlight white edges so this trick defines the edge instead of highlighting.

Paint the skull buckle, teeth and bones with Screaming Skull.

Wash the previous step with Skeleton Horde.

Paint the eyes with Emperor’s Children ensuring you leave some white showing in the centre. Highlight the tongue and scaly pelt with some thin lines of Emperor’s Children.

Wash the eyes with Blood Angels Red. Allow a little to spill over onto the metal google frames to help make it look like they’re glowing and the red light is reflecting from the metal frames.

Add some water to Abaddon Black on your mixing palette and work your way round the model adding thin lines to define areas where two different colours butt against each other. This will help add definition and tidy up the model. Also paint around any bolts and rivets.

Here we have the painted Beast Snagga Wurrboy. The base is Steel Legion Drab washed with Agraz Earthshade and dry brushed with Karak Stone.

Paints you will need for this tutorial:
- Leadbelcher (base)
- Retributor Armour (base)
- Basilicanum Grey (contrast)
- Gore-grunta Fur (contrast)
- Runefang Steel (layer)
- Elysian Green (layer)
- Ork Flesh (contrast)
- Nurgling Green (layer)
- Kislev Flesh (layer)
- Pink Horror (layer)
- Carroburg Crimson (shade)
- Kantor Blue (base)
- Alaitoc Blue (layer)
- Leviadon Blue (contrast)
- Doombull Brown (layer)
- Wyldwood (contrast)
- Skrag Brown (layer)
- Averland Sunset (base)
- Nazdreg Yellow (contrast)
- Abaddon Black (base)
- Rakarth Flesh (base)
- Contrast Medium (technical)
- Lahmian Medium (technical)
- Steel Legion Drab (base)
- Screaming Skull (layer)
- Skeleton Horde (contrast)
- Emperor’s Children (layer)
- Blood Angels Red (contrast)
Paints you’ll need for the base:
- Steel Legion Drab (base)
- Agrax Earthshade (shade)
- Karak Stone Layer
If you need to expand your paint collection to follow the tutorial, check out our partner stores Wayland Games and Element Games, which offer an amazing range of paints at a discount.
Hope you enjoyed this Beast Snaggas tutorial. If so, leave a comment or reaction below, and if you got any questions, leave them here so I can answer them for you.
If you want to support me personally, please consider buying one of my products from ebay shop. Thank you.

1 Comment
Leave a Reply
Tale of Painters is the unofficial Warhammer hobby magazine run by hobbyists like you. Support our work by using the affiliate links from our 🇺🇸 / 🇨🇦 partner stores for your next orders so we can continue to bring you fantastic FREE content every day:


Or support us directly:


This is one of best tutorials. I can’t tell you how often I refer to it when painting my figures. The tips on TMM are so useful and I use them all the time now. Thanks for taking the time to produce such a great guide.