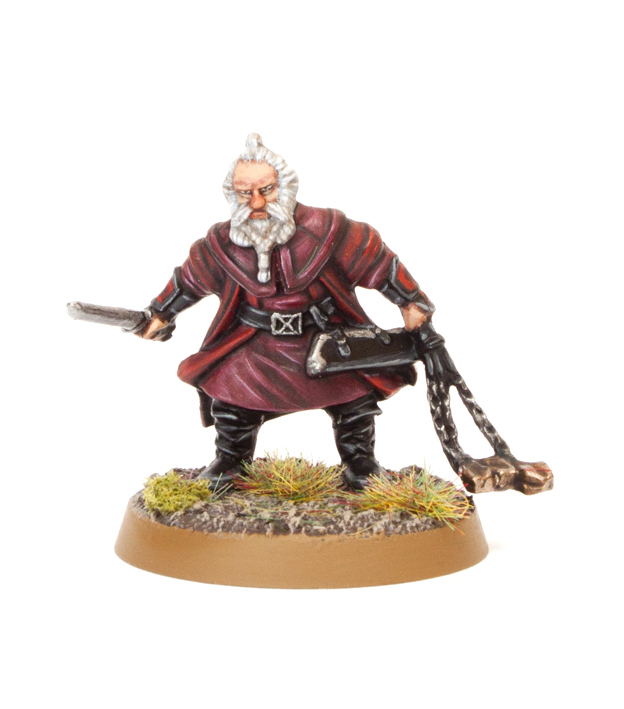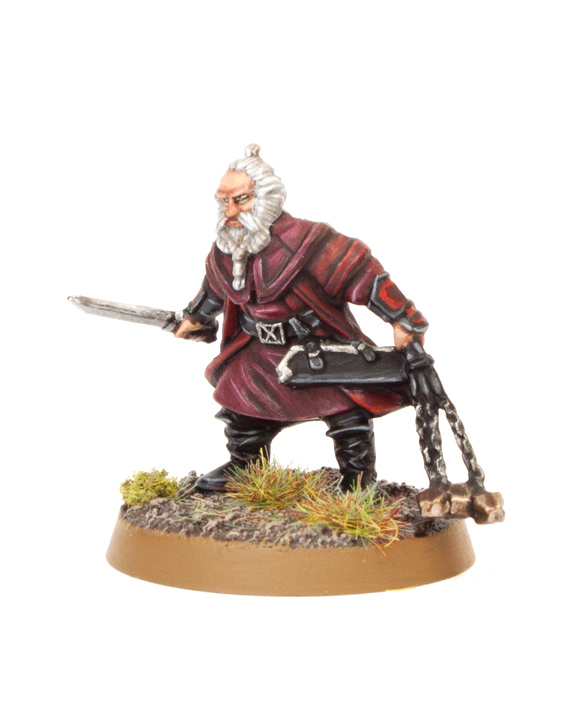

Hobbit Tutorial number 11 is here! Dori is very similar to Balin to paint and quite easy and achievable in 18 steps. I found this to be a good exercise in how thin I could edge highlight. I’m also finally getting to grips with painting the tiny eyes. I have good news with regards to this project, I have started work on producing the next two tutorials in this series – Nori and Fili. Tutorial for Dori after the jump.
This tutorial assumes you have a basic understanding of how to paint. For the beginners, I will explain the techniques as I go along. Each picture below shows four chronological steps. Underneath each picture are the corresponding instructions. Each step shows the paint I used during that step. It’s good to have reference material close to hand to check colours. I used google images for film stills and Games Workshop’s 360º pictures on their website were a great help.
Paints you will need for this tutorial:
Black Undercoat (technical)
Cadian Fleshtone (layer)
Bloodletter (glaze)
Rhinox Hide (base)
Kislev Flesh (layer)
Administratum Grey (layer)
Ceramite White (base)
Agrax Earthshade (shade)
Khorne Red (base)
Pink Horror (layer)
Carroburg Crimson (shade)
Evil Sunz Scarlett (layer)
Nuln Oil (shade)
Eshin Grey (layer)
Dawnstone (layer)
Ironbreaker (layer)
Runelord Brass (layer)
Stirland Mud (texture)
XV-88 (base)
In case you need to expand your paint collection, head over to Wayland Games or Slave to Painting, which both stock a huge selection of paints at competitive prices.
Undercoat the model. The details are small, so I hand undercoated the model (rather then use a spray) with Imperial Primer.


1. I painted the face and fingers with Cadian Fleshtone. I painted around the beard.
2. I changed the hue of the skin using Bloodletter glaze. Dwarves are a little more red in complexion then humans.
3. I watered down Rhinox Hide heavily and then shaded around the eyes, nose, inbetween the fingers and around the face.
4. I highlight the face with Kislev Flesh. Also if you’re feeling brave, this is the opportunity to paint the eyes with a thin black line and two white dots.


5. Paint the beard and hair with Administratum Grey.
6. Use Ceramite White to highlight the hair and beard. I find painting thin highlights more accurate then dry brushing.
7. Lightly wash the hair and beard with Agrax Earthshade to add some colour.
8. Khorne Red is used to paint the over coat and tunic. Where panels butt up against each other I’ve left a black line showing through. I also built this stage up using several lightly watered down layers so I could leave darker shading in the creases. This is like highlighting but using the same colour. You can see how this has turned out in the above pictures with the creases in the tunic.


9. Painting some thin lines of Pink Horror, I highlighted the tunic and collar. Don’t forget the fabric on the elbows.
10. Mix 70% Ceramite White into Pink Horror and further highlight the previous stage with even thinner lines.
11. Wash the tunic and collar with Carroburg Crimson to tone down the brightness of the highlights and change the hue.
12. Highlight the remaining overcoat and wrist guards with Evil Sunz Scarlett. You can now see how drastically different the reds are even though they both started with the same base colour.


13. I washed some Nuln Oil into the creases of the over coat to deeped the shading.
14. Highlight the edges of the boots, belt, wrist guards and scabbard with Eshin Grey.
15. Highlight the previous step further using Dawnstone.
16. Paint the blade, chain flails, belt buckle and edge of the scabbard with Iron Breaker.


17. Paint the ends of the flail with Runelord Brass.
18. Wash the ends of the flail with Nuln Oil before highlighting them with Runelord Brass. You could add some edge highlights of Runefang if you wish.
Finally base the model in a way which fits in with your collection. I used Stirland Mud texture paint highlighted with Karak Stone and the base edge was painted with XV-88. Static grass and scrub were glued on in small clumps.


For more Hobbit tutorials check out my Bilbo, Gandalf, Thorin, Gloin, Bombur, Ori, Dwalin, Balin, Kili and Goblin tutorials. If you found this tutorial useful, let me know in the comments.
Do you like our tutorials and reviews? Here is what you can do to support us: Check out the websites of our sponsors, place your next orders at Wayland Games by clicking here or on the banner on the right. Thank you very much, we appreciate any help to keep us going!


Thanks, great help. Keep up all the good work!
I start with a thin horizontal line of Rhinox hide. Then a thin horizontal line of pallid wych flesh. Finally I do a centre dot of Rhinox Hide.
These eyes are so small you need a decent brush.
If you don't have a steady hand, then Stahly's tutorial is genius. You paint the eyes first and then the skin around it. Check it out… http://taleofpainters.blogspot.co.uk/2010/06/tutorial-how-to-paint-faces-stahly-way.html
Thanks a lot Garfy, great stuff. I'm able to create a very similar standard to this, but for the life of me I can't get the eyes right… I've given up for now but it's niggling me and I'd like to put it right! Have you got any tips on the matter? Cheers, Chris
Yay, I'll start painting this good guy!
Thanks, Garfy.
Thanks again for the fantastic effort! I'm in a bit of a painting funk currently, but when I do pick up the brush again I will be starting with these tutorials!!
damn good quality
Impressive as always.