
In this post I’ll show you how to paint Aeldari Webway Gates fast and easy. You’ll learn not only how to paint pale ivory wraithbone with drybrushing, but also how to paint scarlet gems and turquoise energy orbs. Find out more in this tutorial.
This tutorial assumes you have a good understanding of how to paint Warhammer miniatures. Underneath each picture is the corresponding instruction. Each step shows the paint(s) I used. I have a rather eclectic paint collection, so when I use a paint that’s not from Games Workshop or out of production, I’ll try to provide you with suitable alternatives from the current Citadel paint range [in brackets]. However, if you want to achieve the exact same result as shown, you might want to expand your paint collection withthe specific colour. You’ll find a list of all the paints used in this tutorial at the end of the post.
How to paint bone-white Aeldari Webway Gates
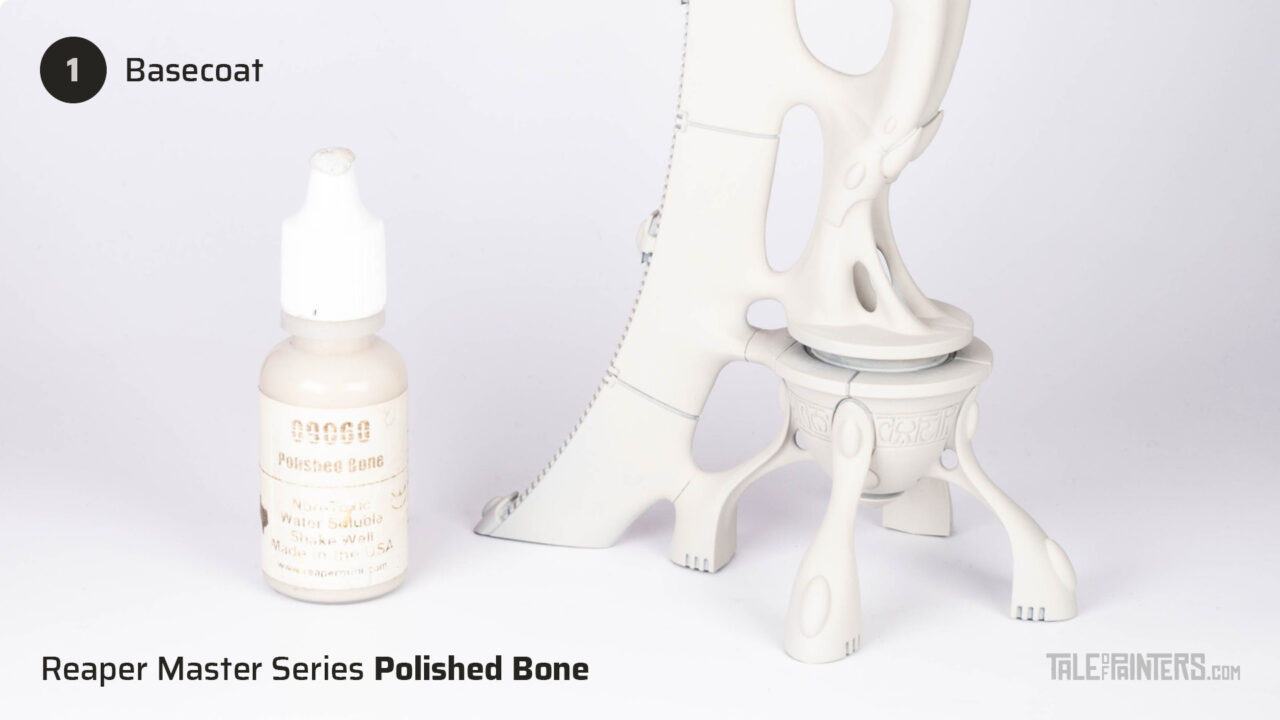
Prime with Corax White or any other suitable white or light primer, then apply a basecoat of Reaper Master Series Polished Bone [mix of Rakarth Flesh / Pallid Wych Flesh] with an airbrush or large brush.
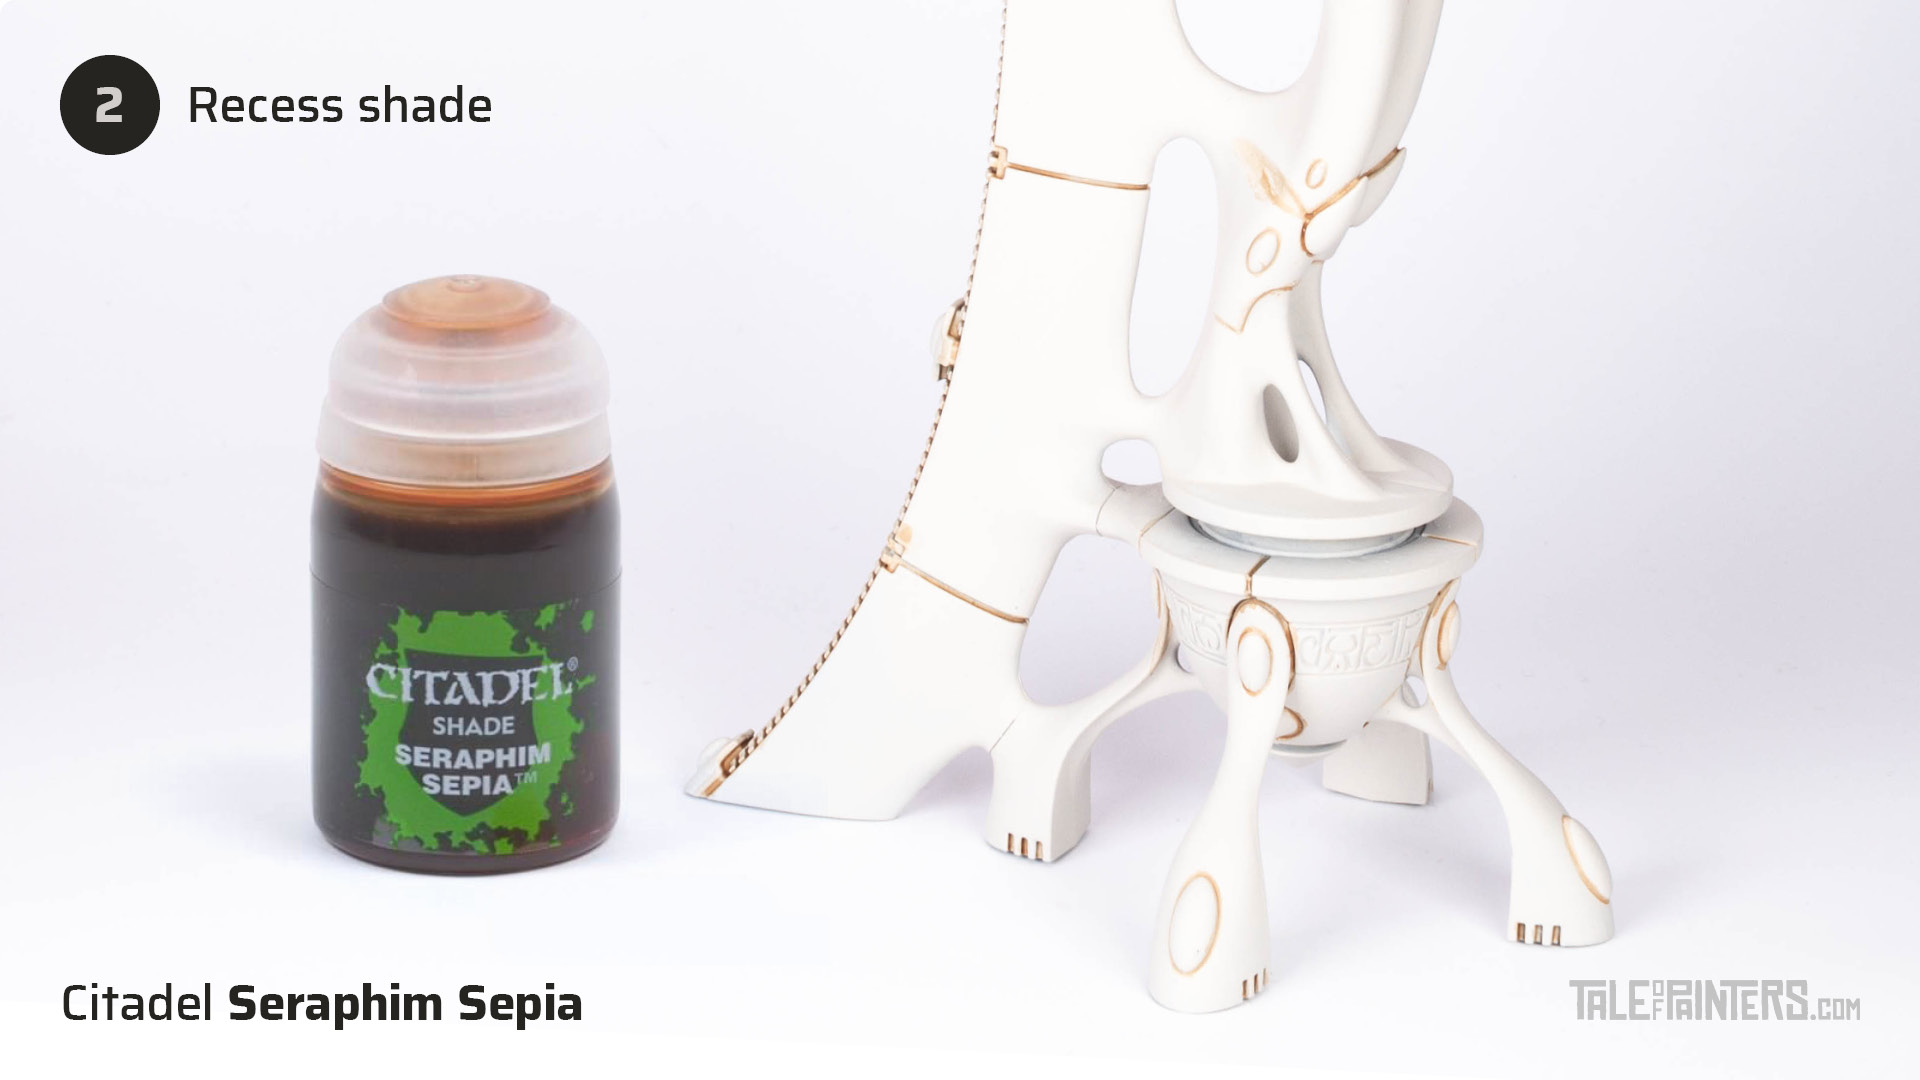
Apply a wash of Seraphim Sepia directly into the recesses of the model.
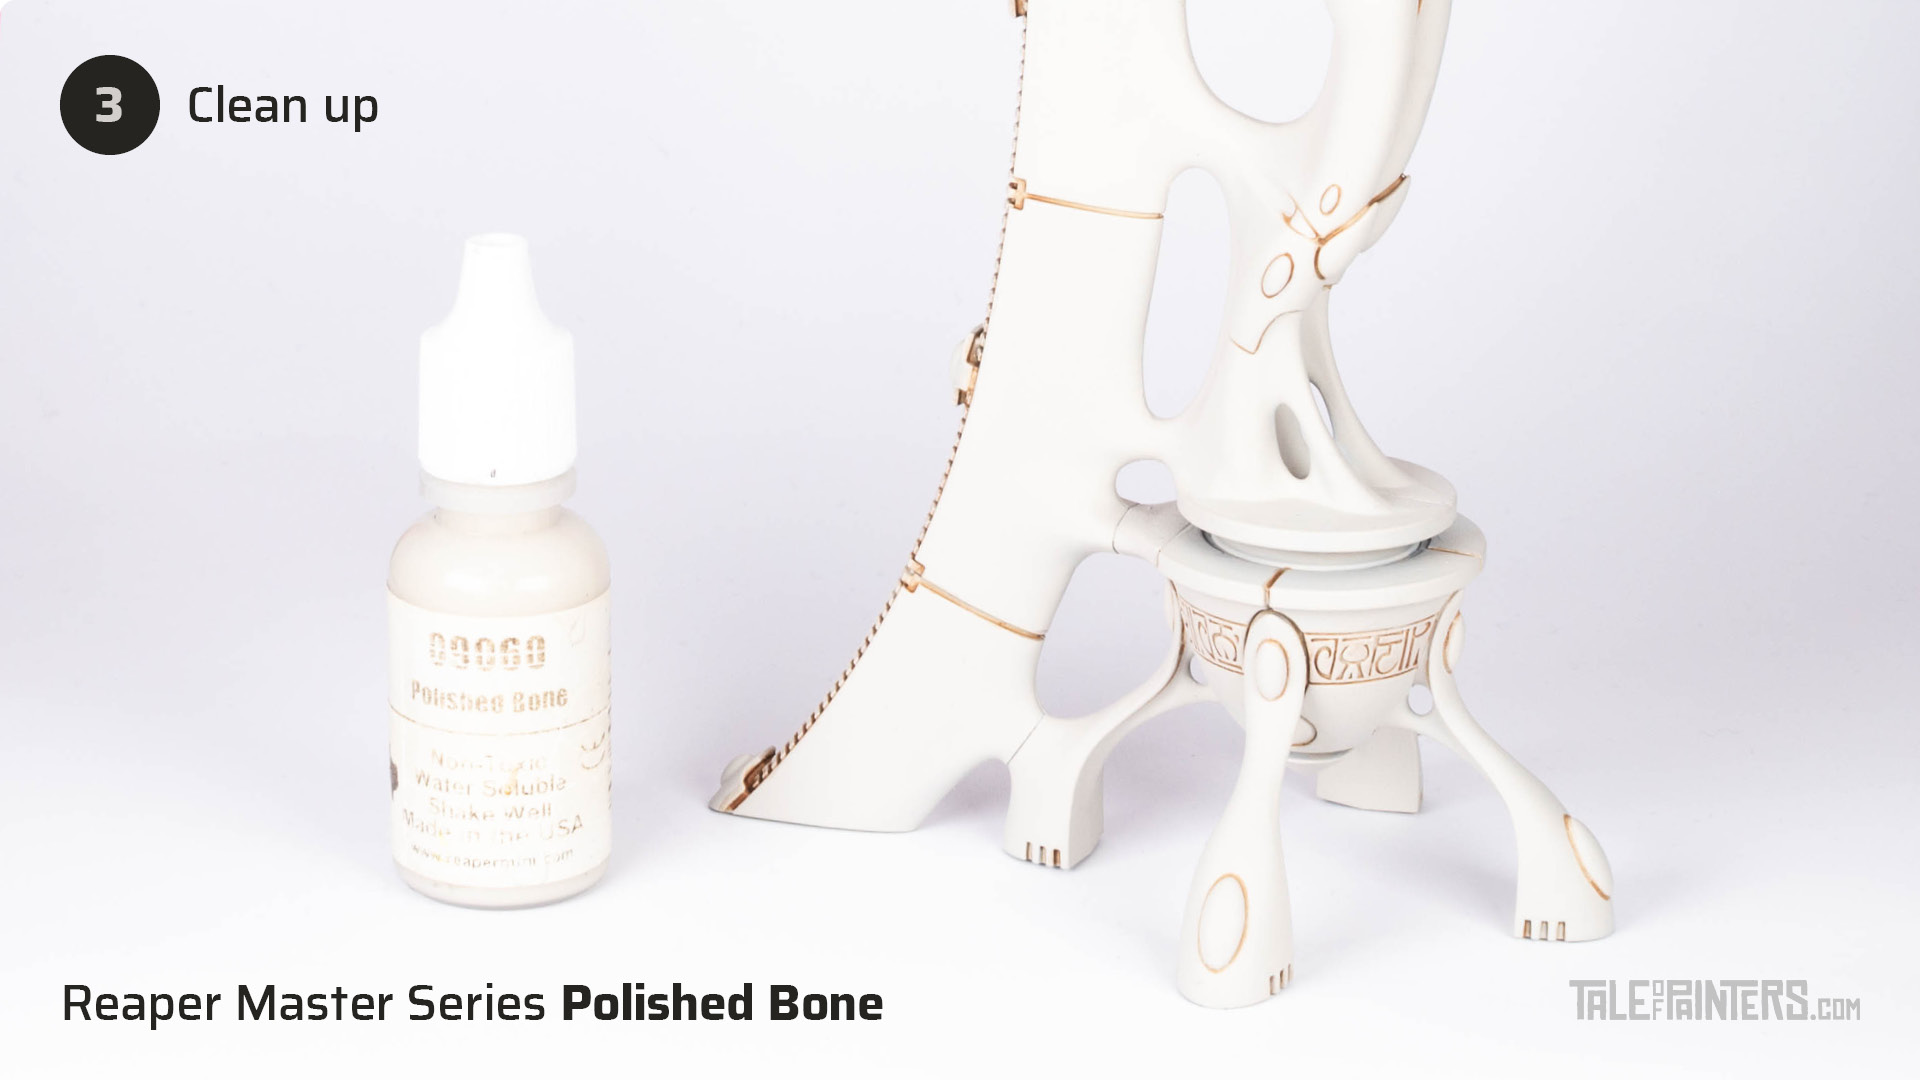
Return to your base colour of Reaper Master Series Polished Bone [mix of Rakarth Flesh / Pallid Wych Flesh] and clean up any areas where the wash spilled over.
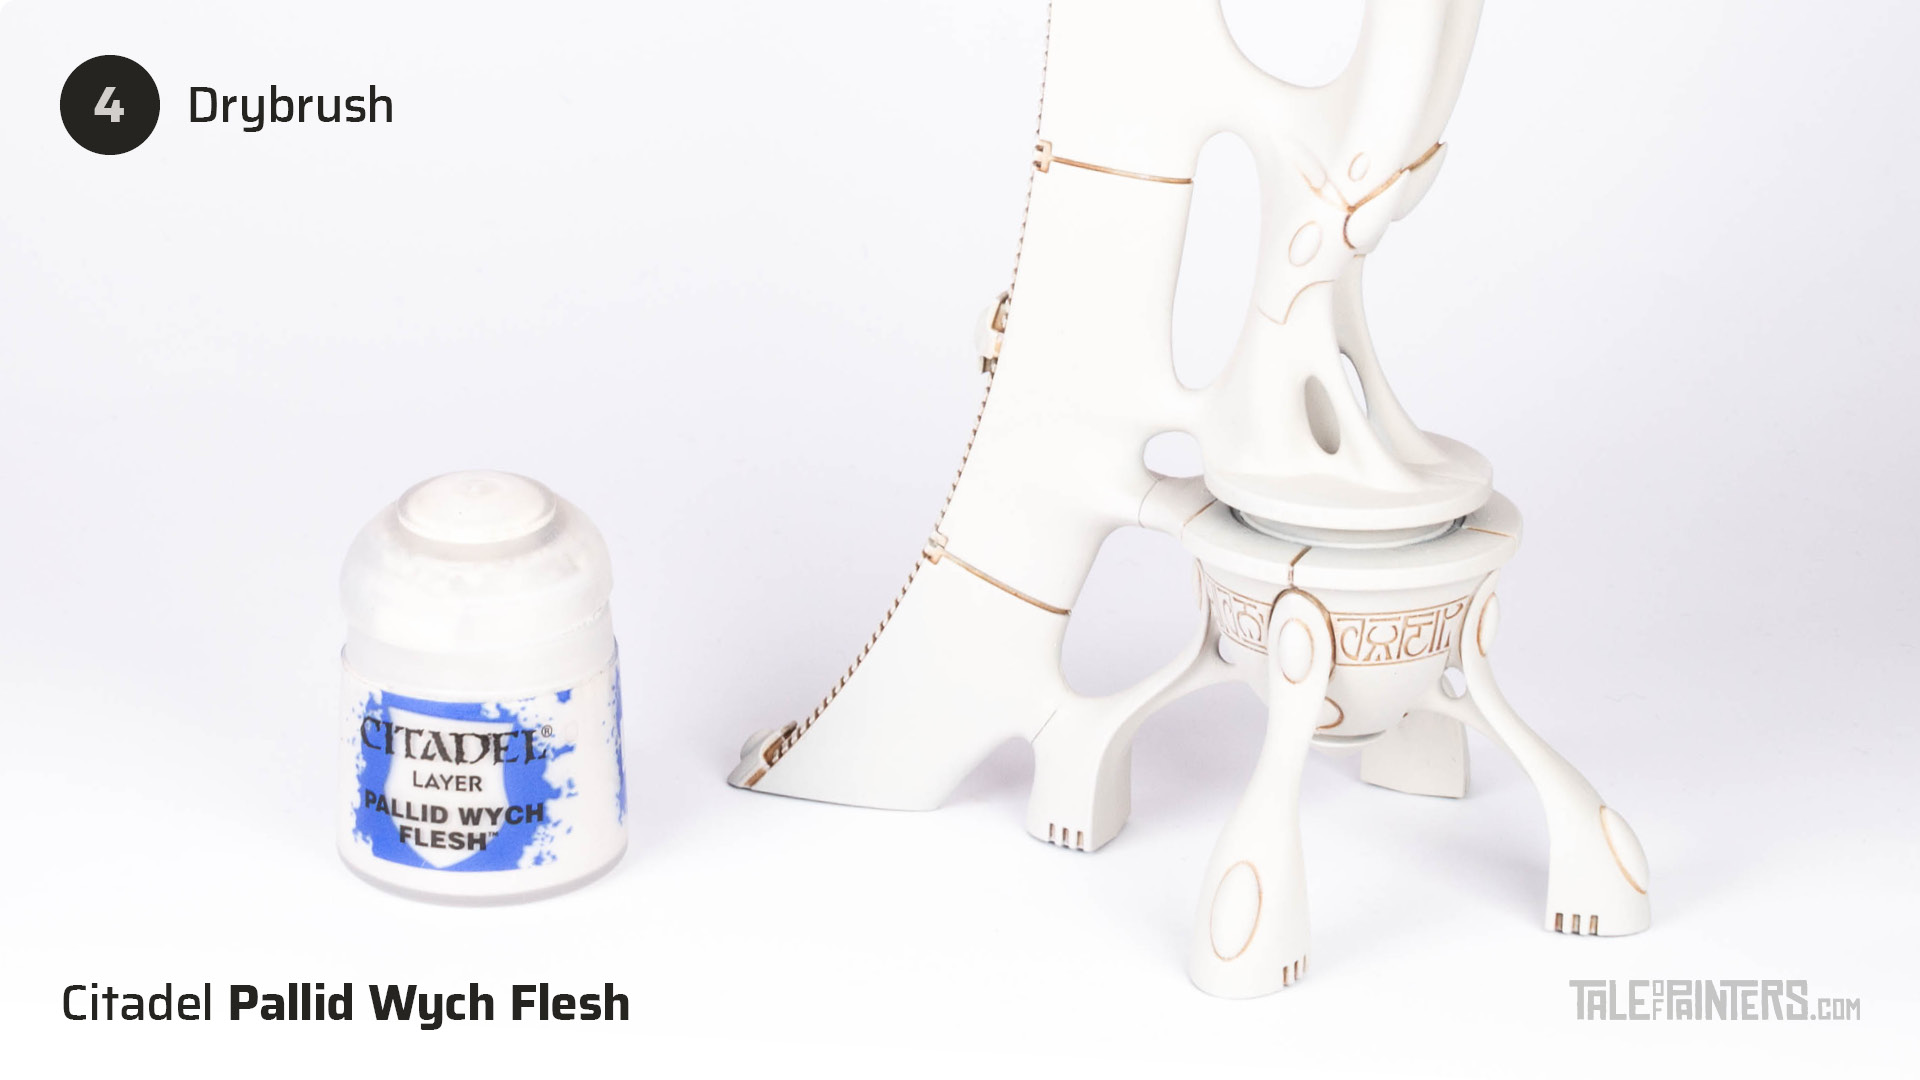
Drybrush the ivory wraithbone with Pallid Wych Flesh. I prefer to use a large brush with soft, short bristles and a round top, such as The Army Painter’s Masterclass Drybrushes or make-up brushes.
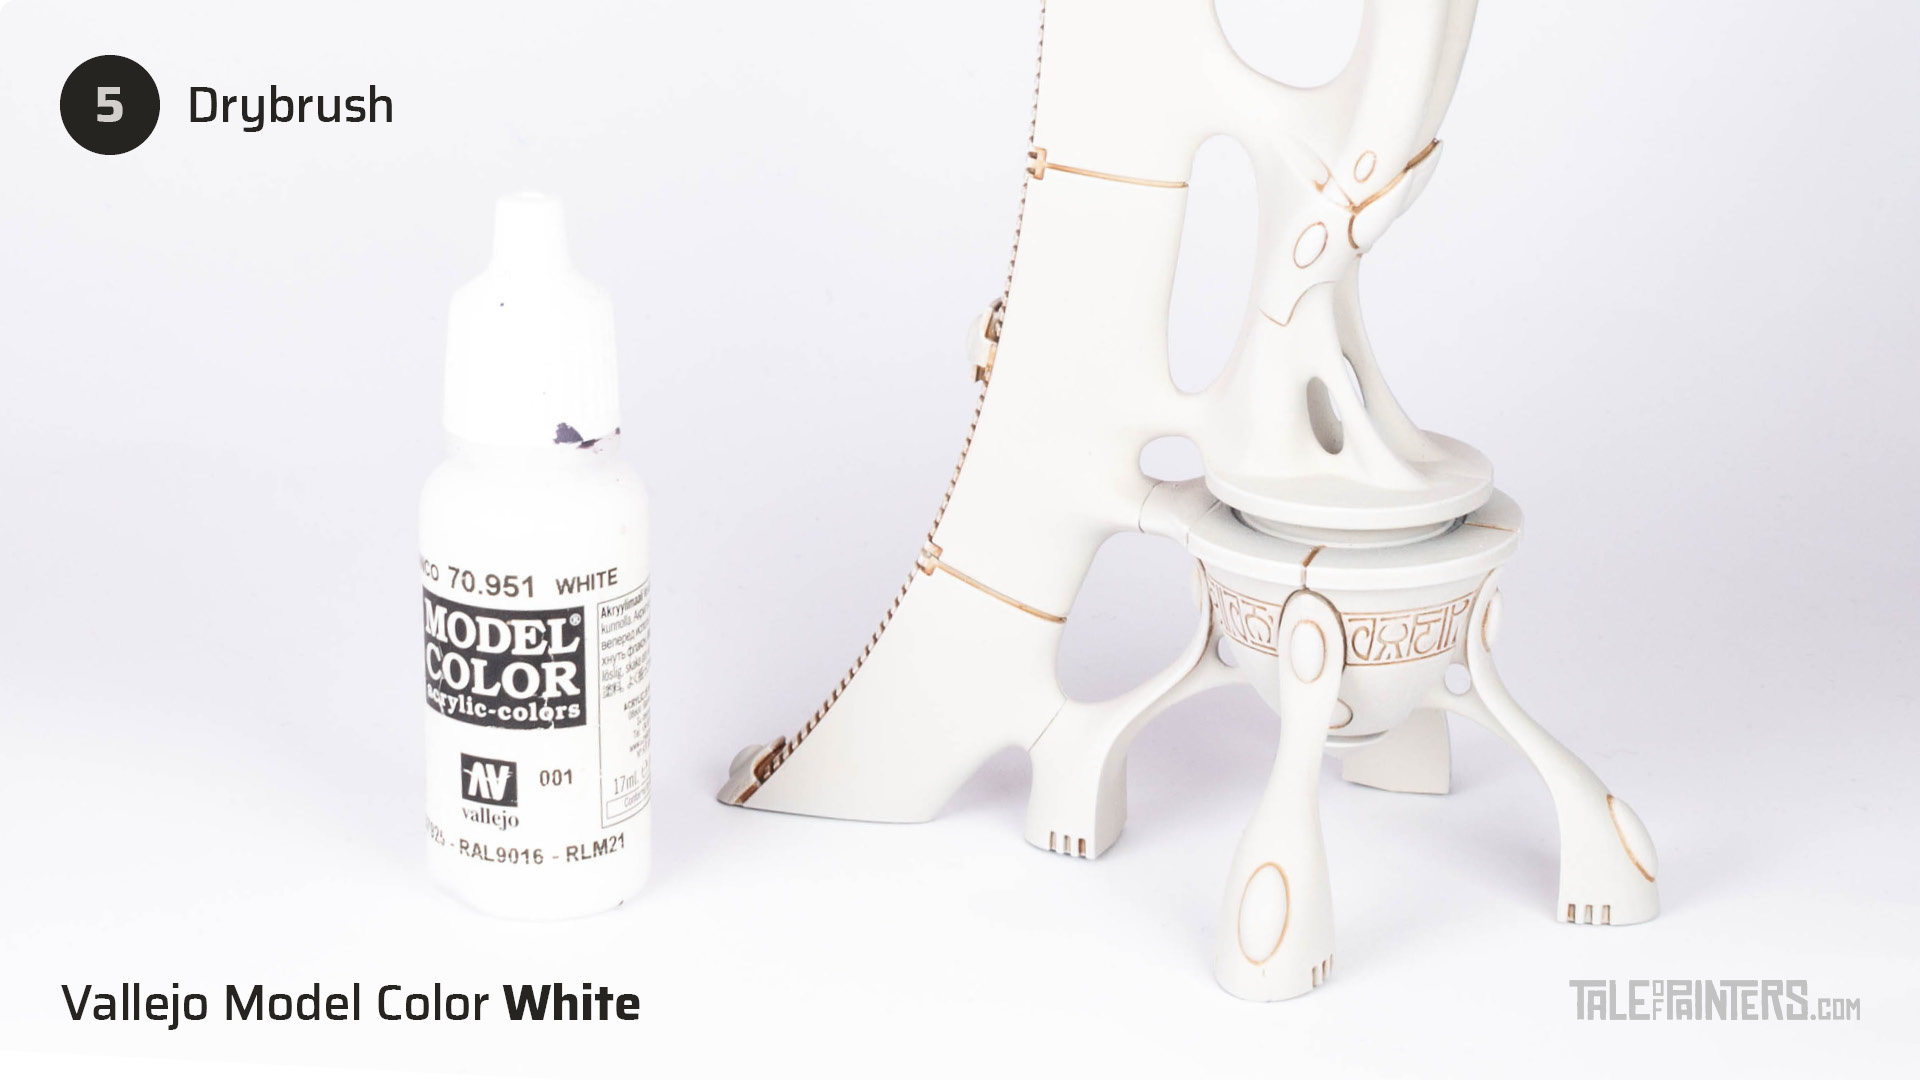
Apply another drybrush of Vallejo Model Color White [White Scar], concentrating on the edges of the wraithbone structure.
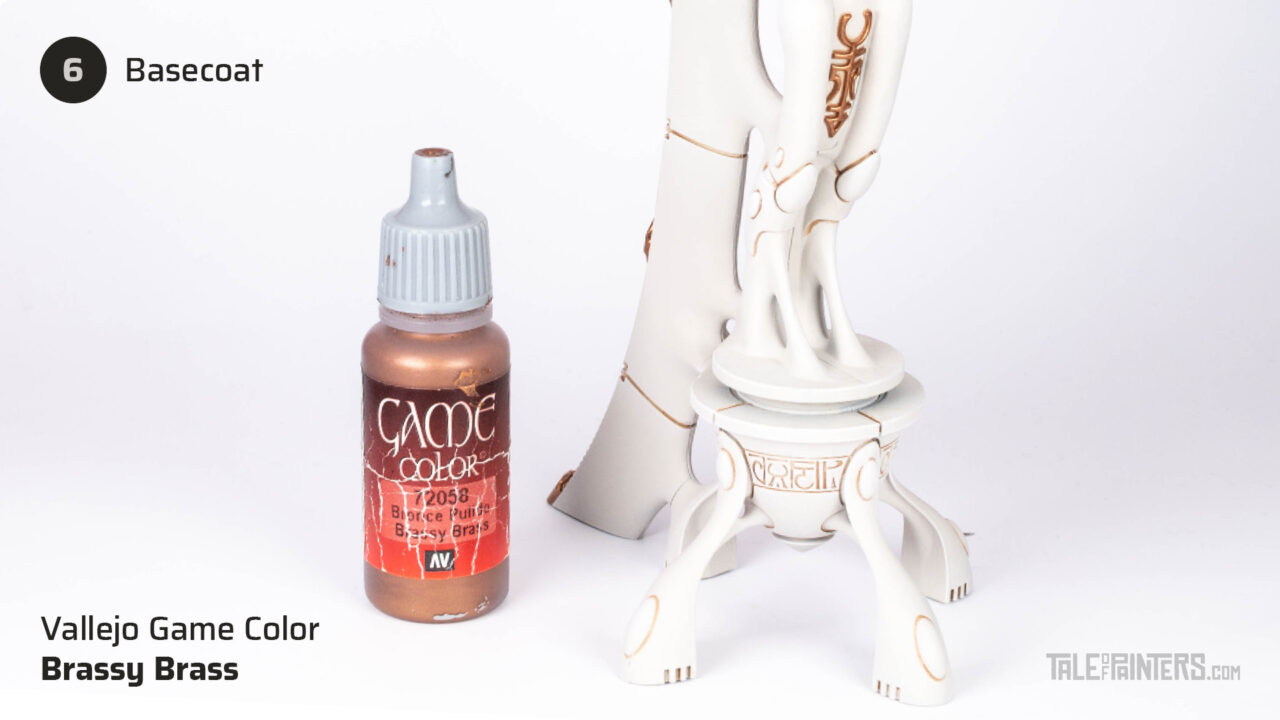
Basecoat the brass details, such as the energy projectors, runes, and gem settings, with Vallejo Game Color Brassy Brass [Brass Scorpion].
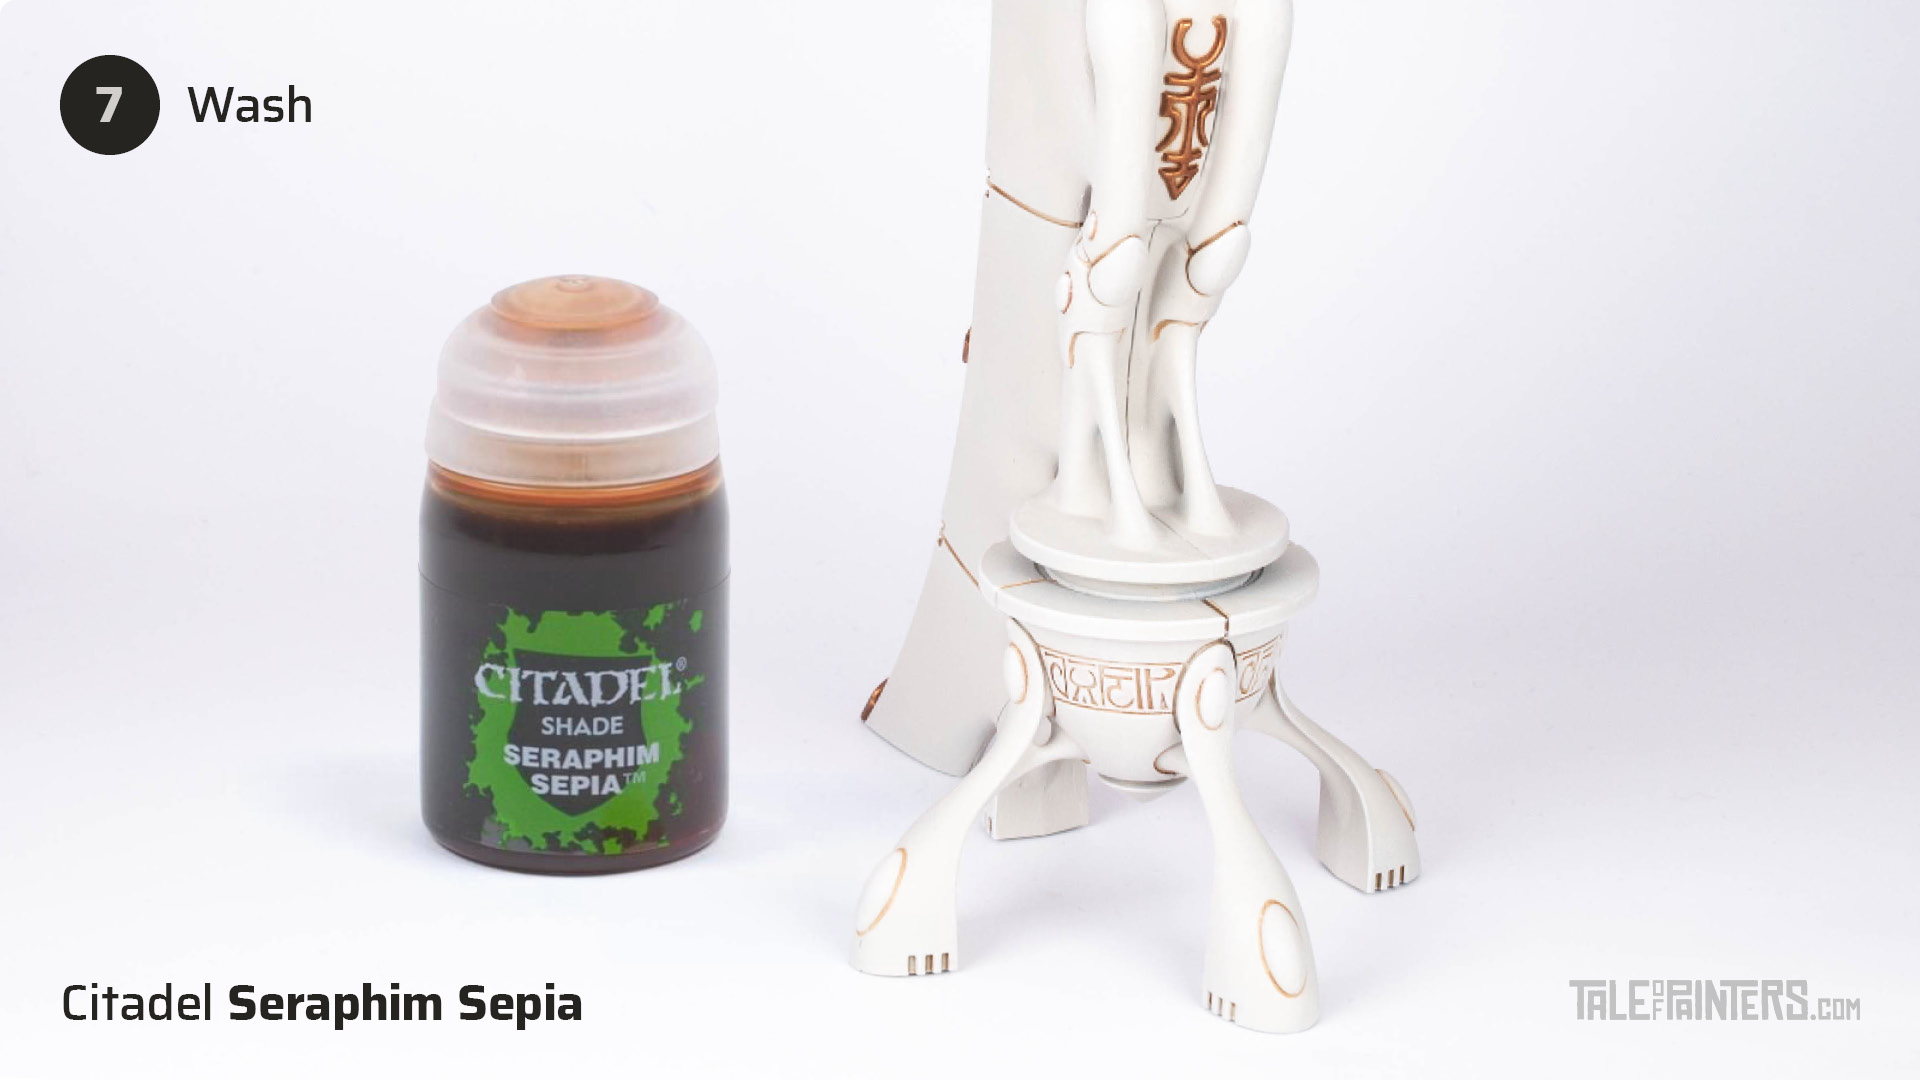
Wash the brass with Seraphim Sepia.
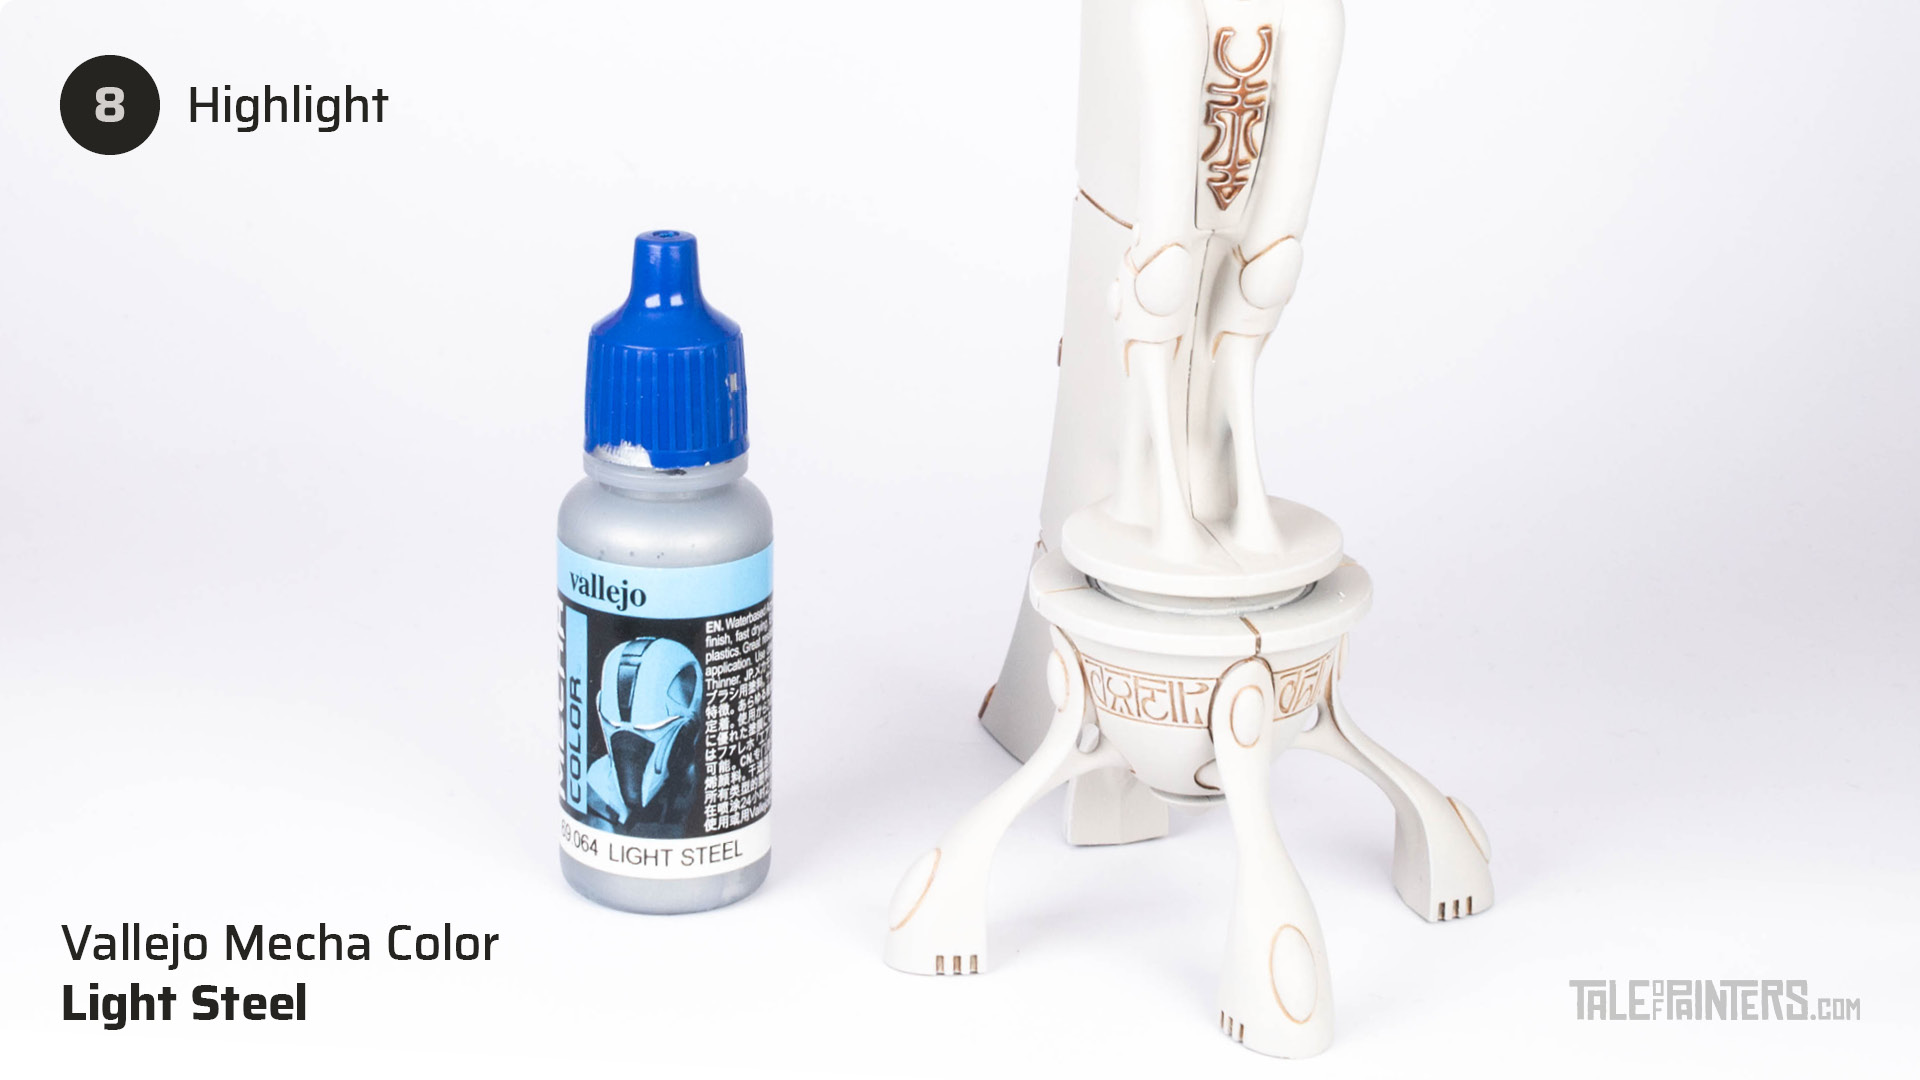
Edge highlight the brass with Vallejo Mecha Color Light Steel [Stormhost Silver]. You could also use Canoptek Alloy for a more subtle highlight.

Basecoat the energy orbs with Stegadon Scale Green.
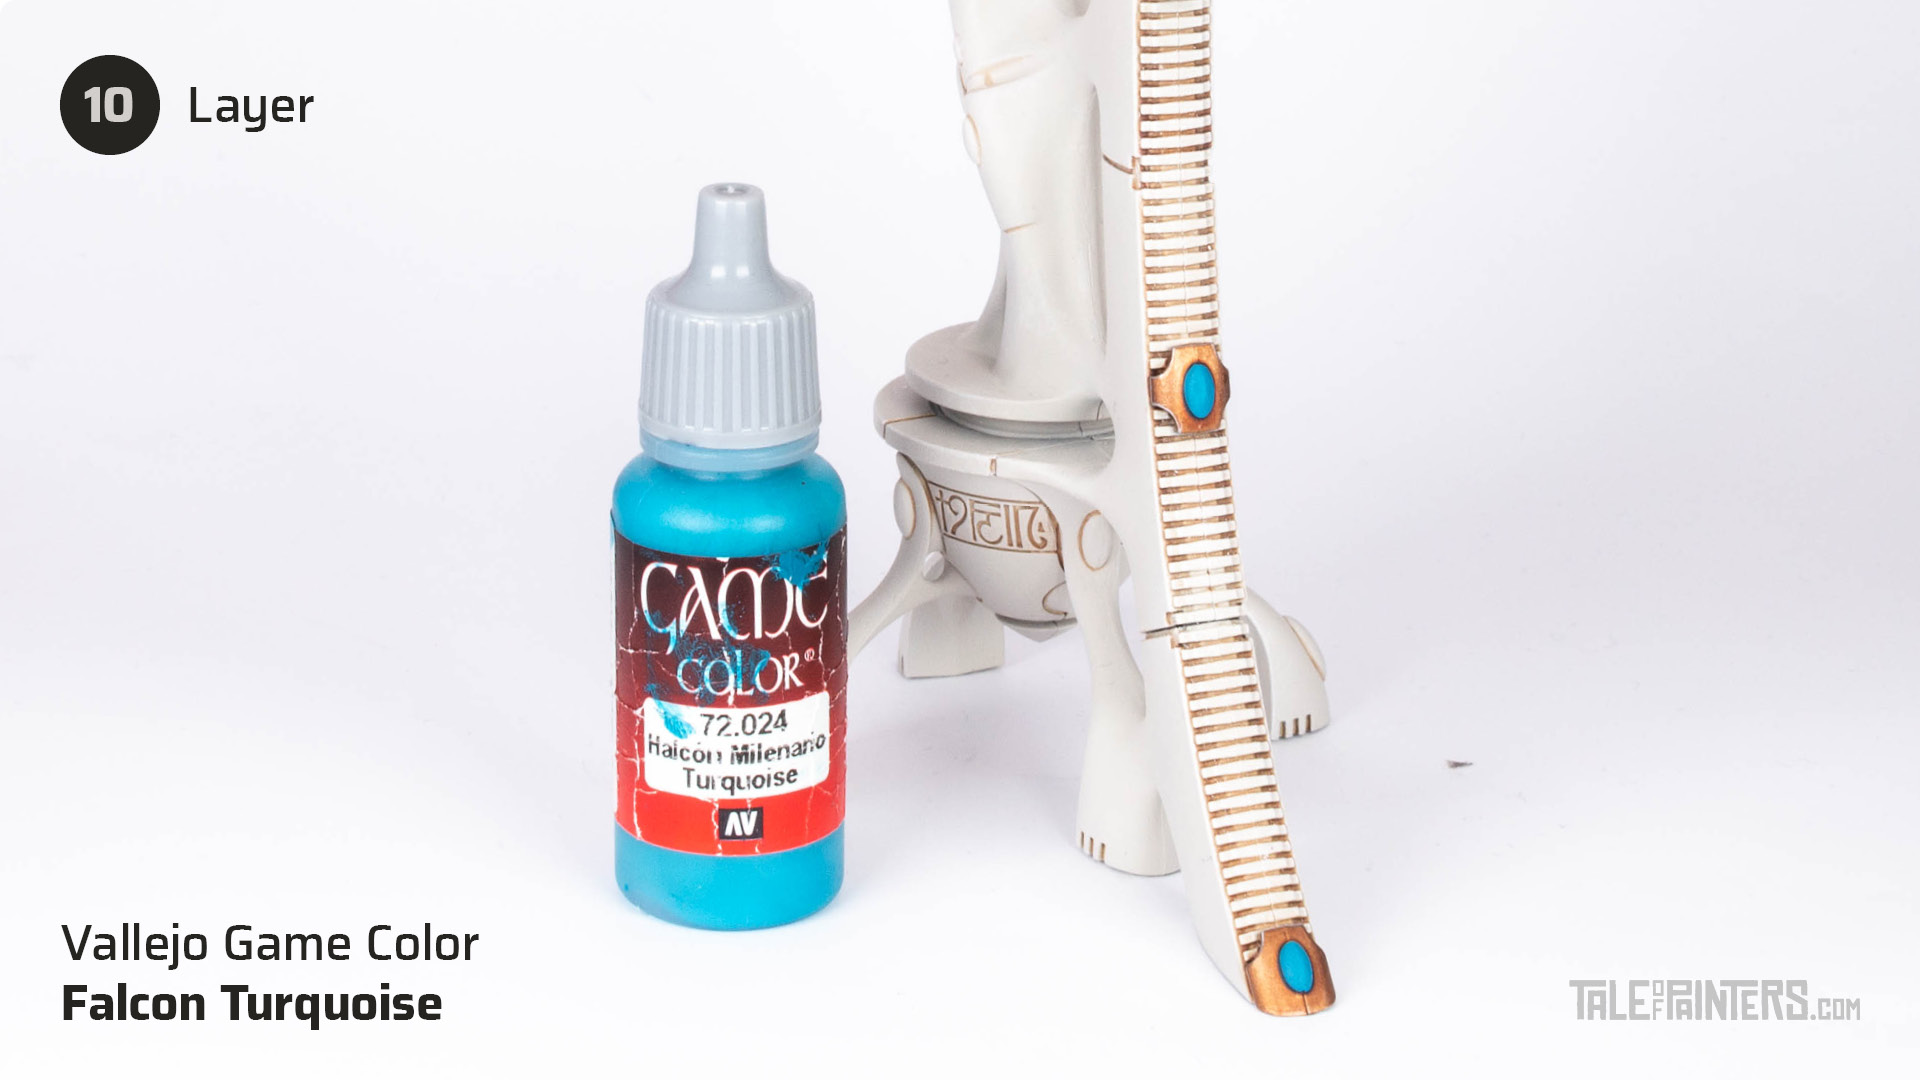
Layer the orbs with Vallejo Game Color Falcon Turquoise [or Thousand Sons Blue]. Leave an edge of Stegadon Scale Green where the orbs meet the brass.
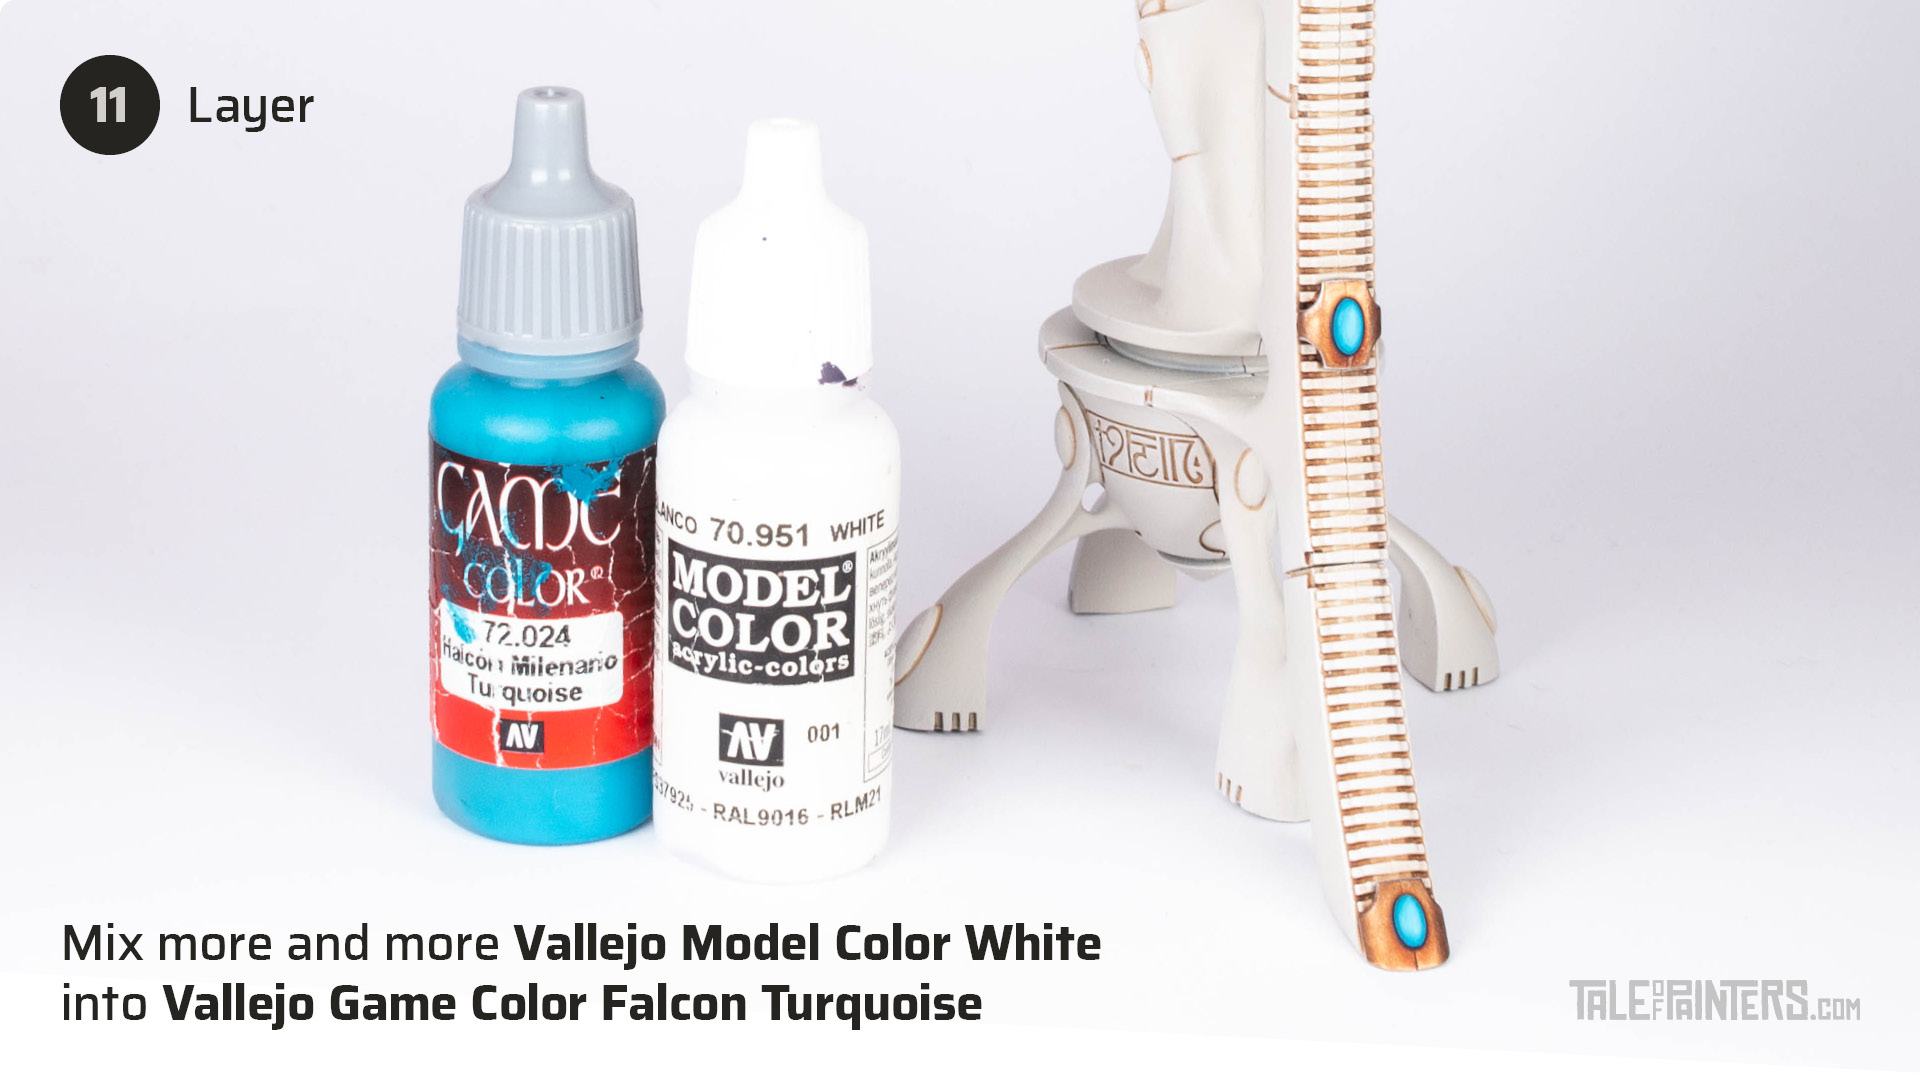
Add a couple of layers by mixing successive amounts of Vallejo Model Color White [White Scar] with the Falcon Turquoise, concentrating on the center of the orbs.
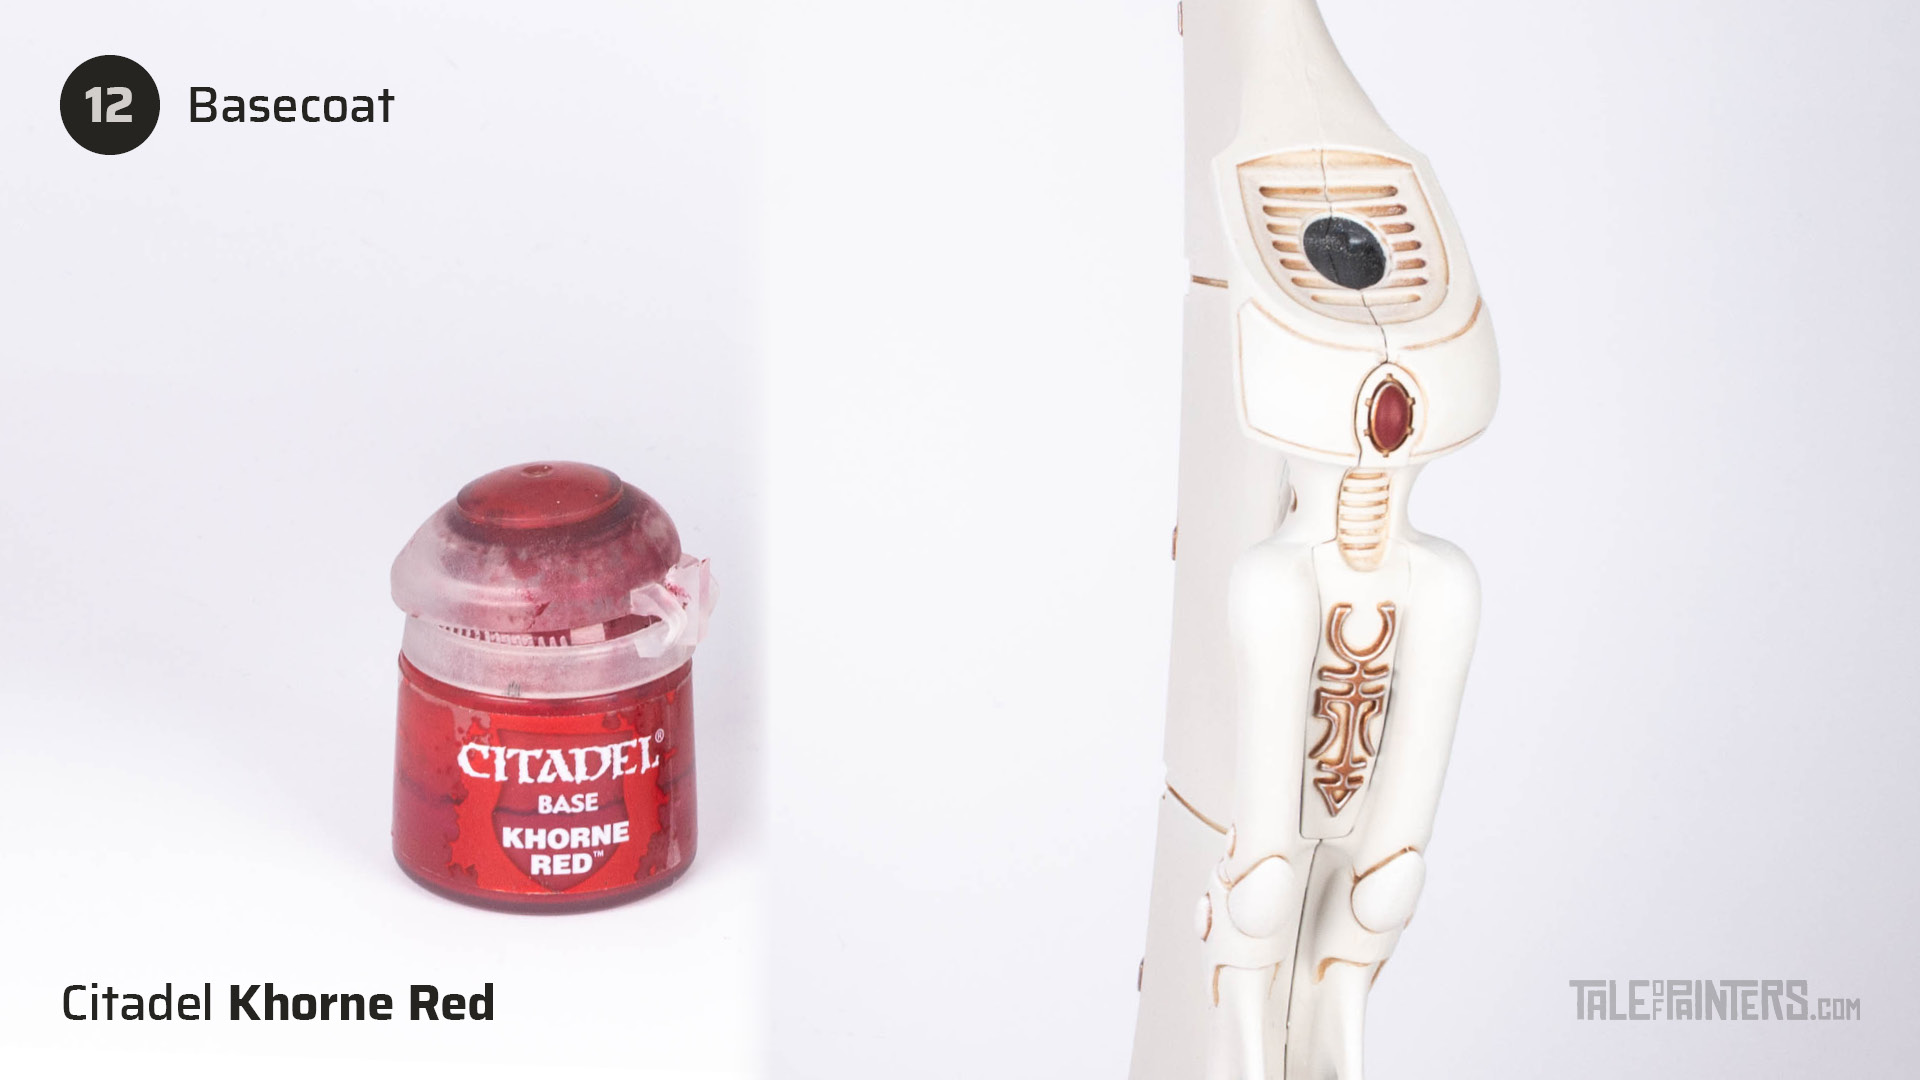
Basecoat the gems with Khorne Red.
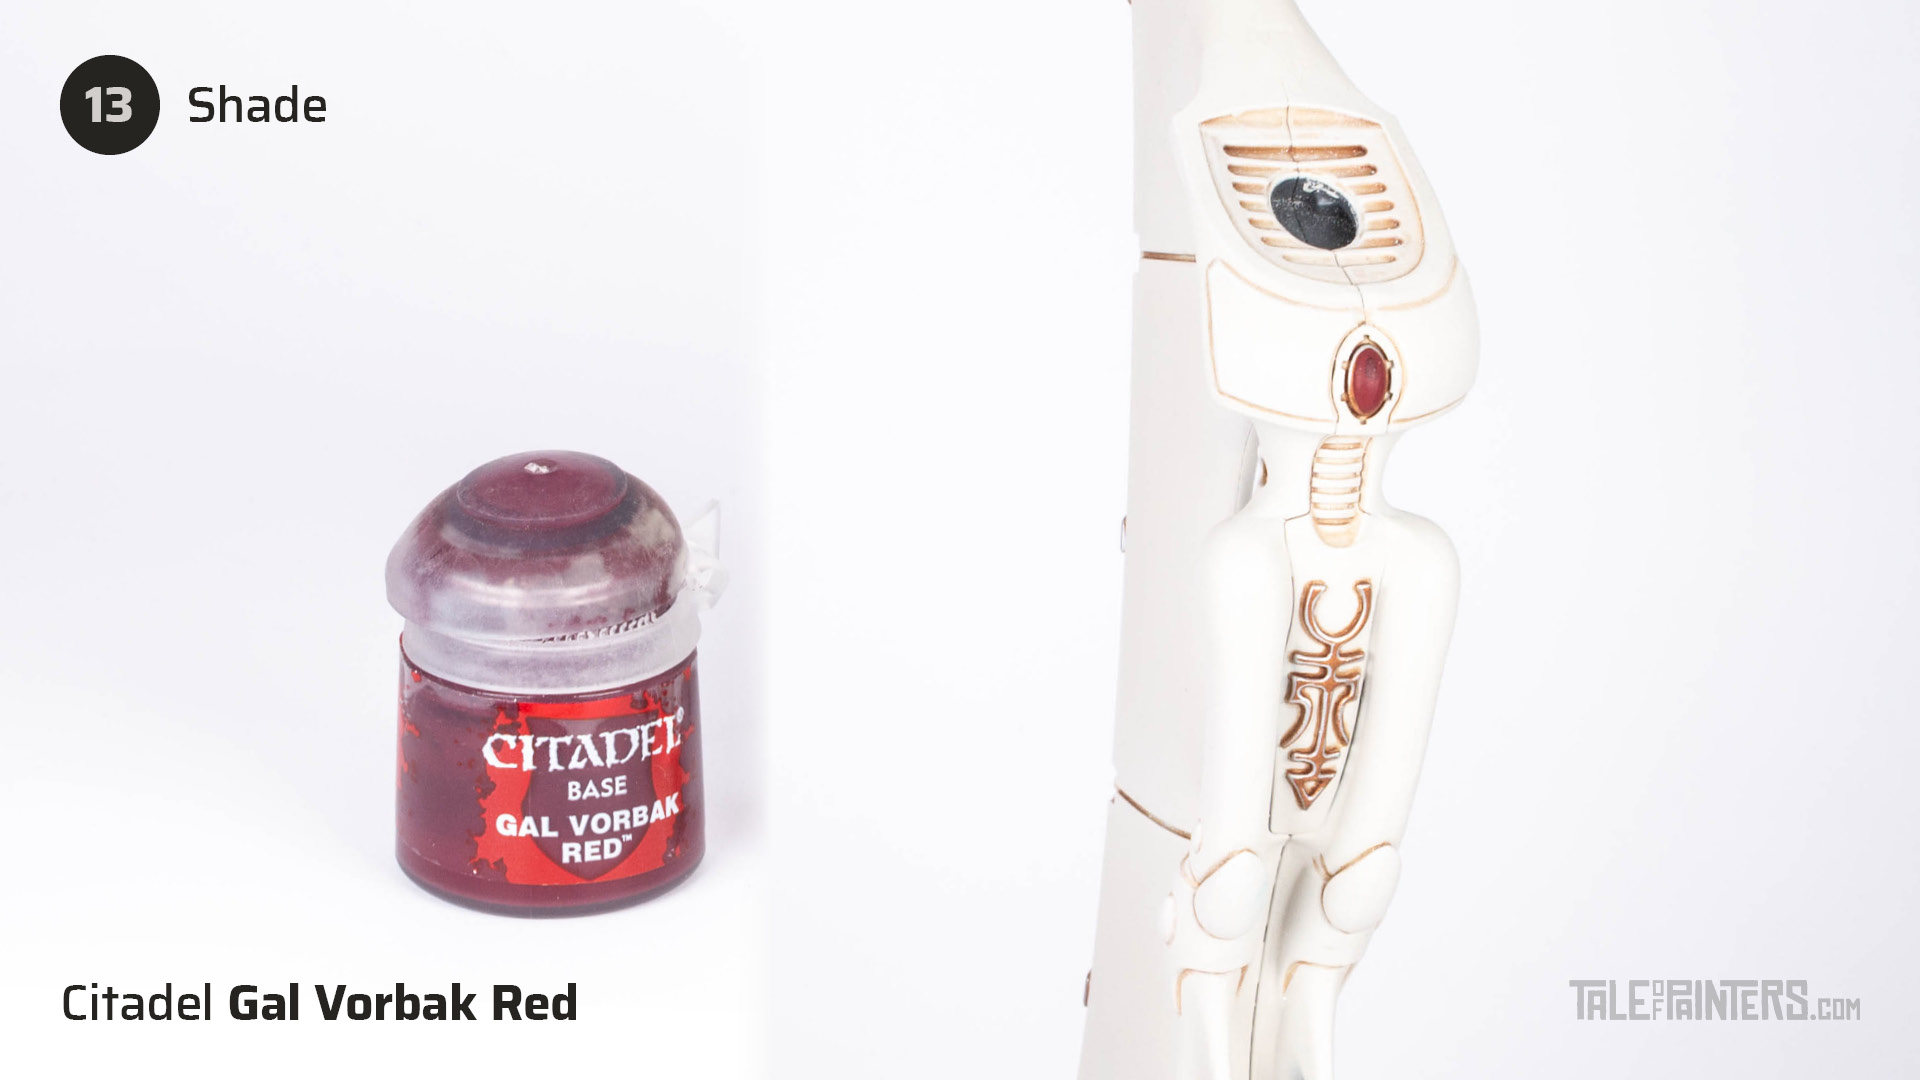
Shade the upper left corner by applying some thinned Gal Vorbak Red.
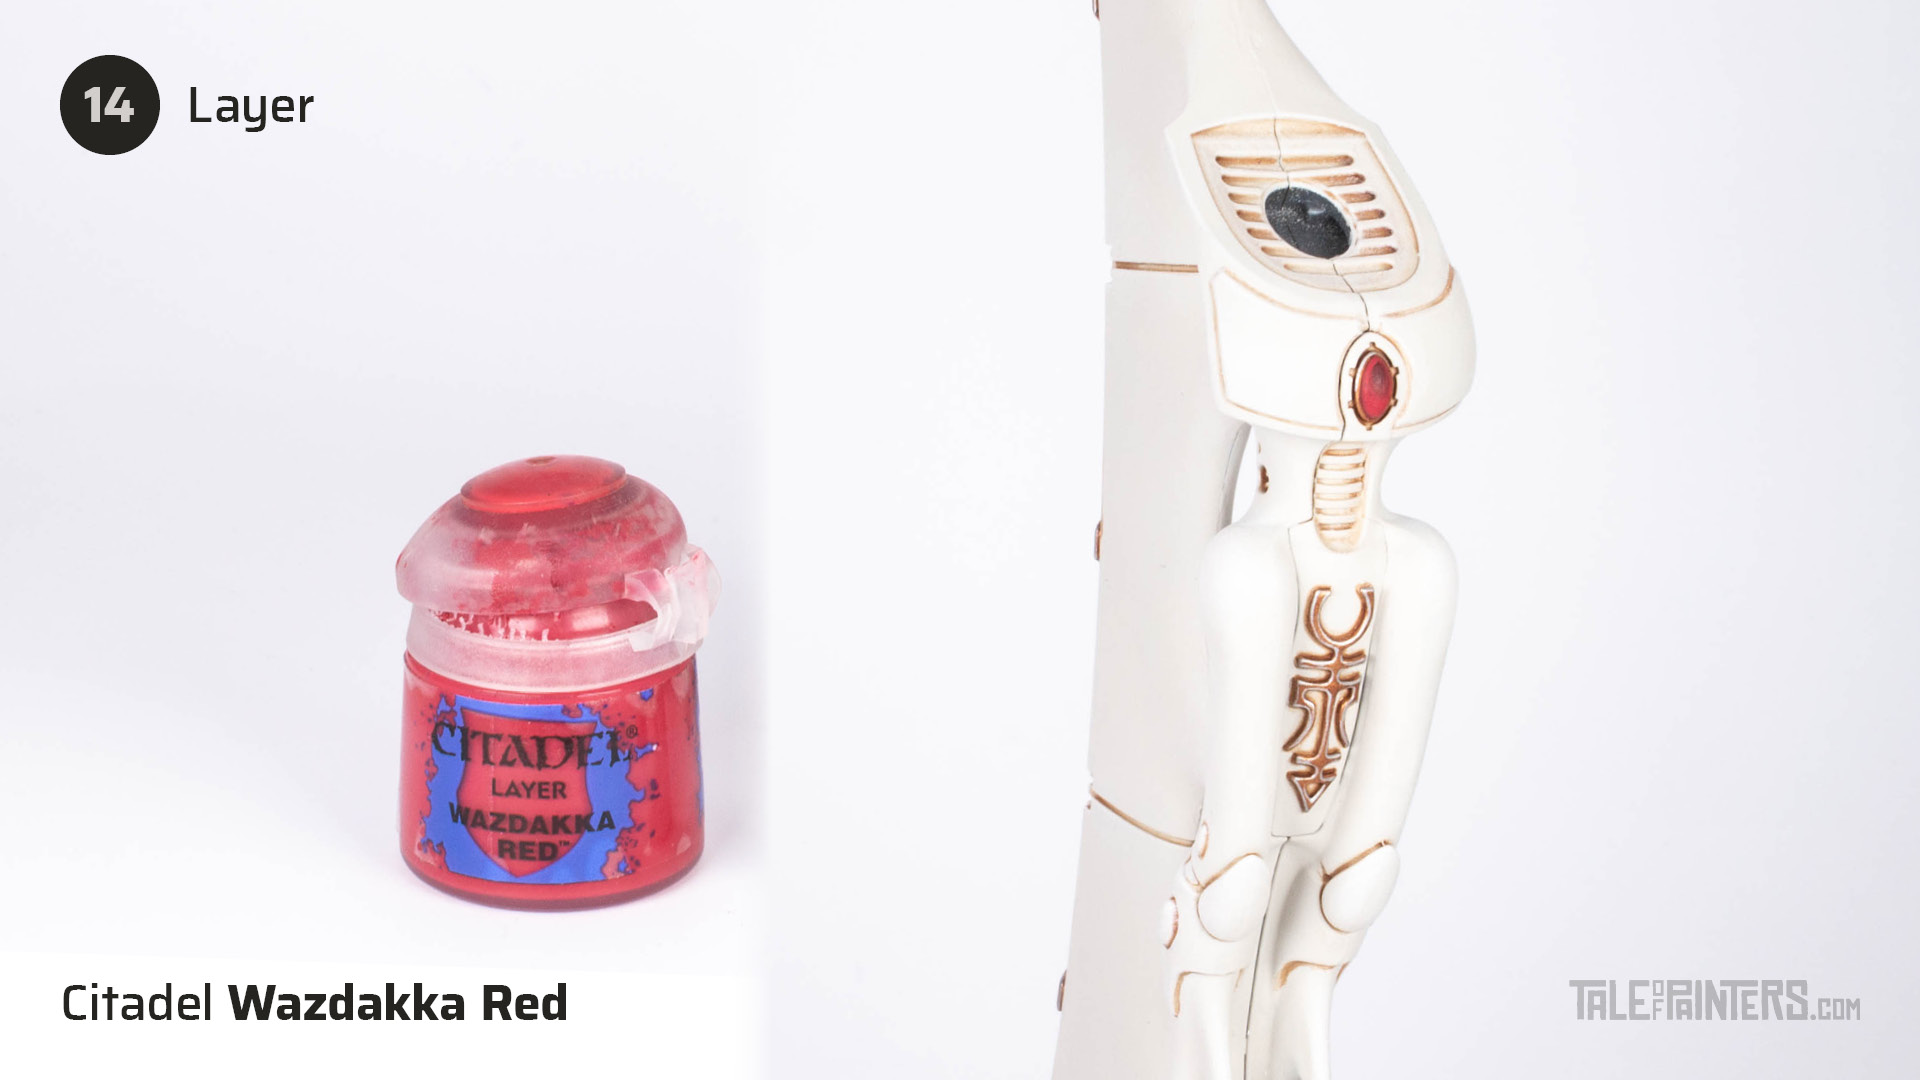
Layer with Wazdakka Red. Concentrate on the lower right half and also apply a line of Wazdakka Red around the upper part of the gem.
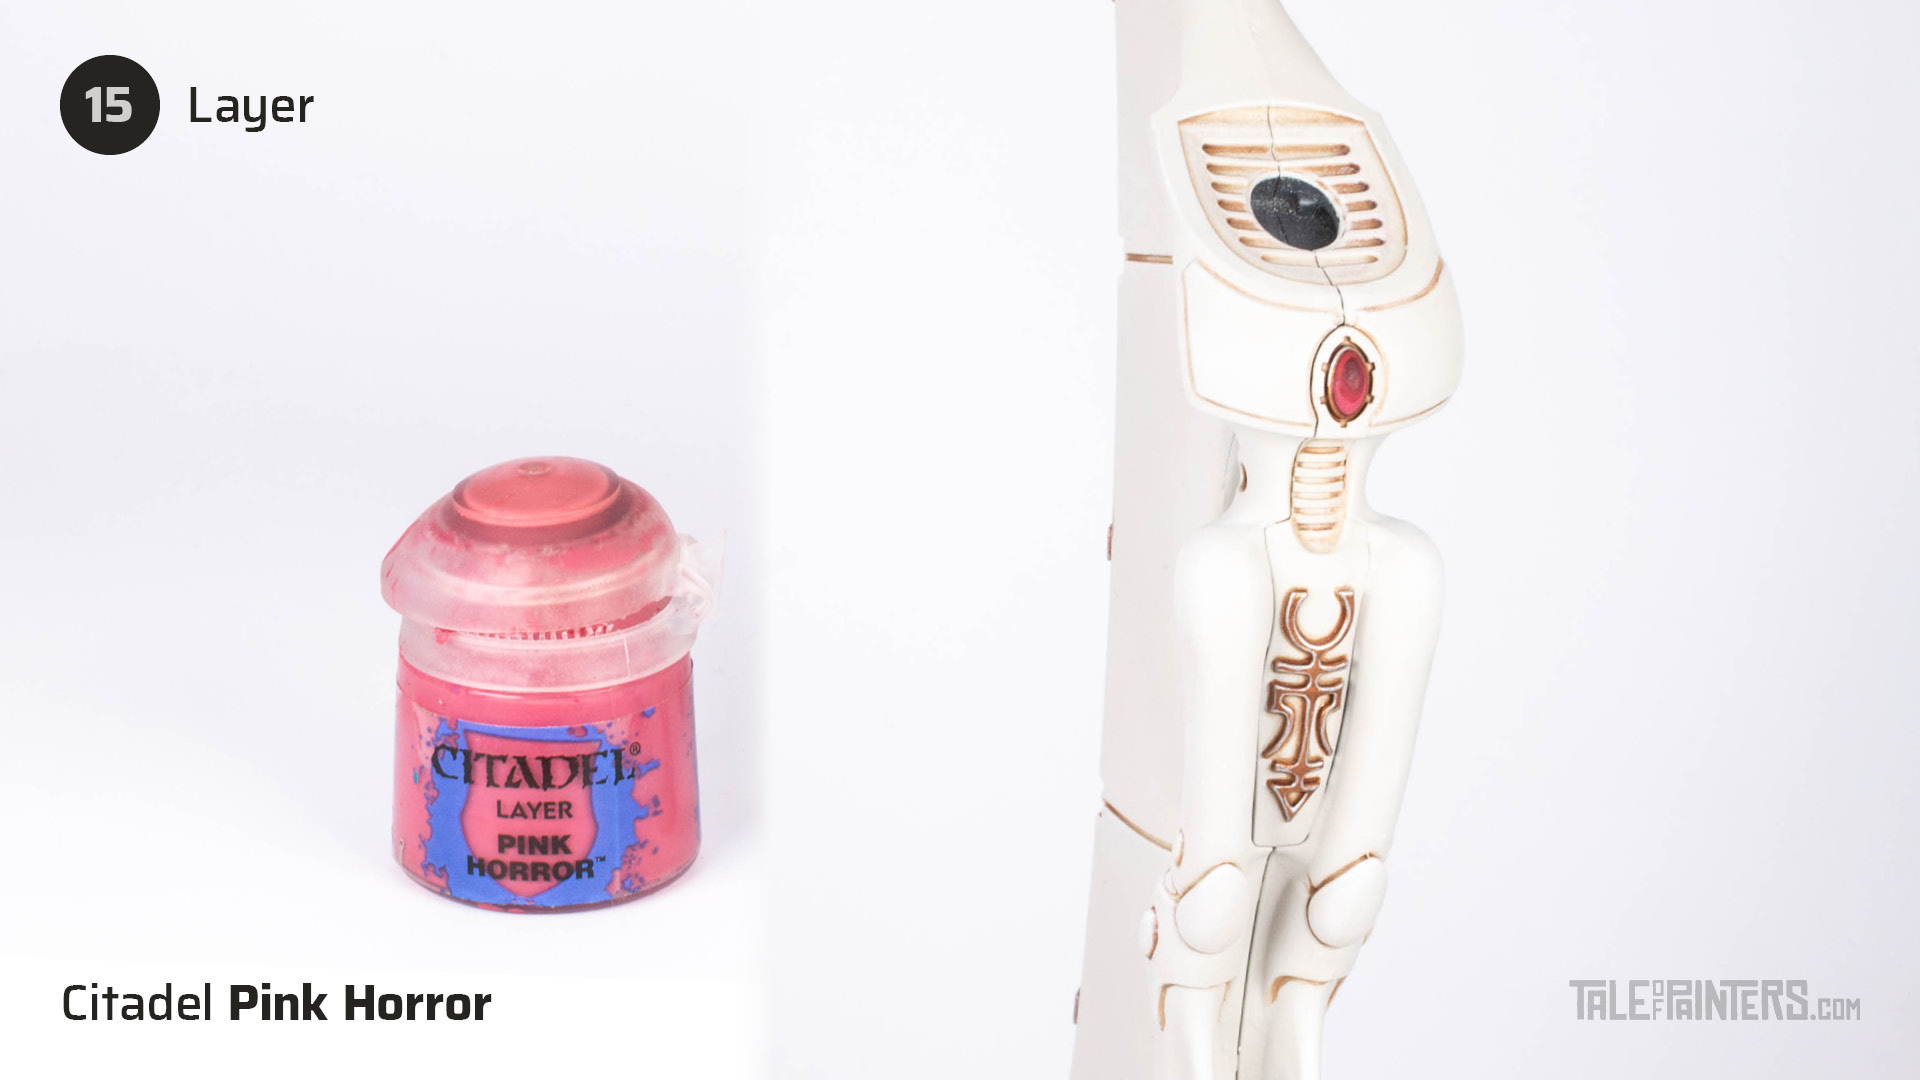
Layer Pink Horror, concentrating on the lower right half of the gem.
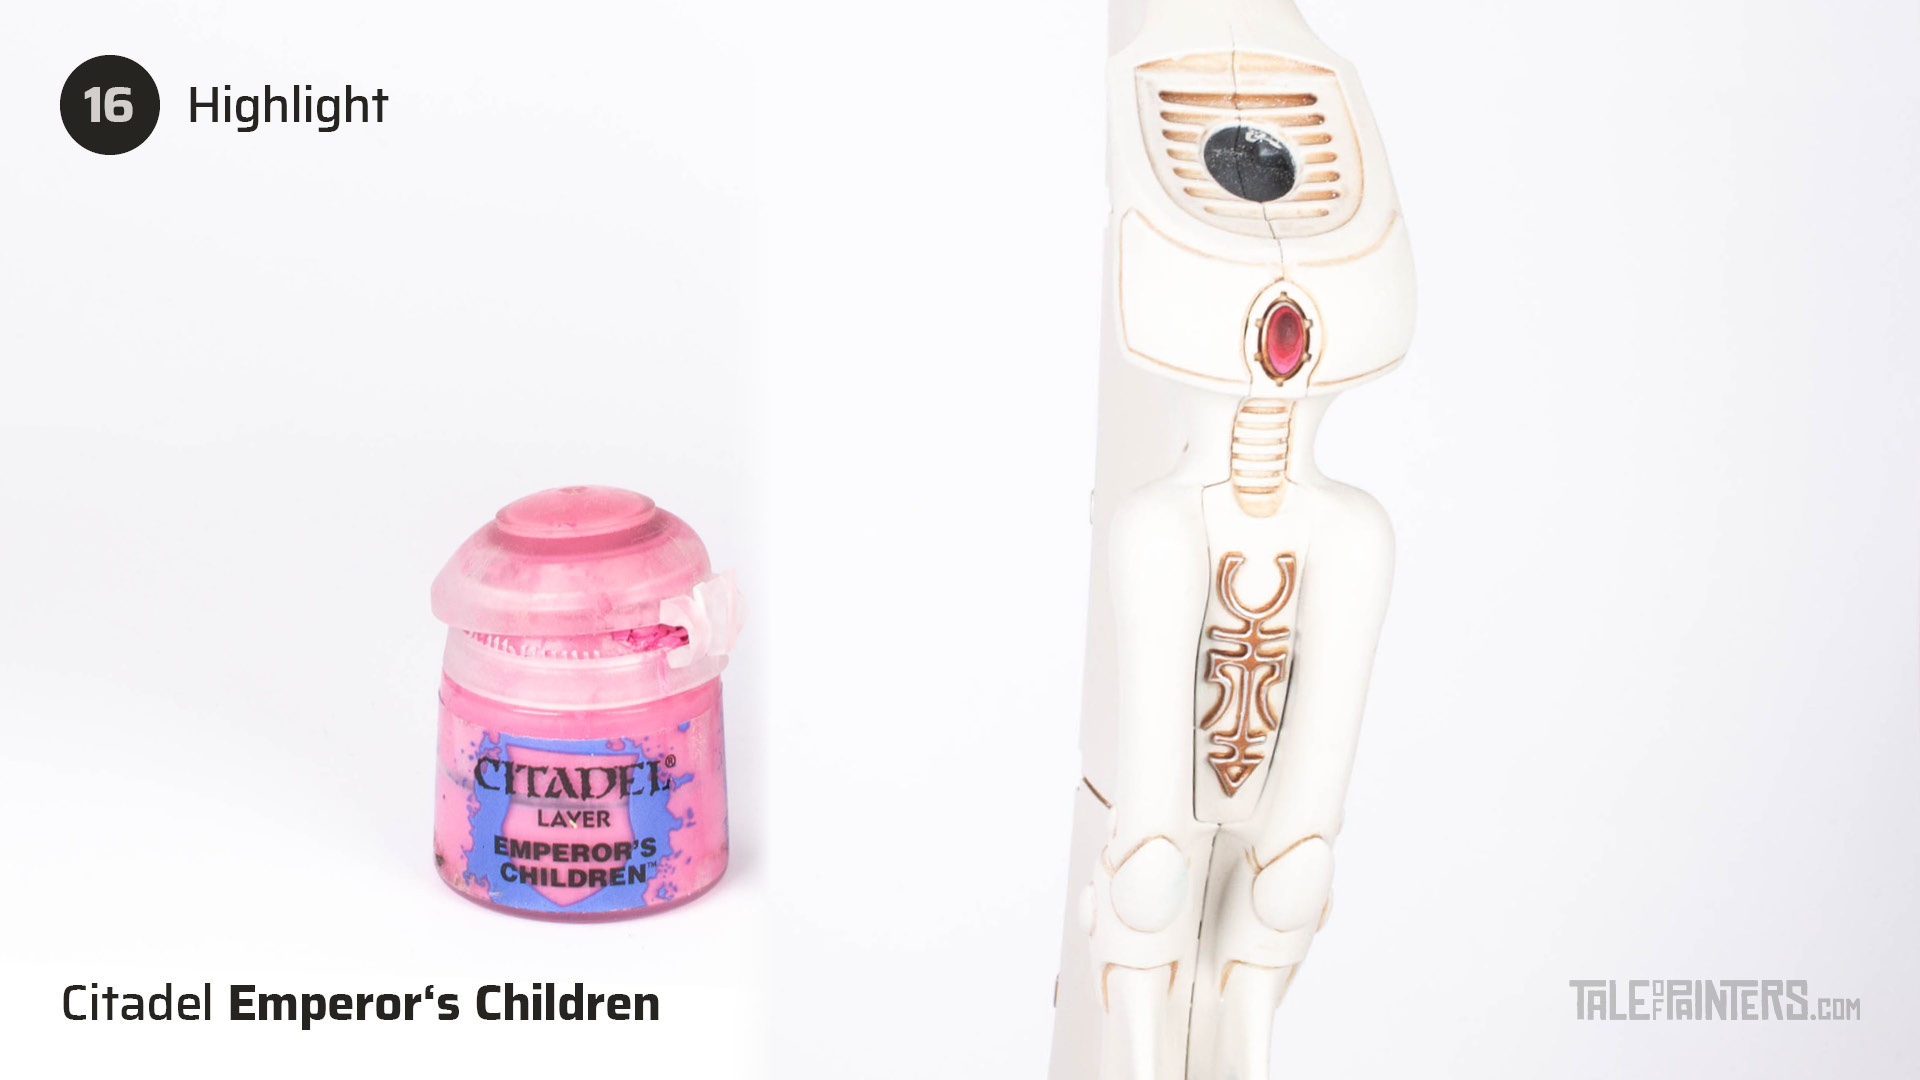
Highlight the lower right corner with Emperor’s Children.
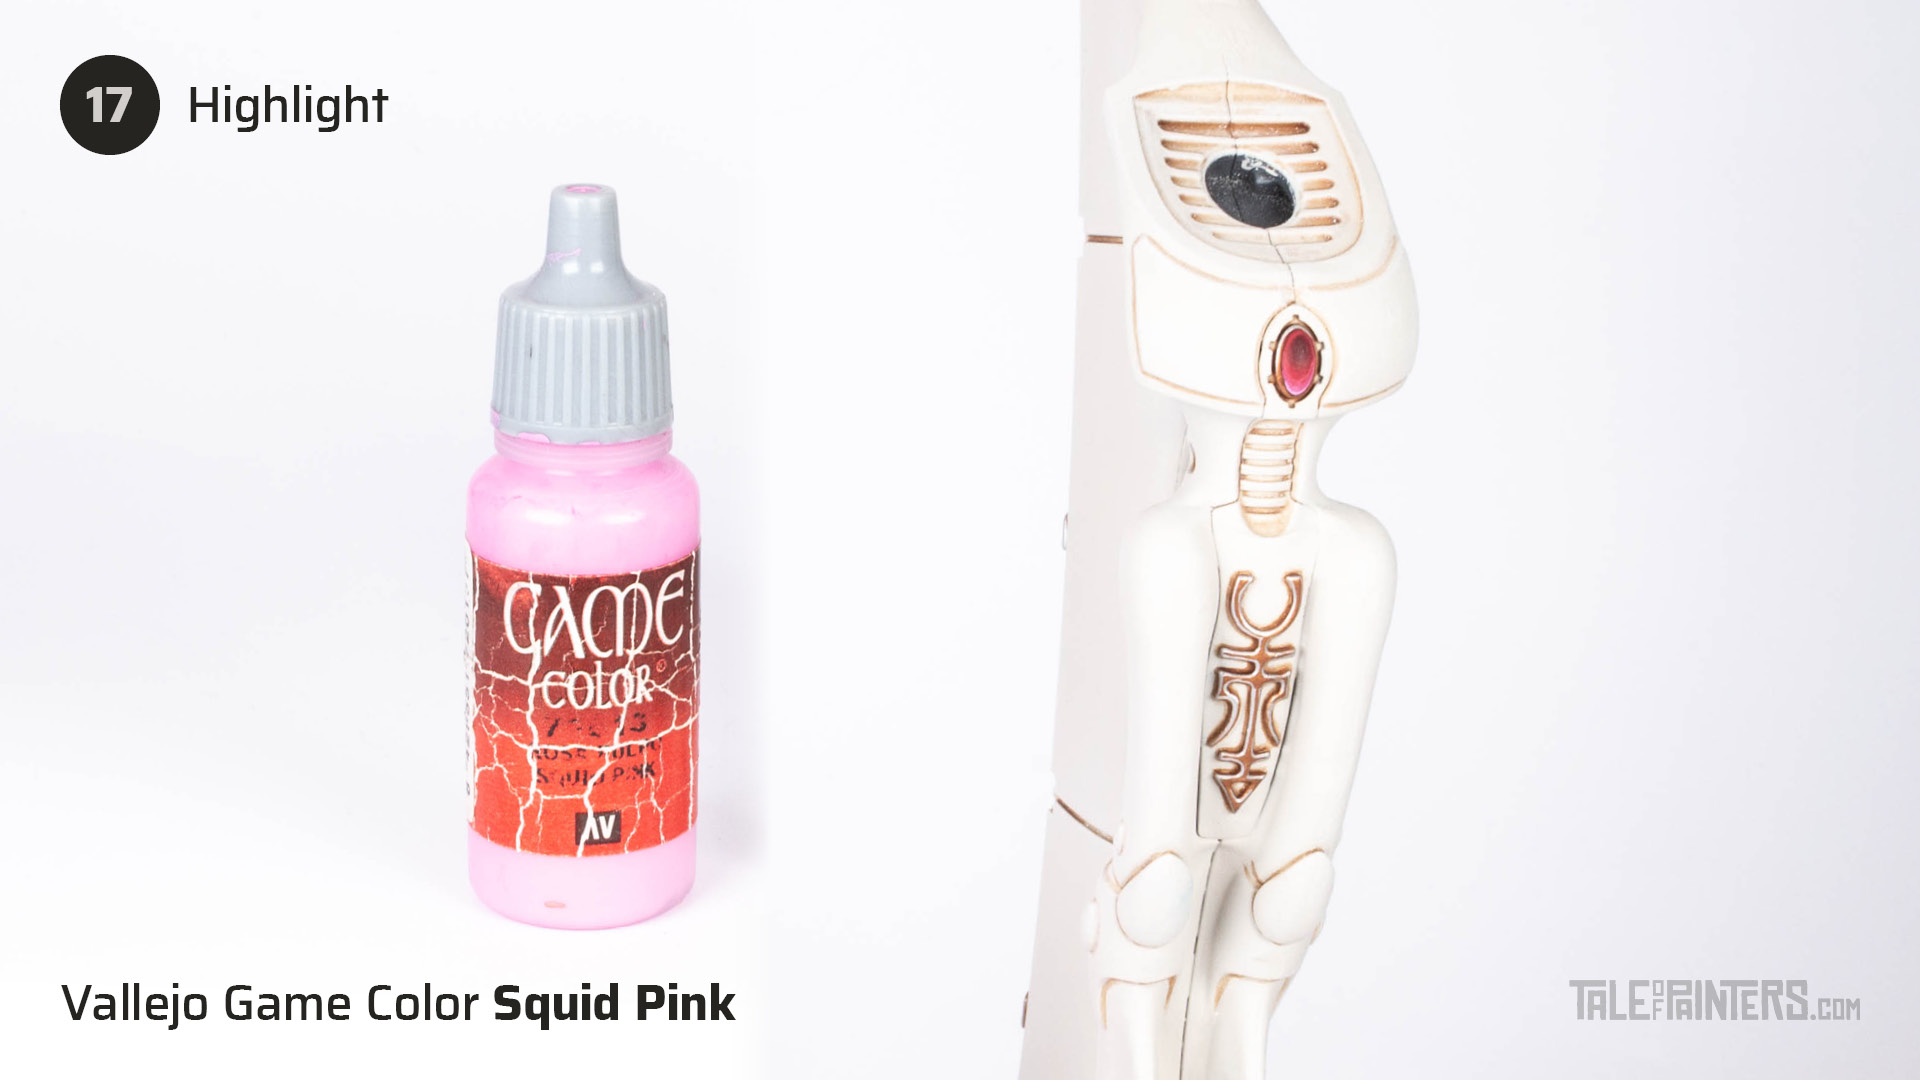
Highlight the lower right corner of the gem with Vallejo Game Color Squid Pink [Fulgrim Pink].
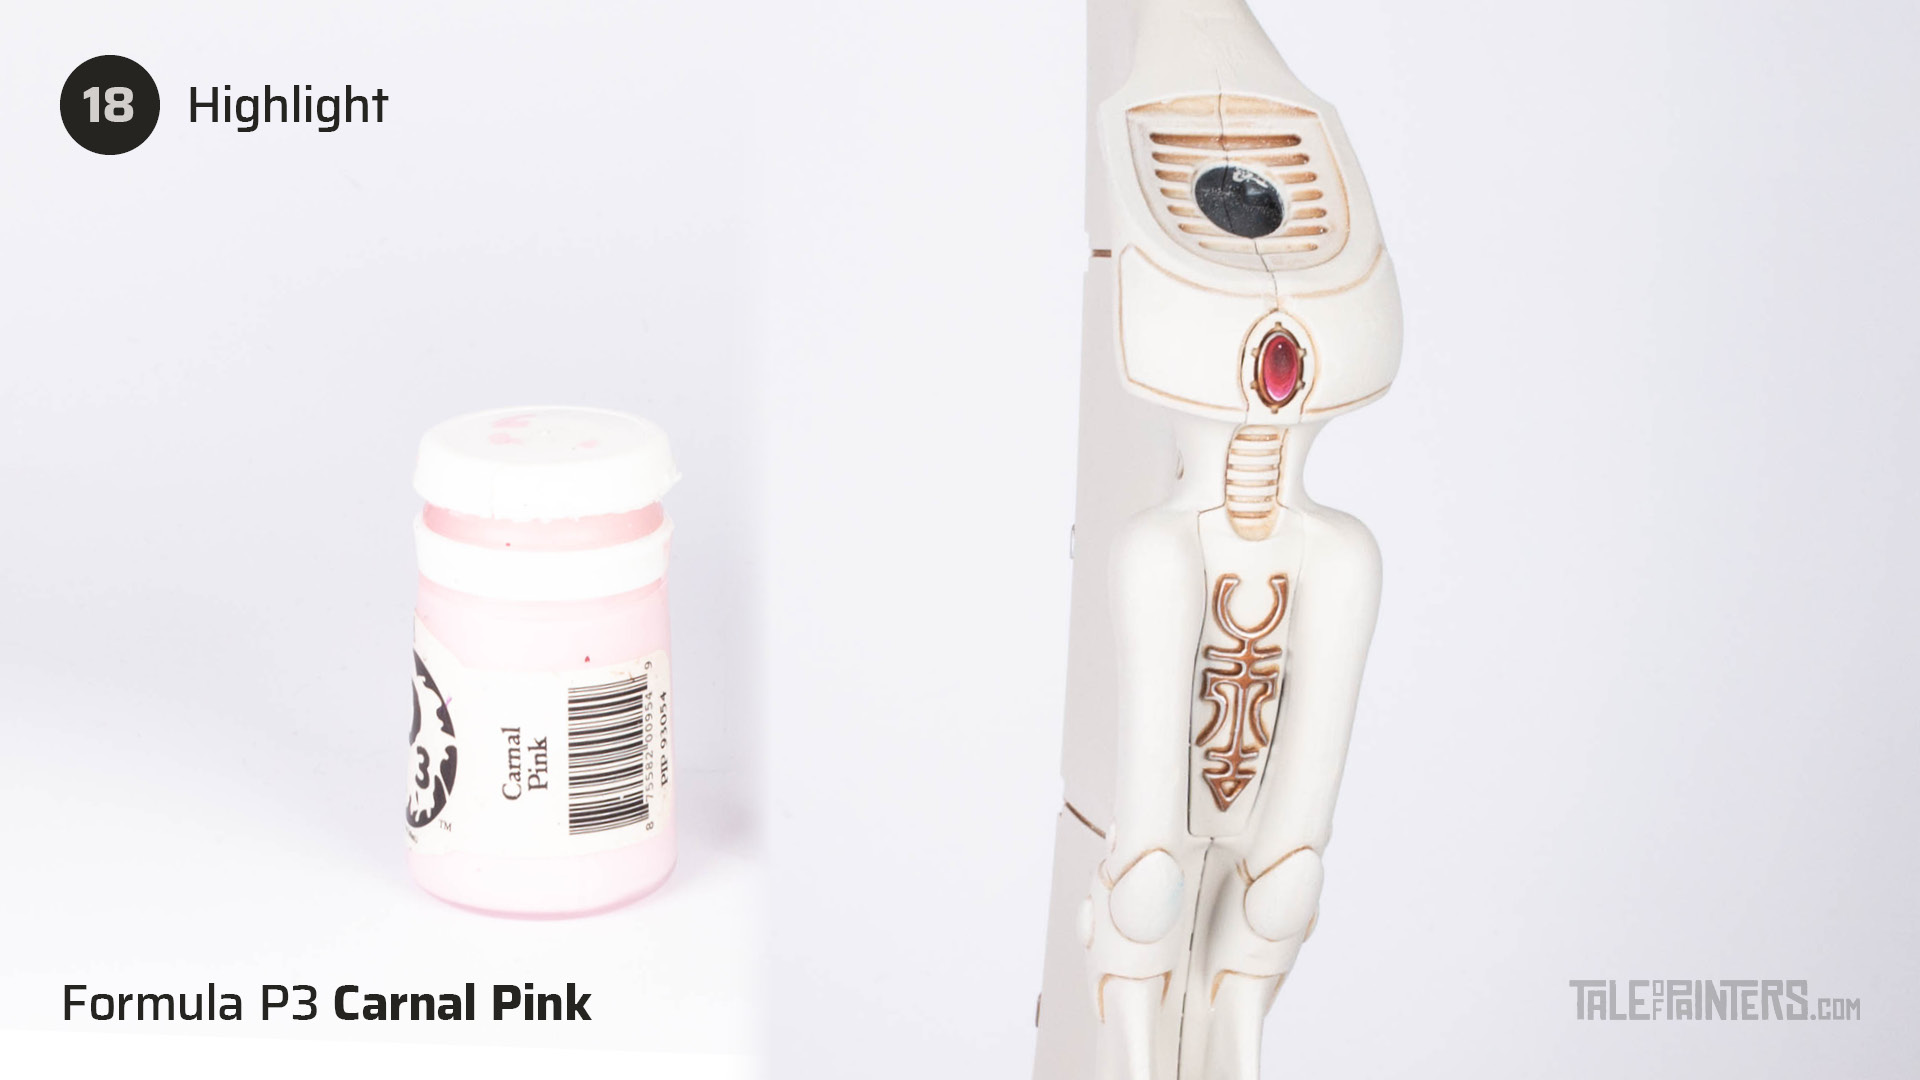
Finally, highlight the lowest right part of the gem with Formula P3 Carnal Pink and also add a small dot of Carnal Pink to the upper left corner of the gem.
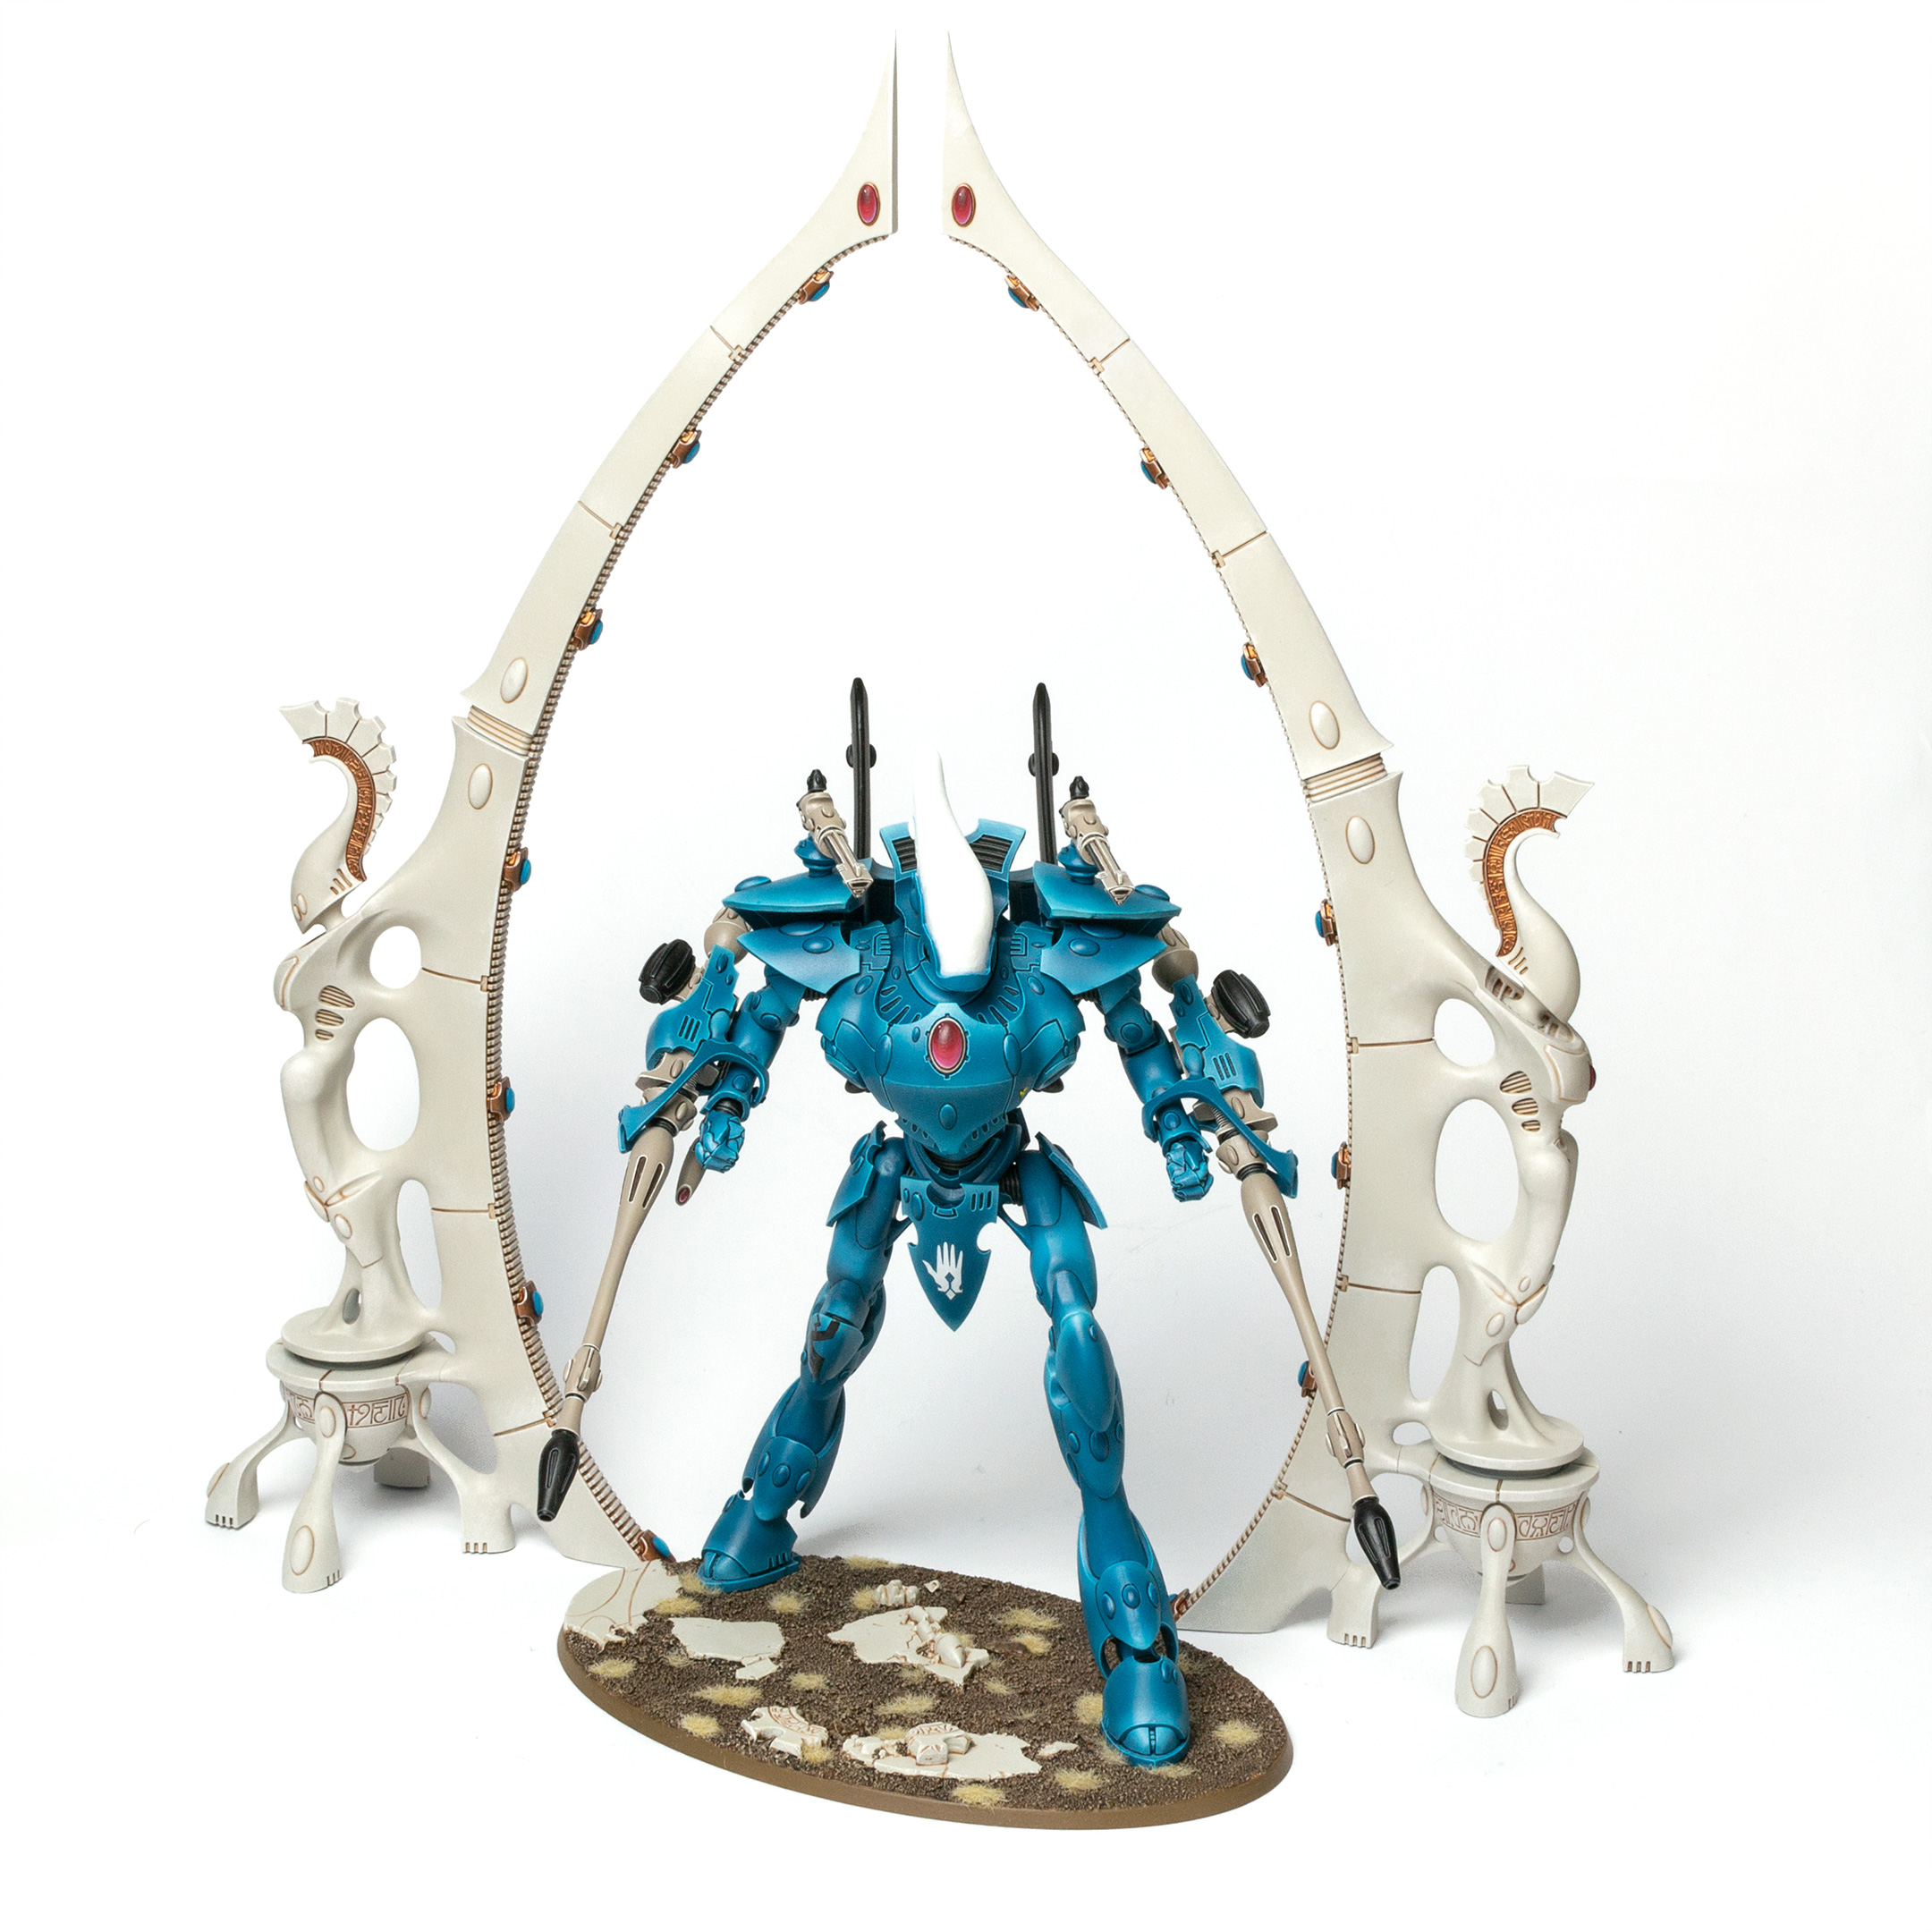
And there we have the finish Aeldari Webway Gates, painted in a bone-white paint scheme matching the broken Aeldari masonry on the bases of my Craftworld Iybraesil collection. Check out my showcase post for a cool scenic shot of my Aeldari Webway Gates.
Paints you will need for this tutorial:
Citadel (Games Workshop)
Corax White Primer
Seraphim Sepia
Stegadon Scale Green
Khorne Red
Gal Vorbak Red
Wazdakka Red
Pink Horror
Emperor’s Children
Pallid Wych Flesh
Formula P3 (Privateer Press)
Carnal Pink [or Fulgrim Pink]
Reaper Master Series
Polished Bone [or a mix of Rakarth Flesh and Pallid Wych Flesh]
Vallejo
Game Color Falcon Turquoise [or Thousand Sons Blue]
Game Color Brassy Brass [or Brass Scorpion]
Mecha Color Light Steel [or Stormhost Silver]
Model Color White [or White Scar]
If you need to expand your paint collection to follow the tutorial, check out our partner stores Wayland Games and Element Games, which offer an amazing range of paints at a discount.
Hope you enjoyed this tutorial. If so, leave a comment or reaction below, and if you got any questions, leave them here so I can answer them for you.
Tale of Painters is the unofficial Warhammer hobby magazine run by hobbyists like you. Support our work by using the affiliate links from our 🇺🇸 / 🇨🇦 partner stores for your next orders so we can continue to bring you fantastic FREE content every day:


Or support us directly:


