
In this post, I’ll show you how to paint a Crusader from the Black Templars from the Black Templar Army Set. I painted this model in 24 easy to follow steps. You’ll learn how I paint black armour, cream tabards, bright yellows and more. This tutorial is perfect for any black armoured Space Marines like Raven Guard and Death Company. Find out how in this tutorial.
This tutorial assumes you have a good understanding of how to paint Warhammer miniatures. With each picture is the corresponding instruction. Each step shows the Citadel paint(s) I used. You’ll find a list of all the paints used in this tutorial at the end of the post.
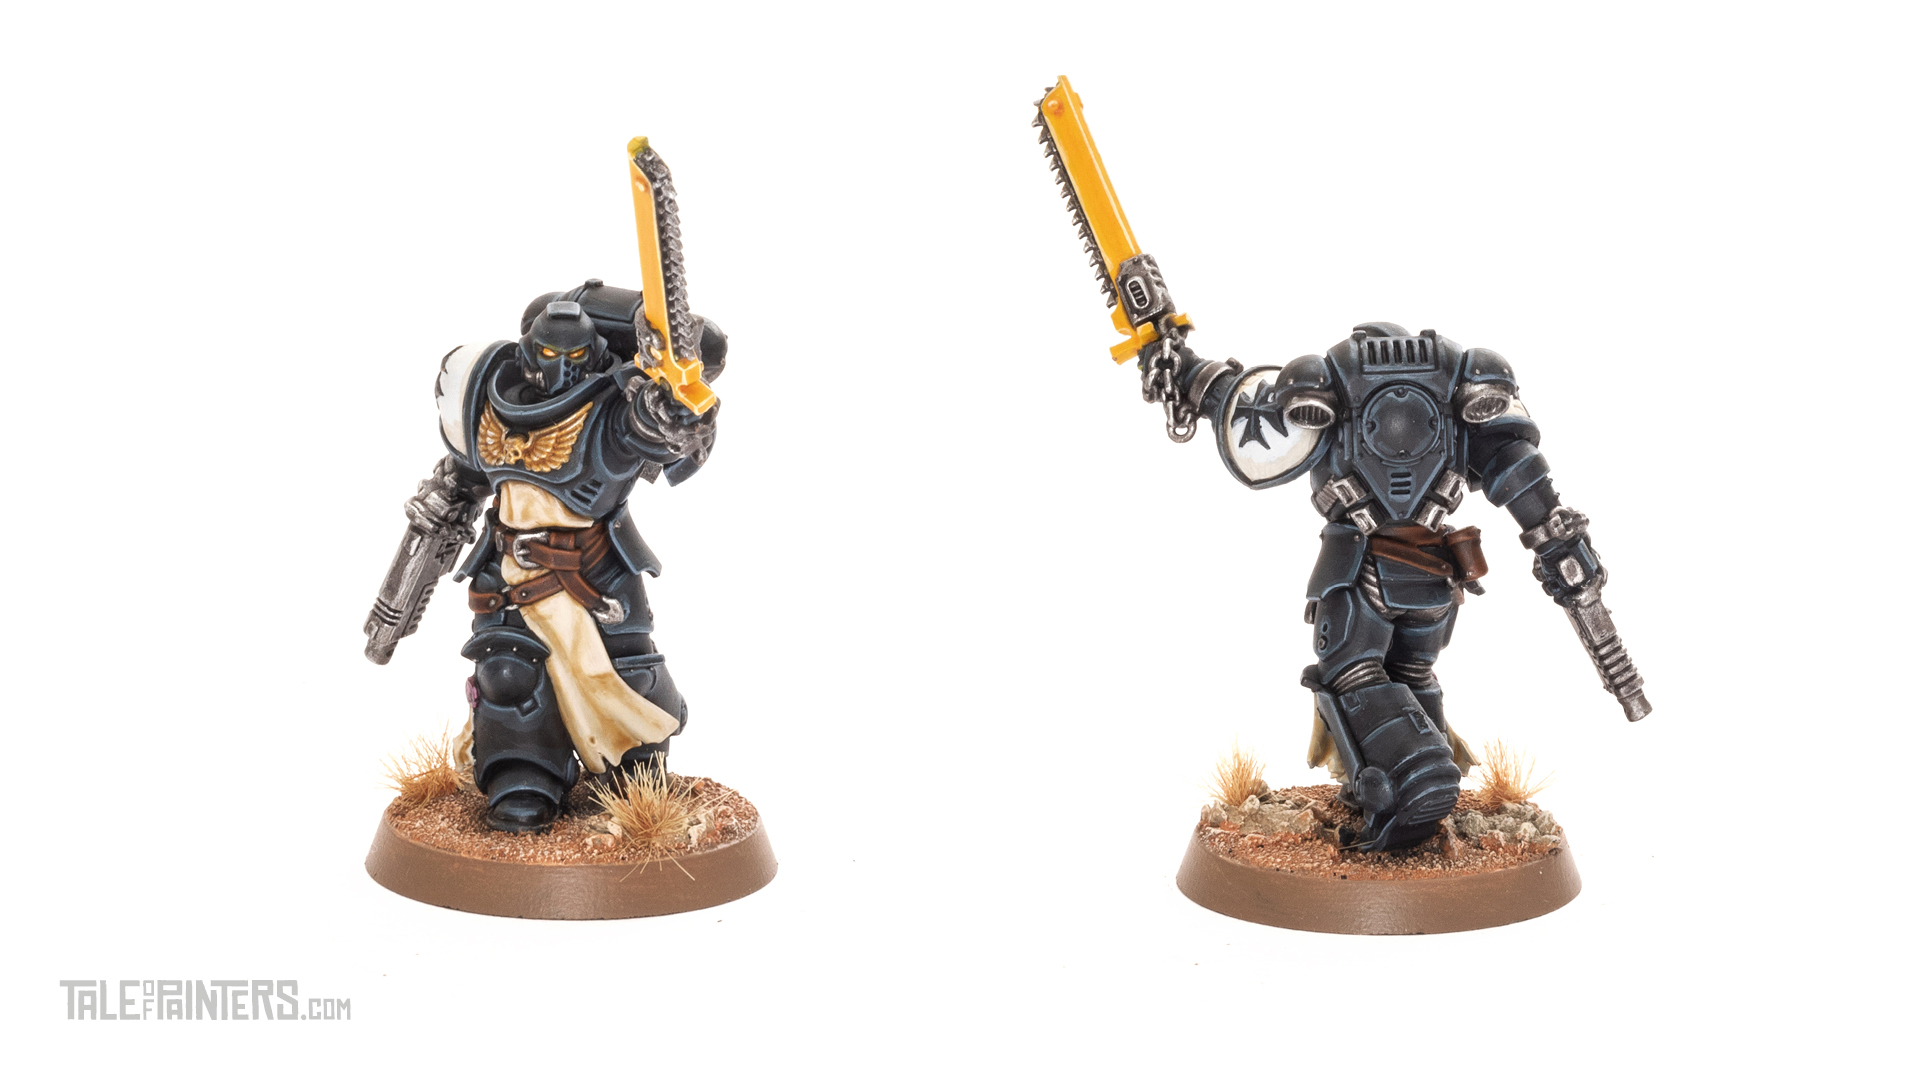
How to paint a Black Templar Crusader
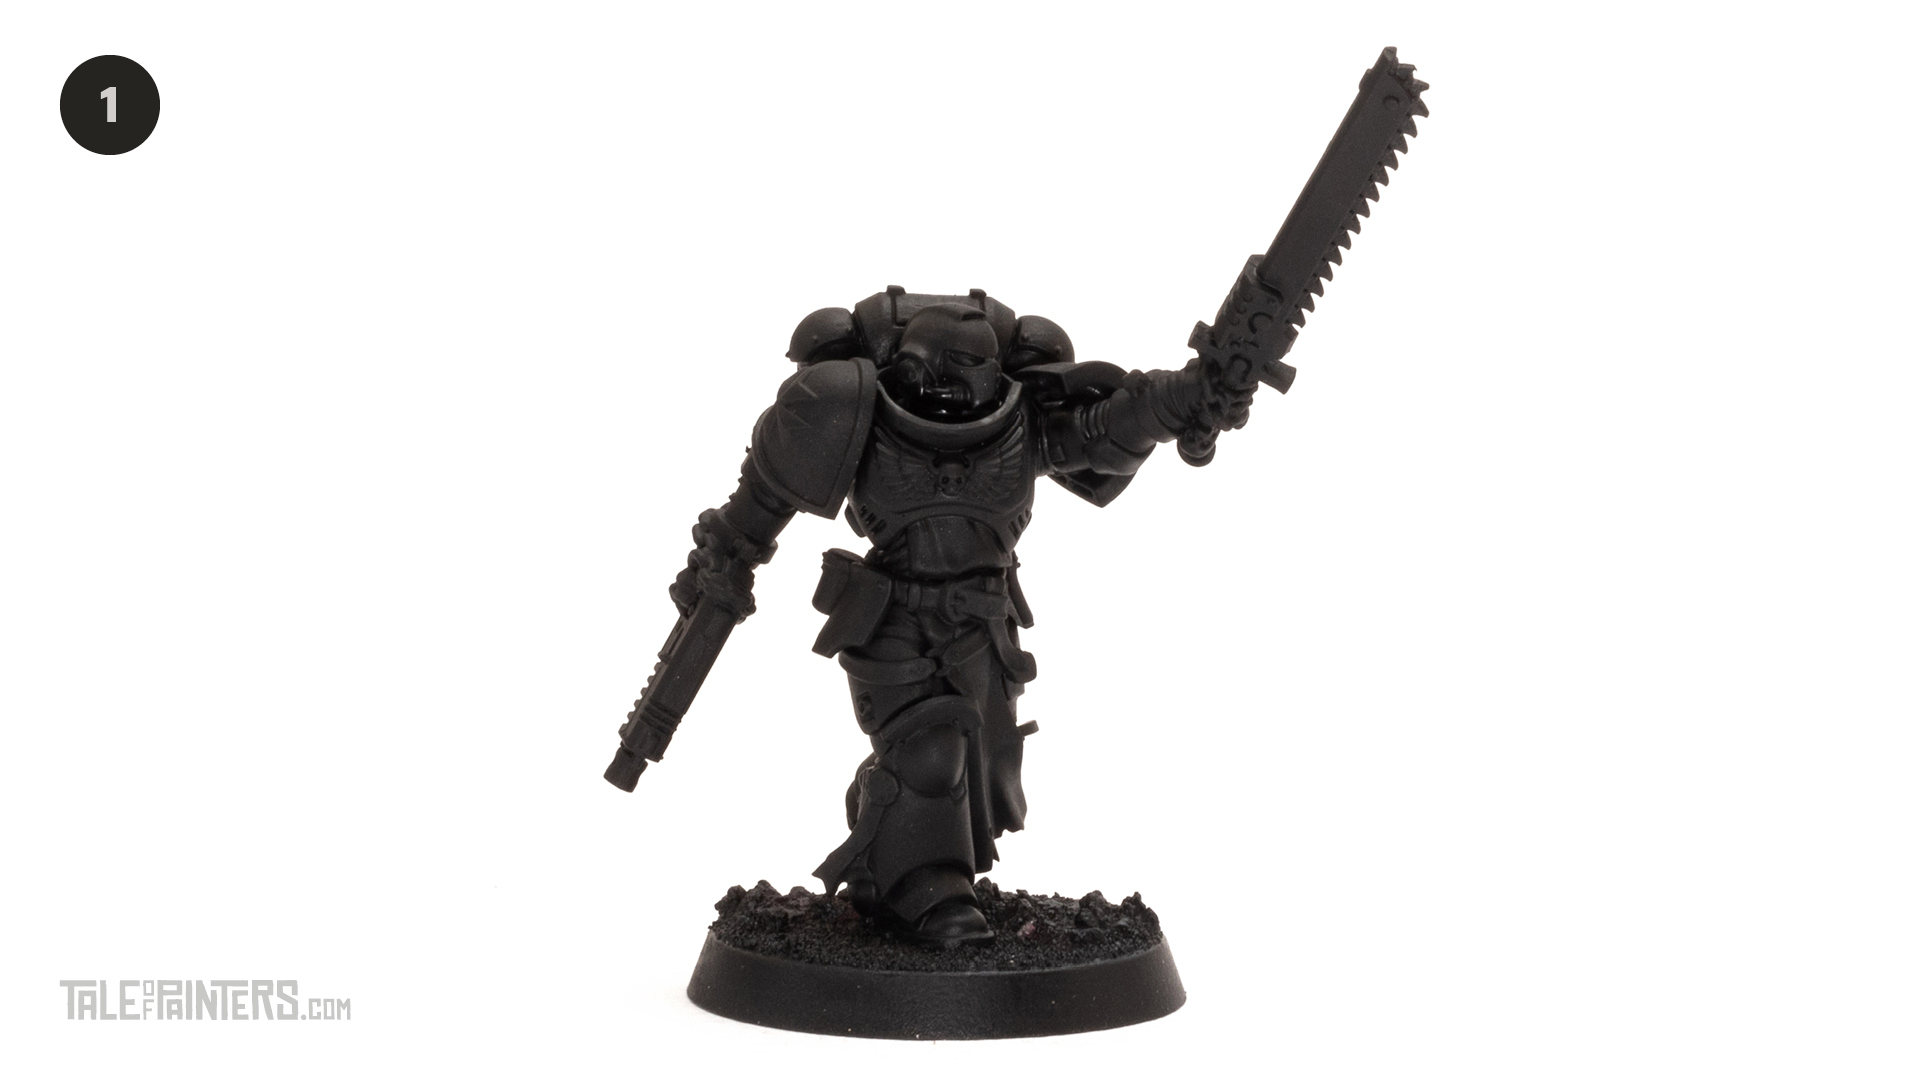
Undercoat your model with black undercoat spray. I used the Army Painter one.
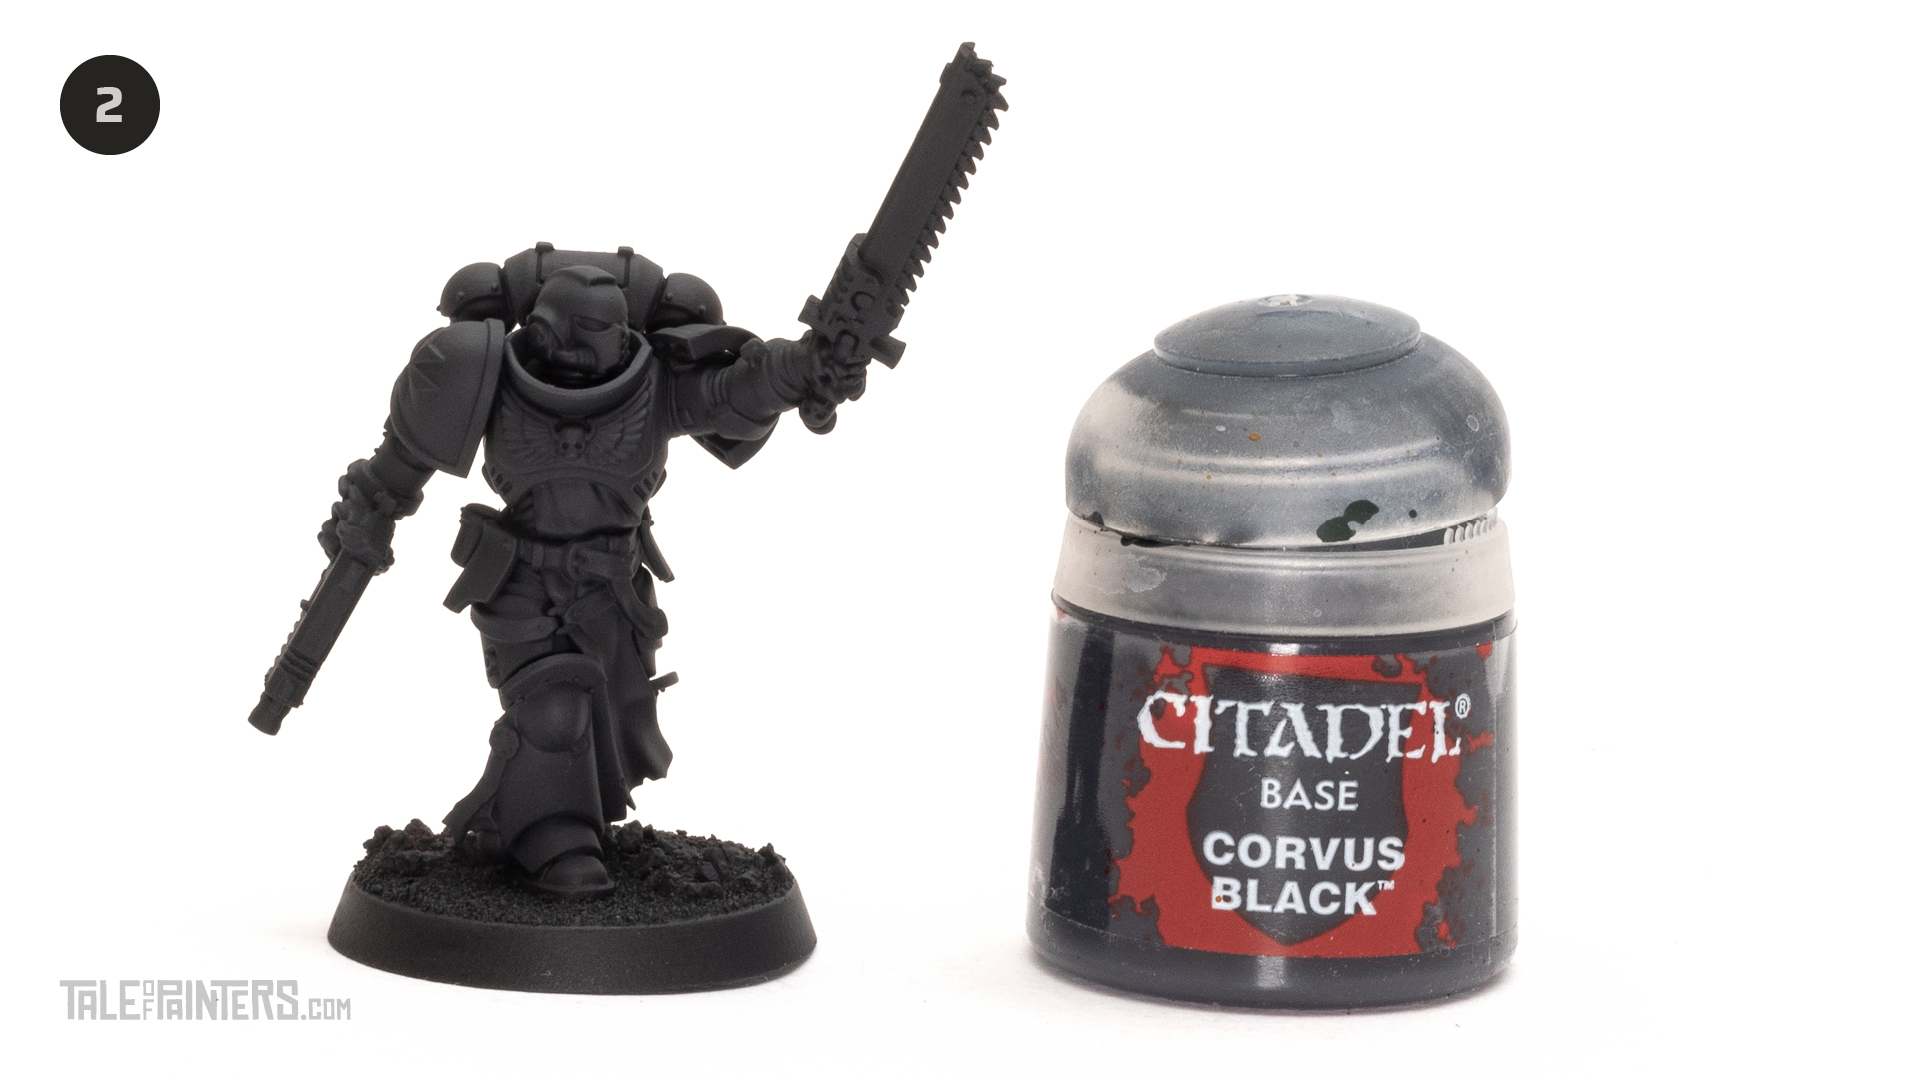
Basecoat the entire model with Corvus Black. You can brush it on in a couple of thin coats. I use an airbrush to speed things up
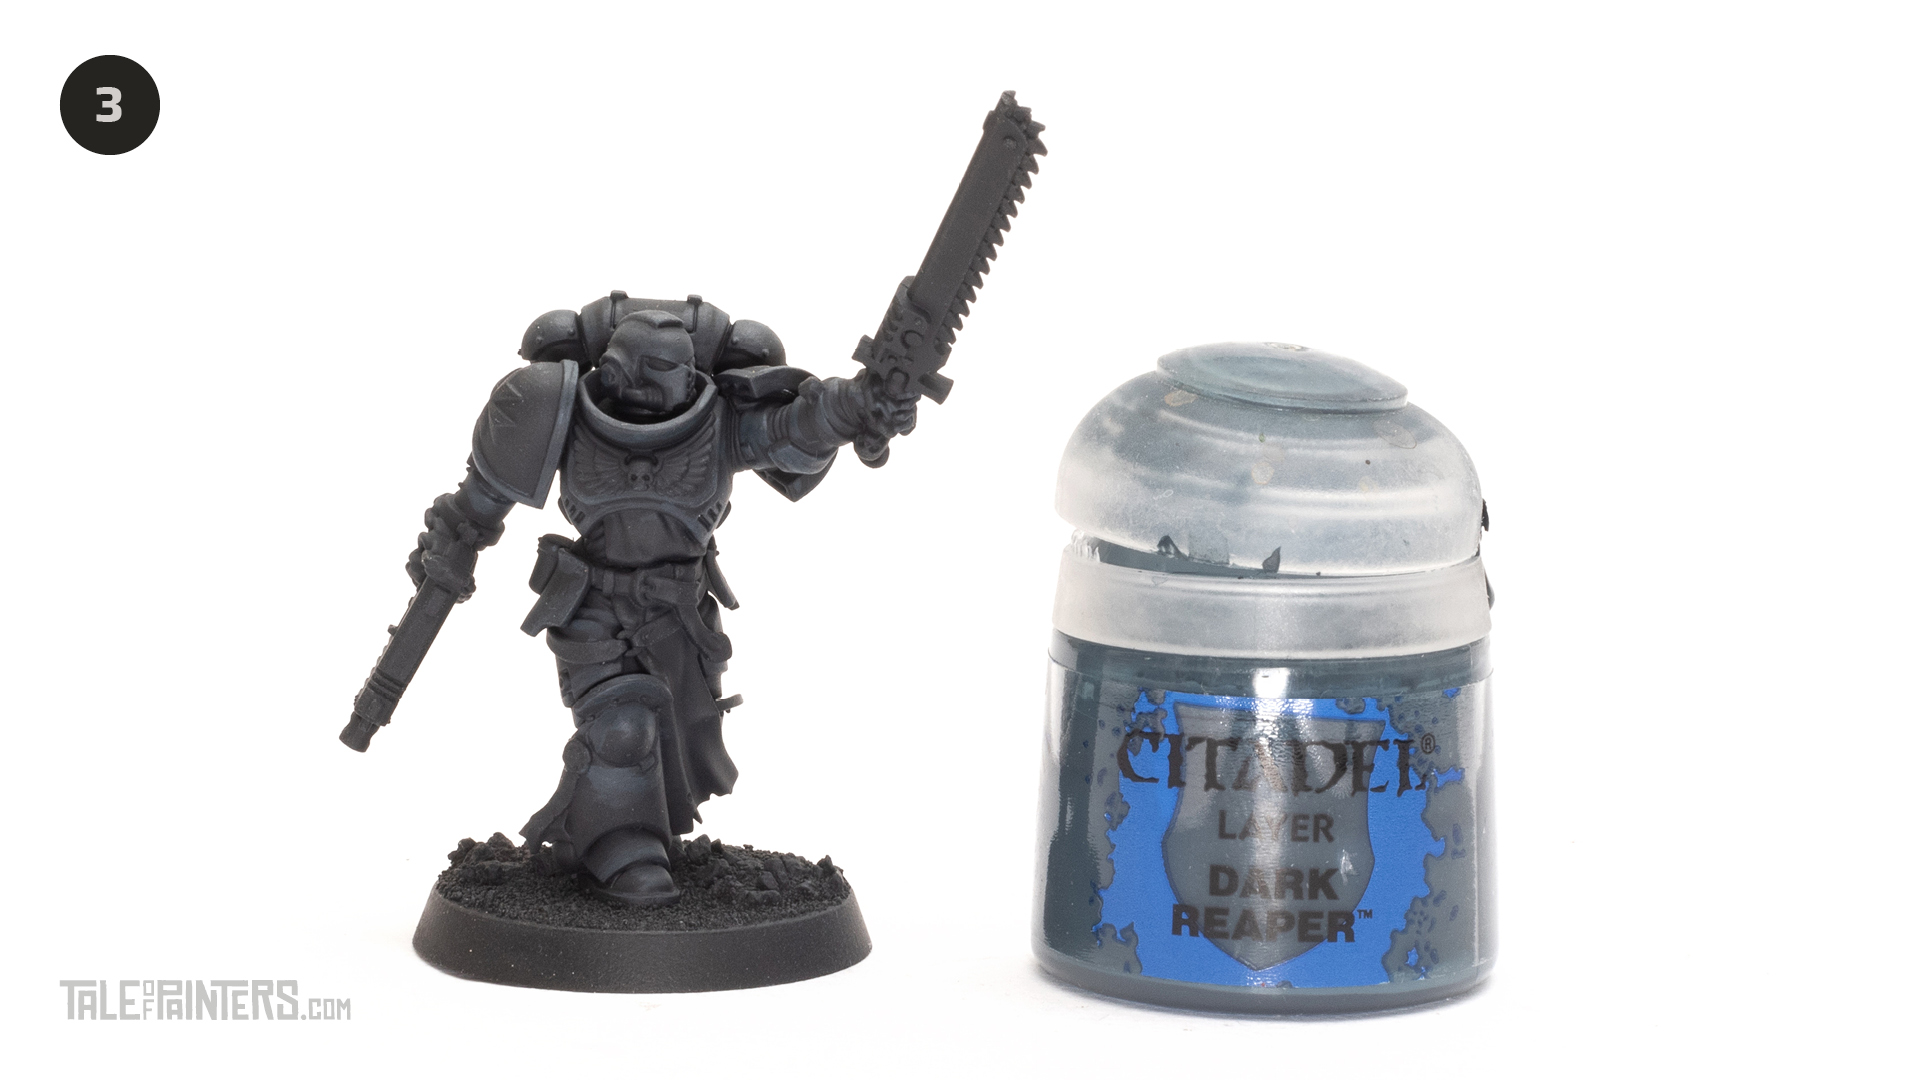
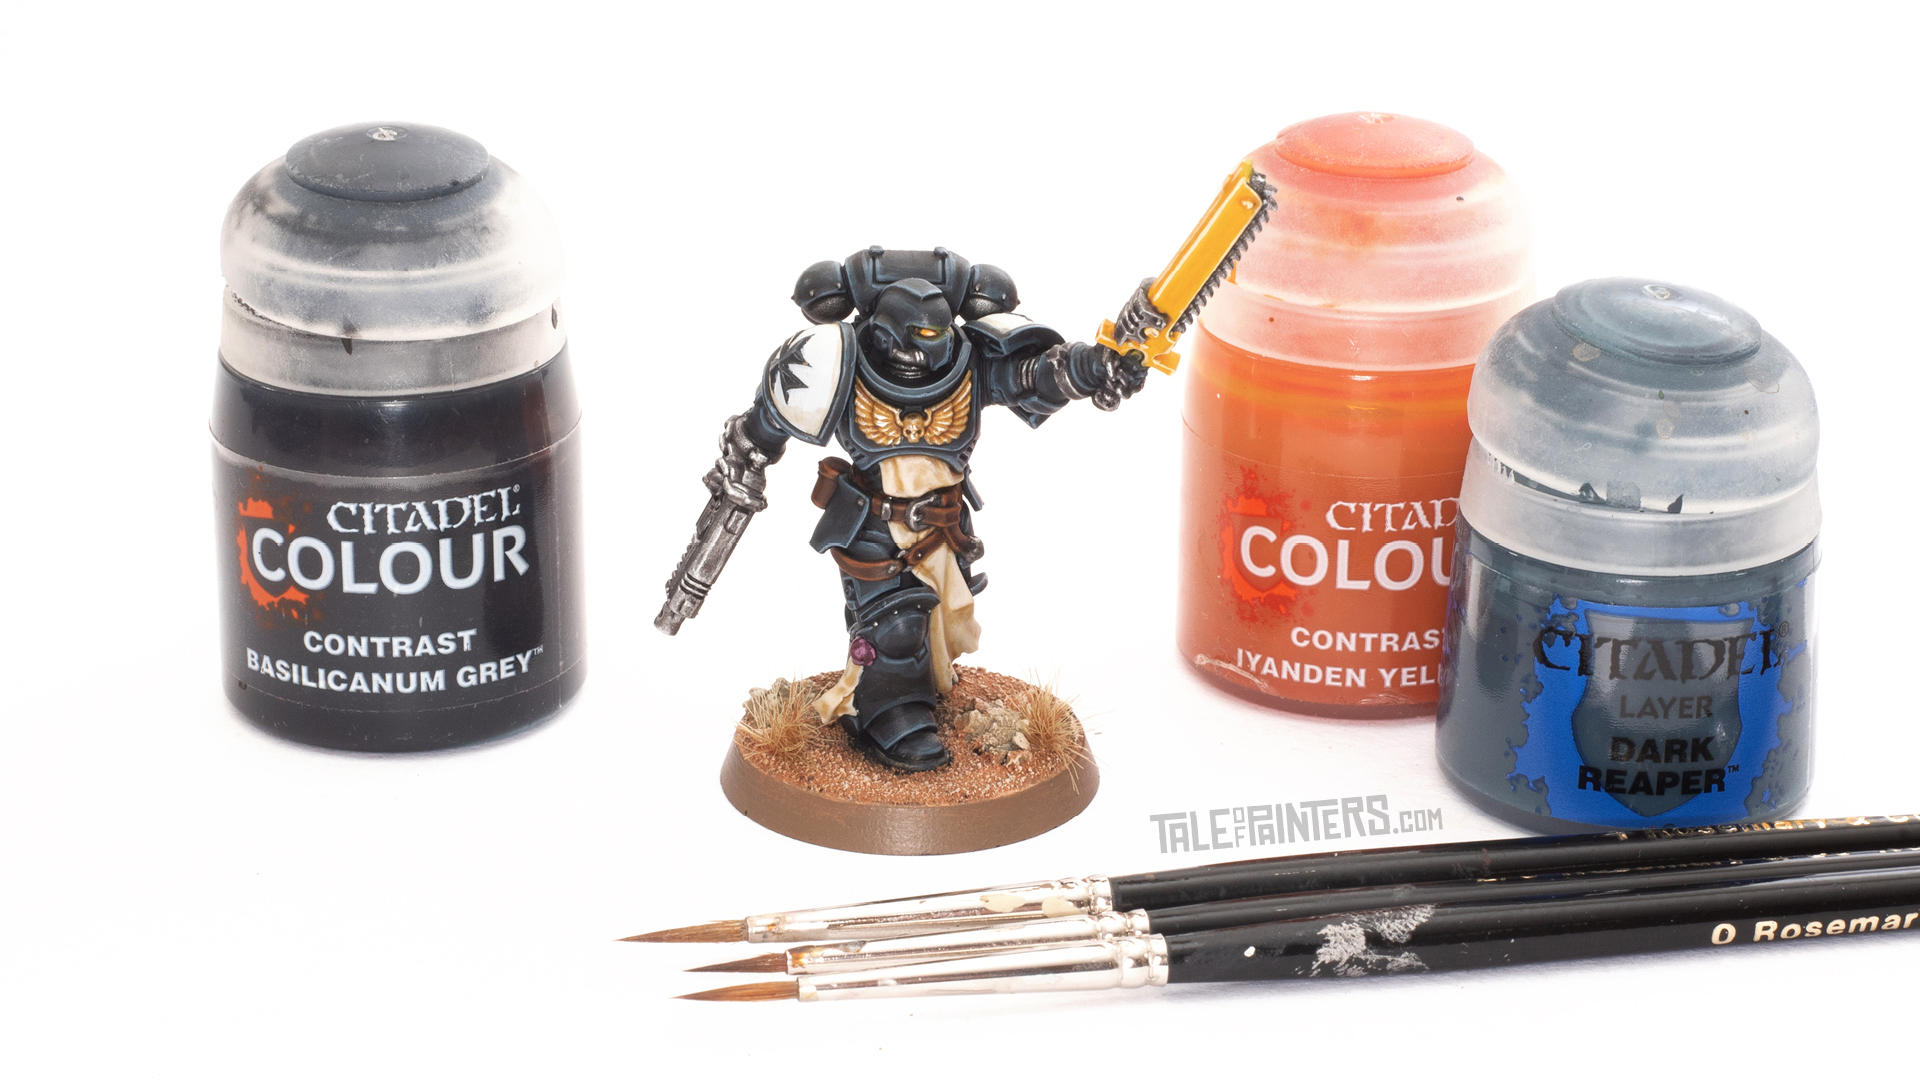
Thin some Dark Reaper paint with water on a mixing palette (old white tile is perfect) and apply really wide highlights to the armour.Repeat this a second time to increase the intensity of the colour of these translucent coats.
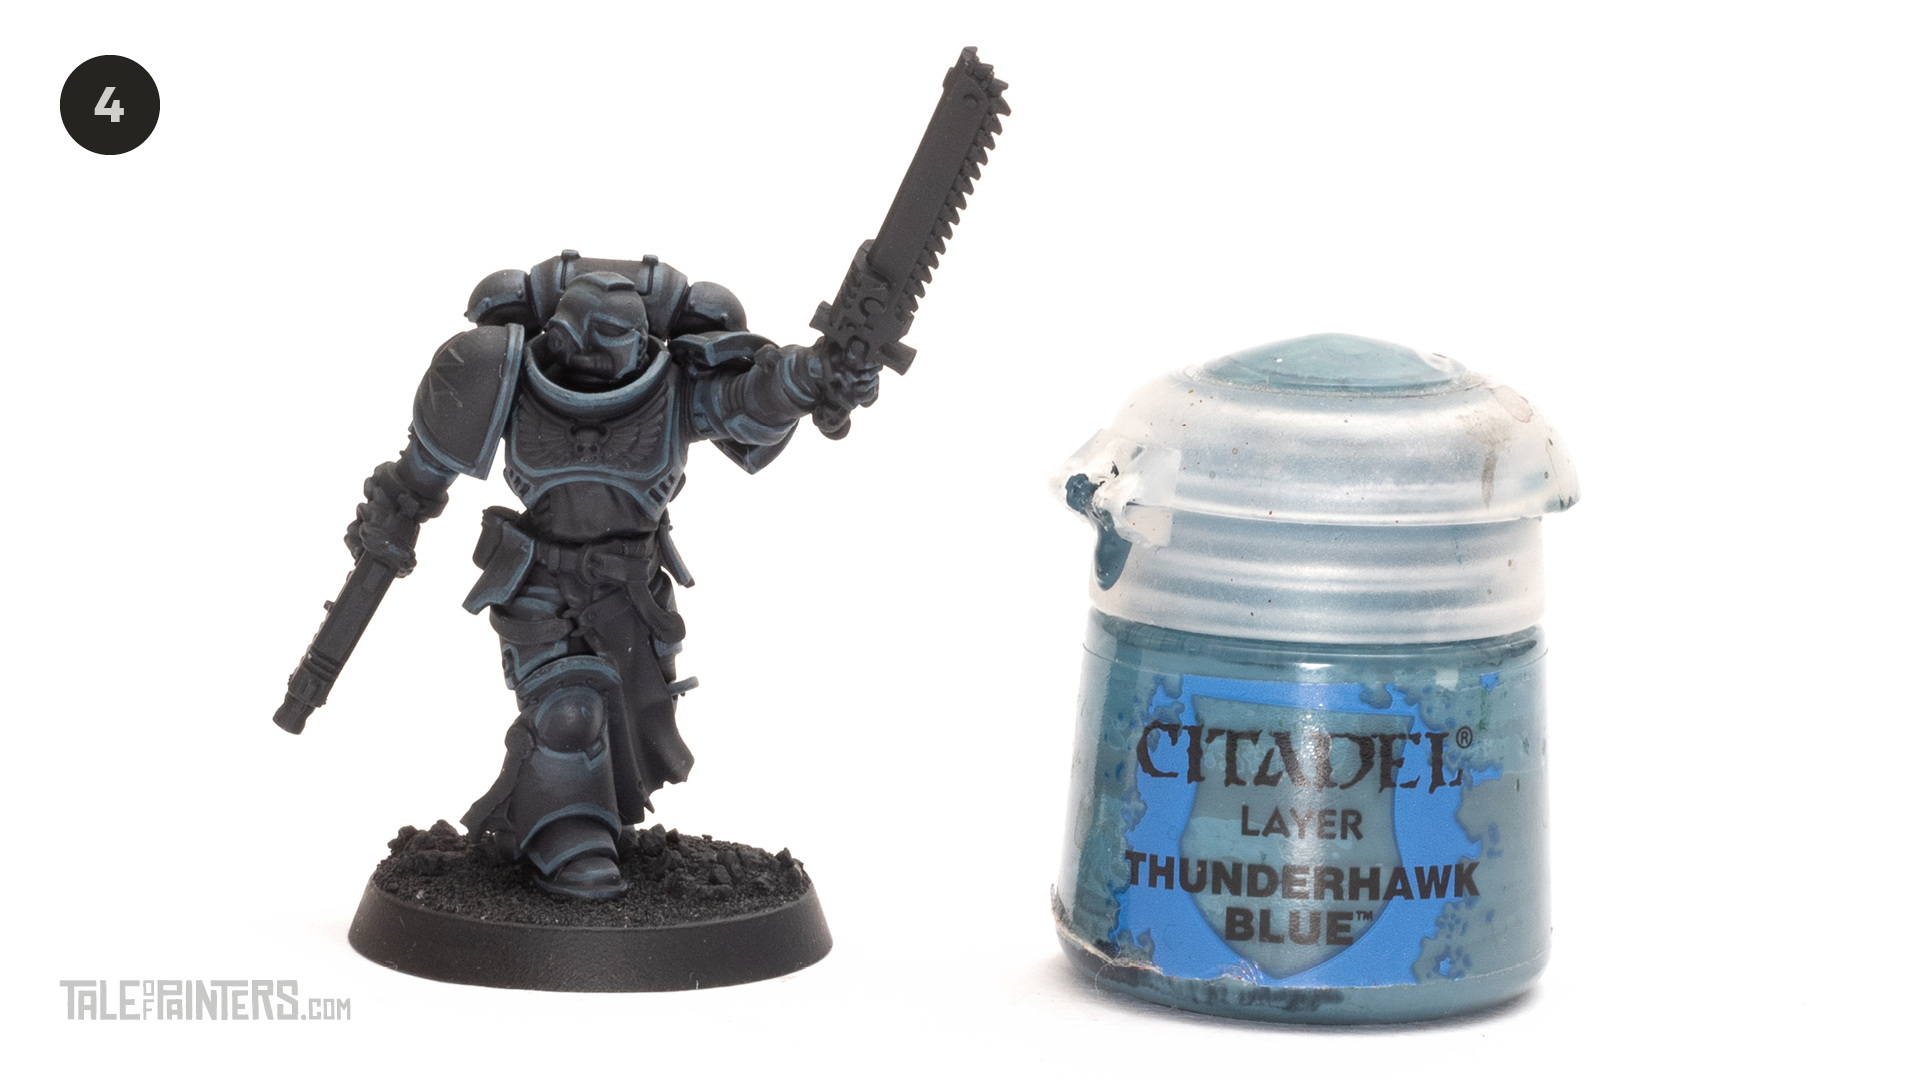
Paint a wide highlight to the edge of the armour using Thunderhawk Blue.
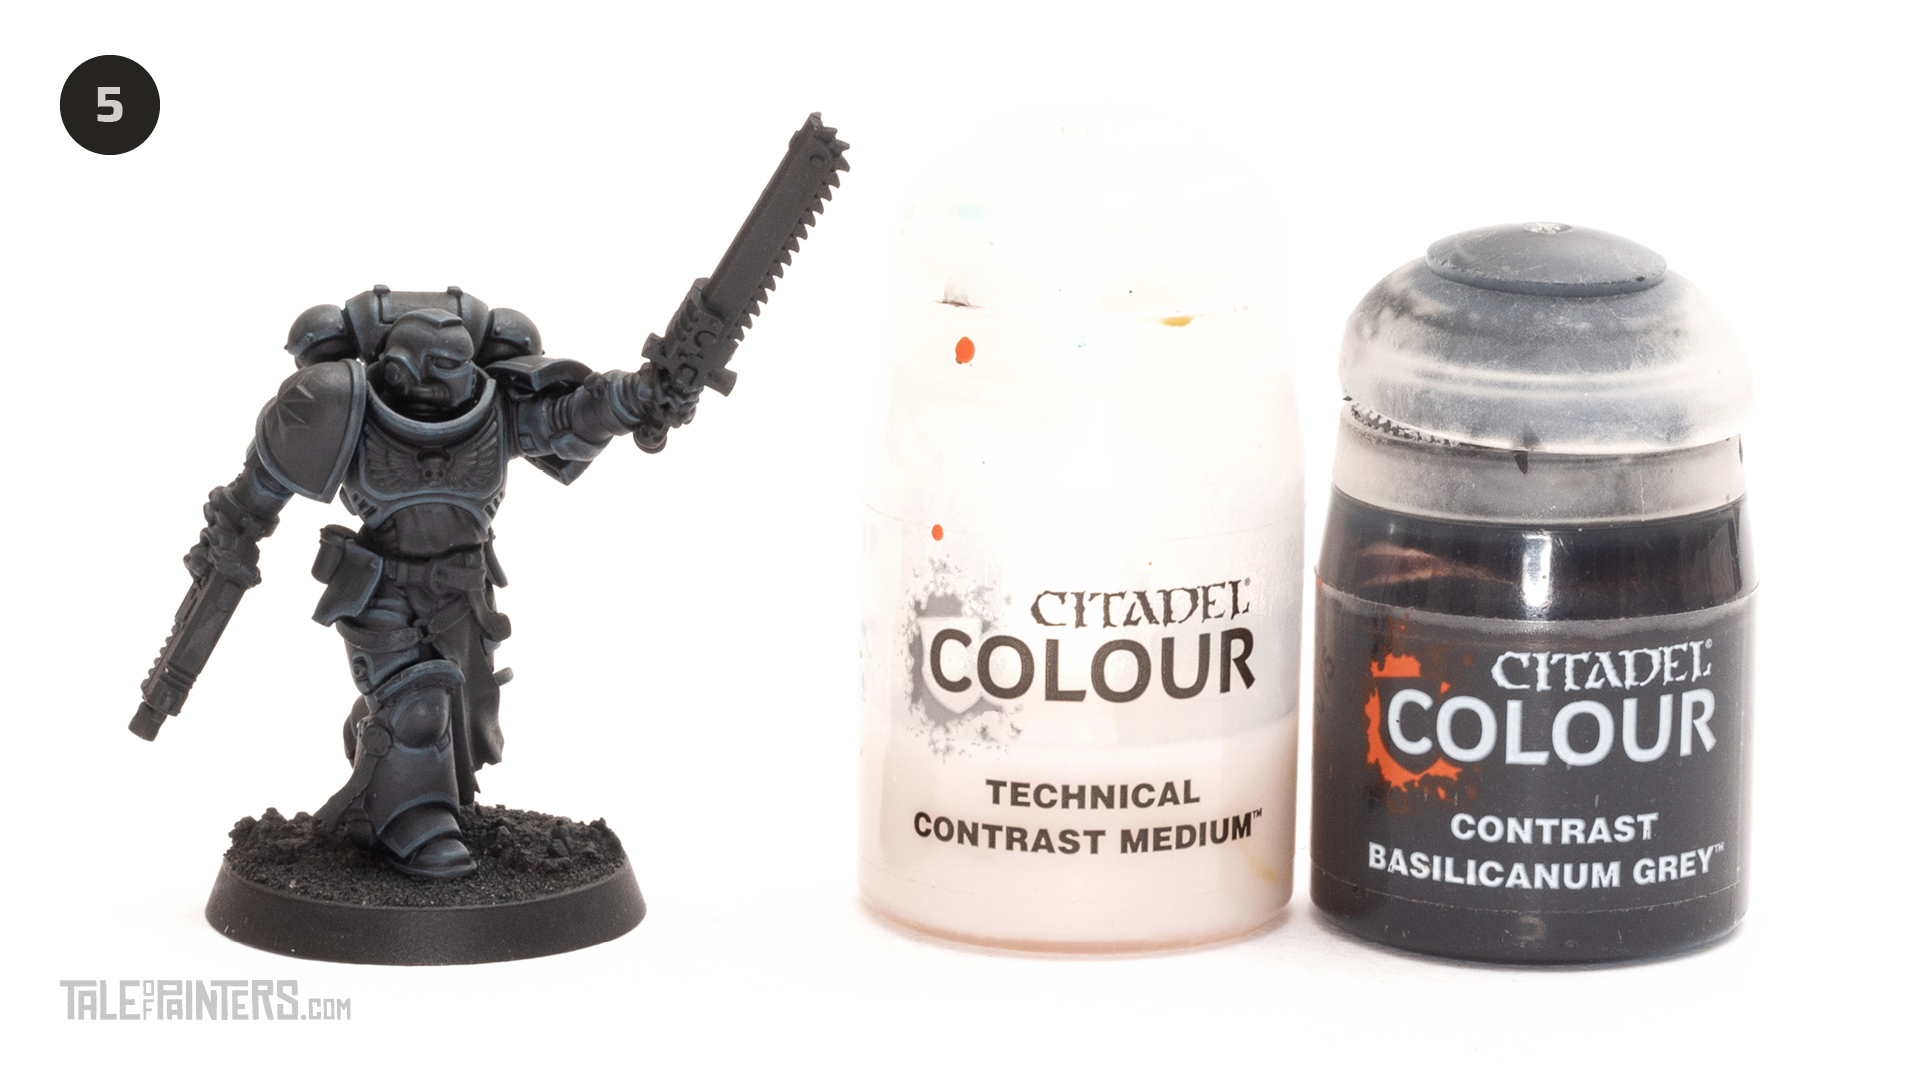
Create a mix of 50:50 Basilicanum Grey and Contrast Medium and cover the whole model. This will blend the previous layers and shade the Corvus Black layer with a darker shade.
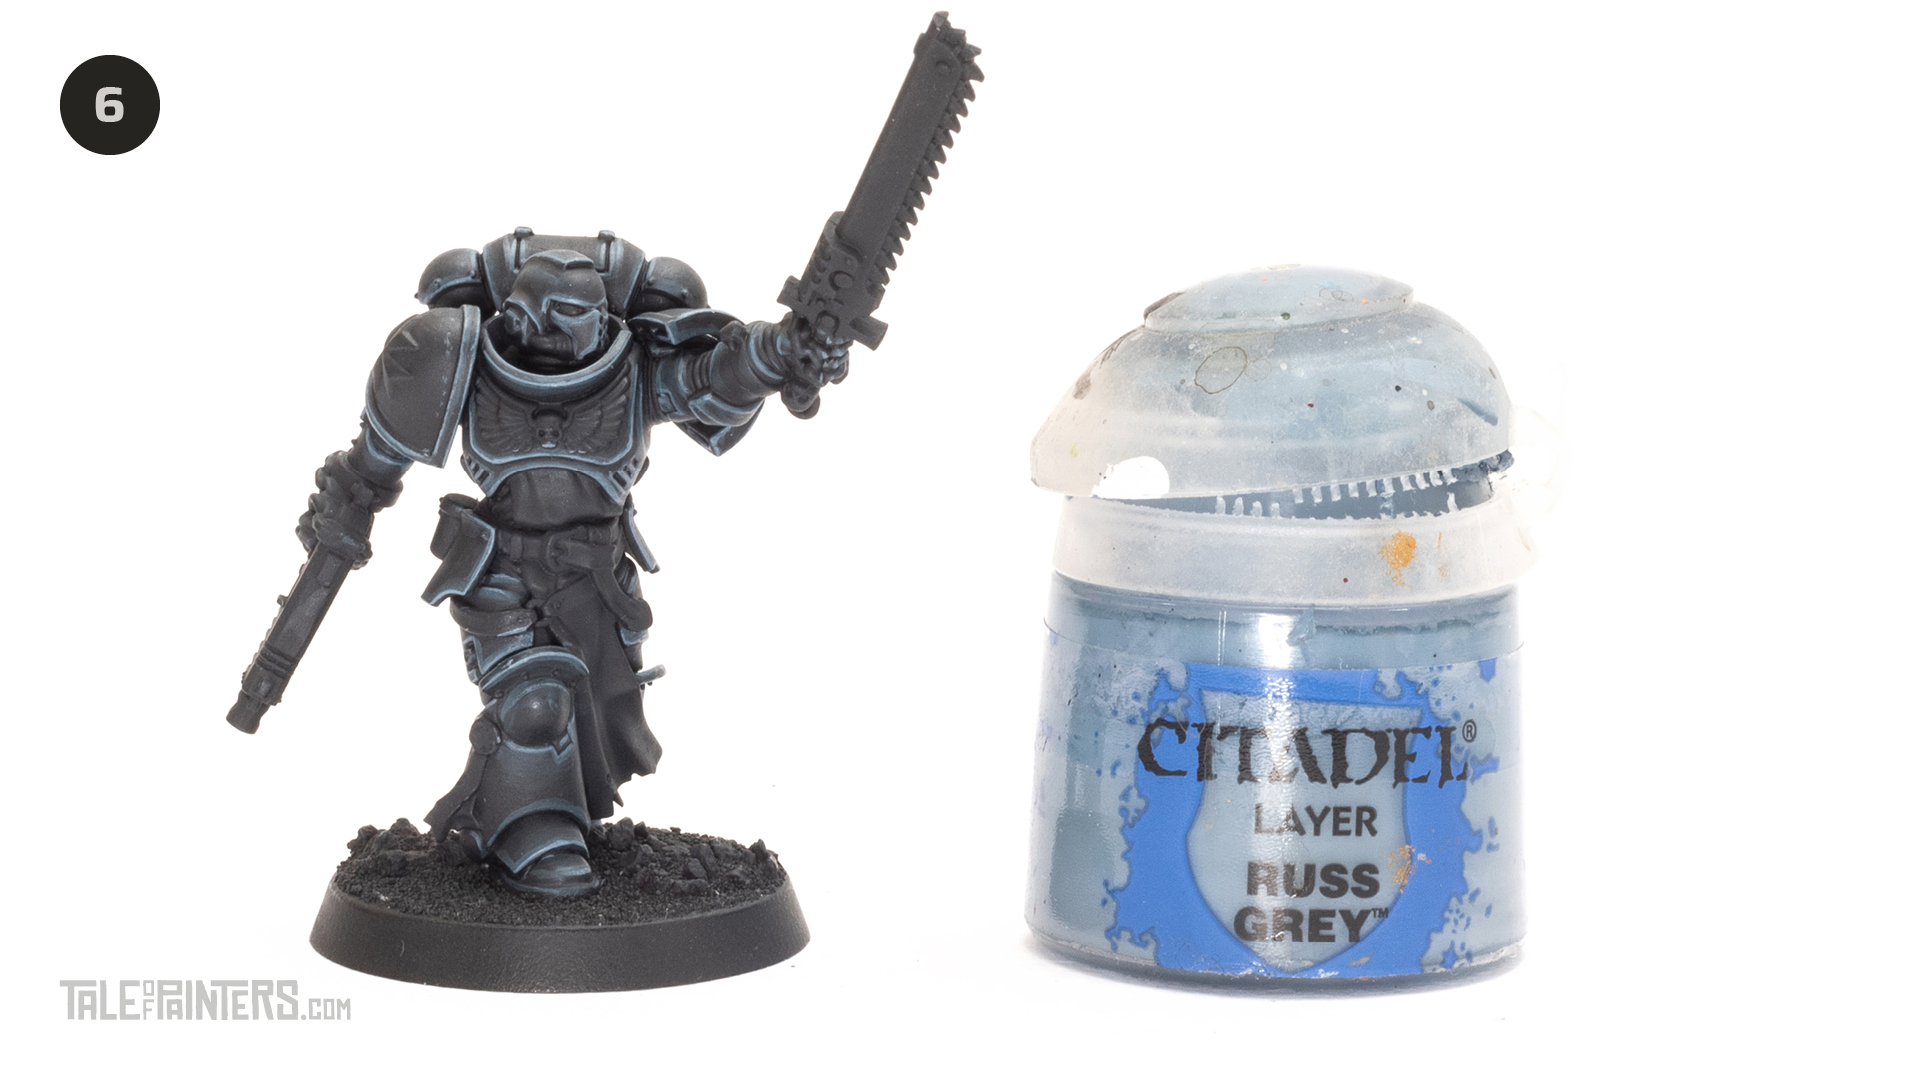
Thin edge highlight the armour with Russ Grey. Thin with a touch of water to help flow the paint from the bristles. You don’t want to dragging the paint off the brush tip as it’s hard to be accurate.
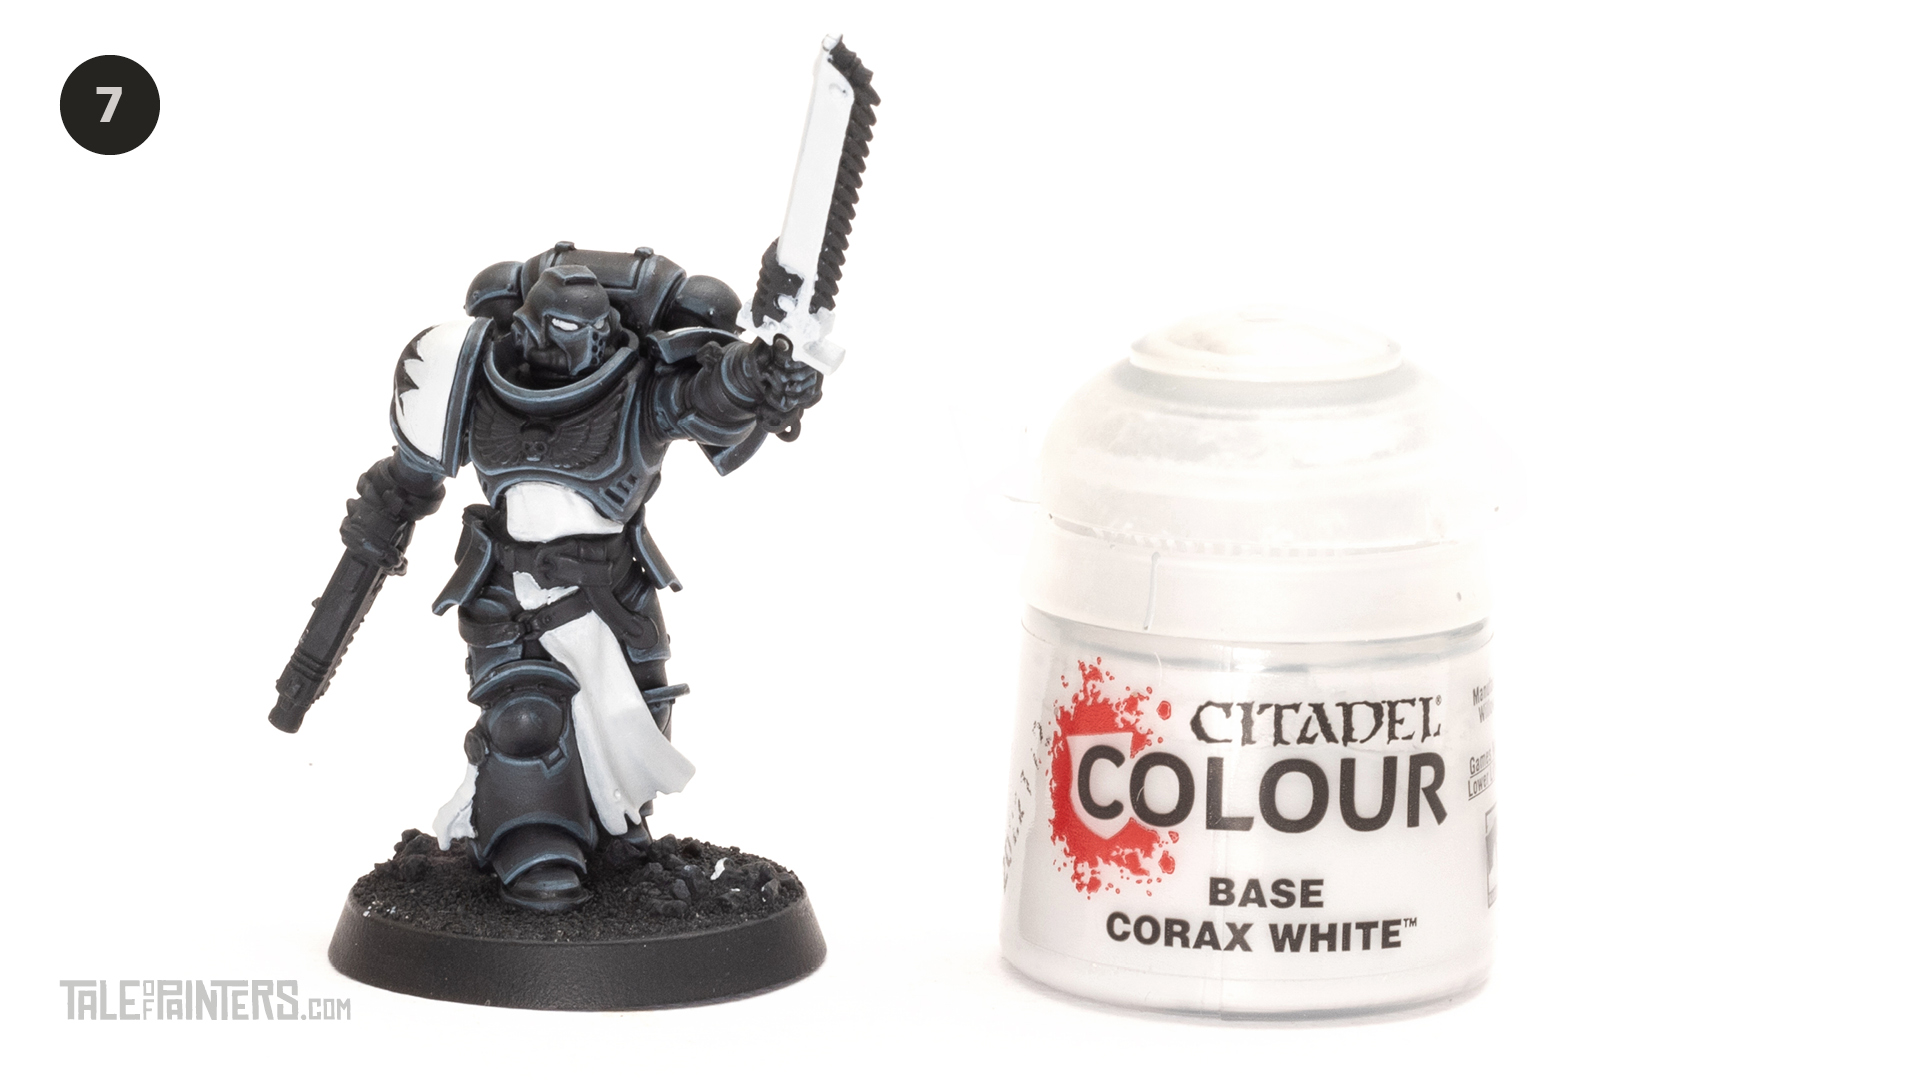
Corax White can be a pain to use and sometimes has the consistency of cottage cheese but if you get some out of the pot and mix some water with it on a mixing palette its good to go. Paint the shoulder pads, chainsword, eyes and tabard with it. You can leave the shoulder pads off the model and spray those with a white undercoat spray if you want to save time.
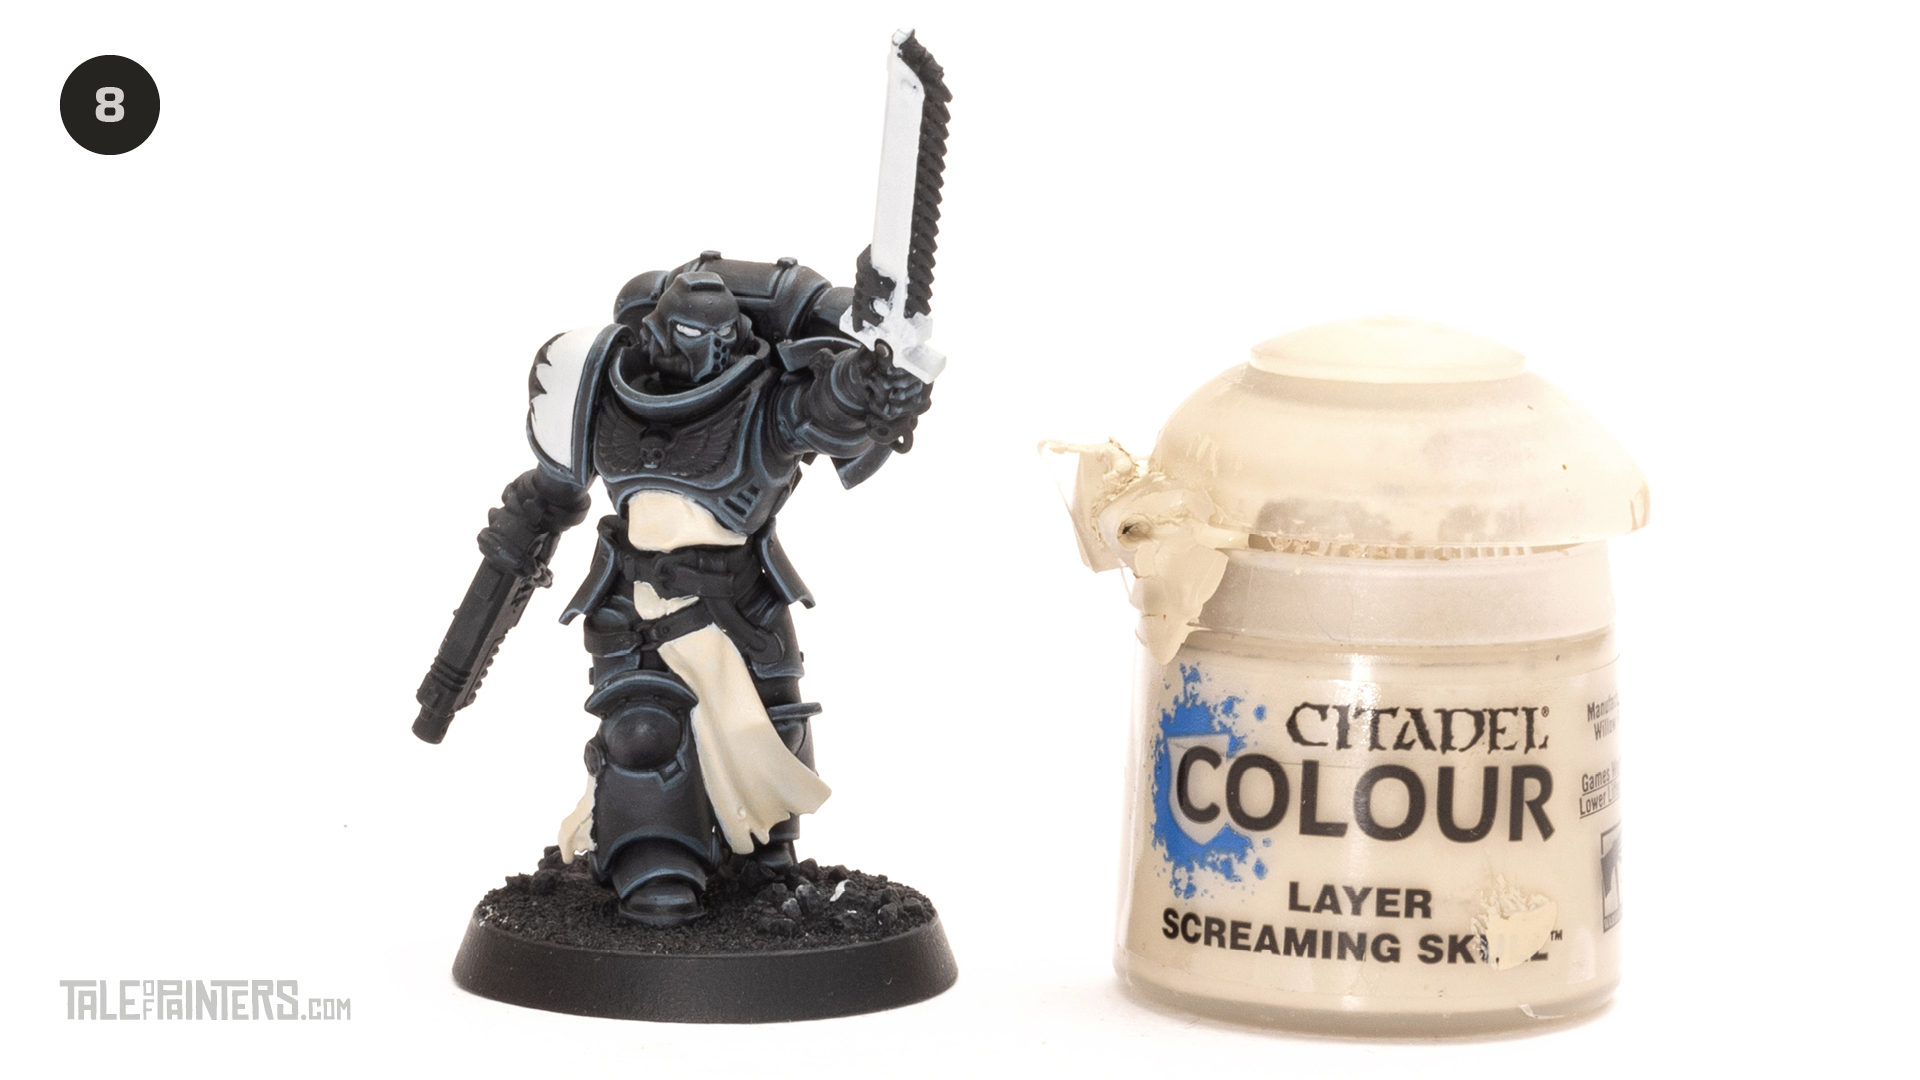
Paint the tabard and oath parchment (purity seals) with Screaming Skull.

Create a mix of 50:50 Skeleton Horde and Contrast Medium and carefully paint it into the folds and creases of the tabard and parchment. A light coat is perfect, don’t overwork it when it’s wet. Once dry, repeat to increase the intensity in the deepest folds.
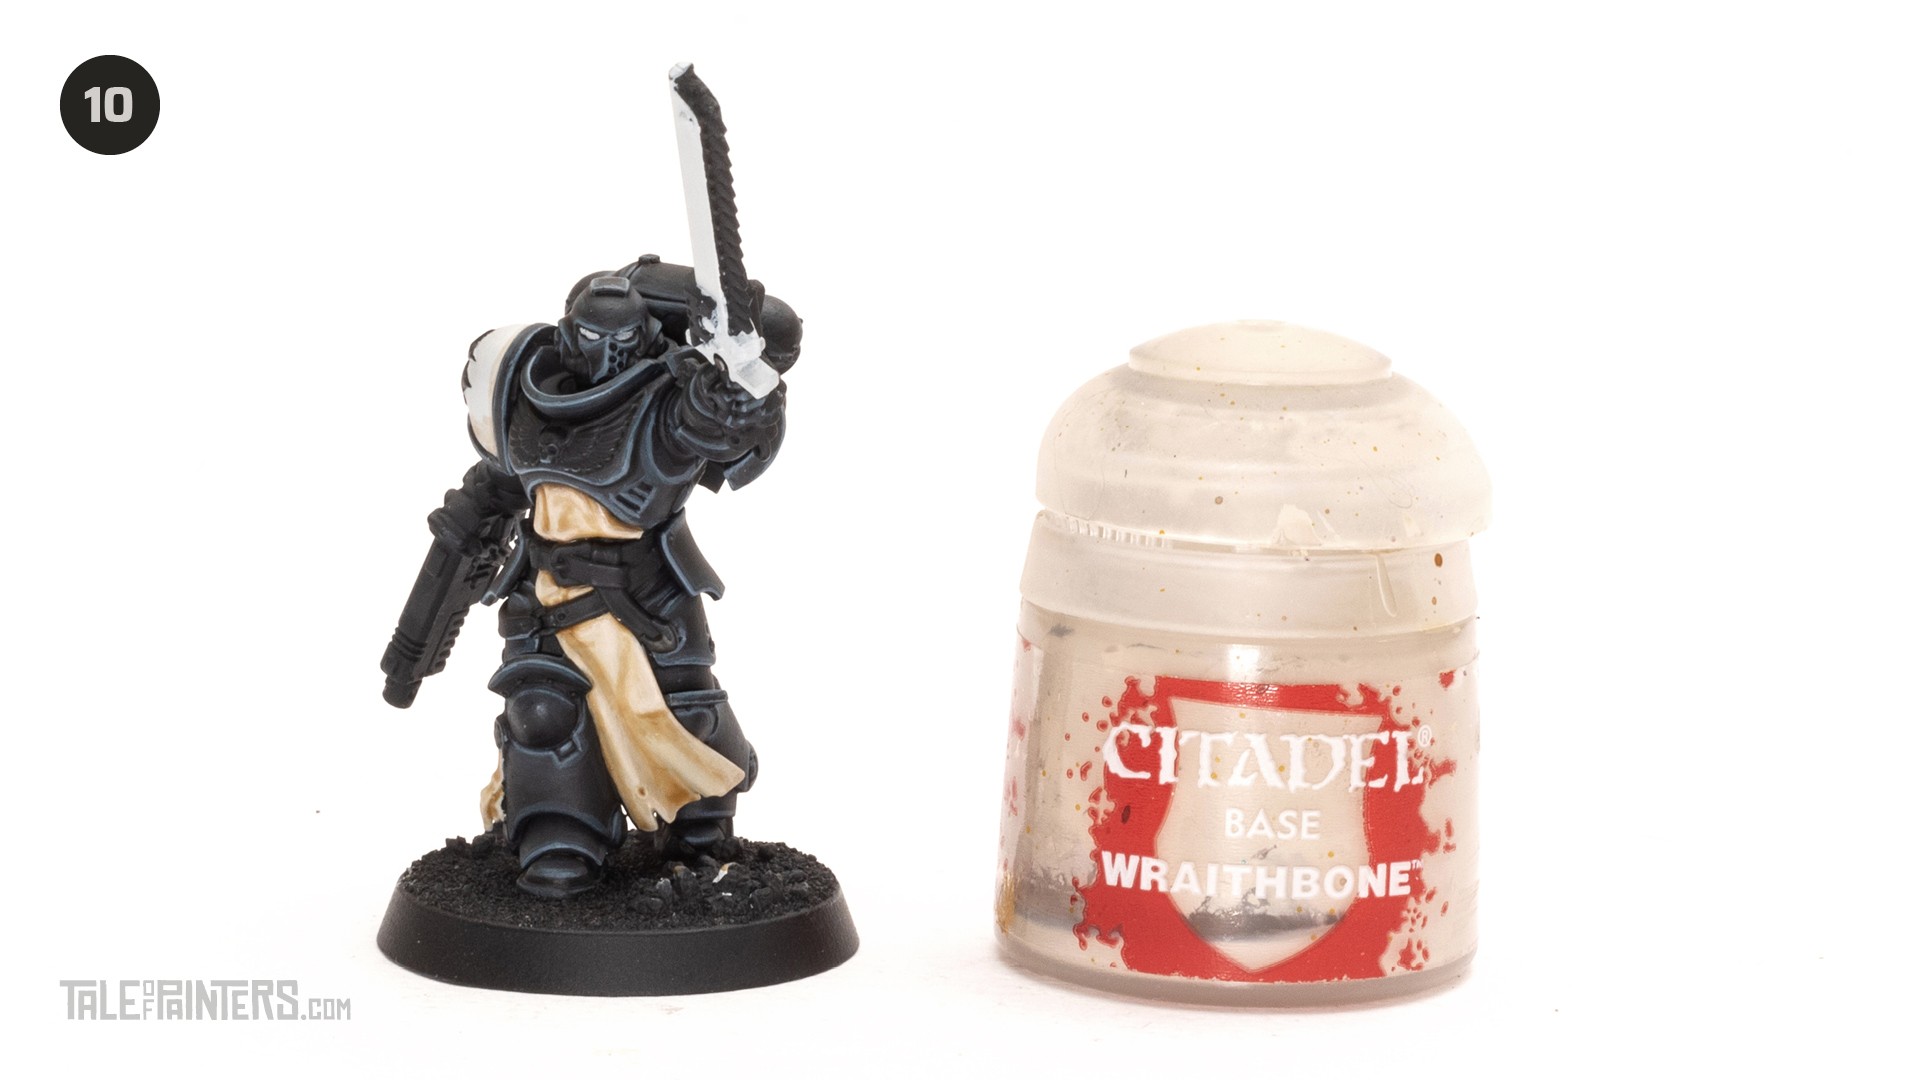
Highlight the edges and raised areas of the tabard and parchment with Wraithbone. hin with a touch of water to help flow the paint from the bristles.
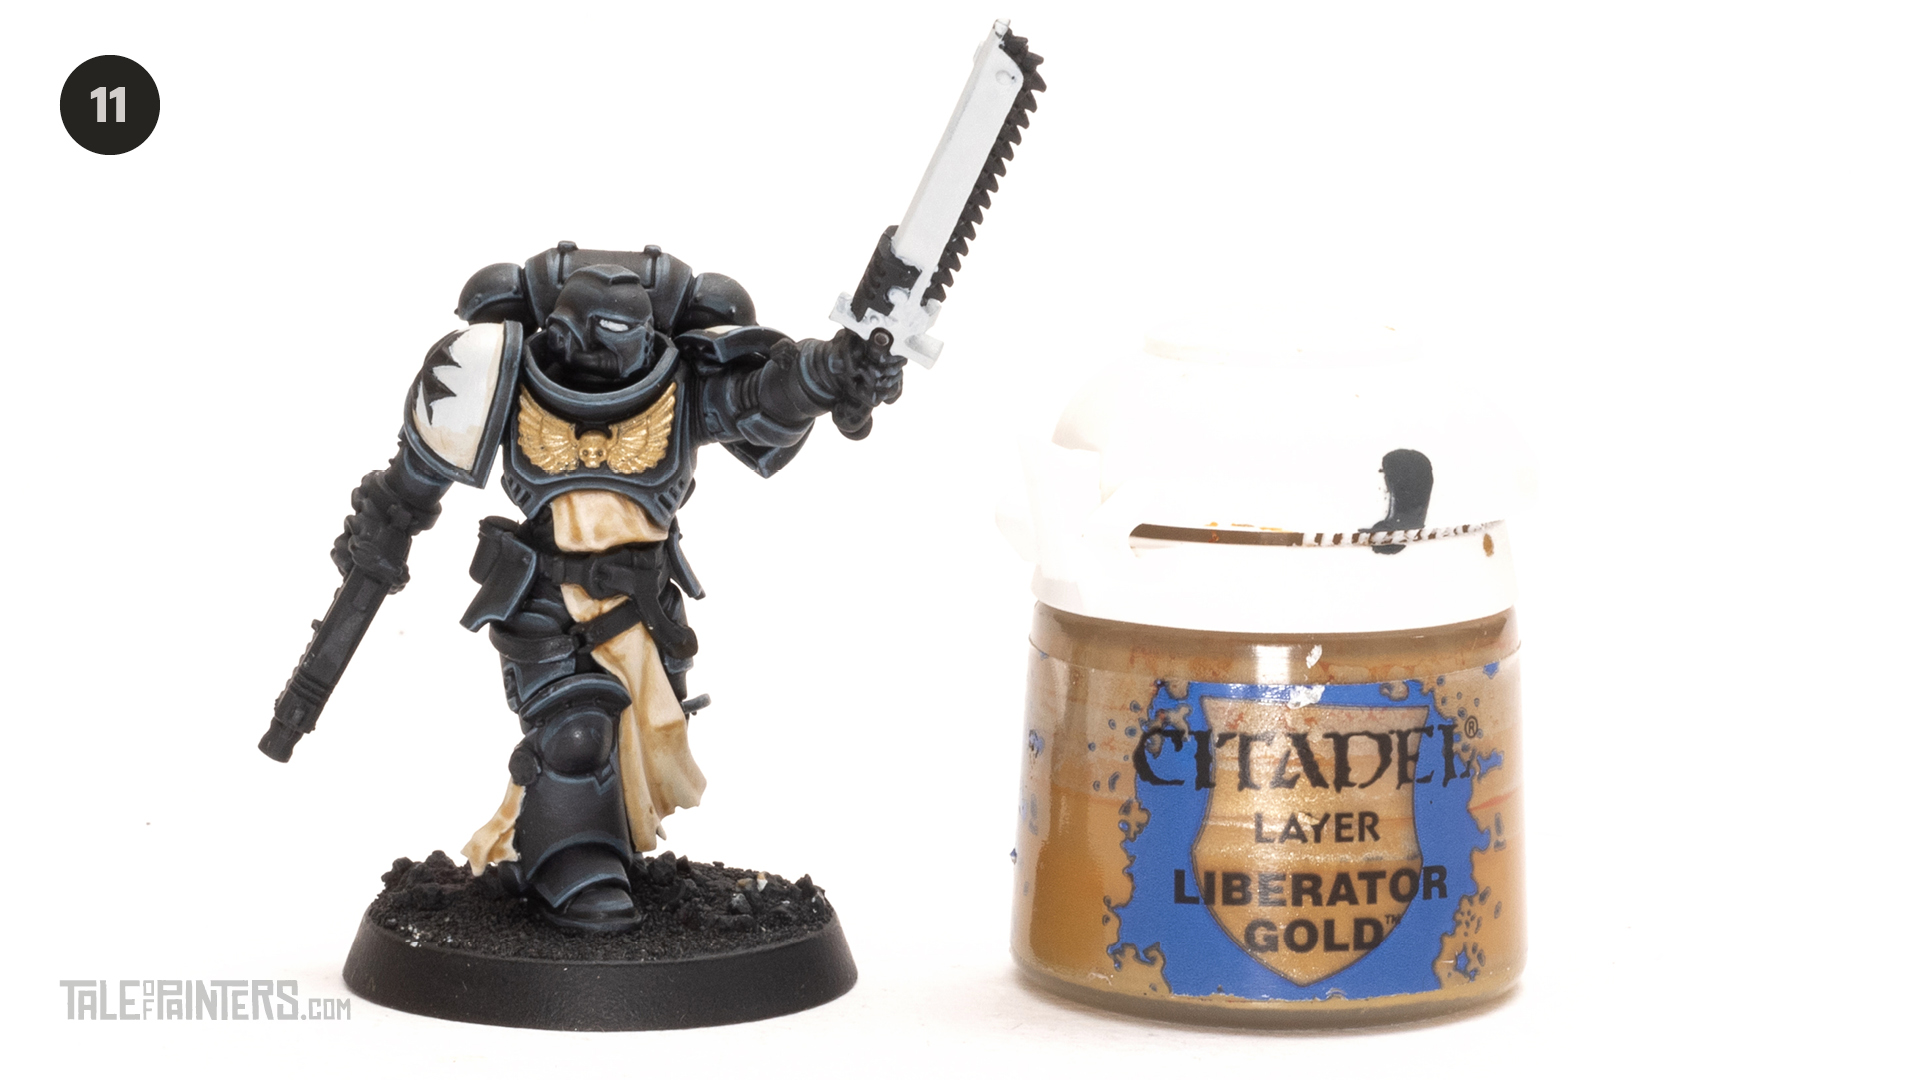
Paint the chest Aquilla with a couple of coats of thinned Liberator Gold.
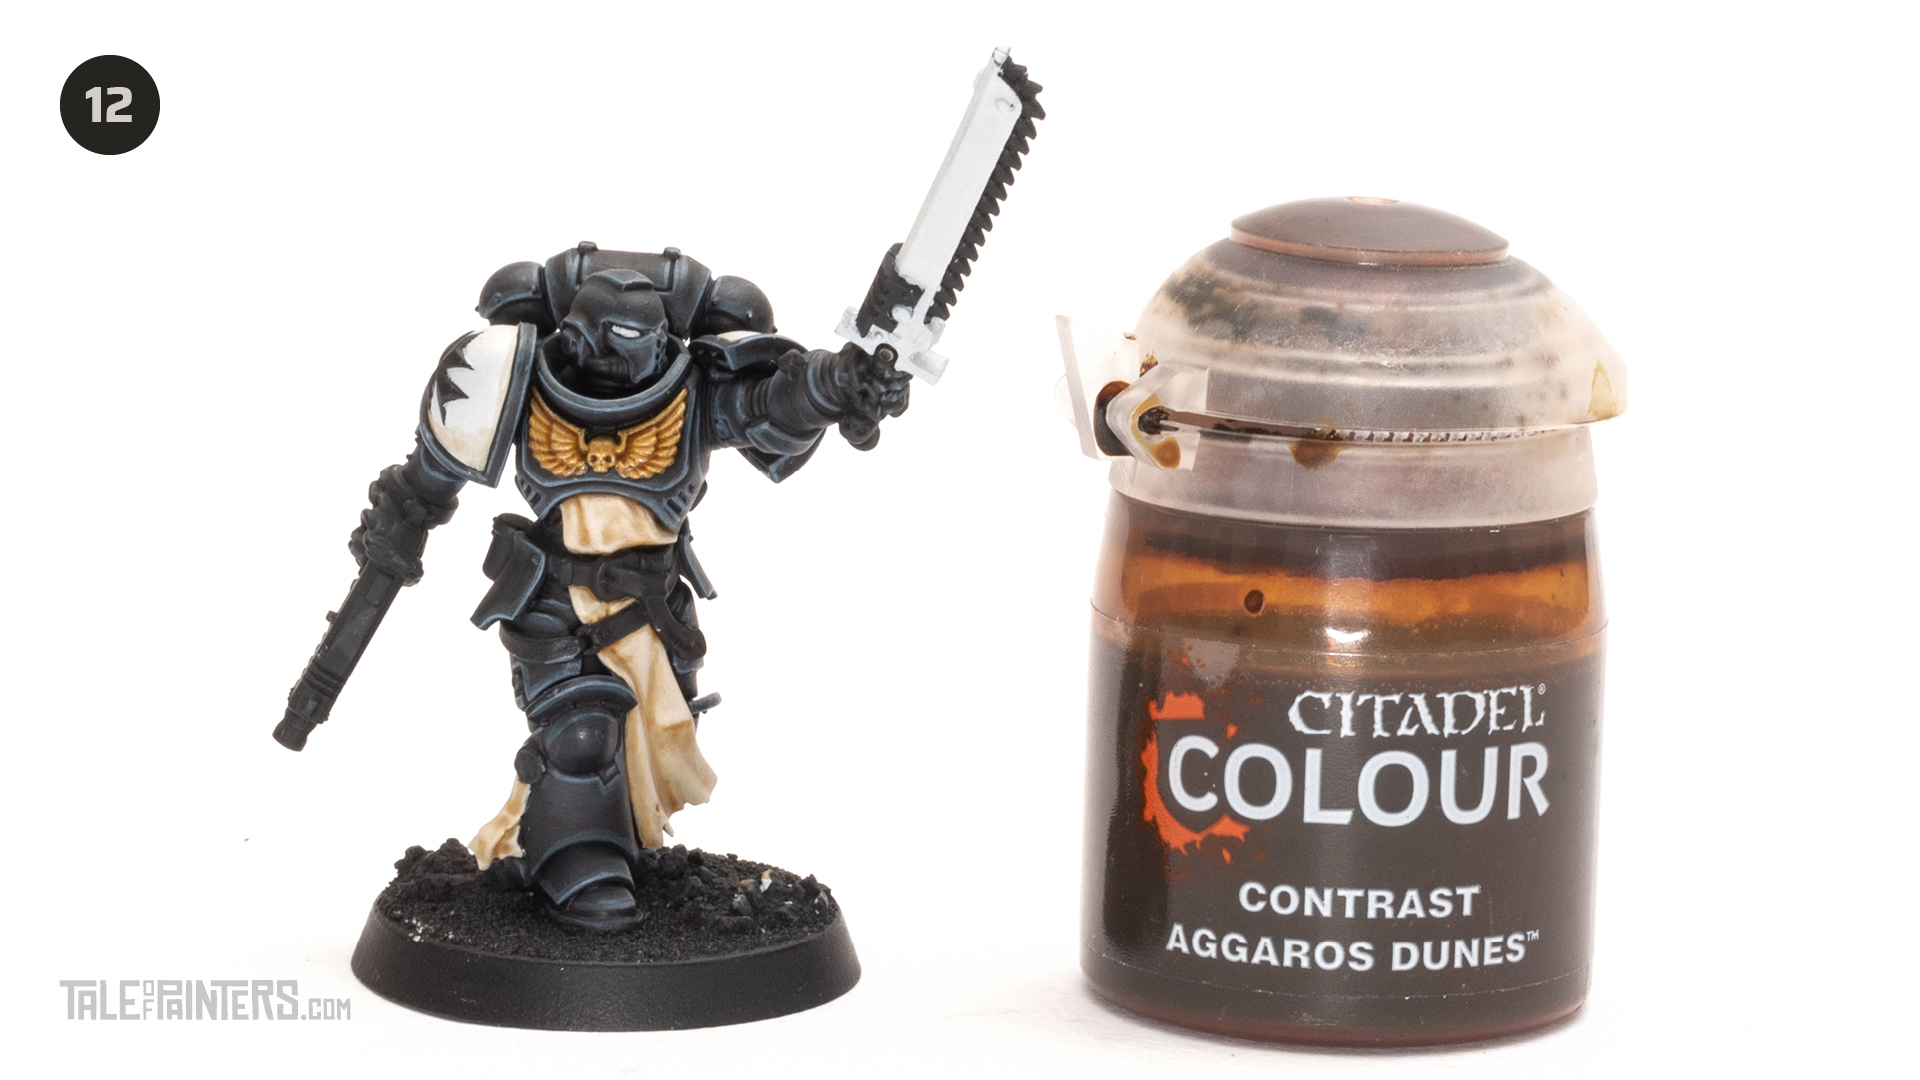
Wash the chest Aquilla with Contrast Aggaros Dunes.
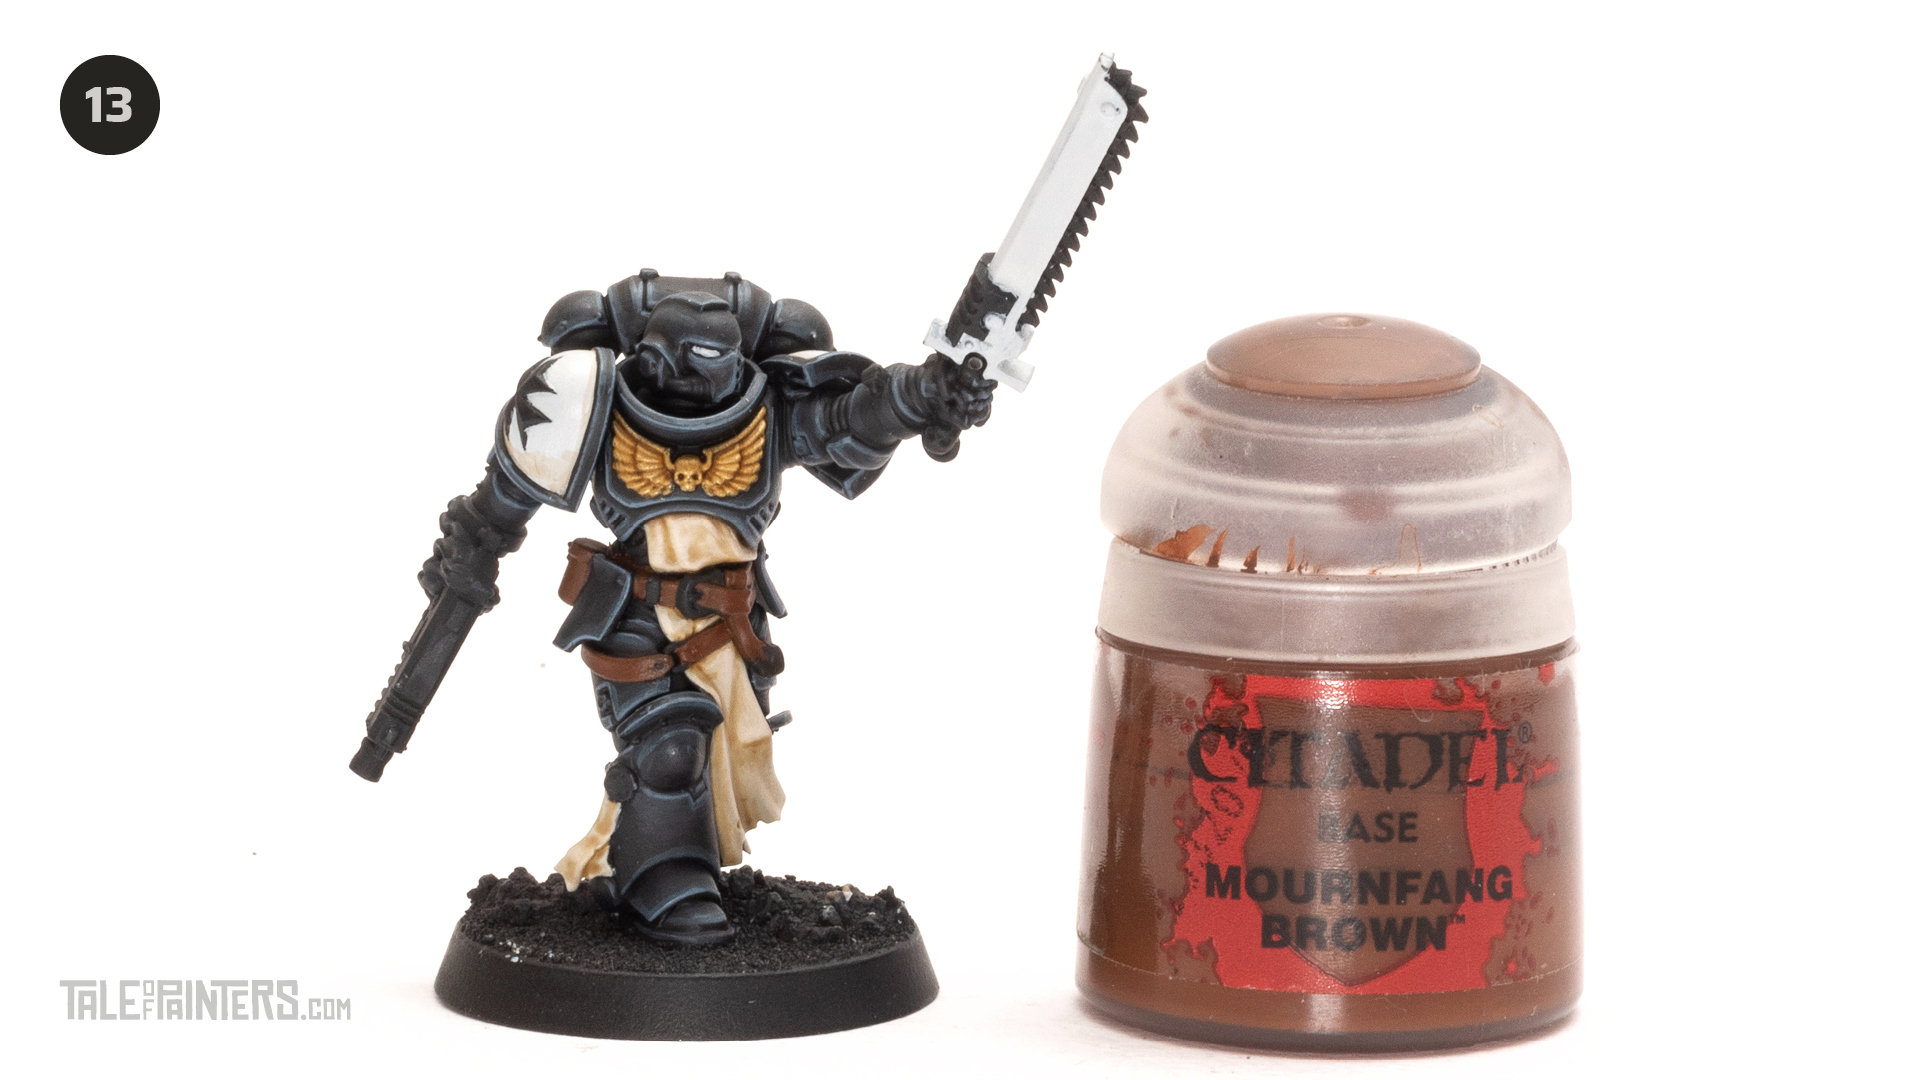
Basecoat the belts and pouches with Mournfang Brown.
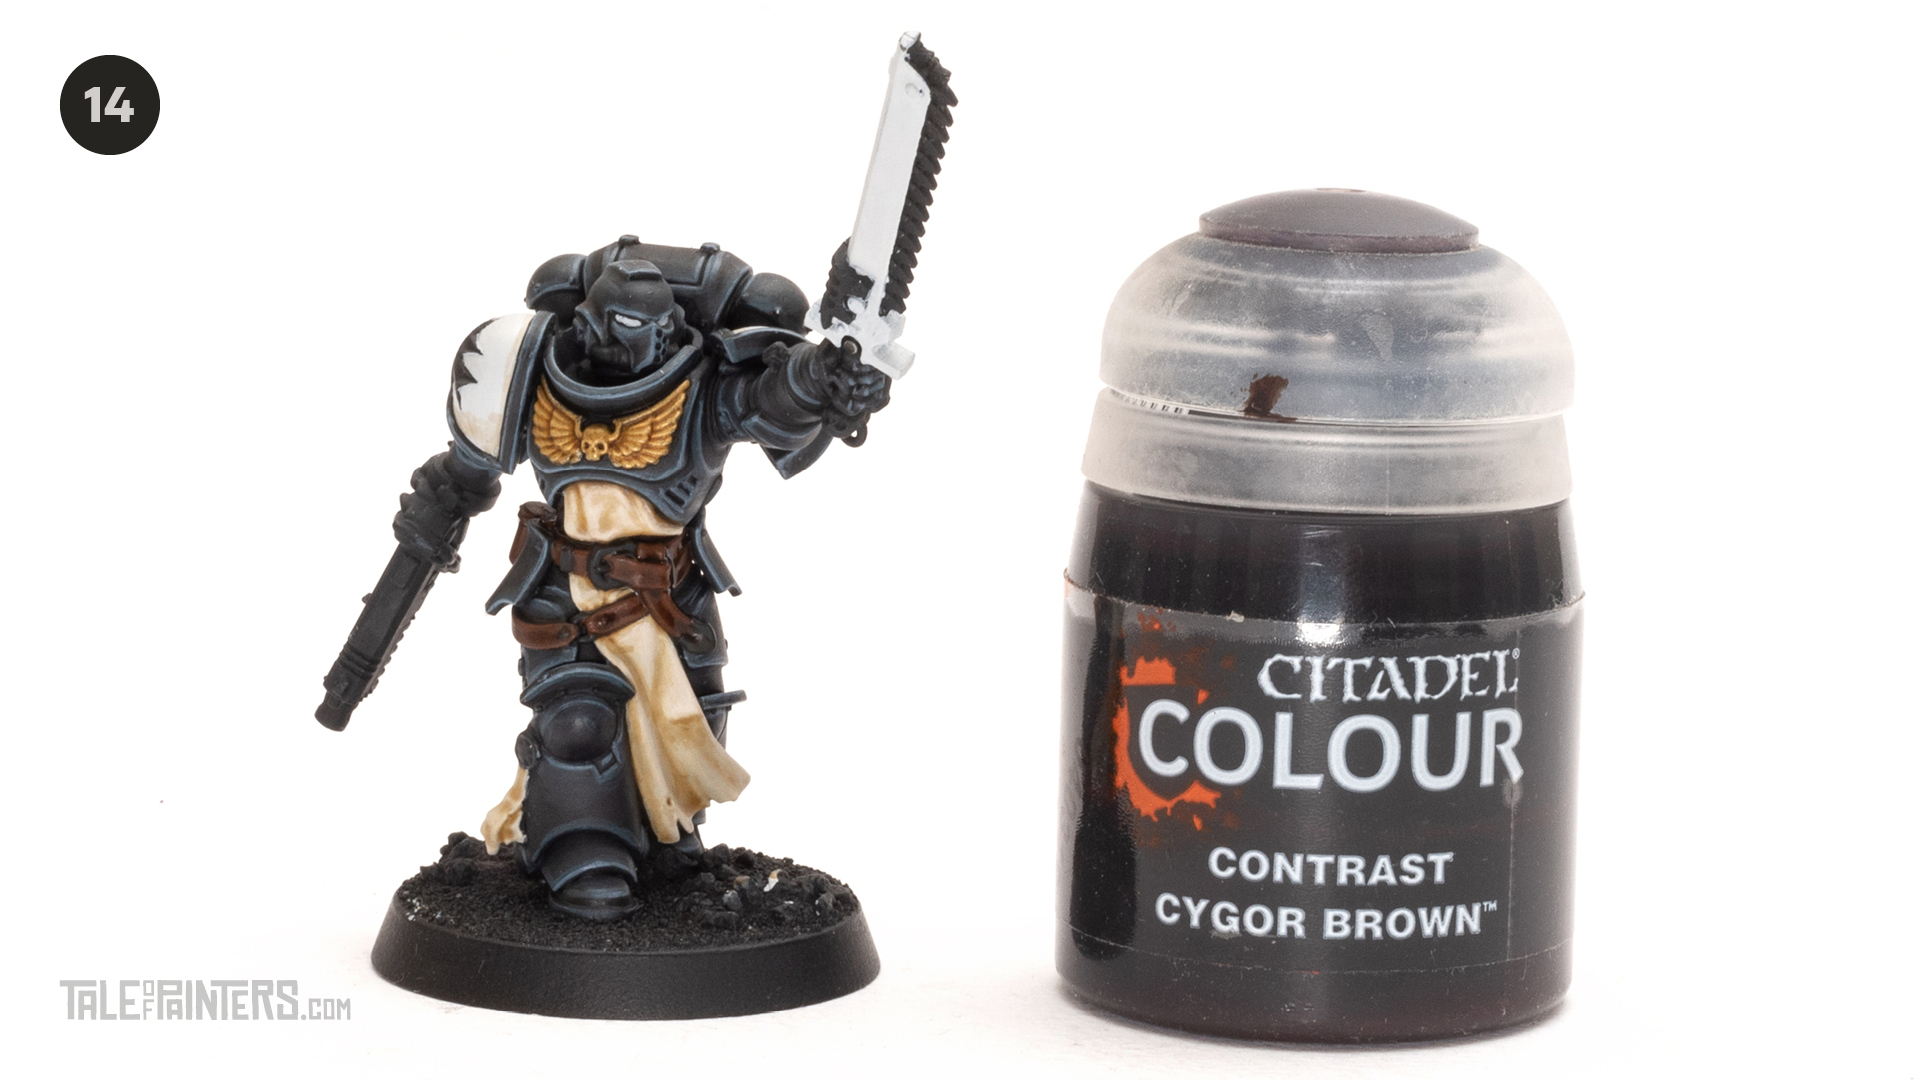
Apply a wash of Contrast Cygor Brown to the belts and pouches.

Apply edge highlights of Skrag Brown to the pouches and belts.
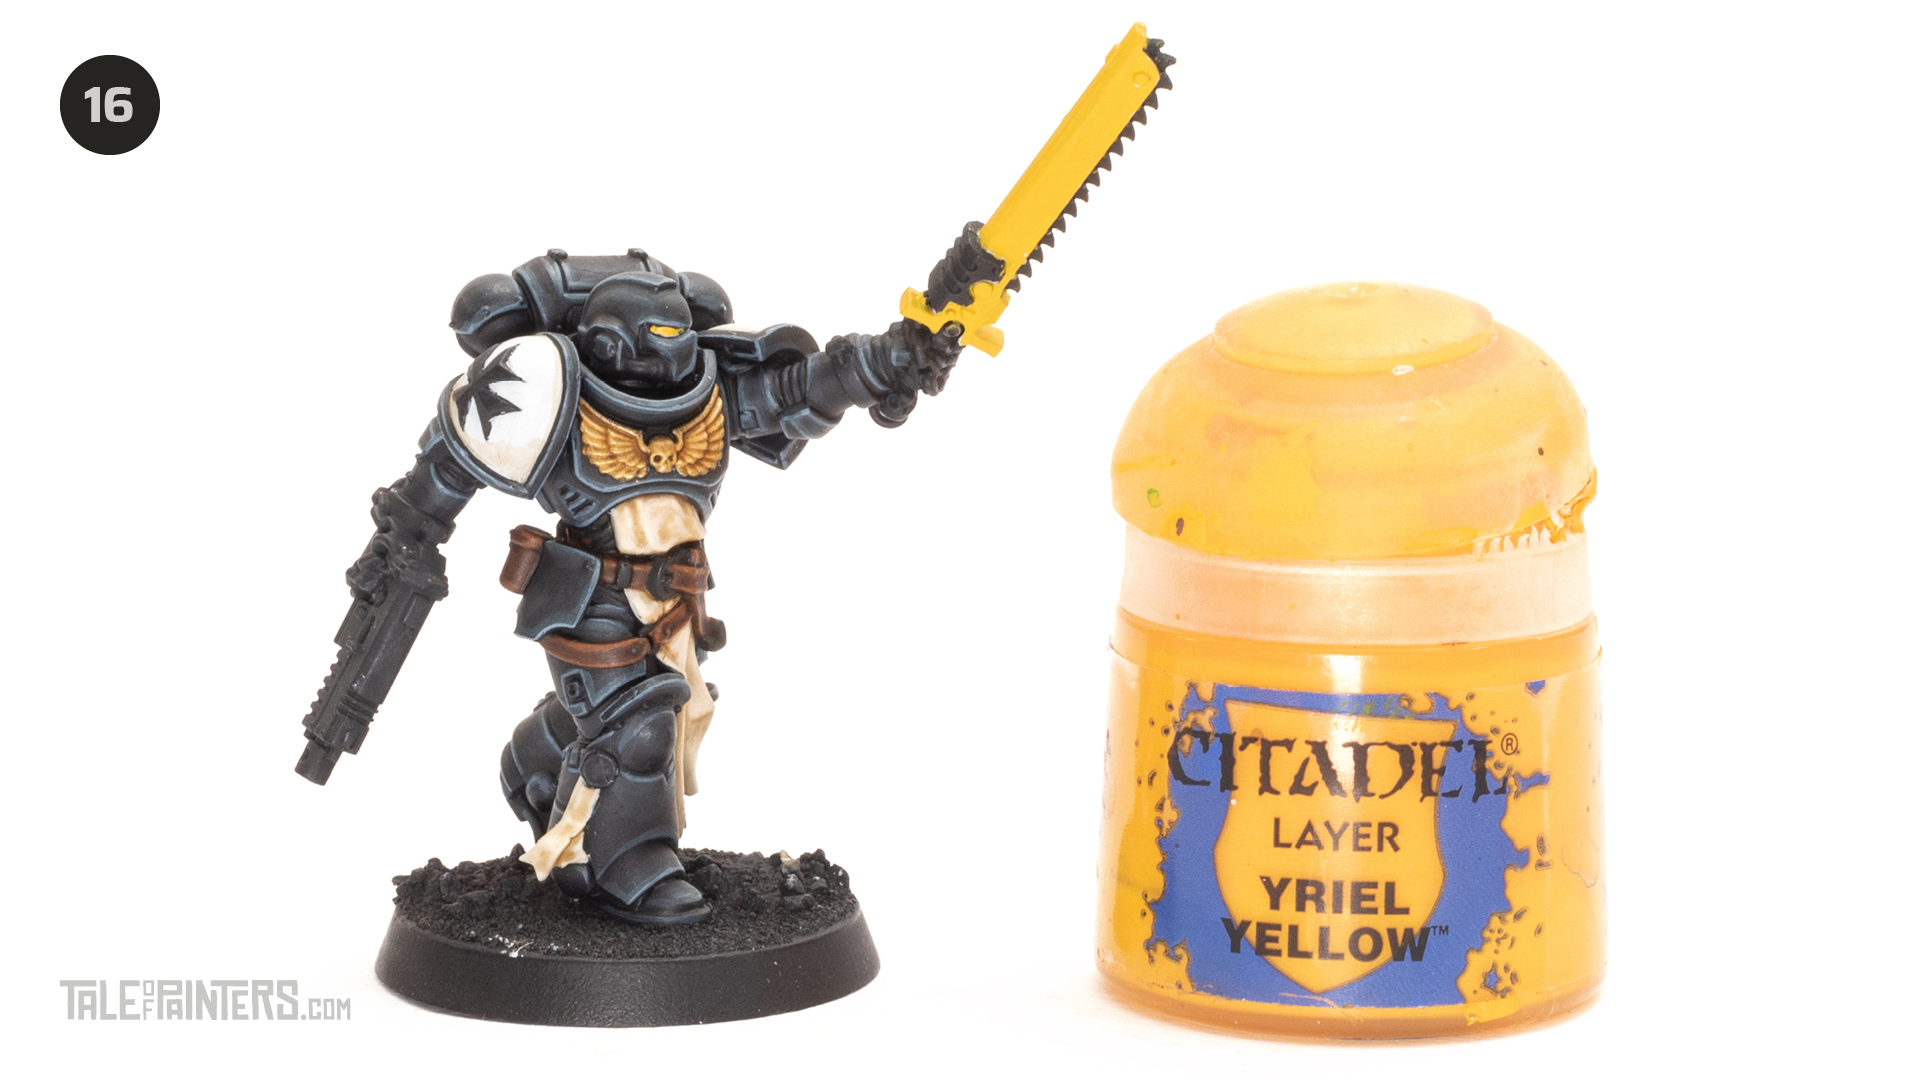
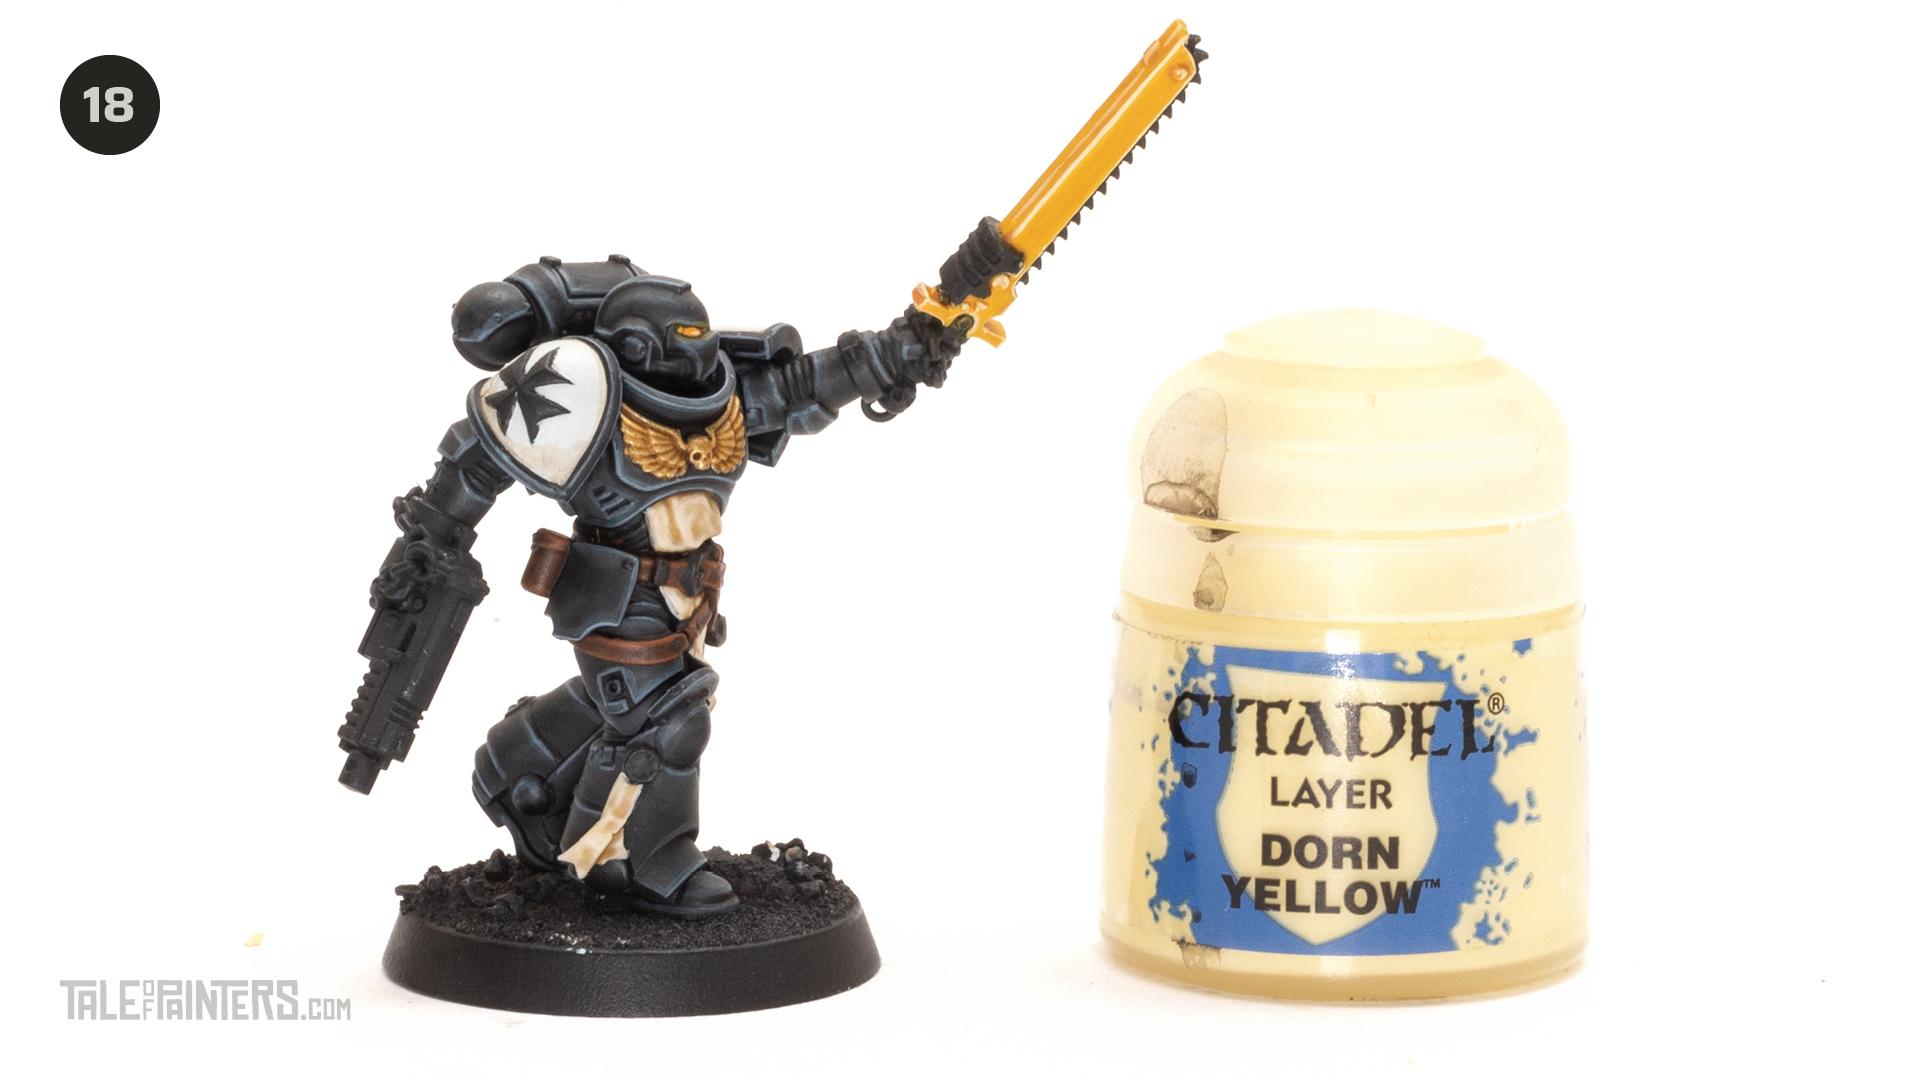
Paint the eyes and chainsword with Yriel Yellow. This might take a couple of thin coats to get a nice coverage.
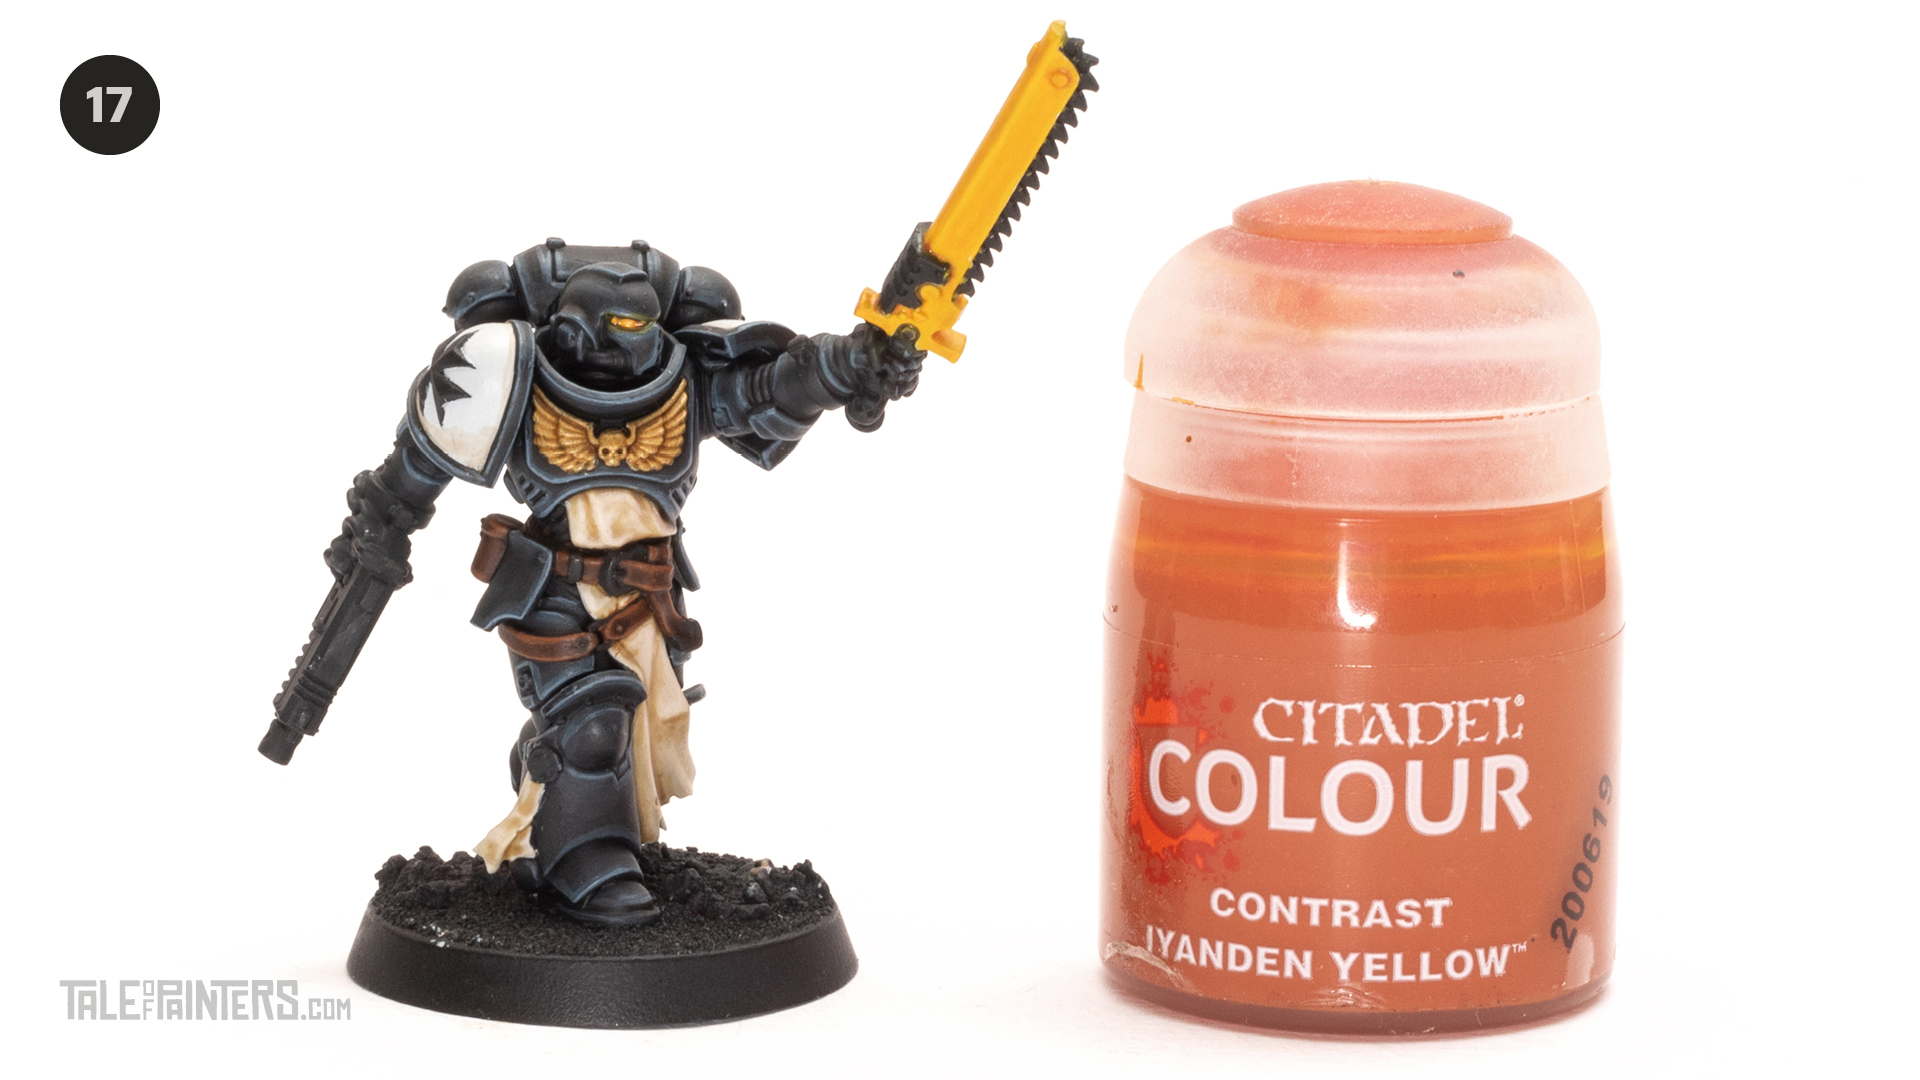
Carefully paint in a single stroke of some Contrast Iyanden Yellow down the middle of the chainsword blade’s flat surfaces. A single stroke is best, if you dab it or over work it you can get weird tidemarks. I start at the top of the blade and work down to the hilt. Once dry then repeat to increase intensity. Run some Contrast Iyanden Yellow into the eye socket.
Edge highlight the chainsword blade with Dorn Yellow. Add a dot of Dorn Yellow at the corner of the eye (nearest nose).
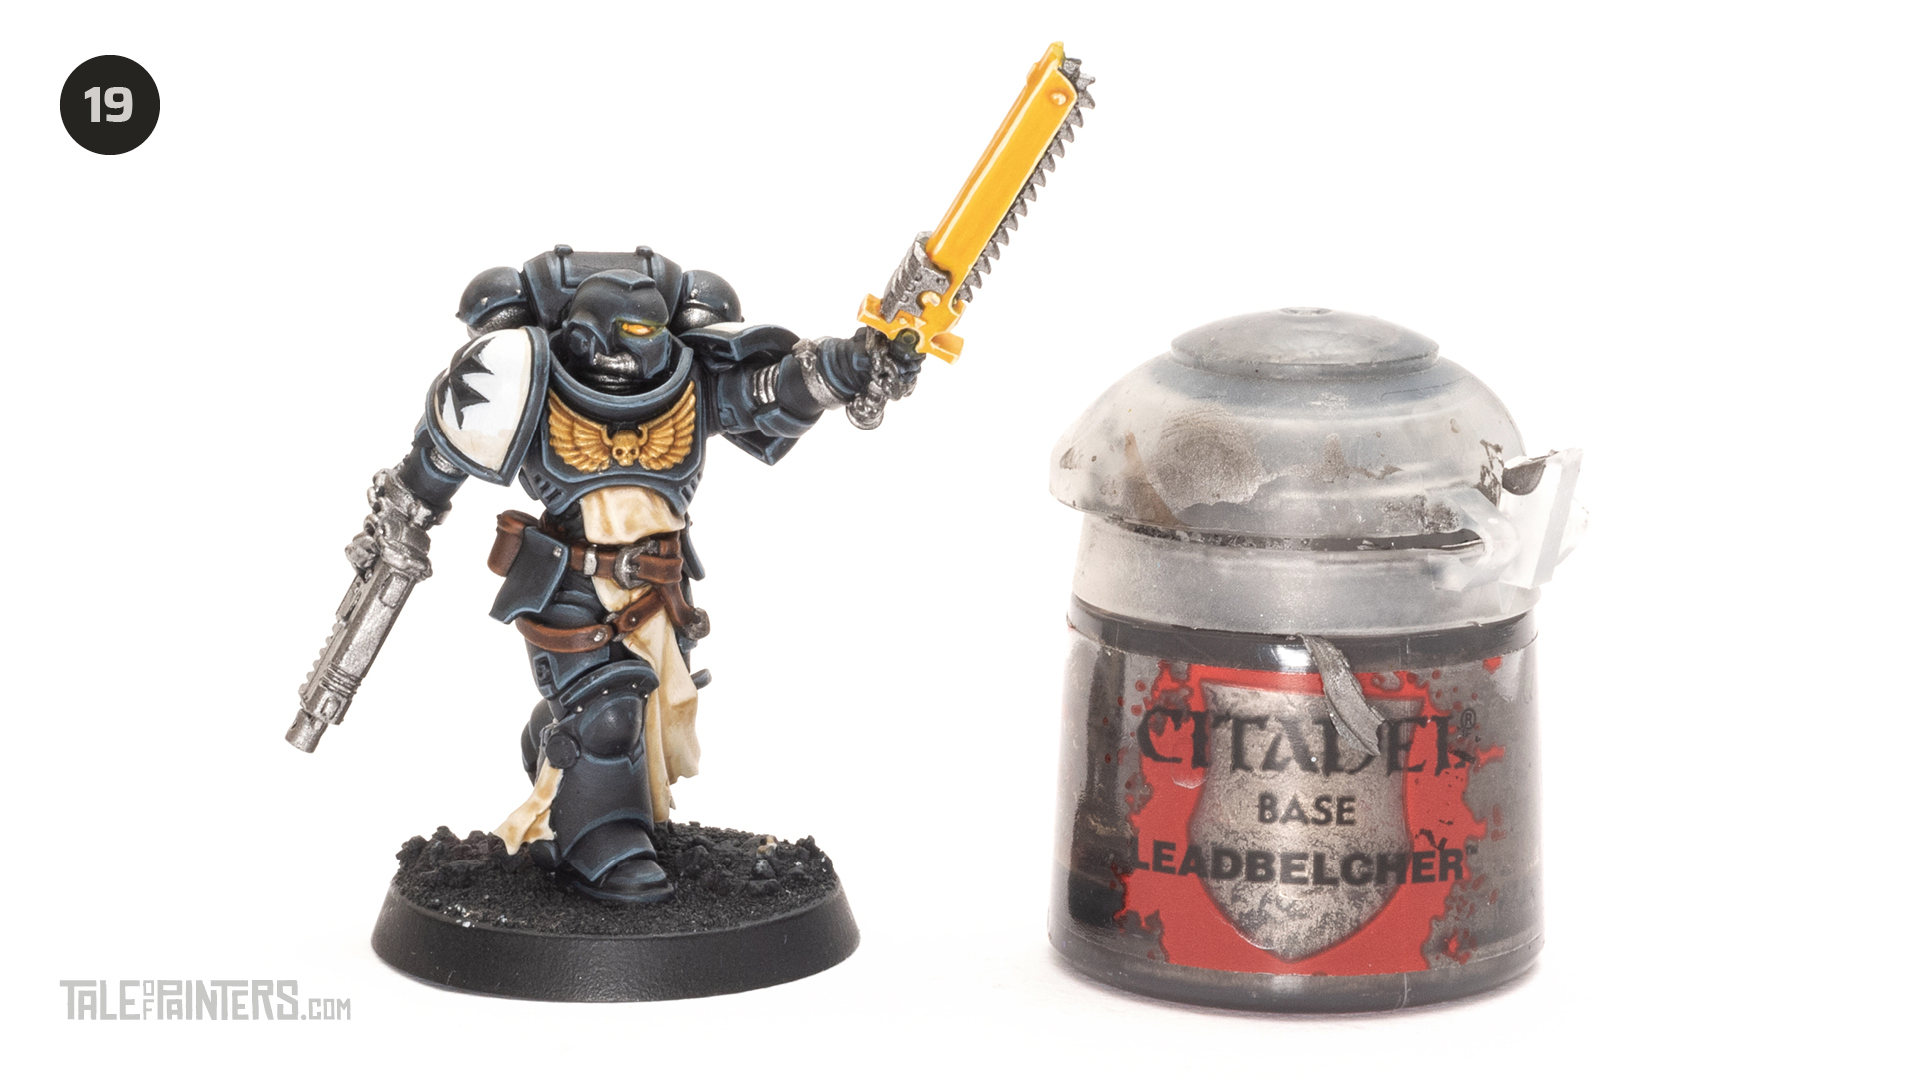
Basecoat all the metal parts with Leadbelcher.
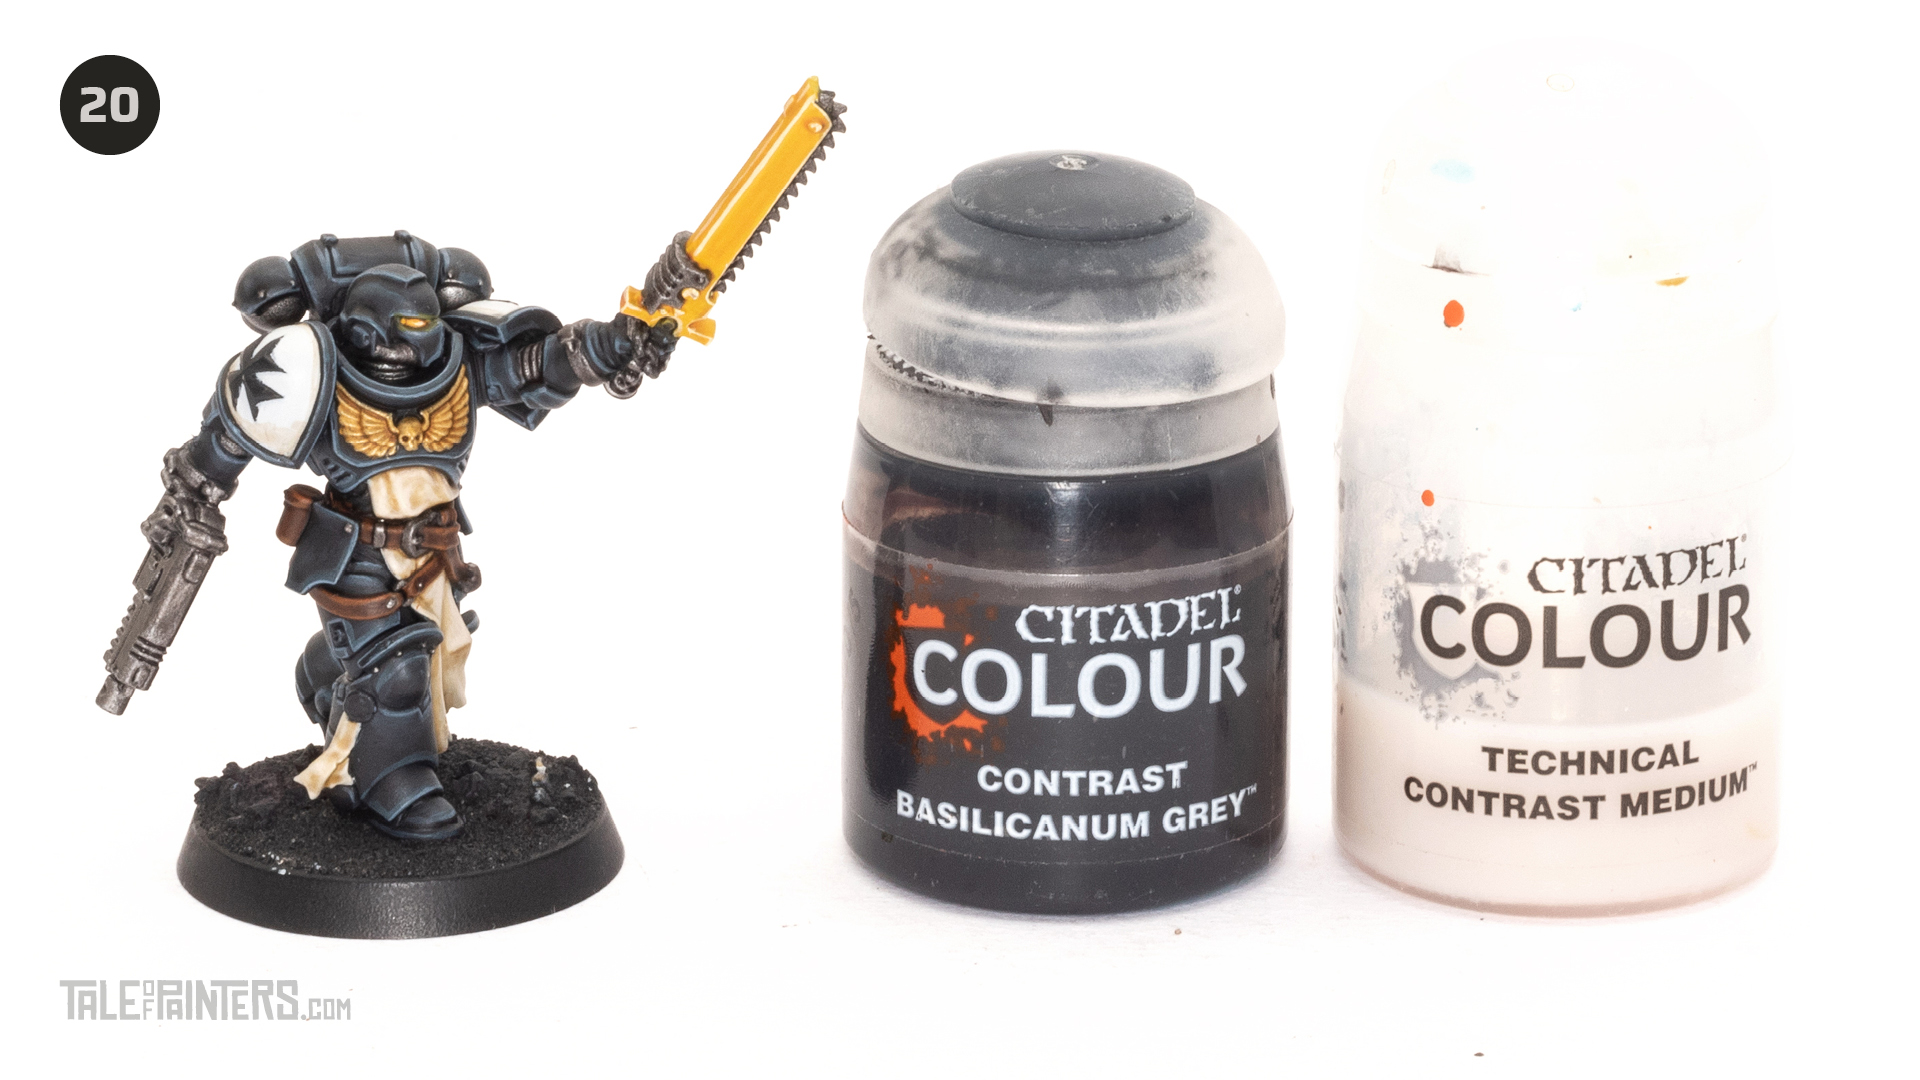
Create a mix of 50:50 Basilicanum Grey and Contrast Medium and apply a heavy wash over the metal areas.
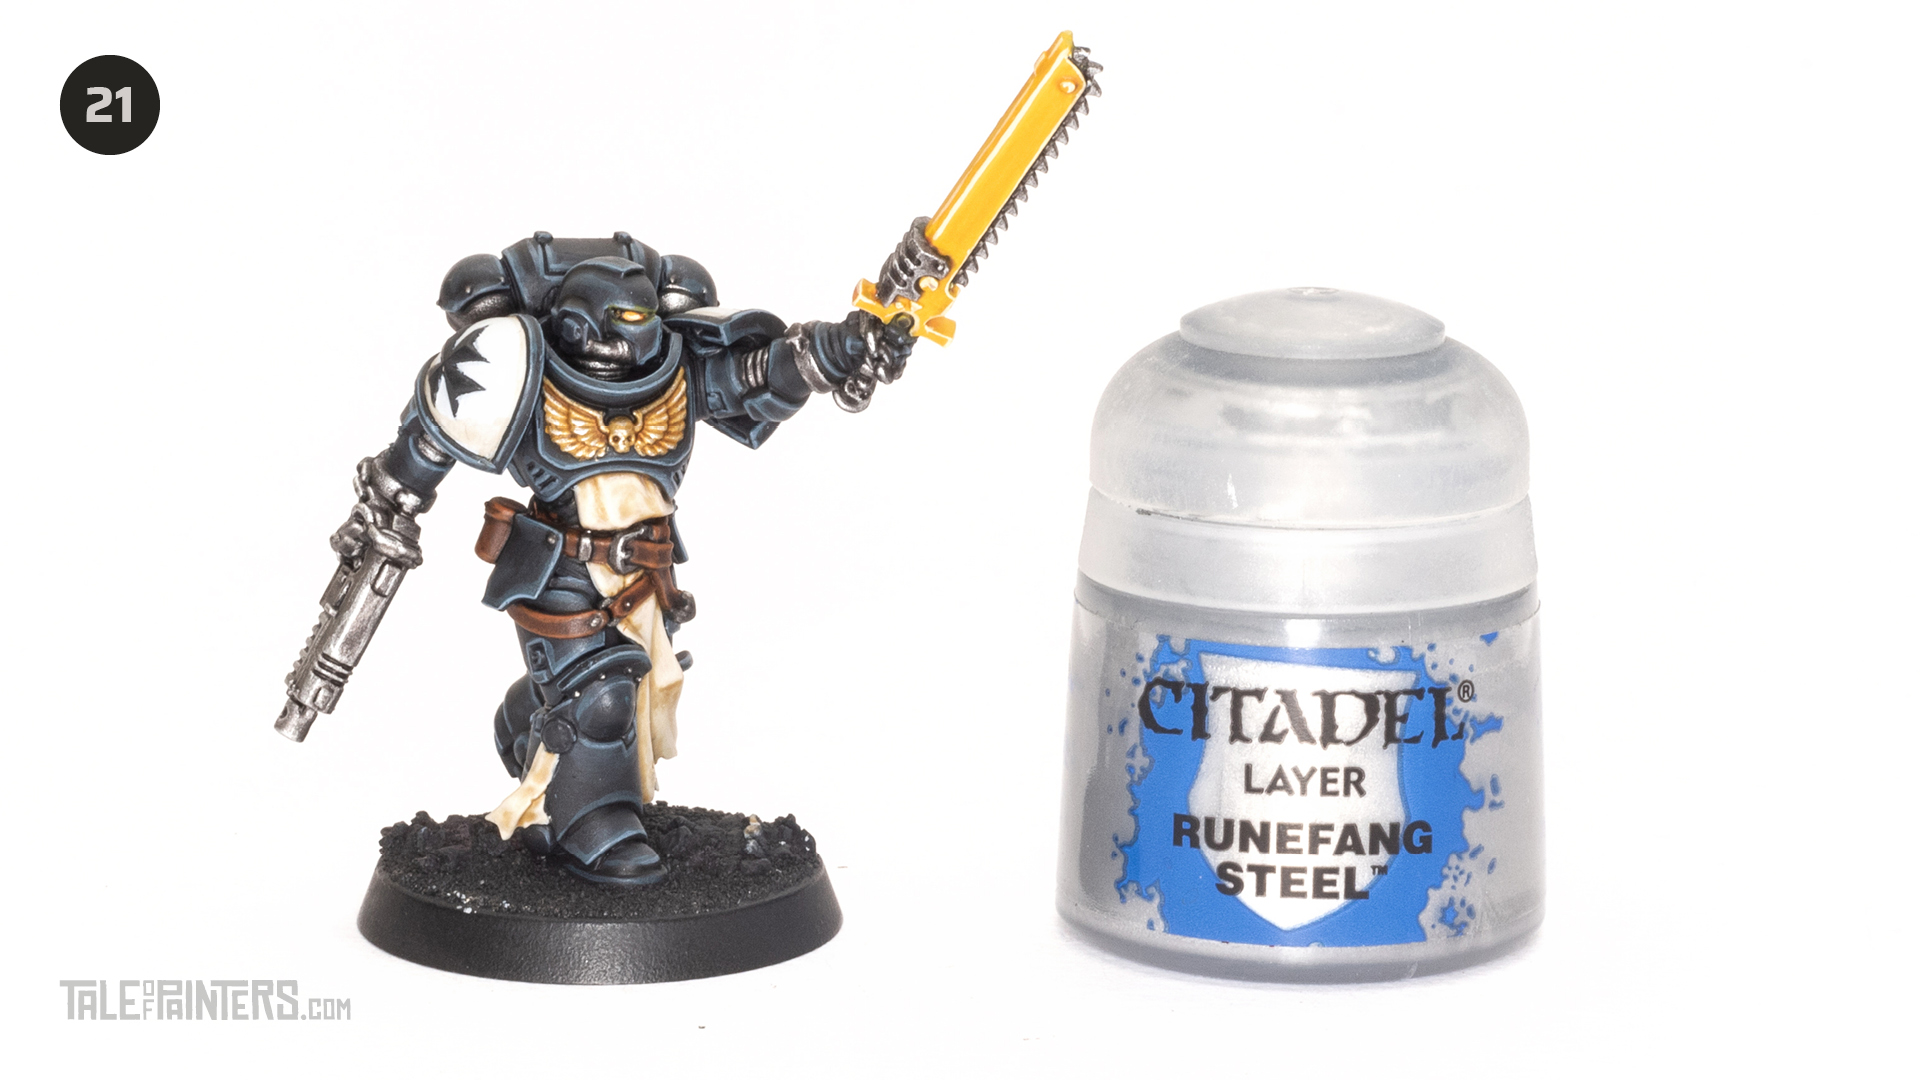
Edge highlight the metals and golds with Runefang Steel. Also paint the rivets with Runefang Steel.
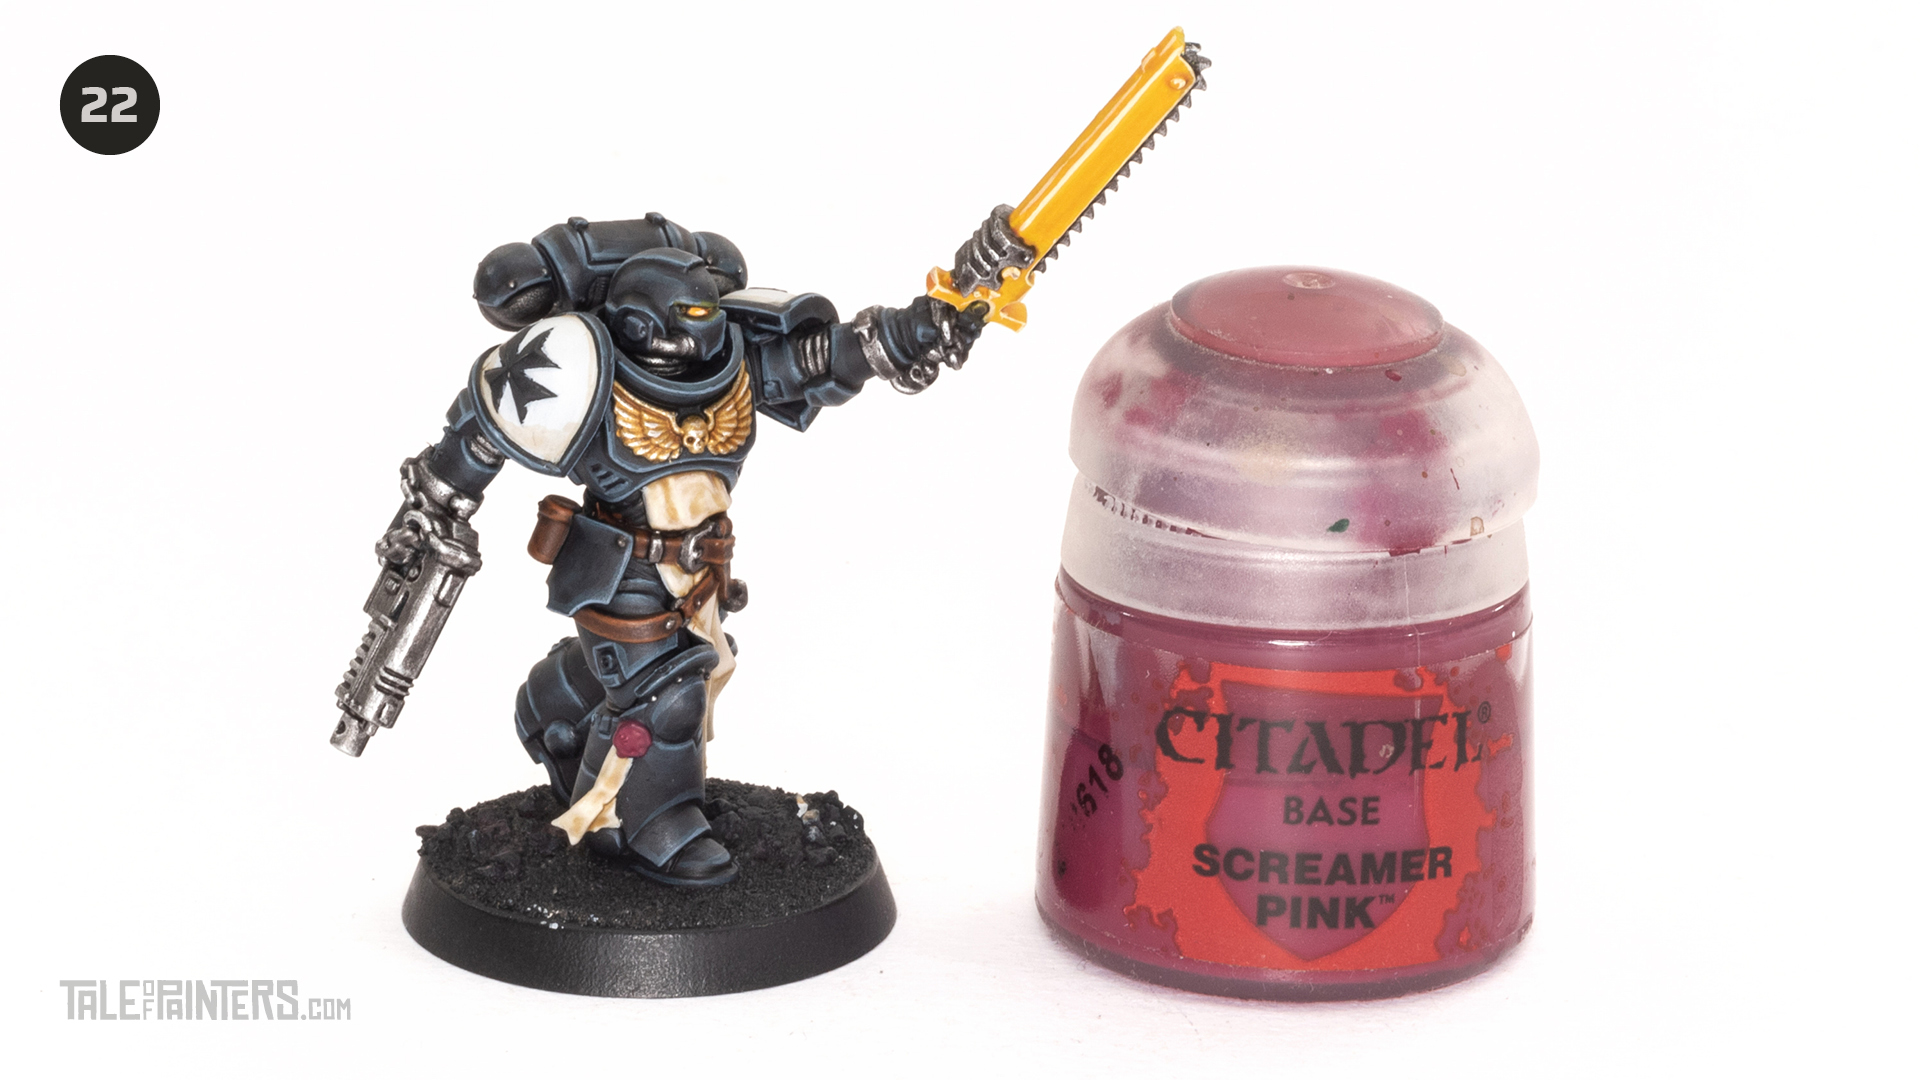
Paint the wax seal with Screamer Pink.
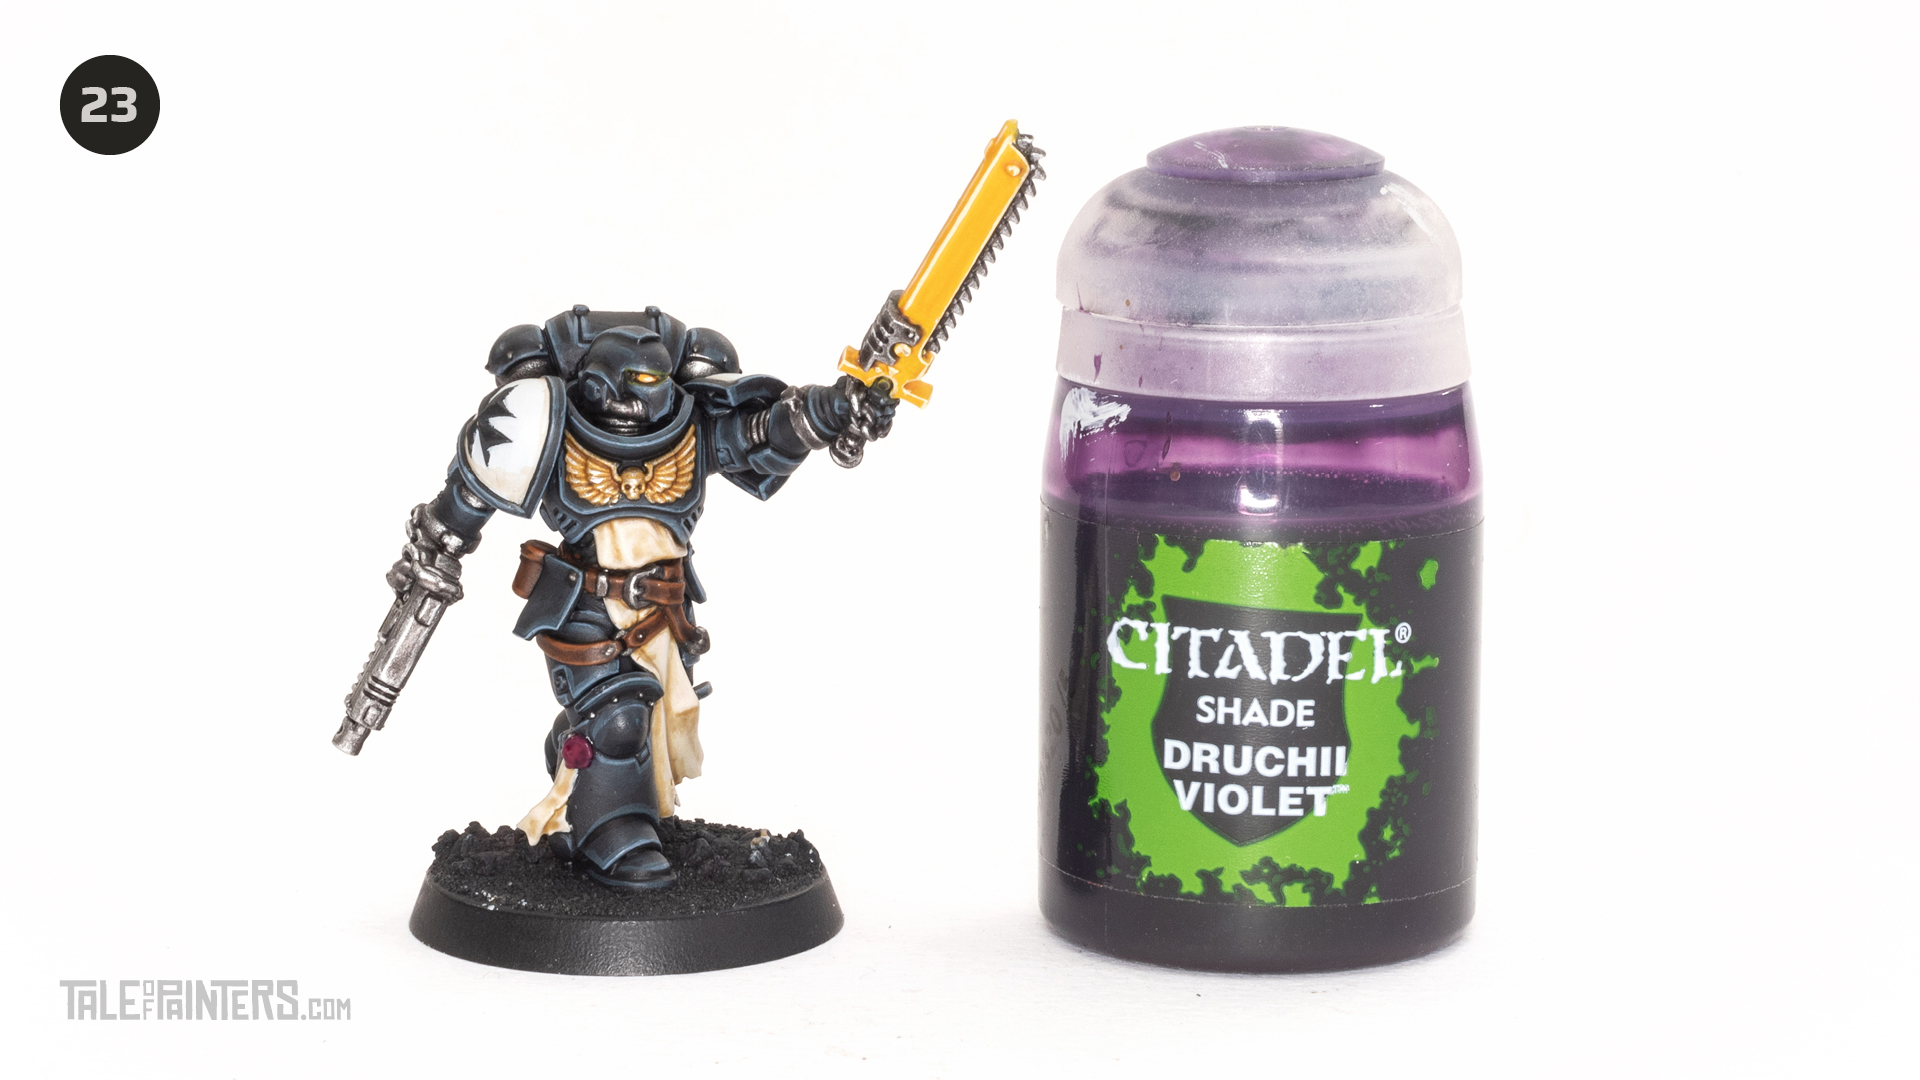
Wash the wax seal with Druchii Violet.
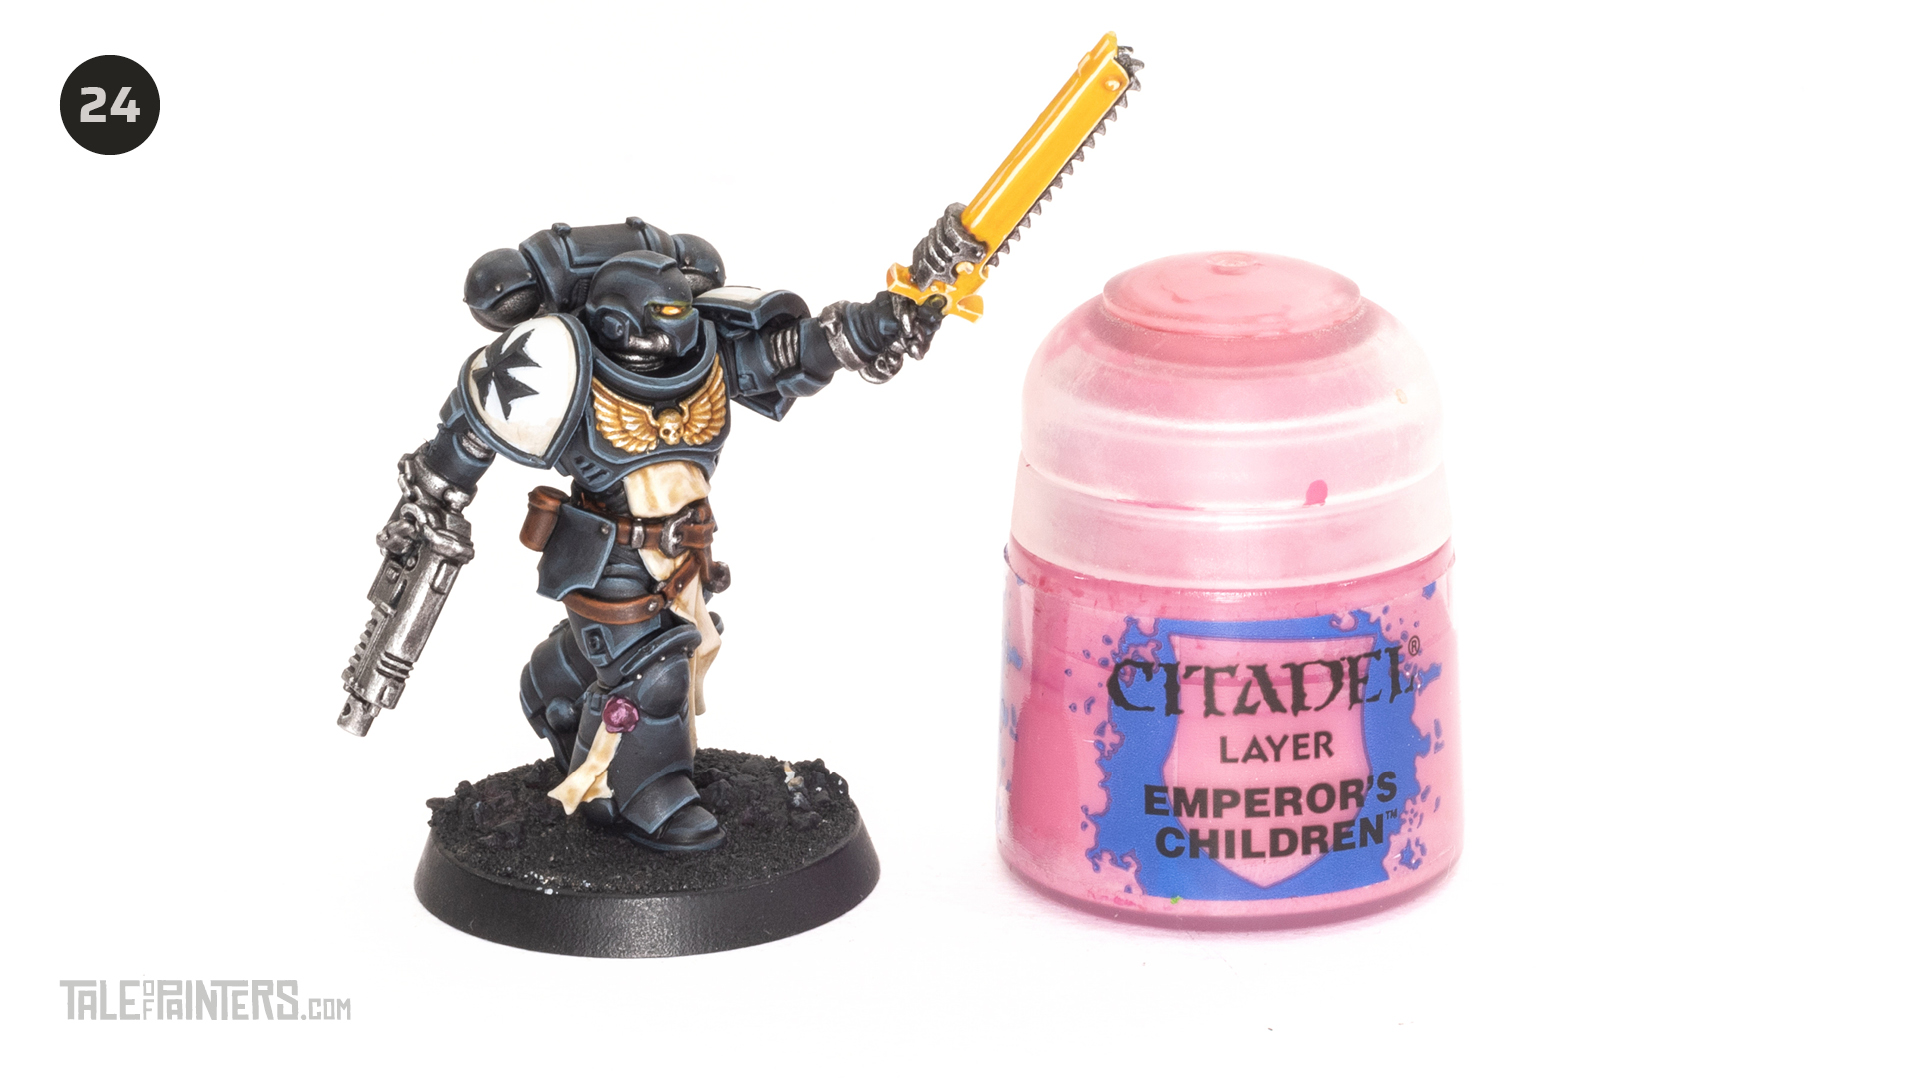
Edge highlight the wax seal with Emperor’s Children.
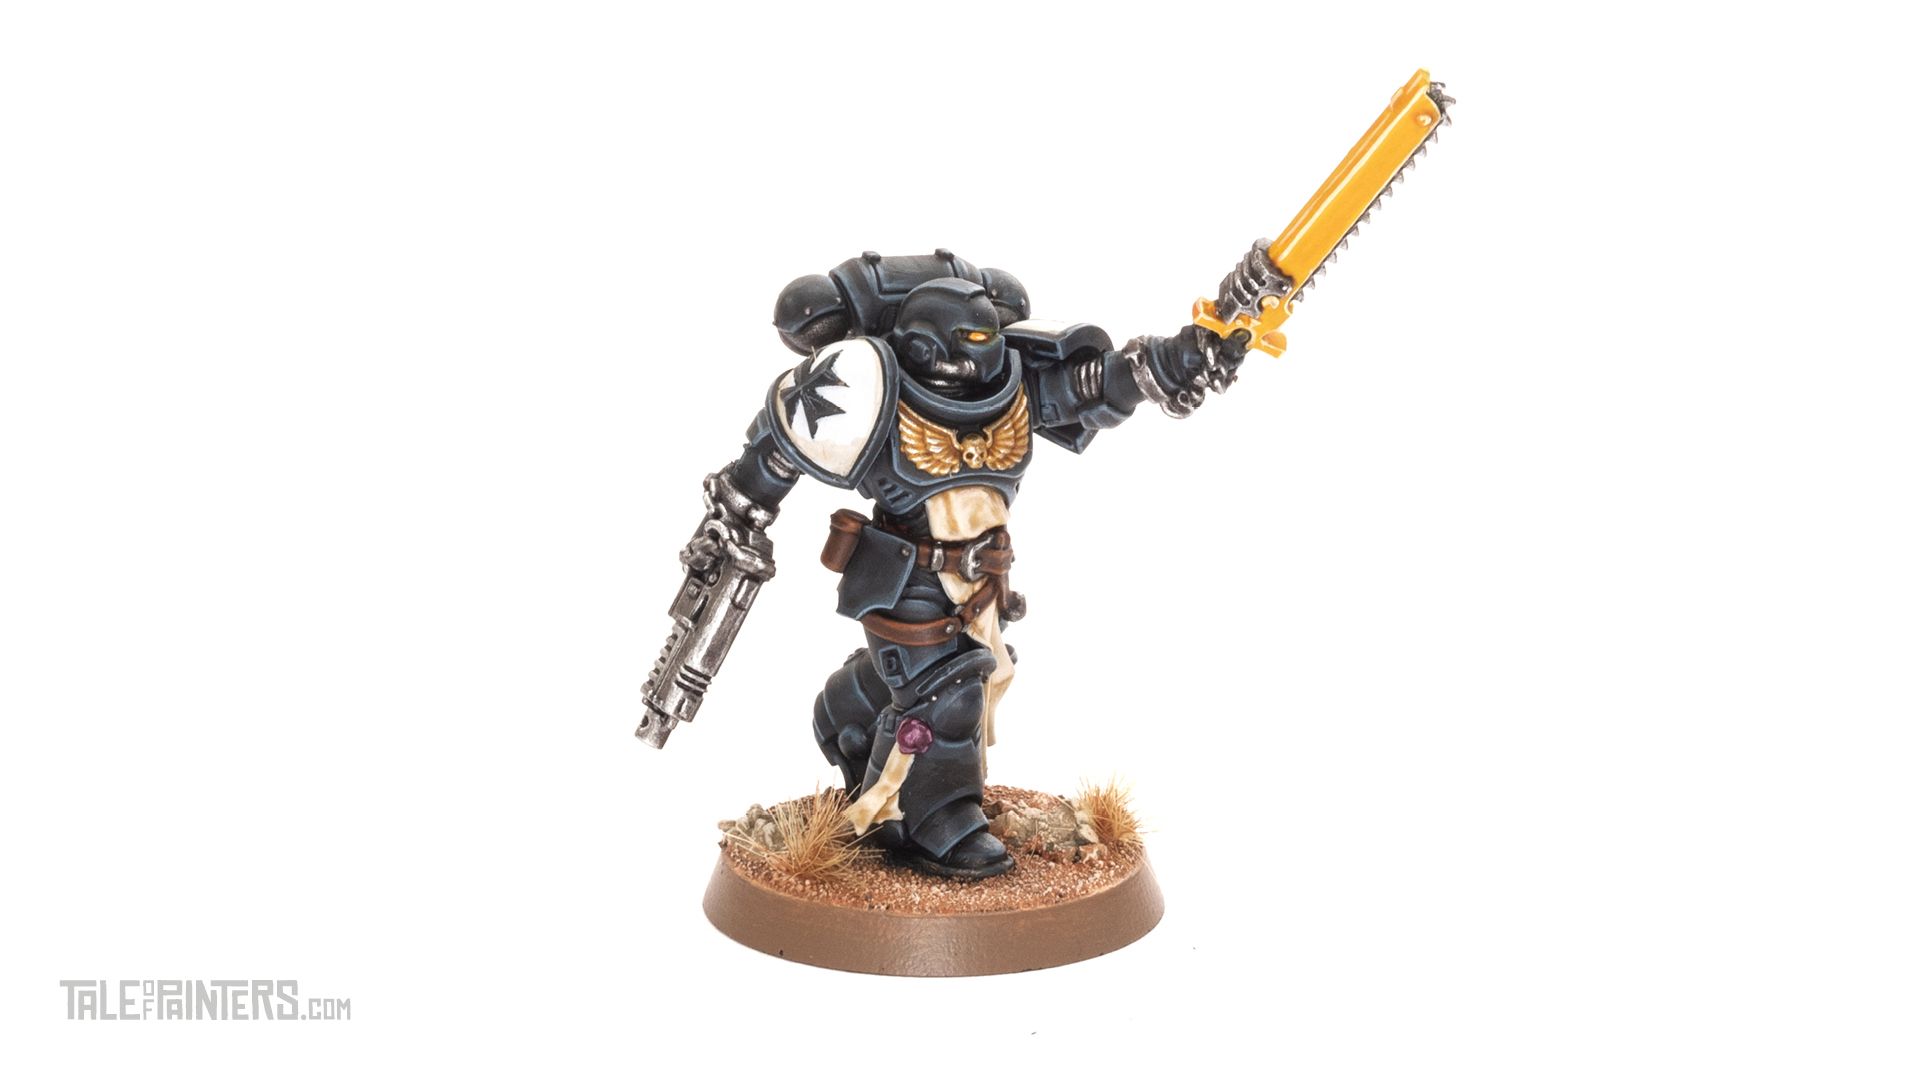
The base rim is Steel Legion Drab. The sand is painted with Deathclaw Brown, dry brushed with Bestigor Flesh and then Screaming Skull. The rocks are painted with Zandri Dust and dry brushed with Morghast Bone and finally dry brushed with Screaming Skull.
Paints you will need for this tutorial:
- Black undercoat
- Corvus Black (Base)
- Dark Reaper (Layer)
- Thunderhawk blue (Layer)
- Basilicanum Grey (Contrast)
- Russ Grey (Layer)
- Corax White (Base)
- Screaming Skull (Layer)
- Skelton Horde (Contrast)
- Wraithbone (Base)
- Liberator Gold (Layer)
- Aggaros Dunes (Contrast)
- Mournfang Brown (Base)
- Cygor Brown (Contrast)
- Skrag Brown (Layer)
- Yriel Yellow (Layer)
- Iyanden Yellow (Contrast)
- Dorn Yellow (Layer)
- Leadbelcher (Base)
- Contrast Medium (Technical)
- Runefang Steel (Layer)
- Screamer Pink (Base)
- Druchii Violet (Shade)
- Emperor’s Children (Layer)
Paints you’ll need for the base:
- Deathclaw Brown (Layer)
- Bestigor Flesh (Layer)
- Zandri Dust (Base)
- Morghast Bone (Base)
- Screaming Skull (Layer)
If you need to expand your paint collection to follow the tutorial, check out our partner stores Wayland Games and Element Games, which offer an amazing range of paints at a discount.
Hope you enjoyed this tutorial. If so, leave a comment or reaction below, and if you got any questions, leave them here so I can answer them for you.
If you want to support me personally, please consider buying one of my products from ebay shop. Thank you.

5 Comments
Leave a Reply
Tale of Painters is the unofficial Warhammer hobby magazine run by hobbyists like you. Support our work by using the affiliate links from our 🇺🇸 / 🇨🇦 partner stores for your next orders so we can continue to bring you fantastic FREE content every day:


Or support us directly:


This is an excellent tutorial – thanks so much for it! Sorry for the inane question, but which tufts do you use for the bases? They are a nice height and perfect colour for your (and now my) scheme. 🙂
Citadel Mordian Corpse-Grass.
Is there something like this for dreadnoughts?
Unfortunately, we don’t have a painting tutorial for dreadnoughts yet, but the colours and techniques explained in this tutorial should also work well for a larger model. You just might want to use drybrushing instead of edge highlights here and there to speed things up.
This is such a great tutorial. Love it