
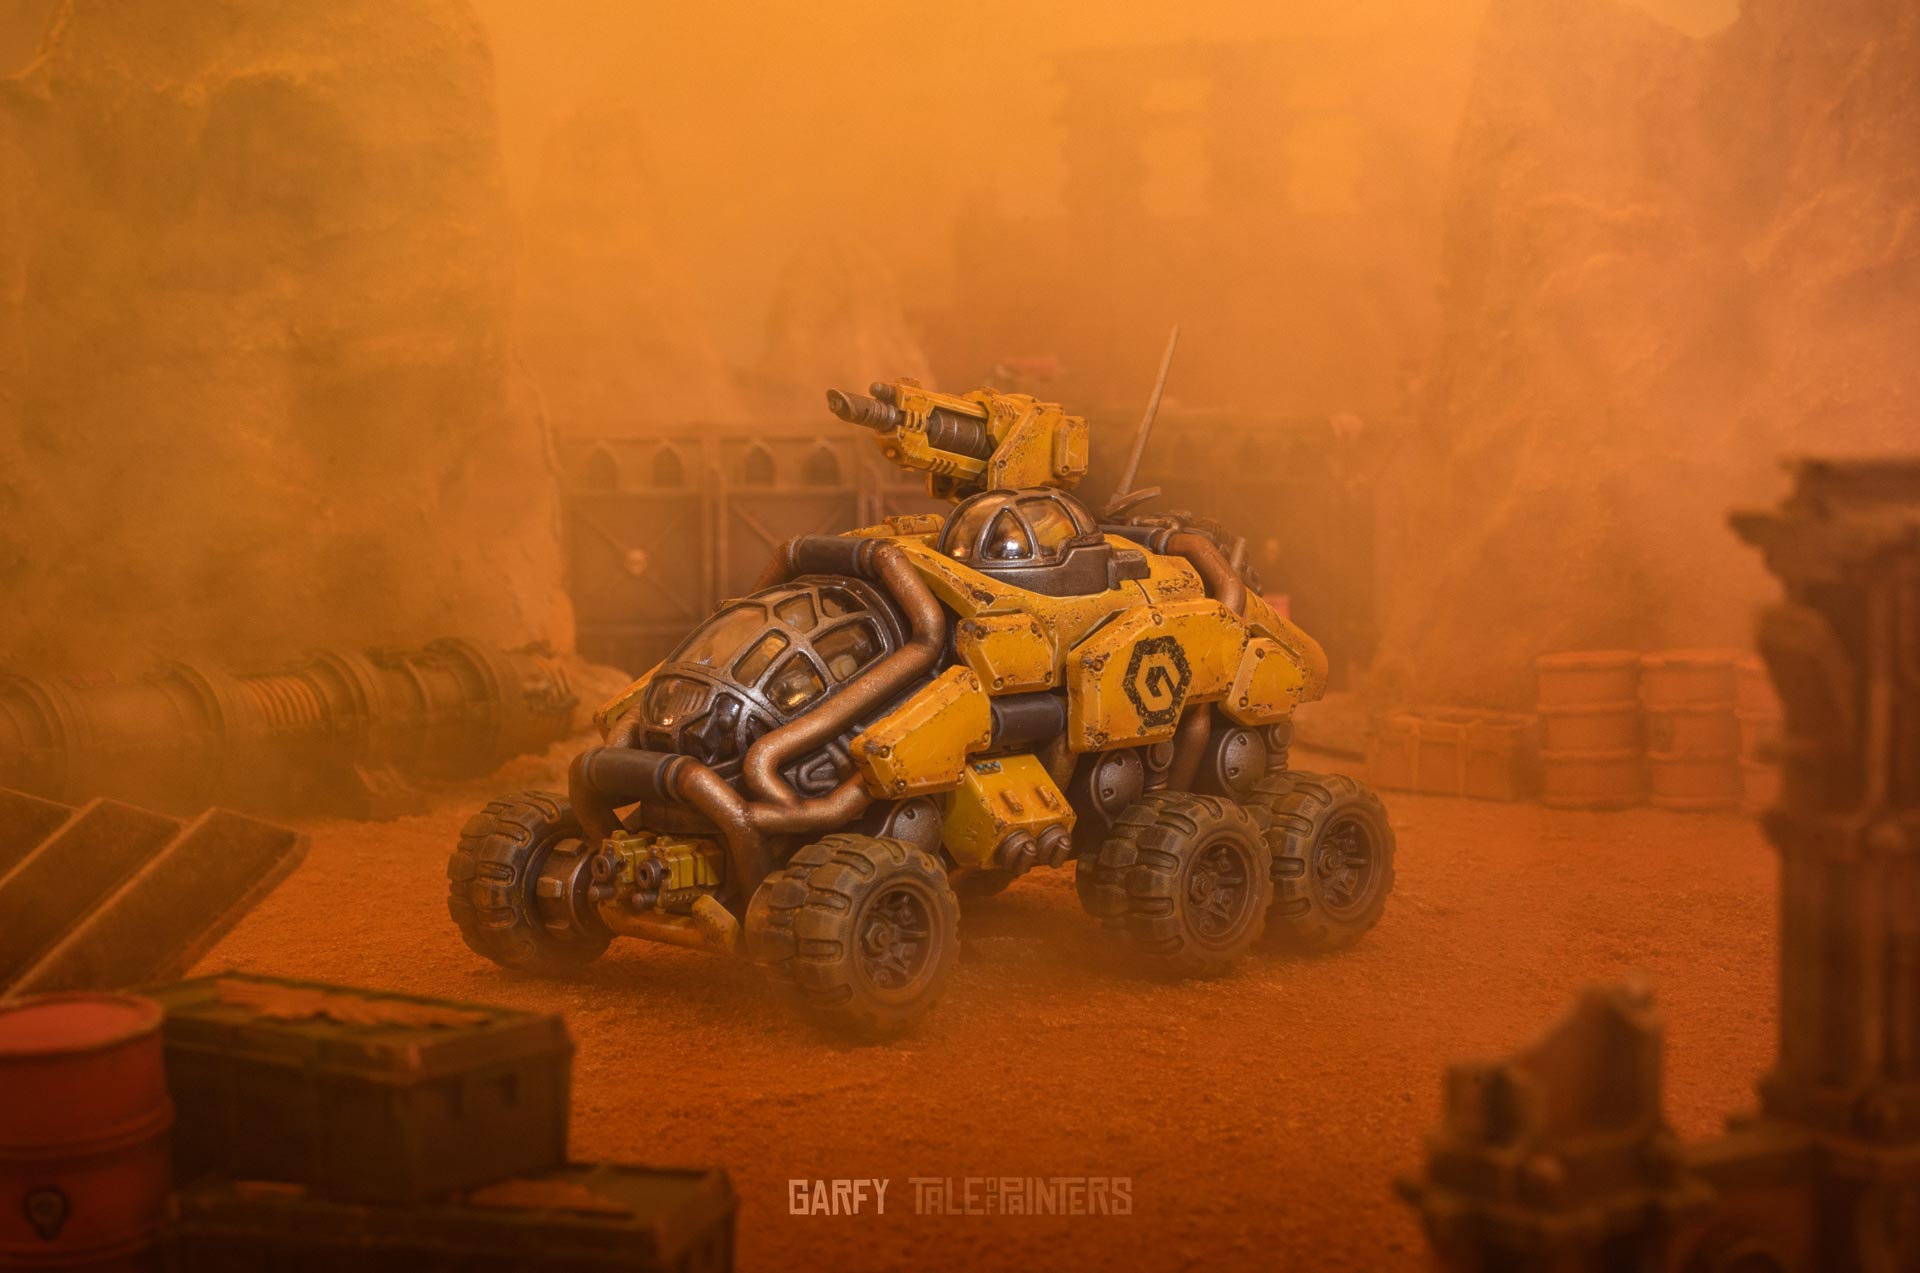
For today’s Leagues of Votann Sagitaur post, I thought I’d go into more detail on how I painted the Kins’ transport vehicle.
Painting the Sagitaur
- Undercoat the entire model black.
Metals
- Basecoat the entire model with Leadbelcher. I used an airbrush but you can use a big brush if you prefer.
- Using a large brush wash over the entire model with the new Nuln Oil.
- Drybrush the model with Leadbelcher.
- Give the model a very light drybrush of Runefang Steel
Brass Roll bars
- Basecoat the roll bars with Hashut Copper
- Wash the roll bars with Agrax Earthshade
- Repaint the pipes with Runelord Brass leaving plenty of the previous layers showing as shading (like under the pipes or where the pipes join)
- Using a fine sponge, dab on some Canoptek Alloy to look like textured pitting/weathering/damage. It also acts as a nice highlight without actually trying to paint a thin line.

Yellow Armour
I left off as many panels, doors and guns as I could and undercoated them white and then sprayed them with Averland Sunset to basecoat them. Sadly, some of the armour is joined to the hull and will need to be painted by hand unless you want to use masking tape and airbrush it.
- Basecoat the Armour with Averland Sunset. Painting over the previous silver layers this will take 3-4 watered down (thinned) coats.
- Using the new formulated Seraphim Sepia apply layers to the bottom half of the armour panels, once dry repeat to increase the intensity. Keep repeating until you’re happy. I think I did it 4 times. This is called glazing.
- The top half of the armour panels are glazed with thinned Yriel Yellow. Once again 3 or 4 coats to build up the intensity.
- Using a fine sponge I dabbed on Rhinox Hide to represent damage and paint chips.
- I used Dorn Yellow to add edge highlights to the yellow armour and underlined the chipping. I also added random scratch lines on the armour. I think Dorn Yellow is discontinued. If so just add white to Yriel Yellow or use Ubshanti Bone.


Weathered Tyres
- Leave the tyres off separately and undercoat them black
- Basecoat the tyres with Corvus Black
- Drybrush the tyres with Mechanicus Grey
- Lightly drybrush the tyres with Dawnstone Grey
- Add 99% isopropyl alcohol to small glass jar. Dip old large brush into weathering powder, then into the isopropyl, then brush on to treads. The alcohol will evaporate leaving the pigment
- Brush on Lahmian Medium to remove powder if desired
- Seal with light spray of varnish


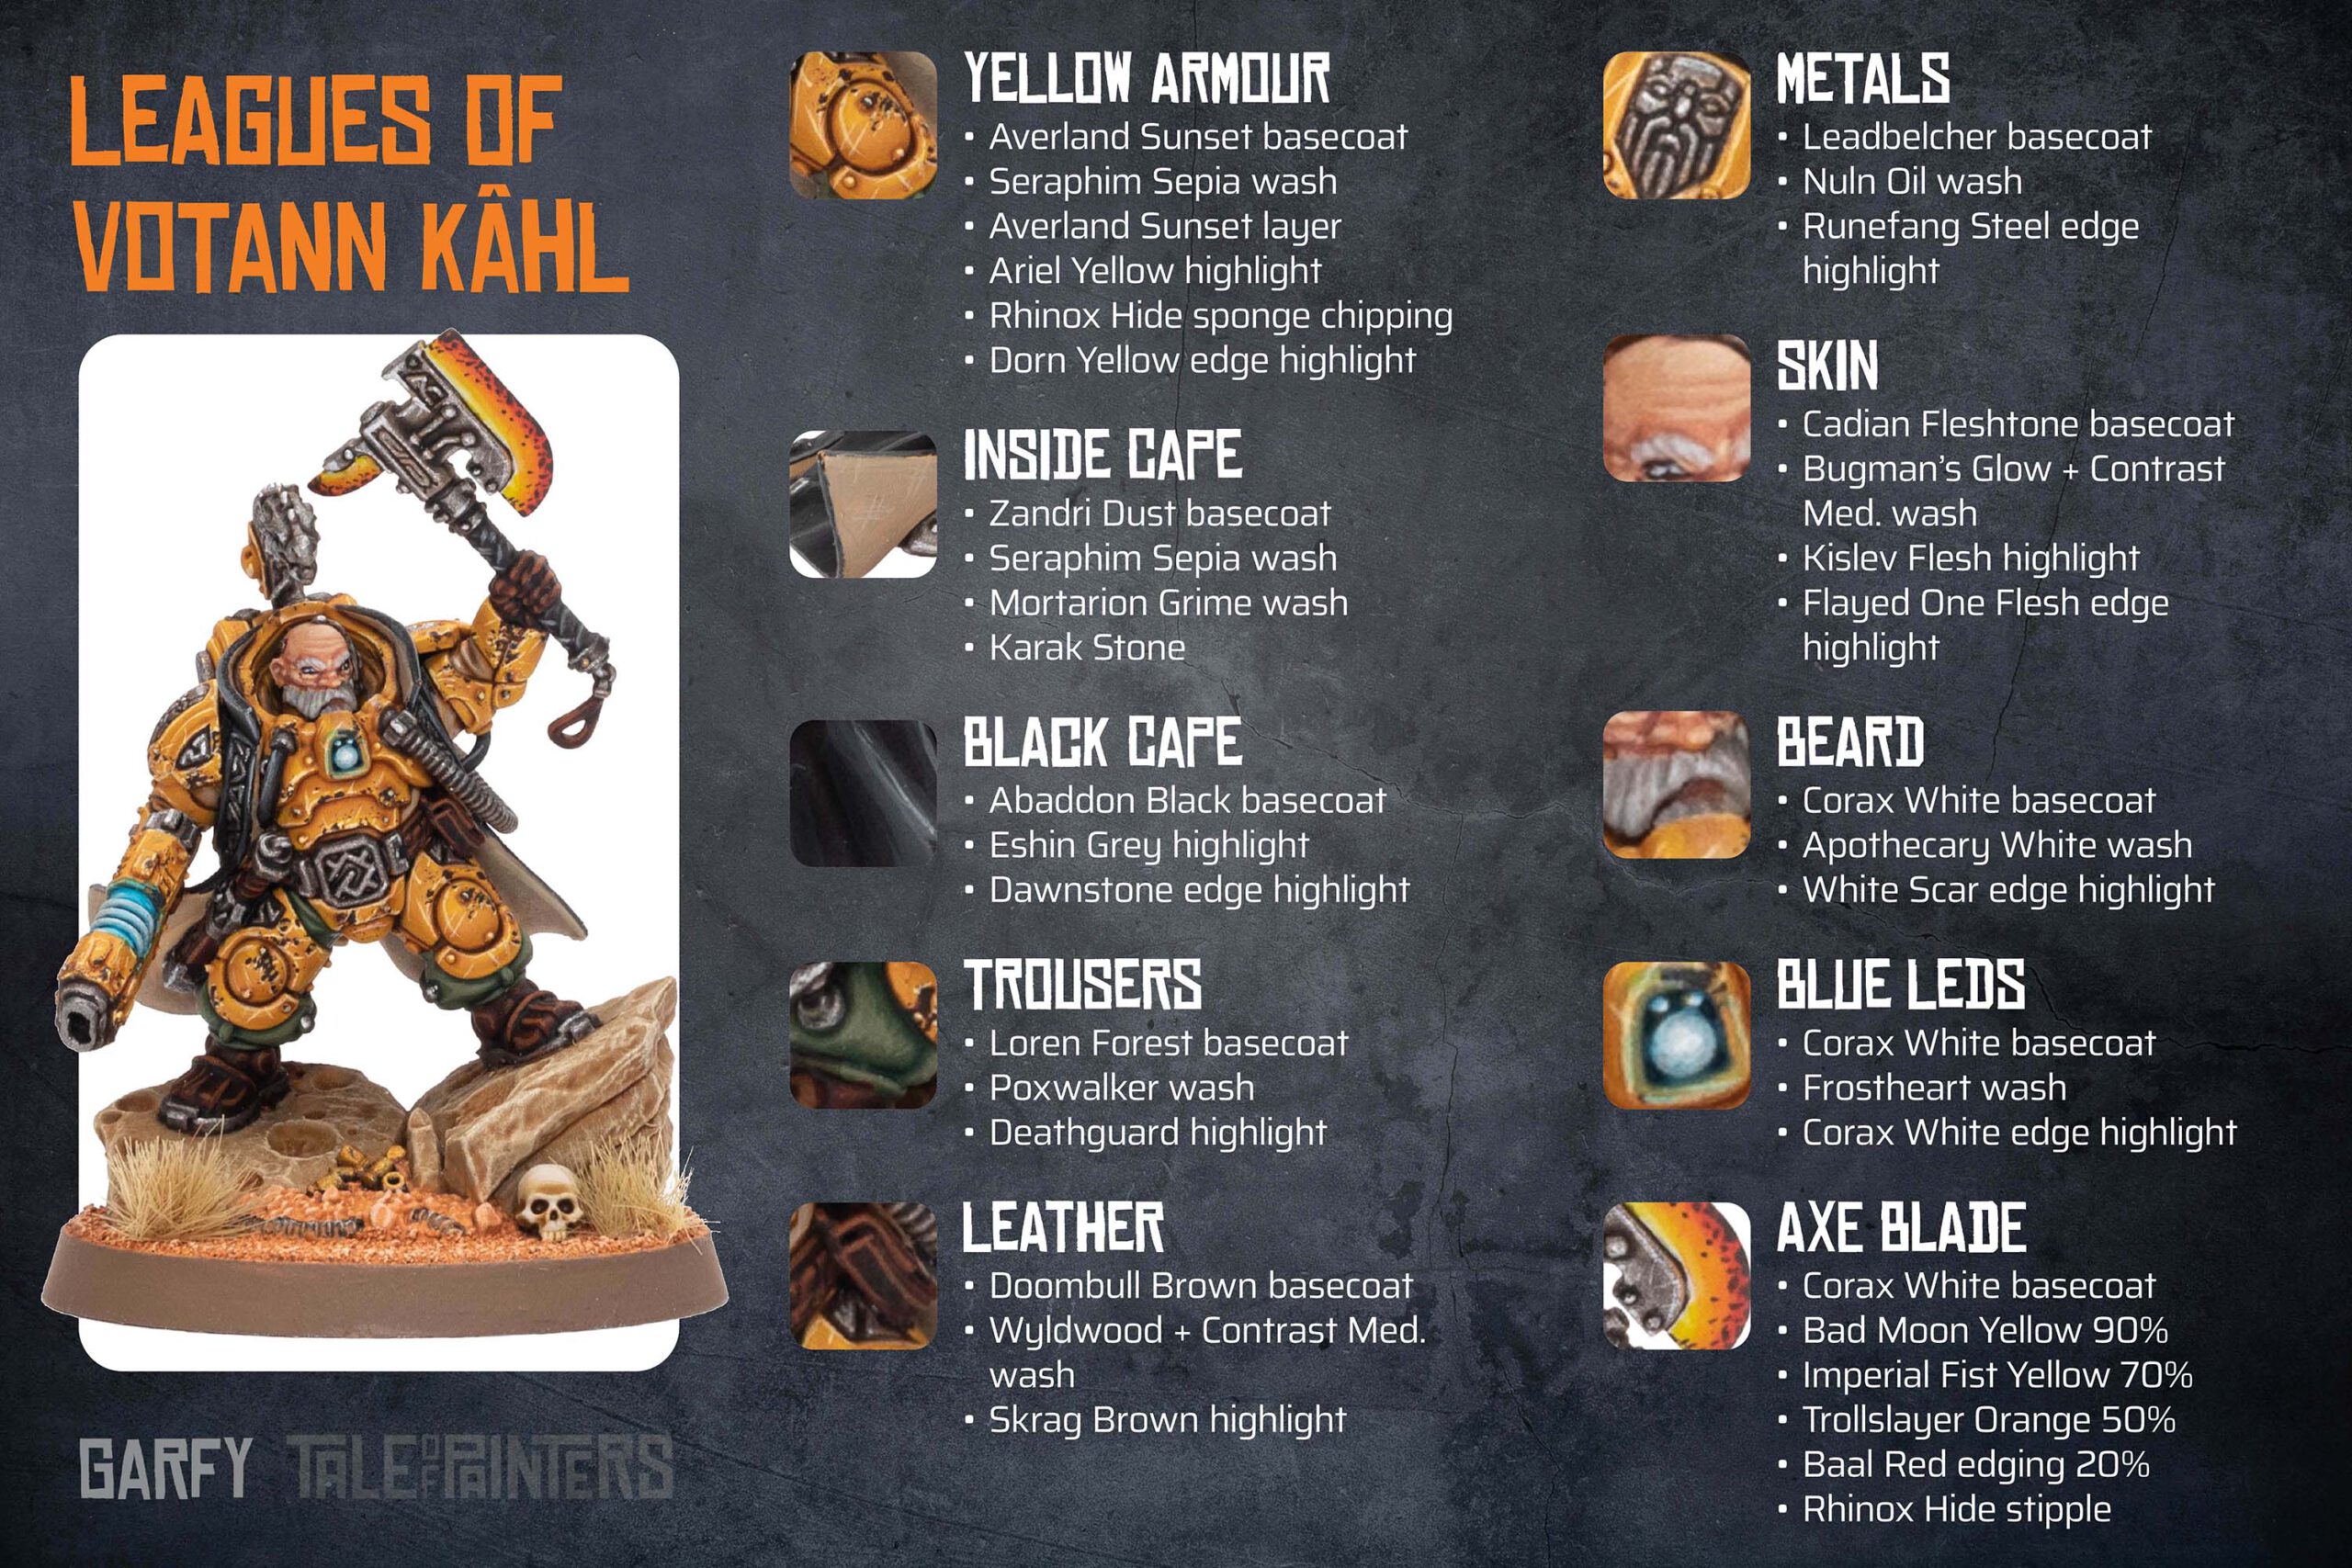
Crew
You can use this guide below to paint the crew.
Clear Canopies
I wanted to keep the canopies clear (some people like to paint the whole thing), this means it’s difficult to undercoat the canopies with airbrushes or aerosol cans. Even using masking tape I would be worried that the paint would bleed under the tape. This leaves painting it by hand.
- Using Abbadon Black, carefully paint on 3 thinned coats to the frame on the canopy. With no undercoat this paint will try to repel from the plastic and the first couple of coats will look sploodgy. Just let each coat dry before applying the next.
- Paint the frame with Leadbelcher.
Over on Twitter I asked people for help on the logo. Some interesting comments, my favourite was I’d inadvertently created the GameCube logo. That helped me decide on the slightly rotated version. I’m always posting extra behind the scenes stuff to Twitter so feel free to follow me.
Hope you found this post useful and interesting.

Tale of Painters is the unofficial Warhammer hobby magazine run by hobbyists like you. Support our work by using the affiliate links from our 🇺🇸 / 🇨🇦 partner stores for your next orders so we can continue to bring you fantastic FREE content every day:


Or support us directly:


