
Whether you’re a beginner or an experienced painter, this review will give you insights and opinions from both sides.
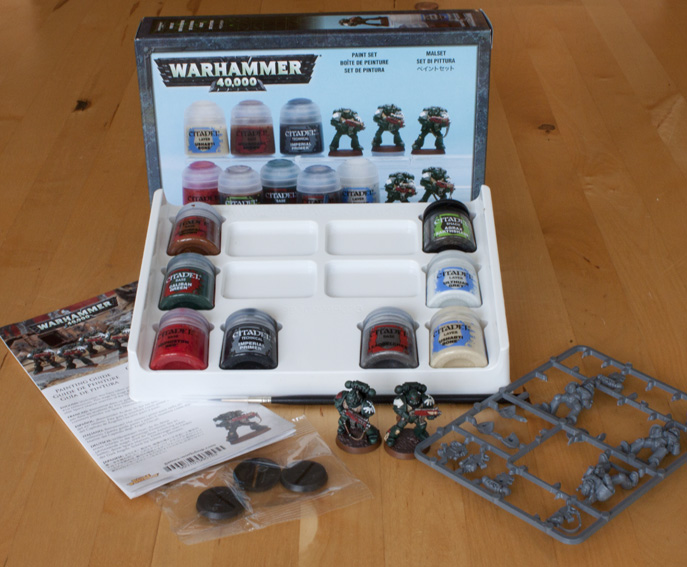
The Warhammer 40,000 Paint Set includes 4 base paints, 2 layers paints, a shade and a technical paint. You get 5 Dark Angels with Bolters, a Starter Brush (appears to be cheaper quality then the usual GW brushes) and an instruction leaflet in multiple languages with some basic text information and 8 pictorial steps to follow.
My wife Jo and I will be conducting this review so you can get the opinions from a beginner and someone who has been painting for a while. It’s a starter set, so I thought it would be a great idea to ask Jo if she would paint a Dark Angel using the painting guide supplied, while I just do my own thing only using the paints supplied in the box. Read on to see how we got on.
Stage 1 – Base Colours
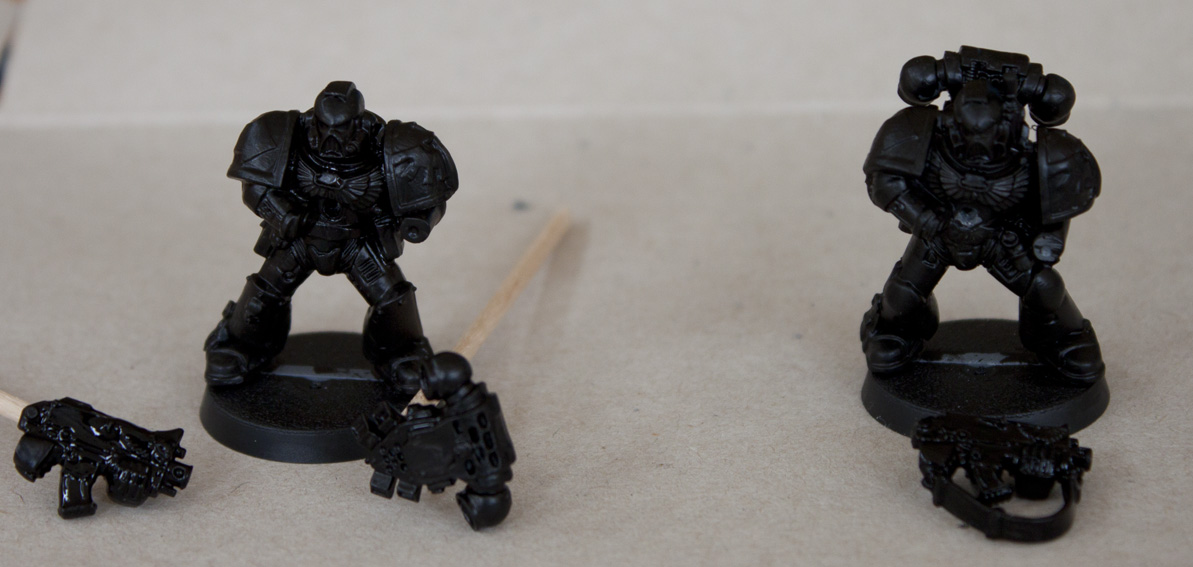

Garfy – I grabbed the Imperial Primer paint and started slapping it on. Having recently reviewed the Vallejo Surface primer, I had some experience with brushed on primers and this one doesn’t perform as well. It’s kinda lumpy and doesn’t self level as well as the Vallejo equivalent. It also rubs off way too easily. I then had my first experience of a Base paint, Caliban Green. That went on nice in just 2 coats.
Jo – having selected a model, shoulder pad, gun and back pack from the sprue. I then picked up the instructions. Step one listed ‘Abaddon Black’ the black included in the starter set is ‘imperial primer’ (the colour listed for the metal and the white is also incorrect). I stuck my gun and back pack to cocktail sticks to aid holding them whilst painting (see below).
Using the starter brush I applied the ‘imperial primer’ Along with the primer rubbing off I noticed that the bristles seemed to be going through a malting phase on to my dark angel, so I swapped for another brush from Garfy’s collection. The ‘Caliban Green’ is a nice consistency to paint with.

Stage 2 – Details

Garfy – Using Ushabti Bone, I mixed it with Caliban Green and painted on some highlights. I then mixed Imperial Primer with Leadbelcher (a metallic) to create a dark metal base colour and then highlighted up to pure Leadbealcher. I then heavily watered down Imperial Primer and used that as a wash on my metals to shade them. I’m improvising because of the lack of paints supplied in the starter set, but I’m impressed with the versatility of Imperial Primer. It makes a better black then it does a primer. For my reds I started off with a mix of Mephiston Red + Mournfang Brown + a touch of Imperial Primer and then highlighted up to Mephiston Red, and a final edge highlight of Mephiston Red + Ushabti Bone was applied. The strap and pouches had similar treatment. Mixing Imperial Primer with Mournfang to shade, mourn fang as the main colour and then Ushabti was mixed in to highlight. As a painter, I feel the labelling of Bases, Layers, Glazes is going to stifle creativity and be limiting. Peoples armies are going to look identical in colour if they no longer have to mix. I feel part of the joy of painting is mixing and creating those perfect shades and highlights.
Jo – Following steps 3, 4, 5 and 6 I worked on the metals, leathers, reds and bone. The instruction leaflet was very basic and I had to ask Garfy a few times on what colours to paint some of the areas, if I was painting for the first time by myself I would have probably turned to a search engine online for help! Painting the eye area was a very fiddly, ended up painting too much red and tidying it up with green paint.
Stage 3 – Washes, whites and basing
Garfy – At this stage Jo was using the Agrax Earthshade to wash the bone and metal, but I’m an old skool painter and I painted my bone areas with a mix of Mournfang Brown and Ushabti Bone and then highlighted up to Ushabti bone. This means painting the individual feathers one by one on the chest. For the Dark Angel symbol I mixed a tiny touch of Imperial Primer to Ulthuan Grey to create a darker grey base colour and then highlighted up to pure Ulthuan Grey, doing it this way I get a bit of shading and cut down on the the number of layers needed to paint the white. I then painted the model’a base with Mournfang Brown. This colour looks really similar to the old Bestial Brown and covers just as well.
Jo – The wash looks like cold tea but I was assured by Garfy that it will instantly add shading to my model so I applied it, although I was slightly heavy handed and had to quickly dab it off with tissue, I found that a couple of thin layers were easier to apply.
I found the white very challenging to paint, got there in the end but I didn’t like the brightness of the white so I added a coat of wash to tone it down a little. I was pleased with the end result, but I needed to do a bit more tidying, really grateful that the green is quite dark and gives good coverage.
The Mournfang Brown didn’t adhere to the black base too well so needed a couple of coats of paint.
Final thoughts

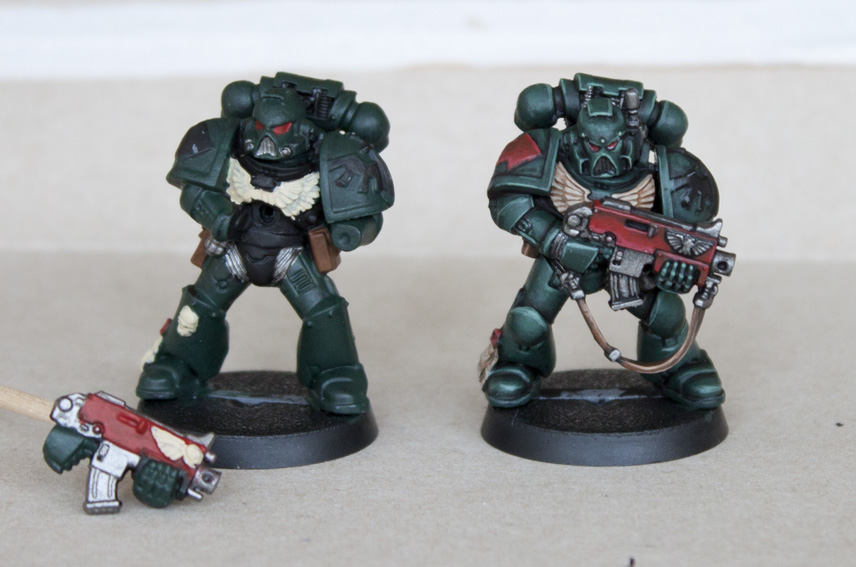
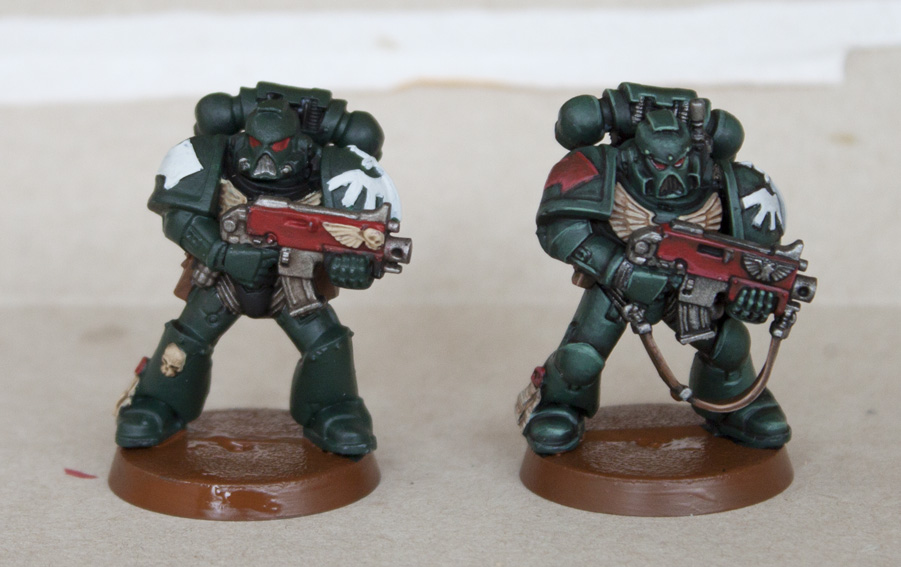
Garfy – Finished! The picture above shows our completed models. You’ll notice we’ve added the new Texture paint Stirland Mud, which isn’t included in the starter set. Overall I enjoyed using the starter set. The space marine model is quite nice with it’s moulded iconography. It’s a shame it’s a Dark Angel, but I guess it makes a nice change from the Ultramarines always being in the spot light. The colour choices in the set are good and I managed to adapt and mix highlights and shades with the paints included. You could probably paint the model as a Blood Angel. The major problem with the set though is the instructions. It’s actually just a series of photos with the paints listed, and 3 of those paints are listed incorrectly as Jo mentioned above. This could be confusing for new painters. The actual paints were good. The new formulas felt smooth, mixed and blended well and I look forward to trying more out. The exception is Imperial Primer which didn’t self level as claimed and rubbed off way too easily. The set is also good value for money at £22.50.
Jo – phew done! I also used the textured paint on the base, very realistic look and feel wise. Overall, I was quite impressed that my model, the one on the left of the above picture, didn’t resemble road kill! I found the paint pots are quite fiddly to open and the instructions were not very specific but having said that it was quite a nice change to spend an afternoon painting with Garfy.
Do you like our tutorials and reviews? Here is what you can do to support us: Disable your Ad Blocker or place your next Wayland Games order by clicking here or on the banner on the right. Thank you very much, we appreciate any help to keep us going!

15 Comments
Leave a Reply
Tale of Painters is the unofficial Warhammer hobby magazine run by hobbyists like you. Support our work by using the affiliate links from our 🇦🇺 partner stores for your next purchases so we can continue to bring you fantastic FREE content every day:


![]()
![]()
Or support us directly:


Been 10 years since I have painted, got my starter set coming in the post – around £19! Can't wait to get back into the hobby hope my paint skills are up to scratch, this review will help. Thanks guys!
I remeber when the starter paint set was like £12 and it was worse quality granted, but £22.50 is waaay to much for a beginner to pay. Typical GW pricing.
Love the write up and review here. Really goes to show you what you can do with minimal paints if you want to put some more effort into it. Great work on both parties.
Very nice! Garfy, your work on that marine is quite impressive given the reduced choice of colours, but what I'm really impressed by is Jo's miniature. My first model definitely didn't look as good as that, kudos! Although I'm not quite sure if that says anything about the quality of the paints or rather your painting talent and the advice of a very good painter… ;-).
Now, will there be something like Jo's own Dark Angels army?
I wish my wife would share an afternoon of painting with me :-S.
Green is quite easy to paint, especially dark green, that might be why the boys in blue got the shaft. I remember when Imperial Fists were the trendy chapter when 3rd Edition was released, that was pre-Foundation paints so yellow over black might not have gone down so well. Choosing Dark Angels for this box may have also been based on which paints they wanted to include, dark green over black is probably easier to achieve than bright blue…
GW is certainly trying to make things simpler for beginners with the new paint range and associated products, unfortunately I think the cost along with the prevalence of video games will eventually kill the hobby, certainly it will become more of a niche, Lord of the Rings was a once in a lifetime opportunity, but the Hobbit might bring some new people into the hobby, maybe someone will do a Hunger Games miniature game, that'll attract the kids.
Keep up the good work.
Well I'm not sure about that, I think the general wargaming hobby will continue, perhaps just not with Games Workshop at the helm.
Thanks Oink, i'll look into it.
Another great review of the paints. Excellent stuff and its great to hear from two very different painter levels.
In terms of photographs, you may want to consider picking up a portable, fold down light box. My wife got me one off of ebay for a pretty reasonable price and it included a pair of lamps too. Helps me take pretty good photos if I do say so myself :
I don't have a studio set up for photography, and have to rely on natural light, and these pics were taken over the course of 2 days so differing light levels are to be expected. The last pic is quite accurate, but the other pics aren't that far off. You could look at these pics on different computers and see different results even further. They're certainly not blue on my iMac.
good review
I am guessing you had a mismatch with your white balance camera setting because the last picture looks different than the rest.
I think (and hope) that the last pic is a more accurate representation of the colours, otherwise DAs look too blue compared to the old shemes.
Really nice tutorial. I was an absolutely great idea to use your wife as reviewer for the beginners level. And since your wife seems to have enjoyed the painting afternoon I think I'll try the same together with wife at the next child-free saturday.
Nice work there!
I found the instructions slightly odd in regards the paint names as well. I must admit I was slightly disappointed to find that my brush had several bent bristles because they didn't include a clear plastic brush protector and that several of the paint lids (the actual 'screw' on part) had lifted up slightly.
What I did find interesting was that the DA iconography was on a separately moulded shoulder pad. I wonder if this means the next starter set will include chapter options!
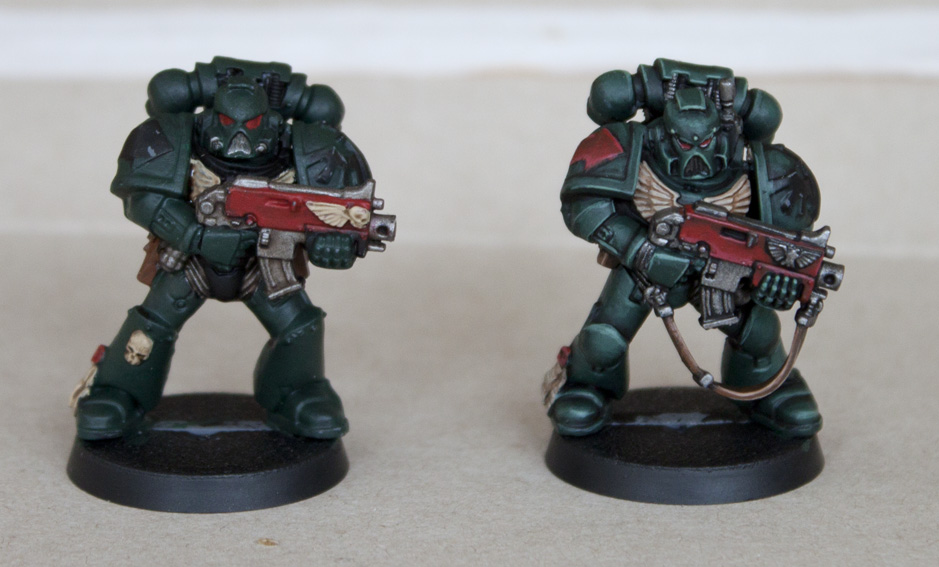
No not drybrushed, just layered using plenty of water and a few gradually blended shades. I was using 'Base' paints like layers, and this is what I mean't about GW labelling the paints. It will stifle peoples creativity if they don't play with the paints because one is a 'Base' and one is 'Layer'… it's all just paint, slap it on and play with it.
Although both use the same paint, the glazing and transition effects on the right model is clearly superior. Are the smooth transition dry-brushed on?
Really interesting to see both point of view. And it's nice to see what can someone with more skills to a simple model. I guess I'm closer to Jo paint skills than yours 😛