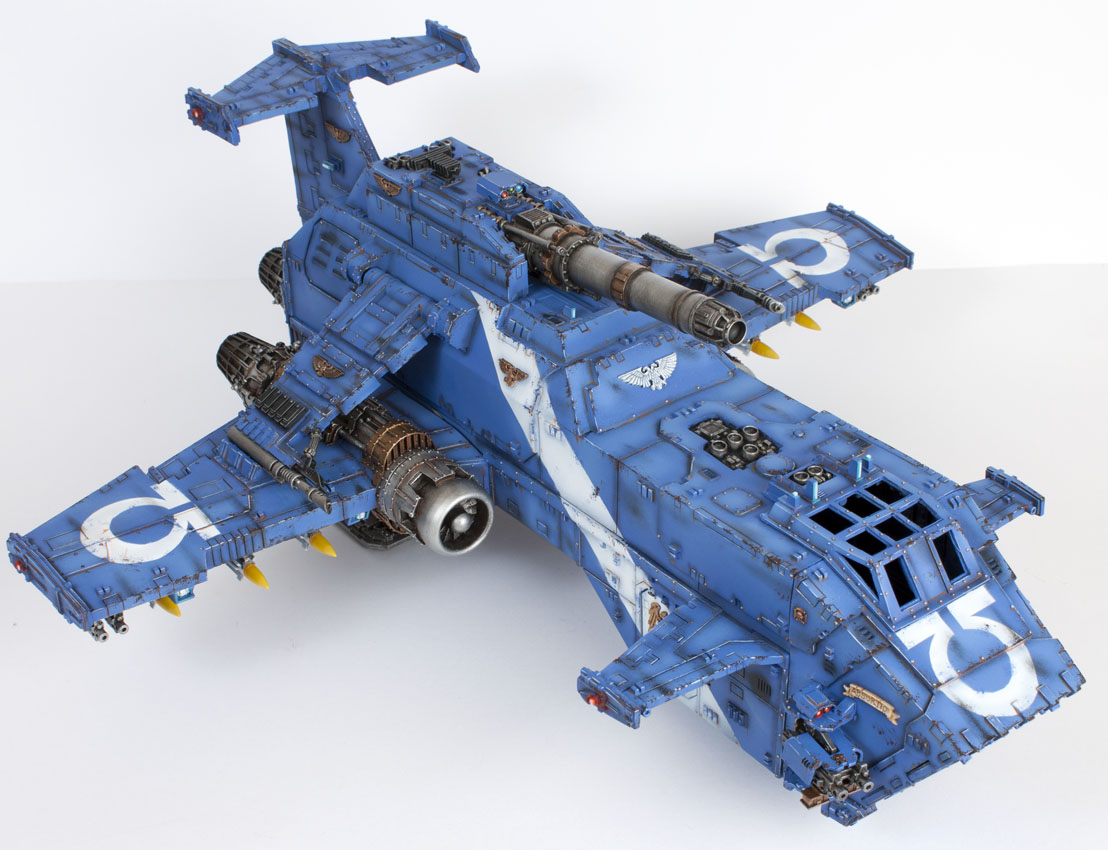

The exterior is complete! This week I’ve spent way too much time painting rust around rivets and chips on armour. I will never get those 7 hours back… 7 hours just to weather a Thunderhawk. I must be crazy. Read on to see what else I’ve accomplished since the last WIP post.


In the before and after shots shown above, you can see the difference the weathering makes. I’ve also painted all the lights. They’re either blue or red with a little OSL added just to reinforce the fact they’re lights. I’ve also finally painted the name of my Thunderhawk on the nose badge. Thanks to Gary Therkildsen for the suggestion of Absortio.


The Hunter Killer missiles have been painted. The mounts are glued to the wings, the missiles neatly clip into the mounts so there was no need to magnetise. I choose yellow tips for my warheads just because it’s matches my Storm Raven and Storm Talon. You can also see the hole I drilled out for the flying stand.


I’ve also painted and glued on the Targetter for the Turbo Laser and just behind it I added the small black piece which I guess is a communication array.


Despite being a large flat blue brick, all the touches I’ve added are really starting to make this piece “come to life”. The massive icons and the white stripe break up the sea of blue. The bronze colours help break up the metals. The shading and highlighting of the blue with the airbrush has given the flat panels depth and has further been complimented with the use of a bright edge highlight on the upper edges. The introduction of the weathering has added context and touch or realism.
Next job is the interior and then the base… or maybe the base and then the interior… suffice to say I’m really close to finishing the blue brick of doom.


I'm new to Tale of Painters, and found this gem.! Amazing work Garfy, love this model. I'm curious what you did for sealing the model? Did you do a matte varnish or do you even us a varnish?
I never sealed it.
Veeeery nice. Easily one of the most impressive T-hawks I've seen so far! You can really see the amount of work that went into the detailing!
Anonymous, that's my thoughts exactly. Thank's for taking the time to comment 😀
I appreciate that you don't add weathering to the missles. Of course, the missles would always be new. It's a detail that most painters miss – even the 'Eavy Metal guys.
Love these articles Garfy! Keep them coming.
That looks incredible. 7hrs seems like a fair trade. Look at what you accomplished. Pretty damn impressive.
Well on paper it's easy, but the key is the application. If you add your chipping and smoke damage in unrealistic places or make it too symmetrical then it won't sit well with your minds eye. I'll try to cover this in more depth when i get round to the Land Raider tutorial but suffice to say you can't go wrong with looking at real life examples or using common sense for damage and weathering.
Do you have any links to your weathered vehicles mate?
Don't have any posted, and haven't done any recently. Hence the tutorials would be helpful 😉 Most of my vehicles are "factory fresh" 🙂 Will post up some of my older Ork items ( Stompa and Dreadnought ) that I tried my hand at it.
Only model with rust I have is my Nurgle lord and some of his followers.. http://mrleespaintingemporium.blogspot.co.uk/2012/06/project-daemons-of-chaos-nurgle-herald_29.html.. but need to take better shots of it..
Get recipe would be
1. Airbrush blue
2. Painstakingly paint orangey brown around the rivets and run into a few crevices.
3. Sponge on some dark brown chipping
4. Drybrush black smoke damage in places.
5. If painting a ground vehicle use weathering dust around the skirt and on the wheels/tracks.
I might paint a Land Raider soon. If I do I'll do a tutorial on painting it including the weathering.
Thanks for taking the time to comment M R Lee. (-:
Cheers for that Garfy! Always nice to see how others do it, and yours came out great! Also like how it can be described so easily, but in reality is it? 😉 Looking forward to the tutorial on the land raider. Always enjoy the ToP tutorials!
Great work there. It might have been 7 hrs, but it was well worth it! Any chance for a quick tut on you how went about it? Or recipe?