
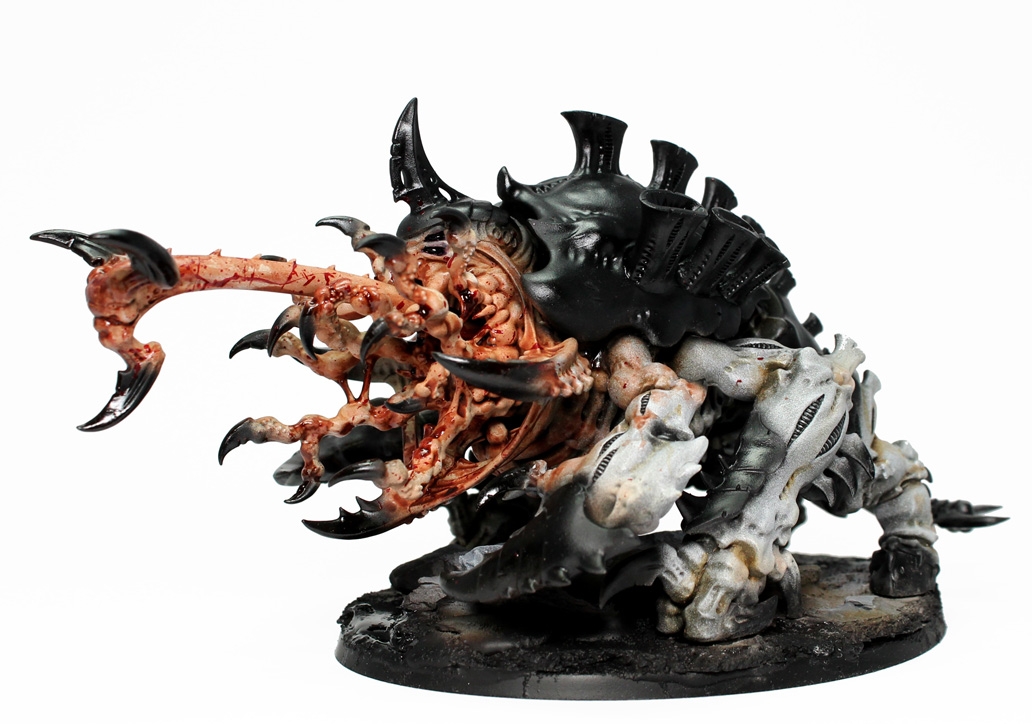
Hey guys, today I want to do a quick tutorial on painting blood. How I paint blood is a question that I get asked a lot and it’s very easy to do.
Step 1:
Load your brush up with GW Reikland Flesh Shade and apply to area that you want blood. At this stage you do not have to be all that careful, infact the more randomly messy the better.
Step 2:
Once the wash has dried completely apply another layer of GW Reikland Flesh Shade and let this dry.
Step 3:
Mix Vallejo Smoke with GW Evil Sunz Scarlet. This should be something like a 70/30 ratio mix. The 70 being the Vallejo Smoke as you want to create a darker dirtier colour. You then need to create a wash with this colour. All you need to do is dilute it down with regular water. Once you have this colour watered down apply it in areas of interest over the already dried GW Reikland Flesh Shade. Again the more randomly messy the better. (keep this paint to one side for later).
Step 4:
Once step 3 has dried mix Tamiya Smoke with Tamiya Clear Red. You want this at a ratio that you are using more Tamiya Smoke in the mix so that the red is darker. Apply then in areas of interest. This paint is interesting as the finish is gloss compared to the paints that you have laid down previously.
Step 5:
Once this has dried or even if it is still slightly still wet you can apply Tamiya Clear Red on it’s own in area’s of interest. Let this dry.
Step 6:
Now the fun part. With the previous mix of Vallejo Smoke and GW Evil Sunz Scarlet that was watered down load up a stiff brush and with your finger flick the brush at the areas you have painted blood on. You can also do the same with GW Blood for the Blood God paint. I usually use both as I like the effect.
So I hope that answers any questions about how I paint blood. Was it useful?

13 Comments
Leave a Reply
Tale of Painters is the unofficial Warhammer hobby magazine run by hobbyists like you. Support our work by using the affiliate links from our 🇺🇸 / 🇨🇦 partner stores for your next orders so we can continue to bring you fantastic FREE content every day:


Or support us directly:


Sorry not sorry for necroing the thread.
Hell yeah that was useful. Been lurking a while, and your tuts are still useful, informative, and inspiring.
Thank you all.
Your tyranids have precisely the sort of paint scheme I'd like to try for my swarm. Thanks for sharing your blood recipe – I'd also like to see how you painted the rest of the miniature.
Hi, many thanks for that. As many people here I was really looking forward to your tutorial for painting the whole nid. Even the black part, I was wondering if you do some highlight?
Thanks for your tutorial on Painting blood.
take the time to visit my website
Cheers mate, I will use this on my Skaven. Cool!
All of this is covered in your Nurgle tutorial.
That it was, but just thought I would do a recap for any new readers to the blog.
I went looking for this Nurgle tut but couldn't find it, glad you have re-capped it here for us new readers! I have saved it to Evernote
That's awesome I love colour scheme on the nid! What's the recipe for that organic greyish tone?
Yeah i wanna know this to.
Please give us the secret.! XD
I love this skin style
I am about to start a large Tyranid army quite soon, so maybe I'll do a quick tutorial then if I can find the time.
yeeeeeees
Thanks for that! I will give it a go. Dan