

I love it when something goes wrong. It gives me the opportunity to create a solution. Let me explain after the jump.
I received some macro extension lens tubes for my DSLR camera for Christmas. These are fantastic for getting even closer to subjects. The subject fills my camera’s frame more because I can focus closer. There is a downside however, I can see things on the paint job that I couldn’t with the naked eye. Including paint rub.
Paint rub happens if you handle your model too much. Since 1993, I’ve always held the base and painted the model. Occasionally, resting a finger on the model to steady my hands. That’s a long time doing the same thing. I have to break this habit to stop rubbing paint of my models.


Early Concepts – Epitome of over design
I’m a Graphic Designer (print background). So I’m use to coming up with ideas and concepts to solve problems. Whenever I start conceptualising, I always over think it and over design it. This is to try and visualise all problems and solutions. Gradually, I’ll strip away the over complicated ideas or work them into the design in a more elegant way. The first concepts above had a separate stand, adjustable finger rest with clamp, spring loaded grippers, nuts, bolts etc etc. It’s crazy and needed reworking. It’s good to see what it shouldn’t look like.

Revised Concept – Streamlined
The revised concept above is much closer to what I ended up 3D printing. You can see a handle which is made from two halves which is bolted together. It has a a recessed area at the top for 50mm, 40mm, 32mm and 25mm bases and I’ve written a note for a cork insert. The stand is gone, I’ll just make sure it’s flat at the bottom so it can stand. The spring loaded clamp has been removed and shims will be used instead for different sizes. The adjustable finger rest has been removed completely. This could be an add on for future versions.

Getting the size right.
With a rough idea of how I wanted the handle to work, I needed to find out what size and shape would be the most comfortable. I used Play-Doh and moulded it into my hand. This gave me a feel for what height and diameter would be comfortable. I also decided it needed some “dimples” to act as a grip and a place for finger and thumb tips to rest.

The next stage was to create my handle in CAD software called Fusion360. Here you can see some changes from the concept sketch. The cavity for the cork has been moved to the bottom of the handle. Instead of a single bolt, holes have been added for three bolts. This helps prevent the two halves twisting and to make sure there is enough force to clamp the cork and the bases at both ends.

First Prototype
I was really keen to print off a prototype and test the handle. Overall size and shape were fantastic. I pretty much just had to tweak my support structures in the 3D print slicer software to get a more accurate print and adjust the size of the shims by fractions of a mm and I was done.

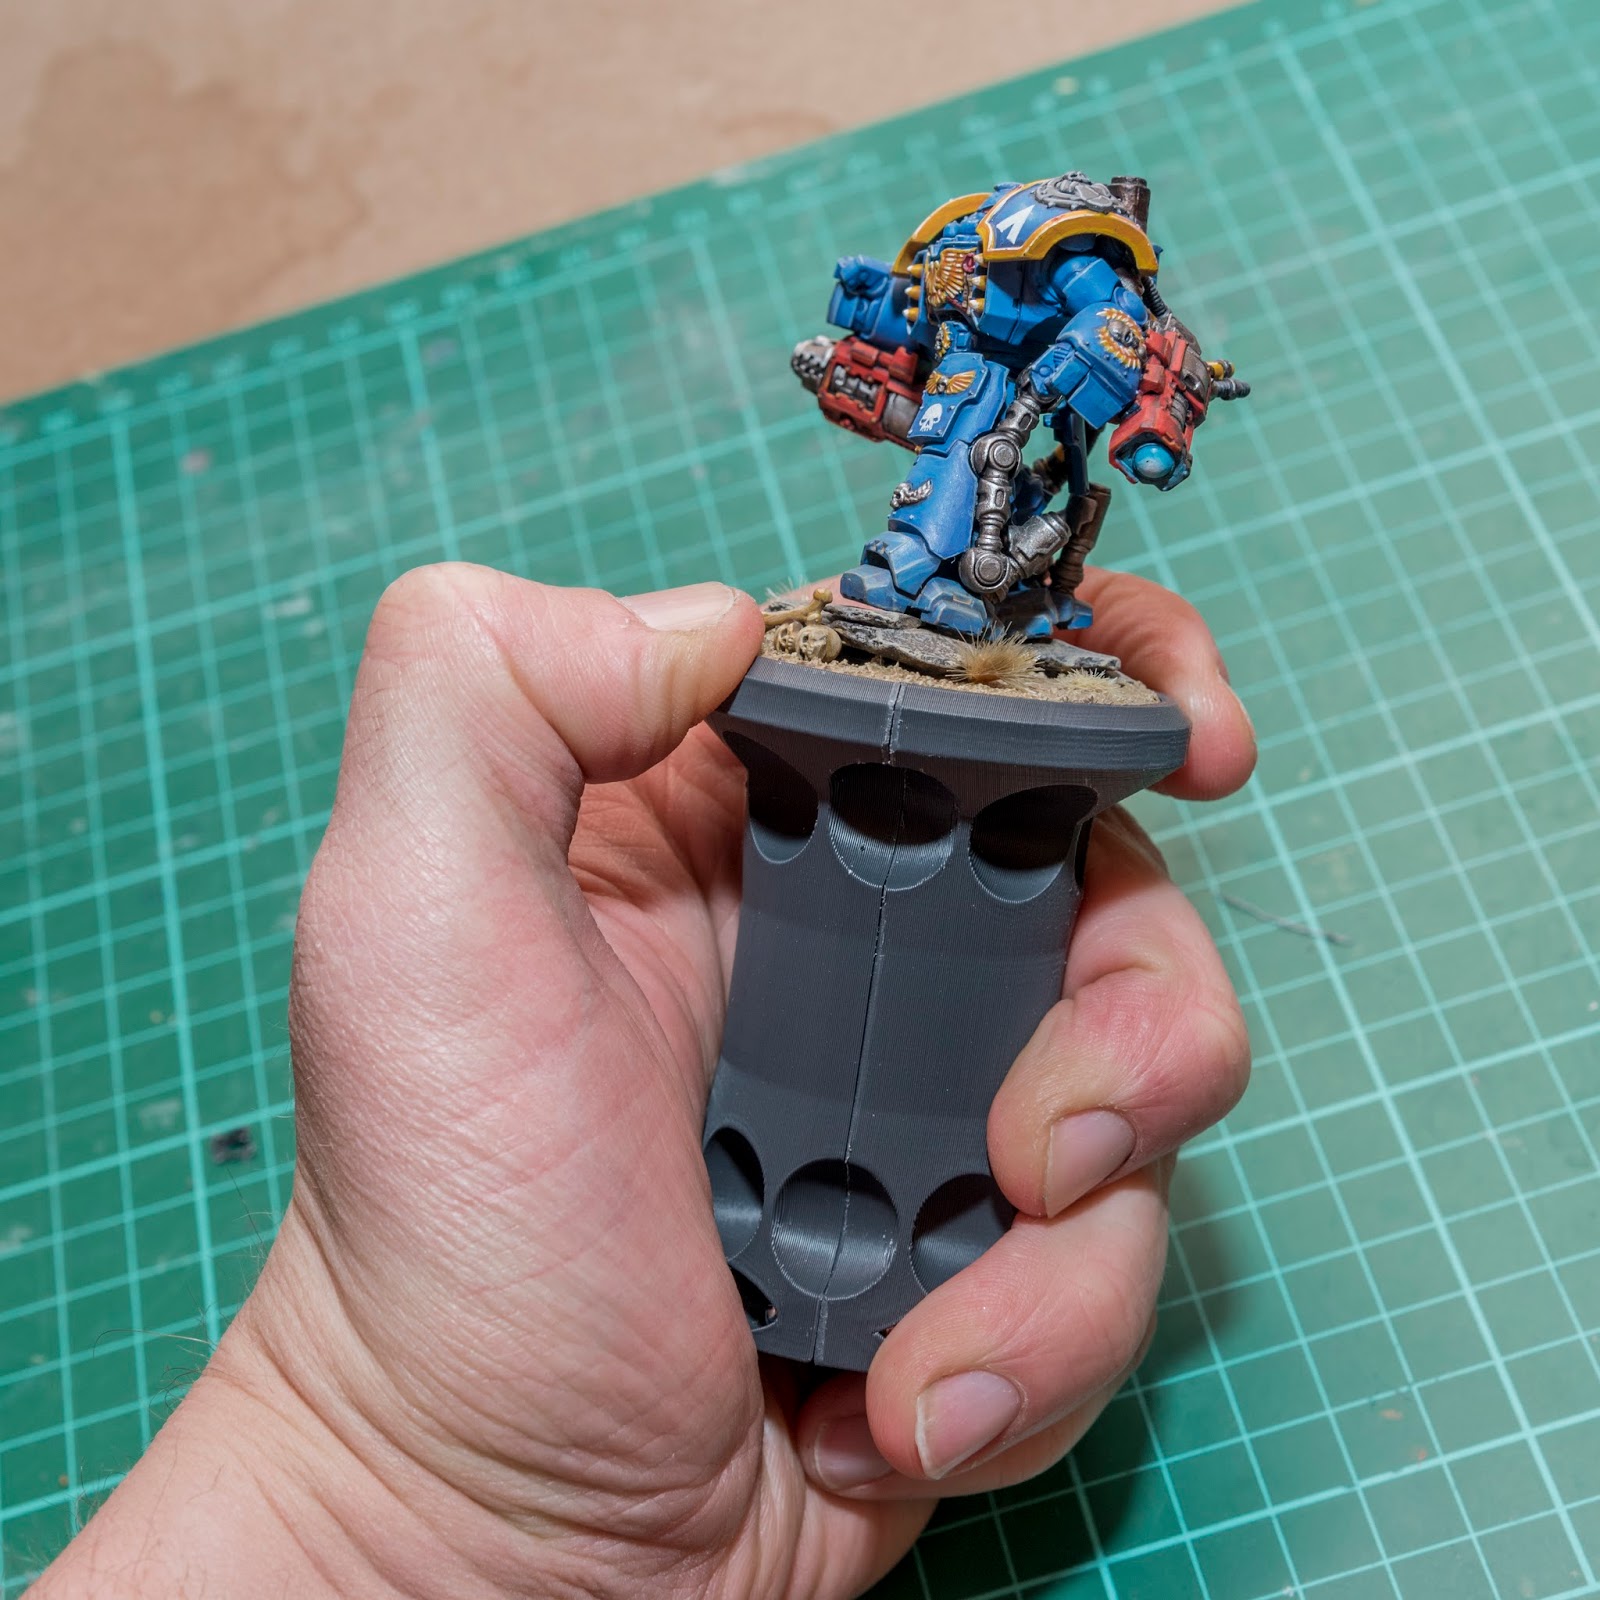
Meet Garfy’s Get-a-Grip, which was almost named Garfy’s hand job, which before that was almost named the rim job.
Ta-da! The finished grip. You’re probably wondering “that’s a lot of time and effort to create something that Citadel sells for £5” but let me run through some of the useful features that you can’t get on the Games Workshop one.
1. The orange shims have a tapered wall that follow the angle of Games Workshop bases that when clamped together grip the model’s base with no chance of it falling or springing out
2. With no shims added, the handle will take a 50mm base. The Games Workshop one only goes up to 40mm.
3. The cork insert at the bottom makes this really versatile for painting small pieces or models not mounted to a base. Just pin a paperclip to your model piece and push it into the cork.
4. I can print out more of these. Instead of only owning one and having to swap out the models. If I want to batch paint 10 space marines I can print out 10 holders. That would cost me £50 in model holders at a Warhammer store.
5. I can have these in any colour I want. I hope you like my Tale of Painters colour choice.
Now in fairness, mine has a couple of downsides too.
1. Mine won’t grip oval, square or non-games workshop bases. However the cork side is flat so you can blutac or lightly glue odd sized bases to that side.
2. The Games Workshop one is quick to change models with its sprung loaded grip. Mine requires undoing three bolts to release the miniature, which is more fiddly. I use an electric screwdriver with a clutch. It takes seconds to undo with no fear of stripping heads or over tightening.

Great size grip feels comfortable.

Thin enough to hold comfortably like a pen, to paint those hard to reach areas.

Dimples make it it easy to grip it any way you want.
The mock base edge even means you can hold the”base” like you use to.
So what’s next? Well I’m going to use this for a couple of months and see how I get on. I might return to the design and include a finger rest. I’m already thinking the finger rest arm could form fit into one of the side dimples and have a square hole in the side so the handle’s two halves also clamp the finger rest. Not sure if a plastic finger rest will be strong enough but might be.
They take a long time to print. It’s not practical to stock these in my eBay store. I might take a few private orders on Facebook for friends but I can’t really compete with GWs £5 per handle.

Available now on Thingiverse for free, you just need a 3D printer.
If you would like to download and print Garfy’ Get-a-Grip yourself then check out this link at Thingiverse. All the info you need to print this is there. It’s free to download. If you like it, feel free to tip me. It’s greatly appreciated.

Shapeways are expensive, but cheaper than buying your own printer.
For those of you without a 3D printer but want to Get-a-Grip, you can order one at Shapeways. Shapeways will print in high resolution on industry standard machines. A Shapeways print will be better quality than mine! Their price is expensive and it’s there if you need it. You could always order it from Shapeways and make resin casts from the master? The quality from Shapeways is second to none. Better than what I can achieve at home.
Hope you enjoyed this slightly different post. It was a really fun project for me.
UPDATE:
I’ve decided to sell a new and improved MKII version on eBay. Check it out.

17 Comments
Leave a Reply
Tale of Painters is the unofficial Warhammer hobby magazine run by hobbyists like you. Support our work by using the affiliate links from our 🇺🇸 / 🇨🇦 partner stores for your next orders so we can continue to bring you fantastic FREE content every day:


Or support us directly:


Seems like you could work a quick-release key lock tab in to the next version. Essentially a little T shaped key that you turn 90 degrees to lock or release the second half. Would be just as secure but would give you a much faster way to switch out models.
Yeah some form of quick release would be useful, nice idea mate.
I like the other idea of adding a recessed groove in the handle at the top and bottom and using rubber o-rings to hold the two handles together. I think the MK2 design will have that feature instead of the bolts.
Thanks a lot for throwing these up on thingiverse. I can see how a grove could fit just below the upper lip to attach an upper finger holder. Could have little indents to keep it from twisting around and have it attached like an E clip.
If you modify it and make an improvement, make sure you link back to my one on Thingiverse so I can see it and maybe try it out. Would be cool to see people take the idea and improve it.
Ive always been a fan of a tube stuffed full of playdoh, i like the idea of a finger rest
know a few guys who swear by the rathcore holders http://rathcore.com/ which look great other than split cork sucks for GW plastics (great for slotta lead though..)
One simple design change i would make to your holder is to put some stiff springs bookended by washers on the bolts holding the two sides together, and use longer bolts so that you could pry the holder apart to swap rings or mini's rather than full dissassembly, you could tweak the pressure by tightening or loosening the bolts then
That spring suggestion is amazing Nakchak. Thank you
I like very much your design. I have a 3d printer and definitely need to test it. I start with the same overdesign concept, but I finihed with this more easy design to speed up print:
https://www.thingiverse.com/thing:146360
In order to replicate the grip of an handdrill, a smaller diameter grip.
I design some variations with different base dimension etc. I will upload them as soon as possible.
I like the idea of the half moon pieces to grip the miniature, but a small piece of bluetak/patafix works well. I printed plenty of them.. so go for the number respect the design, but it works 🙂 🙂
Good job! I want to test the larger grip, similar to the GW One.
Nice grip man.
Or you could just put bluetac on an empty GW paint and then stick the mini there like I do.
Yeah I'm getting some great ideas over on Facebook. One guy pushes the figure into a tub of playdoh. Someone else uses gloves.
I may have gone high-tech and potentially overboard but it's working for me.
I do something similar – although using some very old (~1992) Tamiya colour pots. They are fatter than the GW ones, so they are a bit easier to hold. Plus they have a flat top with their brand stamped into it, so makes it easier to grip a flat mini base with blutac. Obviously buying new paint pots as holders is a bit of overkill… but they do have a nicer feel than the GW ones.
If you did one with a good finger rest I'd be all over it. Painting up a lord of change and the body and wing's are just to big to have a handle alone so rests at least two are a must.
If someone did a palm piece for one of the rests to hold on higher up the mini without touching it that would have made my life so much easier.
Also if adding a rest it need to be able to rotate round the mini without needing to unclamp.
Thanks for the feedback. Rotating finger rest. Makes sense.
Hmm I may be getting access to a CAD mill in the coming months and would be able to mill aluminium moulds for injection moulding. I may have a the project to taste out my methodson.
Well the STLs are on Thingiverse. Feel free to use/adapt my files if you want.
Thank you. Wayland games is one of my local FLGs so if I get anywhere I'll give you a shout over FB and let you know.
Do you know Stuart Mackaness? I'm friends with him (use to work with him at GW briefly) and he's a manager over at Wayland. So I can easily arrange a meeting between the three of us.