
Looking for a quick and simple way to paint the barricades from Kill Team? Then check out this tutorial. I came up with a straightforward paint scheme that can be easily replicated with only washes and drybrushing, so there’s no excuse not to try it. Definitely no rocket science.
This tutorial assumes you know the basic grips of painting Warhammer miniatures. Step-by-step I explain all the paints and techniques I used. I have a rather eclectic paint collection, so when I use a paint that is not from Games Workshop (or out of production), I’ll try to provide you with suitable alternatives from the current Citadel paint range [in brackets]. However, if you want to achieve exactly the same result as shown, I recommend expanding your paint collection. You’ll find a list of all the paints used in this tutorial at the end of the post.
How to paint Kill Team barricades
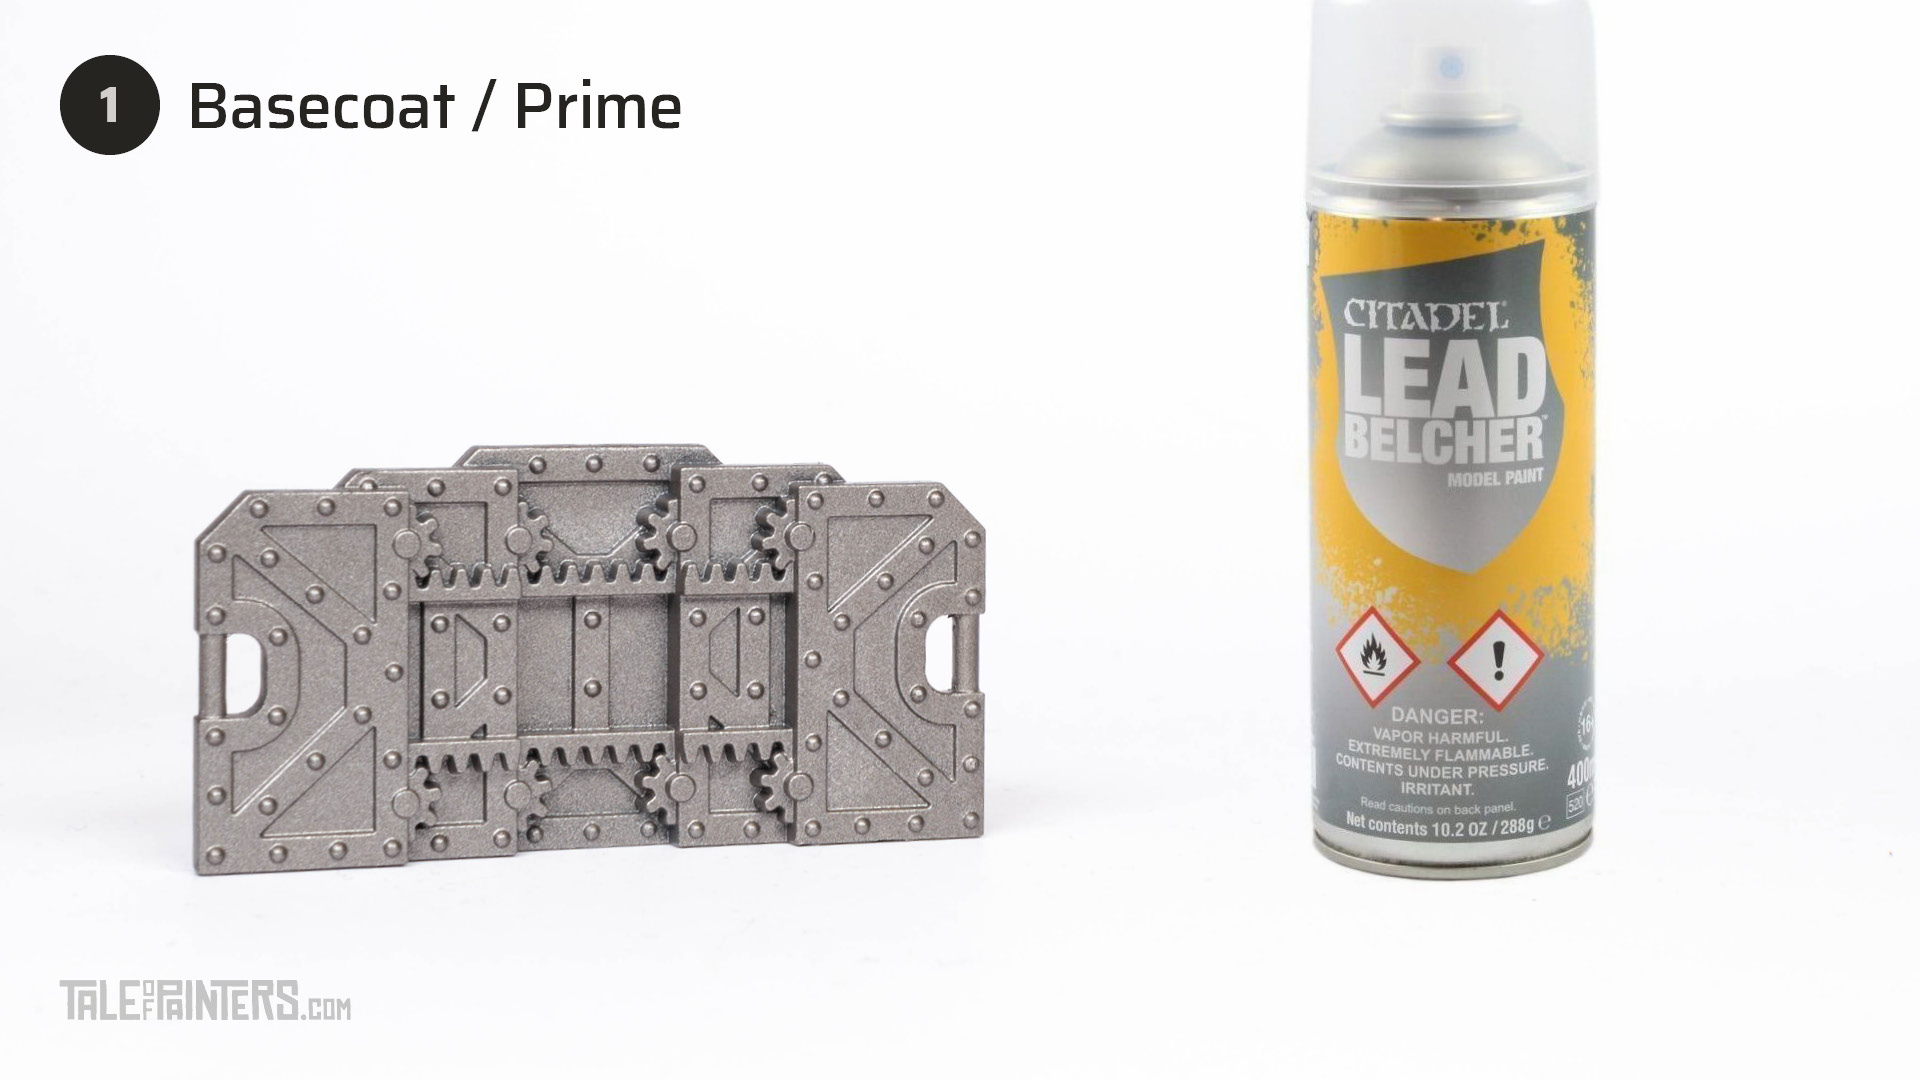
Basecoat the barricades with Leadbelcher spray paint. You could also apply Leadbelcher base paint (or a similar dark metal colour) with an airbrush or large brush.
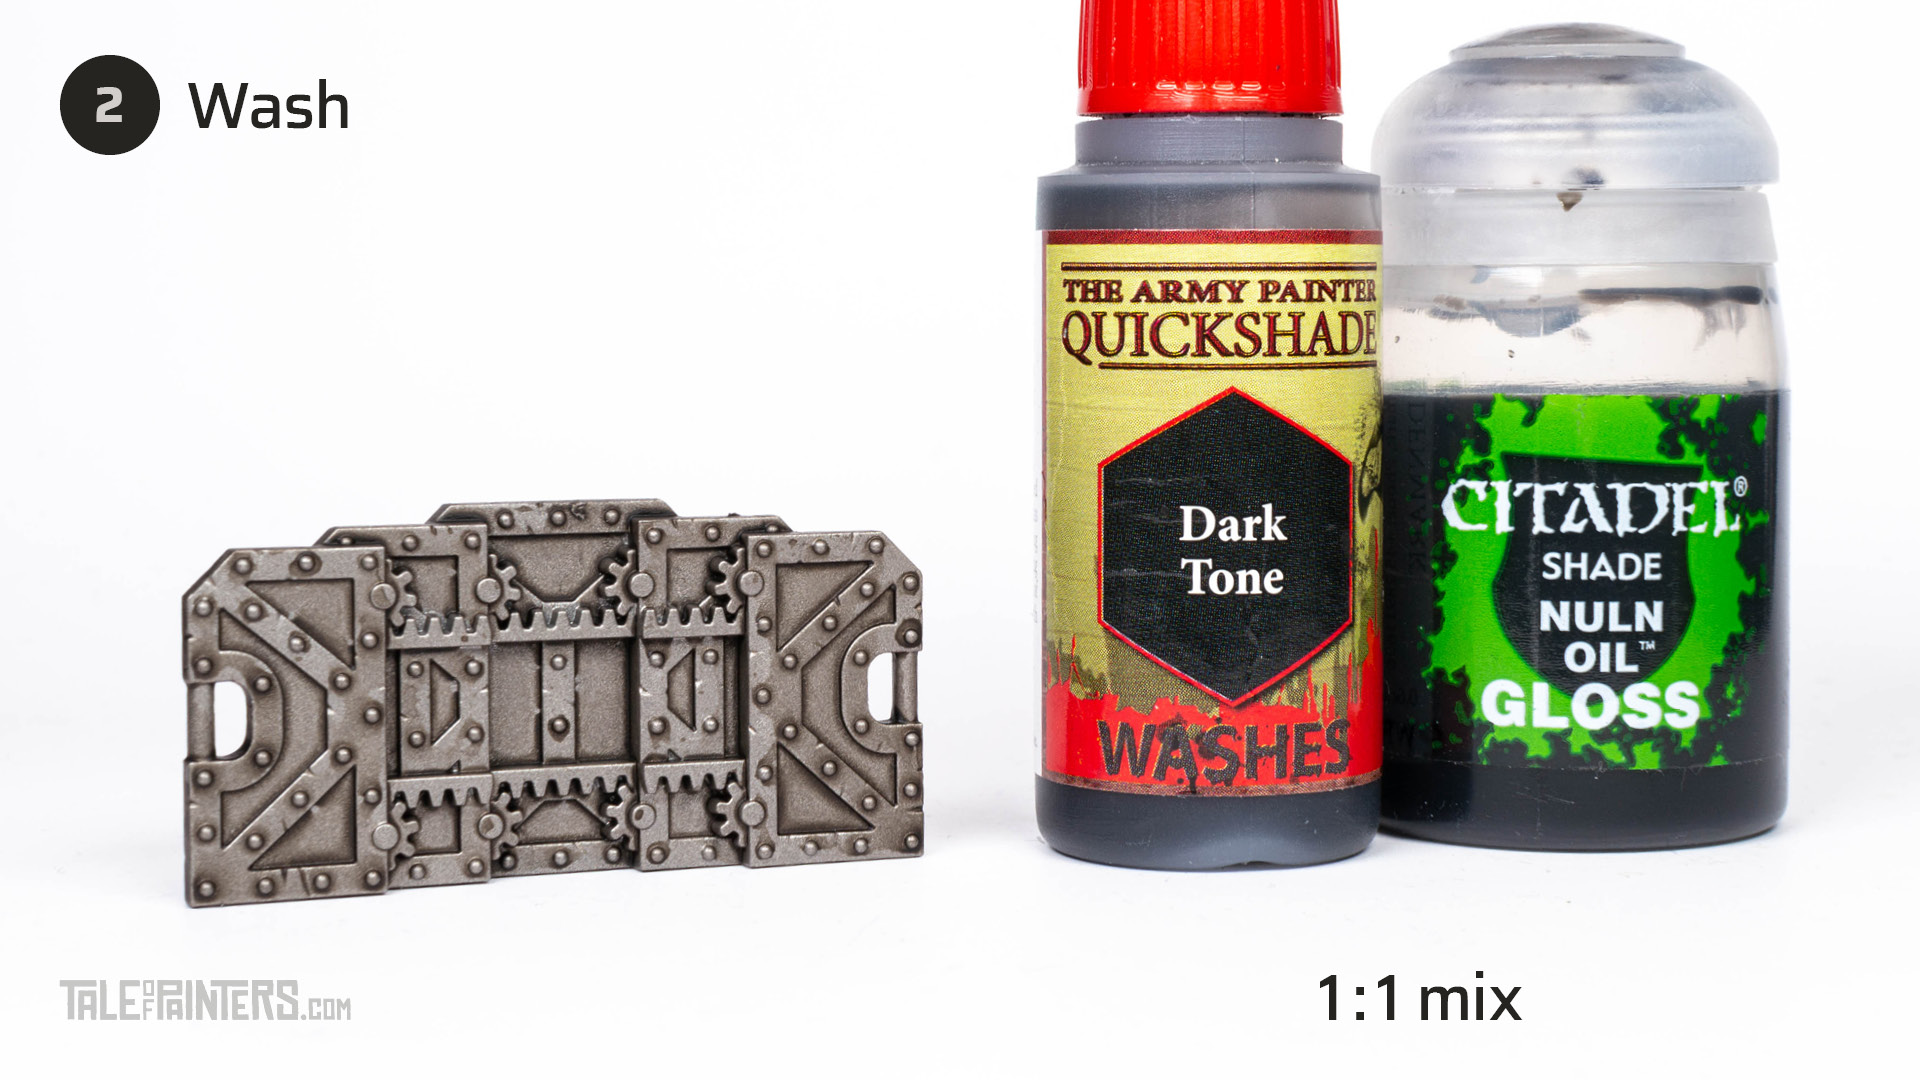
Mix Dark Tone Wash from The Army Painter [or Nuln Oil] 1:1 with Nuln Oil Gloss and apply it all over. For a more even result, I applied the wash on one side of the barricade and let it dry horizontally, so gravity won’t pull the wash towards the bottom. Once dry, I applied the wash to the other side.
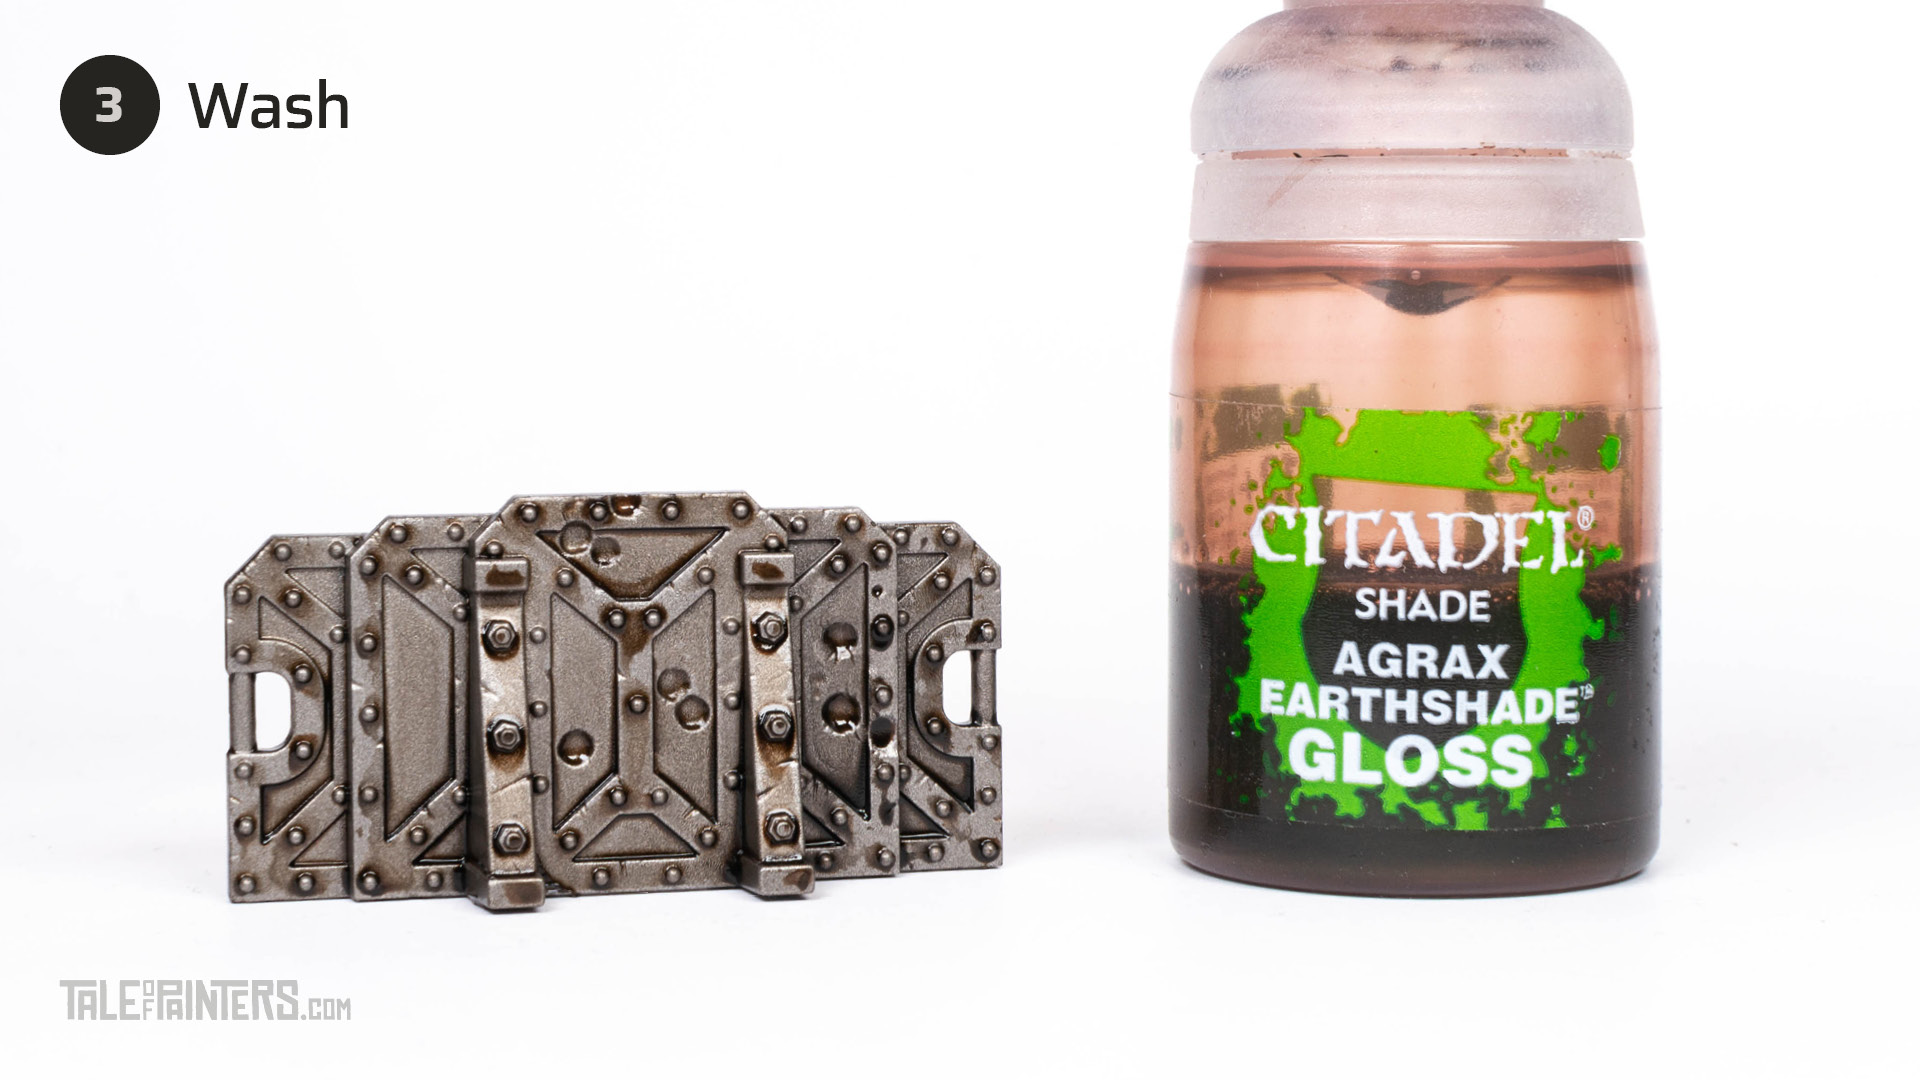
Add another wash with Agrax Earthshade Gloss all over. This time, let the barricades dry vertically, so the wash will form natural streaks towards the bottom for a dirty, oily look.

Mix Vallejo Mecha Color Dark Steel [or Leadbelcher] with Dark Tone Wash and Agrax Earthshade Gloss in an approx. 3:1:1 ratio, and paint it over the edges of the barricades where the washes have probably dried a bit unevenly.
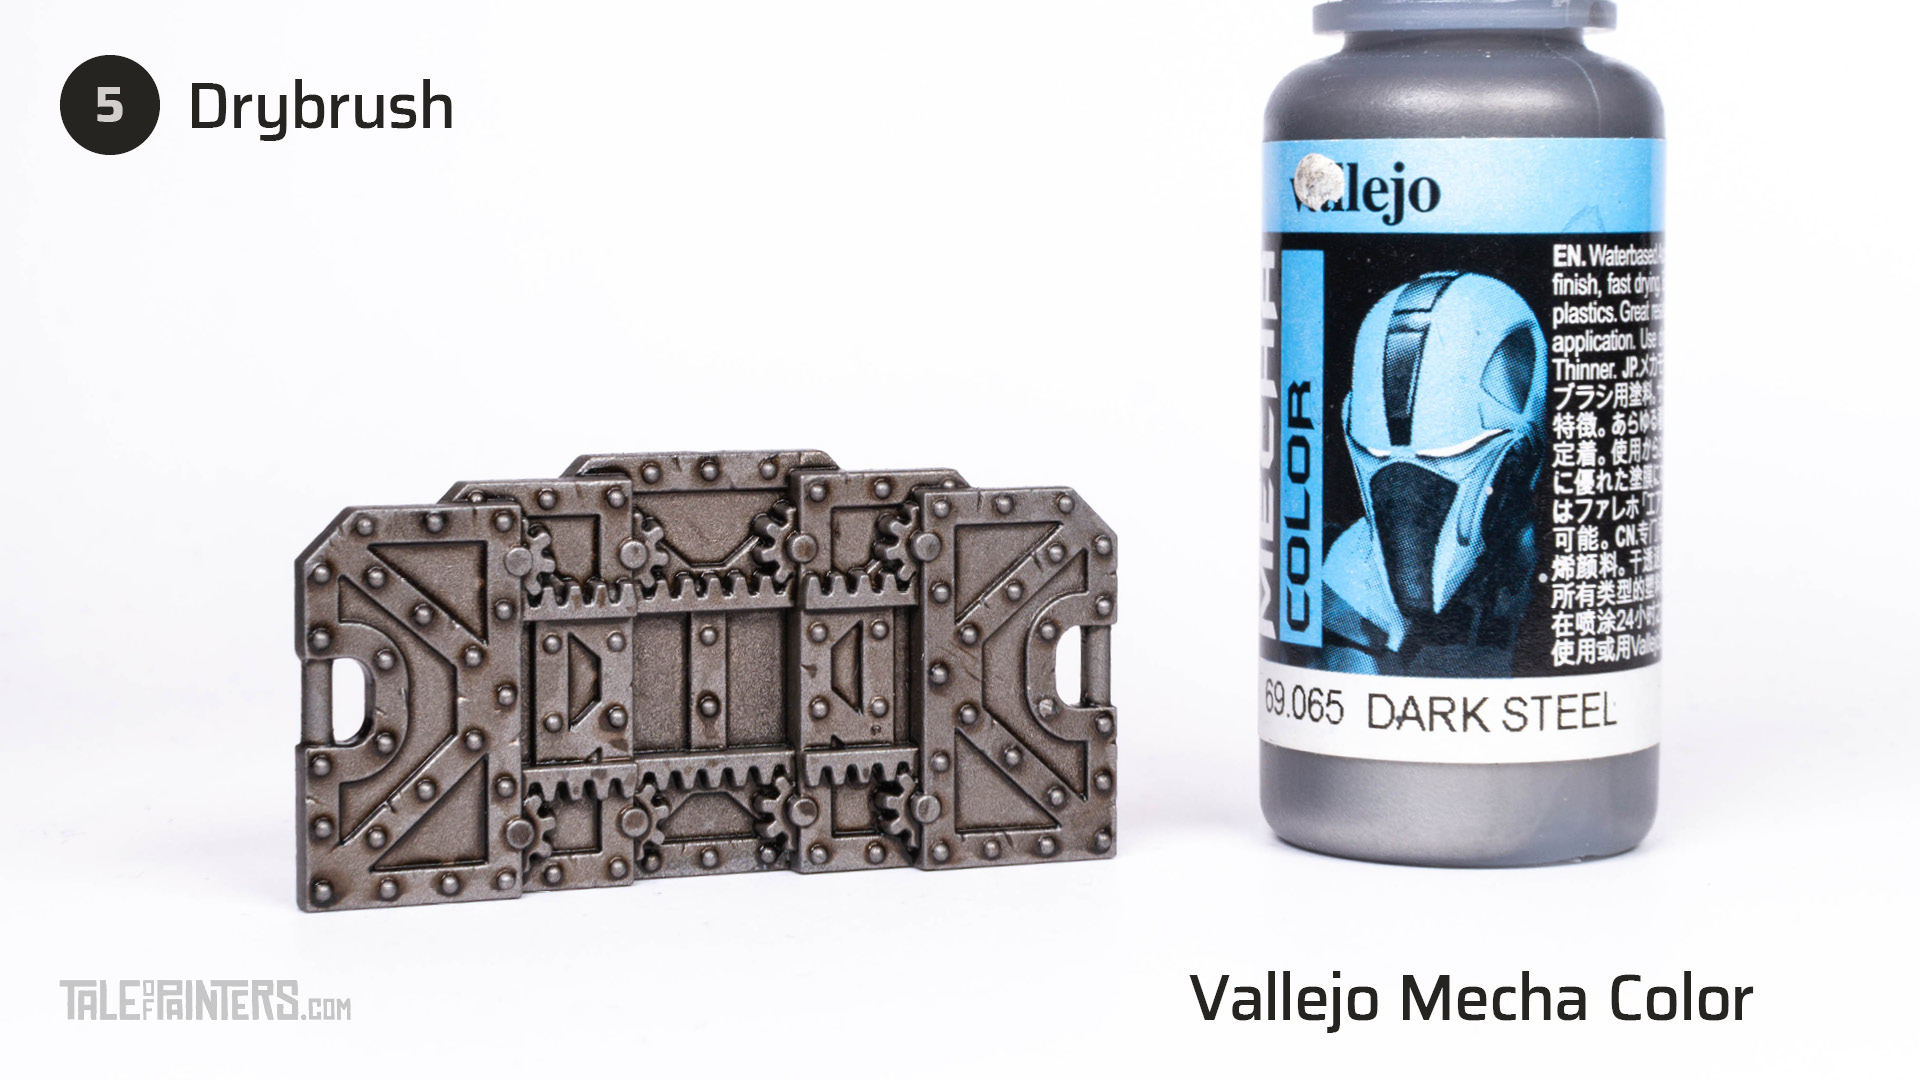
Drybrush the barricade Vallejo Mecha Color Dark Steel [or Leadbelcher], a round top drybrush or makeup brush in circular motions is perfect for this.
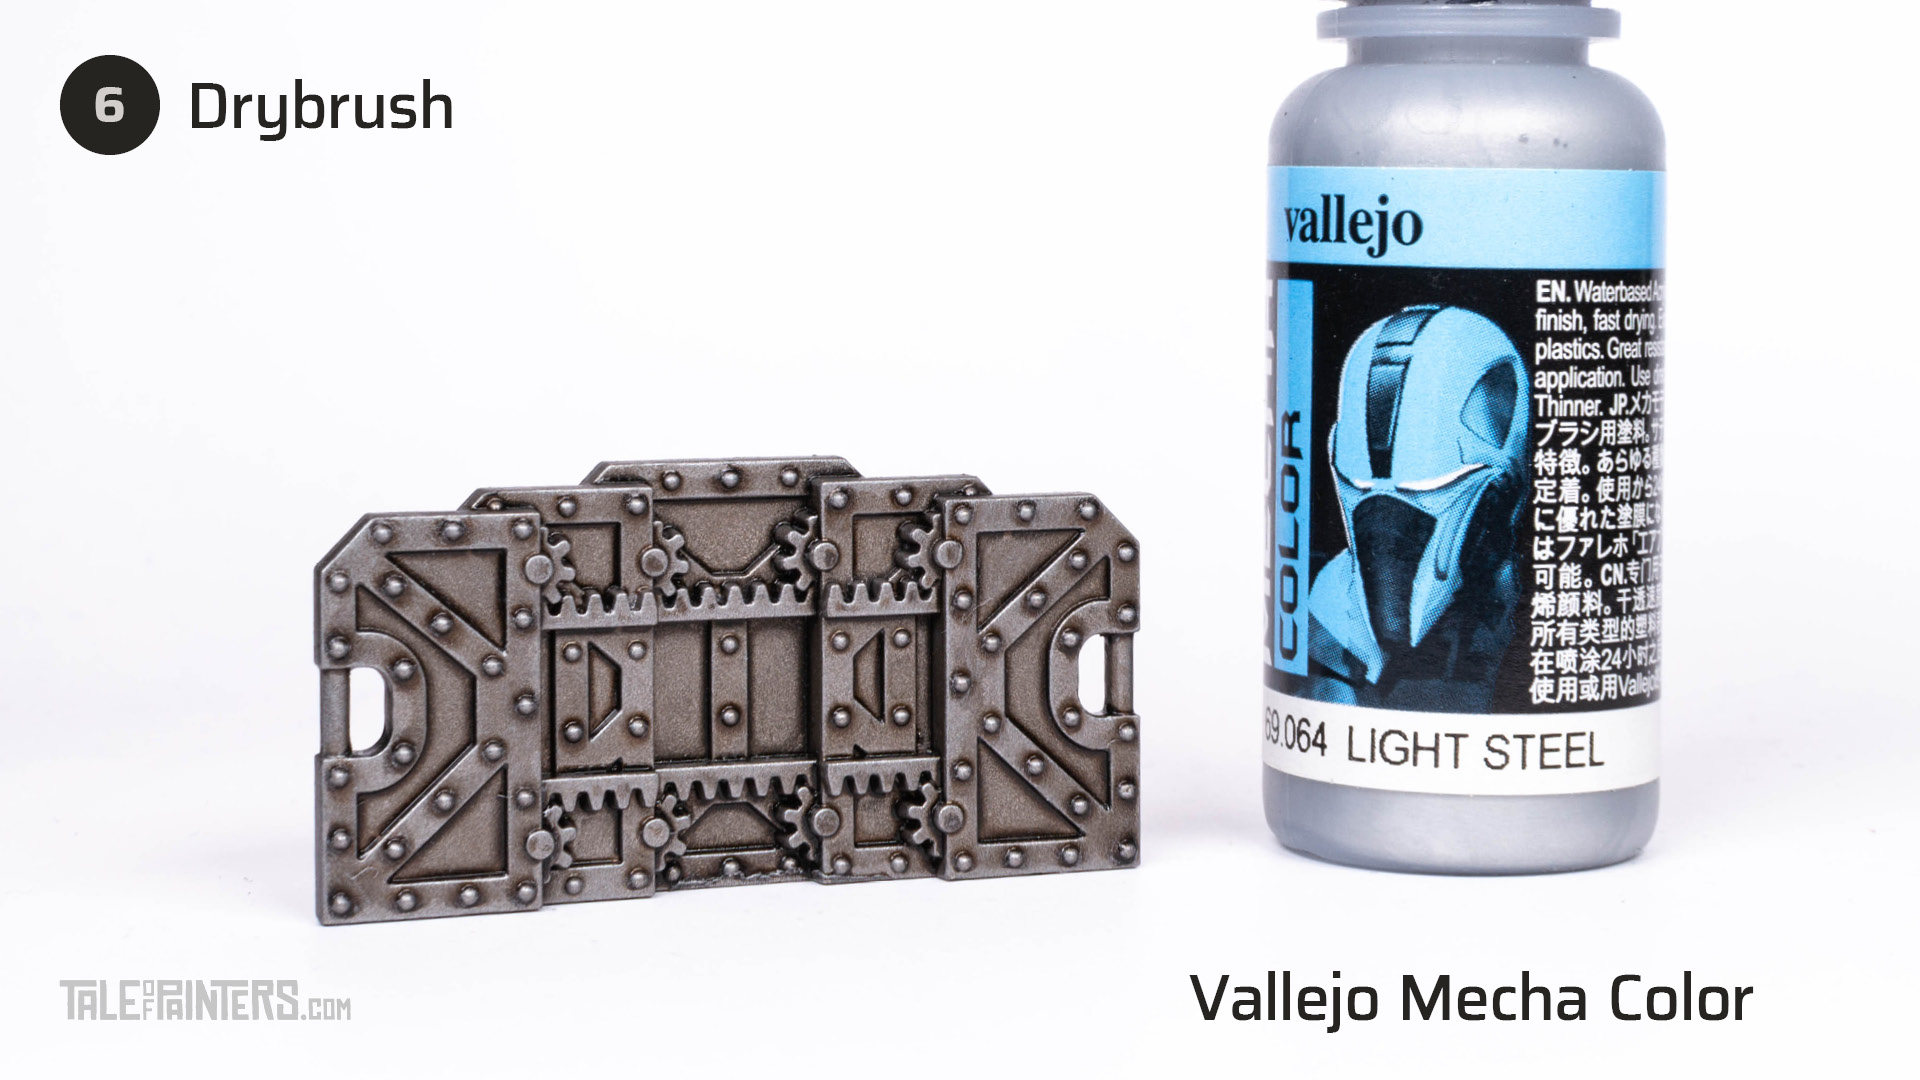
Add a highlight by drybrushing the barricades with Vallejo Mecha Color Light Steel [or Stormhost Silver]. Guide the brush from top to bottom to catch only the upper edges to simulate the natural fall of light.
Finally, a coat of matt varnish (I used Anti-Shine Matt Varnish from The Army Painter) will tie everything together and remove the gloss from Agrax Earthshade Gloss.
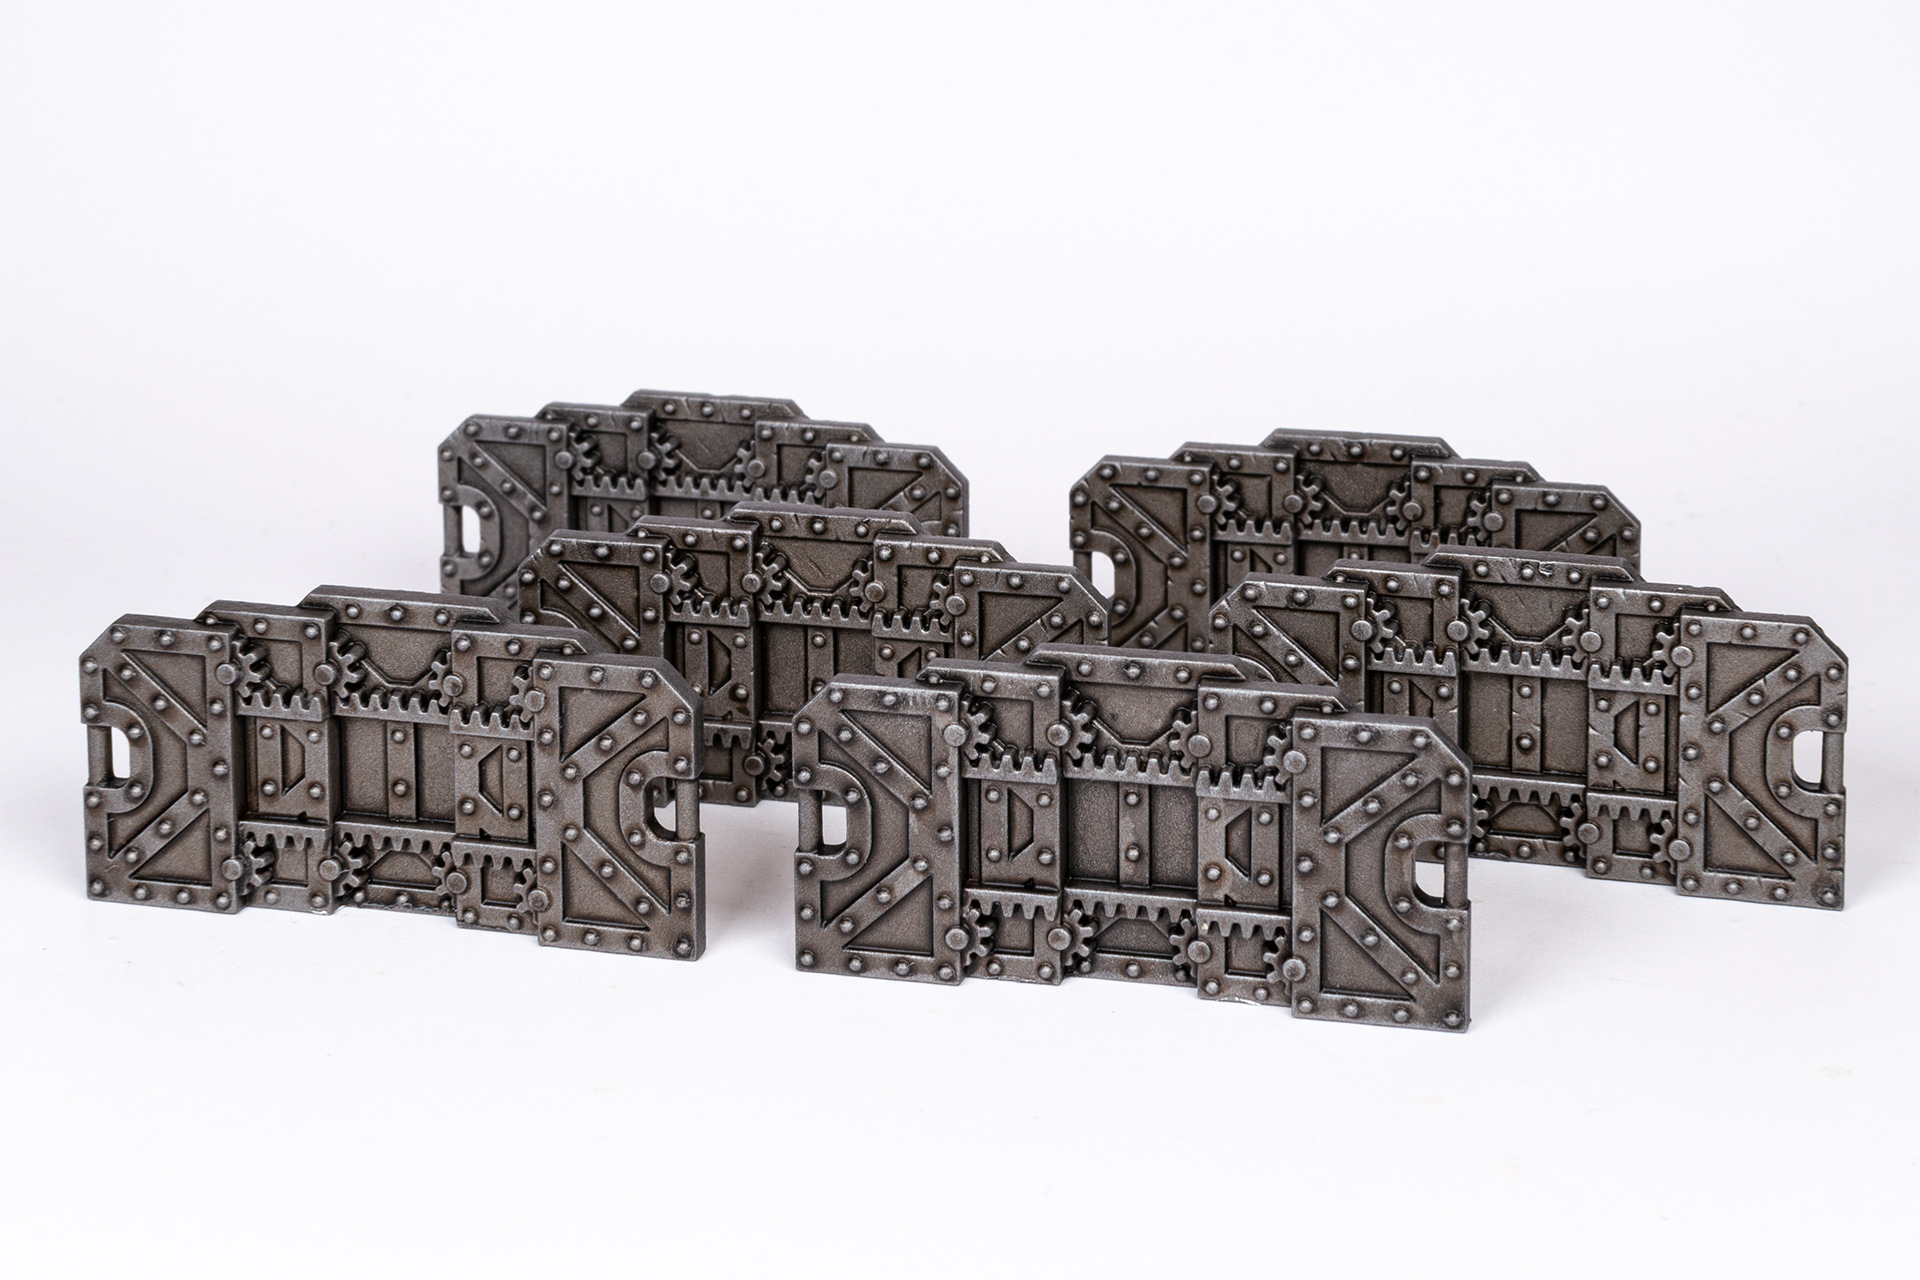
Here we have the finished result. Apart from watching the washes dry, painting these barricades was no effort at all.
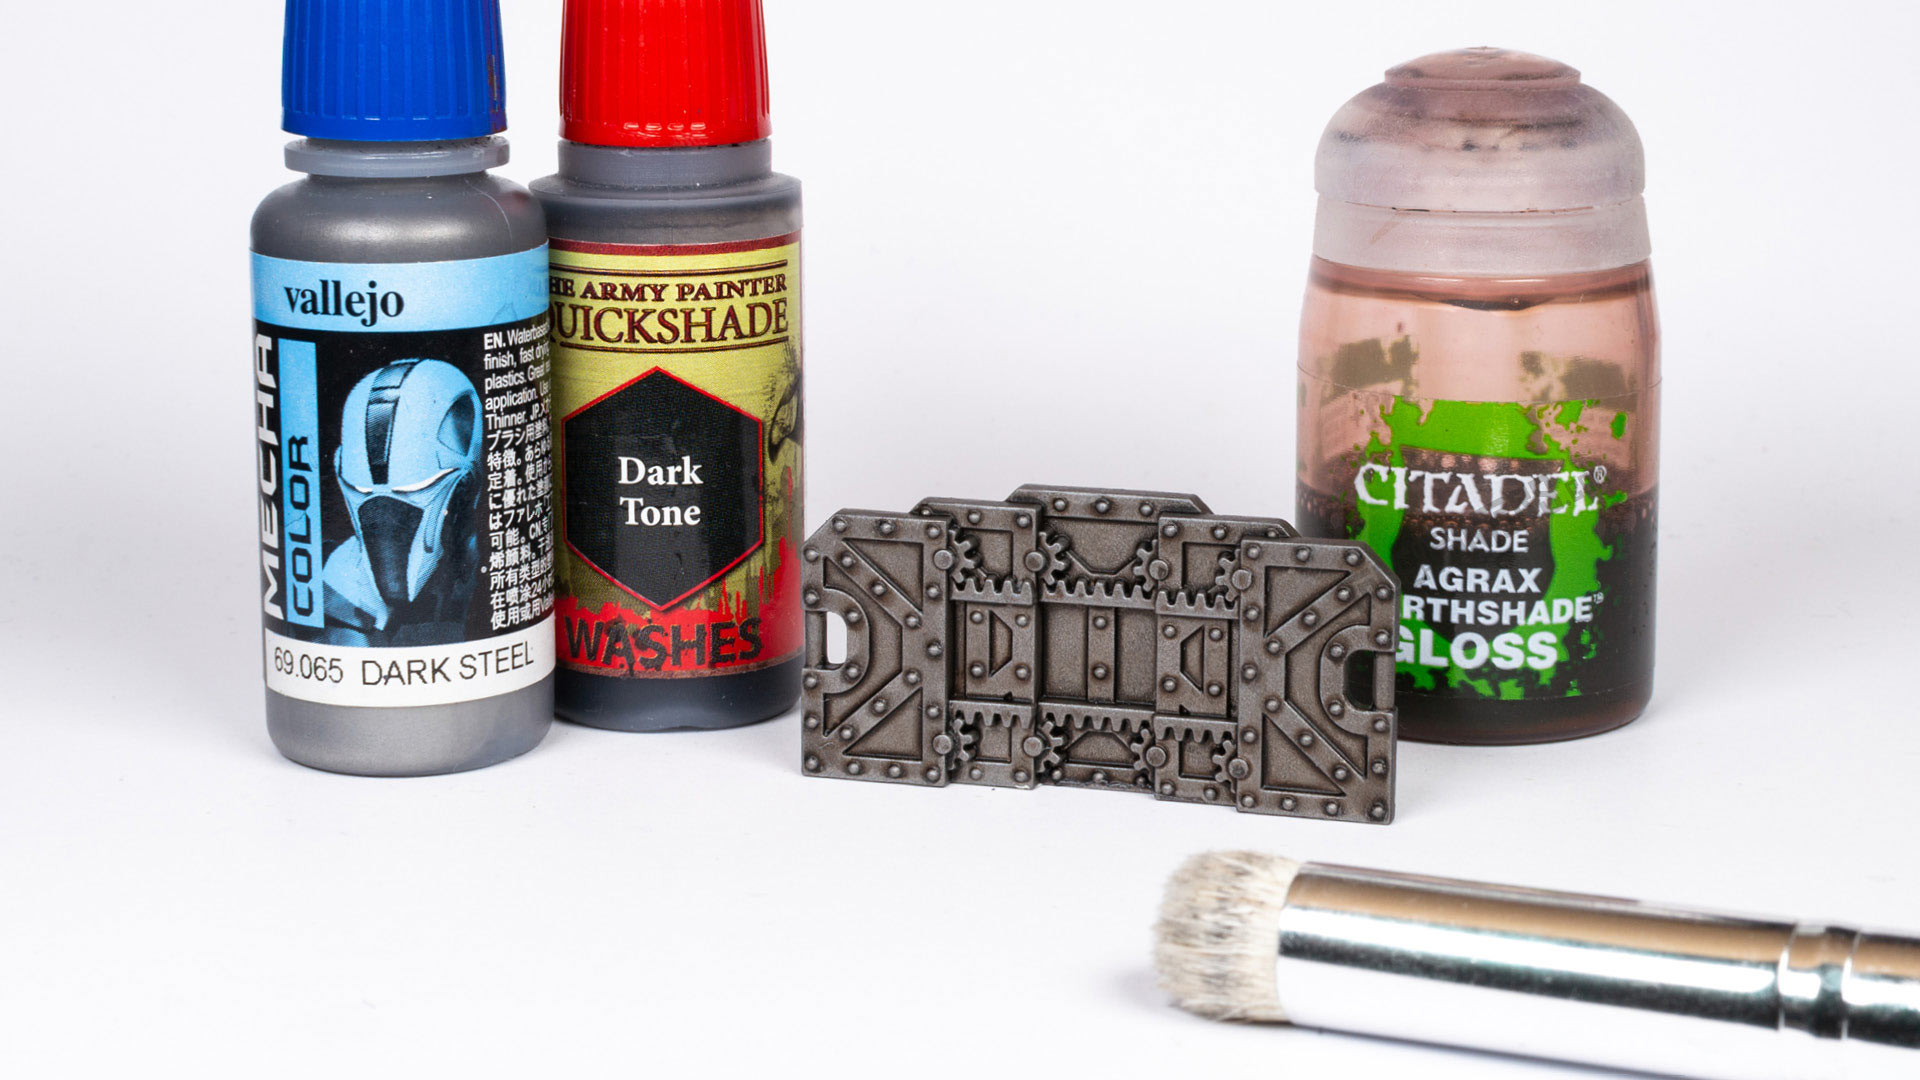
Paints you will need for this tutorial:
Citadel (Games Workshop)
Leadbelcher Spray
Nuln Oil Gloss
Agrax Earthshade Gloss
The Army Painter Warpaints
Dark Tone Wash [or Nuln Oil]
Vallejo Mecha Color
Dark Steel [or Leadbelcher]
Light Steel [or Stormhost Silver]
If you need to expand your paint collection to follow the tutorial, check out our partner stores Wayland Games and Element Games, which offer an amazing range of paints at a discount.
Do you need some more terrain painting inspiration? Check out Garfy’s tutorial for painting the barricades from Pariah Nexus.
Hope you enjoyed this tutorial. If so, leave a comment or reaction below, and if you got any questions, leave them here so I can answer them for you.
3 Comments
Leave a Reply
Tale of Painters is the unofficial Warhammer hobby magazine run by hobbyists like you. Support our work by using the affiliate links from our 🇺🇸 / 🇨🇦 partner stores for your next orders so we can continue to bring you fantastic FREE content every day:


Or support us directly:


Hi,
Why would you mix nuln oil and nuln oil gloss or use Agrax earthshade gloss whey finishing with a Matt varnish to remove the gloss?
Nuln Oil Gloss had better flow properties thanks to its higher surface tension. But since GW improved the formula of their washes in 2022, you can just use the regular version of Nuln Oil and Agrax Earthshade in steps 2 and 4. Hope this helps 🙂
Thx, that good to know.