
In this post, I’ll show you how to paint Necron Flayed Ones from Pariah Nexus in 19 easy to follow steps. You’ll learn how to thin and blend washes, paint blood effects and more. Find out how in this tutorial.

This tutorial assumes you have a good understanding of how to paint Warhammer miniatures. With each picture is the corresponding instruction. Each step shows the Citadel paint(s) I used. You’ll find a list of all the paints used in this tutorial at the end of the post.
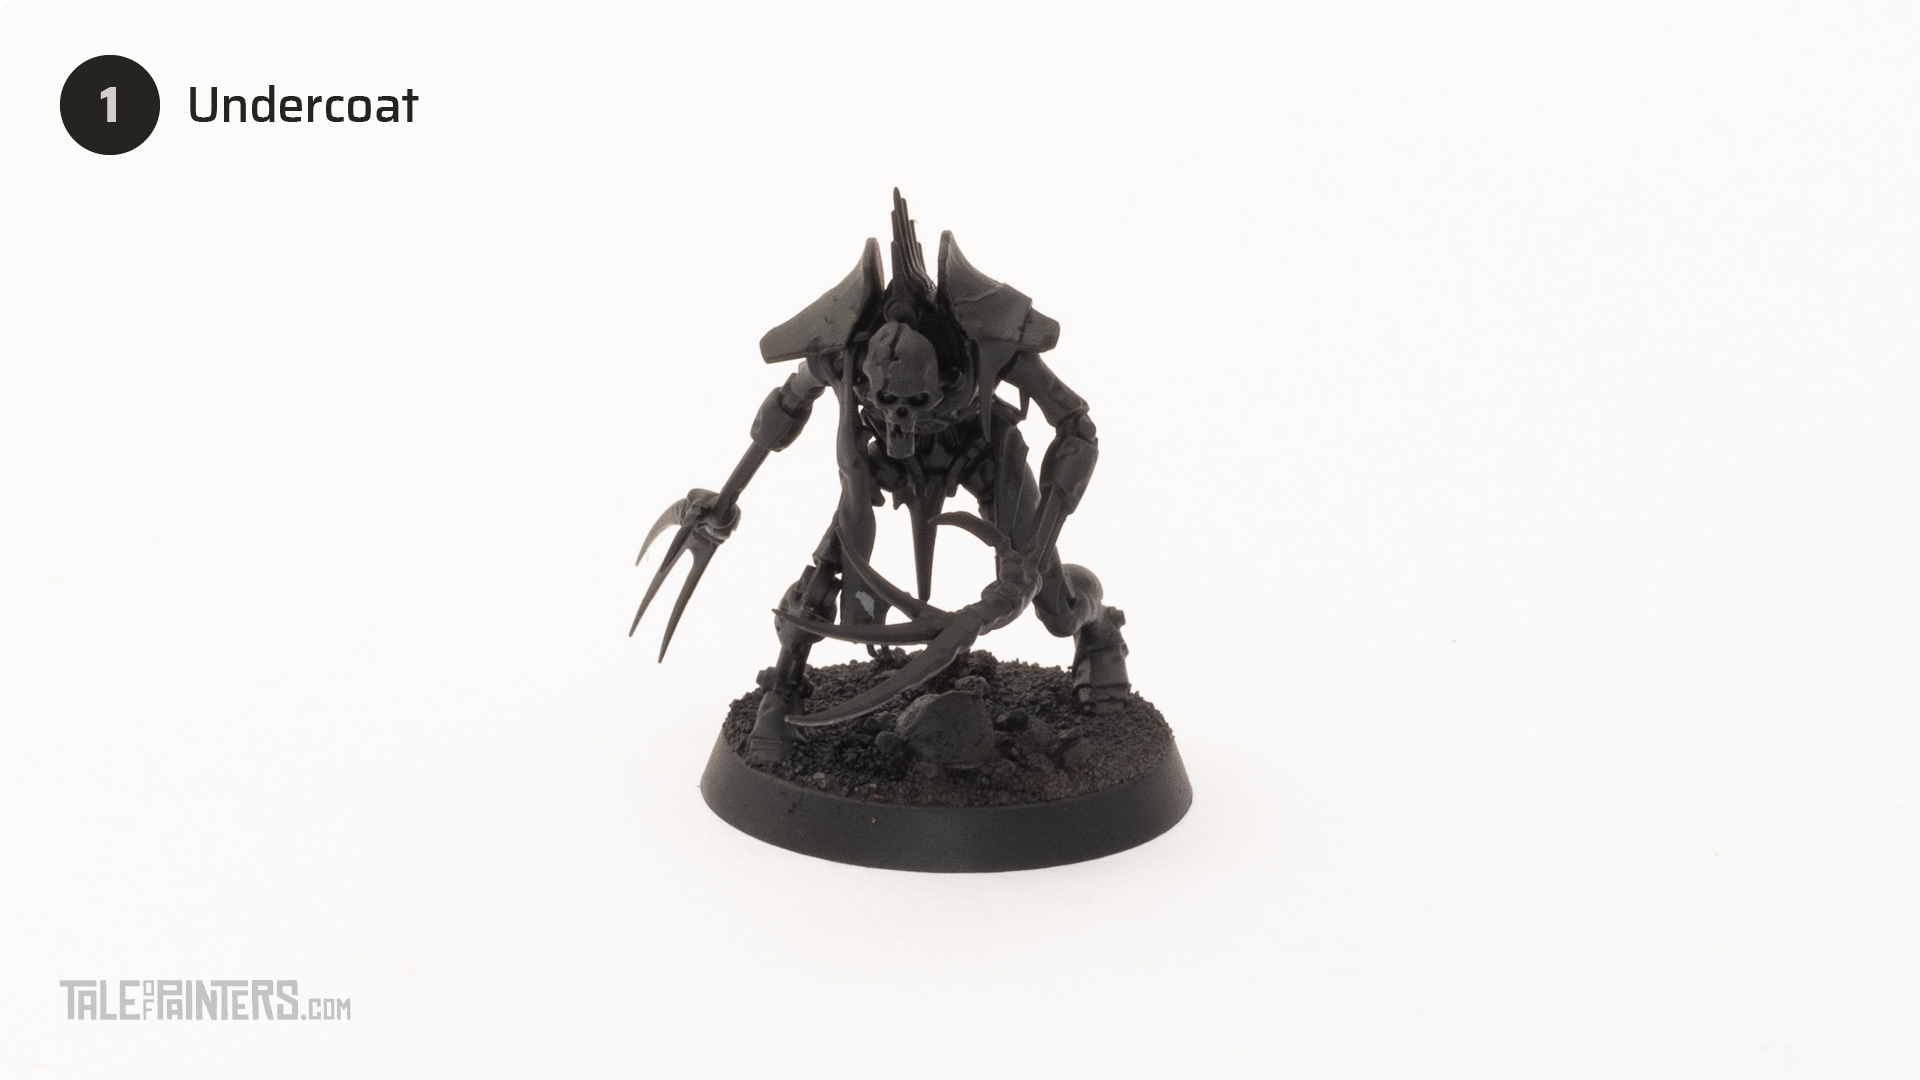
Undercoat the model black. You can use Chaos Black spray, I used Vallejo Surface Primer and my airbrush.

Basecoat the model with Brass Scorpion. A little Lahmian Medium mixed in helps smooth the paint and it applies really nicely.
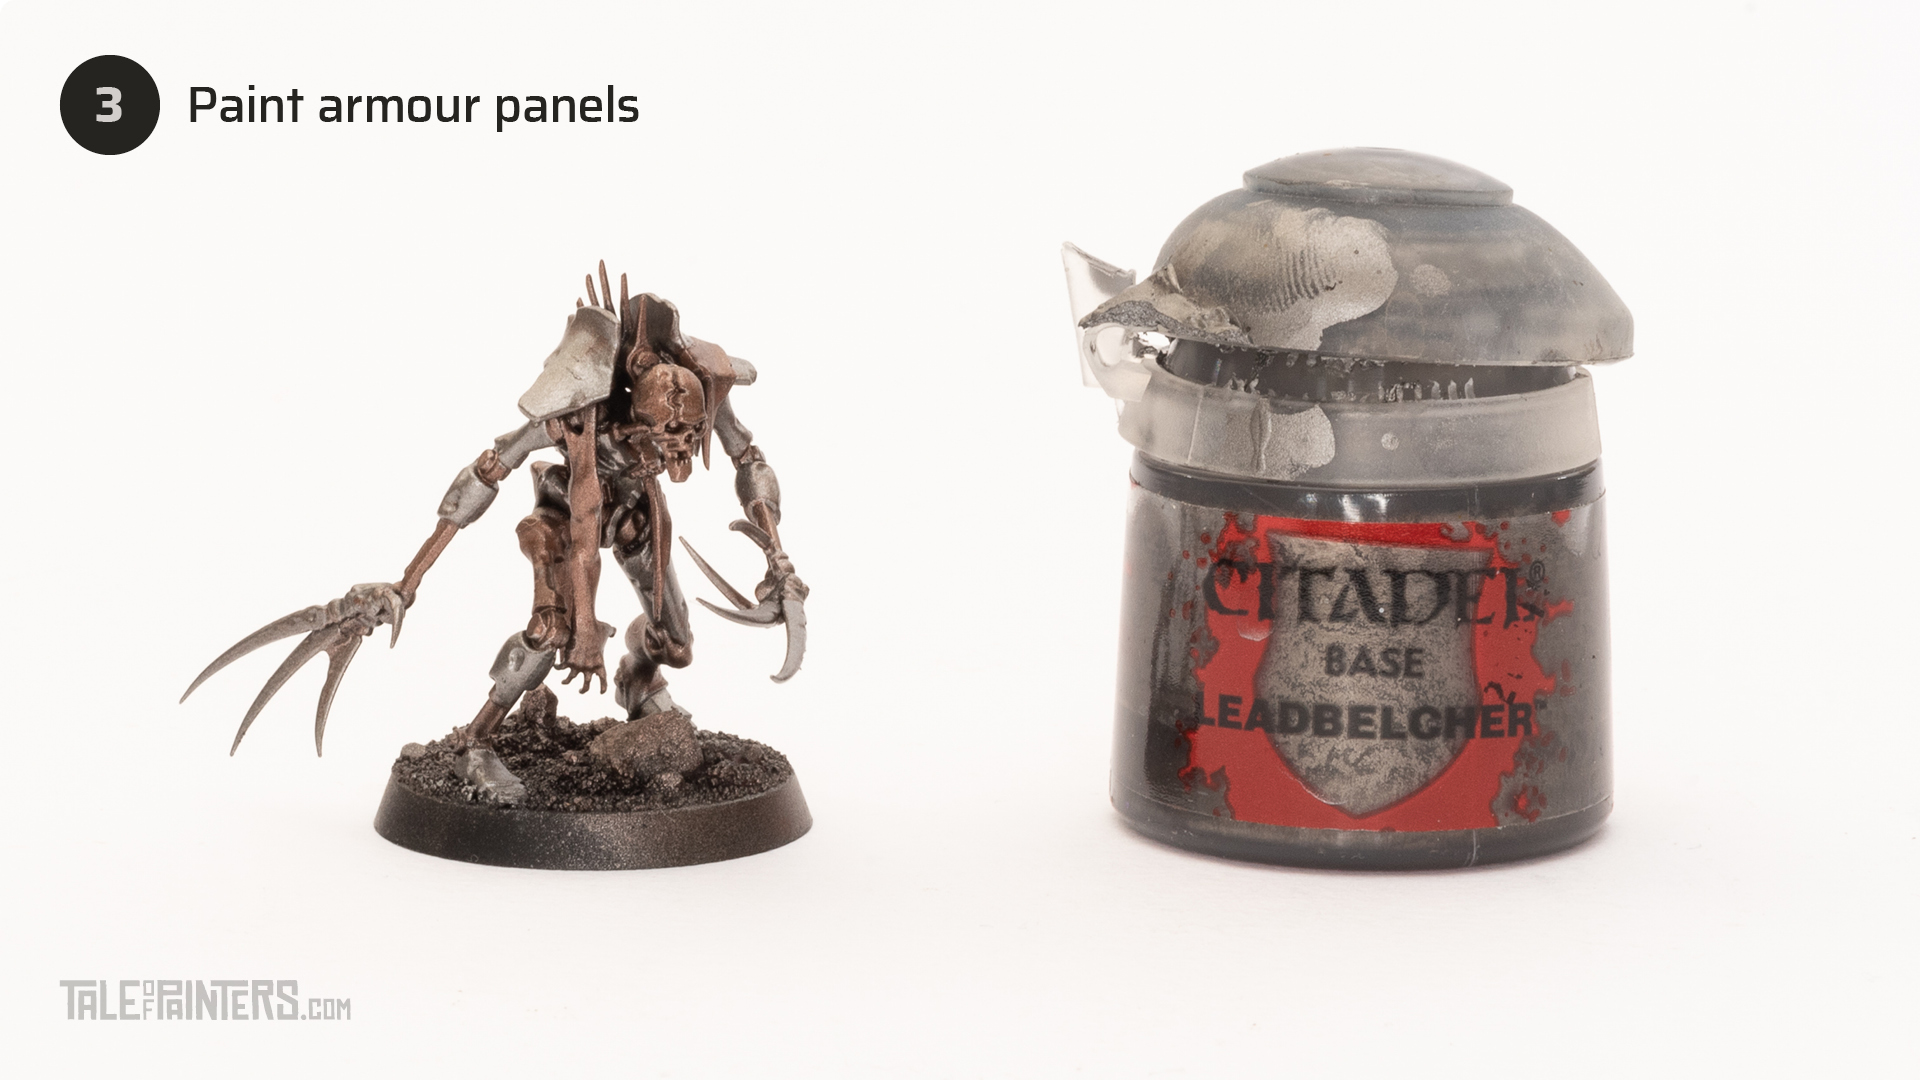
Paint the armour panels and claws with Leadbelcher. Thin with Lahmian Medium and apply two light coats allowing the first coat to dry before applying the second.

Mix equal parts Nuln Oil with Lahmian Medium and wash the entire model with the mix.

Mix equal parts Agrax Earthshade with Lahmian Medium and wash the entire model with the mix.

Repaint the armour with Leadbelcher. Leave the dark shading showing where the dents are.

Repaint the skeletal frame with Brass Scorpion leaving the dark shading in the dents and recesses.

Highlight the edges of the brass and metal with thin lines of Stormhost Silver.

Paint all flayed skin with Rakarth Flesh. This might take a couple of coats to ensure it’s a solid coat.

Mix 5 parts Lahmian Medium with 1 part Contrast Graph-Charger Grey and wash over the skin to give it a lifeless look.

Highlight the raised areas of the skin with Kislev Flesh, leaving plenty of the shaded areas showing through.

Highlight the edges of the skin with Pallid Which Flesh.

Water down some Corax White and apply two coats to the face and central chest coffin shape.

Paint the face and central coffin shape with Wraithbone. You may need a second coat to get an even finish.

Wash the face and central coffin shape with Skeleton Horde. Be wary of the Contrast Paint pooling. If it does just wick it away with another brush.

Now for the blood effects, paint the edges of the skin with uneven, splotchy patterns of Carroburg Cromson. Repeat this step once dry to increase the intensity. This will be matte and look like dried blood.

Repaint the edges of the skin this time with Blood for the Blood God. Leave some of the previous Carroburg Crimson showing through. Blood for the Blood God is gloss and will look like fresh wet blood that hasn’t dried yet.

Paint the eyes and eye sockets with Temple Guard Blue. There is an icon on the chest, I paint that blue as well.

Dot the eyes with White Scar.

To paint the base I painted the rocks with Eshin Grey, the sand was painted with Steel Legion Drab then the sand and rocks were washed with Agrax Earthshade all over. The rocks were dry brushed with Dawnstone and then Celestra Grey. The sand was dry brushed with Baneblade and then Karak Stone. I used some GW Grass tufts for decoration.


Paints you will need for this tutorial:
- Black Undercoat
- Brass Scorpion (layer)
- Leadbelcher (base)
- Nuln Oil (shade)
- Lahmian Medium (technical)
- Agrax Earthshade (shade)
- Stormhost Silver (layer)
- Rakarth Flesh (base)
- Gryph-Charger Grey (contrast)
- Kislev Flesh (layer)
- Pallid Which Flesh (layer)
- Corax White (base)
- Wraithbone (base)
- Skeleton Horde (contrast)
- Carroburg Crimson (shade)
- Blood for the Blood God (technical)
- Temple Guard Blue (layer)
- White Scar (layer)
Paints you’ll need for the base:
- Eshin Grey (layer)
- Steel Legion Drab (base)
- Agrax Earthshade (shade)
- Dawnstone (layer)
- Celestra Grey (base)
- Baneblade Brown (layer)
- Karak Stone (layer)
If you need to expand your paint collection to follow the tutorial, check out our partner stores Wayland Games and Element Games, which offer an amazing range of paints at a discount.
Hope you enjoyed this tutorial. If so, leave a comment or reaction below, and if you got any questions, leave them here so I can answer them for you.

Tale of Painters is the unofficial Warhammer hobby magazine run by hobbyists like you. Support our work by using the affiliate links from our 🇺🇸 / 🇨🇦 partner stores for your next orders so we can continue to bring you fantastic FREE content every day:


Or support us directly:


