
If you think of adding an Impulsor grav tank to your Primaris Space Marines, then why not getting a Gladiator instead and make it modular? In this ToP Tip I explain how to do it, and the best thing, no magnetizing required.
As the Gladiator kit is only a few quids (or dollars or Euros) more expensive than the Impulsor, I think it’s worth paying the extra charge, as the kit is quite modular and both Impulsor sprues are included. Here is what you need to do:
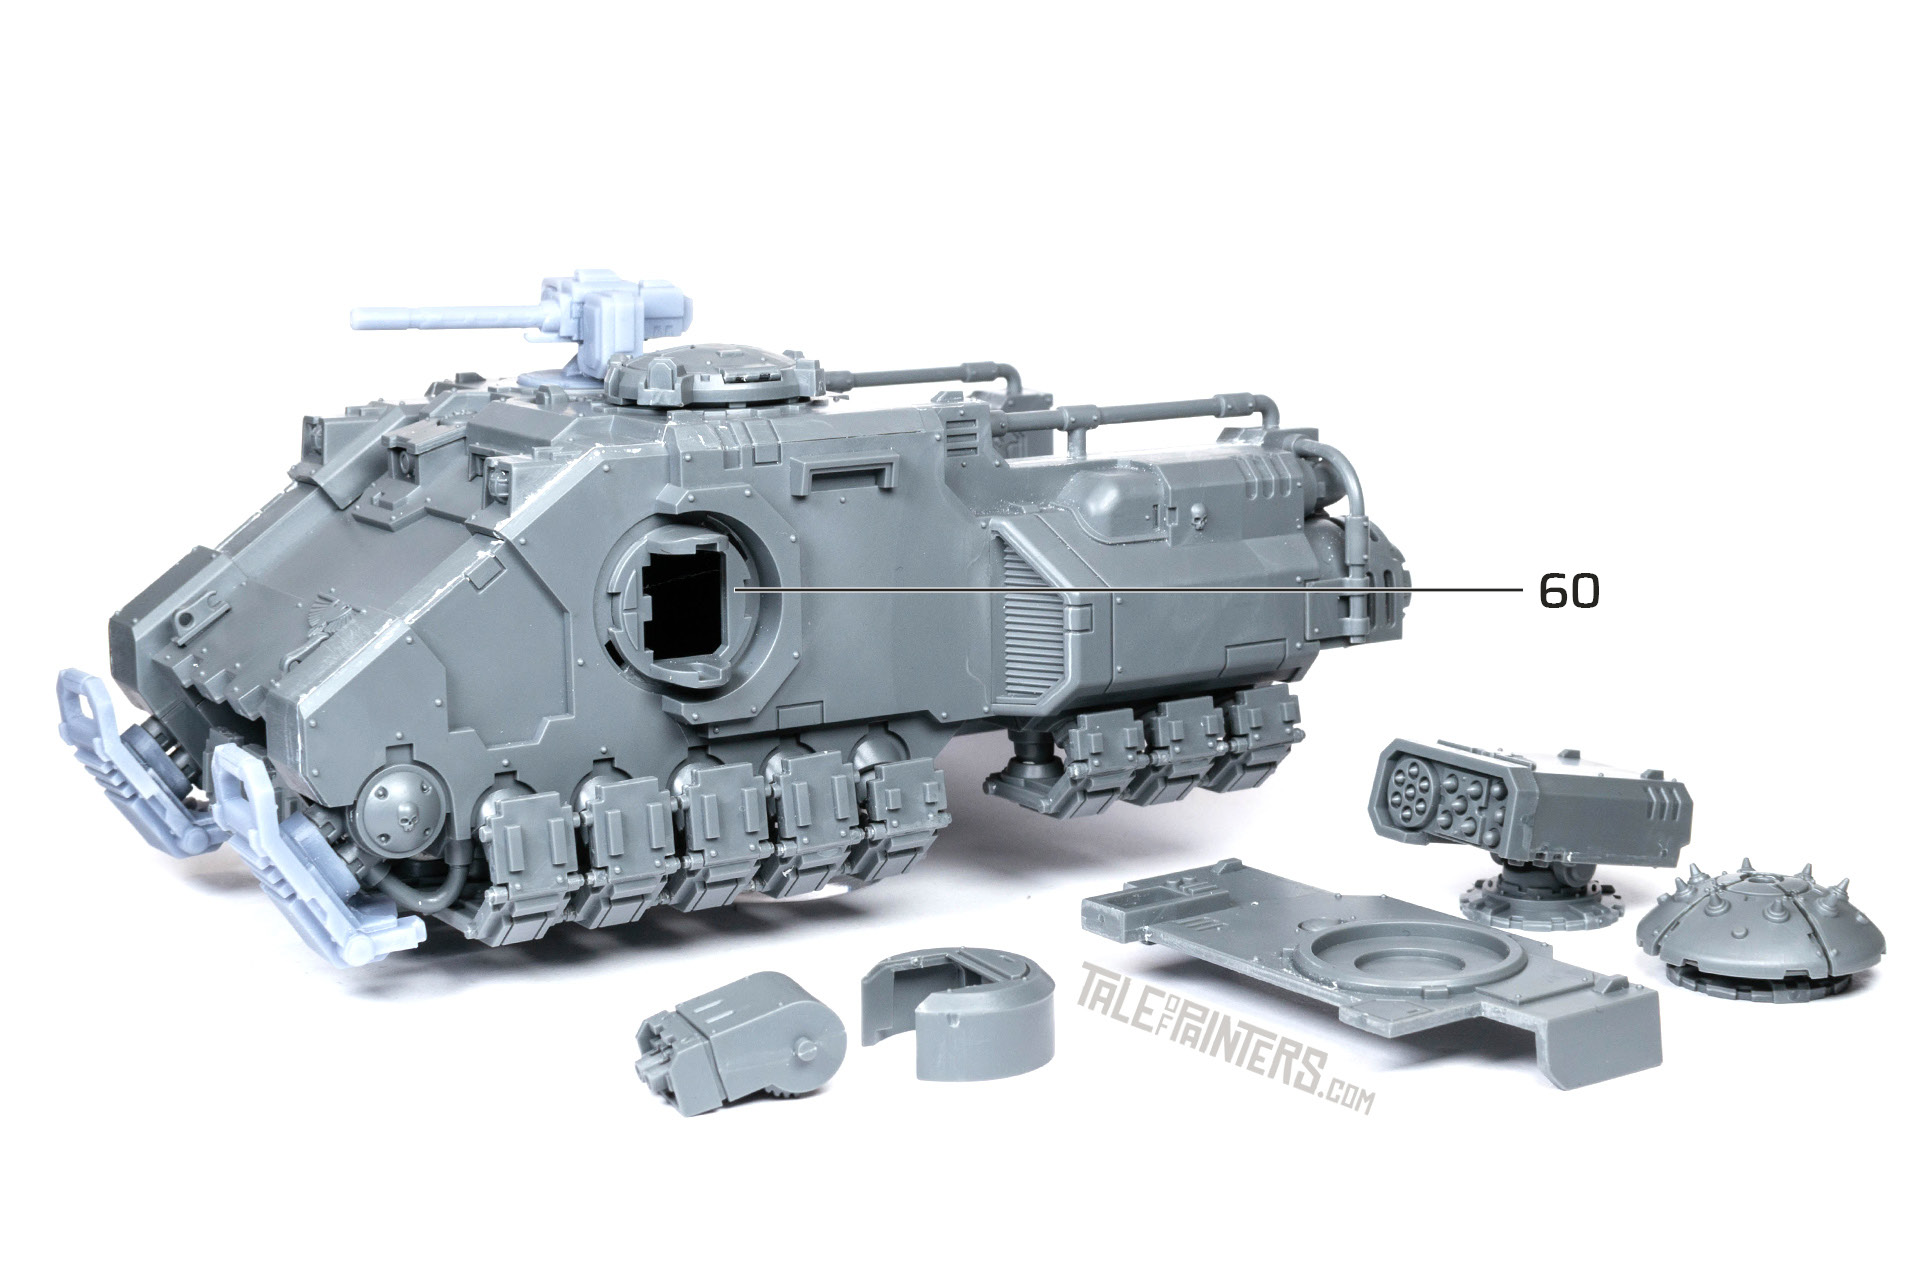
To prepare for your combo build, assemble the Impulsor hull as normal. The only thing you need to be aware of are the sponsons. Both the Gladiator and Impulsor variants come with their own sponson covers and sponson weapons, however, the sponsons share parts 60, which are used for mounting the weapons and sponson covers. Another set of these parts would be needed to make the sponsons truly exchangeable, however, you can bypass this restriction by glueing these pieces to the hull as shown in the picture. With parts 60 glued in place, you’ll lose the up and down movement, but you’ll be easily able to swap between the sponsons by push fitting them. With a few coats of paints added, the sponsons will stay in place snugly.
The Gladiator Valiant and Reaper use the same push-fit sockets for the sponson weapons, so you can switch between multi-melters and tempest bolters, while the Lancer uses the Impulsor’s sponsons. Sadly, these don’t have push-fit sockets, so you have to decide on one of the weapon choices if you don’t want to magnetize.
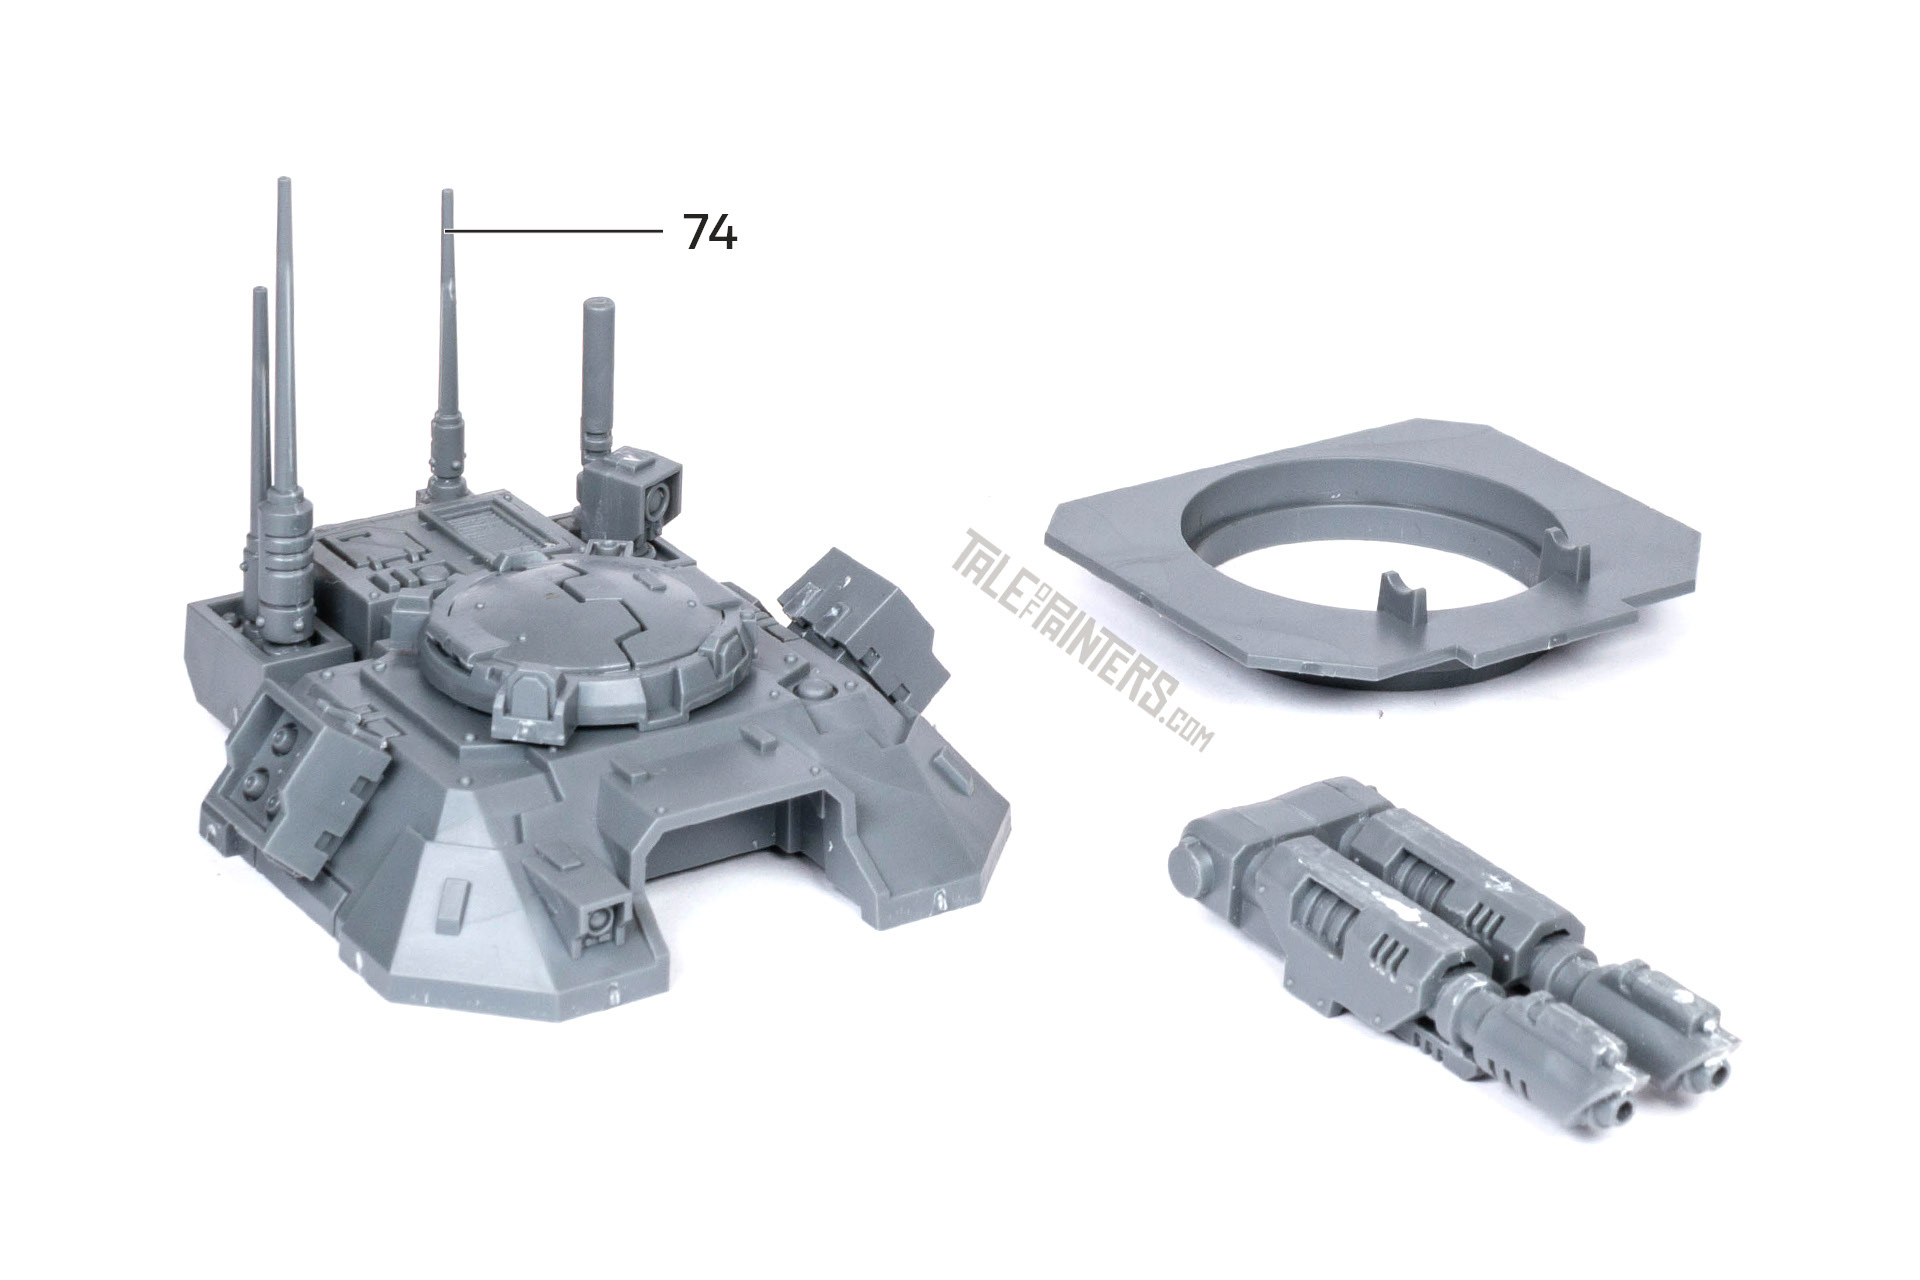
Next, you can assemble the optional roof for the Impulsor, but obviously, don’t glue it to the hull. I recommend sanding down the roof where it rests on the tank, otherwise, it might not fit anymore after a few coats of paint and varnish. The shield drone is a self-contained build, however, the missile and ironhail arrays share the same casing. Unfortunately, the way the chassis is constructed, it’s difficult to make it modular, so you’d have to decide which weapon to build. Note that the optional antenna piece 74 will be used for the Gladiator’s turret, so save this piece for later.
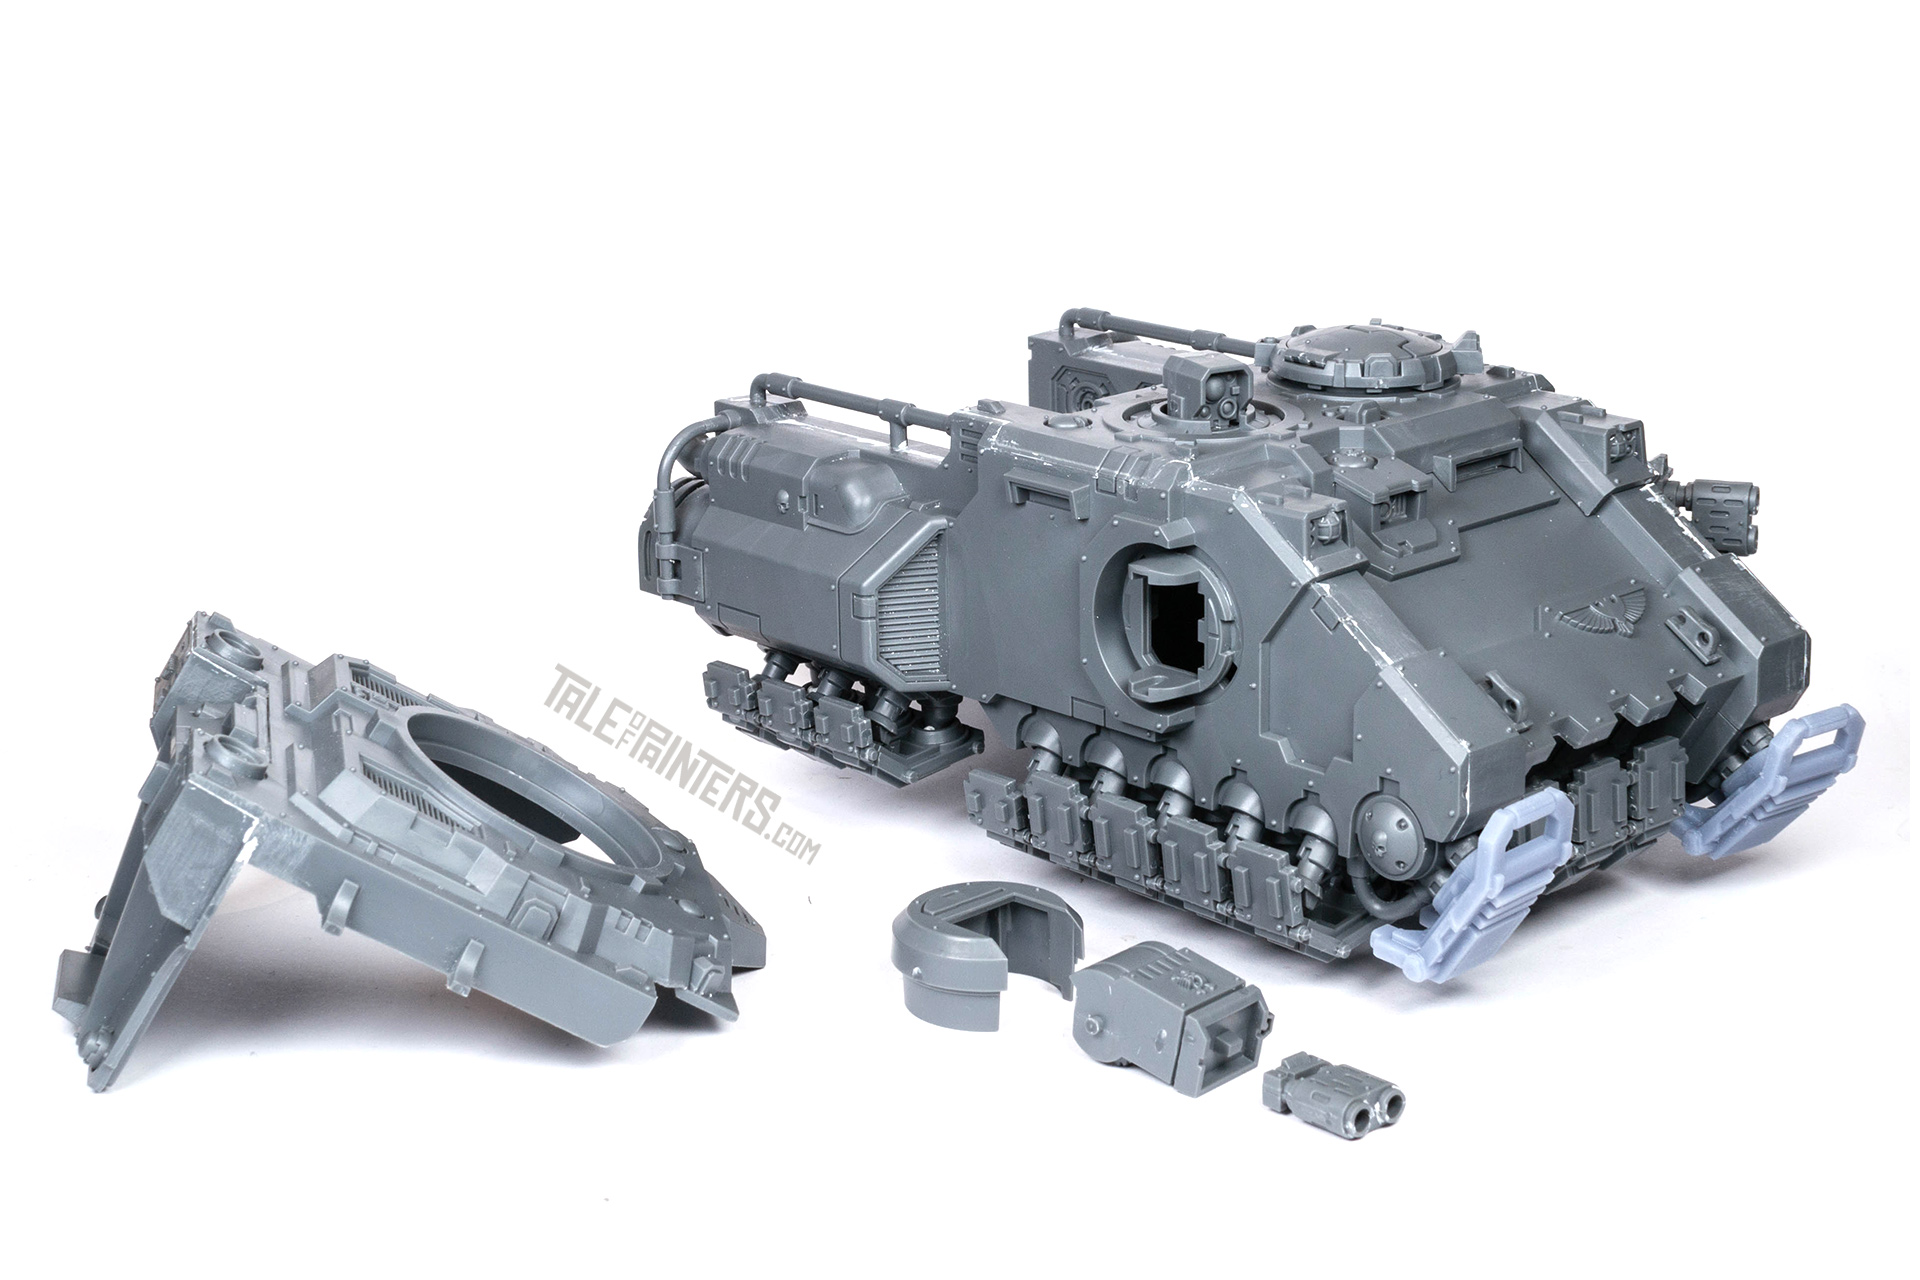
By keeping the roof detachable, you can do the same for the Gladiator’s hull extension by assembling it as shown in the picture. The base plate of the turret does not need to be glued down either, as it sits quite firmly even without glue. If you don’t glue the plate, you can open the turret from below and change the different main weapons.
And there we go, a modular Impulsor / Gladiator build with almost all weapon options available, and no magnets required. If you’re wondering where I got the alternate front grav plates and the self-operated stubber, those are 3D prints from Tight Bore Designs, who kindly provided me with the parts.


I hope you were able to do something with this tip. If you have any questions, feel free to drop me a comment, or leave a reaction. Have fun!
Tale of Painters is the unofficial Warhammer hobby magazine run by hobbyists like you. Support our work by using the affiliate links from our 🇺🇸 / 🇨🇦 partner stores for your next orders so we can continue to bring you fantastic FREE content every day:


Or support us directly:


