In this tutorial, I’ll show you how to paint The Blooded, the Traitor Guard from Kill Team: Moroch (or Blackstone Fortress). The flexible paint scheme is easily adaptable to Chaos Cultists like the new Accursed Cultists that are up for preorder today, and to loyal Astra Militarum Guardsmen as well. I made use of a lot of the new Contrast and Shade paints to get a better feeling for them and sneaked in a few Scale75 Instant Colours as well, so this is gonna get interesting.
This tutorial assumes you know the basic grips of painting Warhammer miniatures. Step-by-step I explain all the paints and techniques I used. I have a rather eclectic paint collection, so when I use a paint that is not from Games Workshop (or out of production), I’ll try to provide you with suitable alternatives from the current Citadel paint range [in brackets]. However, if you want to achieve exactly the same result as shown, I recommend expanding your paint collection. You’ll find a list of all the paints used in this tutorial at the end of the post.
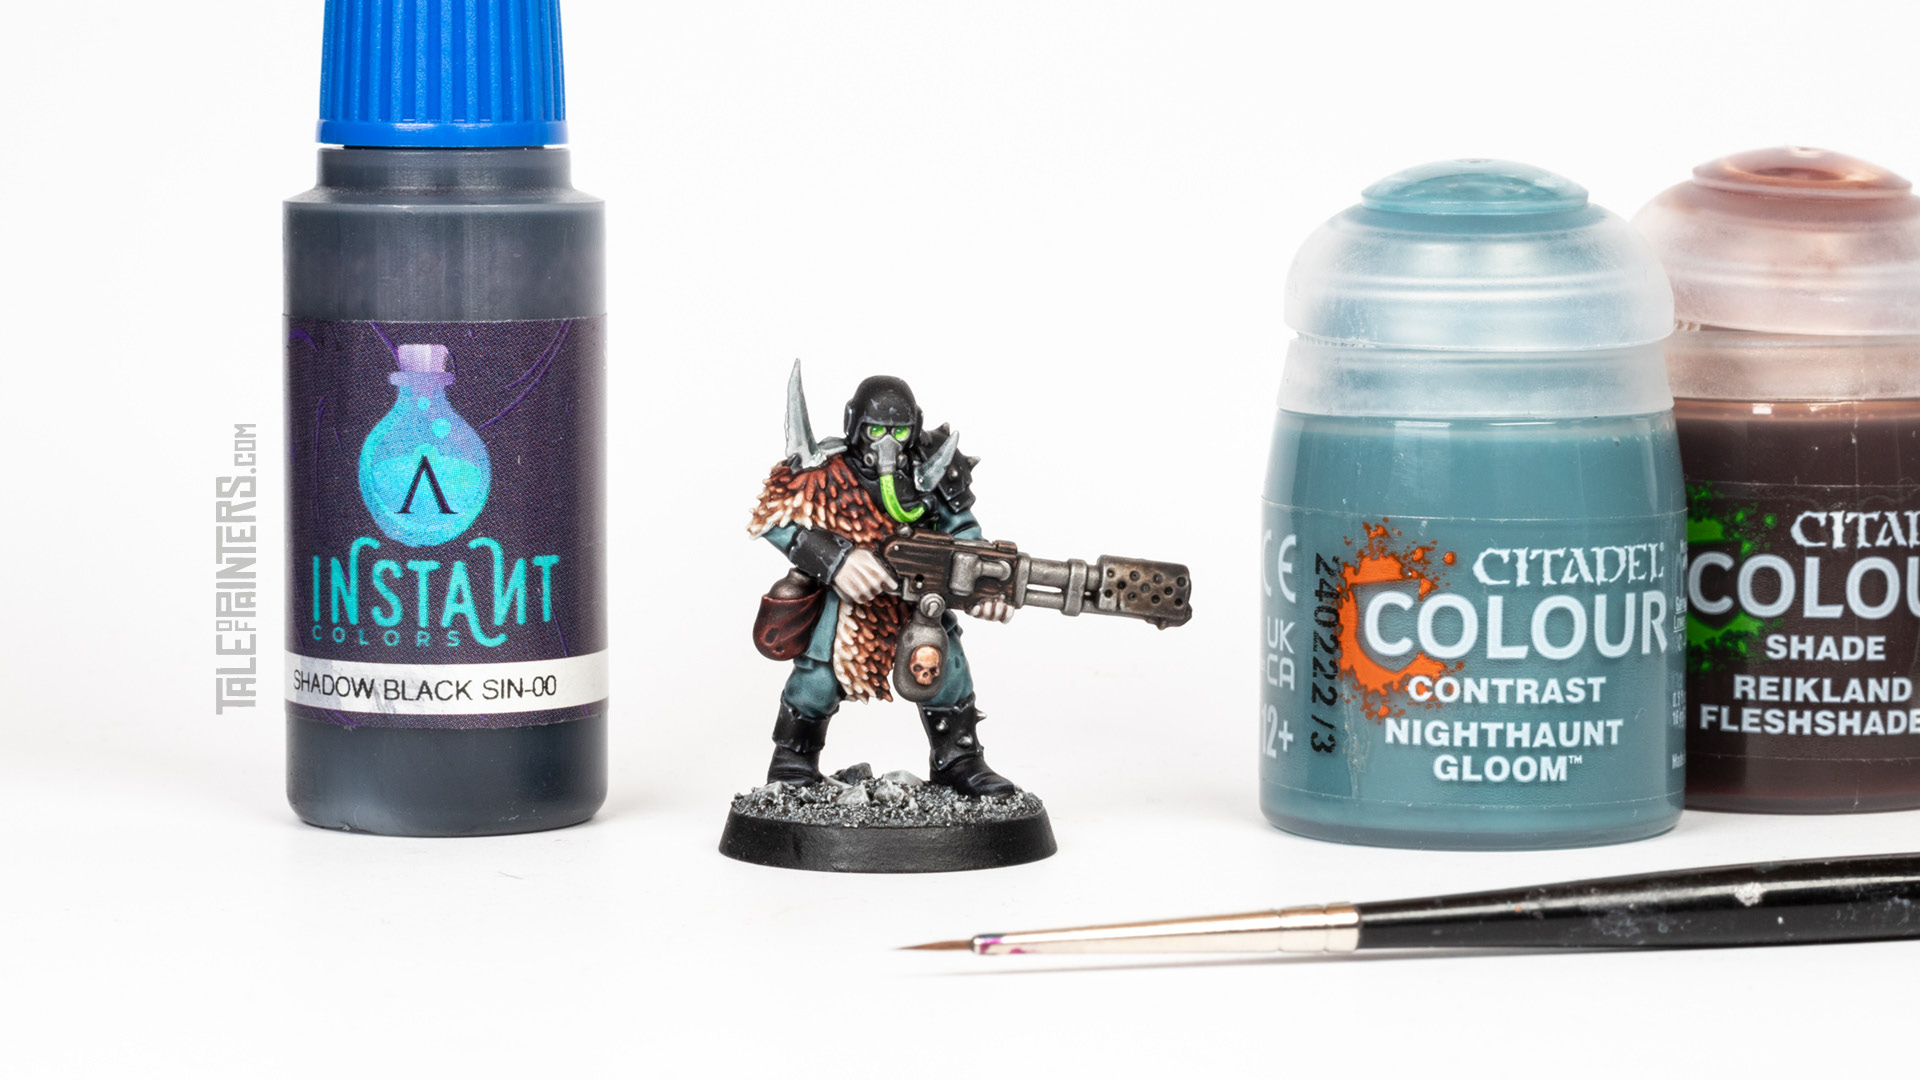

How to paint Traitor Guard
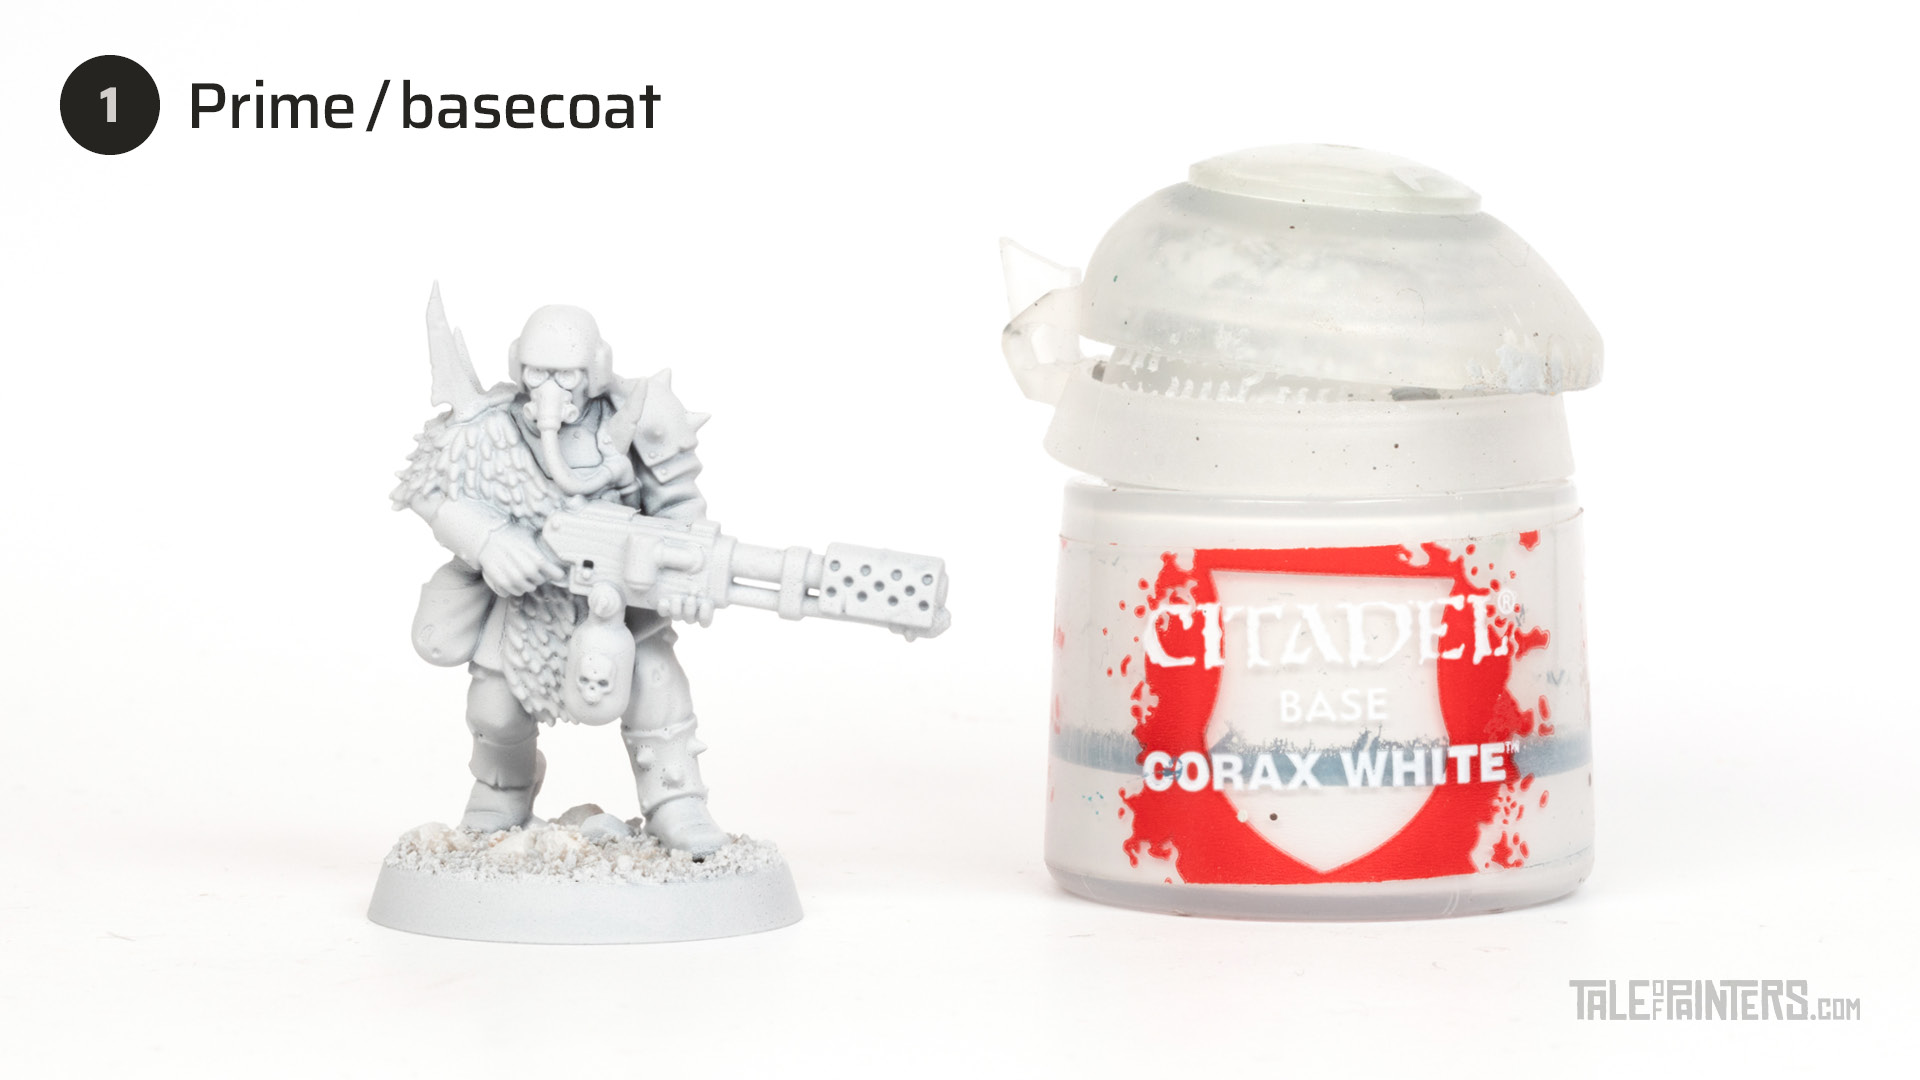

Spray the model with Corax White primer, then paint over any areas the spray paint didn’t catch.
Corax White primer is now OOP. You can also use White Scar primer, which will produce a lighter result for some of the Contrast colours, or, if you want to follow the tutorial more closely, apply a two thin coats of Corax White over the white primer.
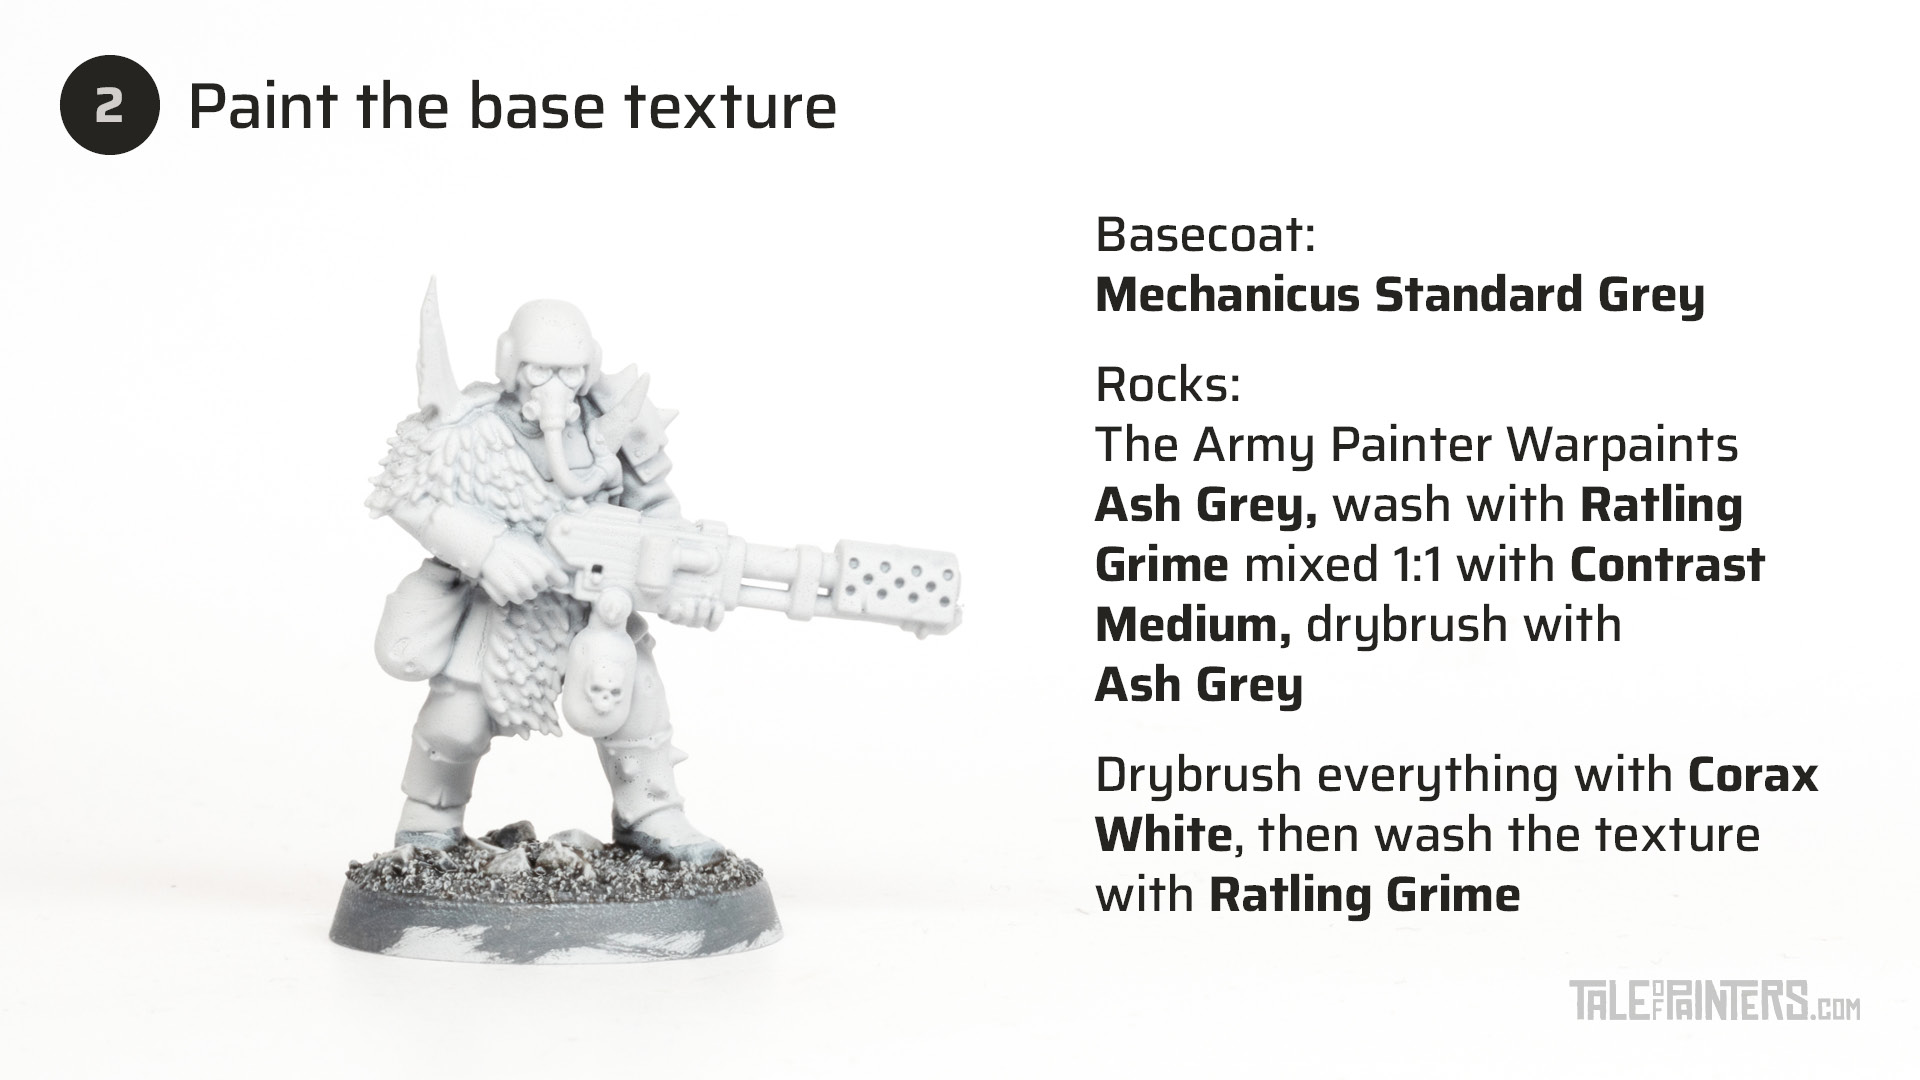

Paint the texture of the base with Mechanicus Standard Grey. Pick out the rocks with Warpaints Ash Grey, then wash them with 1:1 mix of Ratling Grime with Contrast Medium. Drybrush the base with Corax White, then wash the sand with Ratling Grime.
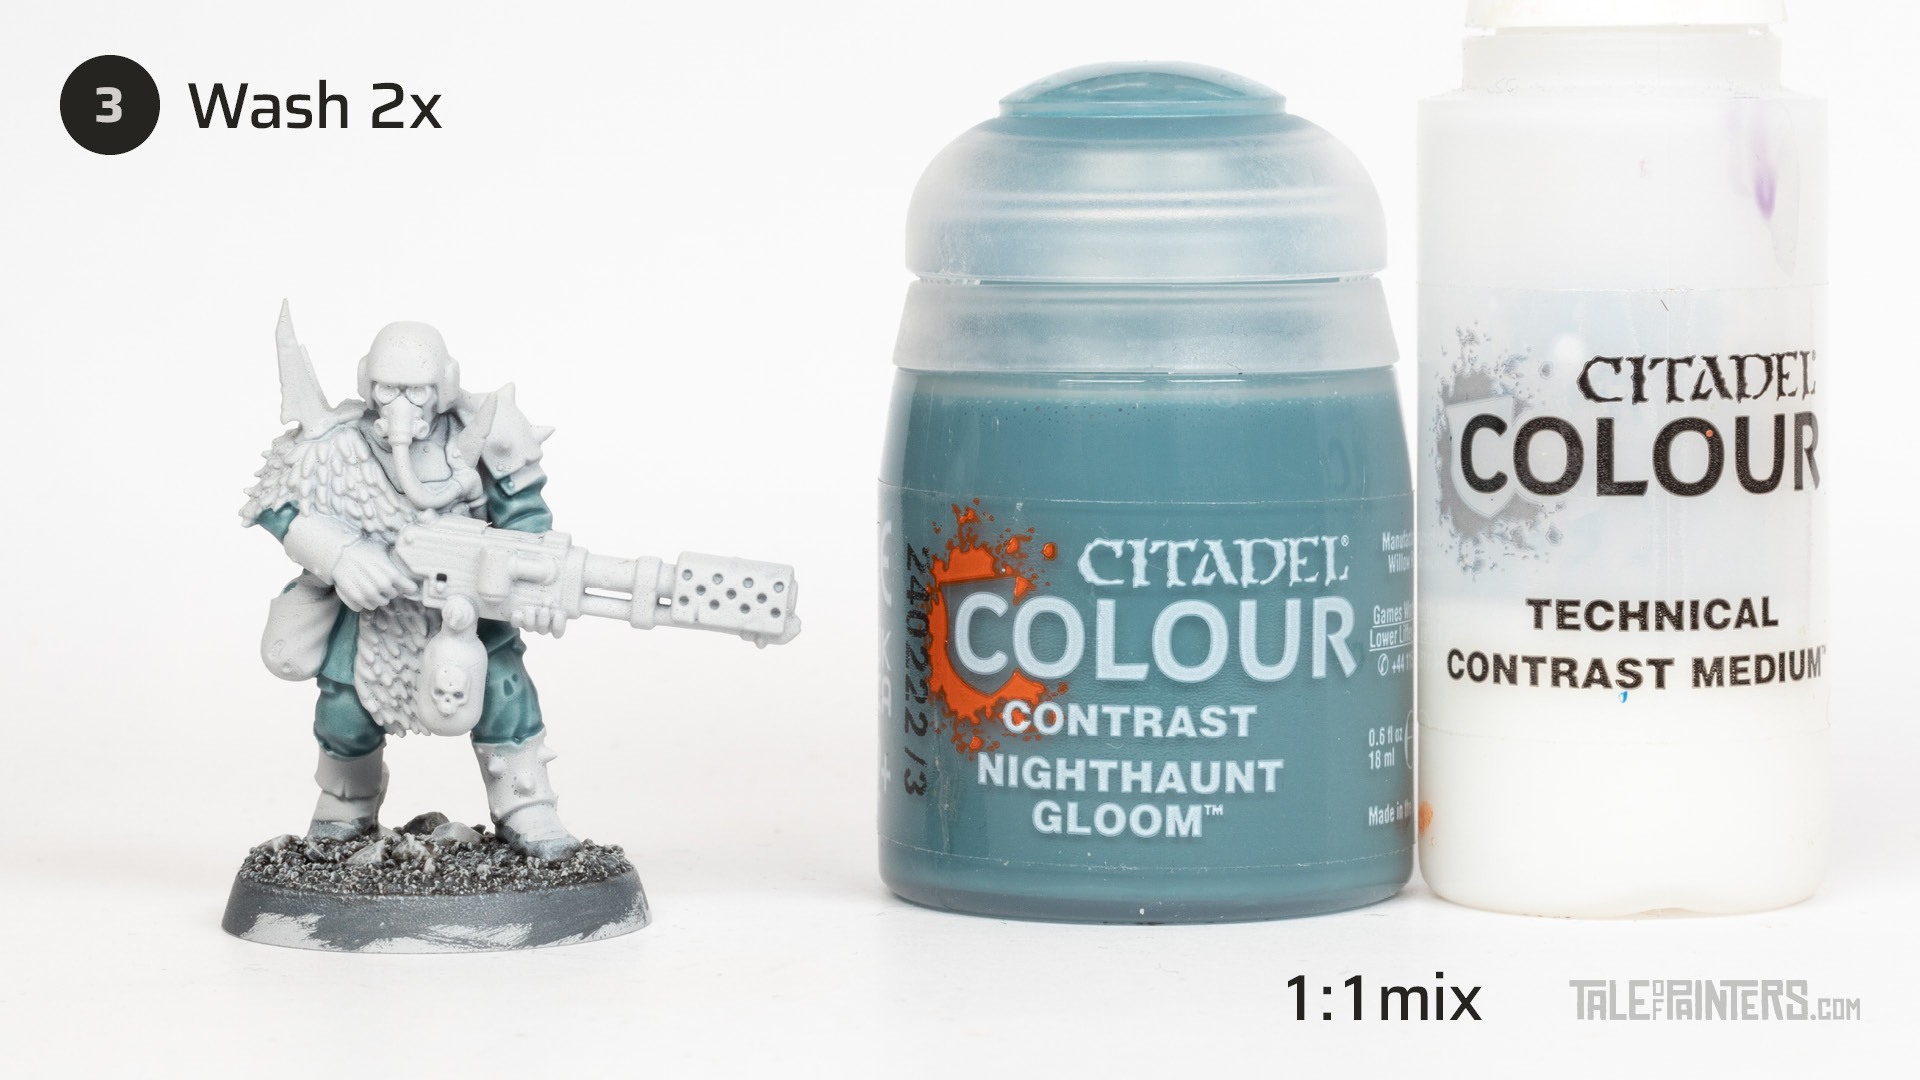

Mix Nighthaunt Gloom 1:1 with Contrast Medium and apply it all over the uniform. I prefer two thinned coats over a single undiluted one, as the result will be more even.
ToP Tip: When applying Contrast and Shade paints / washes, you’ll get the smoothest result when you apply them generously, let them settle for a while, then soak up any excess with a damp brush, before you leave them to dry.


Give the uniform a wash of the new Drakenhof Nightshade to add some more definition.
ToP Tip: If you still use the Citadel Shades with the old formula, I recommend adding a little bit of Lahmian Medium or Scale75 Dispel Magic. You can read more about the differences between the old and new Shade paints in our review.
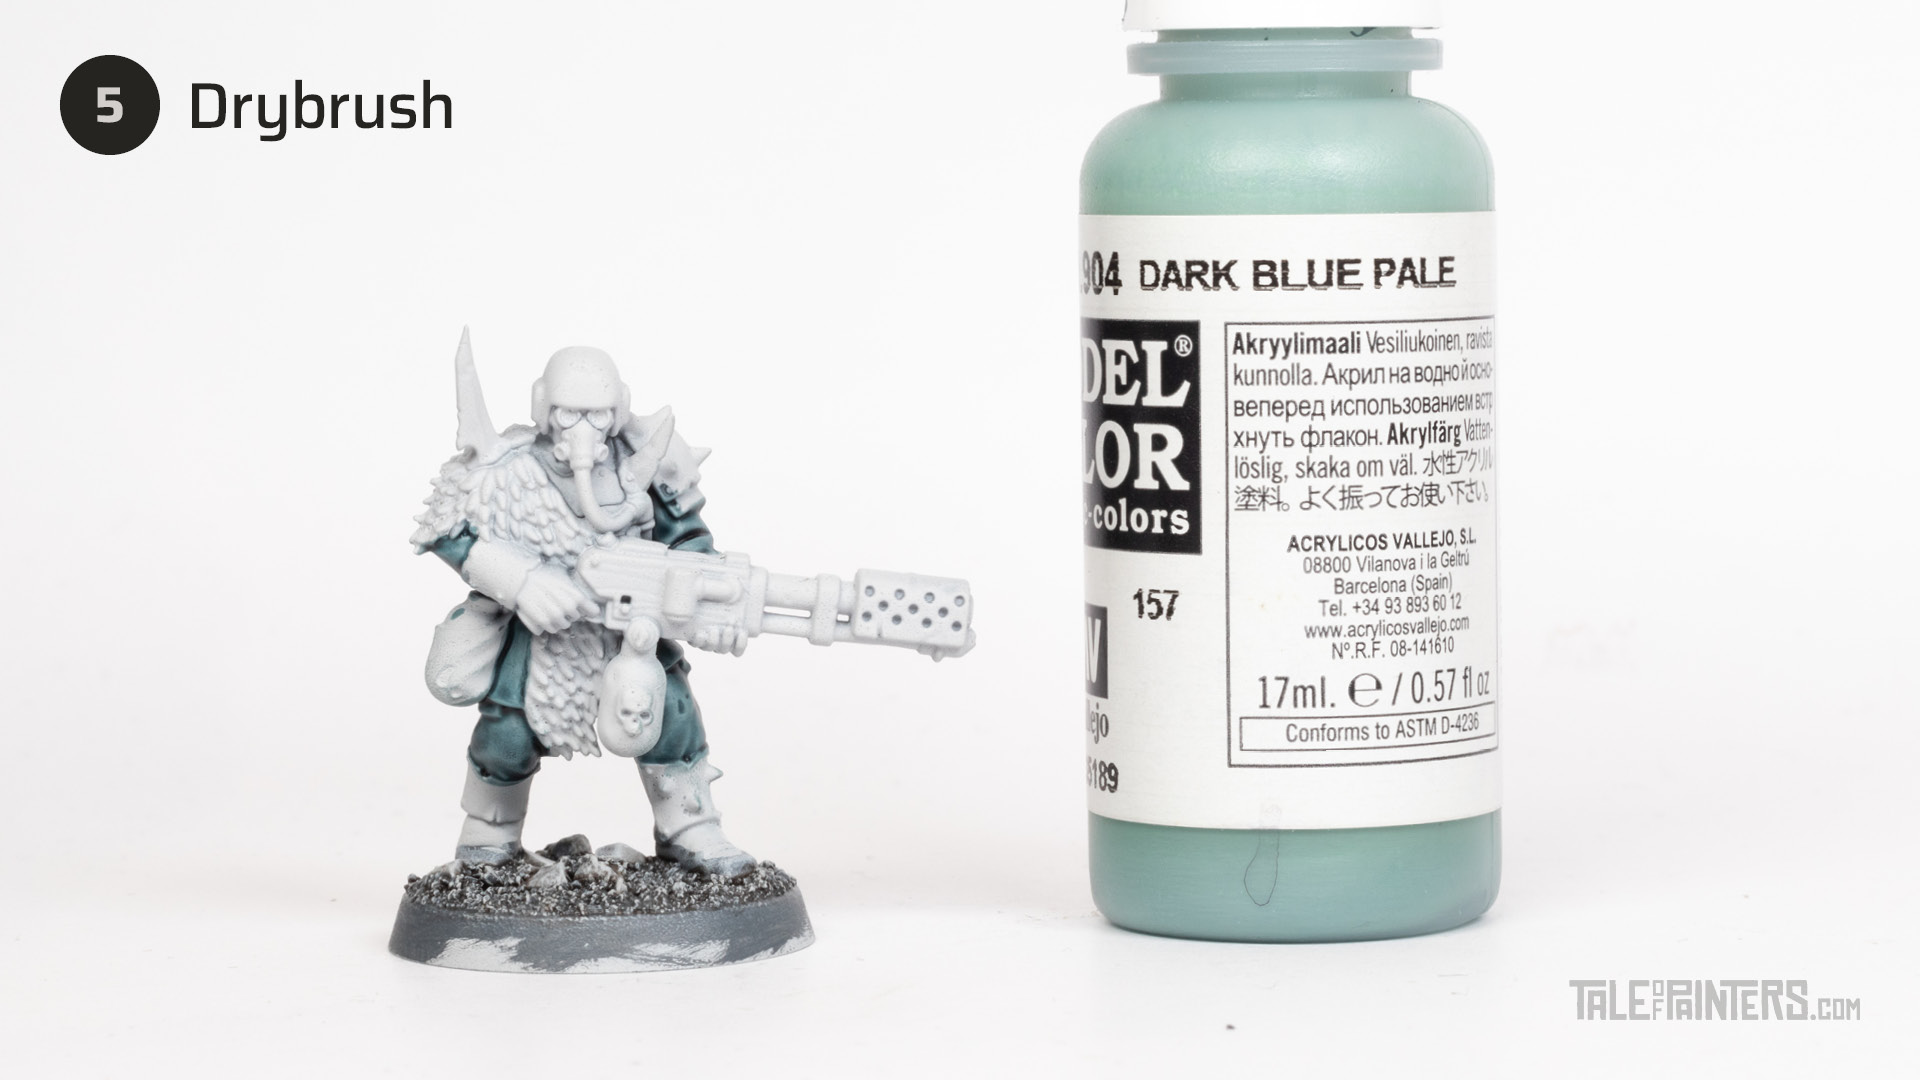

Give the uniform a gentle drybrush of Vallejo Model Color Dark Blue Grey* [or a mix of Thunderhawk Blue and Grey Seer or Corax White] to pick out the folds and hems.
* Dark Blue Pale on older labels, it’s number 70.904
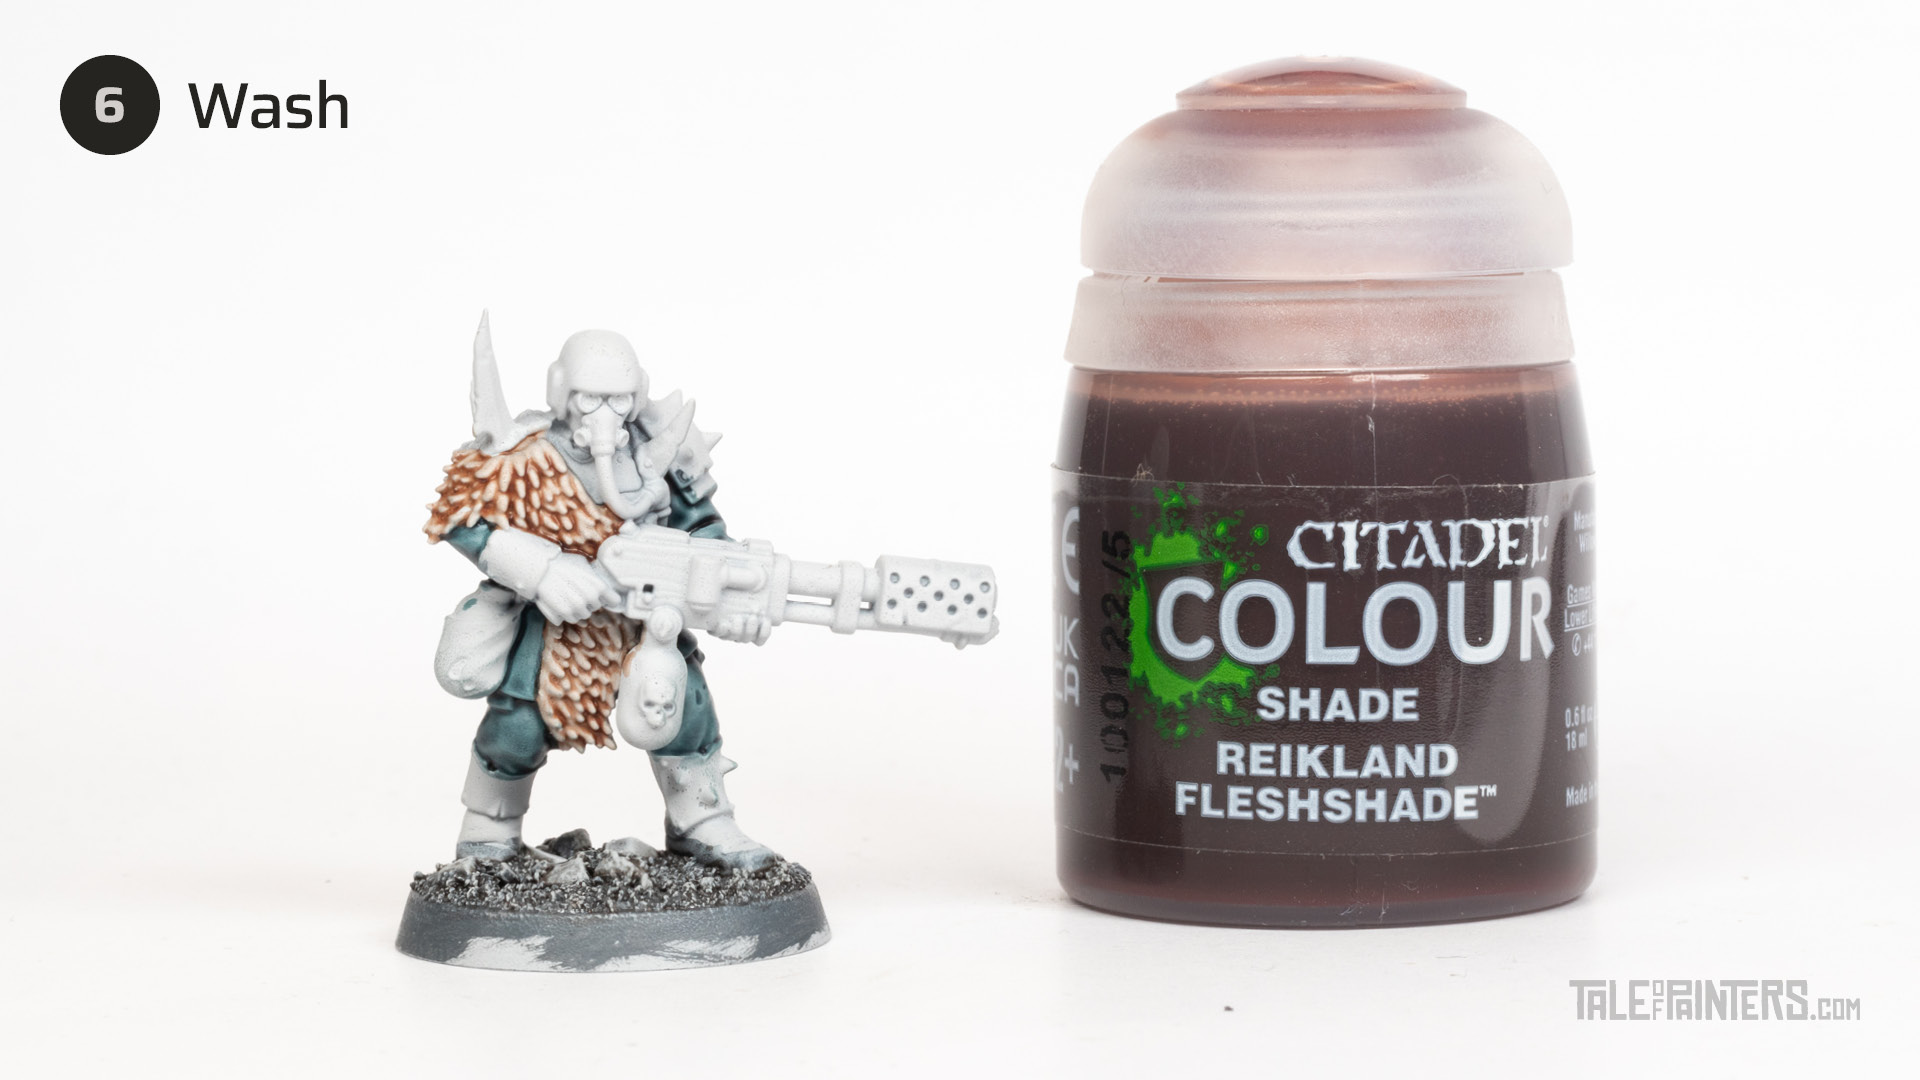

Wash the fur pelt with Reikland Fleshshade.
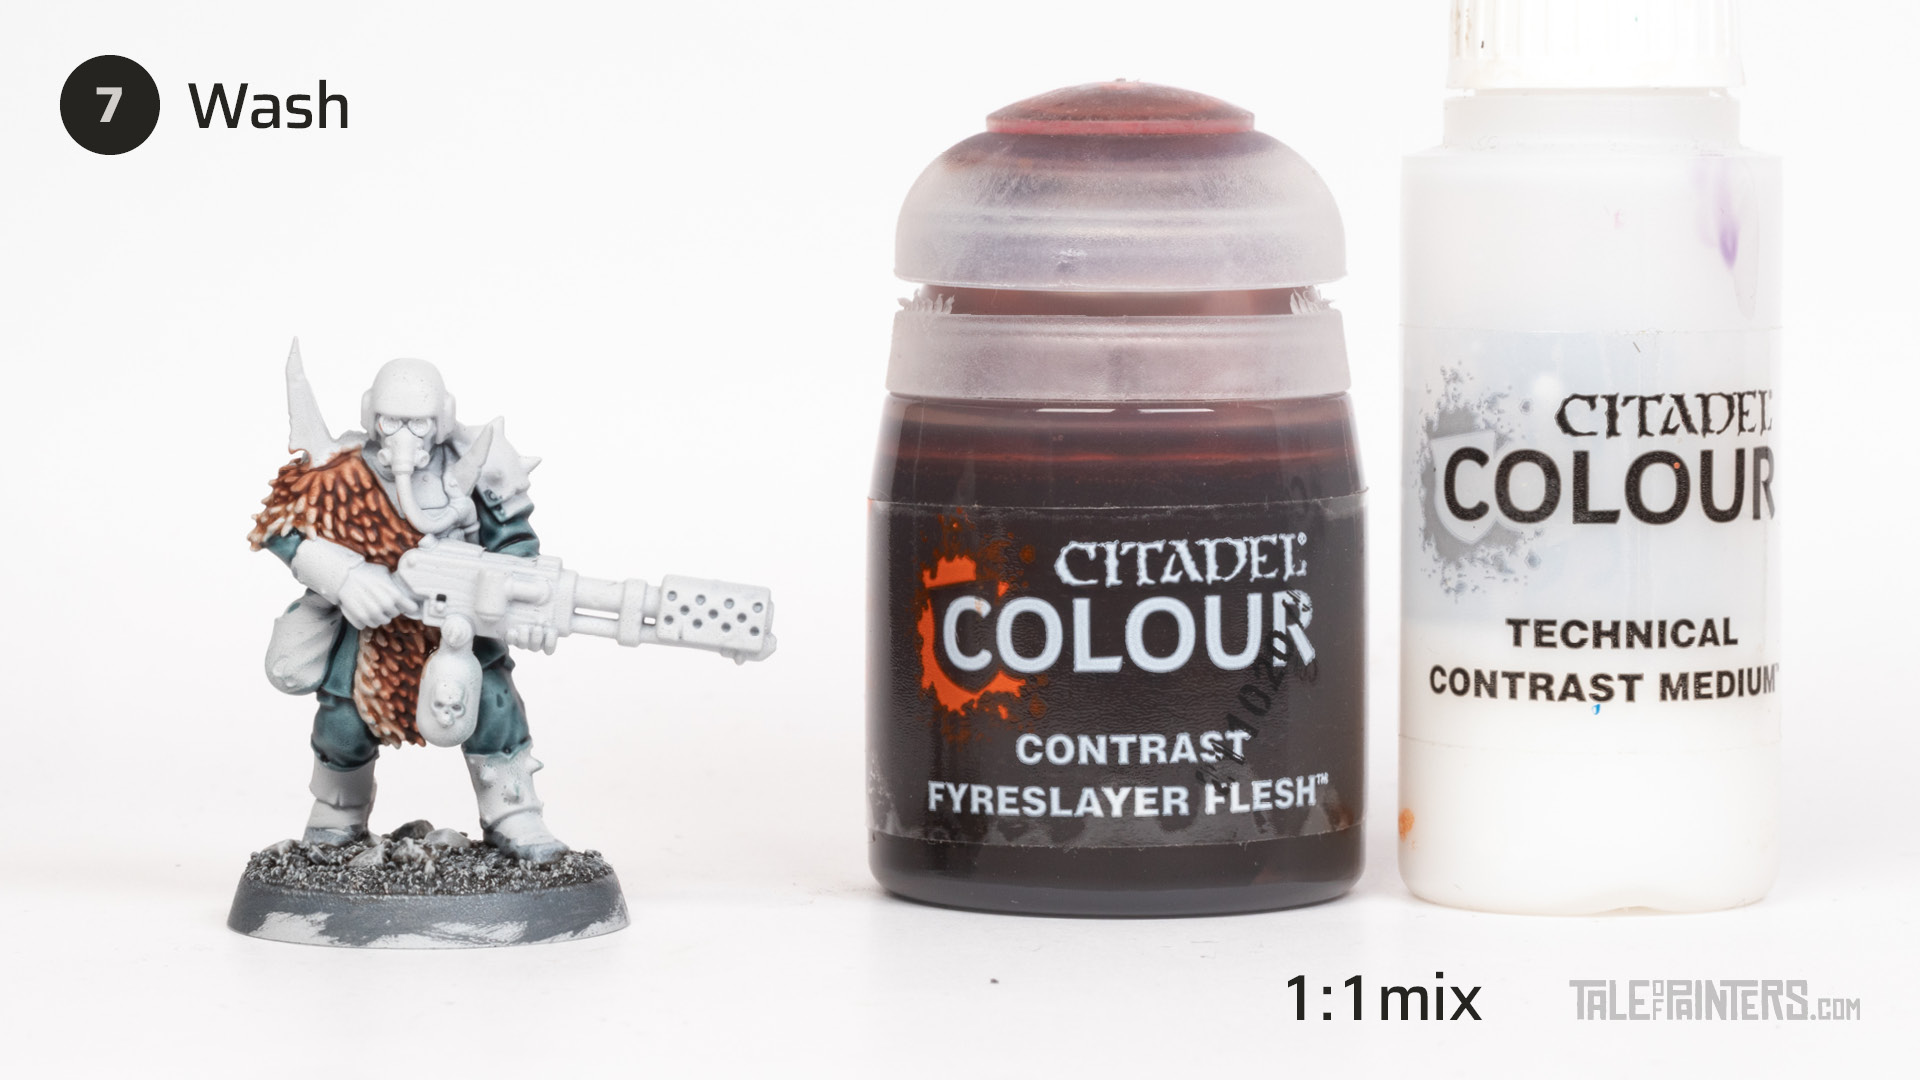

Mix Fyreslayer Flesh about 1:1 with Contrast Medium and give the fur another wash, omitting some of the areas you washed with Reikland Fleshshade to build up a brown gradient.
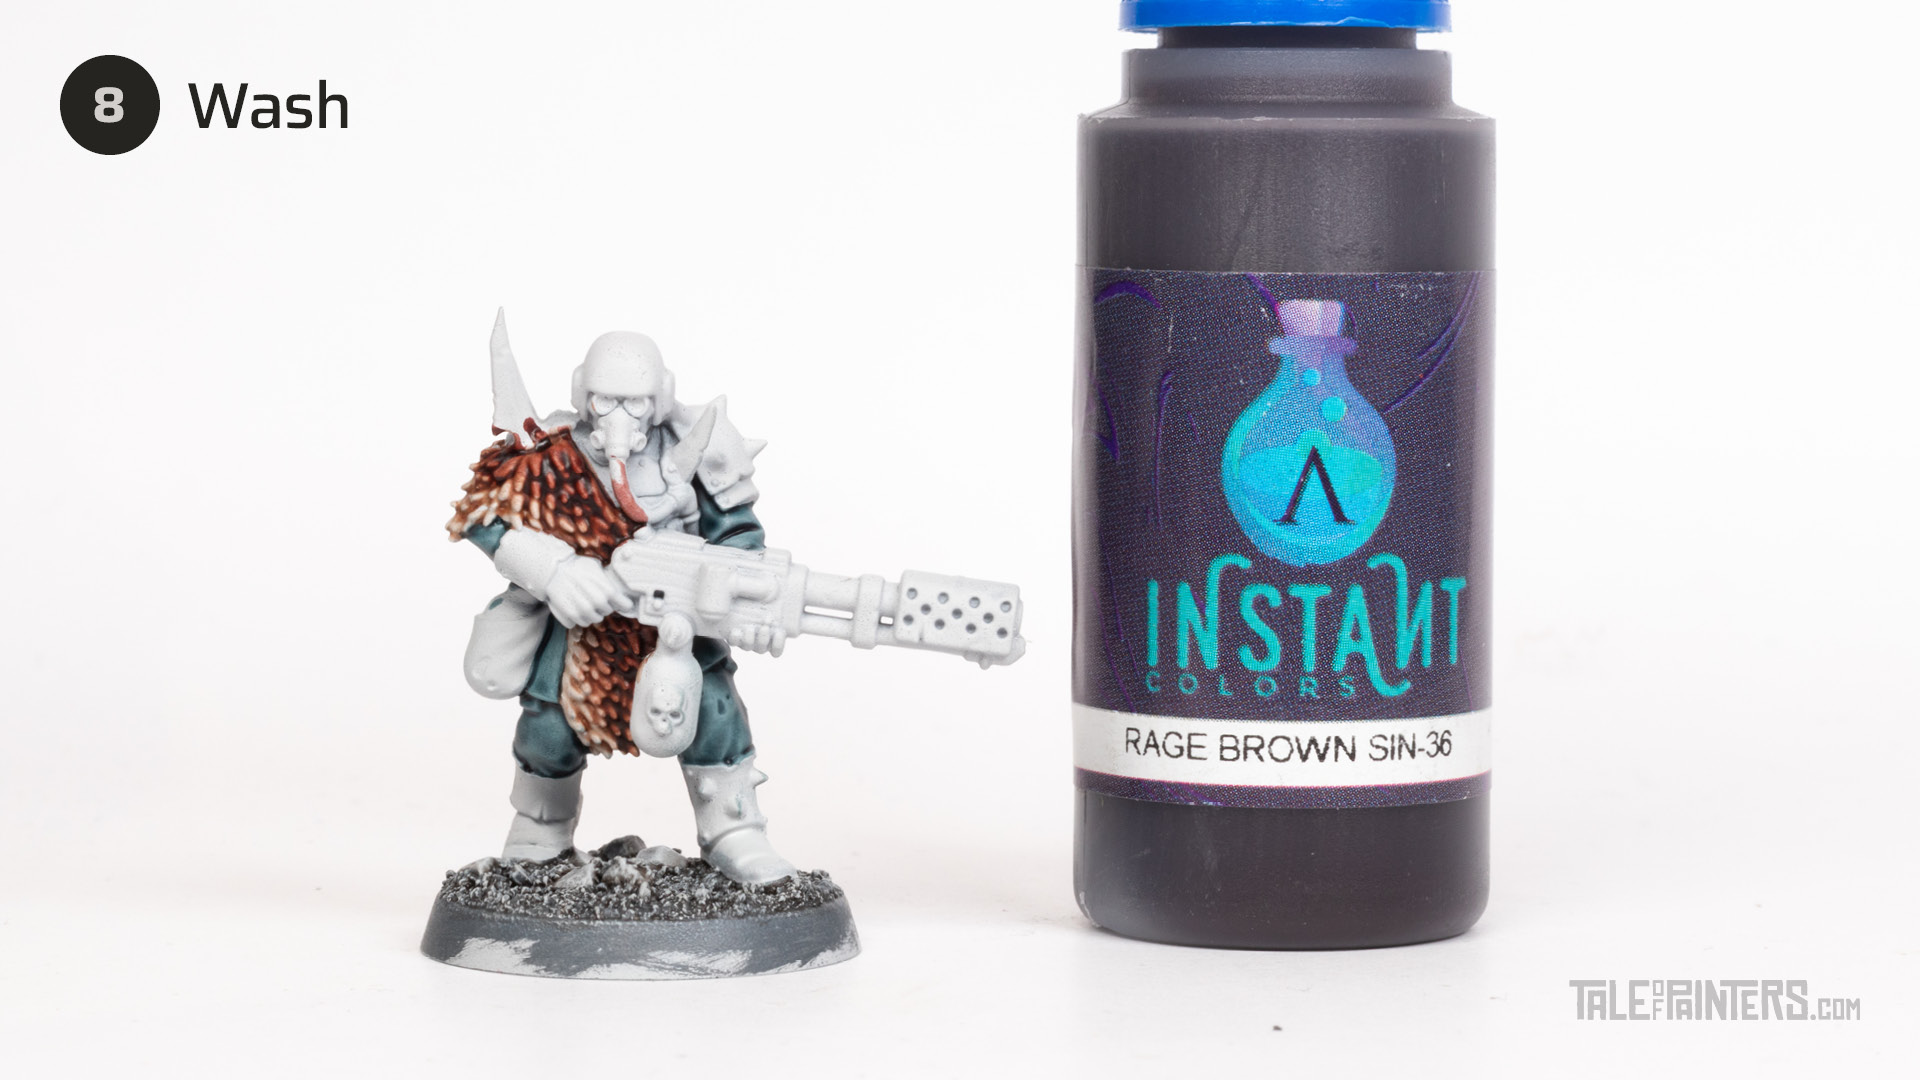

Add another wash with Scale75 Instant Colors Rage Brown [or Cygor Brown mixed 1:2 with Contrast Medium] to the centre of the fur.
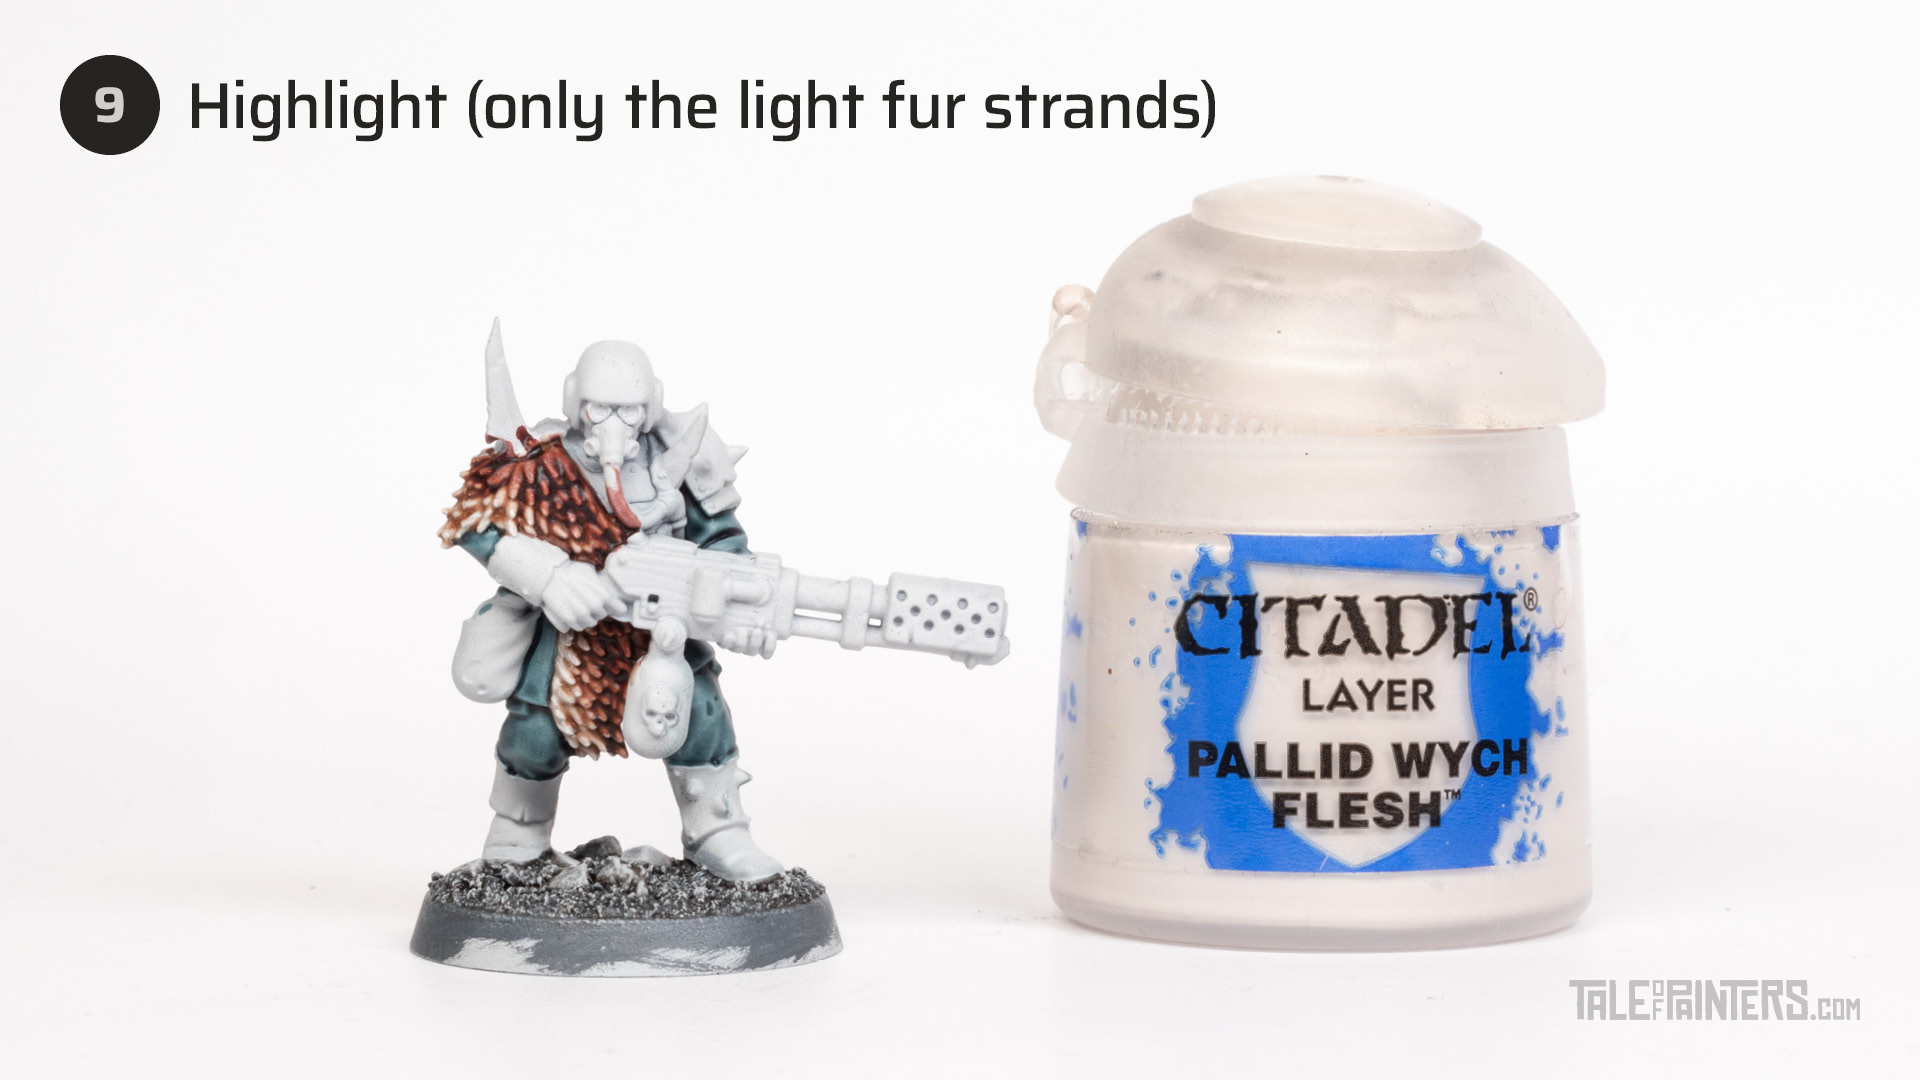

To add some definition, highlight the light fur strands you washed with Reikland Fleshshade in step 6 with Pallid Wych Flesh.
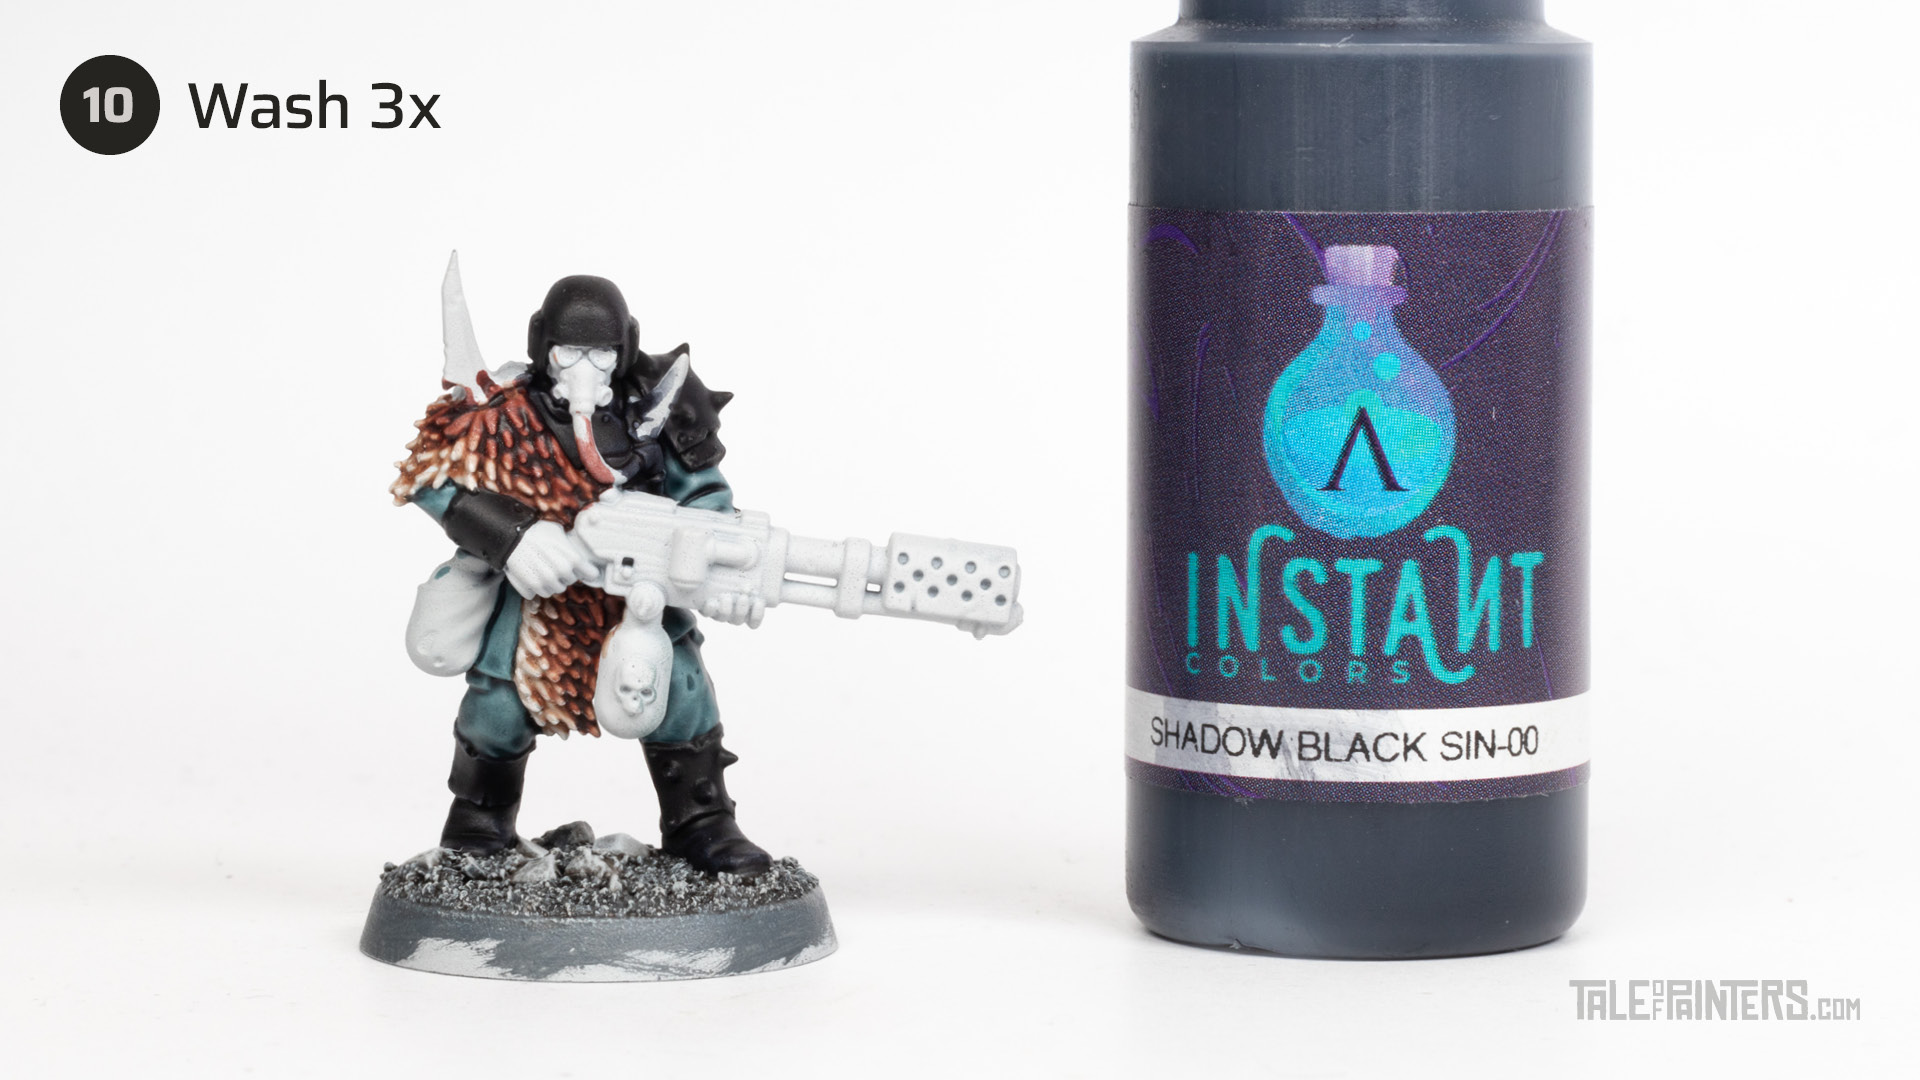

Wash the armour and boots three times with Scale75 Instant Colors Shadow Black to build up a deep black [you could also use a single coat of Black Legion, which would be even faster, but Shadow Black has a slightly blueish tint which I really like in combination with the faded petrol of the clothes].
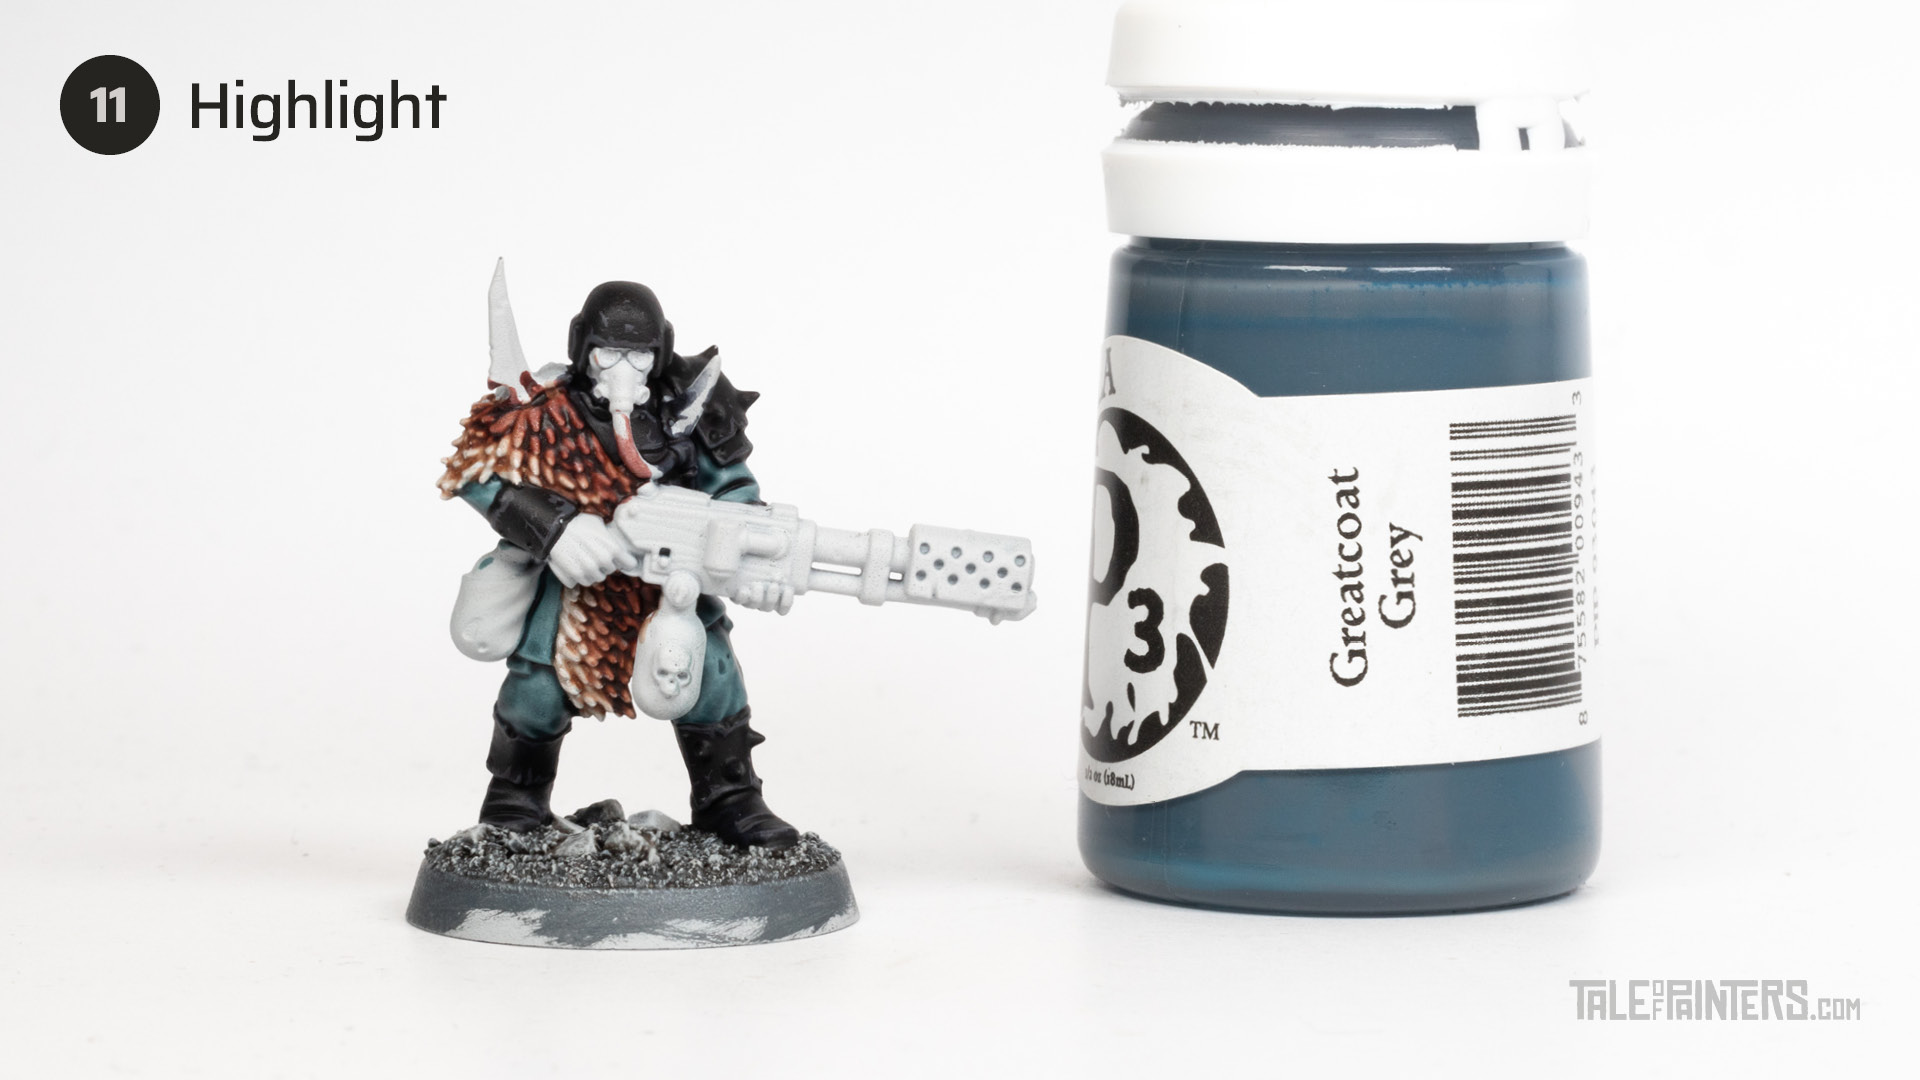

Emphasize the highlights created by the washes of the previous step with a quick highlight of Formula P3 Greatcoat Grey [or Eshin Grey if you used Black Legion]. For the armour, aim for an irregular, chipped look.


Add another, even finer edge highlight with Warpaints Uniform Grey [or Dawnstone], adding a few small scratches and dents to the armour as well.
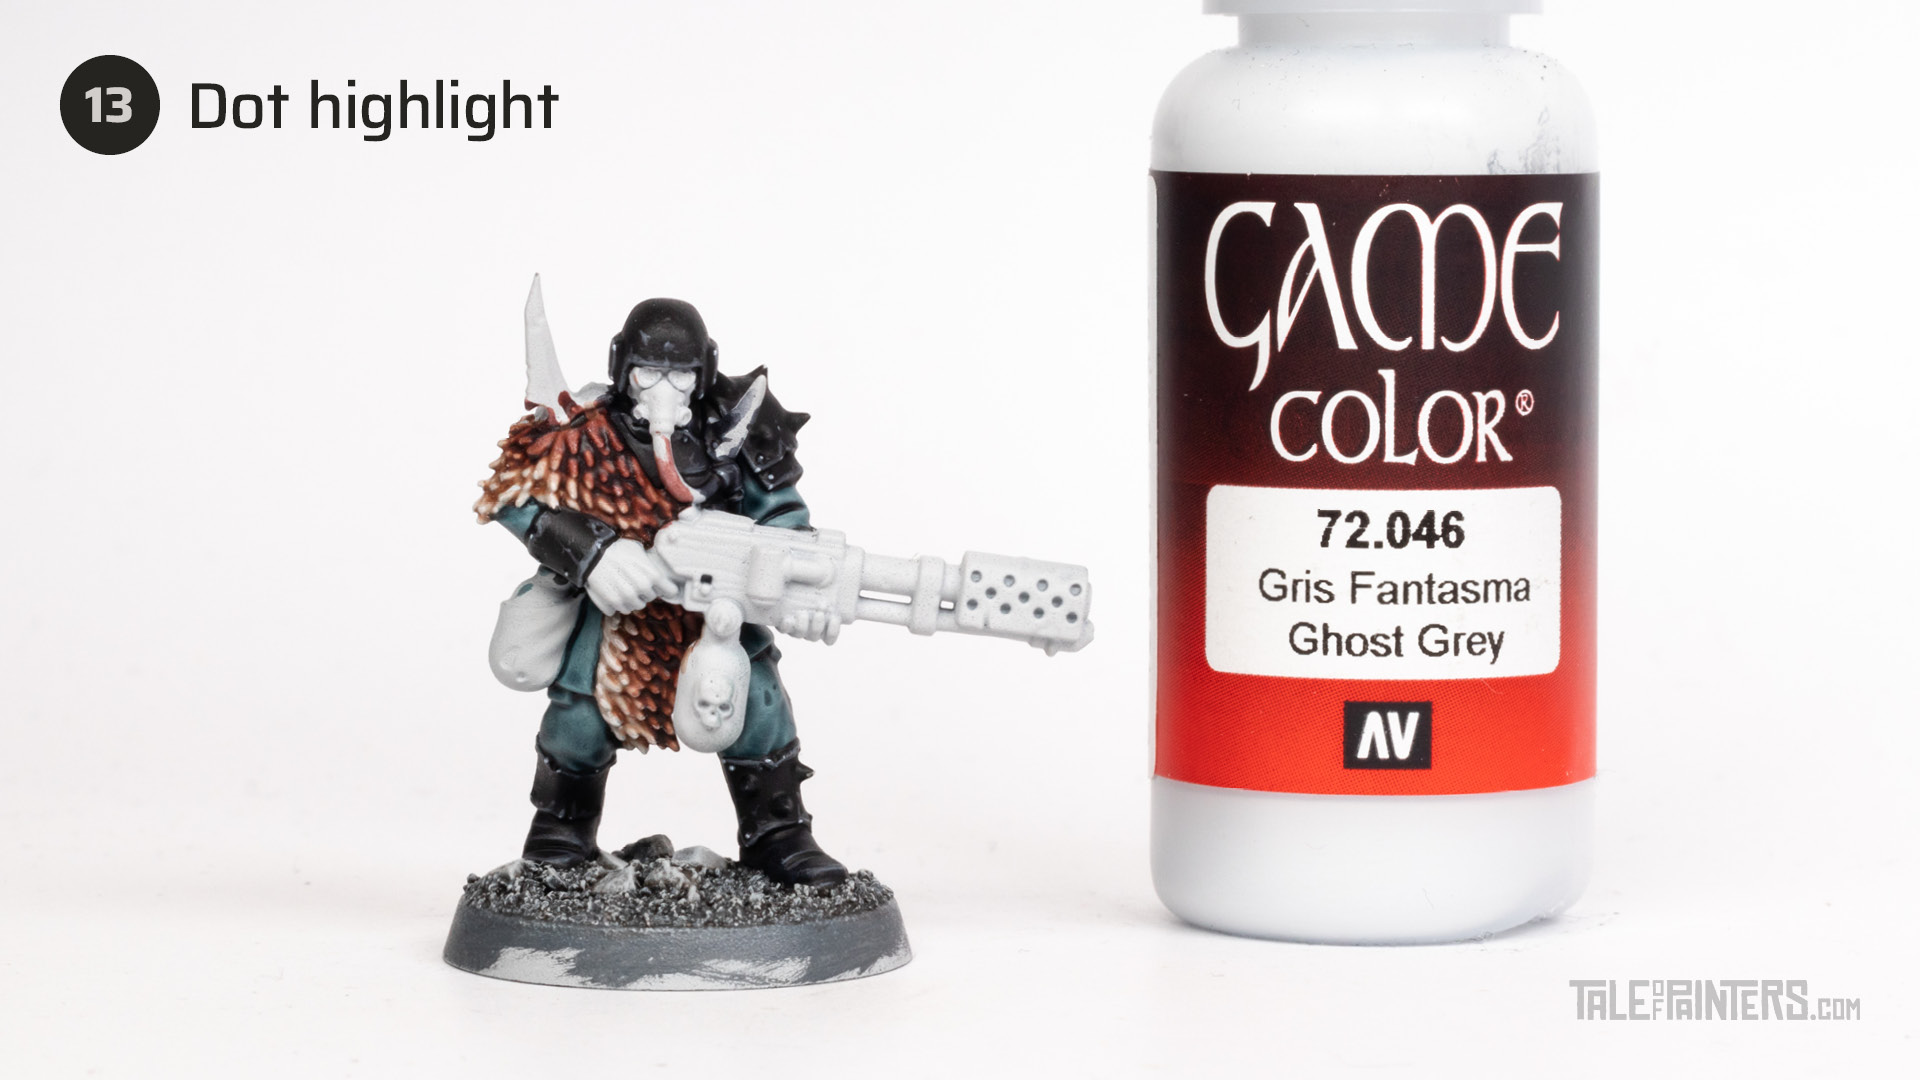

Finally, add dots of Vallejo Ghost Grey [or Corax White] to the rivets and corners of the armour only.
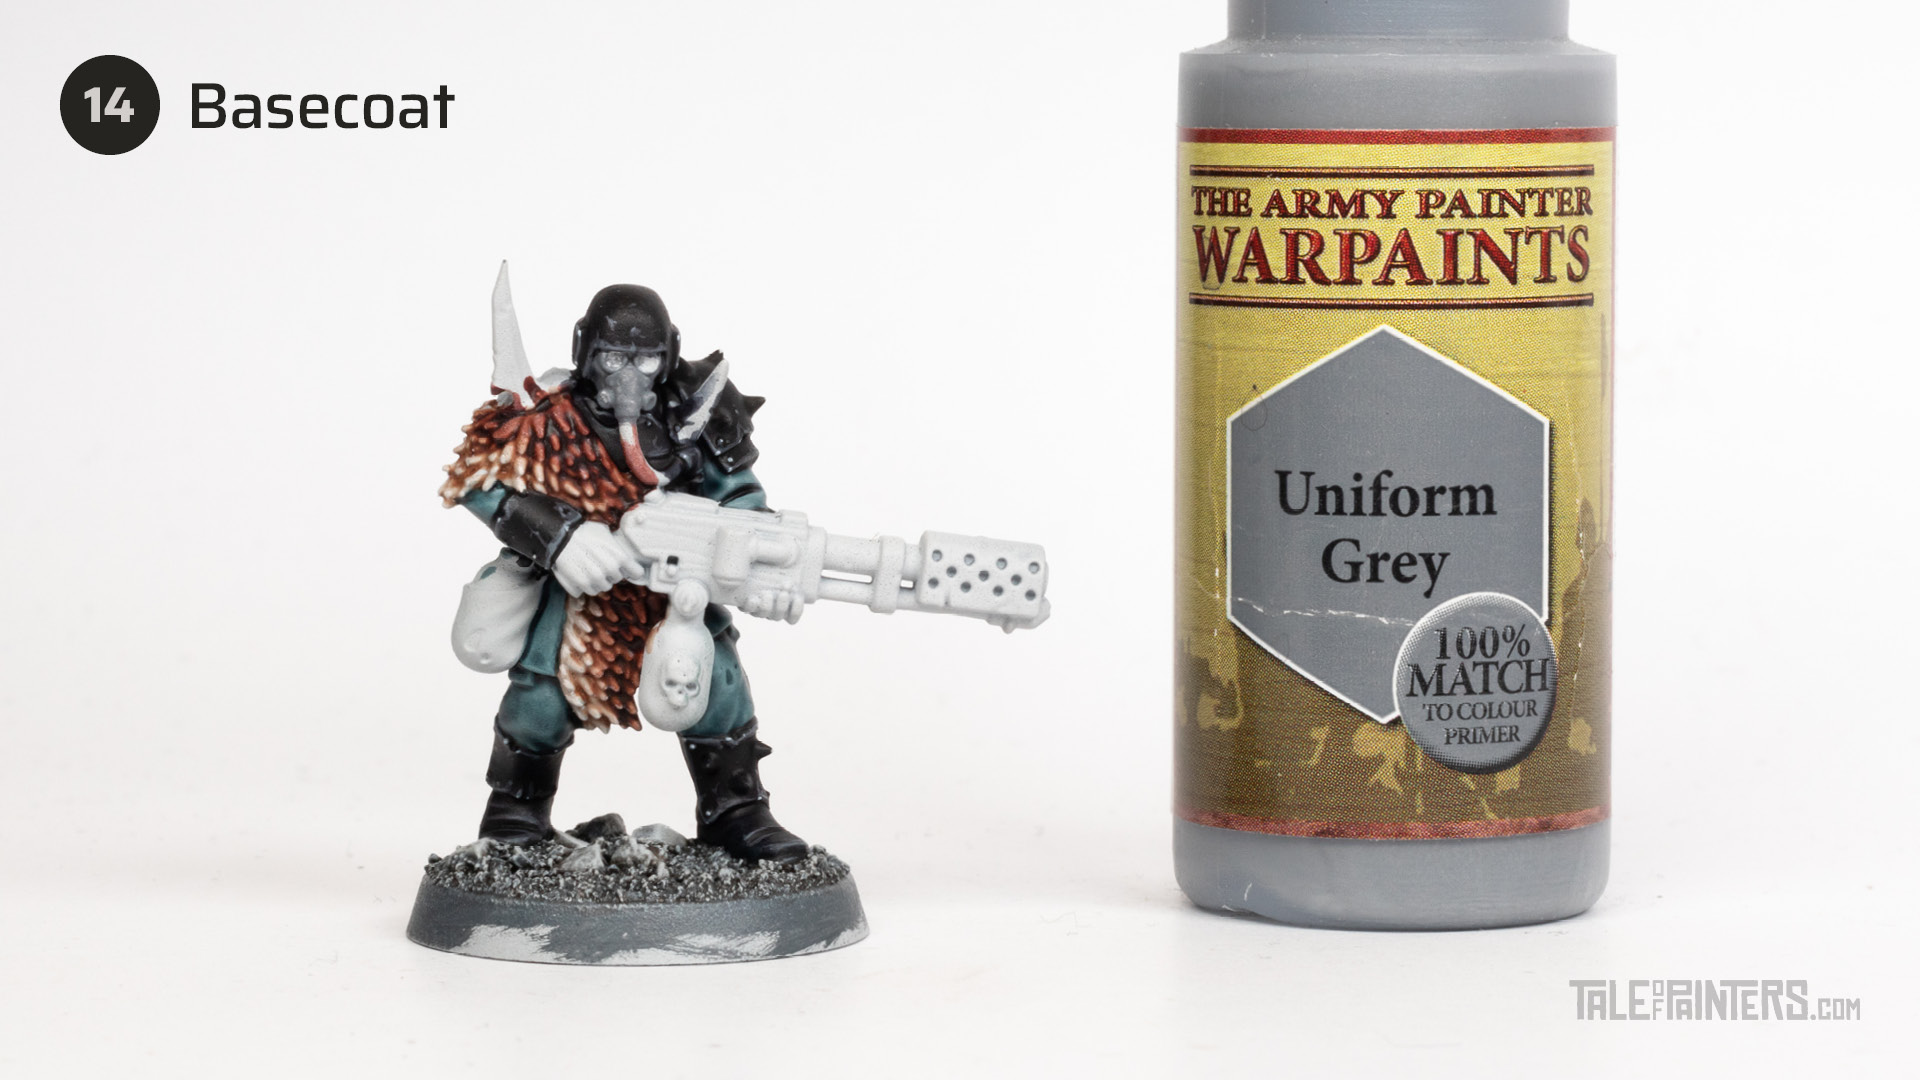

Basecoat the mask with Warpaints Uniform Grey [or Dawnstone].
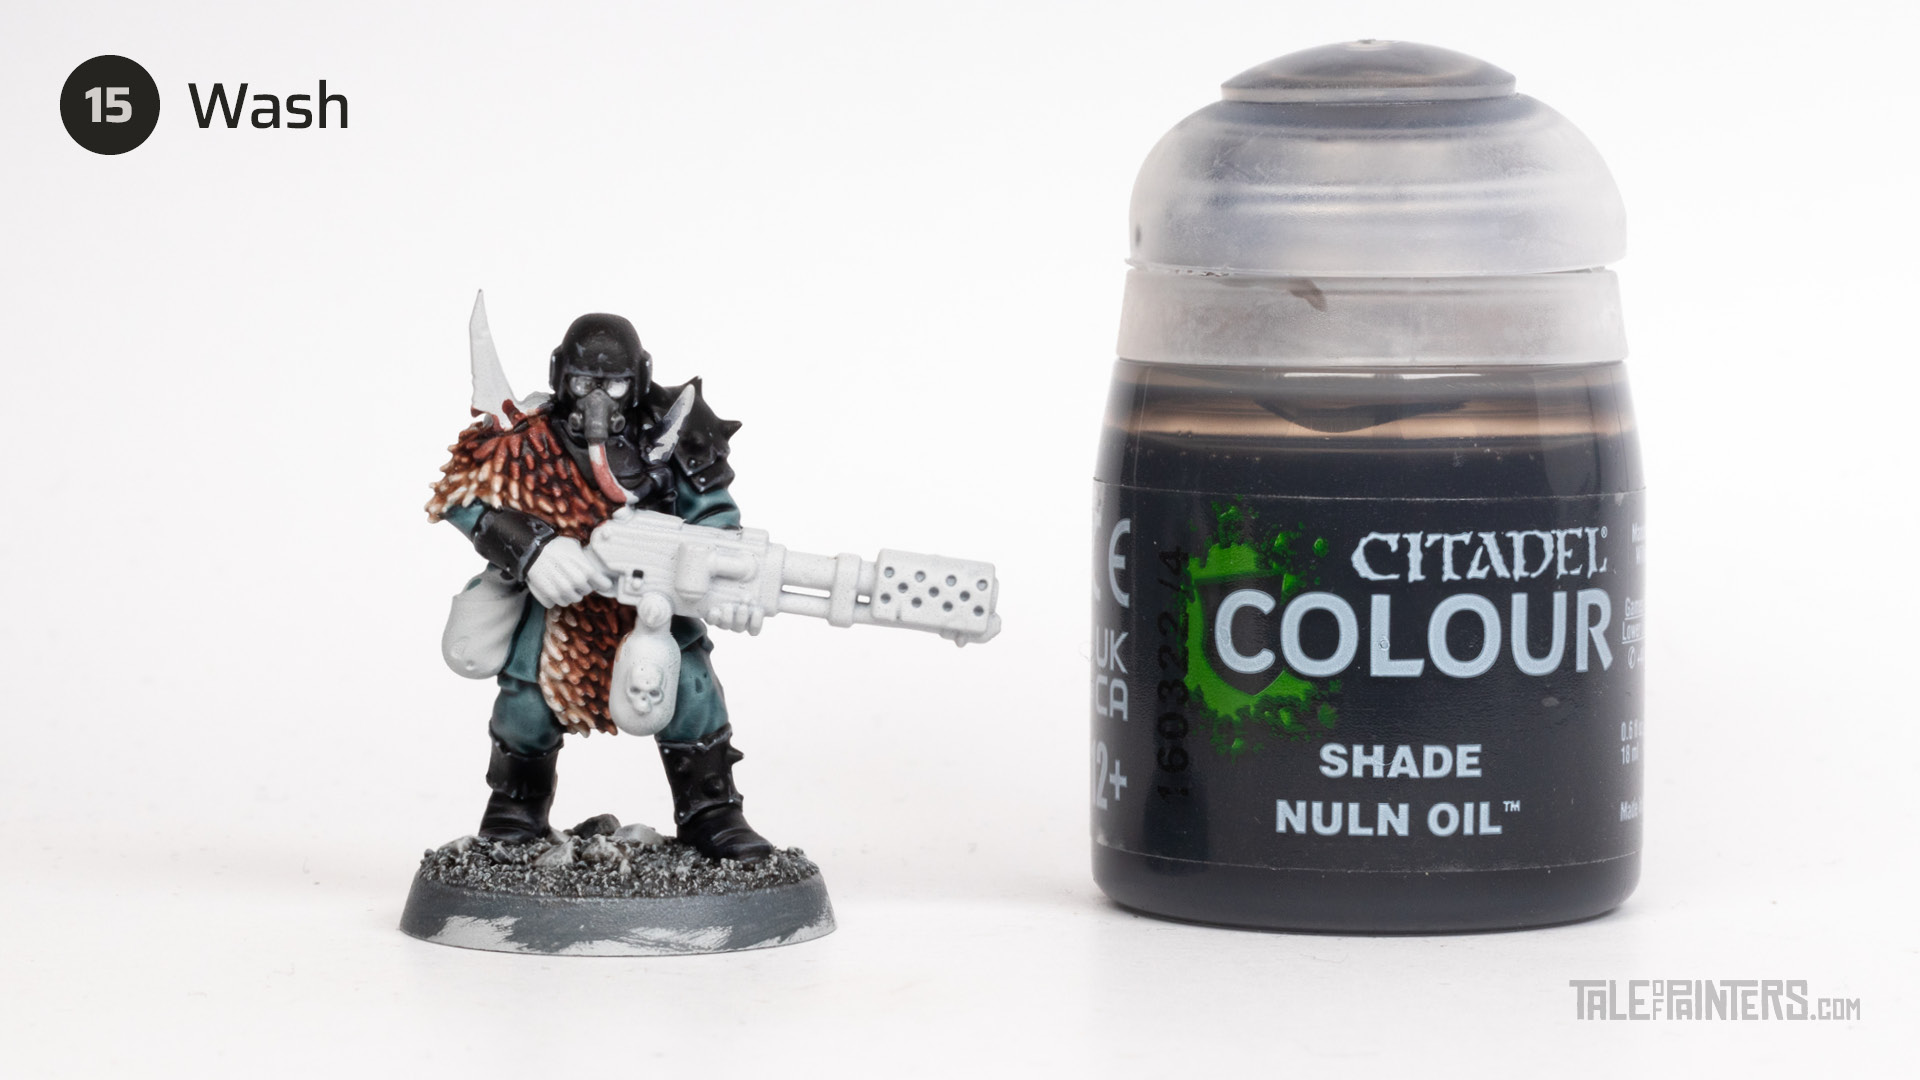

Wash the mask with Nuln Oil.
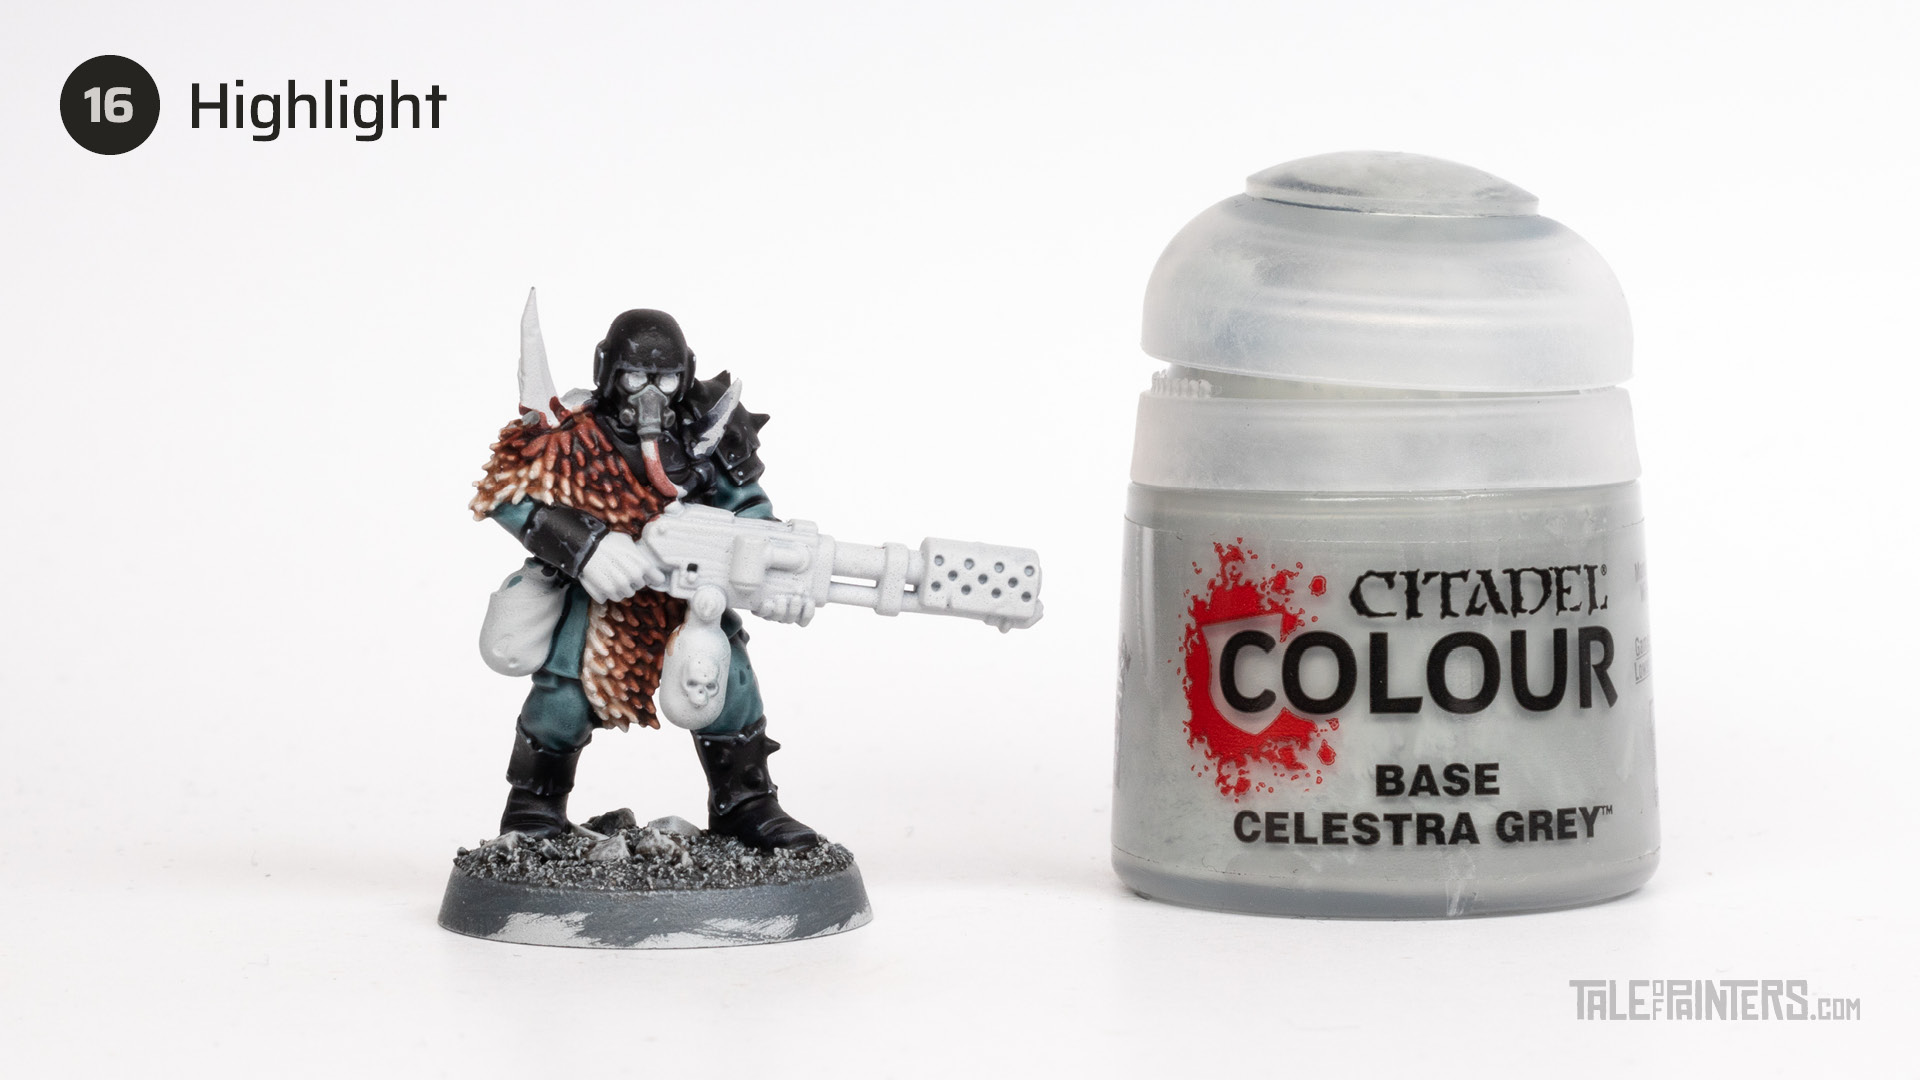

Add a few soft highlights with Celestra Grey.
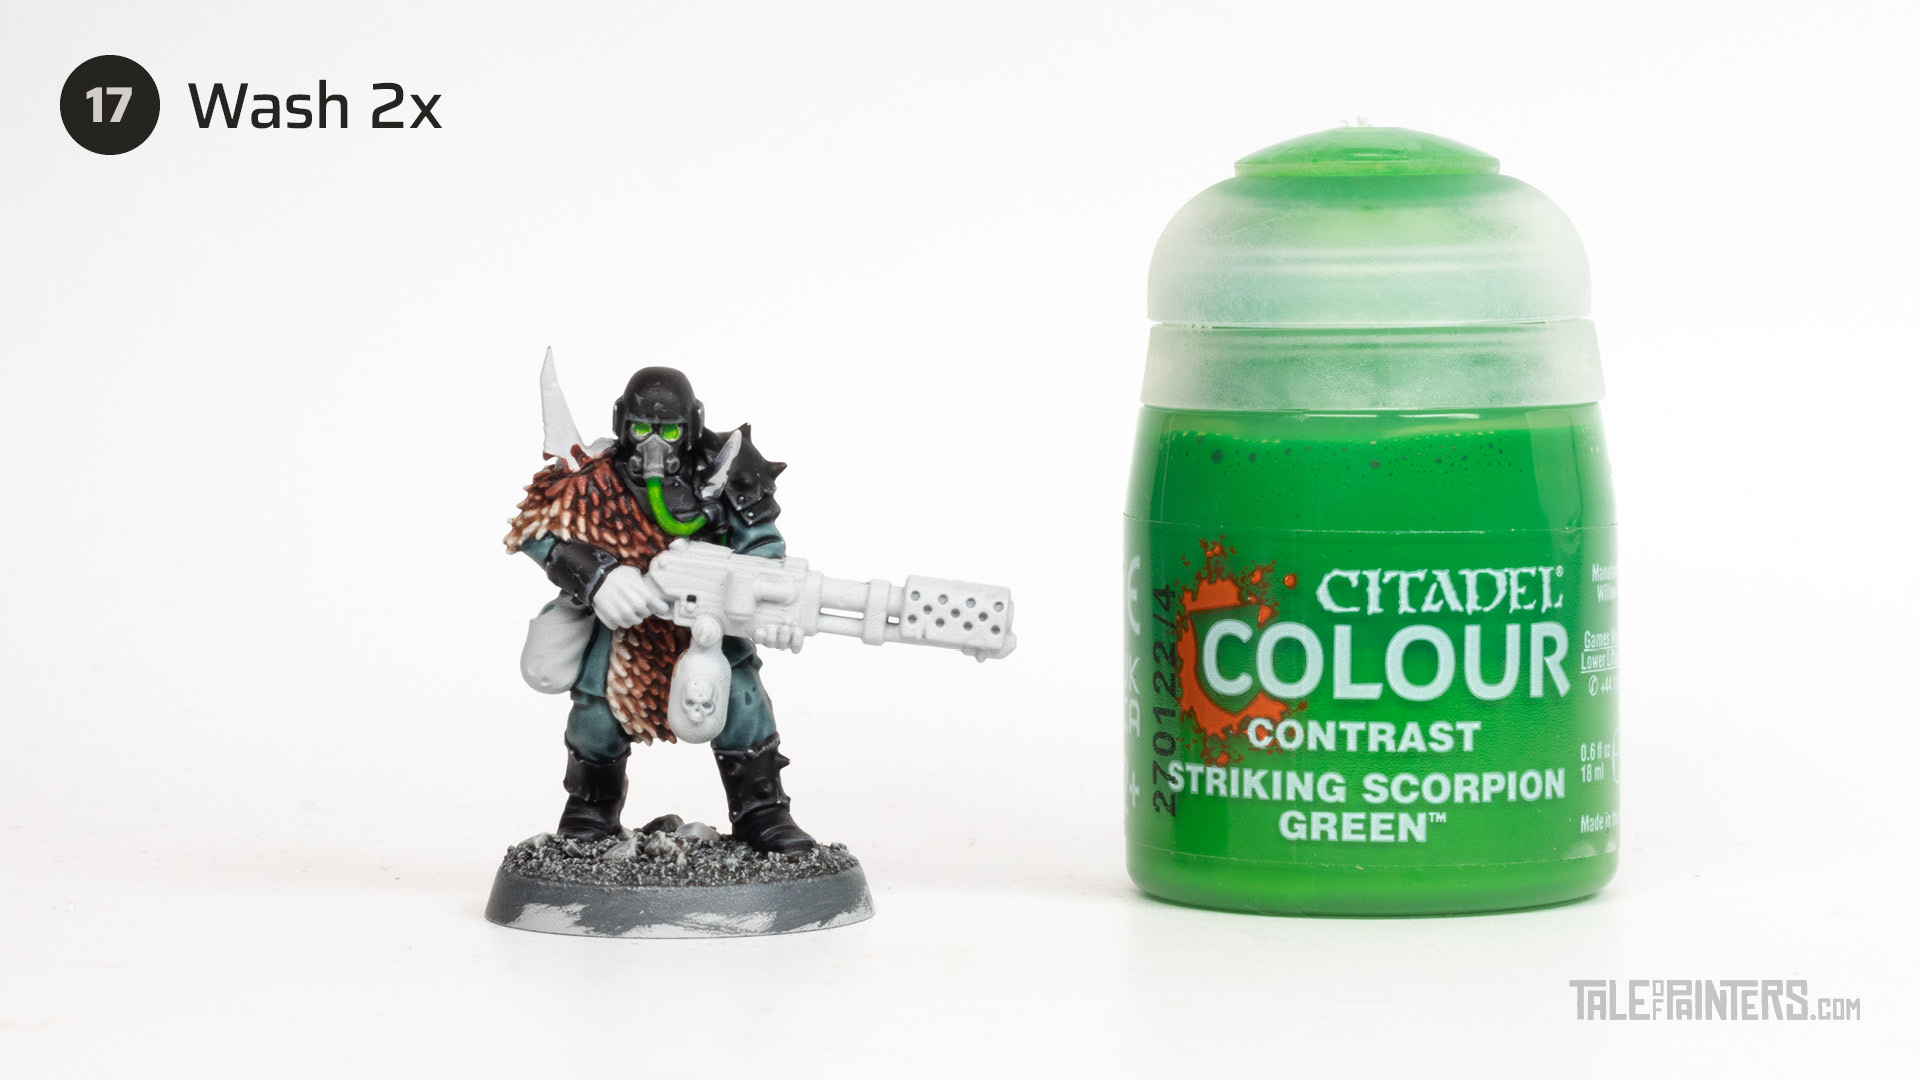

Wash the lenses and hoses with Striking Scorpion Green. Once dry, add another layer to make the green pop.
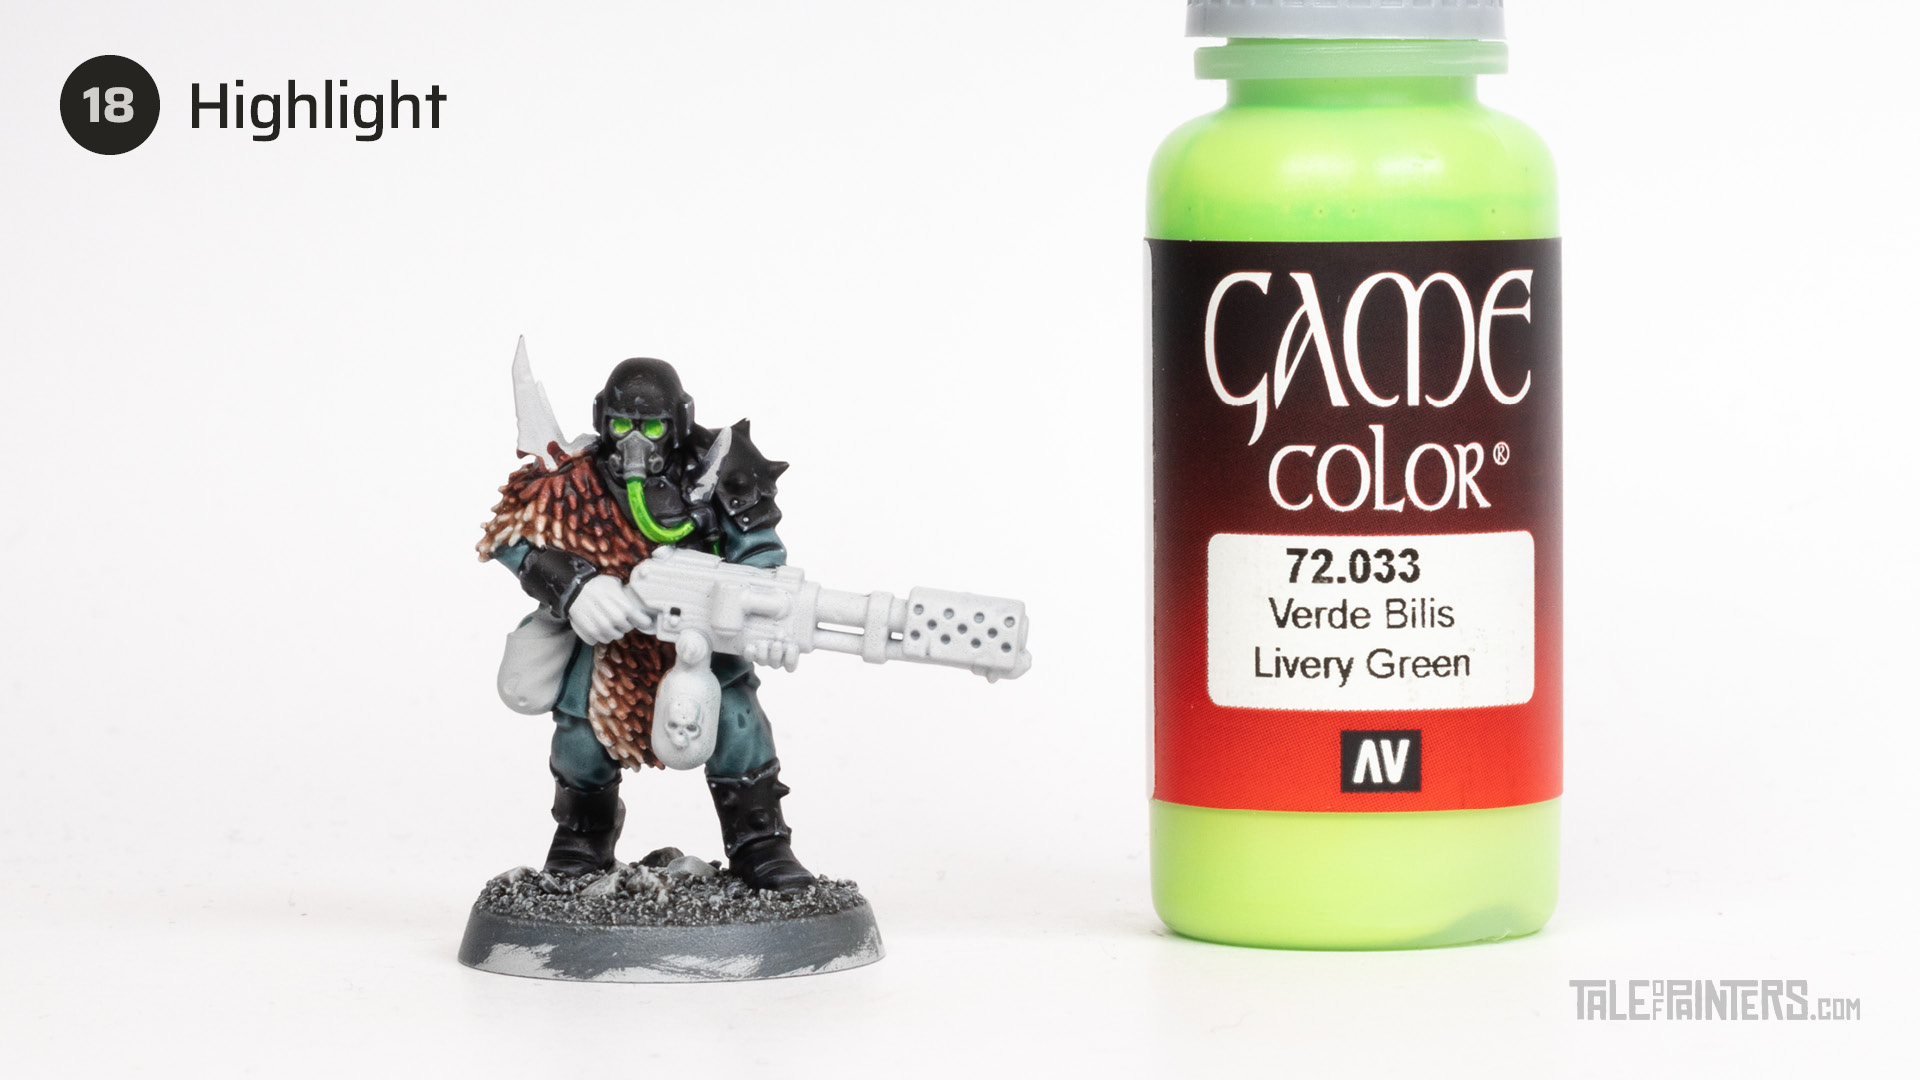

Highlight the lower third of the lenses and the hoses with Vallejo Game color Livery Green [or a mix of Moot Green and Dorn Yellow]. Also add a few tiny dots to represent bubbles.
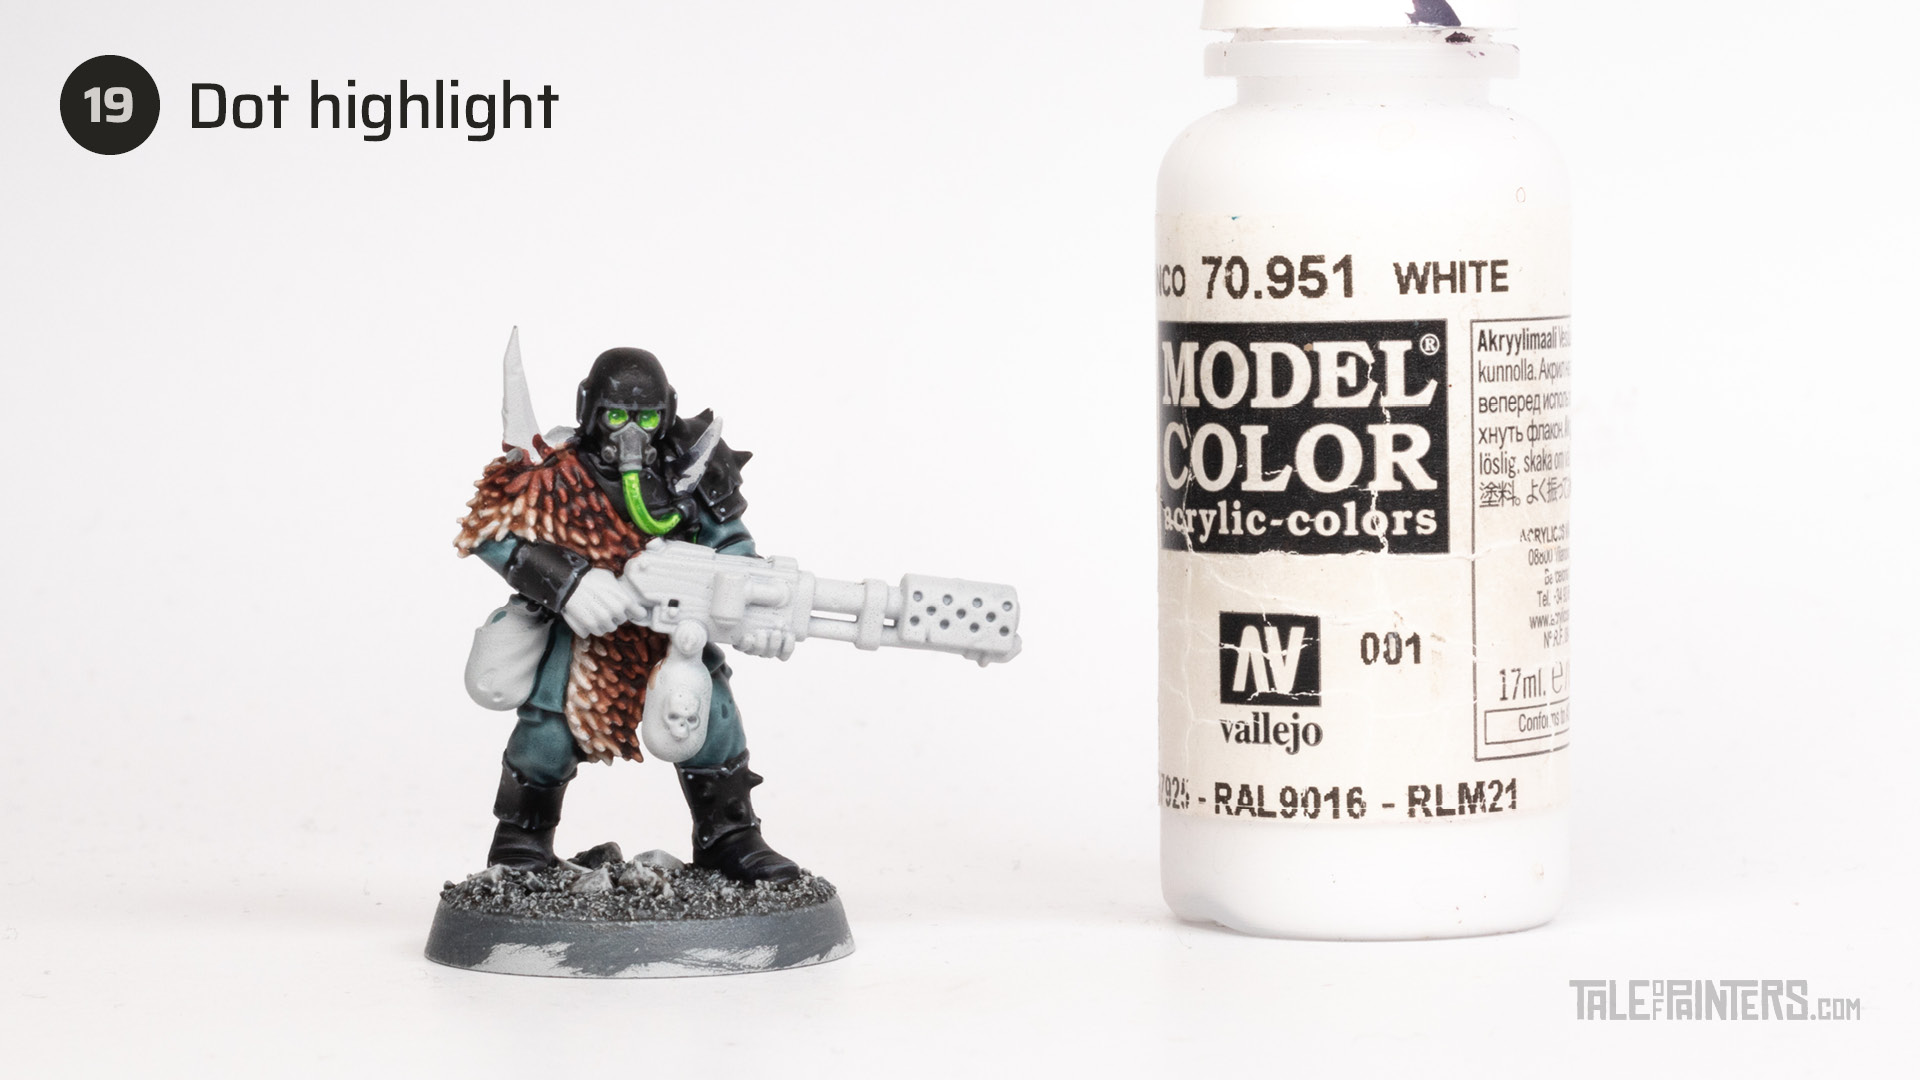

Apply two tiny small dots of Vallejo Model Color White [or White Scar] to the upper left corners of the lenses.
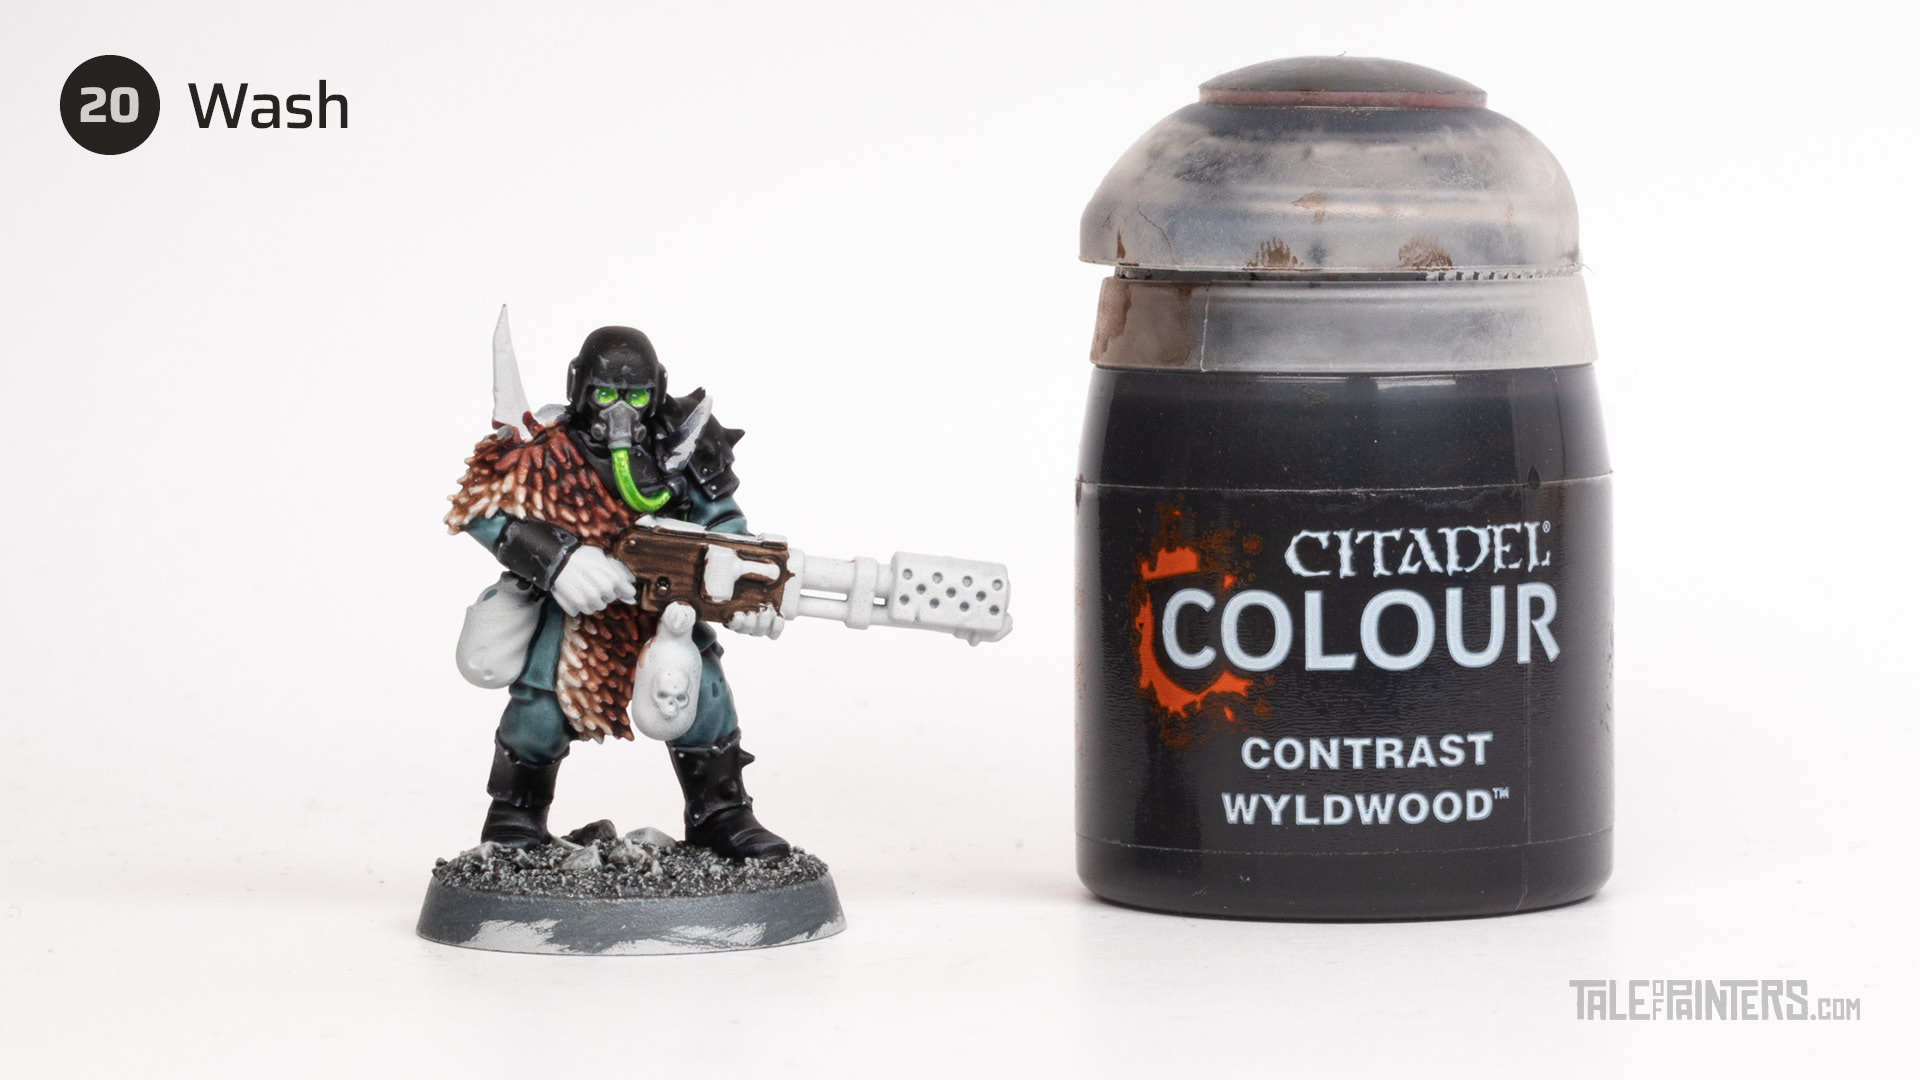

Wash the wooden gun casing with Wyldwood.
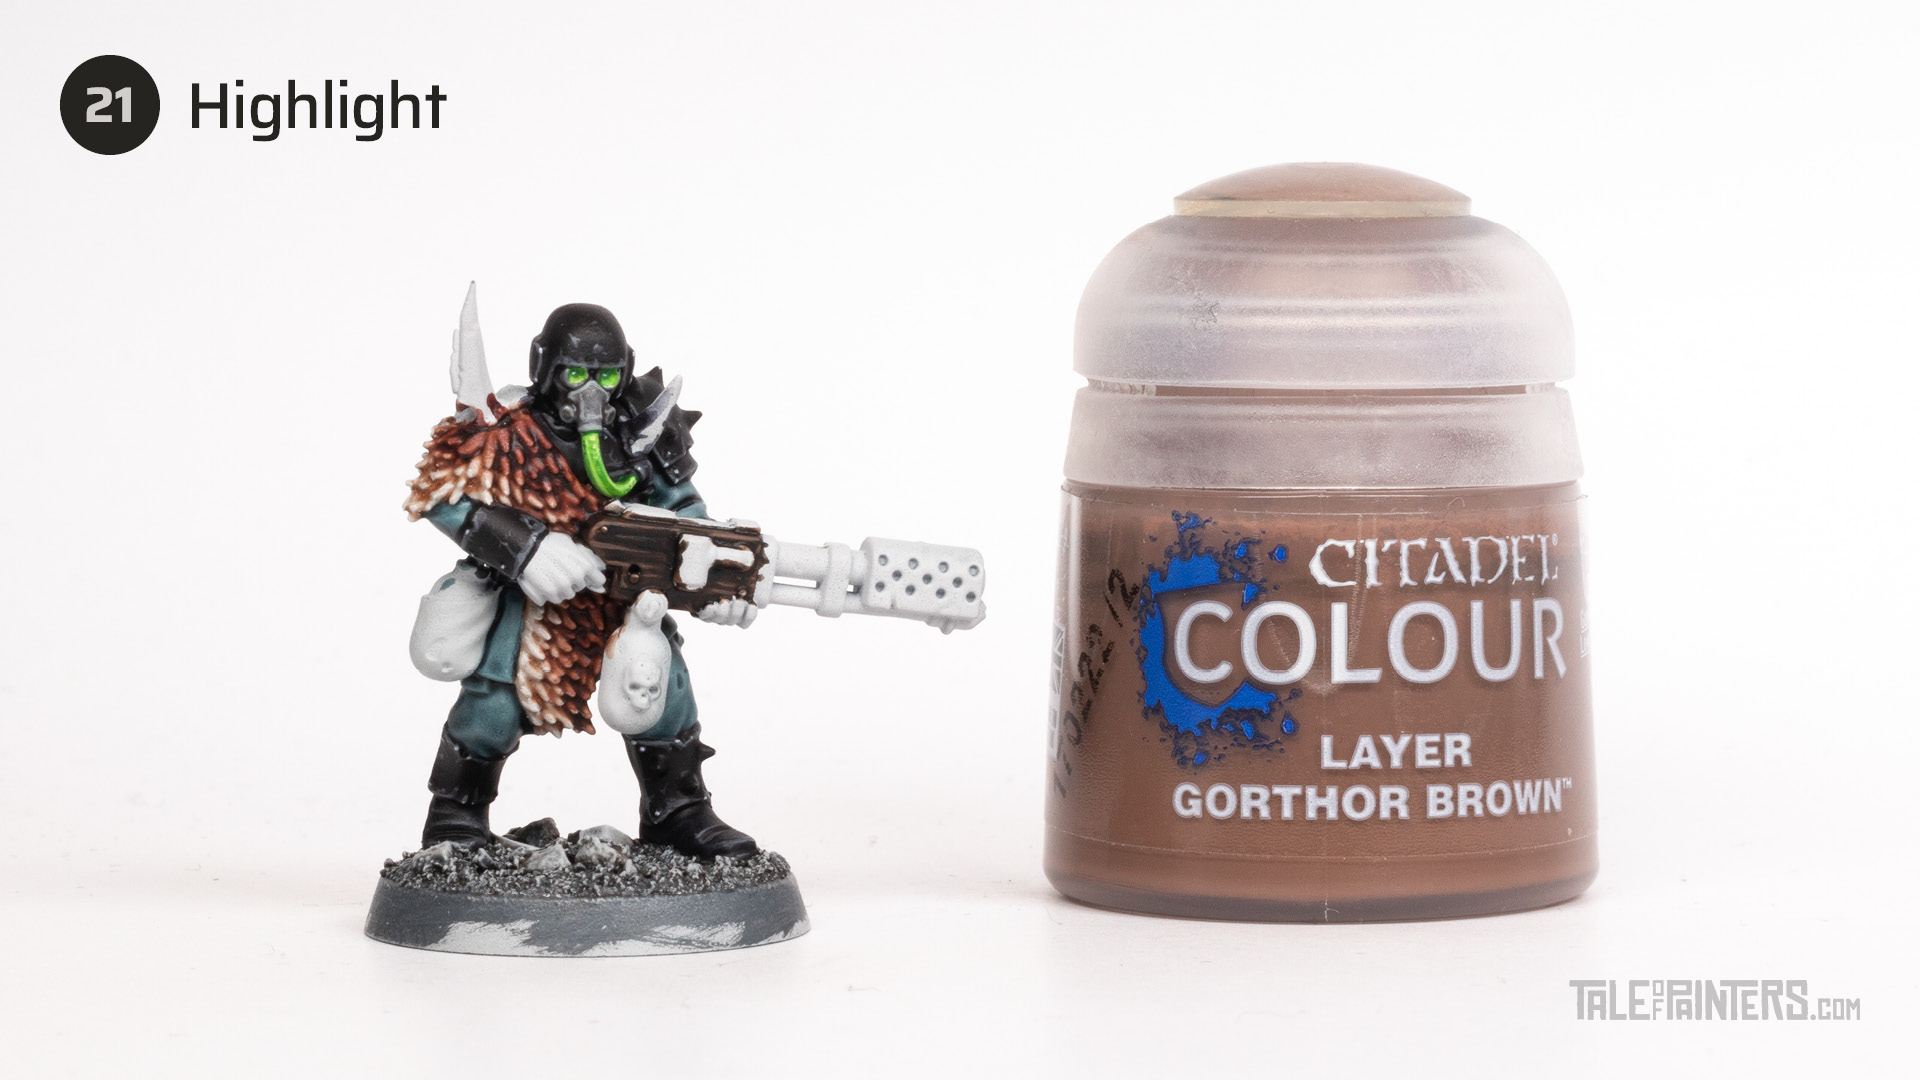

Highlight the wood with Gorthor Brown, following the edges and the pattern of the wood grain.
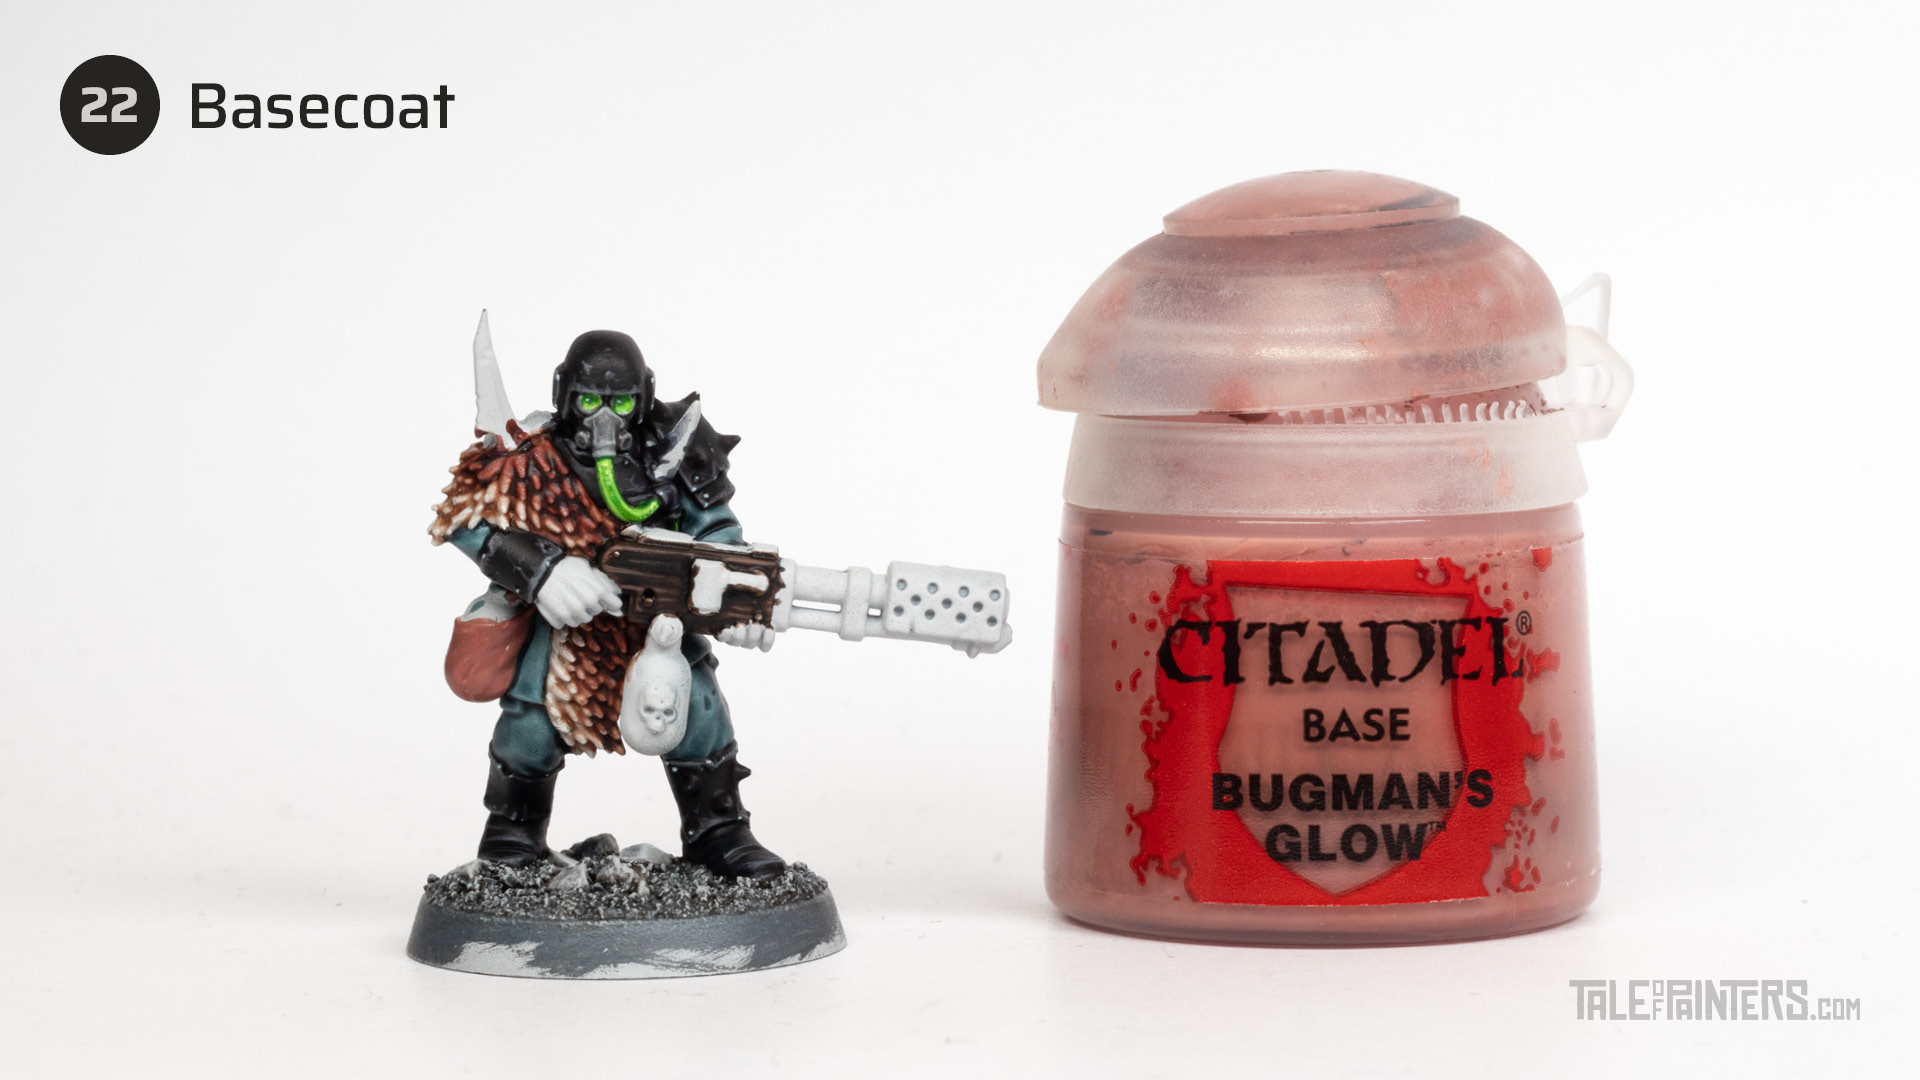

Basecoat the leather with Bugman’s Glow.


Apply three coats of Scale75 Instant Colors Rage Brown to build up a strong, reddish brown [or use a single coat of Cygor Brown with a little bit of Contrast Medium mixed in].
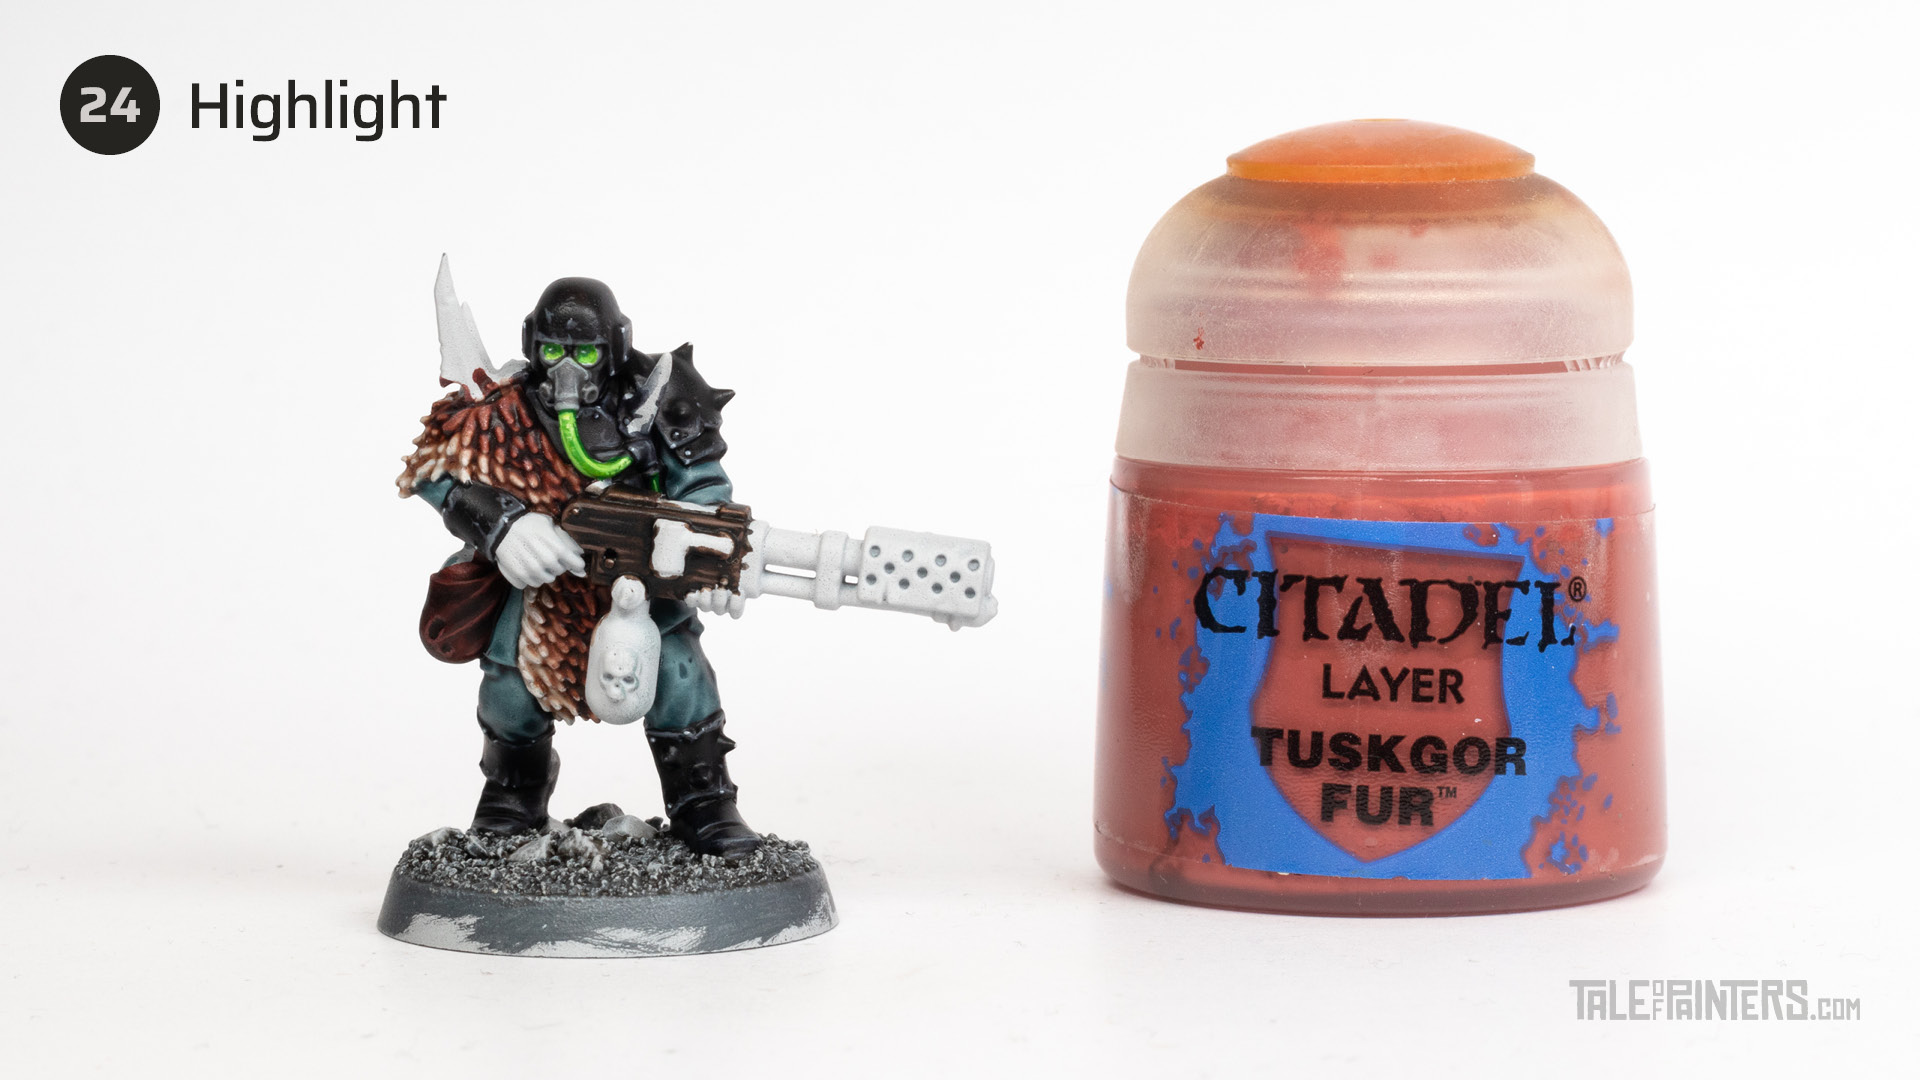

Highlight the leather with Tuskgor Fur with a stippling technique to add some texture.
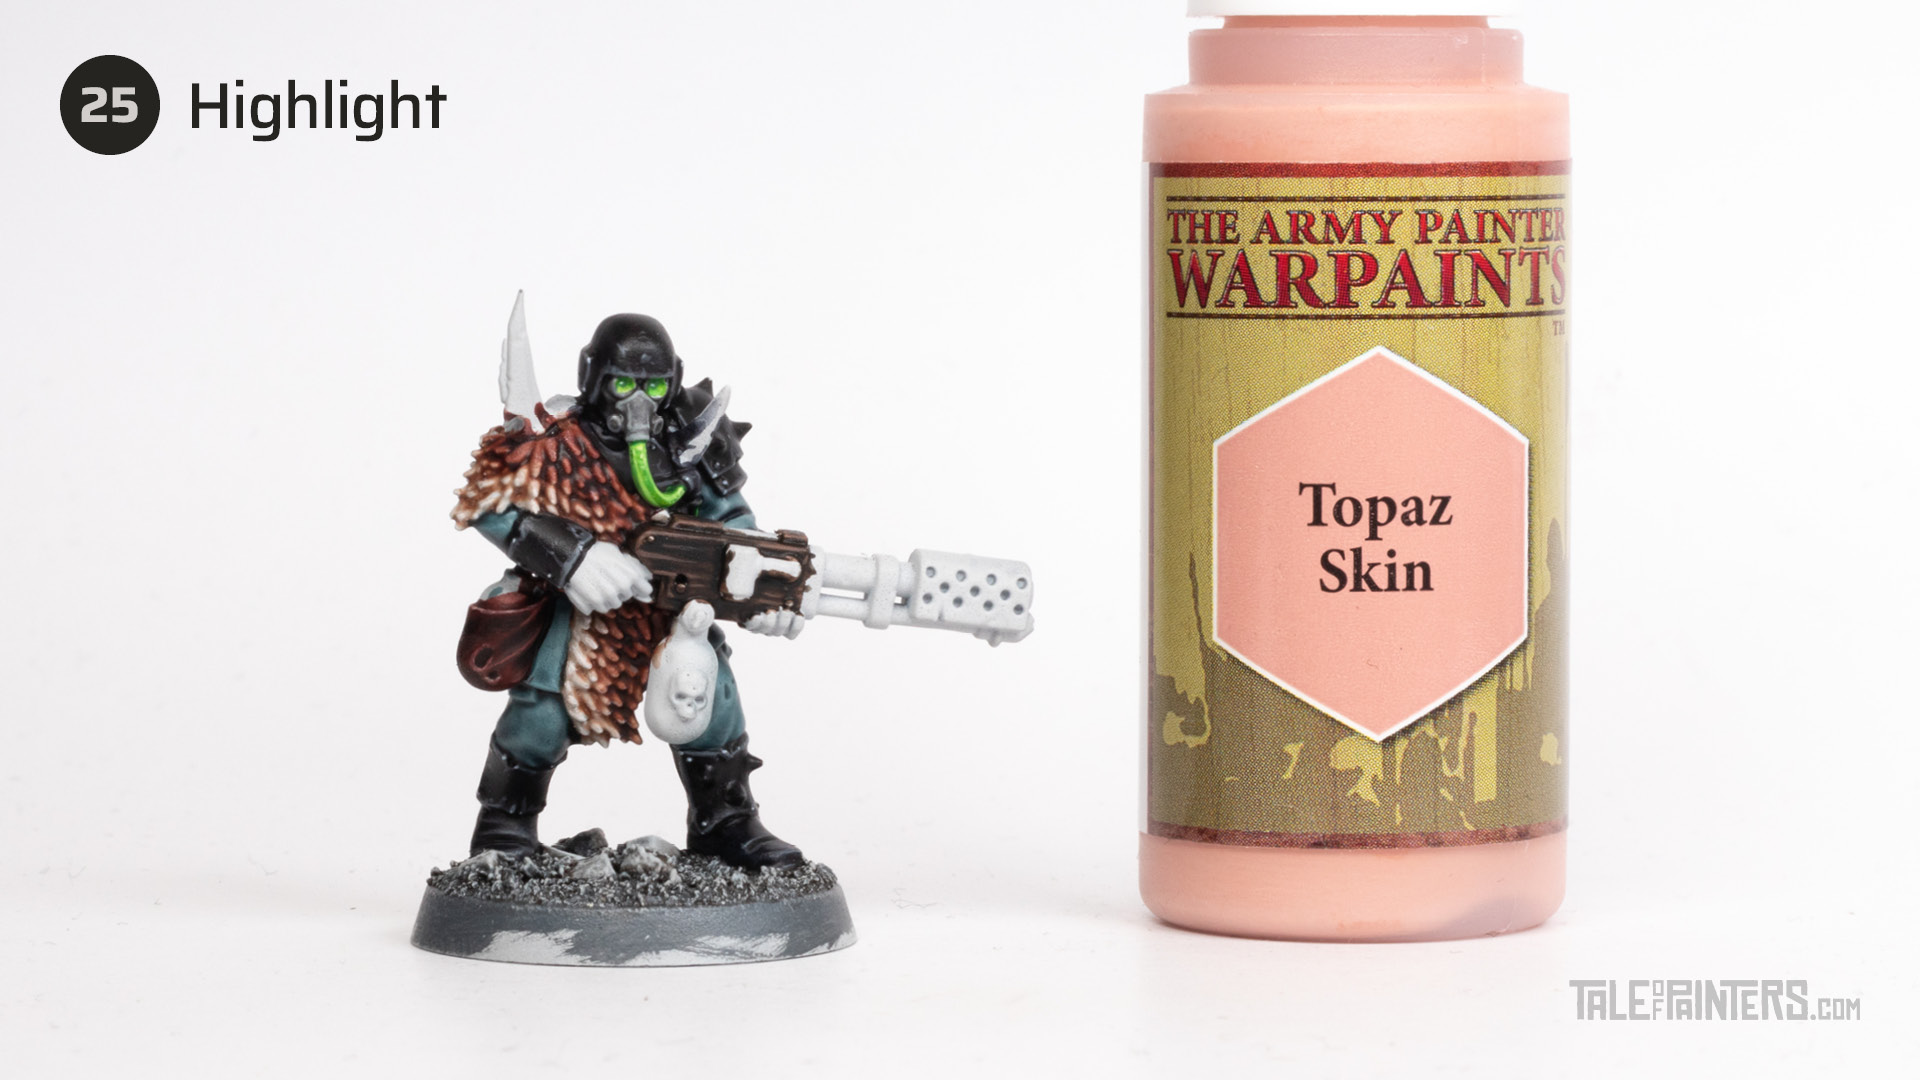

Add a final highlight of Warpaints Topaz Skin [or Cadian Fleshtone], adding a few scratches to build up a cracked leather texture.
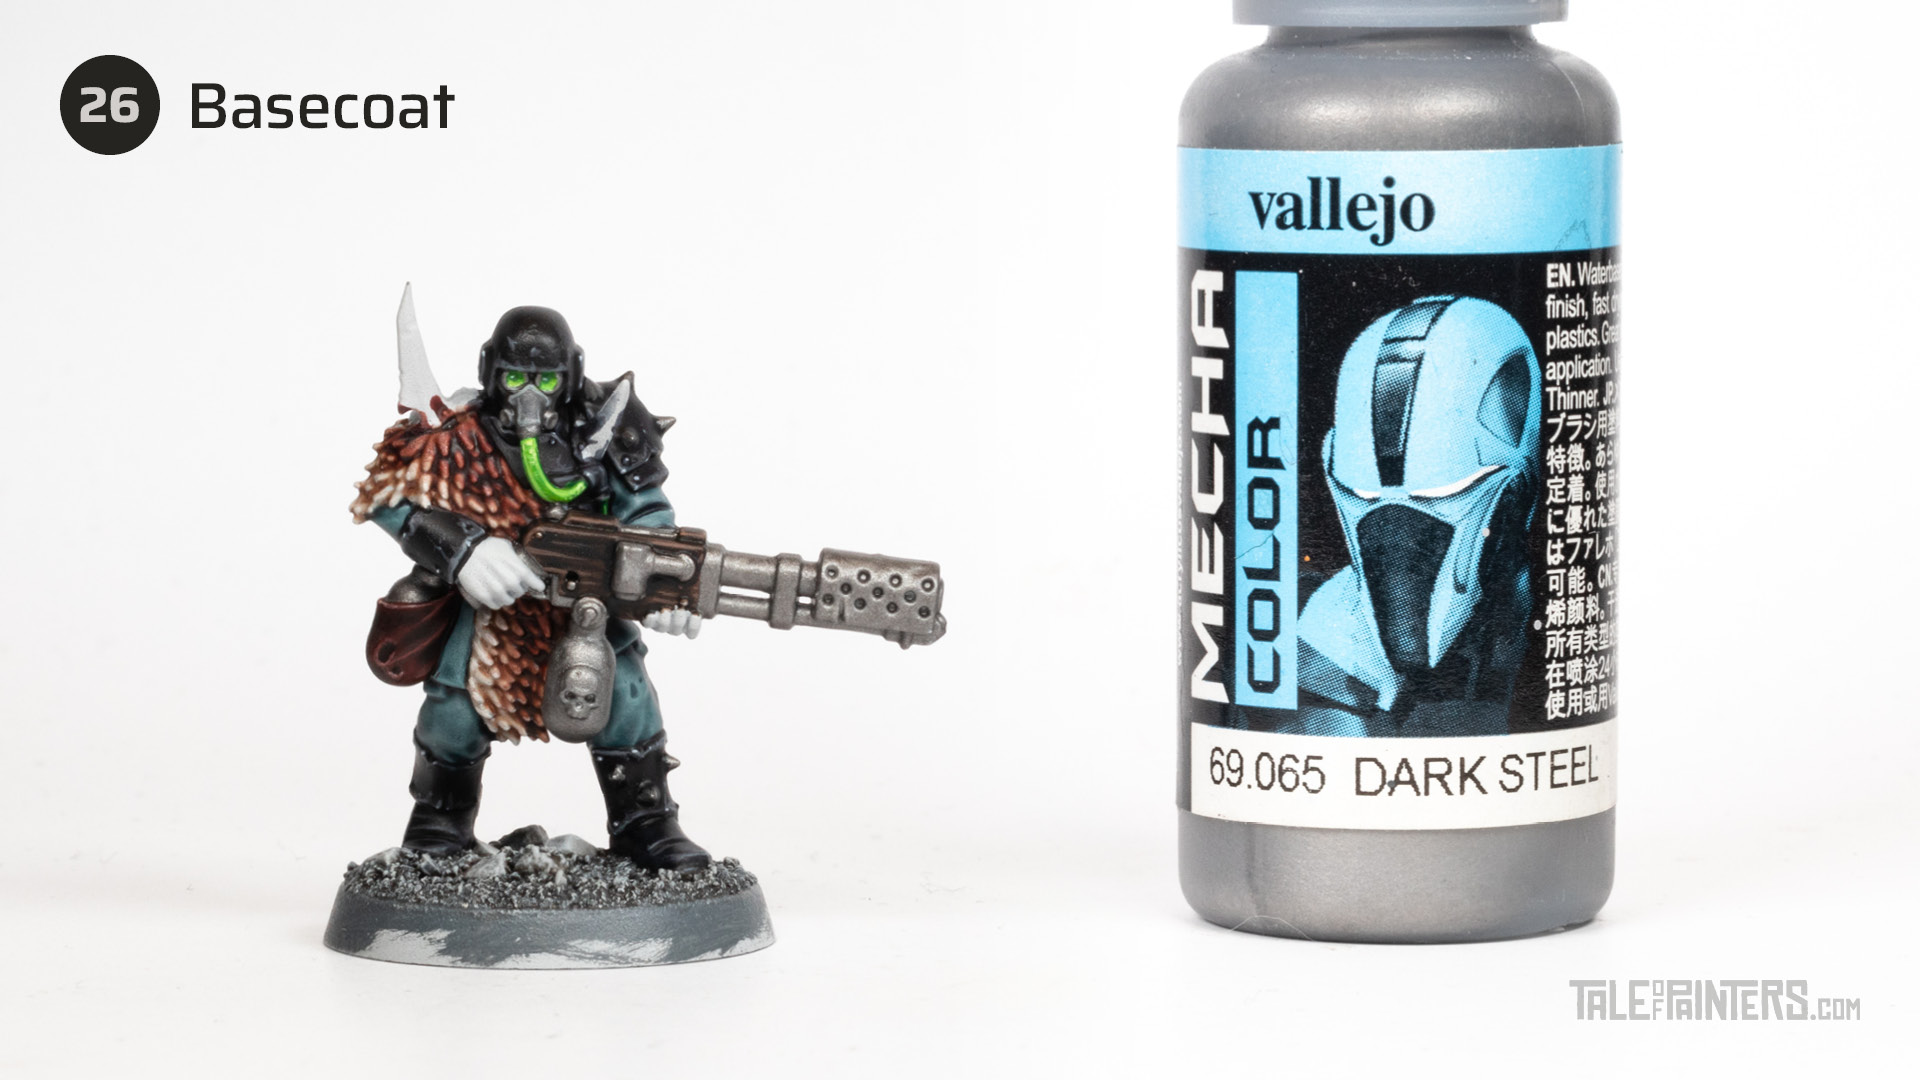

Basecoat all the metal with Vallejo Mecha Color Dark Steel [or Leadbelcher].
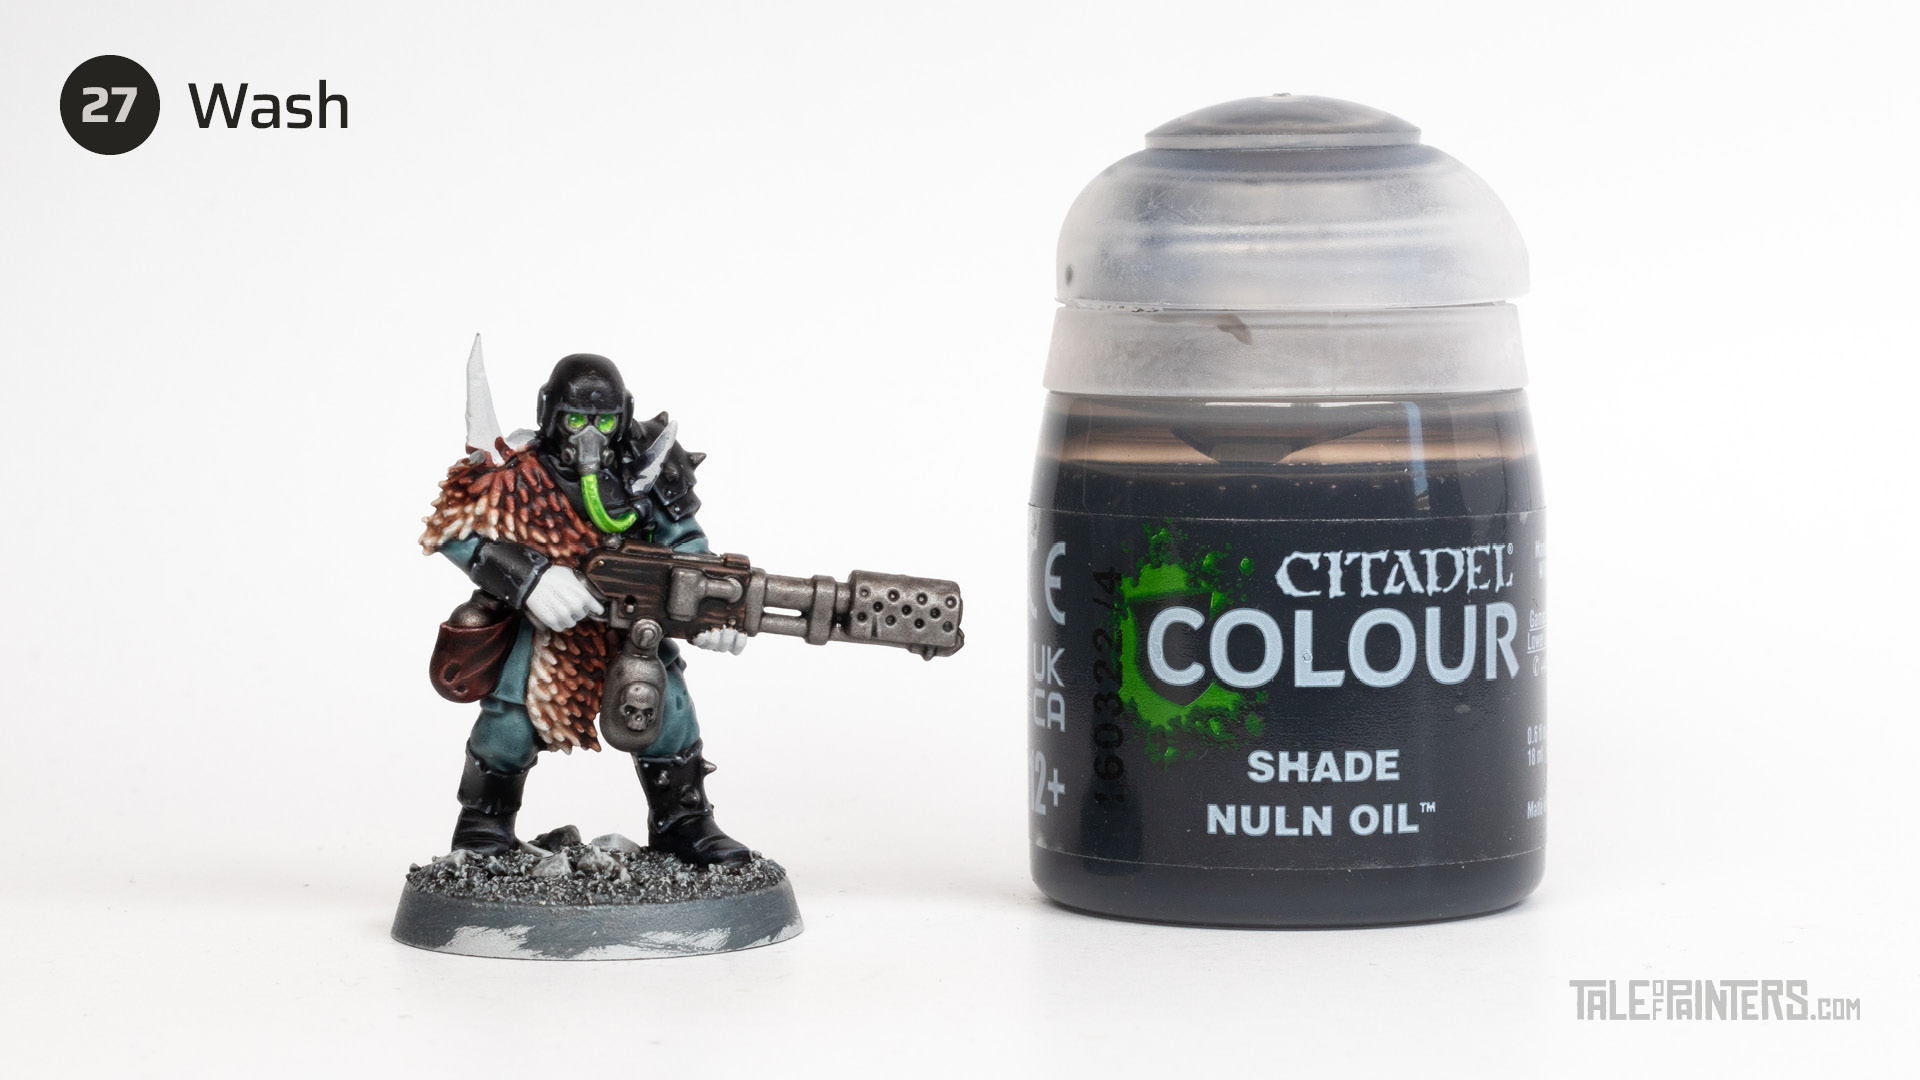

Wash the steel with Nuln Oil.
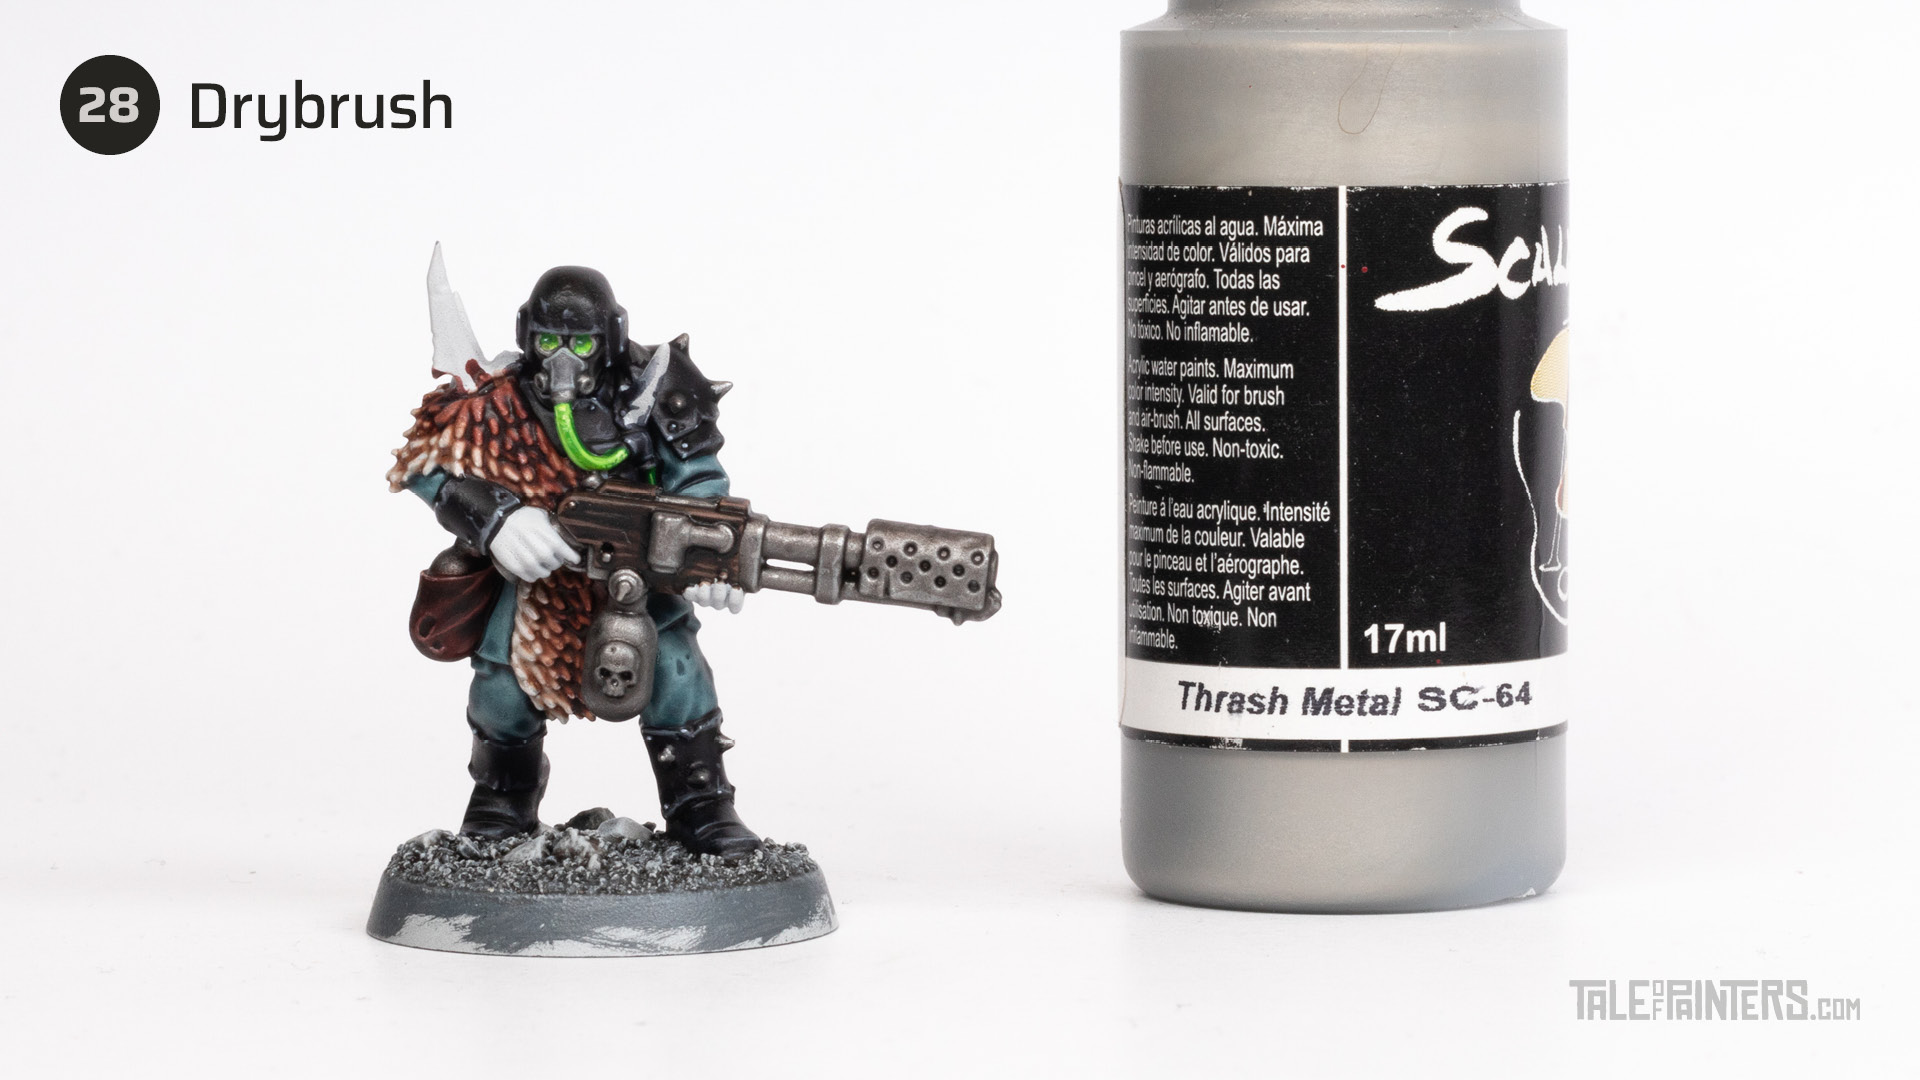

Gently drybrush the edges of the metal with Scale75 Thrash Metal [or Iron Hands Steel].
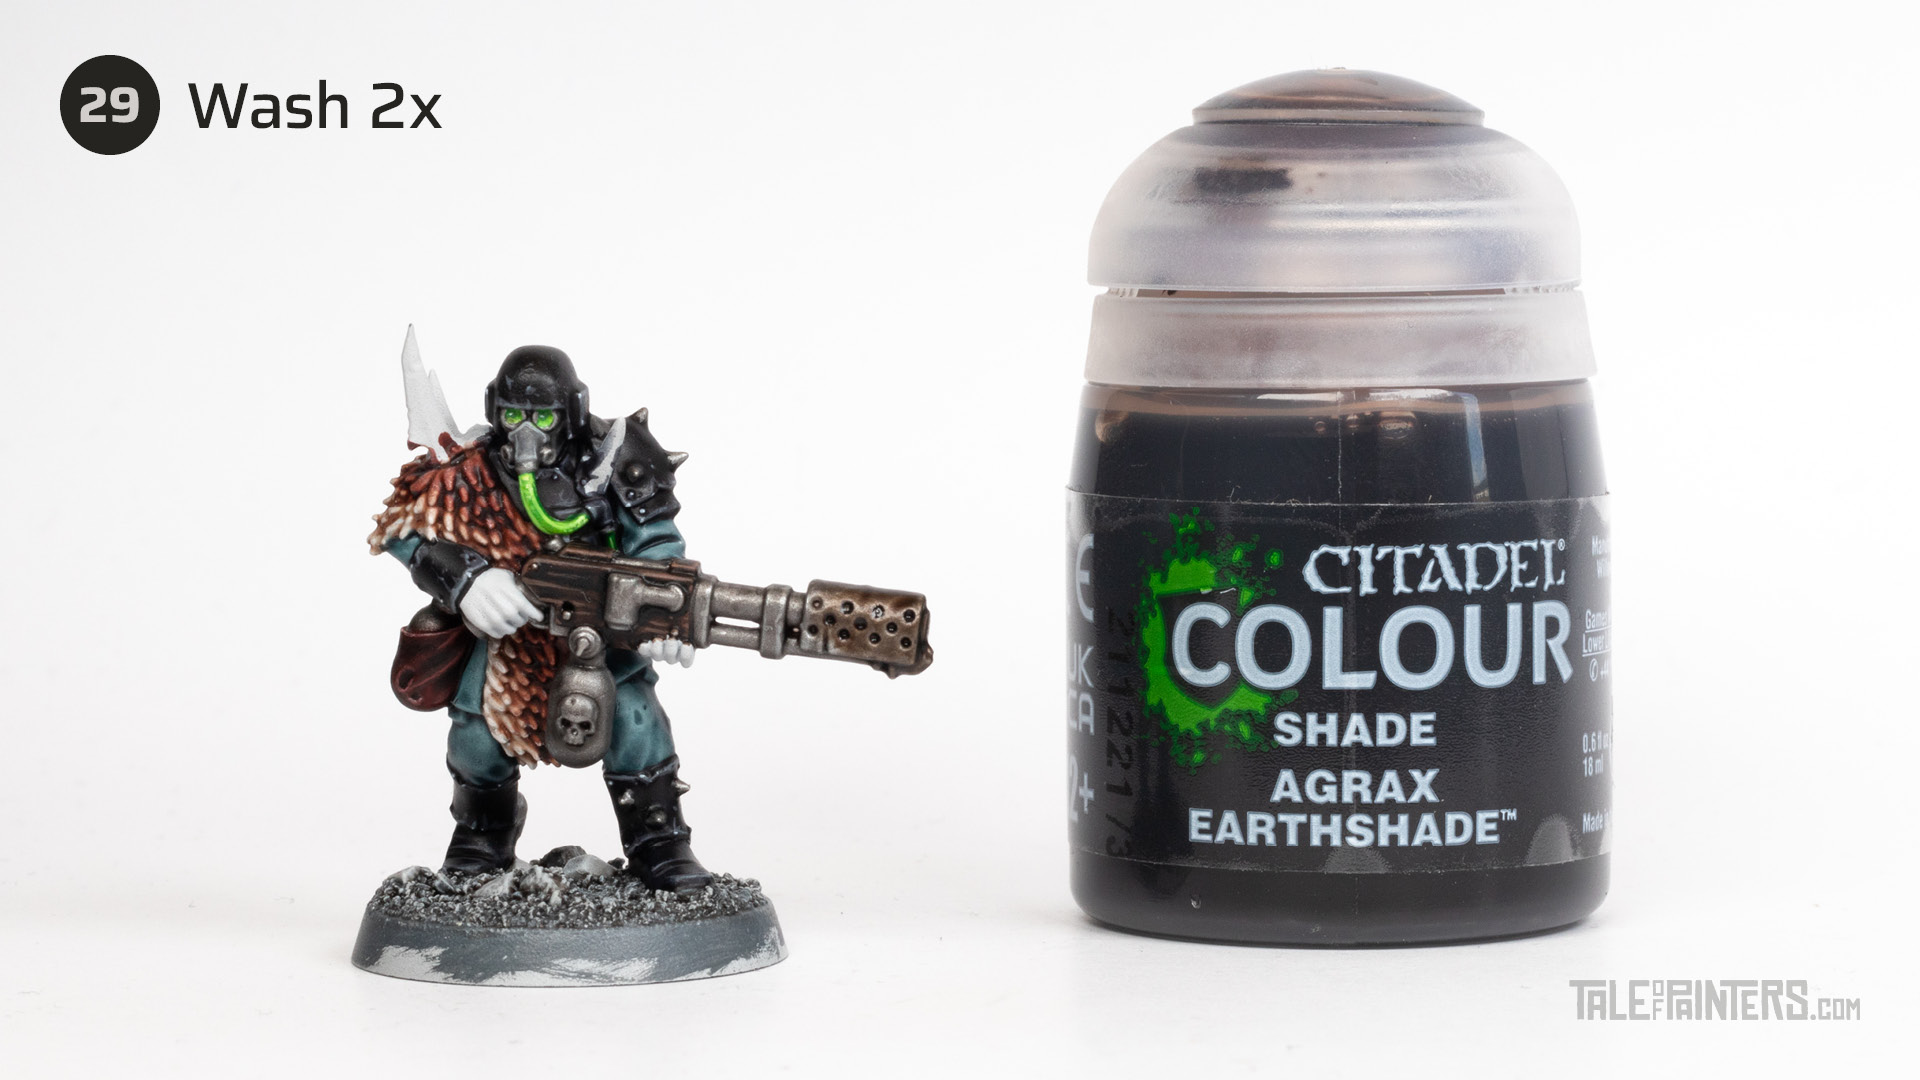

To add soot to the flamer, wash about two third of the nozzle with Agrax Earthshade. Once dry, apply another two but only to the front third to create a gradient.


Gently drybrush the nozzle with Scale75 Thrash Metal [or Iron Hands Steel] once more.
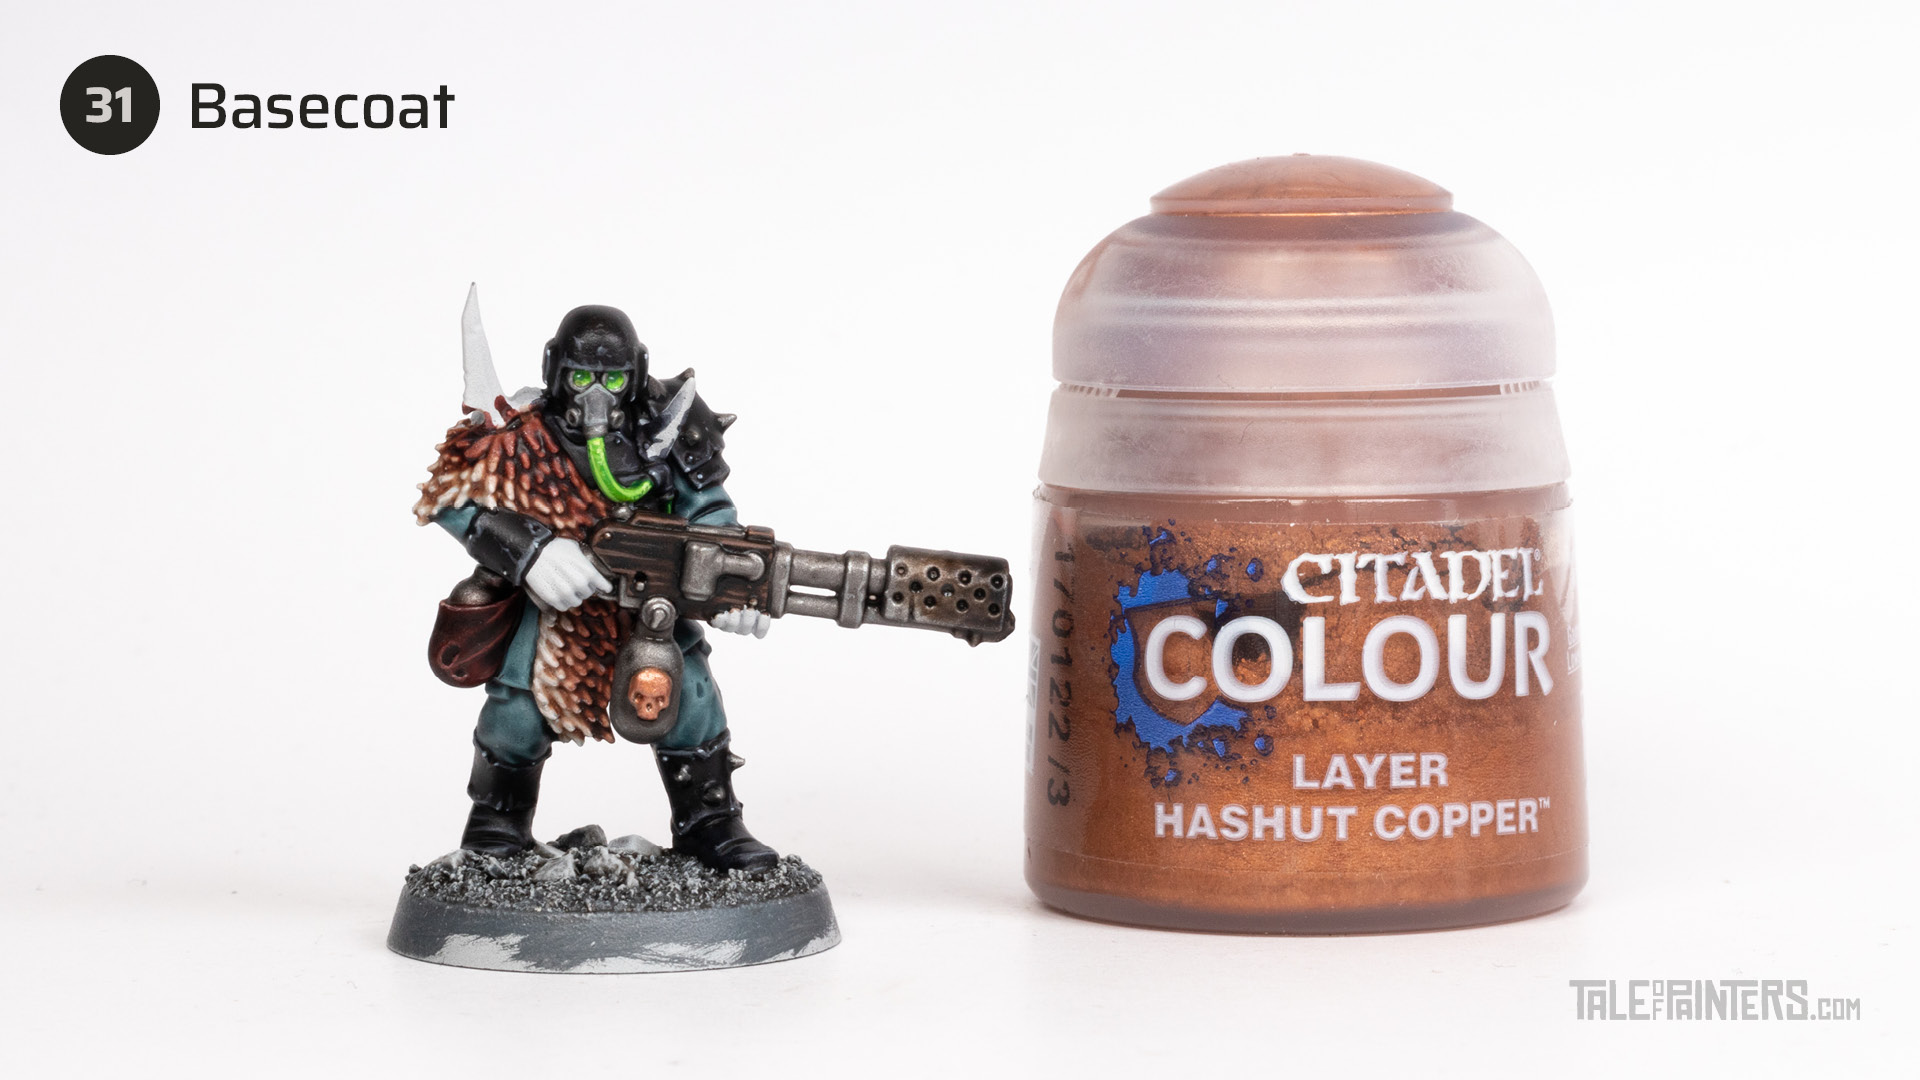

Basecoat the details you want to be copper with Hashut Copper.
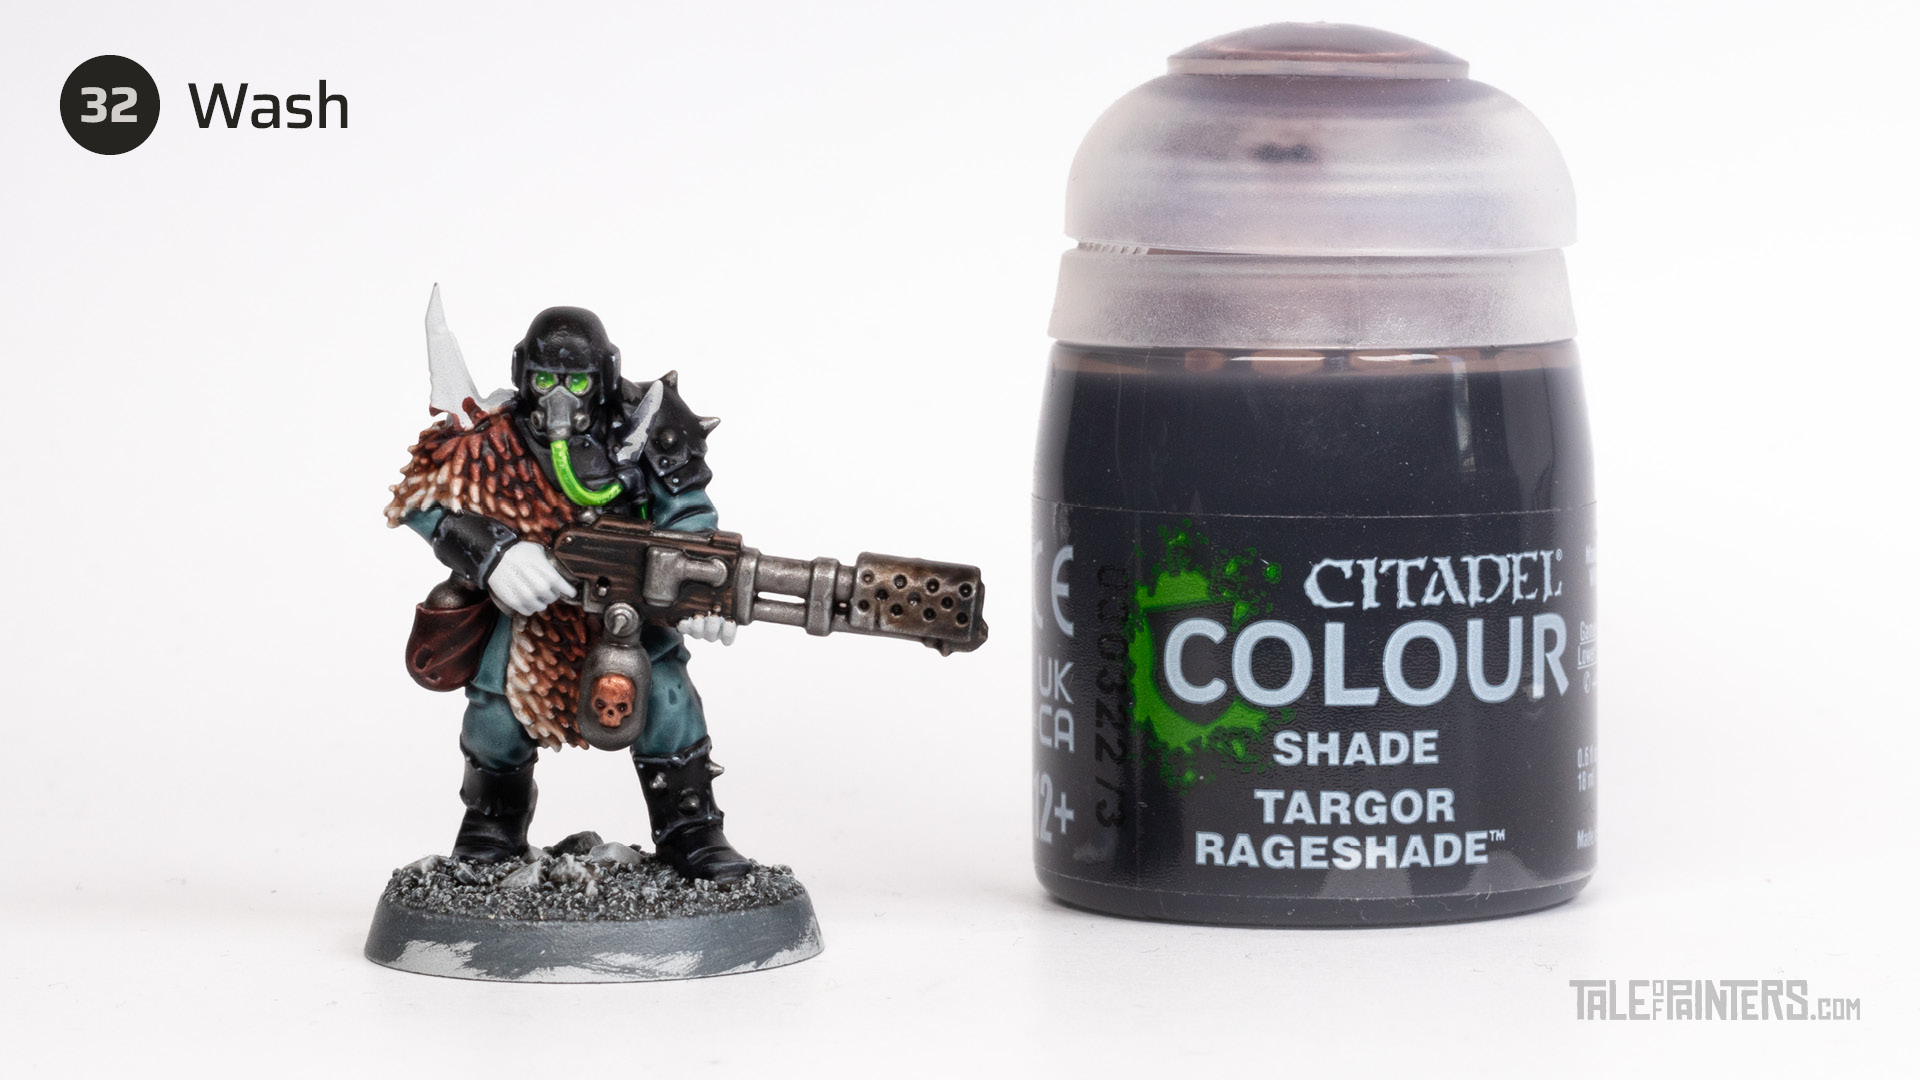

Wash the copper with Targor Rageshade.
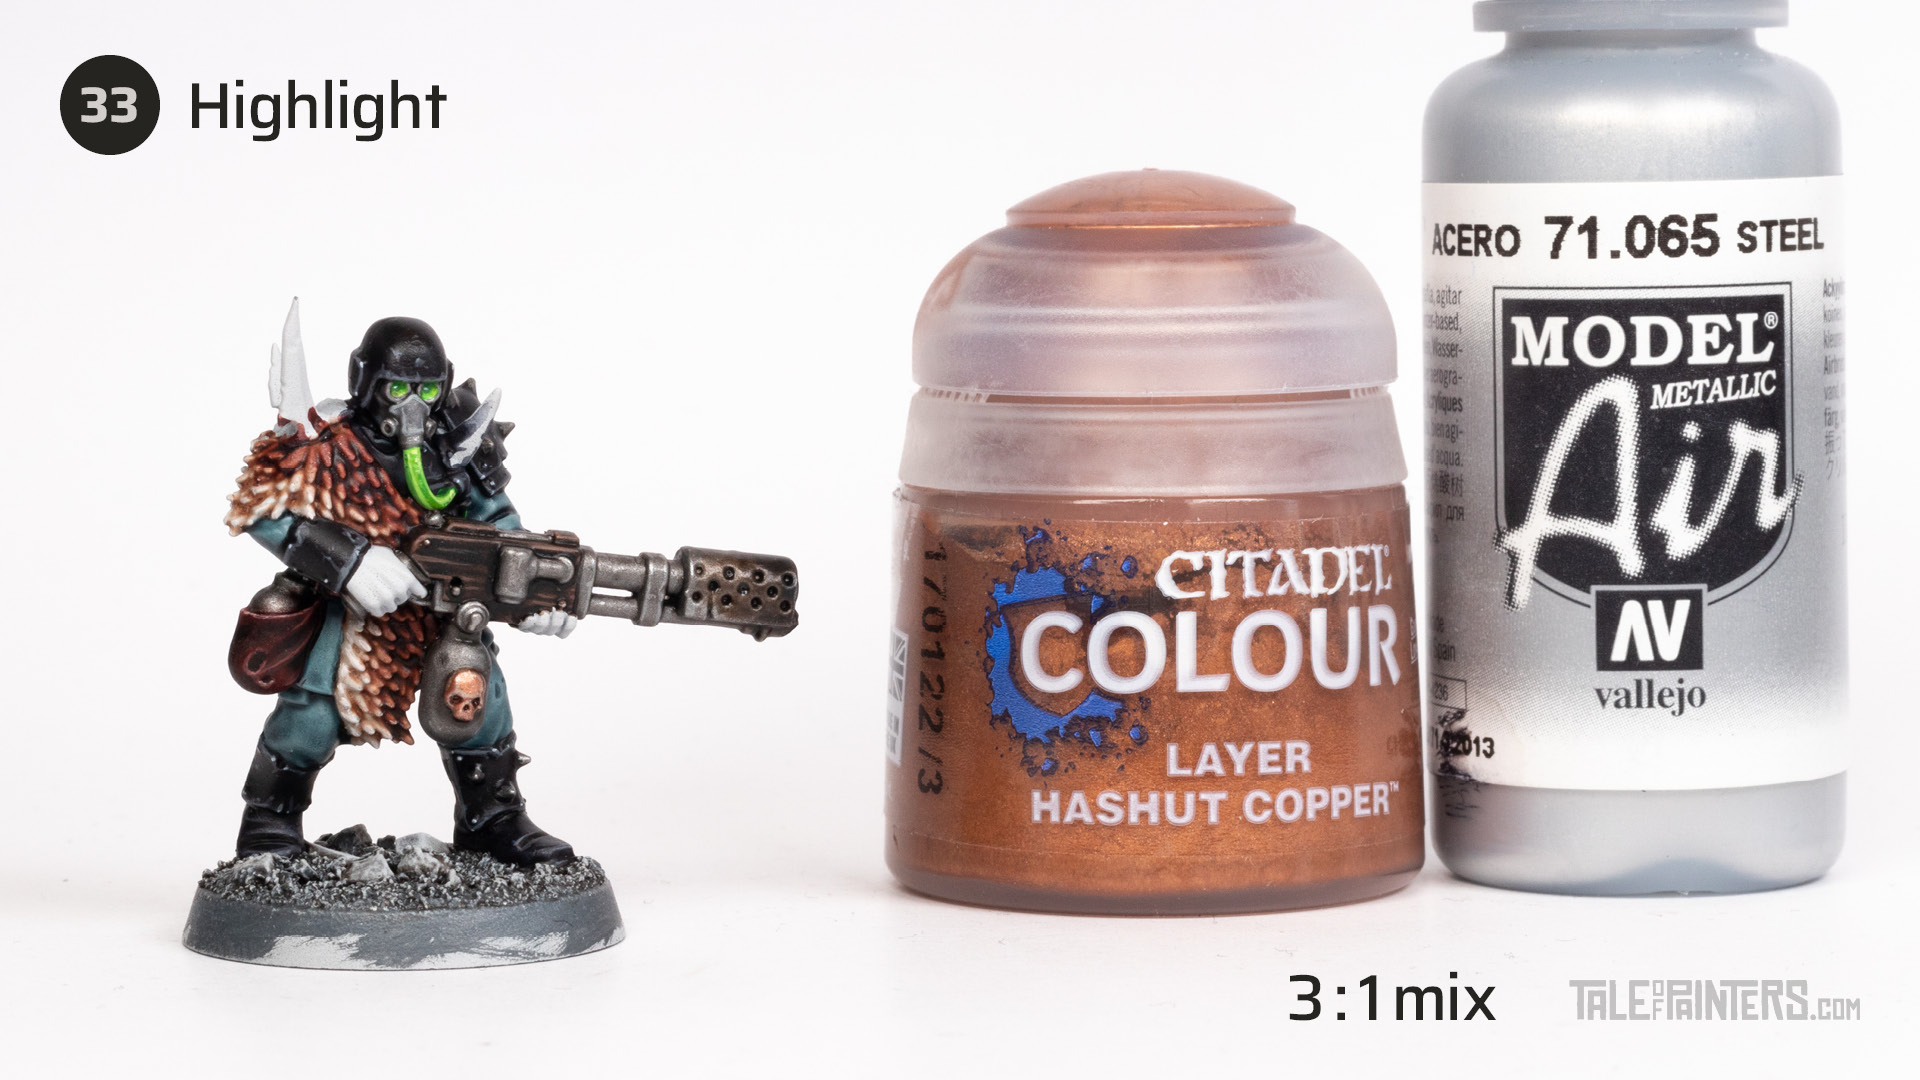

Mix a little bit of Vallejo Model Air Steel [or Stormhost Silver] into Hashut Copper and use the mix to highlight the copper details.
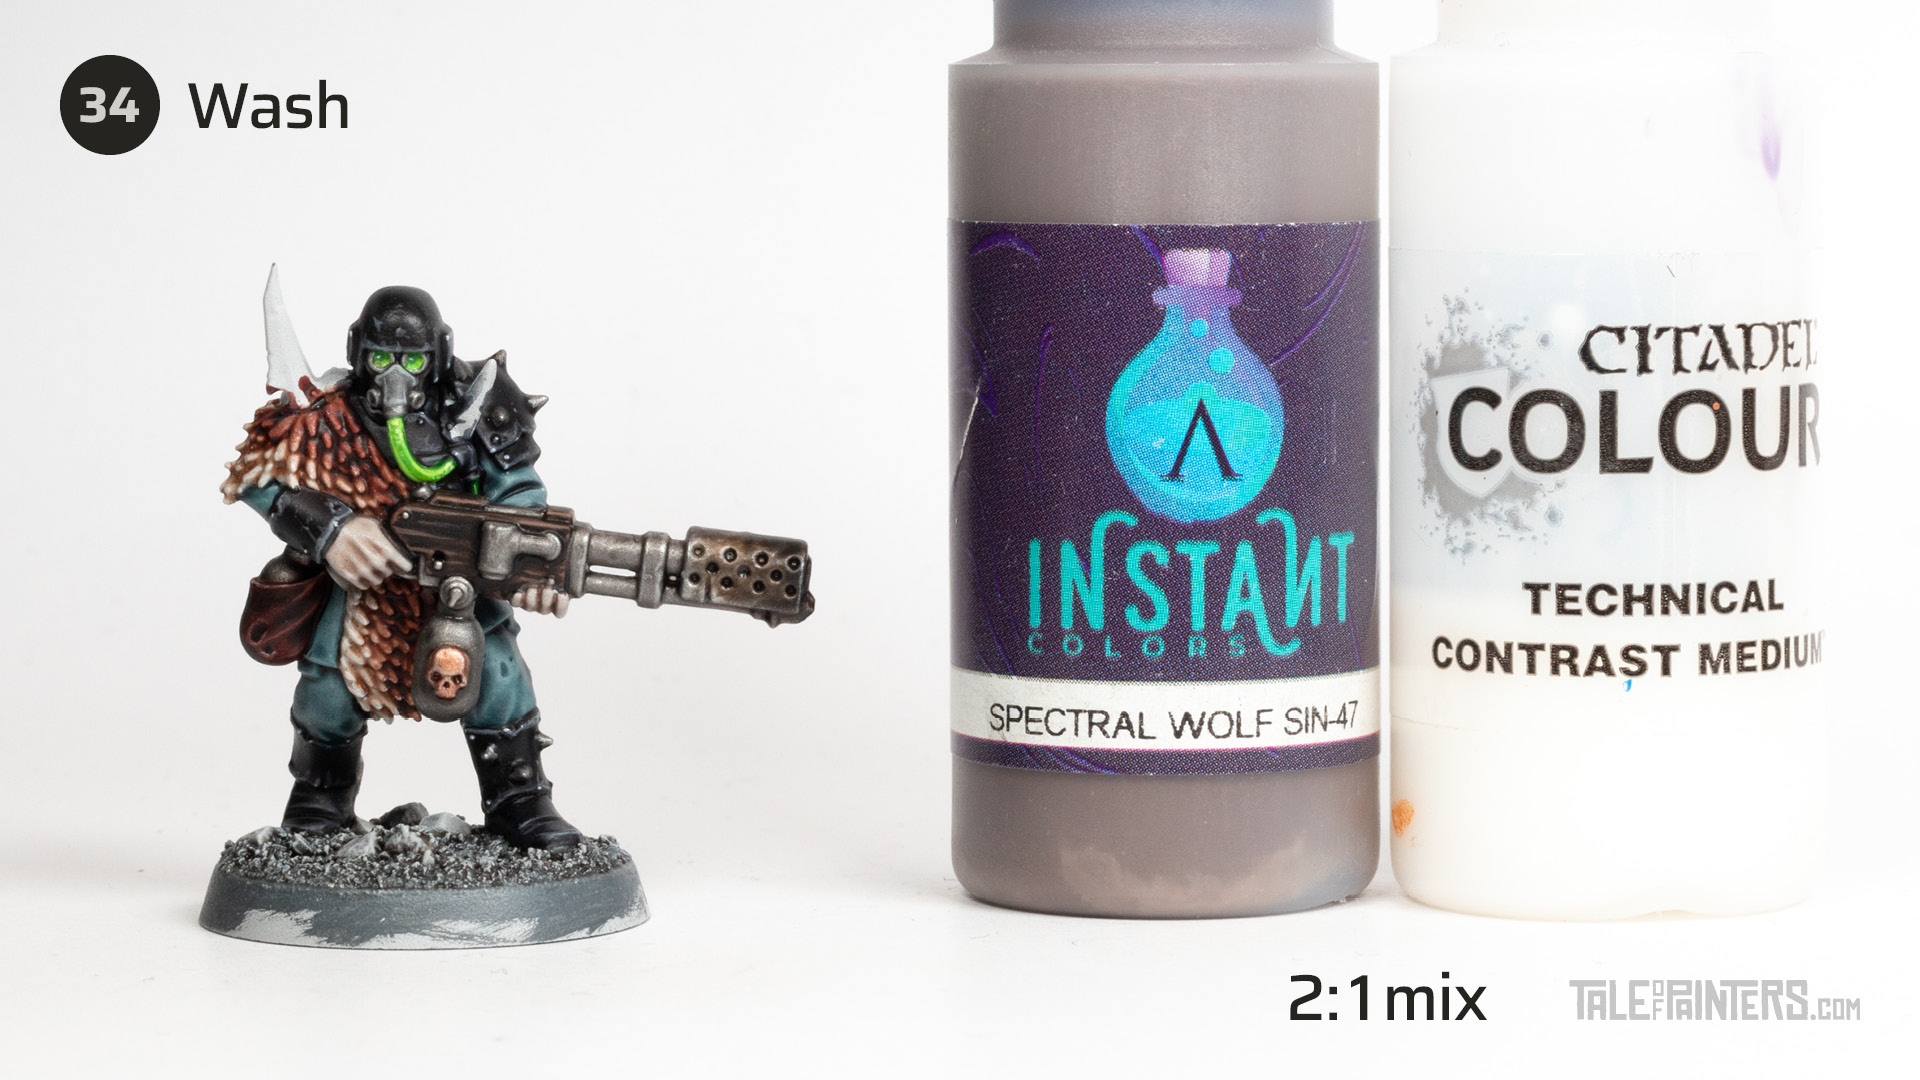

To paint the skin, mix Scale75 Instant Color Spectral Wolf about 2:1 with Contrast Medium and apply it over a Corax White basecoat [if you don’t have Spectral Wolf mix Stormvermin Fur with Contrast Medium to a wash-like consistency and apply two coats].
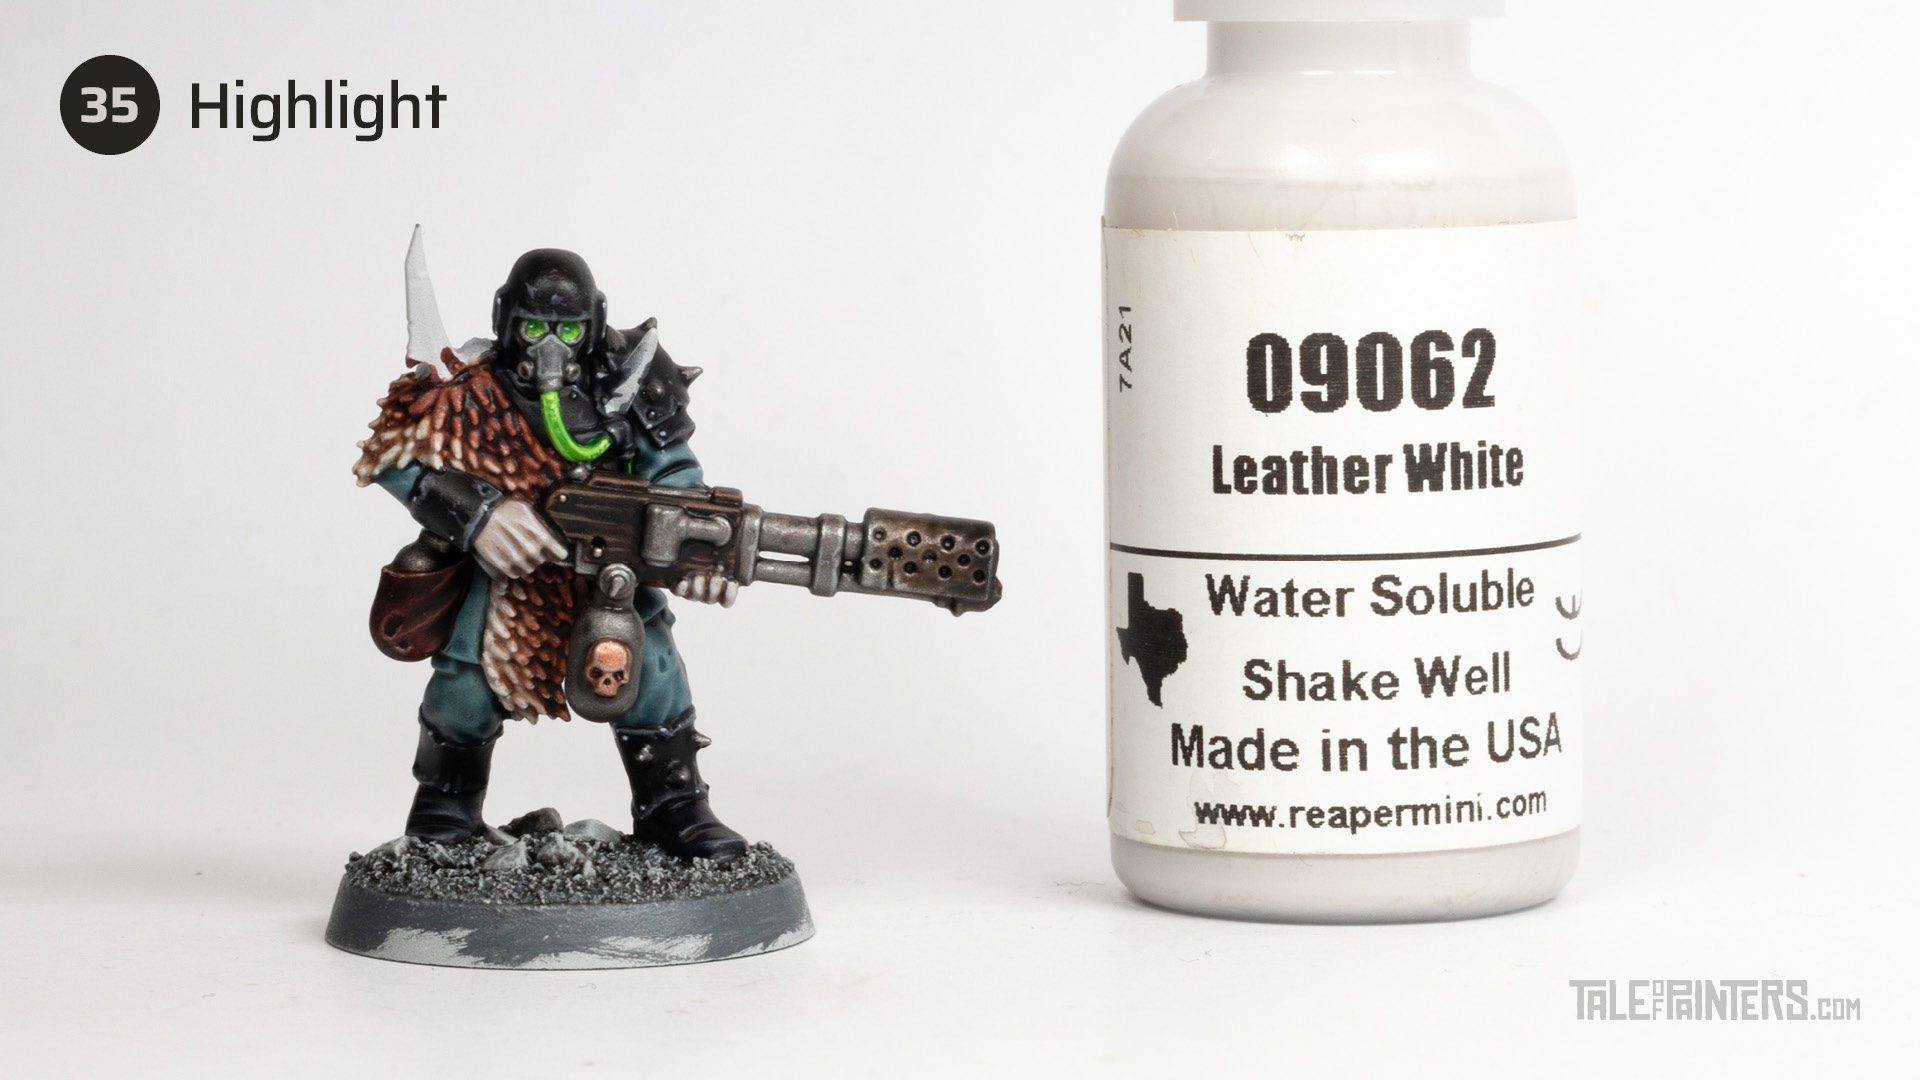

Apply soft highlights with thinned Reaper Master Series Leather White [or Pallid Wych Flesh].
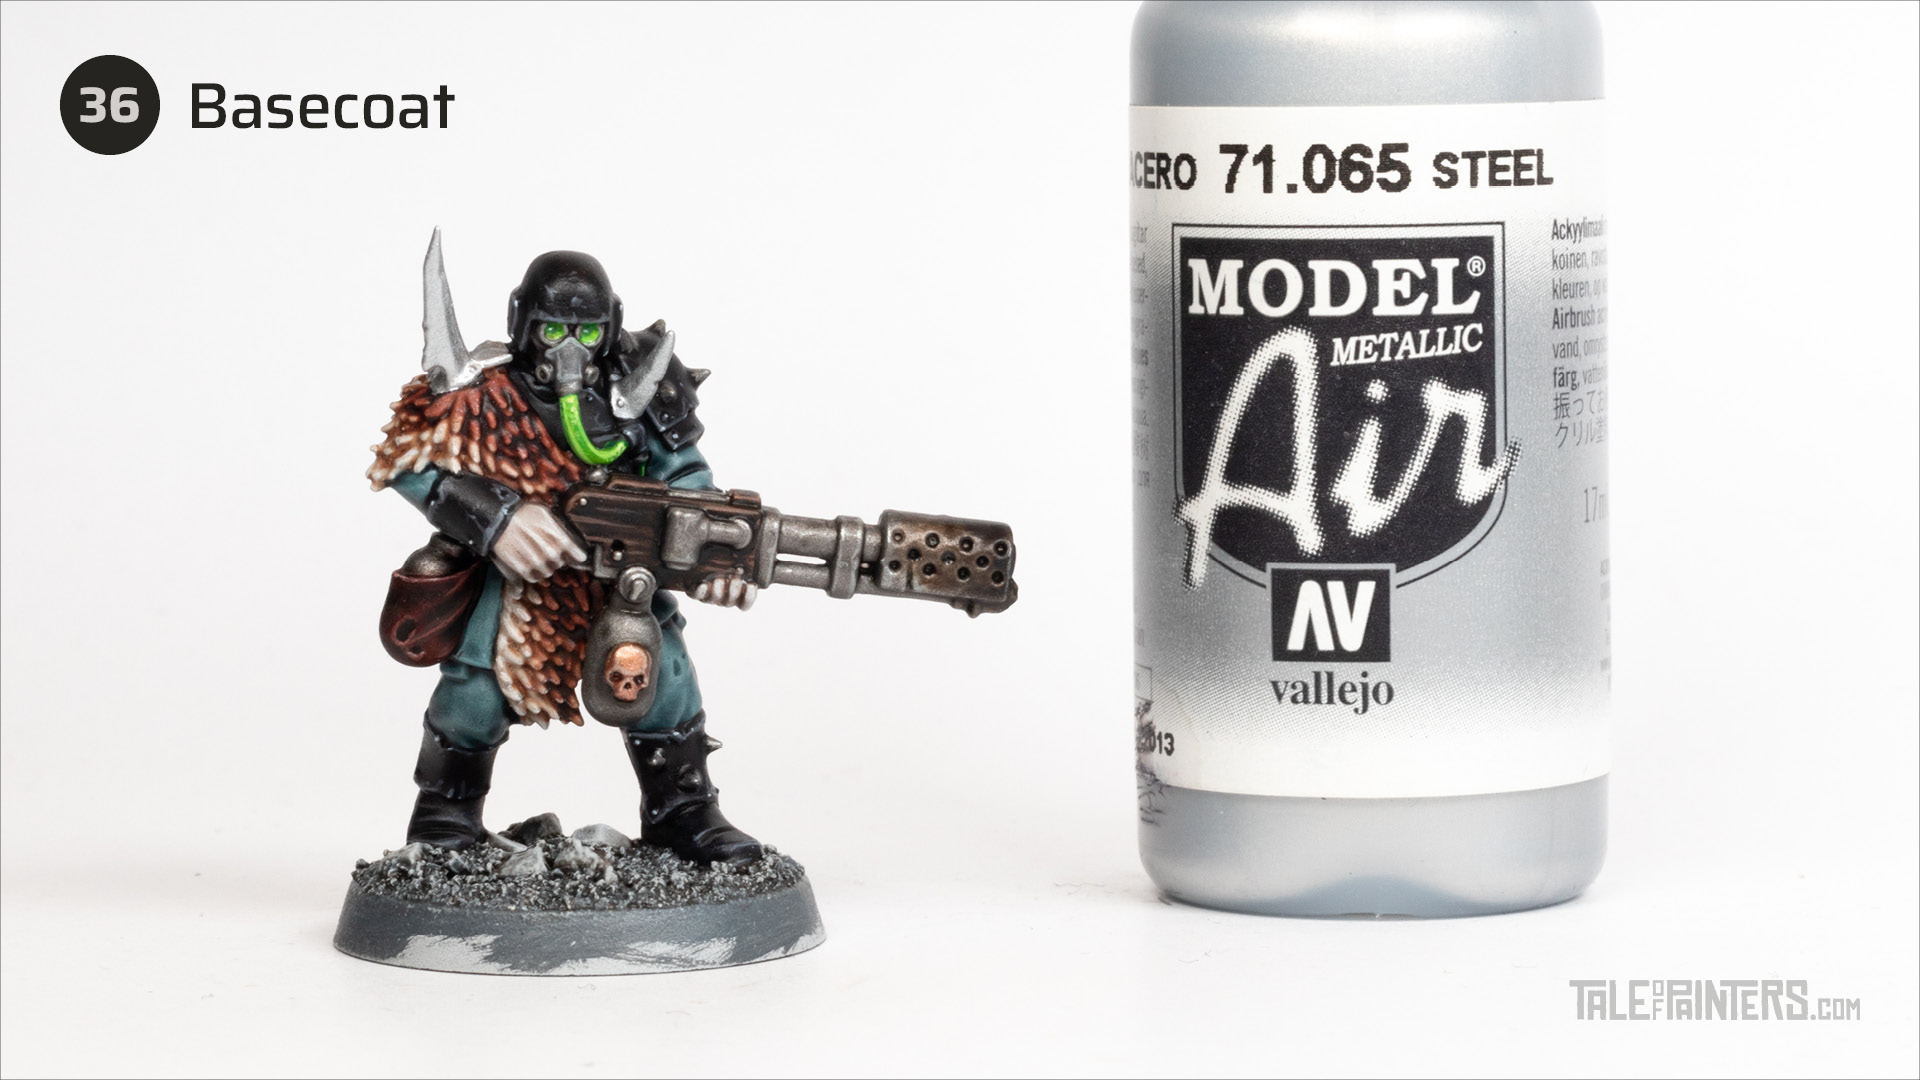

Basecoat the blades with Vallejo Model Air Steel [or Stormhost Silver].
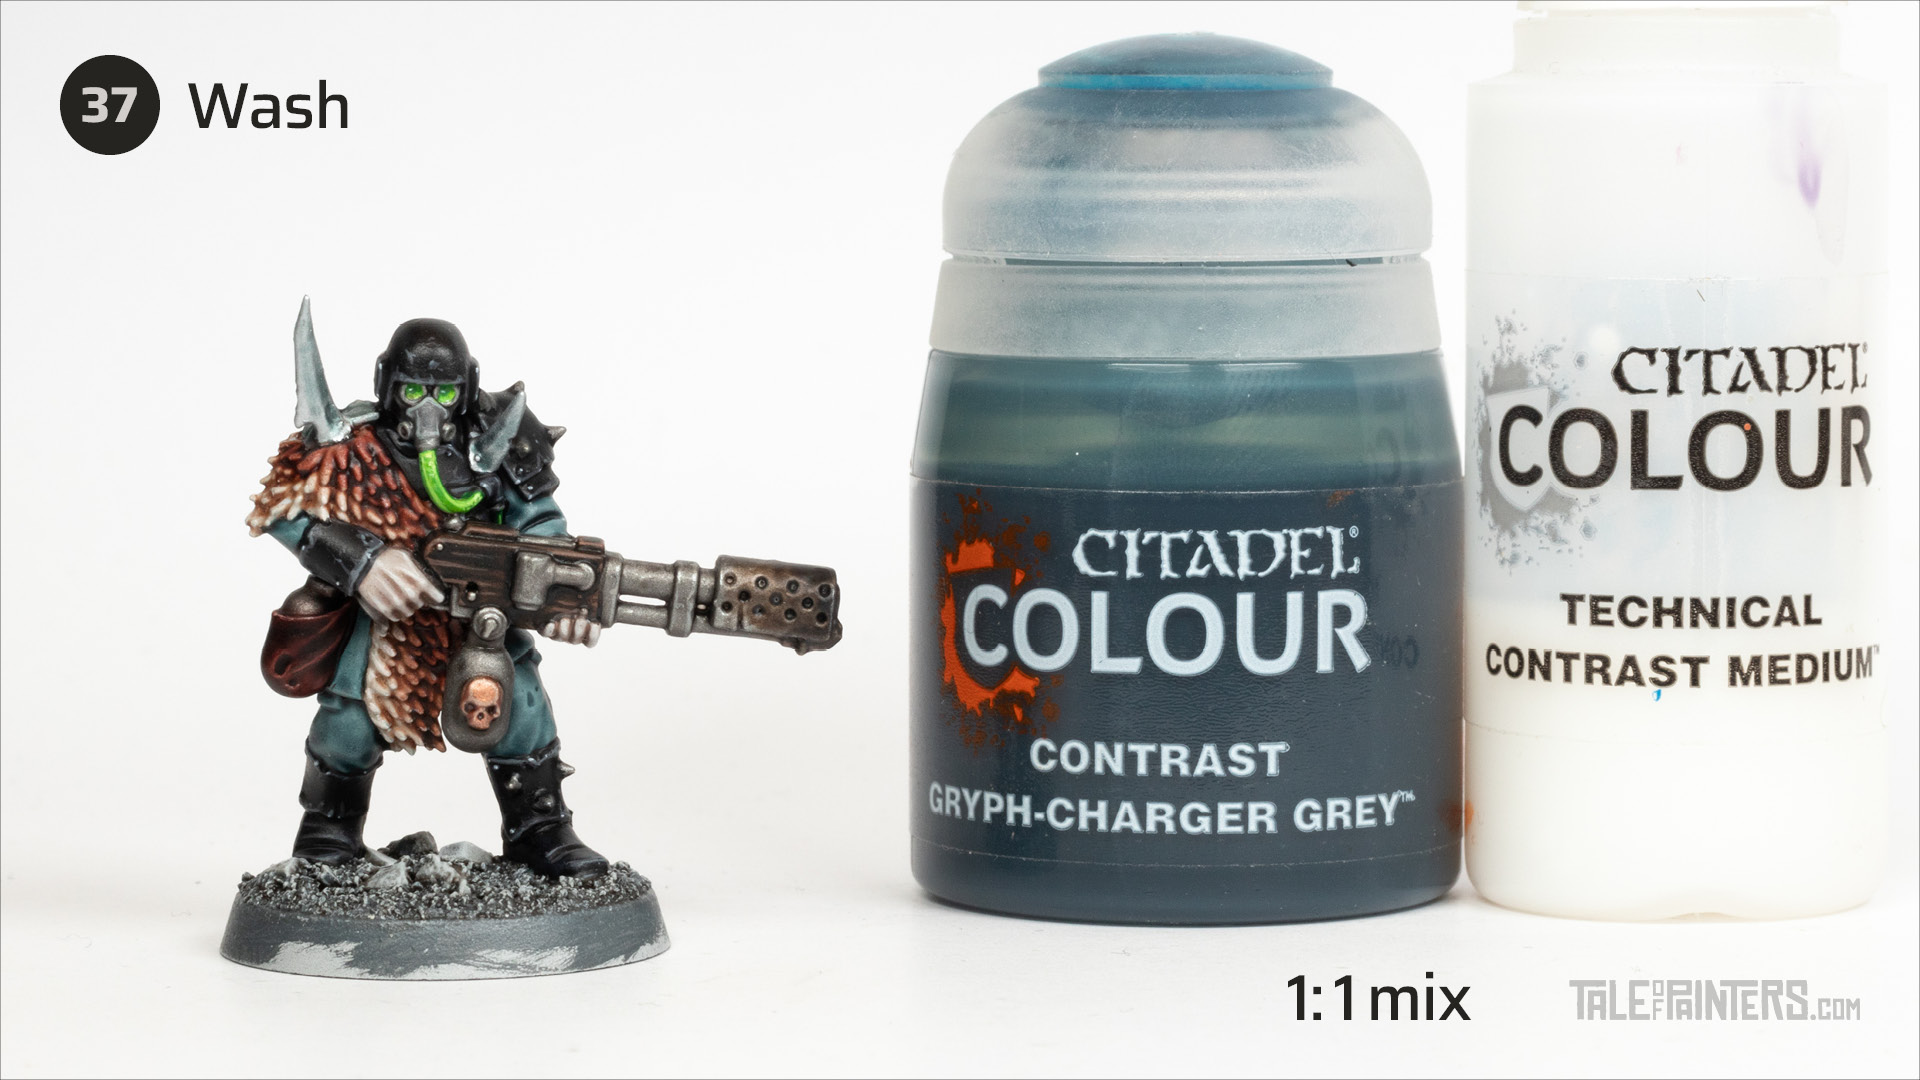

Mix Gryph-charger Grey about 1:1 with Contrast Medium and apply it all over the silver.
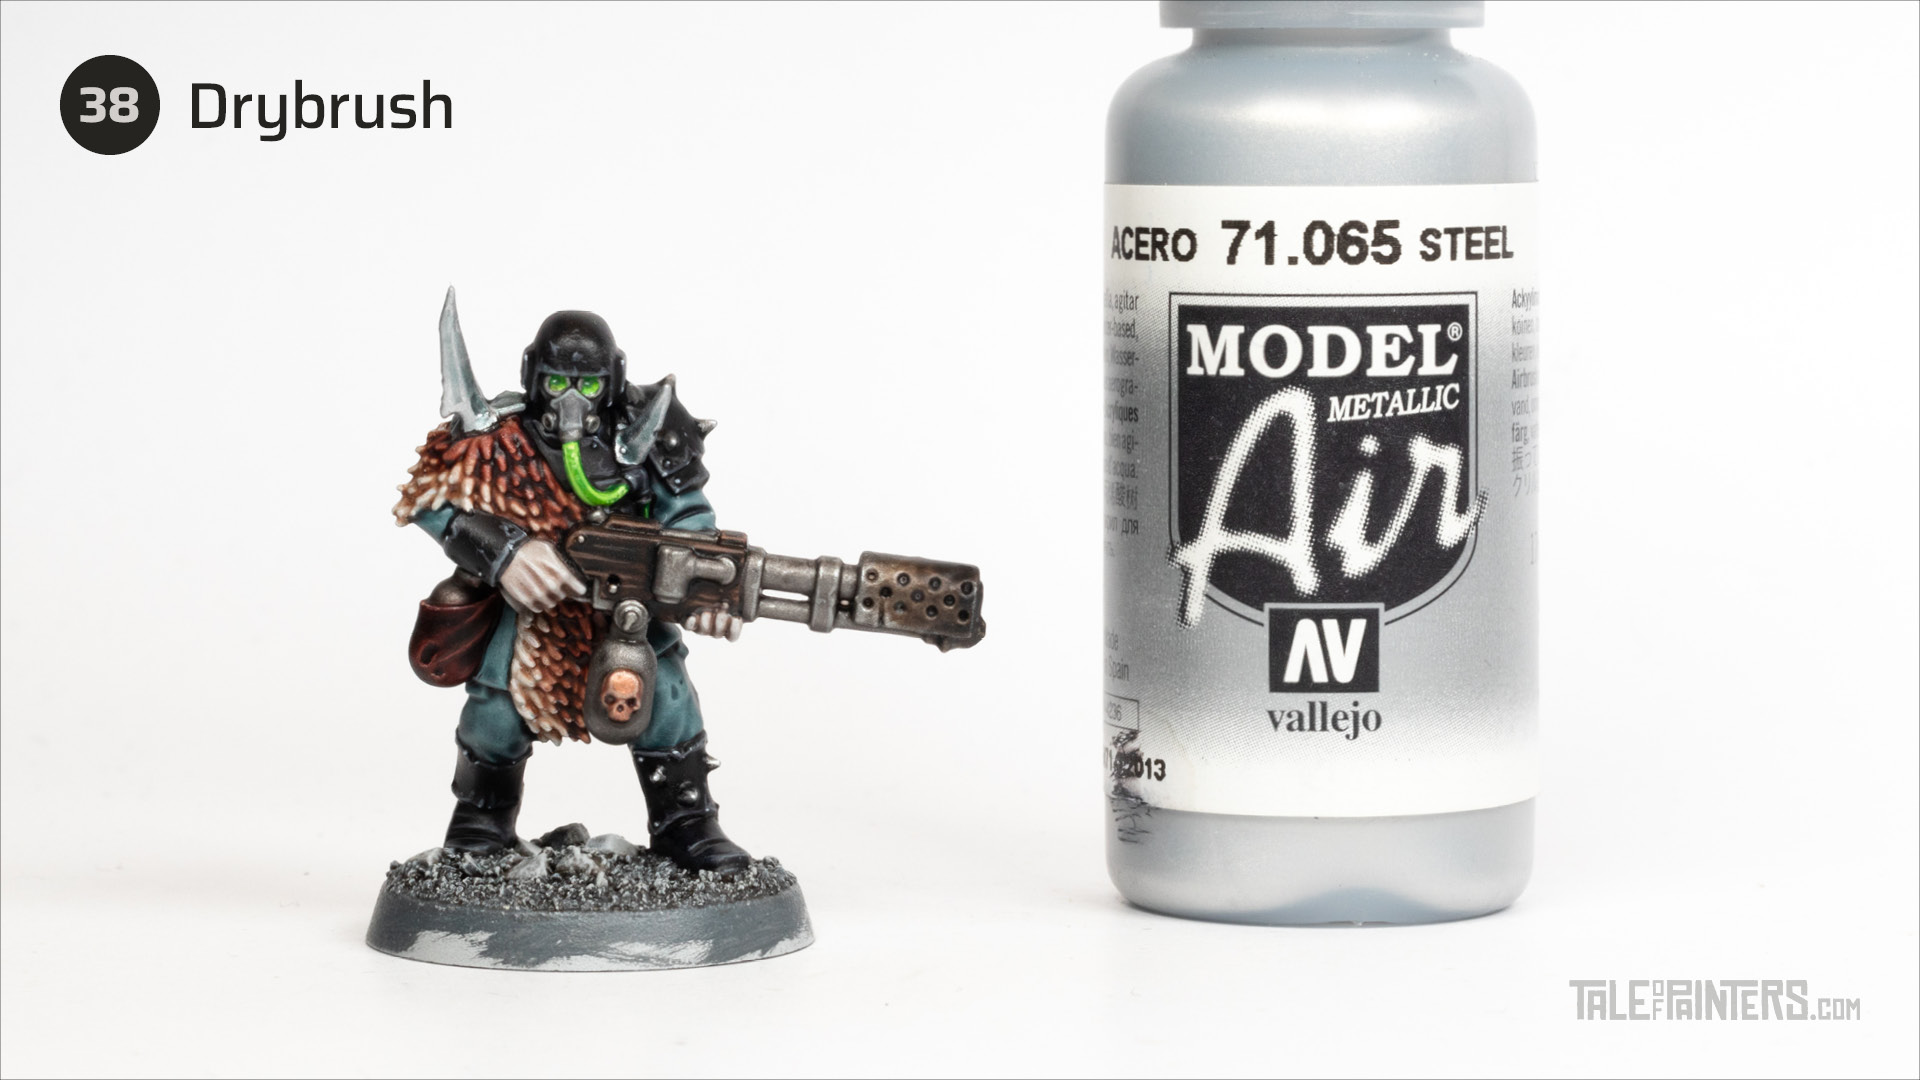

Finally, drybrush the silver blades with Vallejo Model Air Steel [or Stormhost Silver].
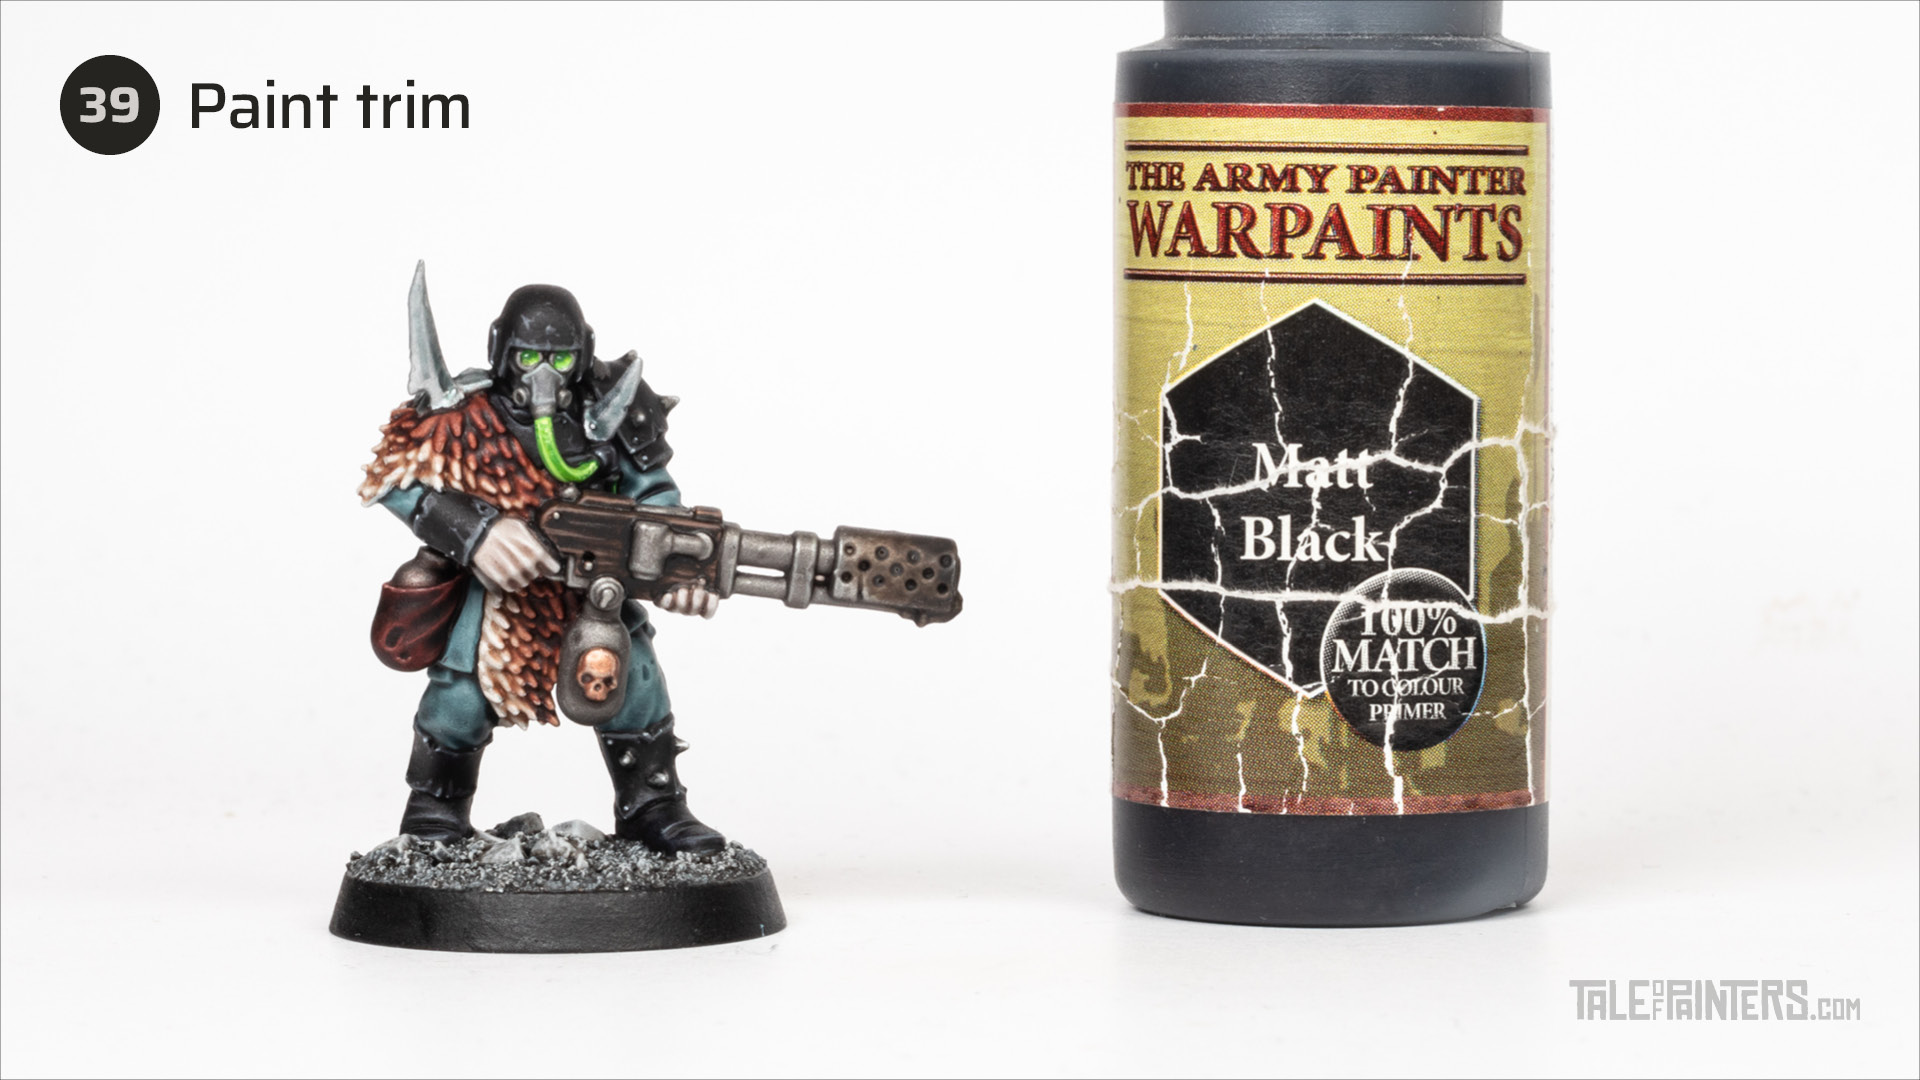

Paint the trim of the base with your preferred colour, I used Warpaints Matt Black.
Once the paint job is complete, seal the model with a coat of matt varnish. I used japanese brand Mr Top Coat Premium Flat, which is my favourite spray matt varnish. A while ago I compiled a list of my favourite matt varnishes (spray, airbrush & brush-on) for every budget, check it out here.
Finished model & paint list
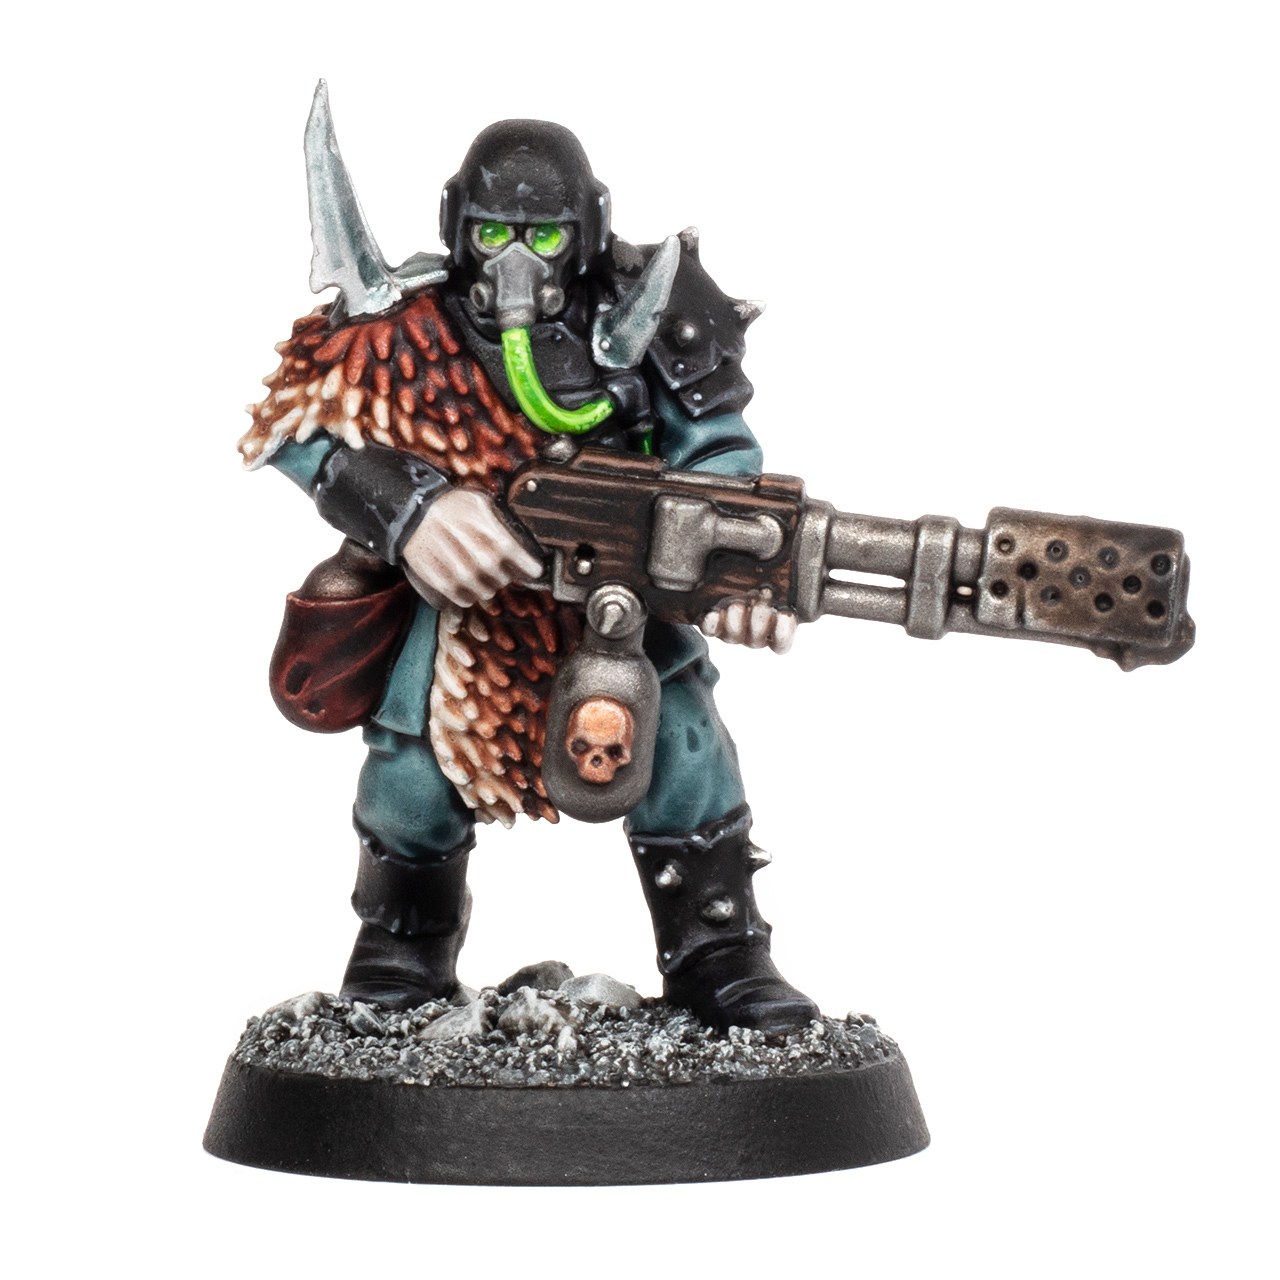

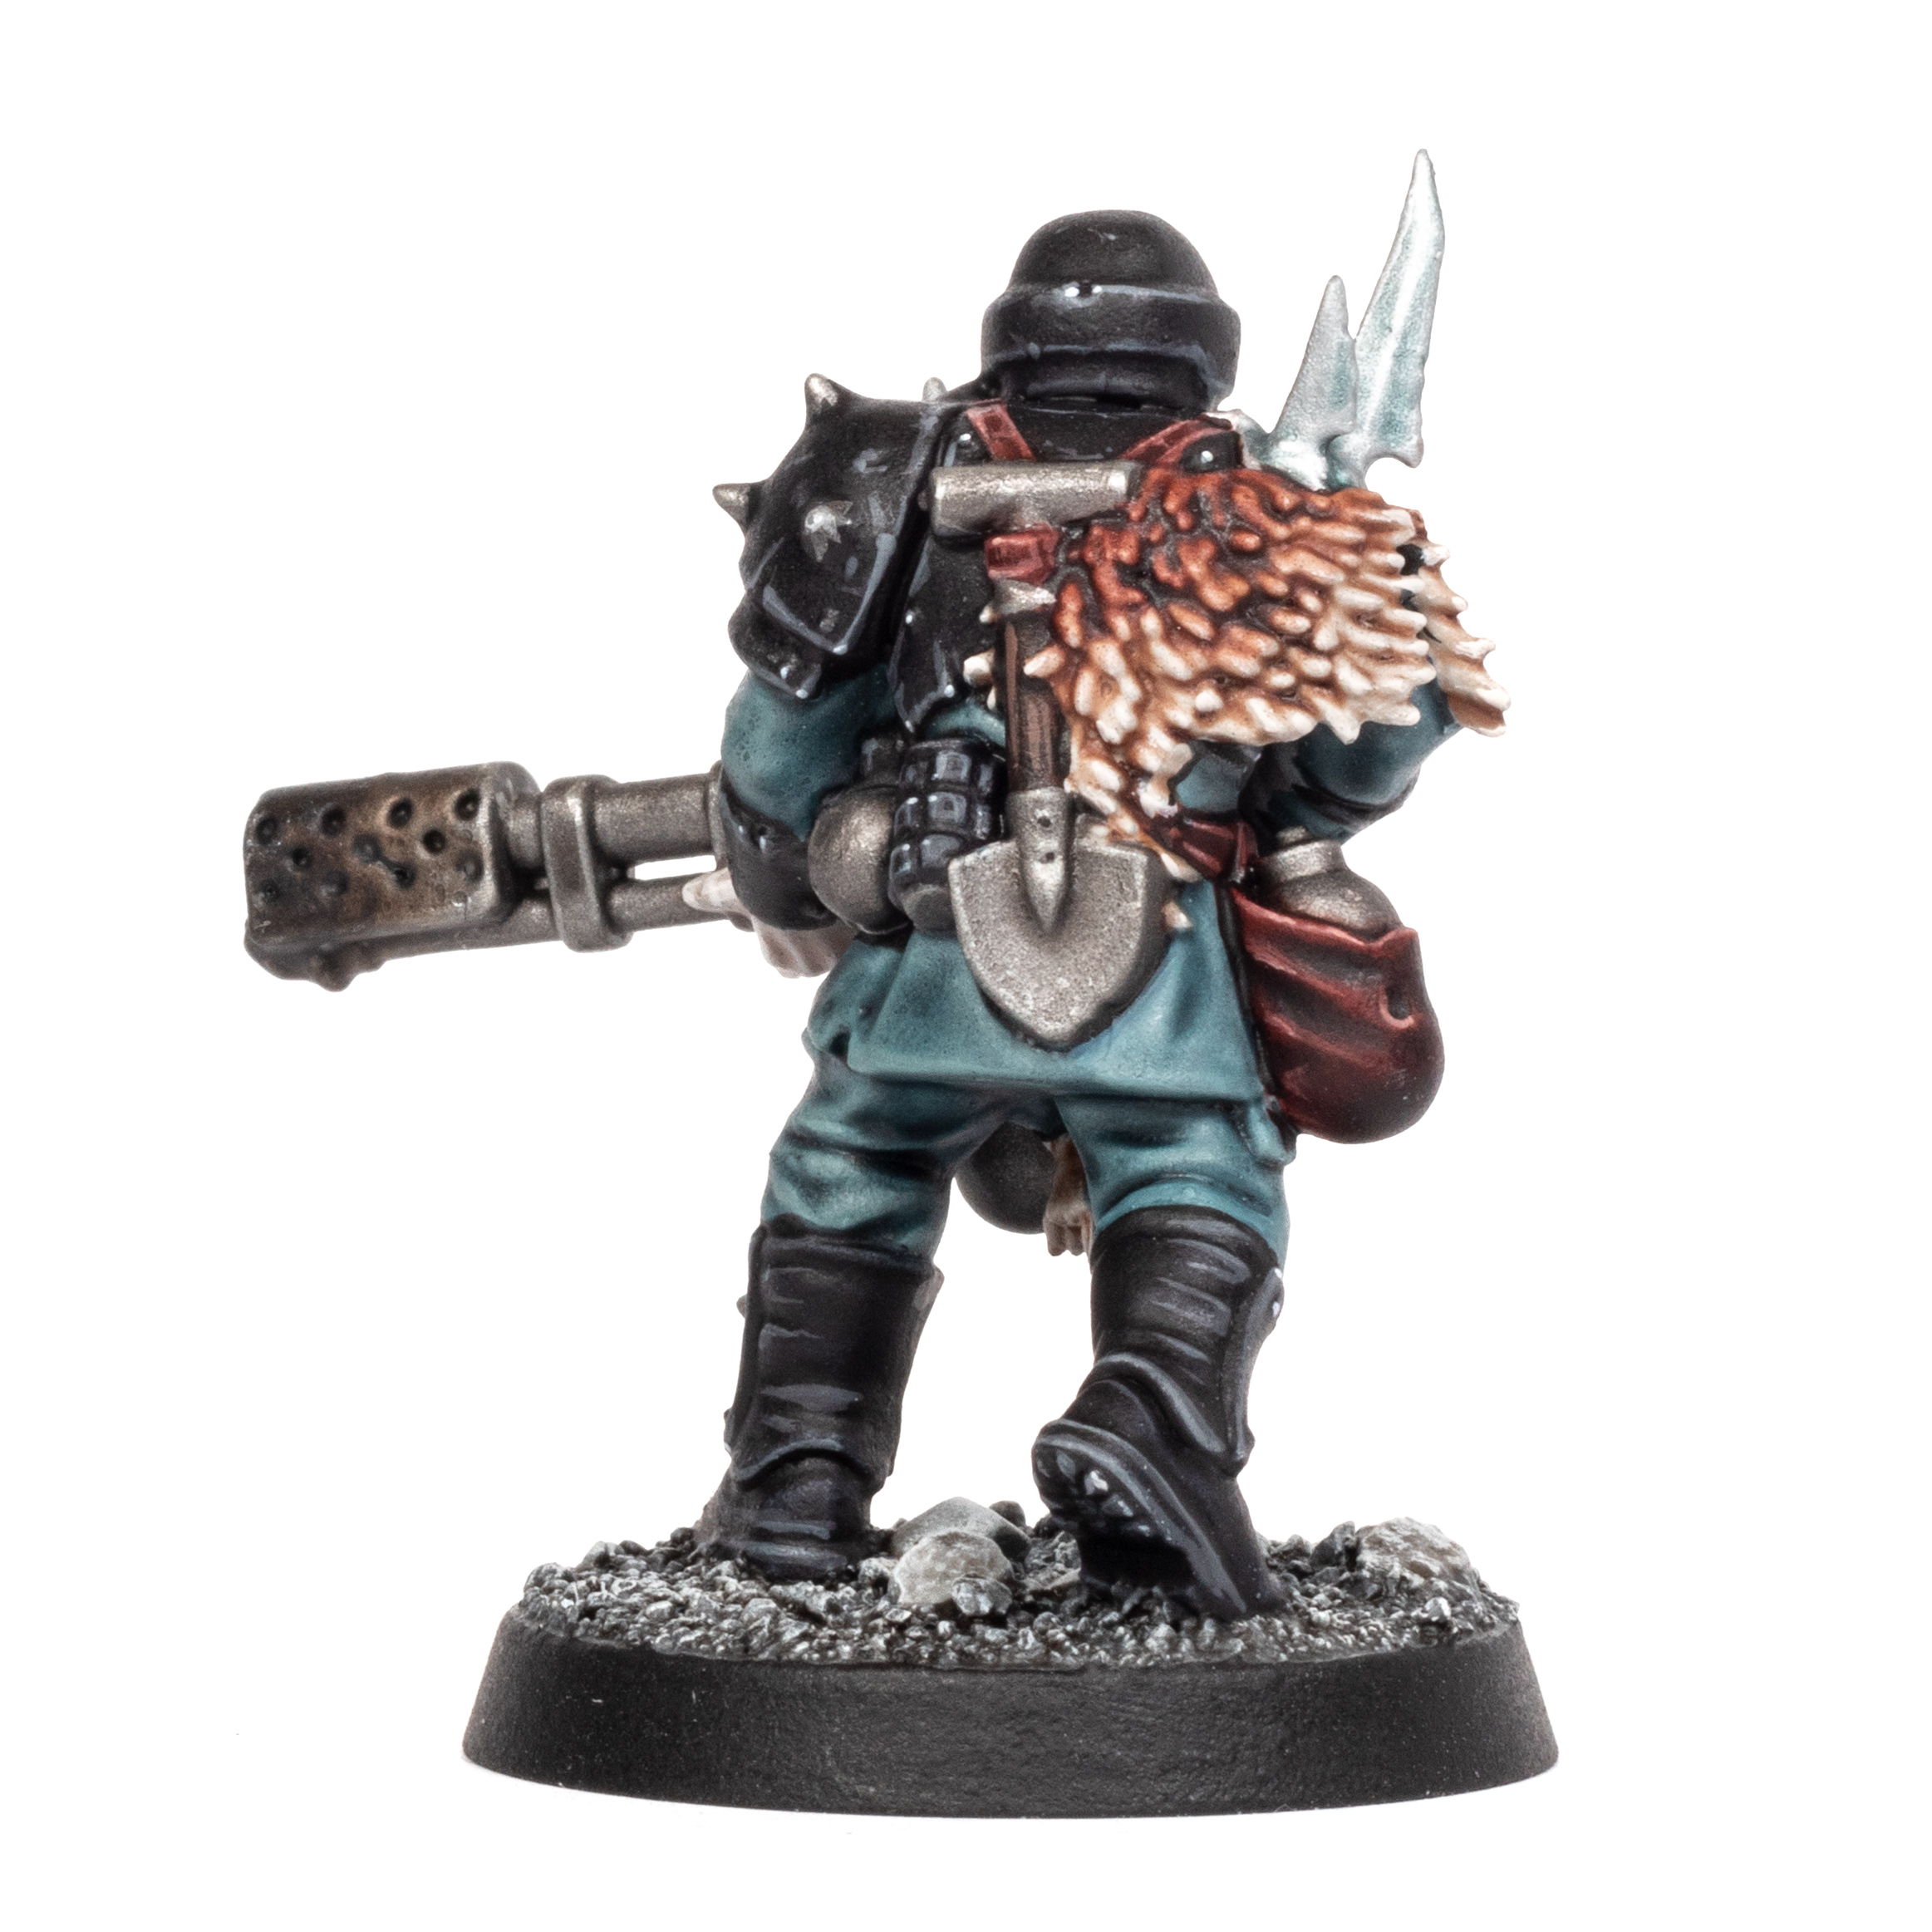
Here we have the finished Traitor Guardsman from my tutorial. As I mentioned at the beginning, this scheme is easily adaptable to Chaos Cultists (check out our review of the new set here) and even regular Astra Militarum guardsmen. Also check out Garfy’s tutorial for a more classical approach to painting Chaos Cultists:
Warhammer Quest players might know that this Traitor Guardsman model comes actually from the Warhammer Quest: Blackstone Fortress set and is now out of production, but The Blooded Traitor Guardsmen kit from Kill Team: Moroch follows the same aesthetics and comes with all available special weapons such as a flamer, grenade launcher, meltagun, plasma gun, and sniper rifle. I’m sure The Blooded will soon get a separate release, probably alongside Kill Team: Into the Dark. It’s a really amazing Traitor Guard kit with lots of assembly options and over 40 (!) heads to choose from.

If you can’t wait for a separate release and want to have your own squad of Traitor Guardsmen, the Kill Team: Moroch box set should still be available from our partner stores Wayland Games, Element Games and Taschengelddieb with up to 20% discount at the time of writing:
Paints you will need for this tutorial:
Citadel (Games Workshop)
Corax White primer [OOP, or White Scar primer]
Corax White
Mechanicus Standard Grey
Celestra Grey
Pallid Wych Flesh
Gorthor Brown
Tuskgor Fur
Bugman’s Glow
Hashut Copper
Drakenhof Nightshade
Reikland Fleshshade
Agrax Earthshade
Nuln Oil
Fyreslayer Flesh (Contrast)
Wyldwood (Contrast)
Ratling Grime (Contrast)
Nighthaunt Gloom (Contrast)
Gryph-Charger Grey (Contrast)
Striking Scorpion Green (Contrast)
Contrast Medium
Formula P3
Greatcoat Grey [or Eshin Grey/Dark Reaper mix]
Reaper Master Series
RMS Leather White [or Pallid Wych Flesh]
RMS Mint Green [or Gauss Blaster Green]
The Army Painter Warpaints
Matt Black [or Abaddon Black]
Uniform Grey [or Dawnstone]
Ash Grey [or Greyseer]
Topaz Skin [or Cadian Fleshtone]
Vallejo Model Color
VMC White [or White Scar]
VMC Dark Blue Grey [or Thunderhawk Blue mixed with Corax White]
Vallejo Model Air Steel
Vallejo Game Color
VGC Ghost Grey [or Corax White]
VGC Livery Green [or Moot Green mixed with Dorn Yellow]
Vallejo Mecha Color
VMeC Dark Steel [or Leadbelcher]
Scale 75
Instant Colors Rage Brown [or Cygor Brown thinned with Contrast Medium]
Instant Colors Shadow Black [or Black Legion]
Thrash Metal [or Iron Hands Steel]
Instant Colors Spectral Wolf [or Stormvermin Fur mixed with Contrast Medium]
If you need to expand your paint collection to follow the tutorial, check out our partner stores Wayland Games and Element Games, which offer an amazing range of paints at a discount.
Hope you enjoyed this tutorial. If so, leave a comment or reaction below, and if you got any questions, leave them here so I can answer them for you.


