In this tutorial I show you how to paint the Gallowdark Space Hulk terrain system from Kill Team: Into the Dark in a heavily weathered cream colour scheme. Thanks to scale modelling techniques like zenithal highlights, oil paints and pigments, this is super fast and looks fantastic. It’s also easier than you think. So here’s how it works.
This tutorial assumes you know the basic grips of painting Warhammer miniatures. Step-by-step I explain all the paints and techniques I used. I have a rather eclectic paint collection, so when I use a paint that is not from Games Workshop (or out of production), I’ll try to provide you with suitable alternatives from the current Citadel paint range [in brackets]. However, if you want to achieve exactly the same result as shown, I recommend expanding your paint collection. You’ll find a list of all the paints used in this tutorial at the end of the post.
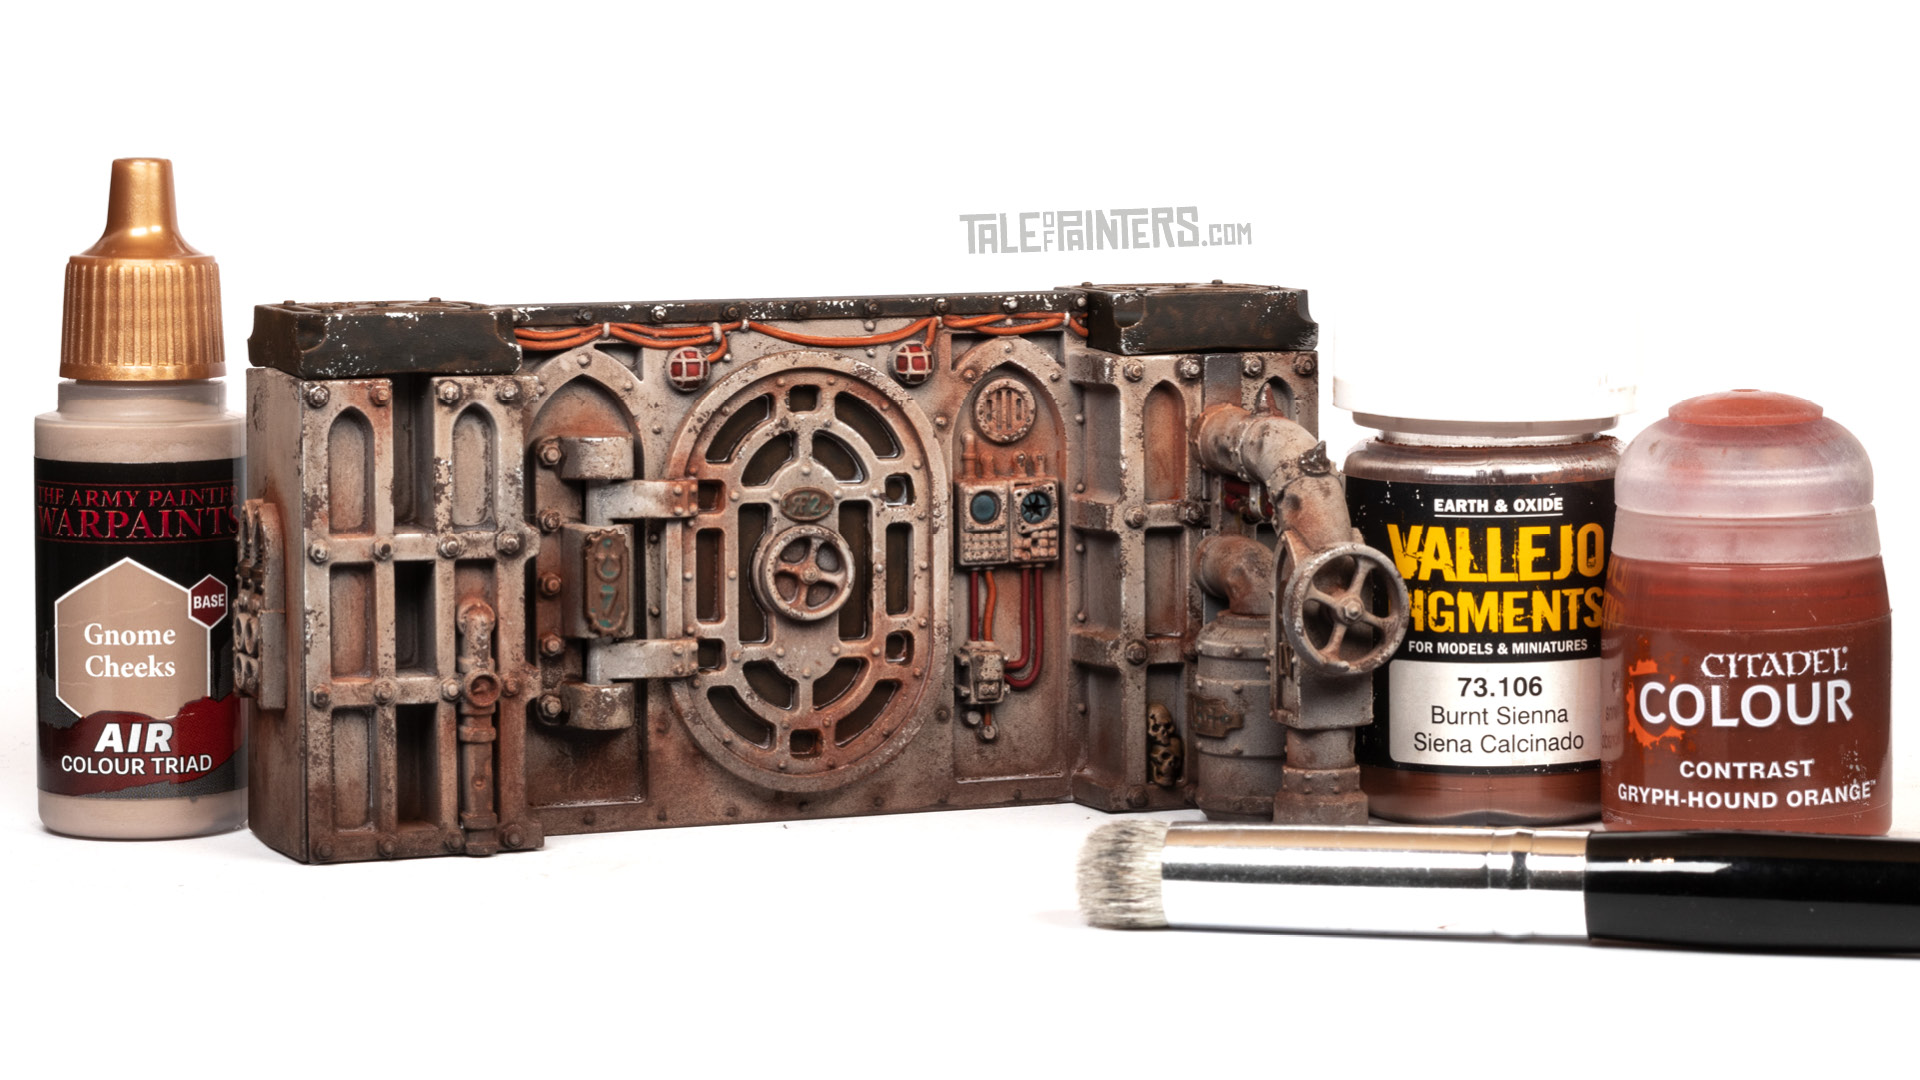

How to paint Kill Team: Into the Dark Gallowdark terrain
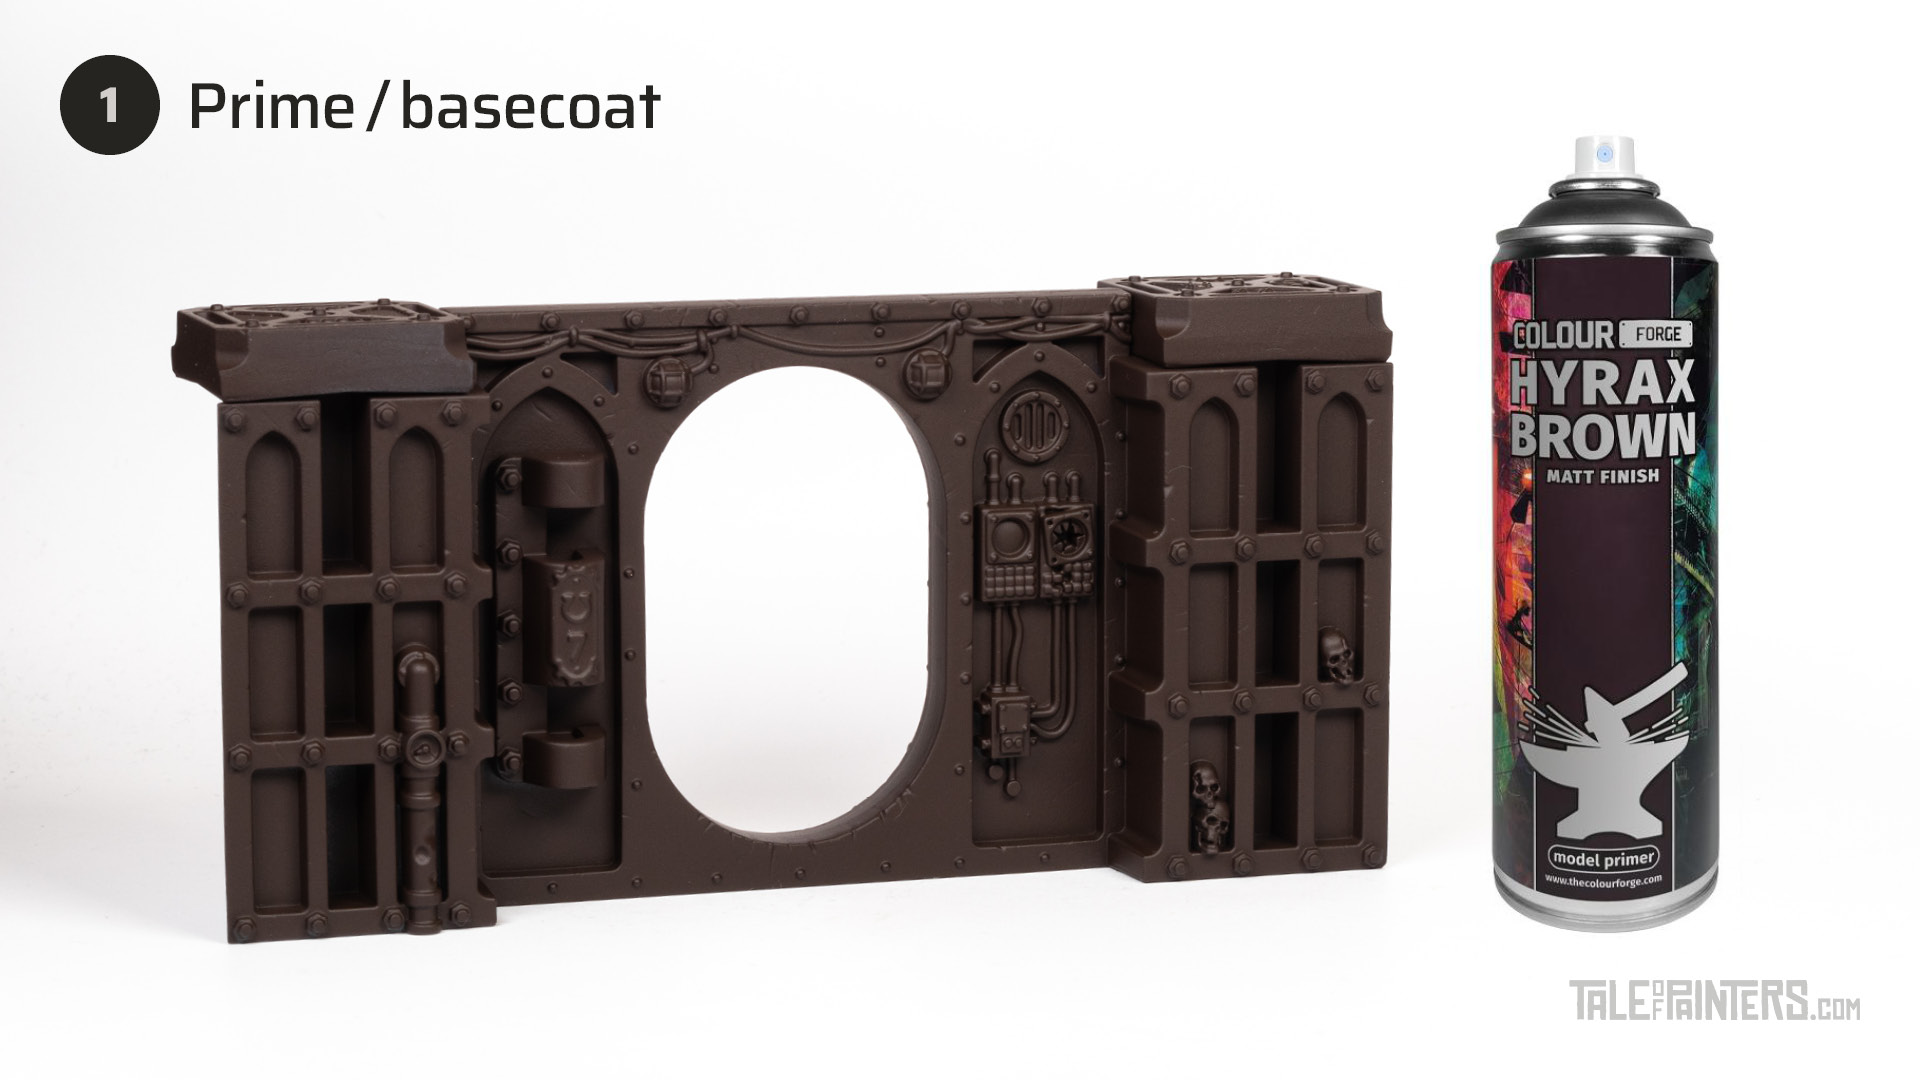

Spray the model with Hyrax Brown primer from Colour Forge, then paint over any areas the spray paint didn’t catch with Rhinox Hide.
Hyrax Brown is designed to match to Rhinox Hide from Games Workshop (find a review of Colour Forge primers here). If you can’t get them in your country, you can also use Oak Brown Colour Primer and warpaint from The Army Painter, or just prime the terrain pieces black and use a big brush to basecoat them with Rhinox Hide.
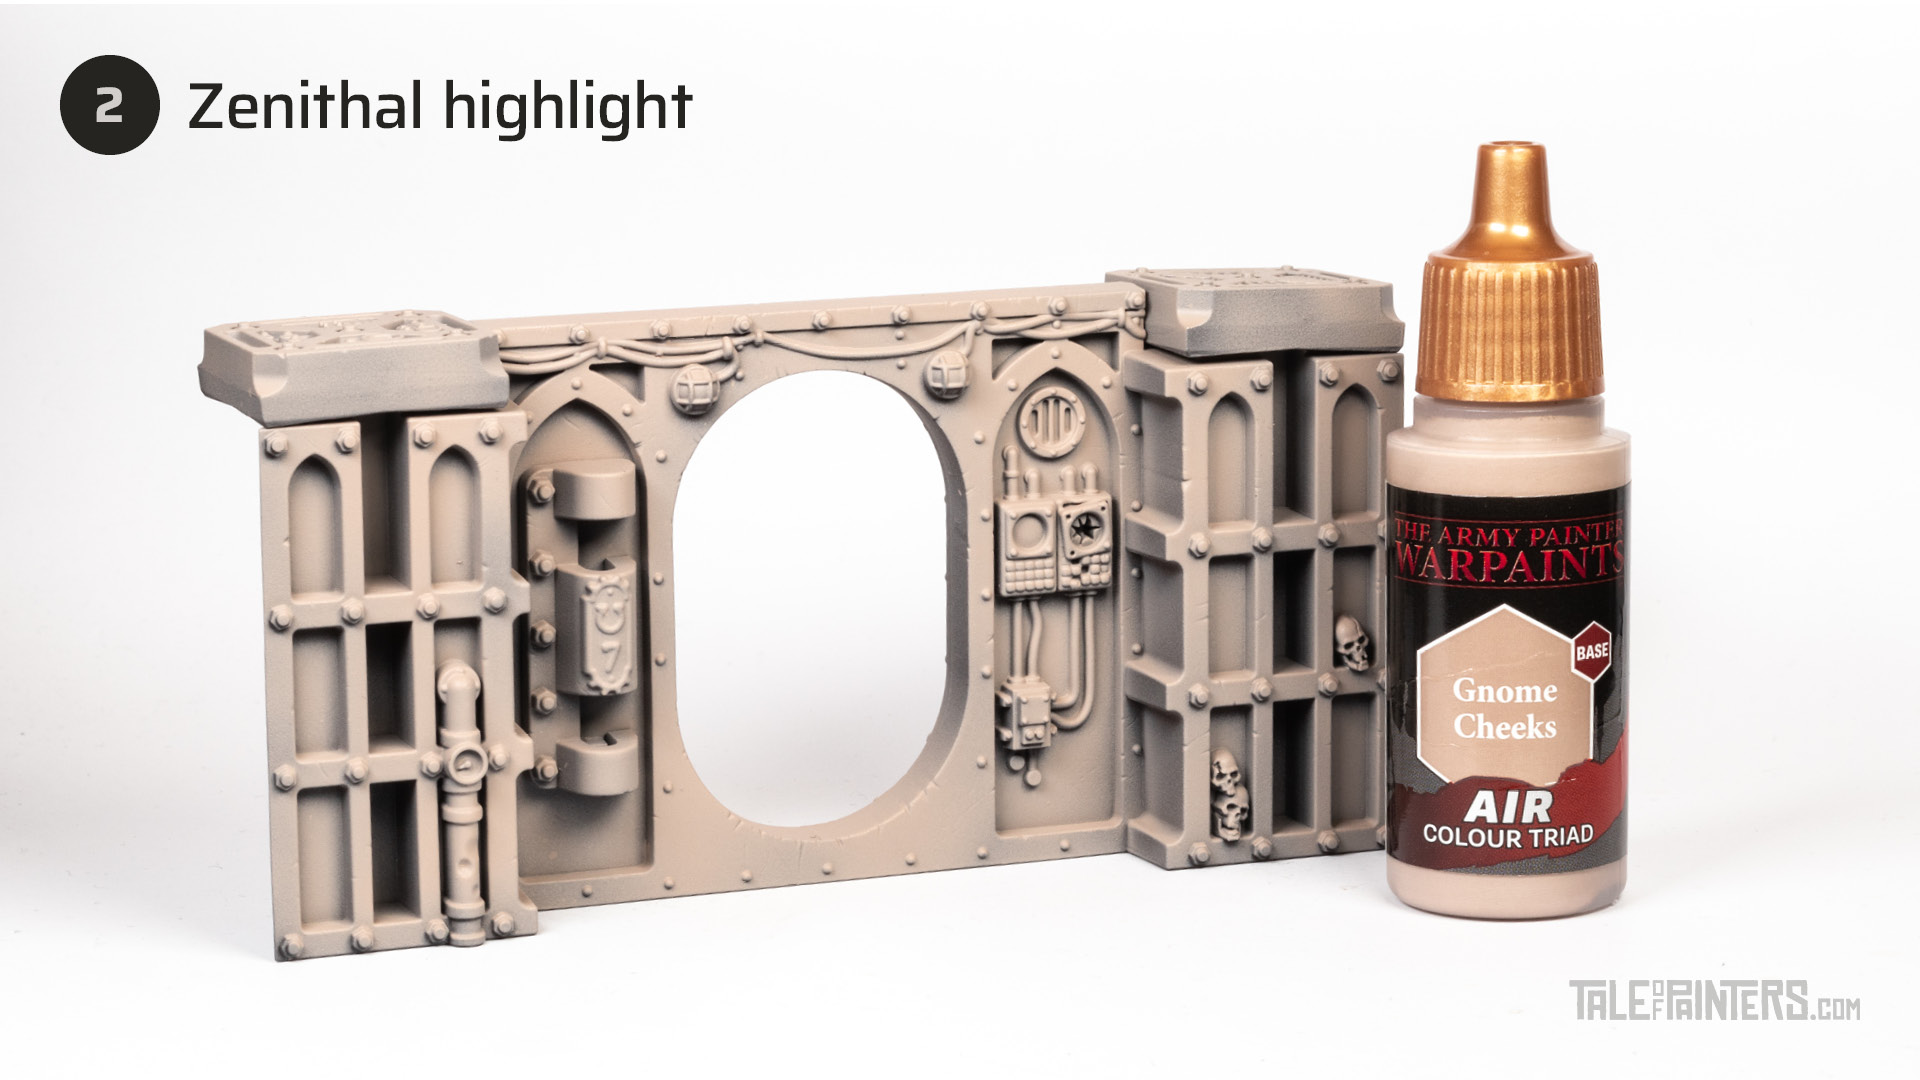

With an airbrush, apply a zenithal highlight of Warpaints Air Gnome Cheeks [if you don’t have an airbrush you can also apply a heavy drybrush of Rakarth Flesh].


Then, drybrush everything with Reaper Master Series Leather White [or Pallid Wych Flesh].
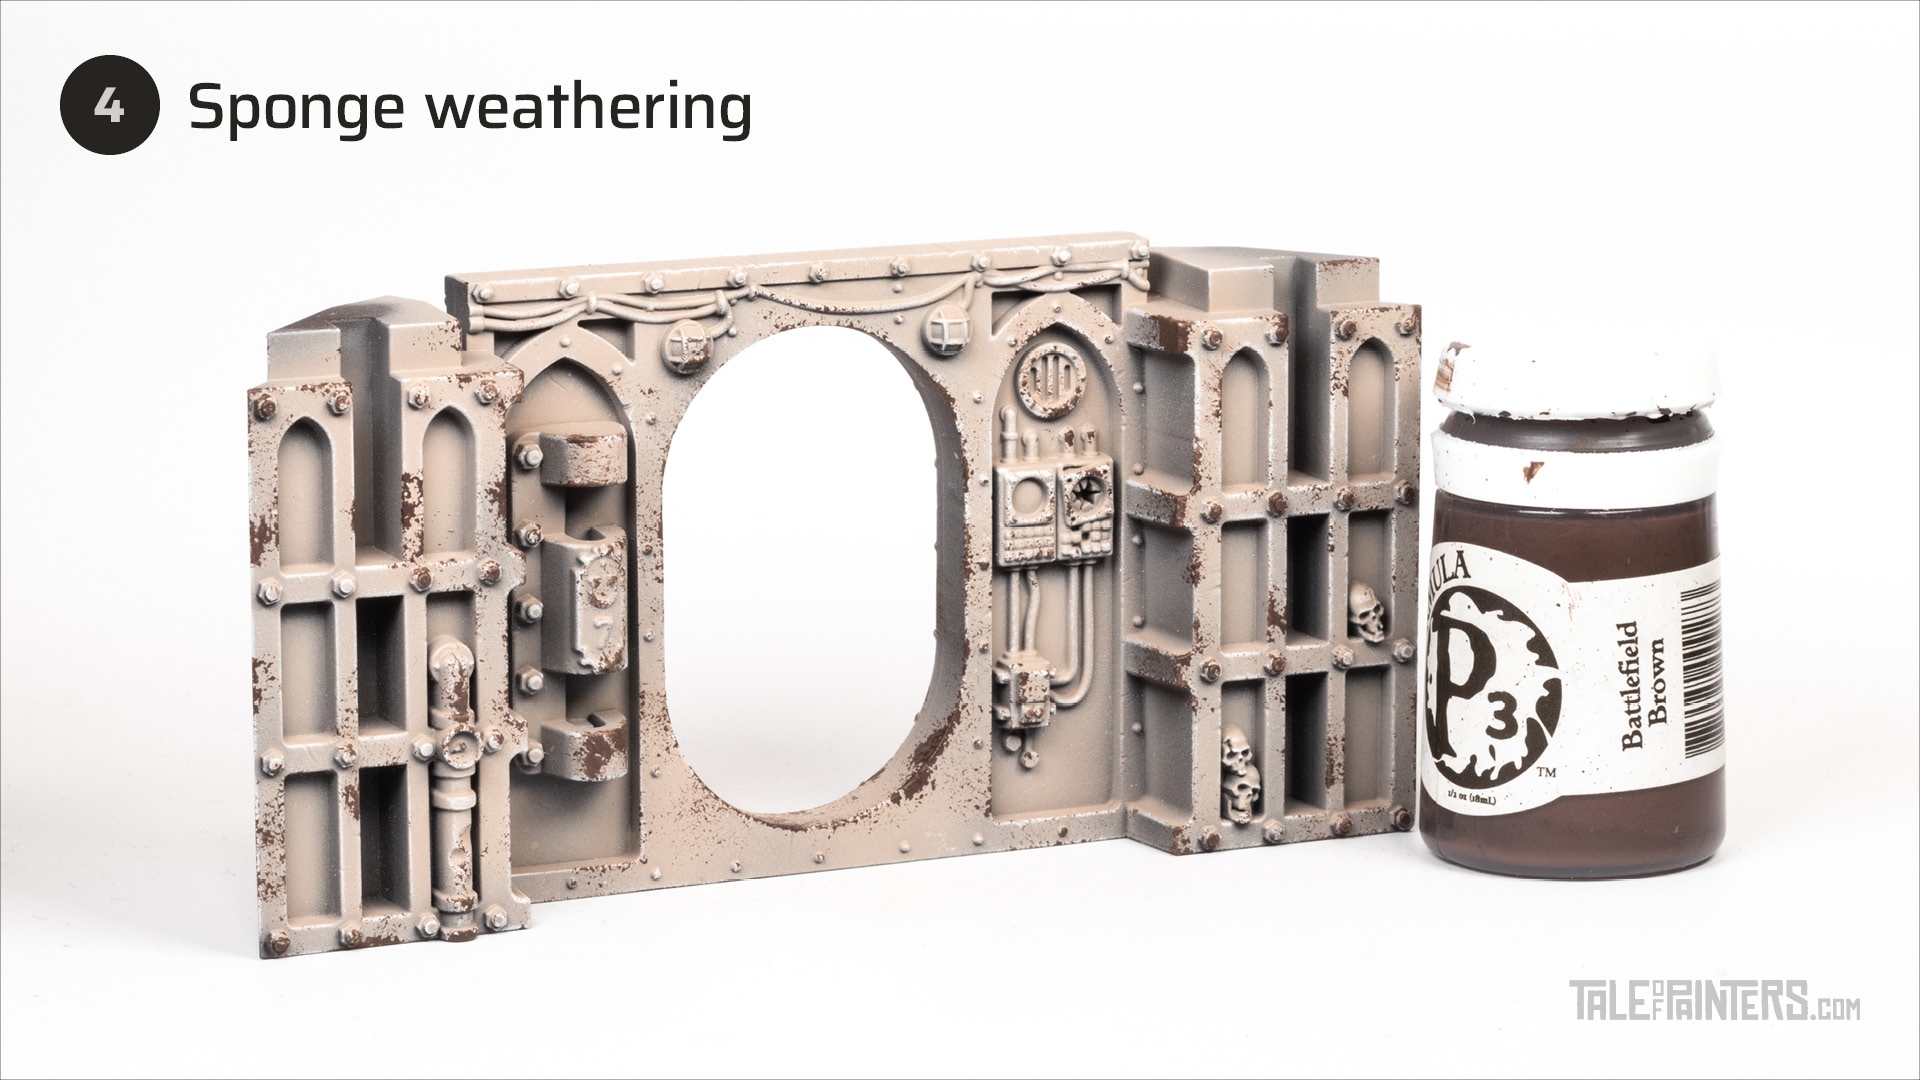

Rip off a small piece of blister sponge, dab it into Formula P3 Battlefield Brown [or Dryad Bark] and press it on random spots for our first stage of sponge weathering.
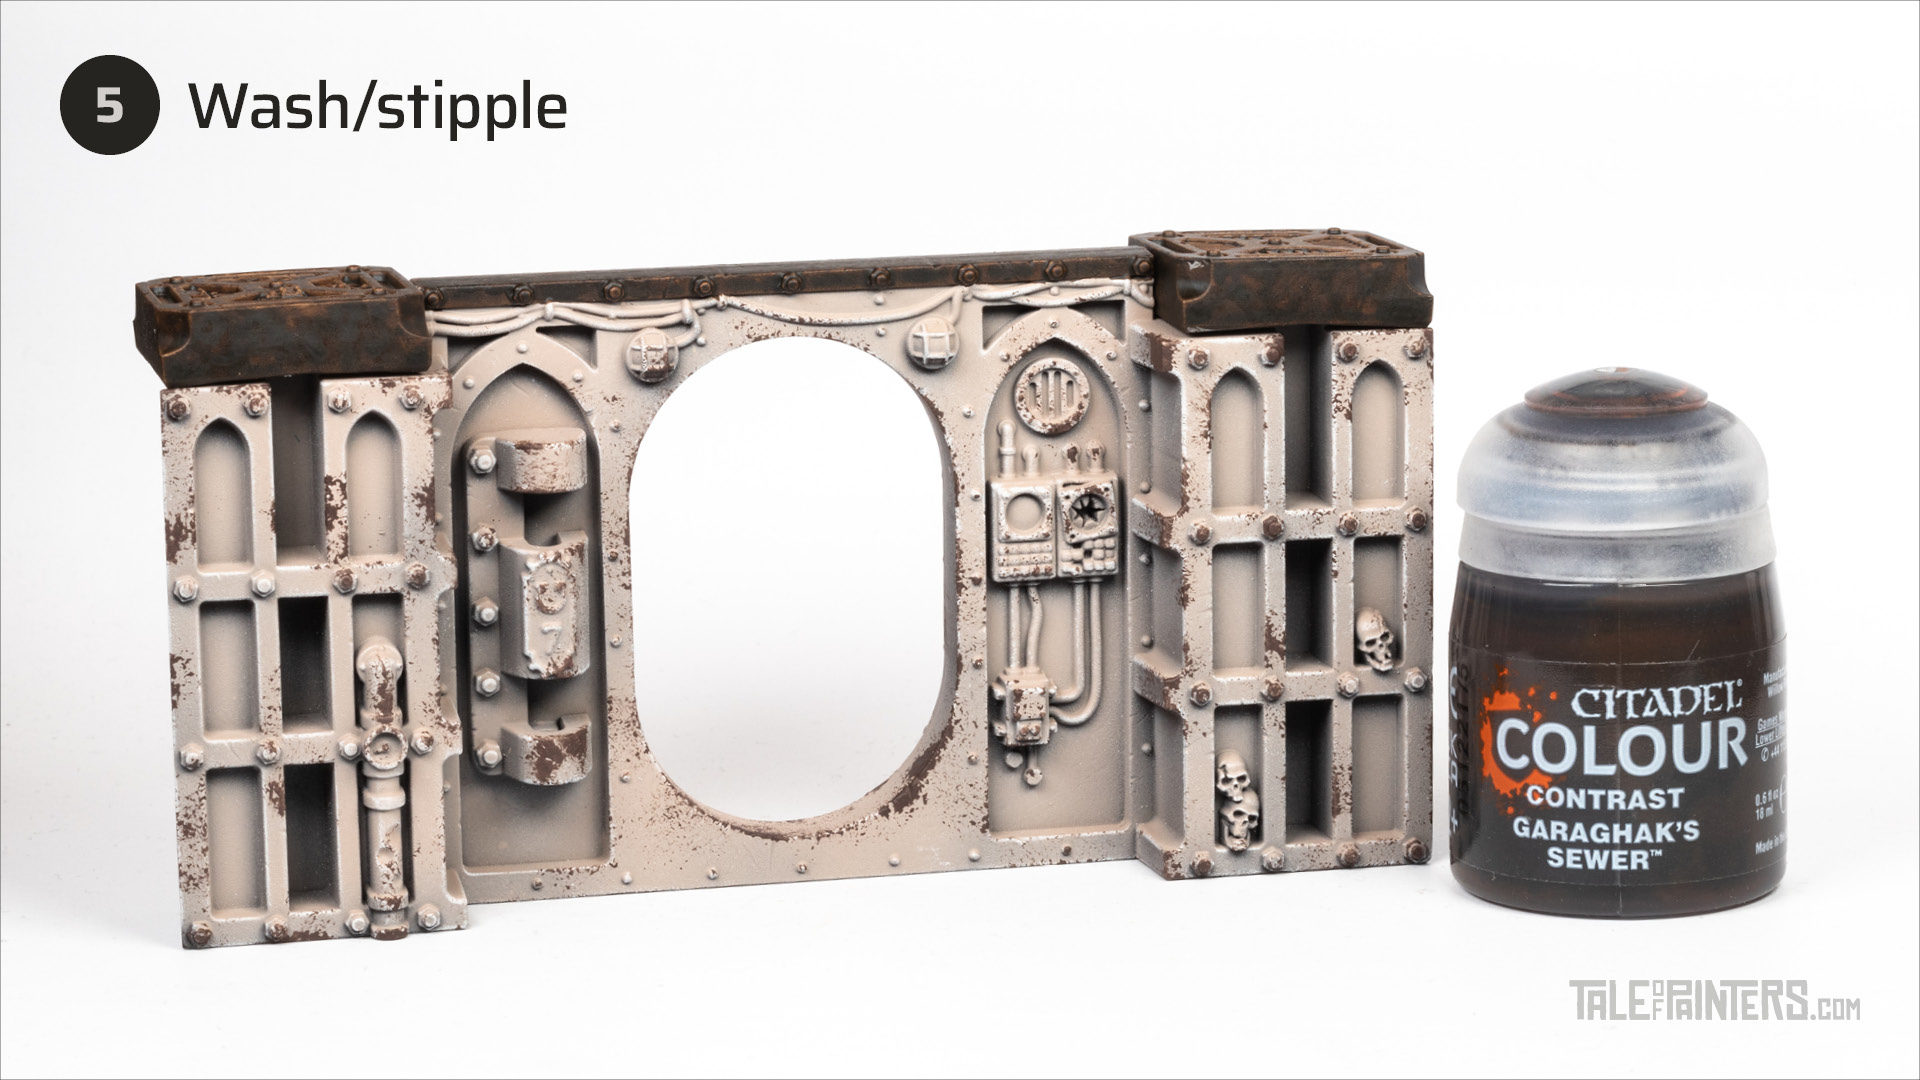

Paint the top caps and beams with a generous coat of Garaghak’s Sewer. While the paint is half-dry, use an old brush and stipple it into the paint to add an interesting texture to the flat areas such as the sides of the caps and the top of the beams.
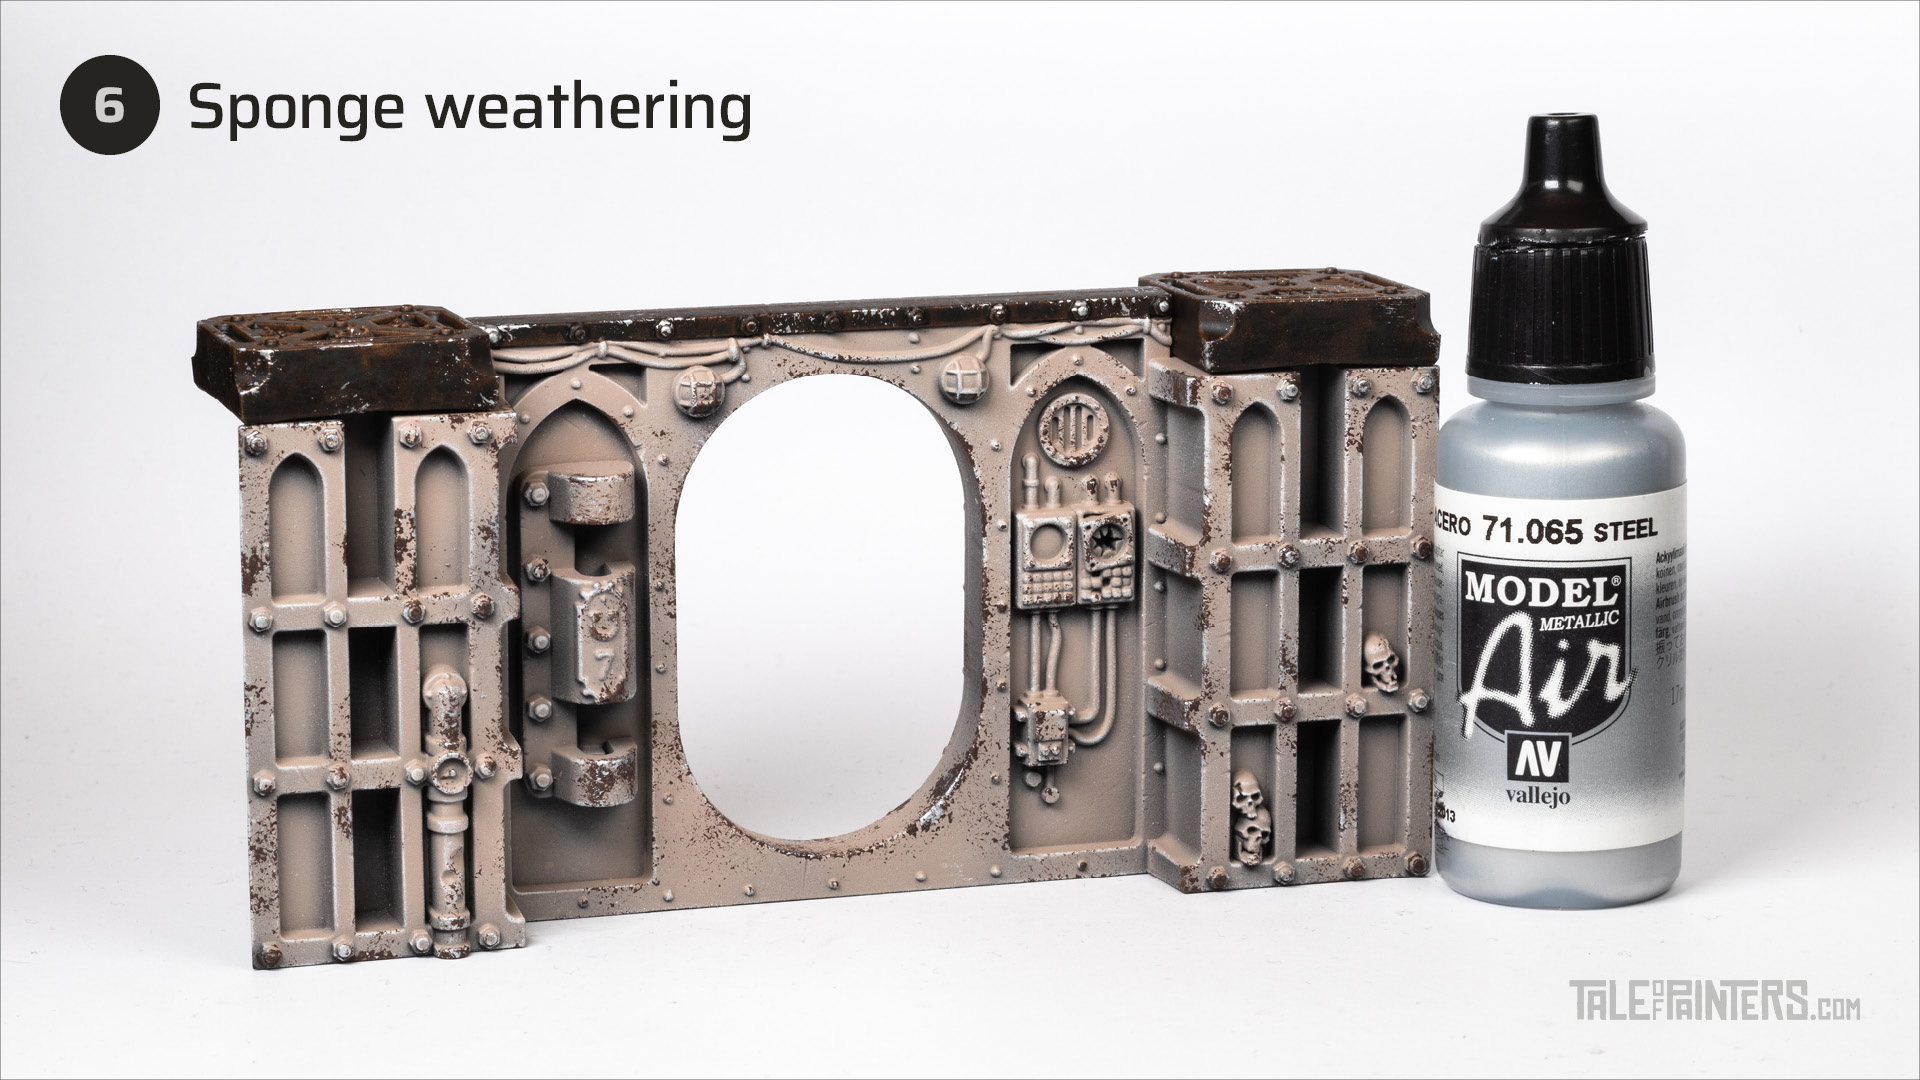

Apply more sponge weathering, this time with Vallejo Model Air Steel [or Stormhost Silver], concentrating on the areas you weathered with Battlefield Brown before.
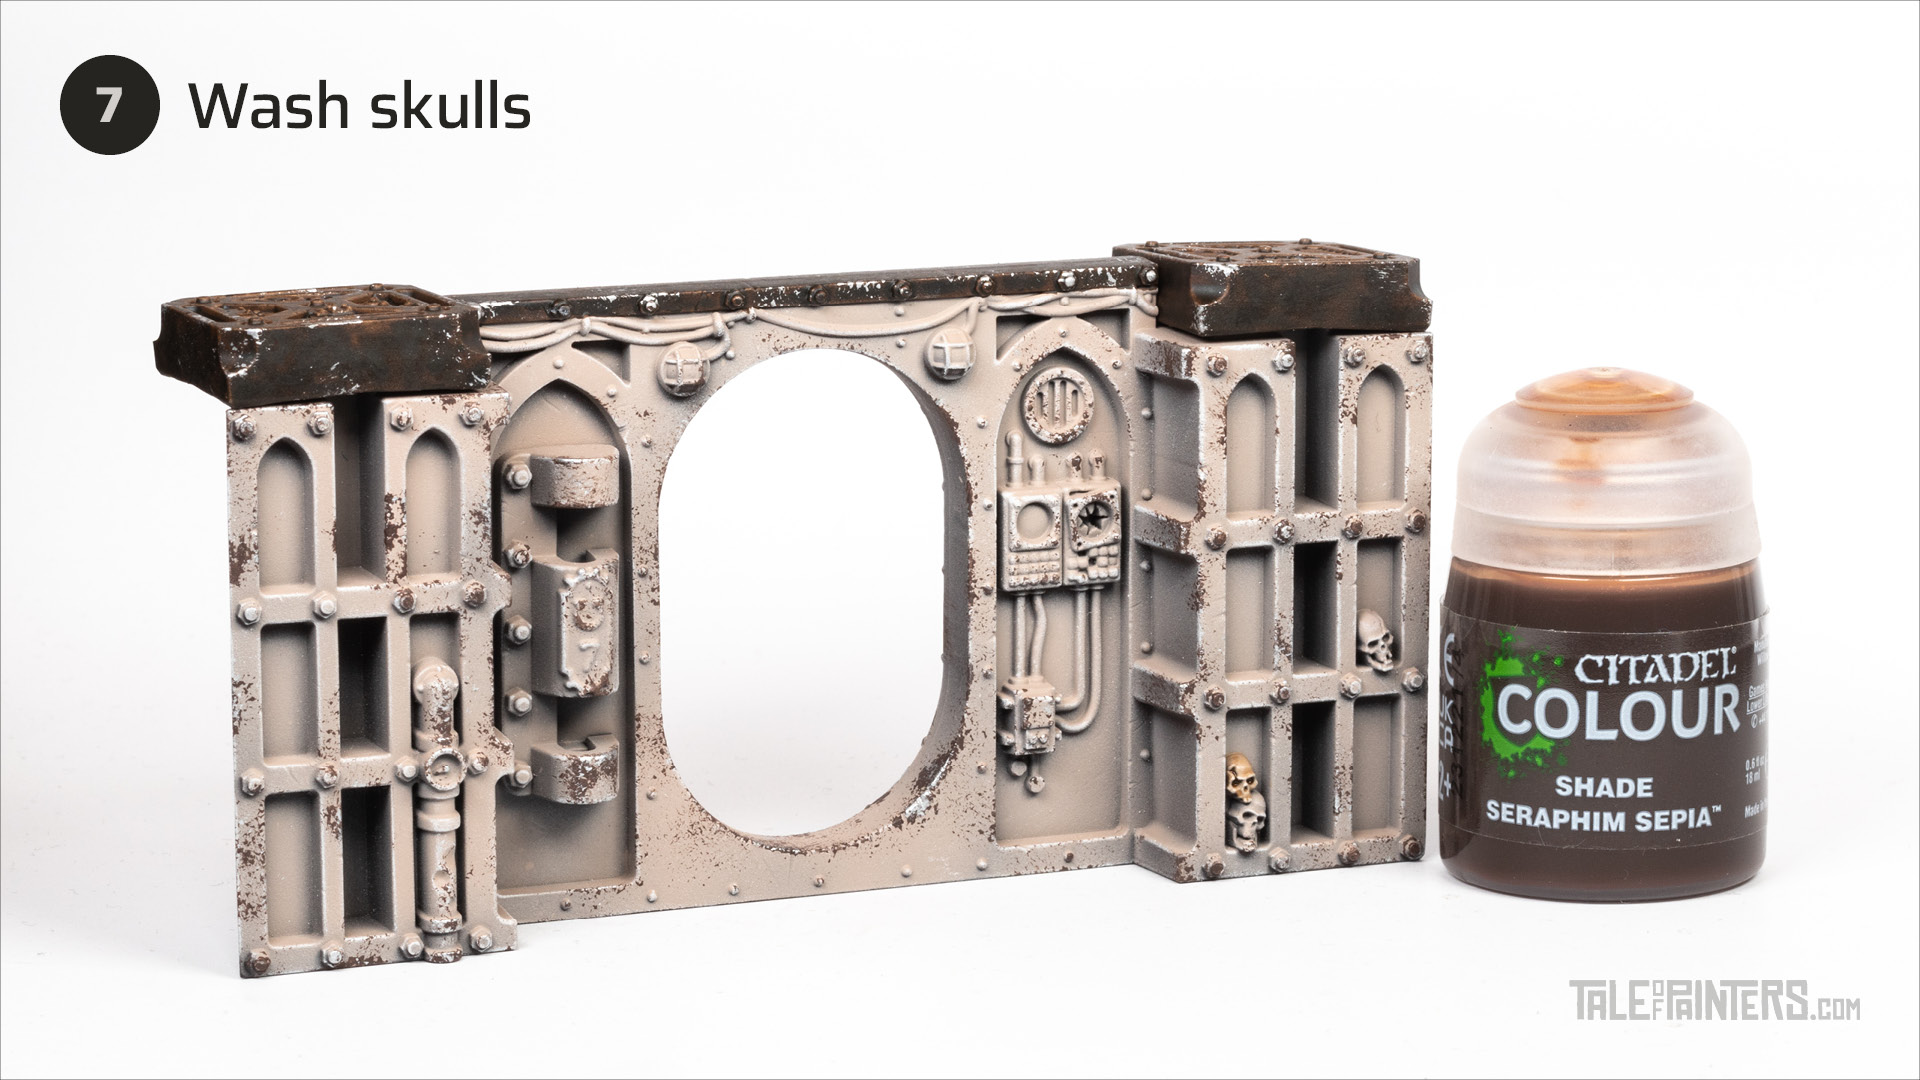

Pick out some of the skulls with a wash of Seraphim Sepia.
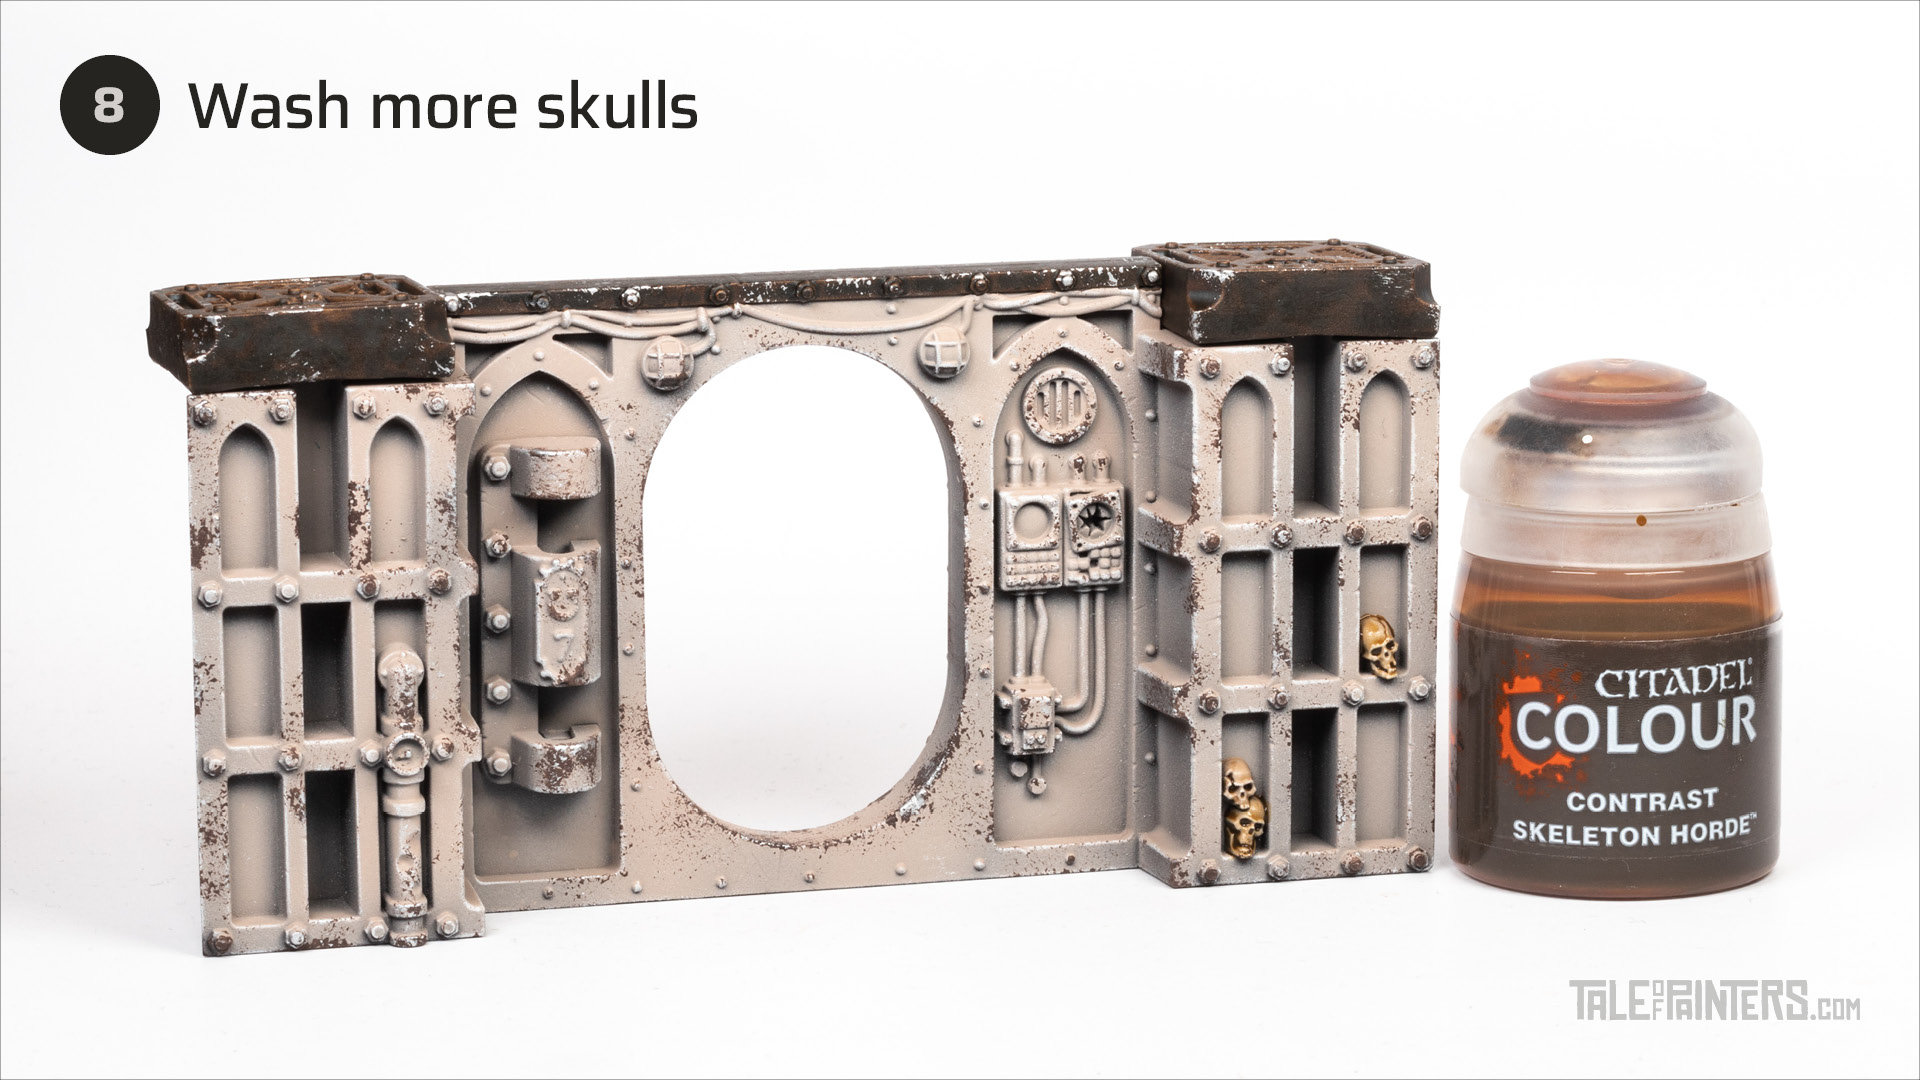

Paint all the remaining skulls with a coat of Skeleton Horde.
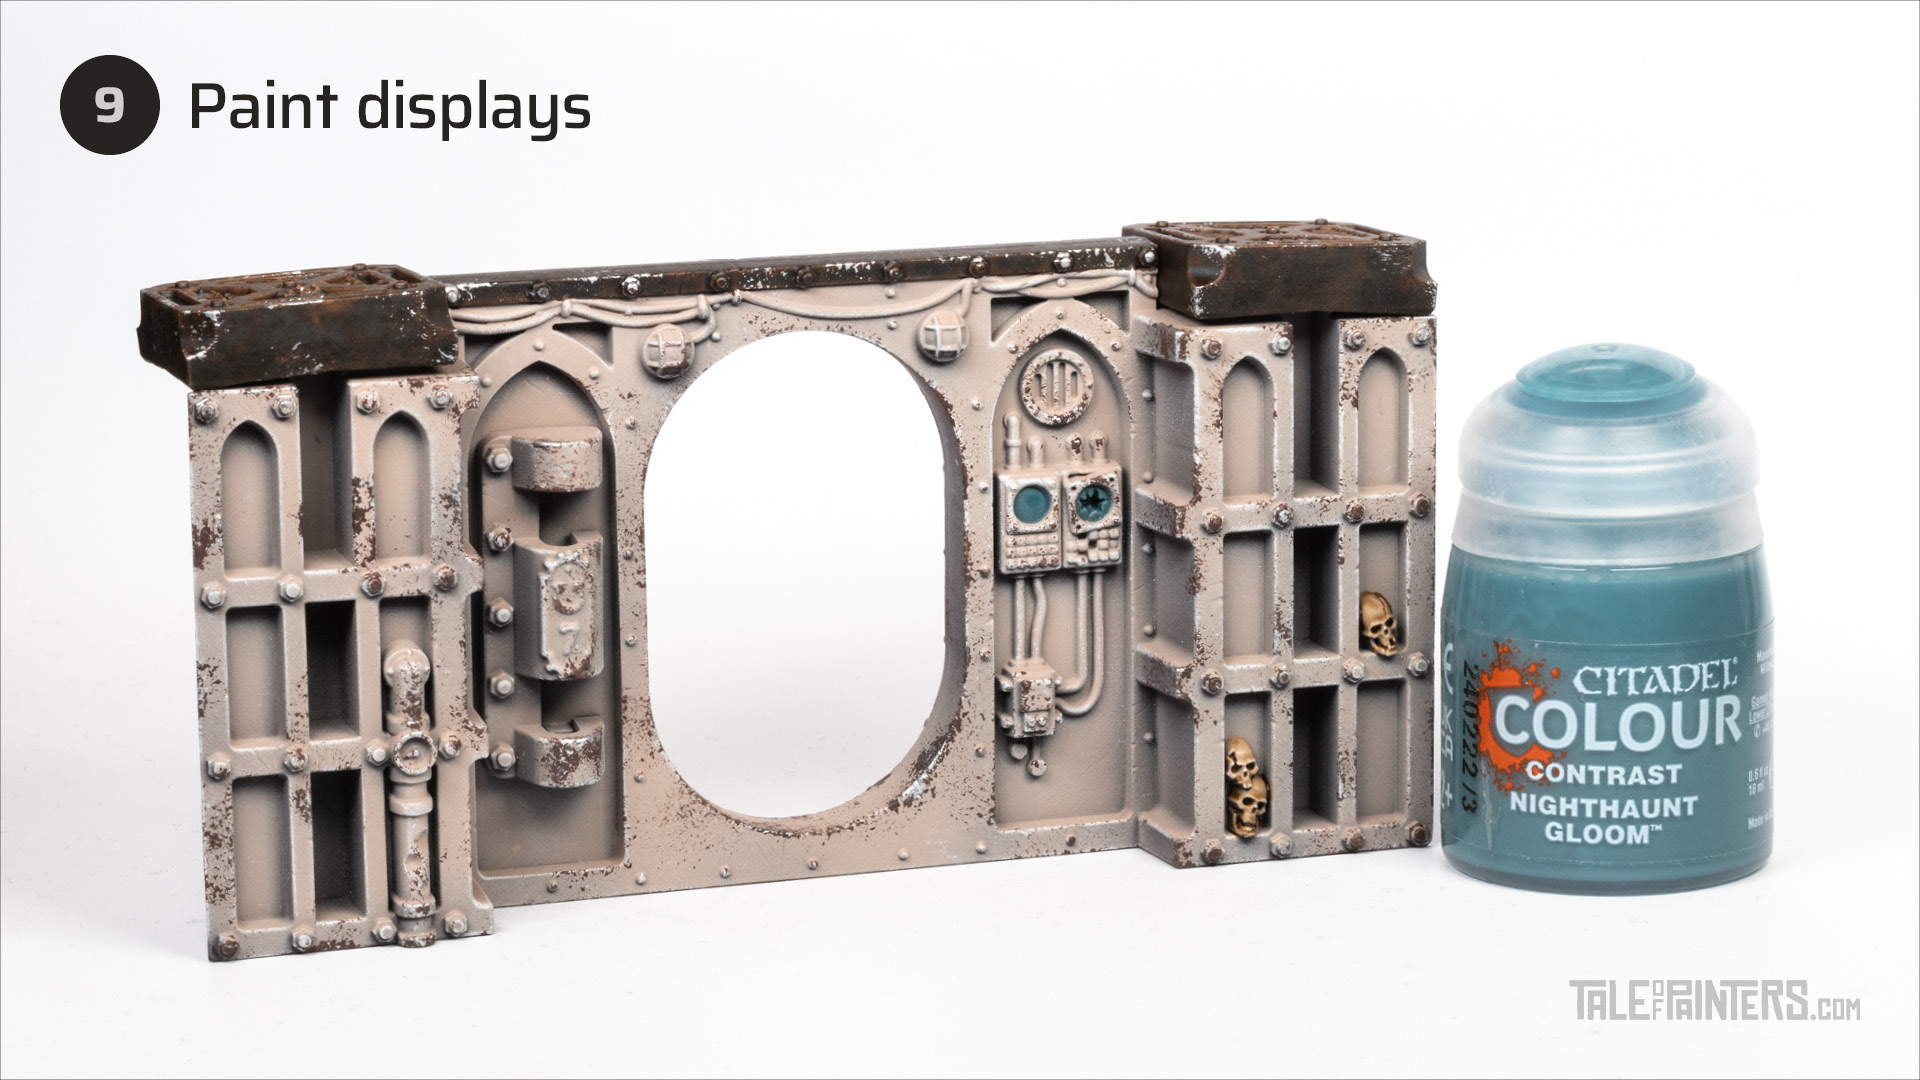

Paint all the displays and screens with a coat of Nighthaunt Gloom.
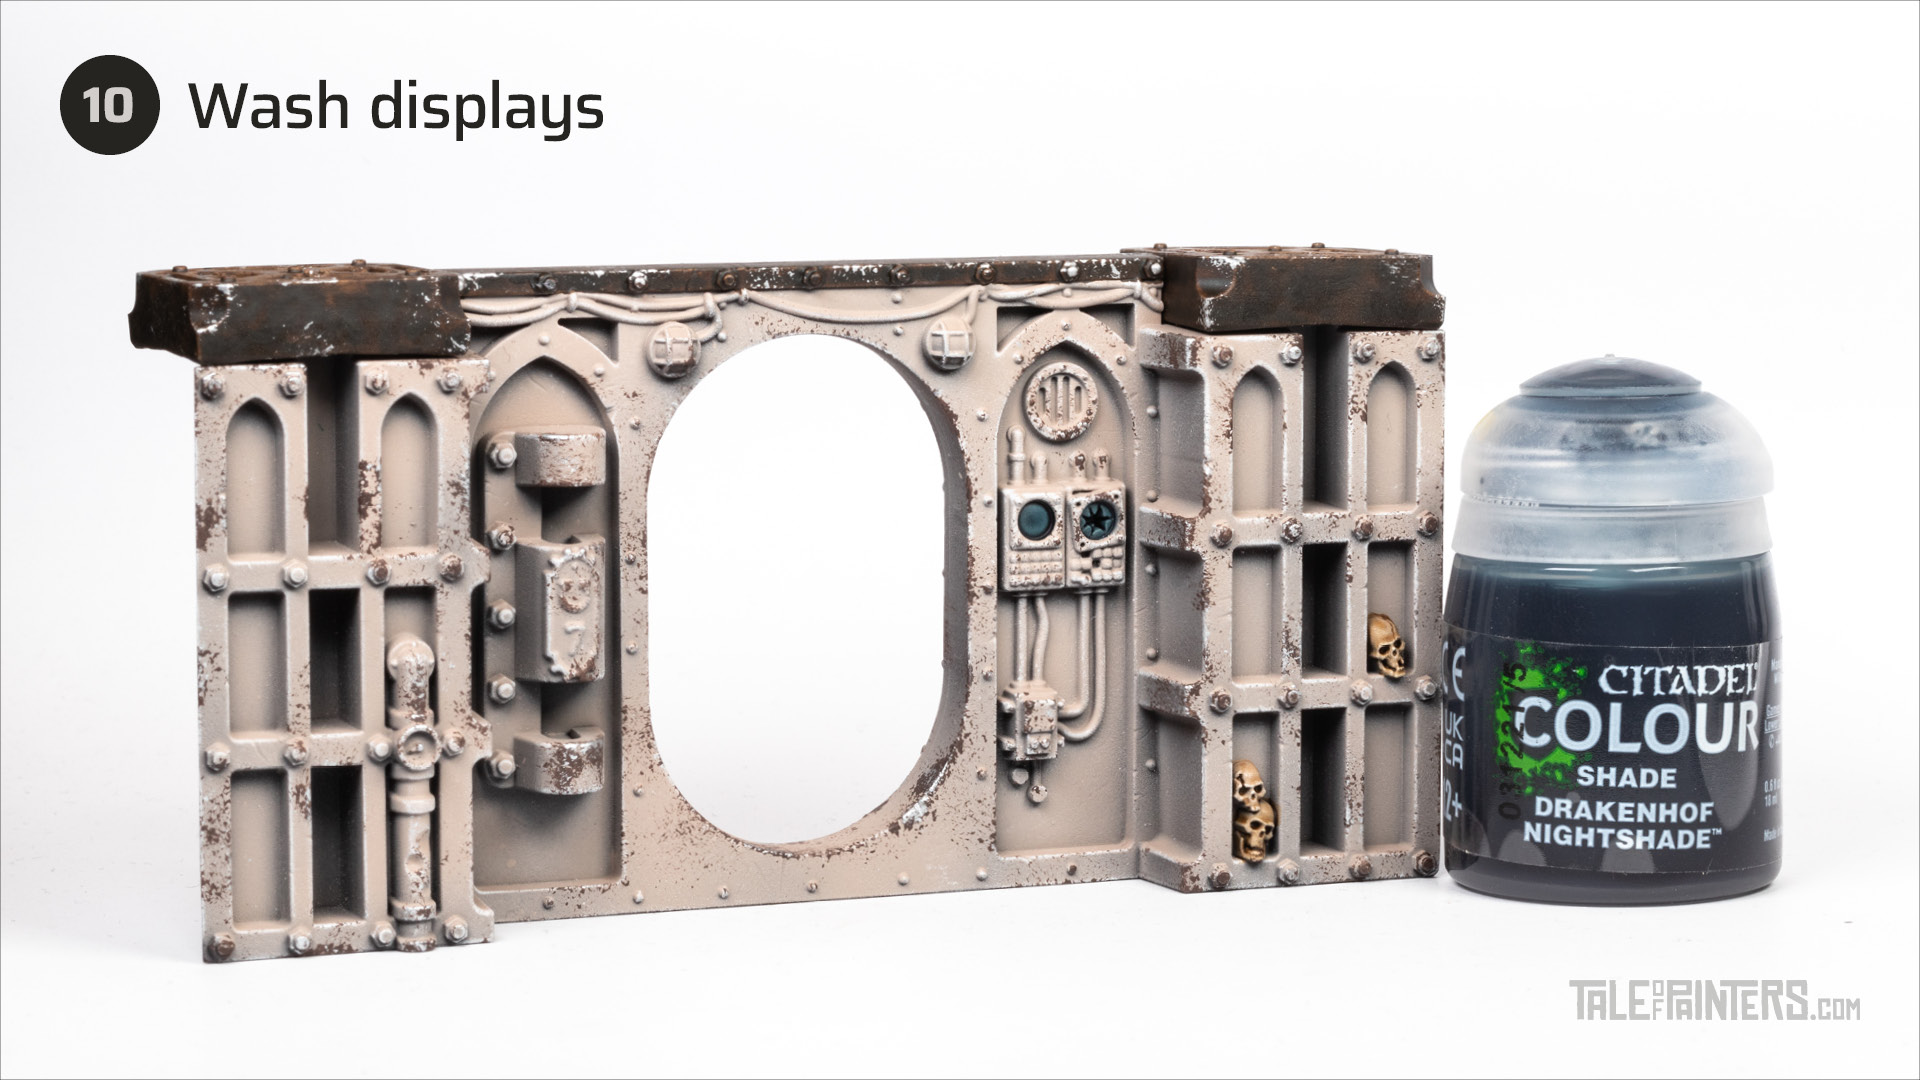

Then wash the screens with a generous amount of Drakenhof Nightshade to add some more depth.
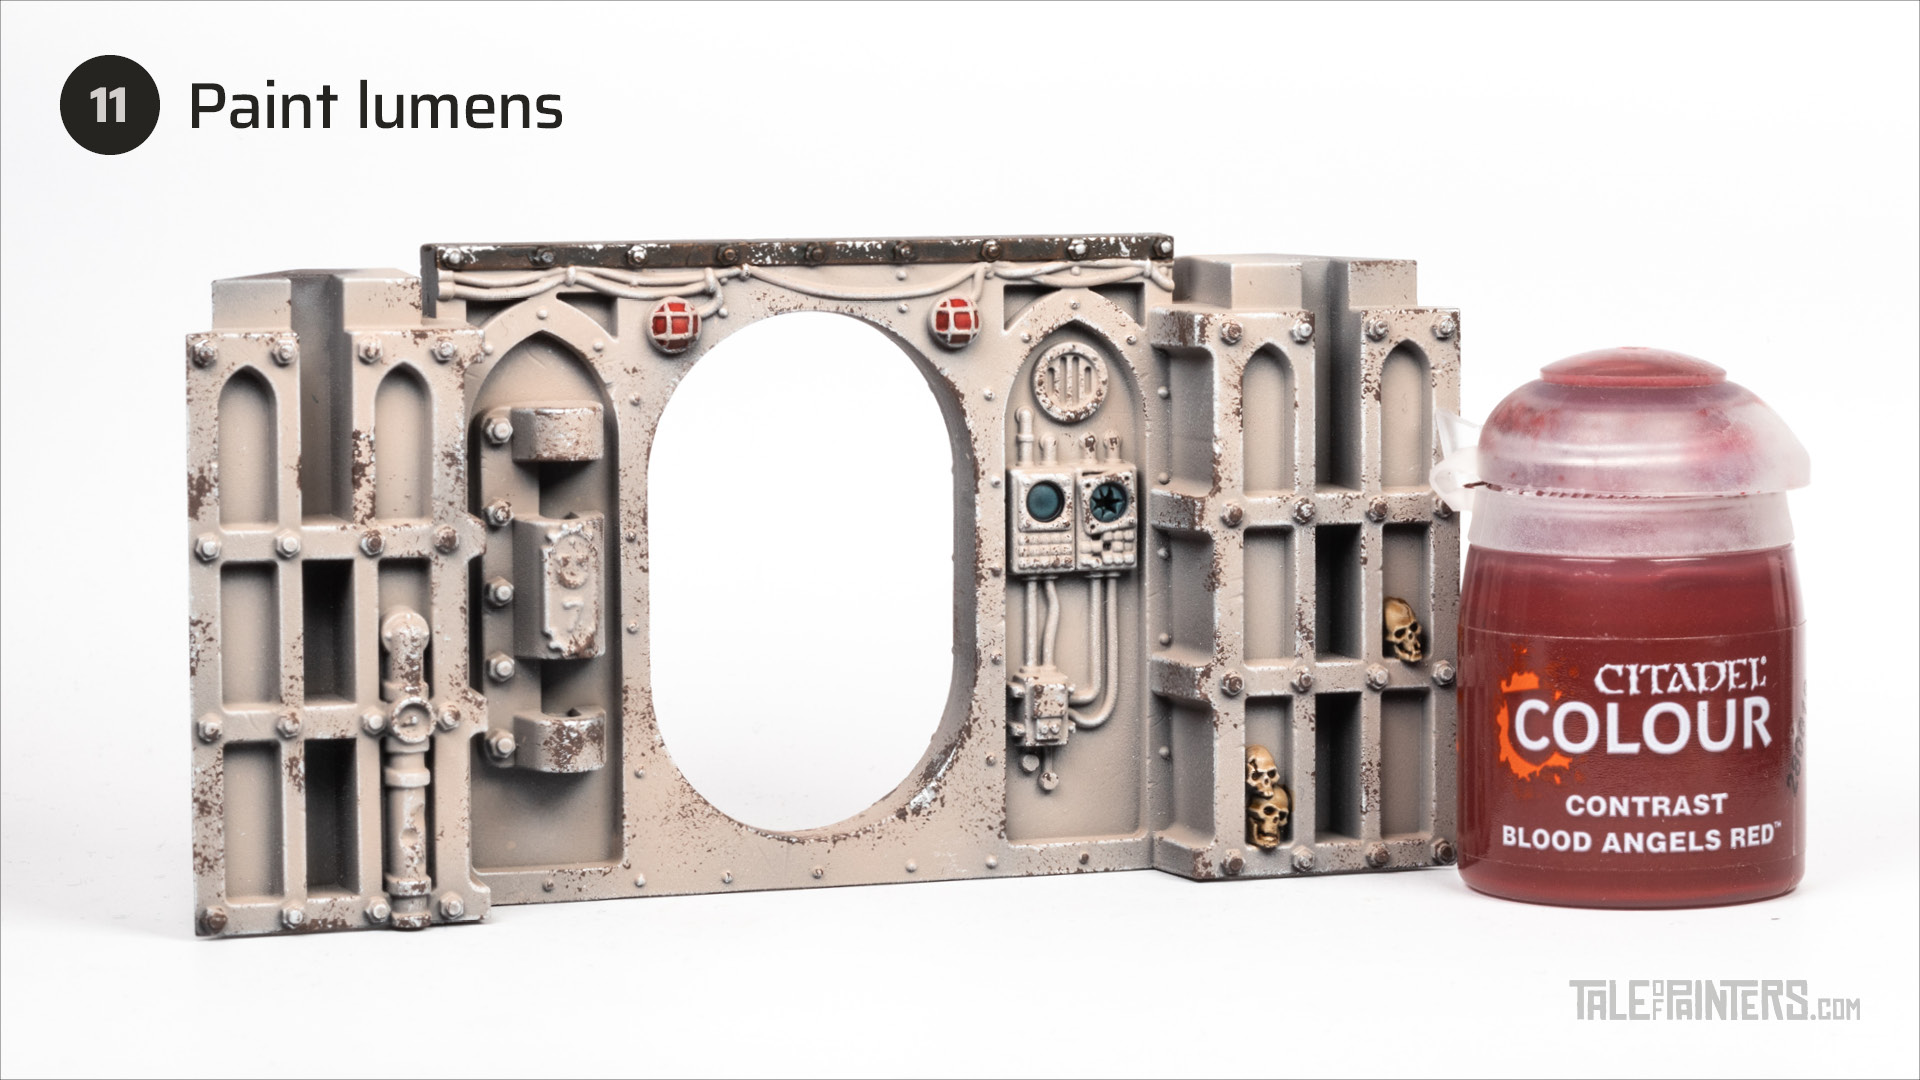

Pick out the lumens and lights with a coat of Blood Angels Red. You might need to clean up the grilles with a little bit of Rakarth Flesh afterwards.
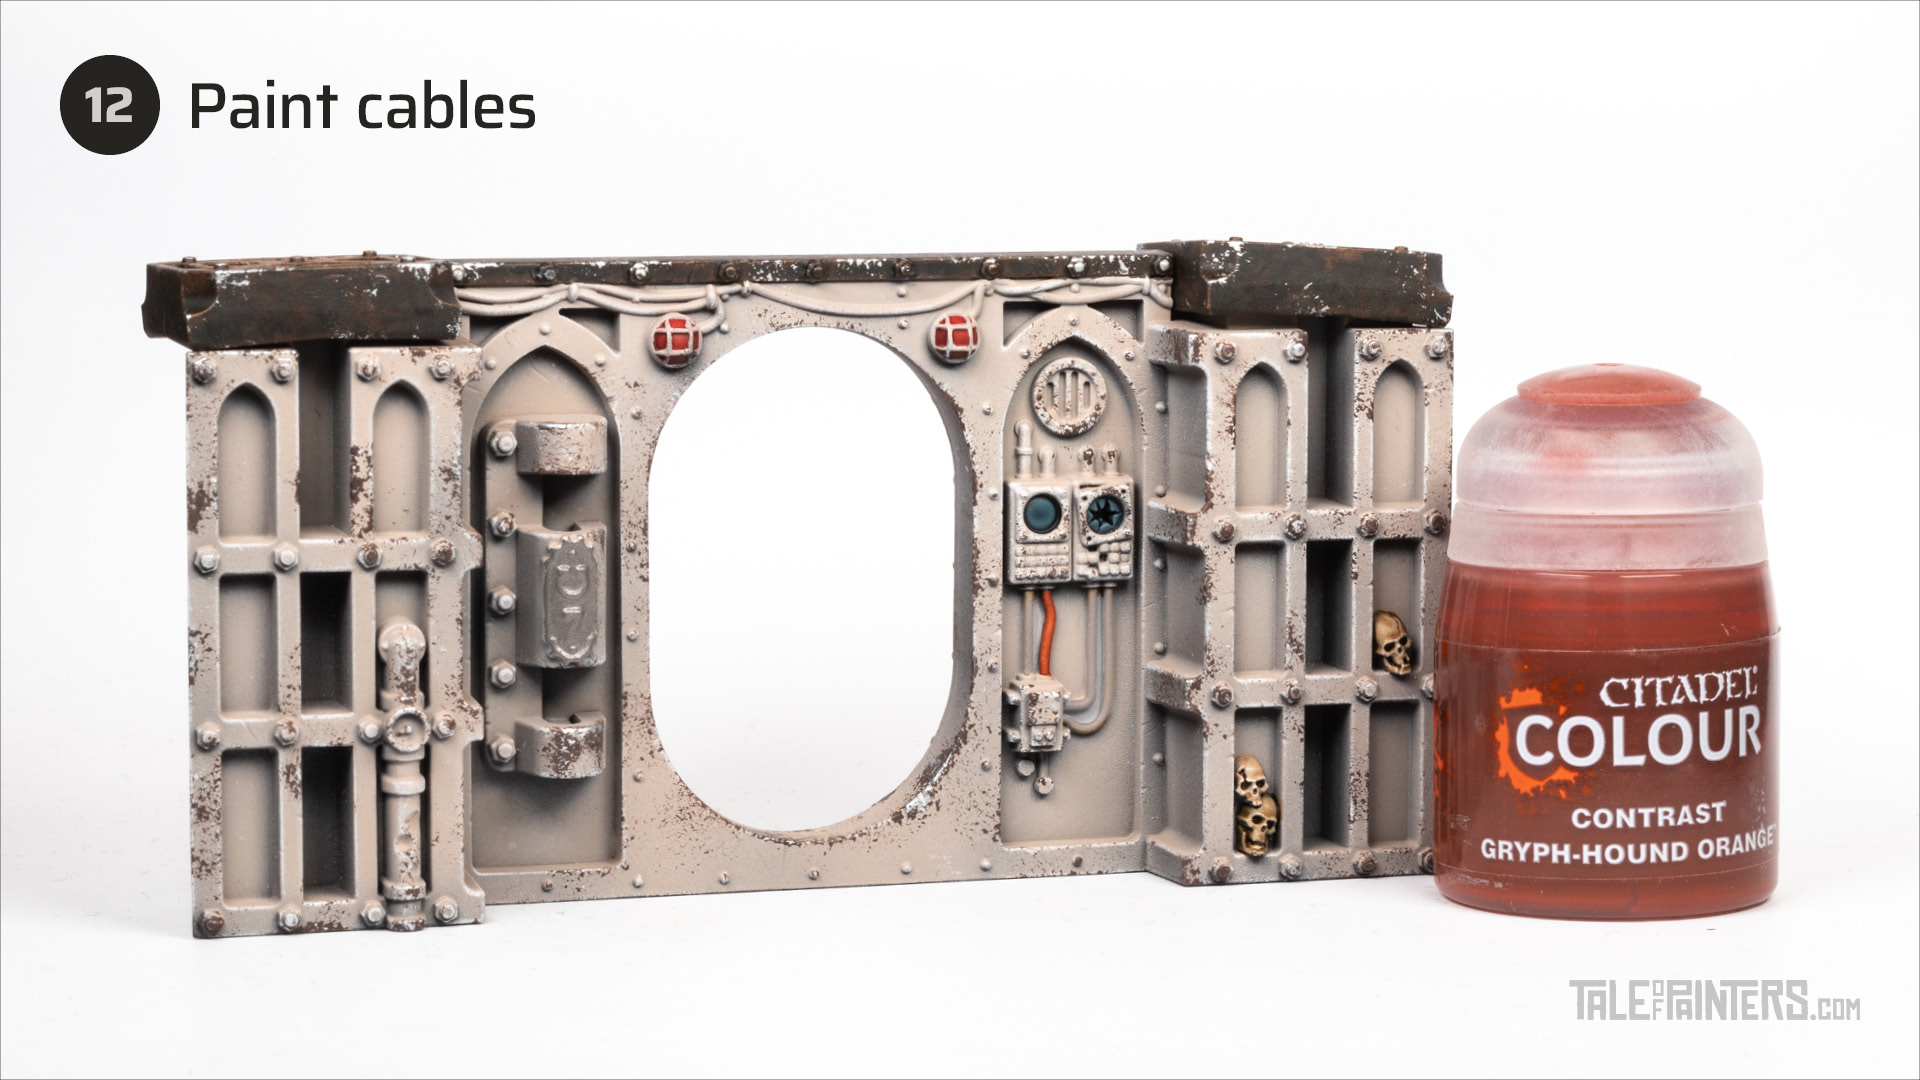

Paint some of the cables with a coat of Gryph-Hound Orange.
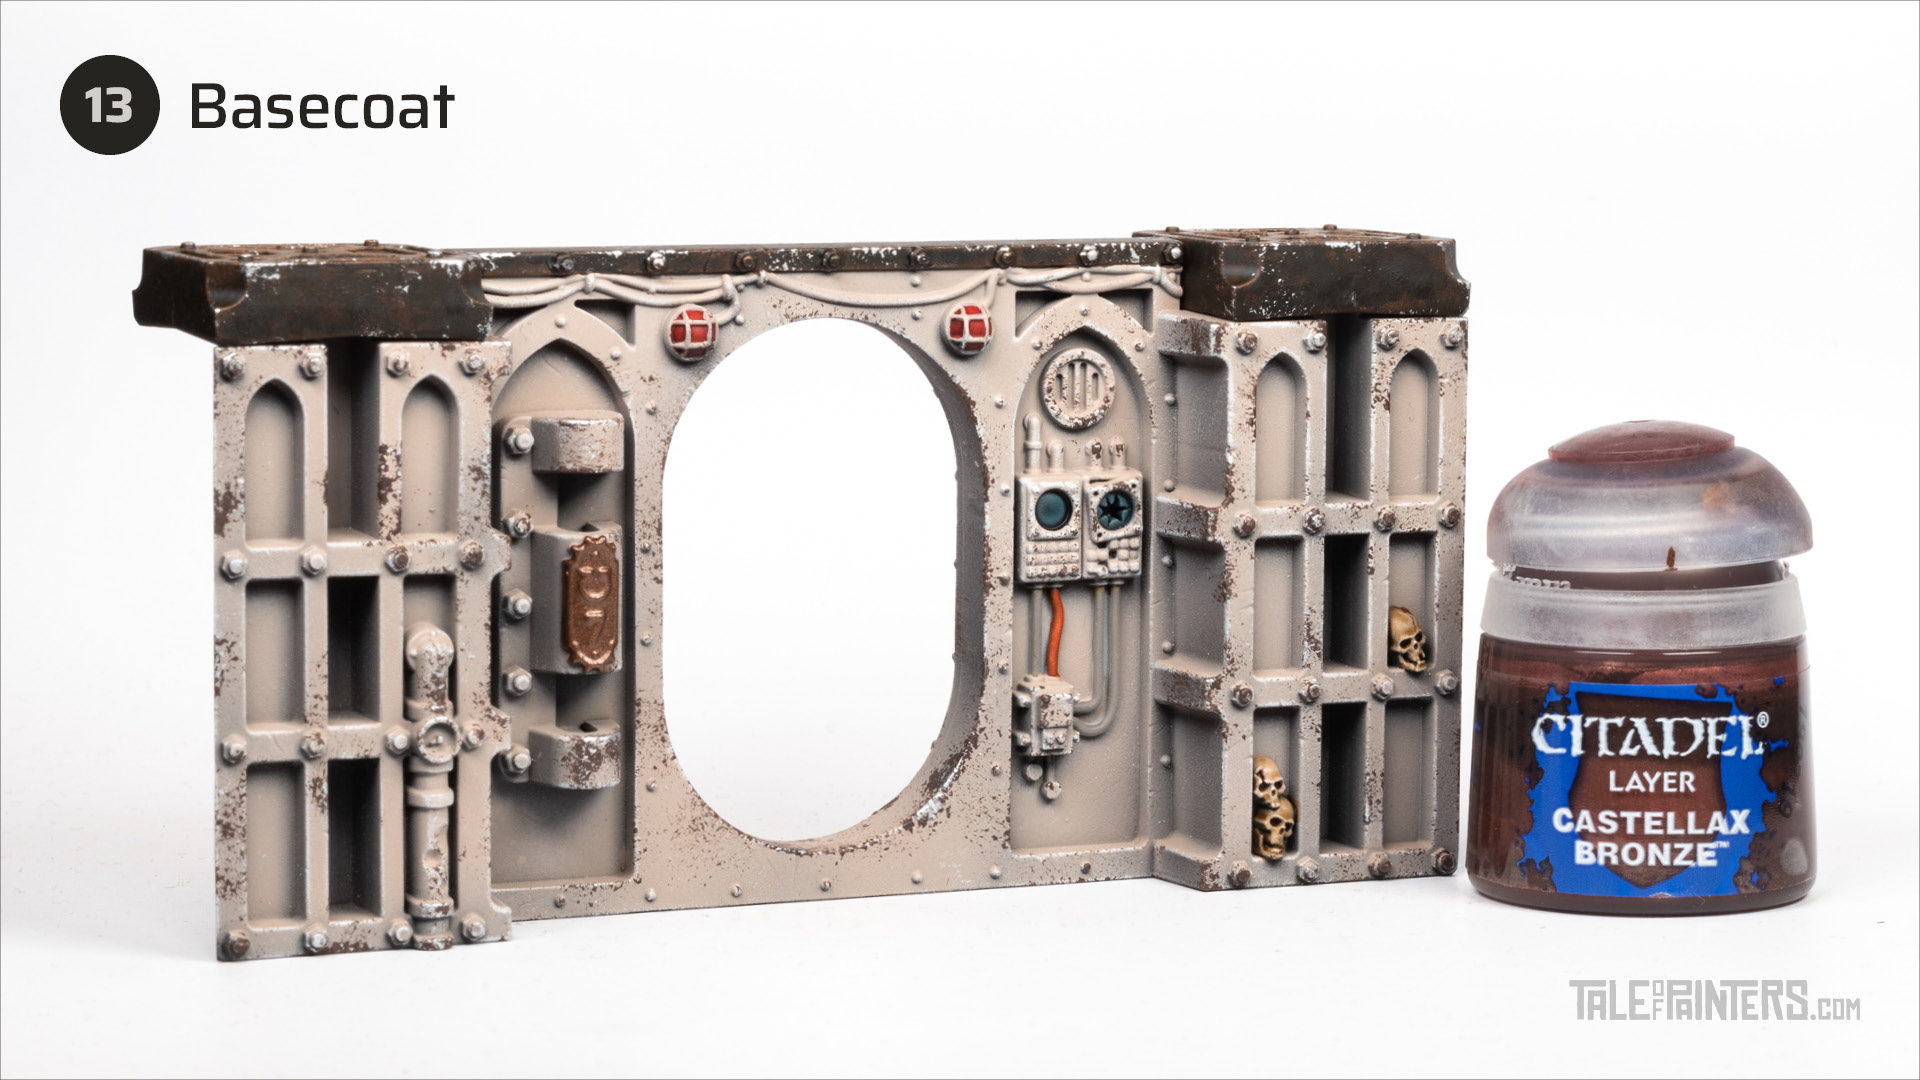

Basecoat all the Mechanicus badges with Castellax Bronze.
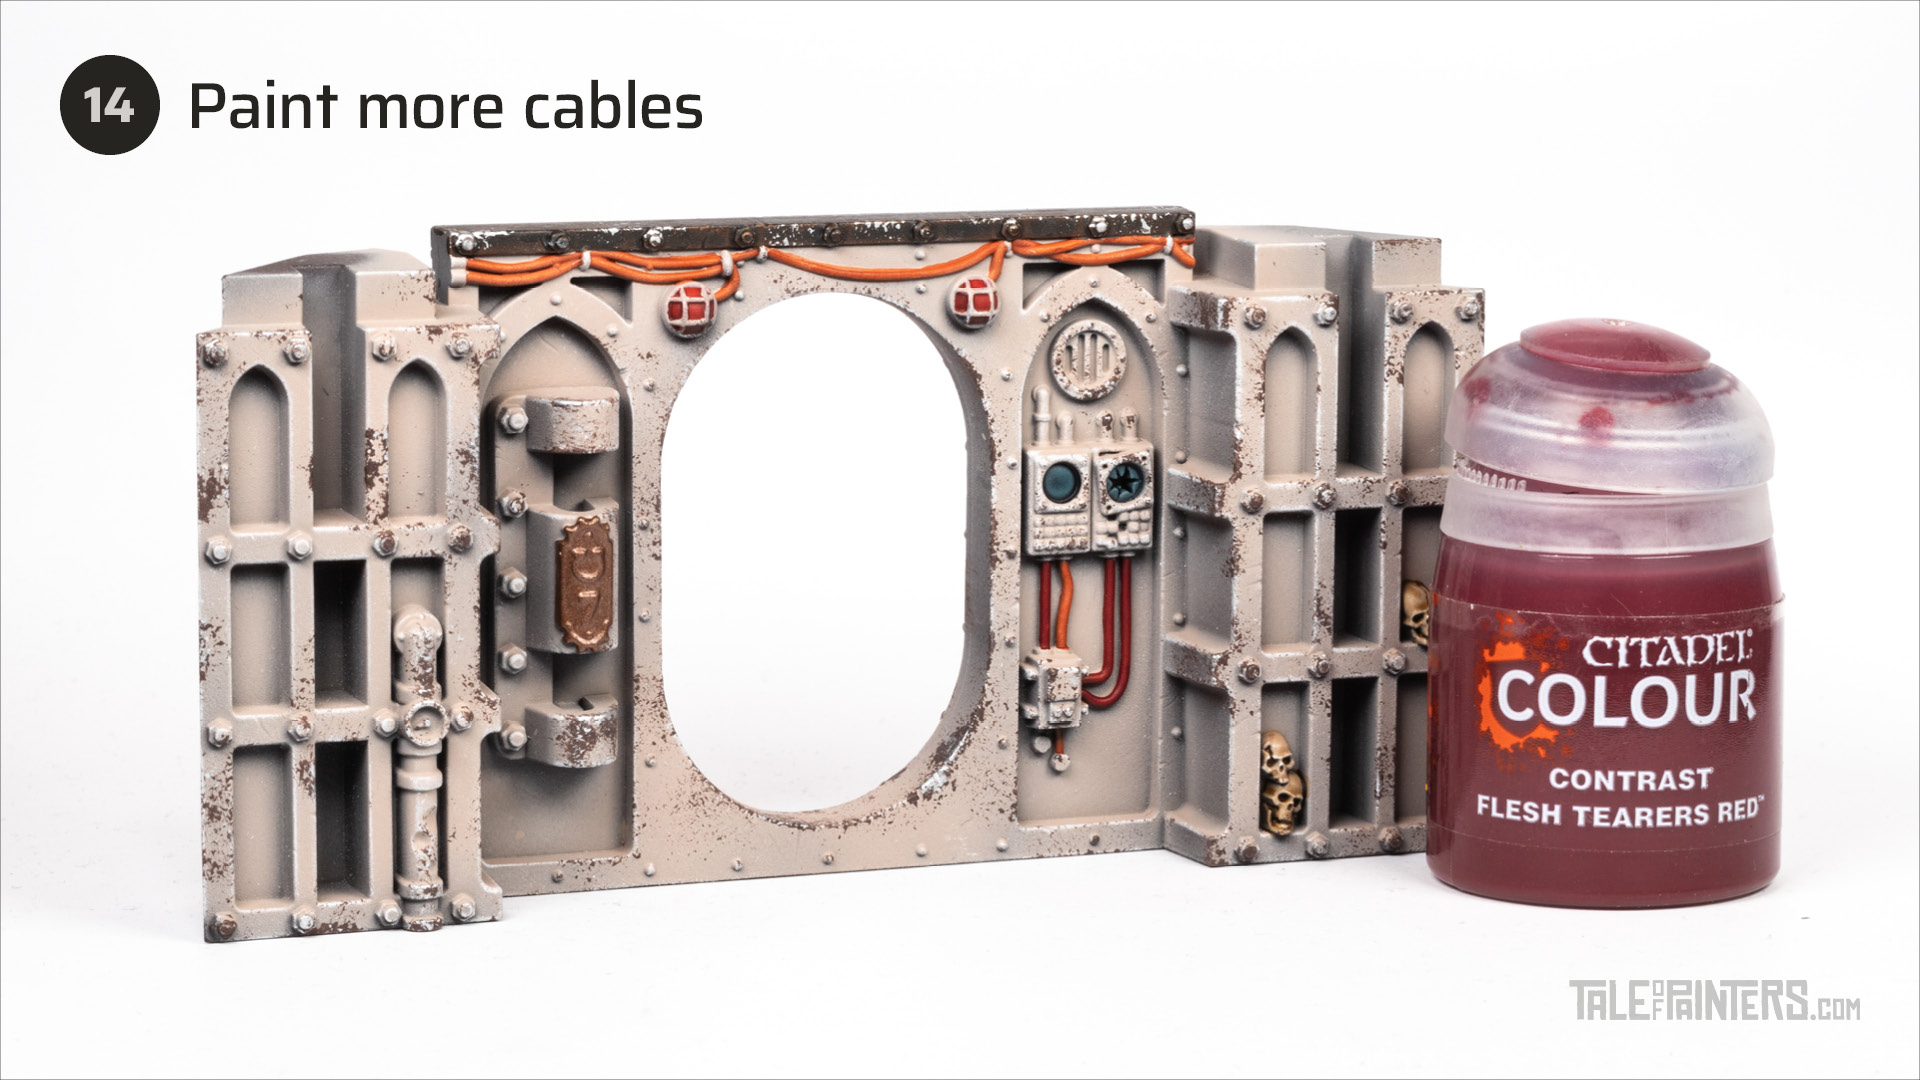

Paint the remaining cables with Flesh Tearers Red.
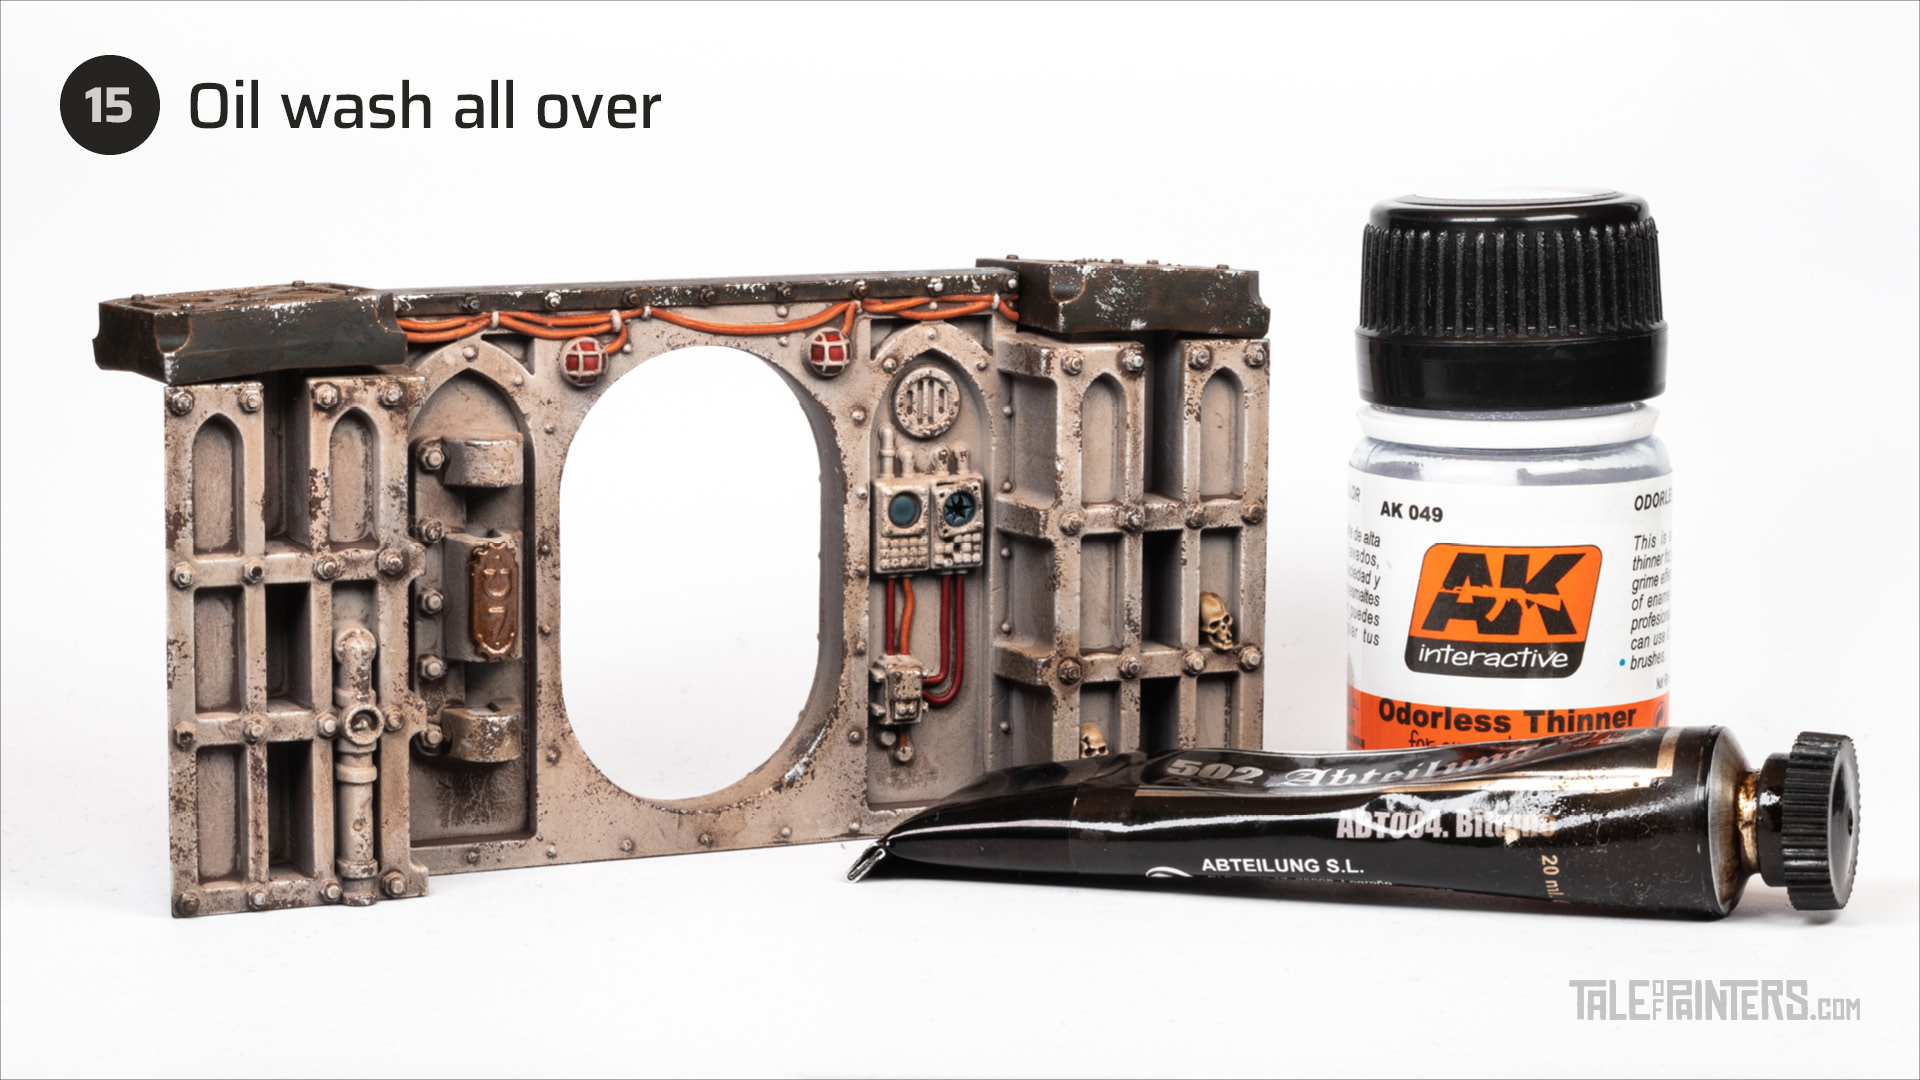

Mix Abteilung 502 Bitume oil paint with AK Interactive Odorless Thinner to a wash-like consistency, and apply it all over the model. Oil paint and thinner has a very low viscosity, so excess paint will gather in the recesses quickly. Make sure to suck it up with a spare brush before it pools too much.
Then, while the wash is still wet, use a kitchen towel and some lint-free cotton swabs and carefully wipe the oil paint away from top to bottom. This way, you’ll remove most of the wash from the surfaces while still shading the recesses, and also create a slightly streaky, oily texture. Give the model plenty of time to try, at least over night. The oil paint is only completely dry when it has lost all gloss and is completely matt.
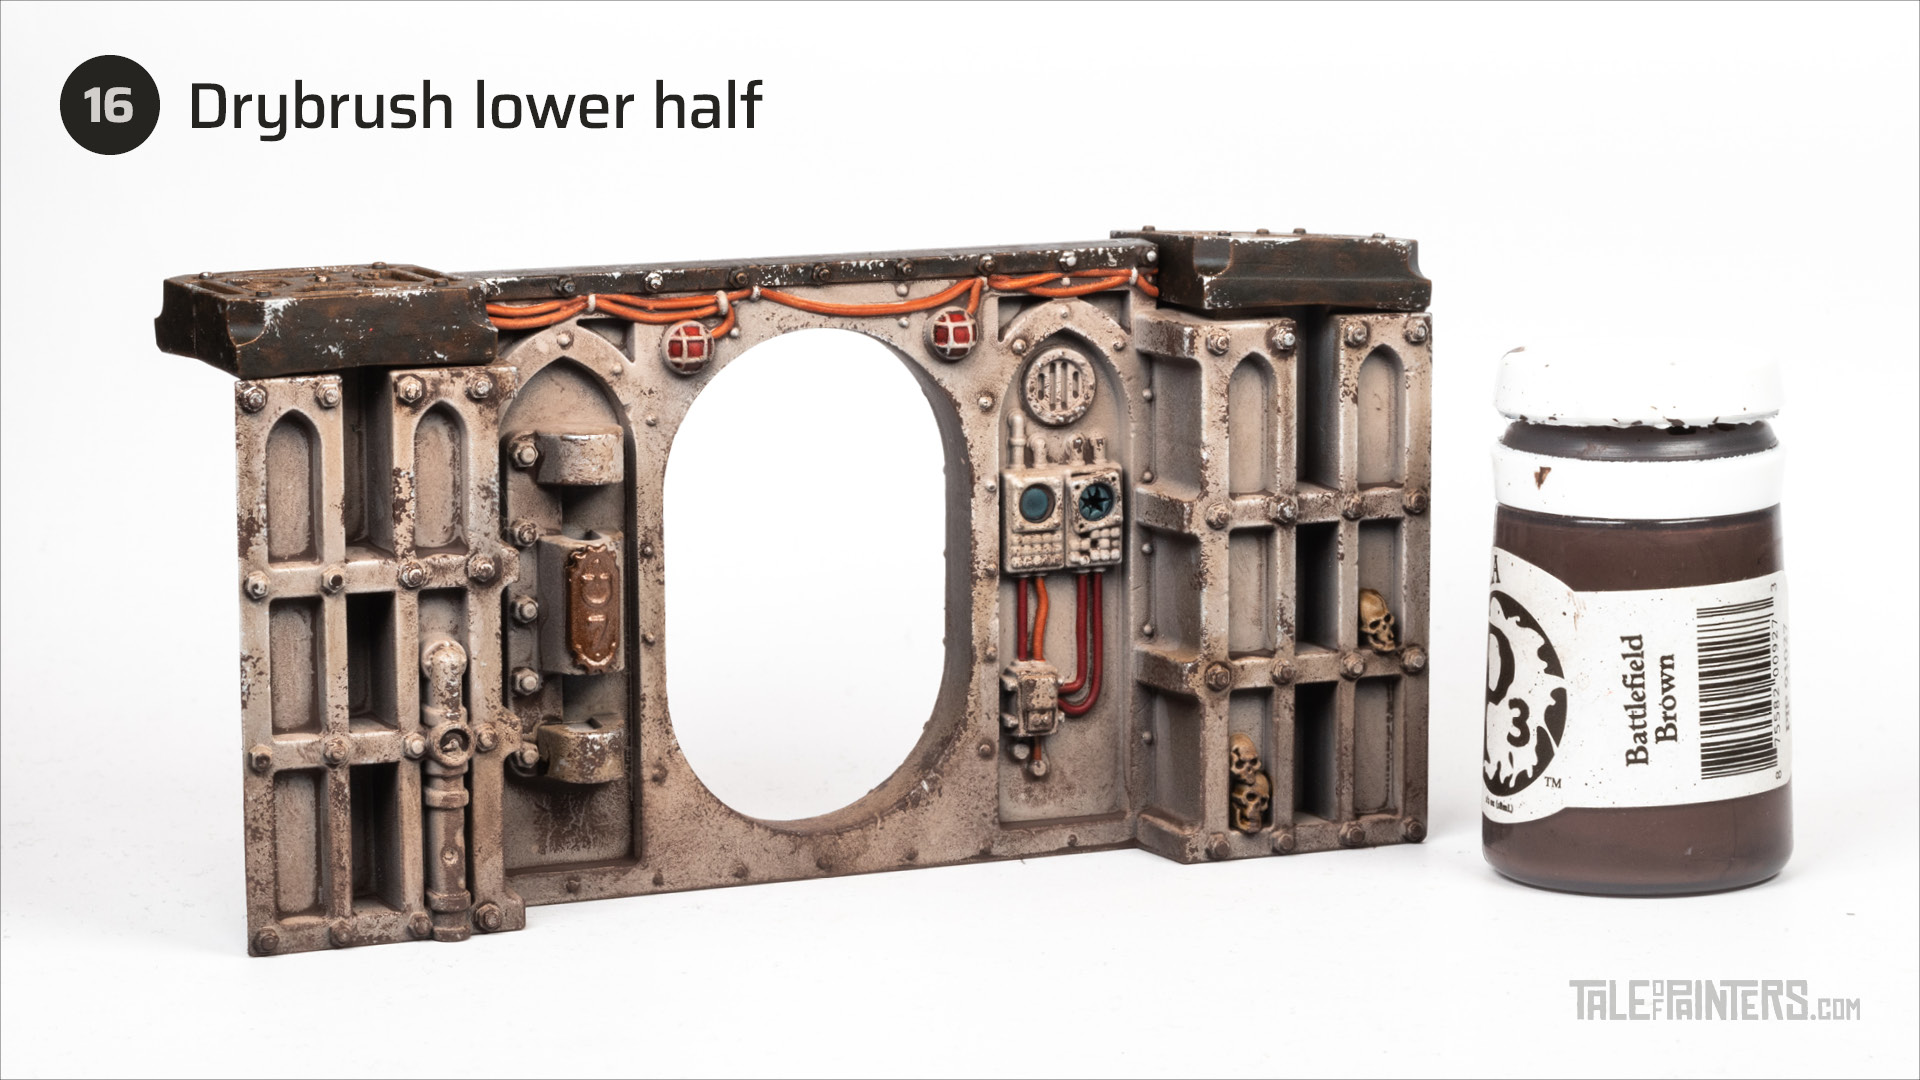

Drybrush the lower half of the Gallowdark terrain pieces with P3 Battlefield Brown [or Dryad Bark], concentrating on the bottom of the walls to create a subtle brown gradient.
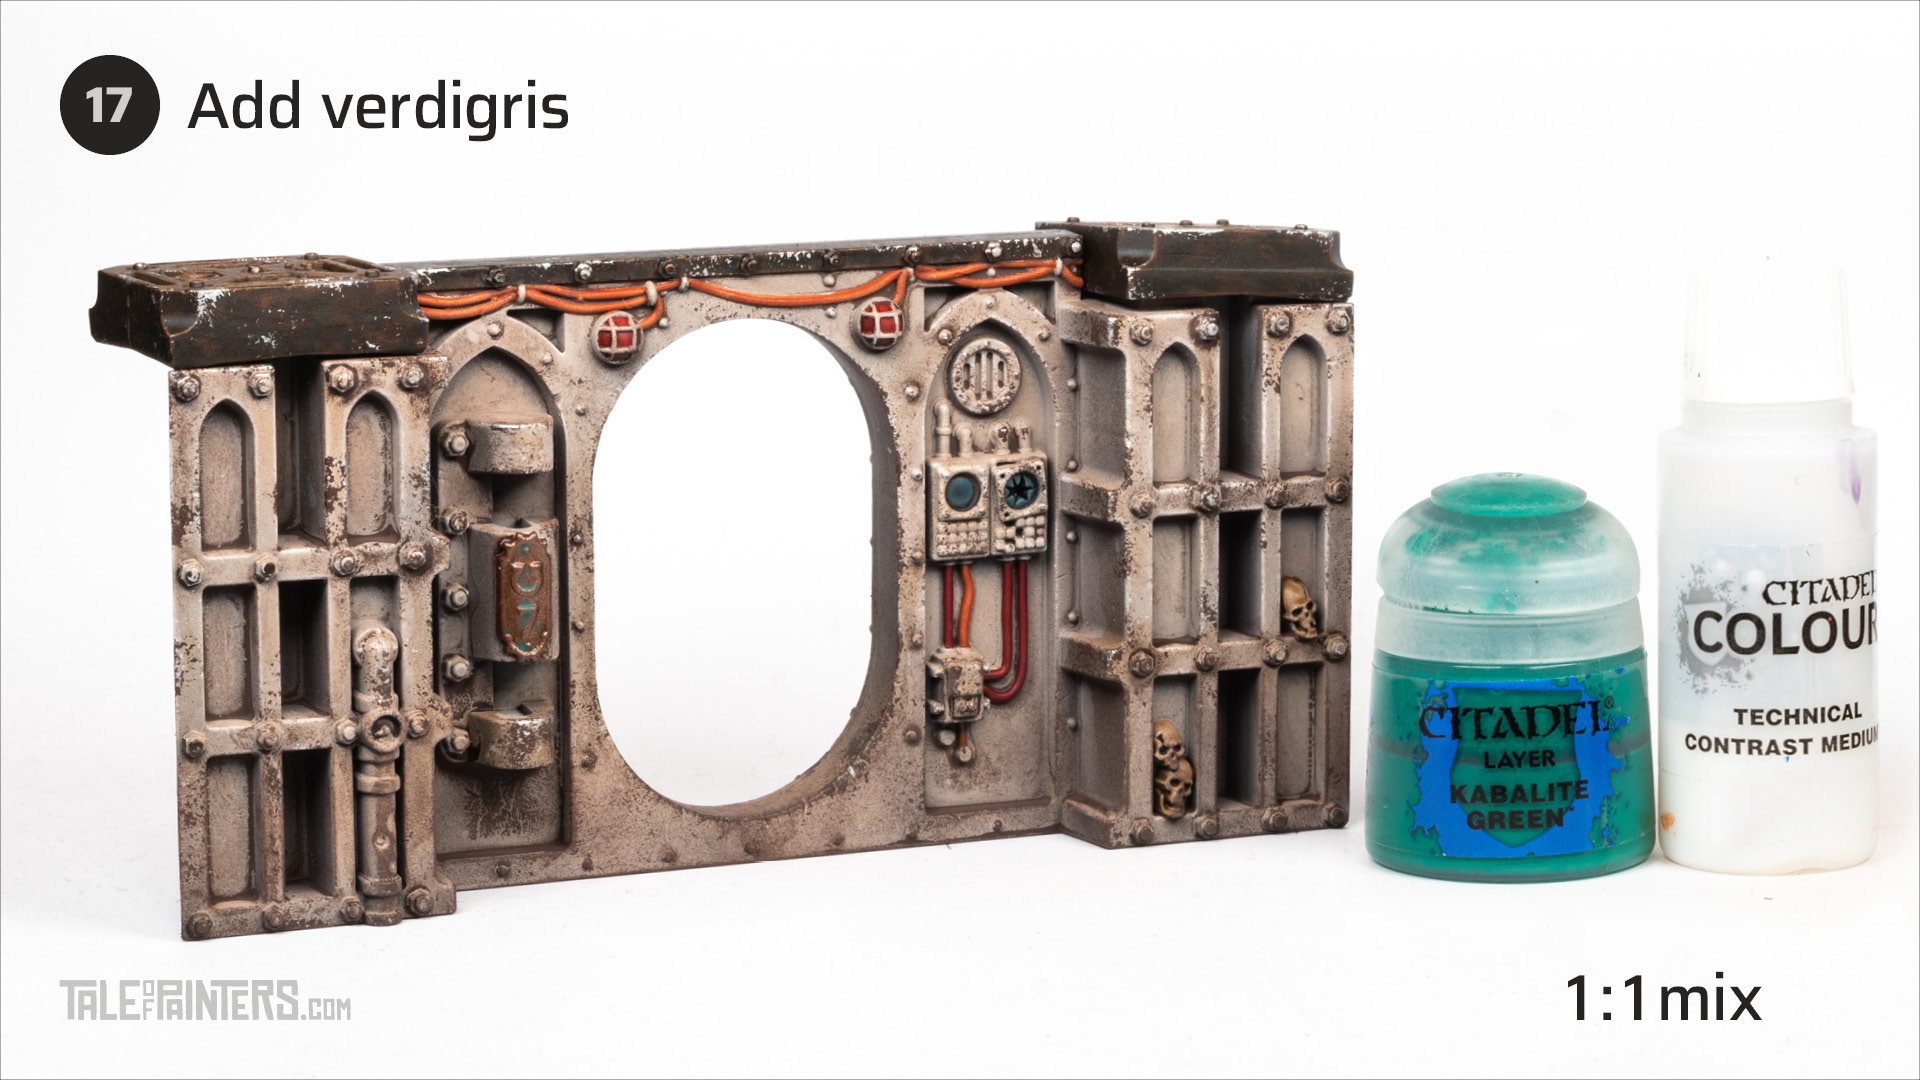

Mix Kabalite Green 1:1 with Contrast Medium and add a verdigris effect by applying this mix around the rivets and details of the Mechanicus plaques.
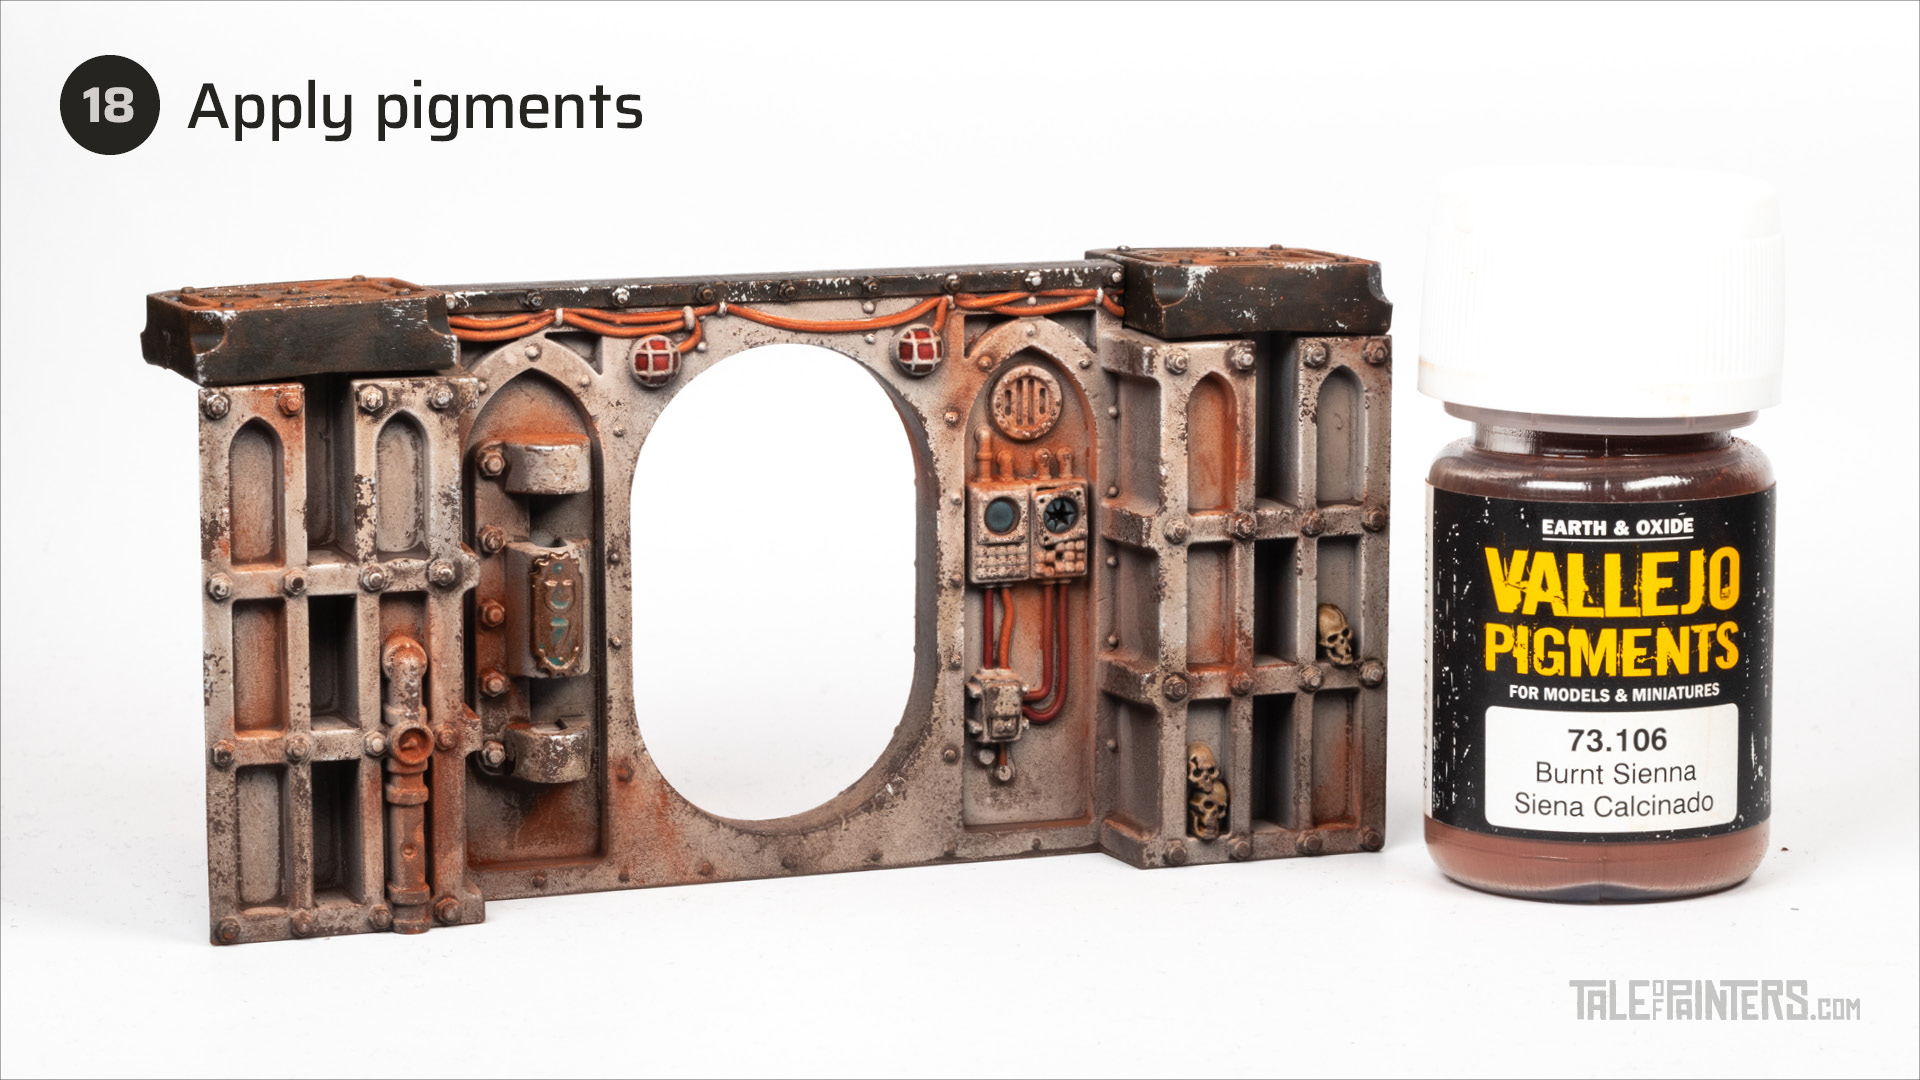

Generously apply Vallejo Pigments Burnt Sienna to the recesses of the Space Hulk walls, using an old brush to smear it around to create natural gradients.
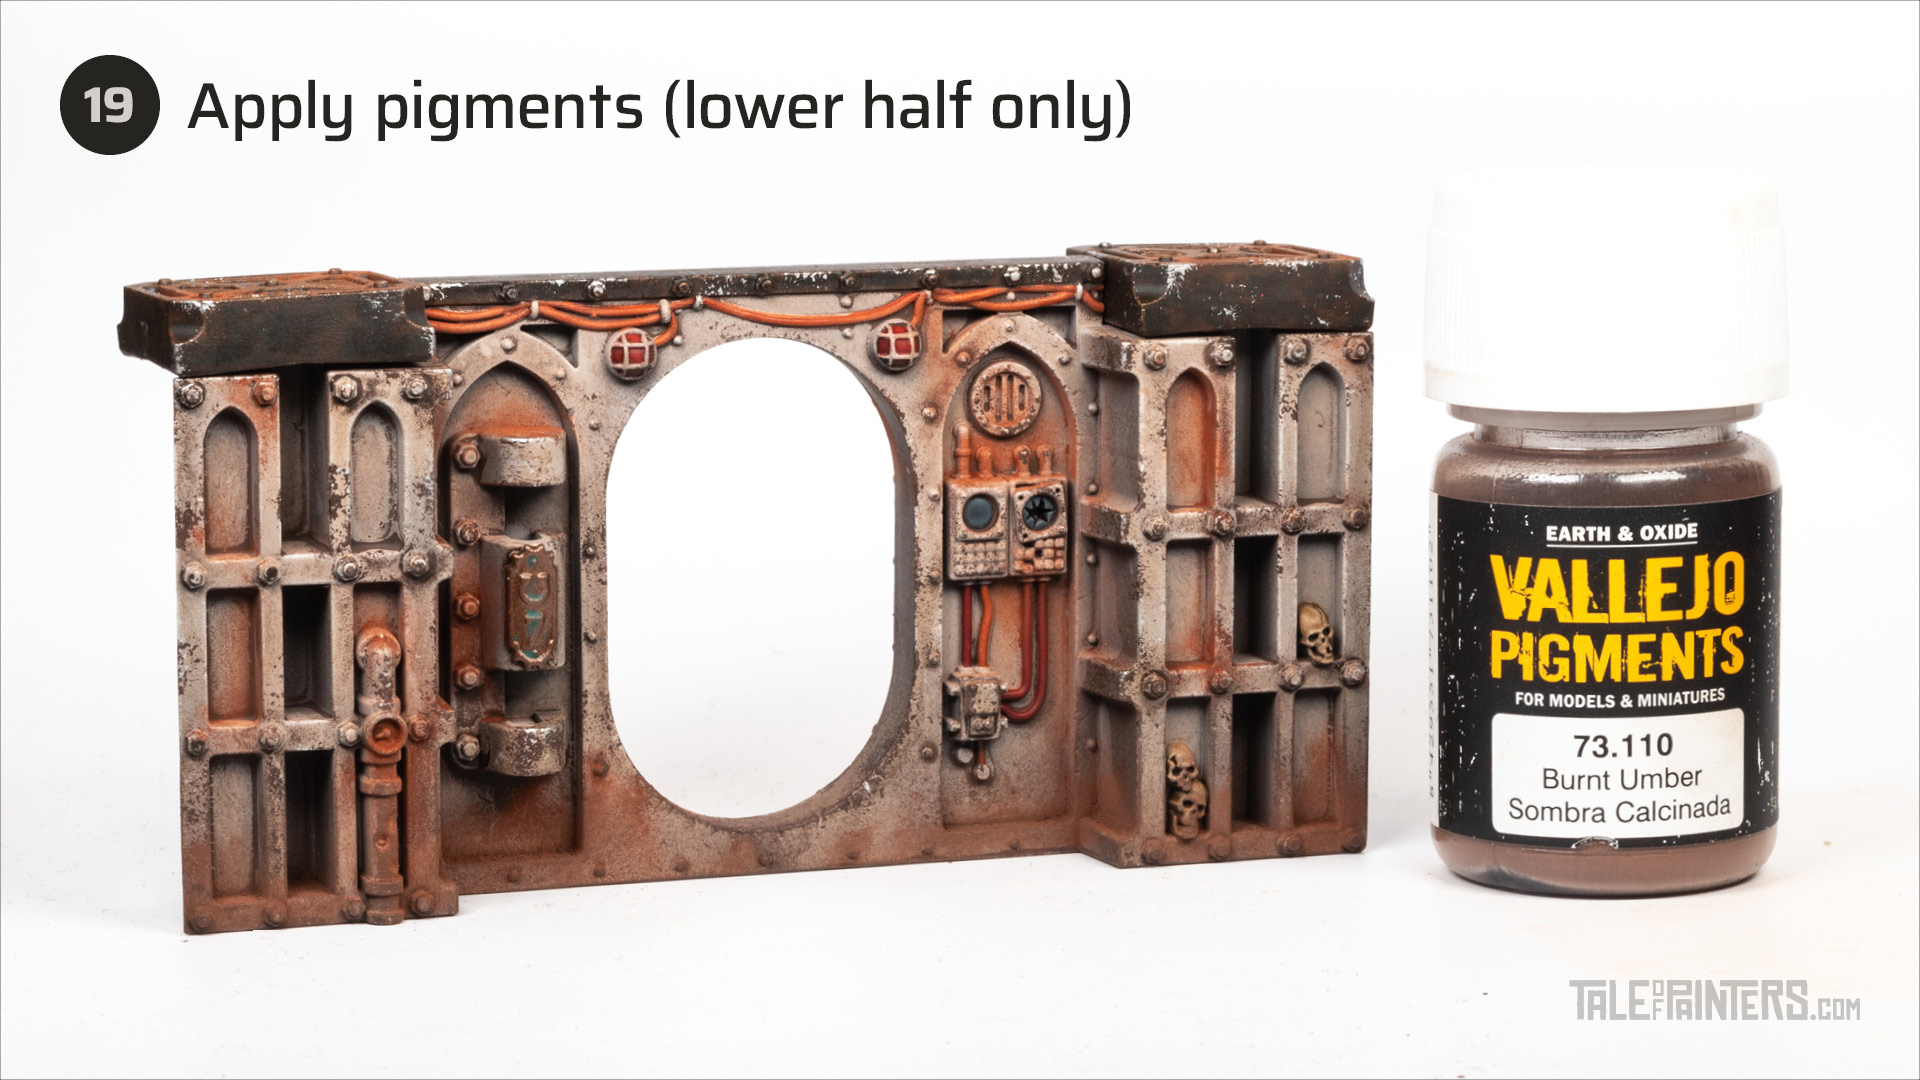

Next, work some Vallejo Pigments Burnt Umber into the model, concentrating on the lower half of the walls to emphasize the brown gradient created in step 16.
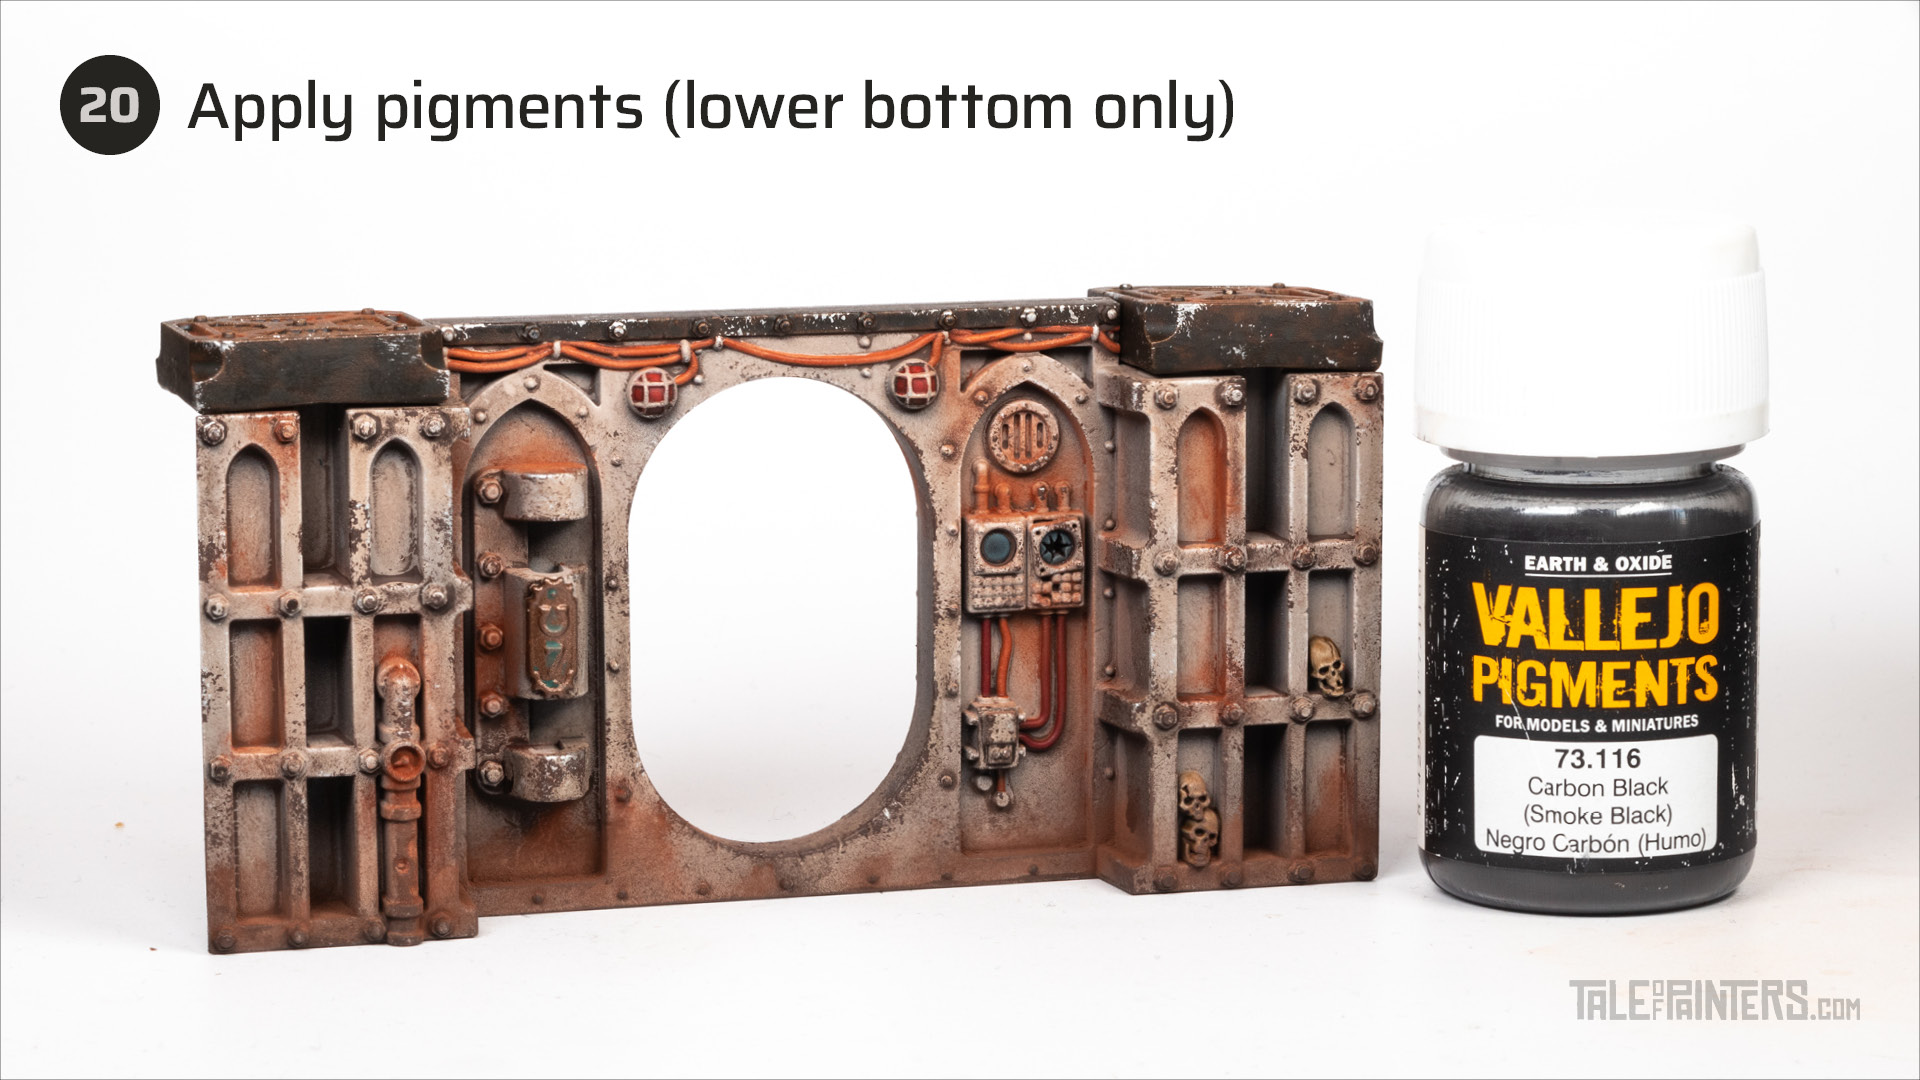

Finally, blend some Vallejo Pigments Carbon Black into the lower edges of the walls to darken them further.
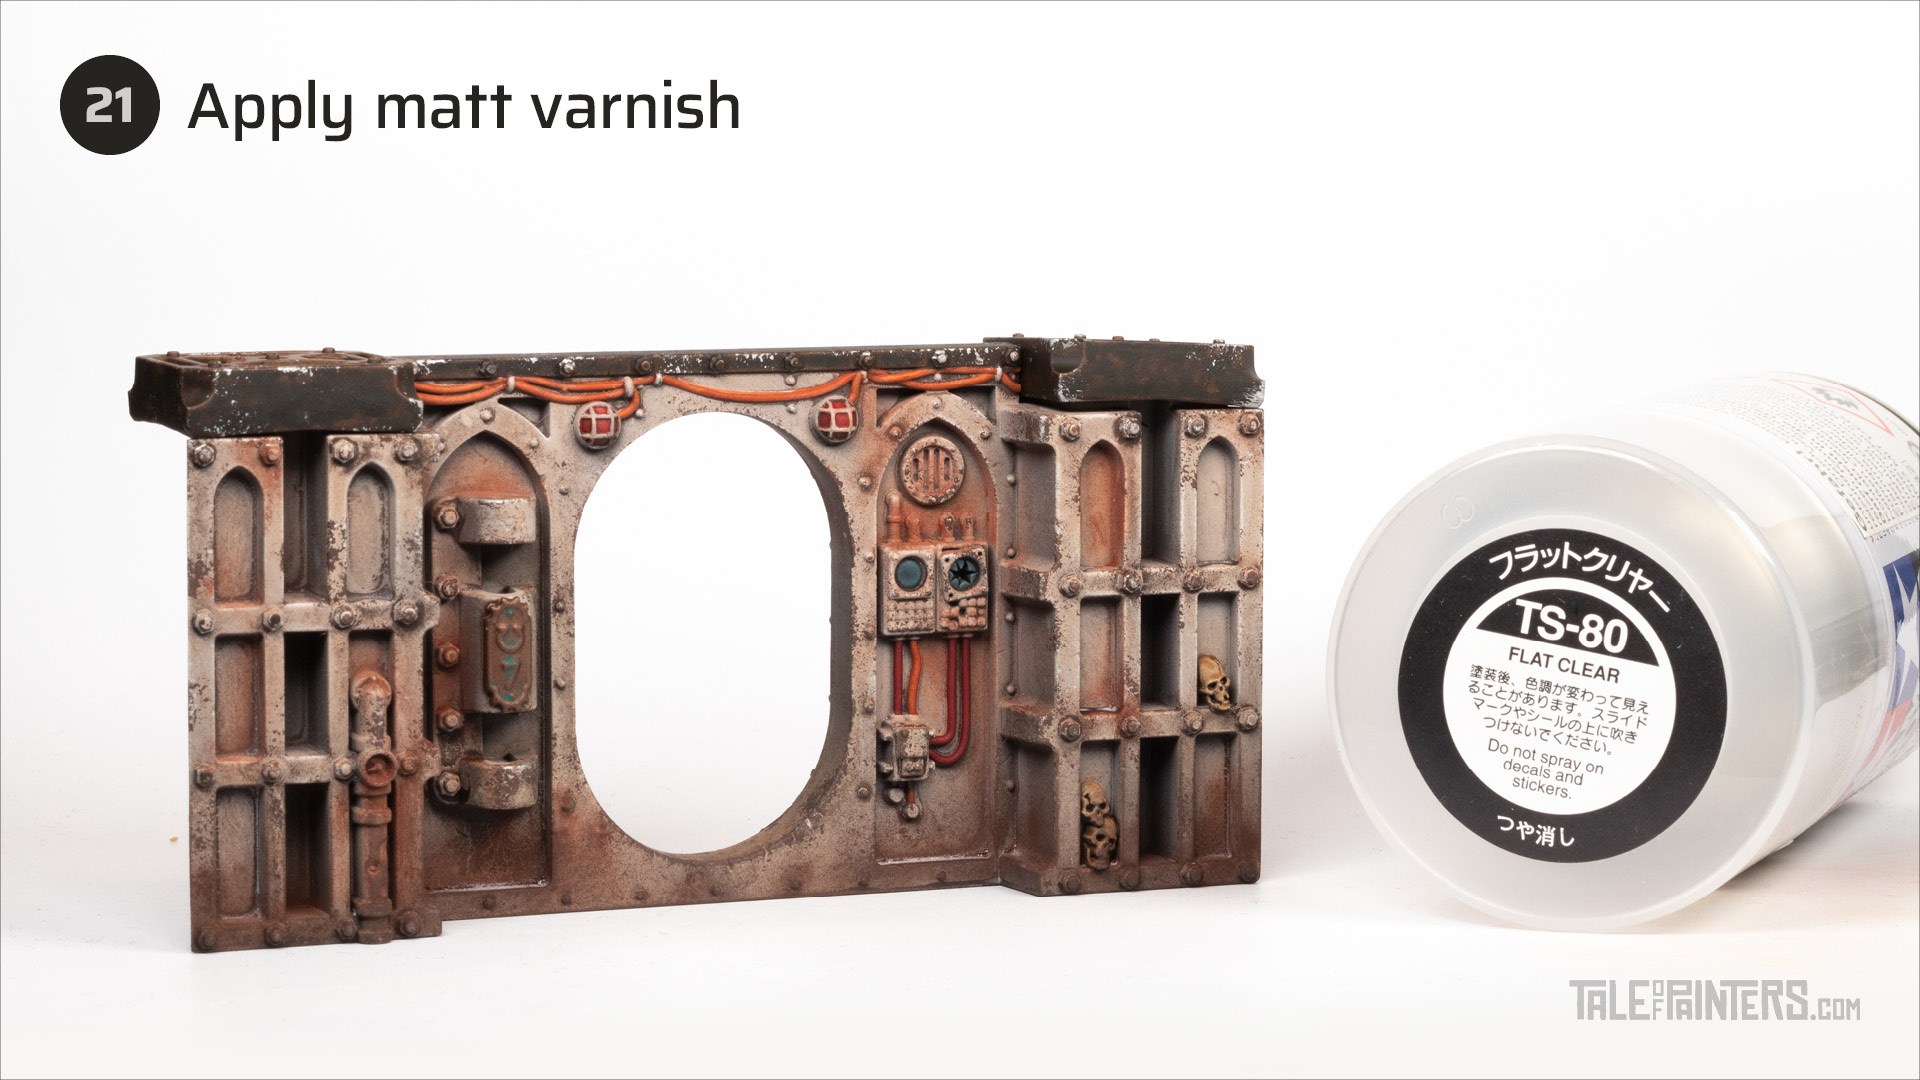

To seal the pigments in place, apply a coat of matt varnish.
For a super matt effect, I used Tamiya TS-80 Flat Clear spray varnish, but as you can see, the varnish reacted with the oil paint and whitened where a lot of oil paint has gathered. I’ll figure out the best way to avoid this, but until then, I would recommend applying a coat of water-based acrylic varnish with an airbrush instead. A while ago I compiled a list of my favourite matt varnishes (spray, airbrush & brush-on) for every budget, check it out here.
Finished terrain piece & paint list


Here you can see the finished Gallowdark Space Hulk terrain piece from Kill Team: Into the Dark. The yellow details on the scatter terrain were painted with a 1:1 mix of Ironjawz Yellow and Nazdreg Yellow, after I established the zenithal basecoat in steps 1 and 2. Then I weathered them in the same way as the walls.
The tutorial shown here can of course be adapted to almost all Warhammer 40,000 terrain pieces. If you need more inspiration for painting your terrain collection, check out this tutorial:
Learn more about the Gallowdark terrain in my Kill Team: Into the Dark review. I also have precise measurements of all wall and pillar elements there, as well as a comparison with other Games Workshop terrain pieces:
At the time of writing, Kill Team: Into the Dark box set should still be available from our partner stores Wayland Games, Element Games and Taschengelddieb, with a welcome discount of up to 20%:
Paints you will need for this tutorial:
Citadel (Games Workshop)
Kabalite Green
Castellax Bronze
Seraphim Sepia
Drakenhof Nightshade
Garaghak’s Sewer (Contrast)
Nighthaunt Gloom (Contrast)
Skeleton Horde (Contrast)
Gryph-hound Orange (Contrast)
Blood Angels Red (Contrast)
Flesh Tearers Red (Contrast)
Contrast Medium
Formula P3
Battlefield Brown [or Pallid Wych Flesh]
Reaper Master Series
RMS Leather White [or Pallid Wych Flesh]
The Army Painter Warpaints
Gnome Cheeks Air [or Rakarth Flesh]
Vallejo Model Air
Steel [or Stormhost Silver]
Colour Forge
Hyrax Brown primer [or Oak Brown Colour Primer from The Army Painter or Rhinox Hide]
Other
Abteilung 502 Bitume oil paint
AK Interactive Odorless Thinner
Vallejo Pigments Burnt Sienna
Vallejo Pigments Burnt Umber
Vallejo Pigments Carbon Black
If you need to expand your paint collection to follow the tutorial, check out our partner stores Wayland Games and Element Games, which offer an amazing range of paints at a discount.
Hope you enjoyed this tutorial. If so, leave a comment or reaction below, and if you got any questions, leave them here so I can answer them for you.


could the oil wash be ghe last and final step?
cuz im wondering if i can prepare the model all the way to the end. varnish, then apply the oil wash at the end to avoid the wierd interaction the oil has with it?
Another great substitution is Rustoleum Satin Protective Enamel spraypaint in Driftwood color in place of the Gnome Cheeks. It’s virtually an identical color match.
https://www.amazon.com/Rust-Oleum-365143-Stops-Spray-Driftwood/dp/B08TTCPV3S
A great, inexpensive substitute for the primer is Rust-Oleum Camouflage spray paint in Earth Brown. Less than $7 a can and matches Rhinox Hide perfectly.