
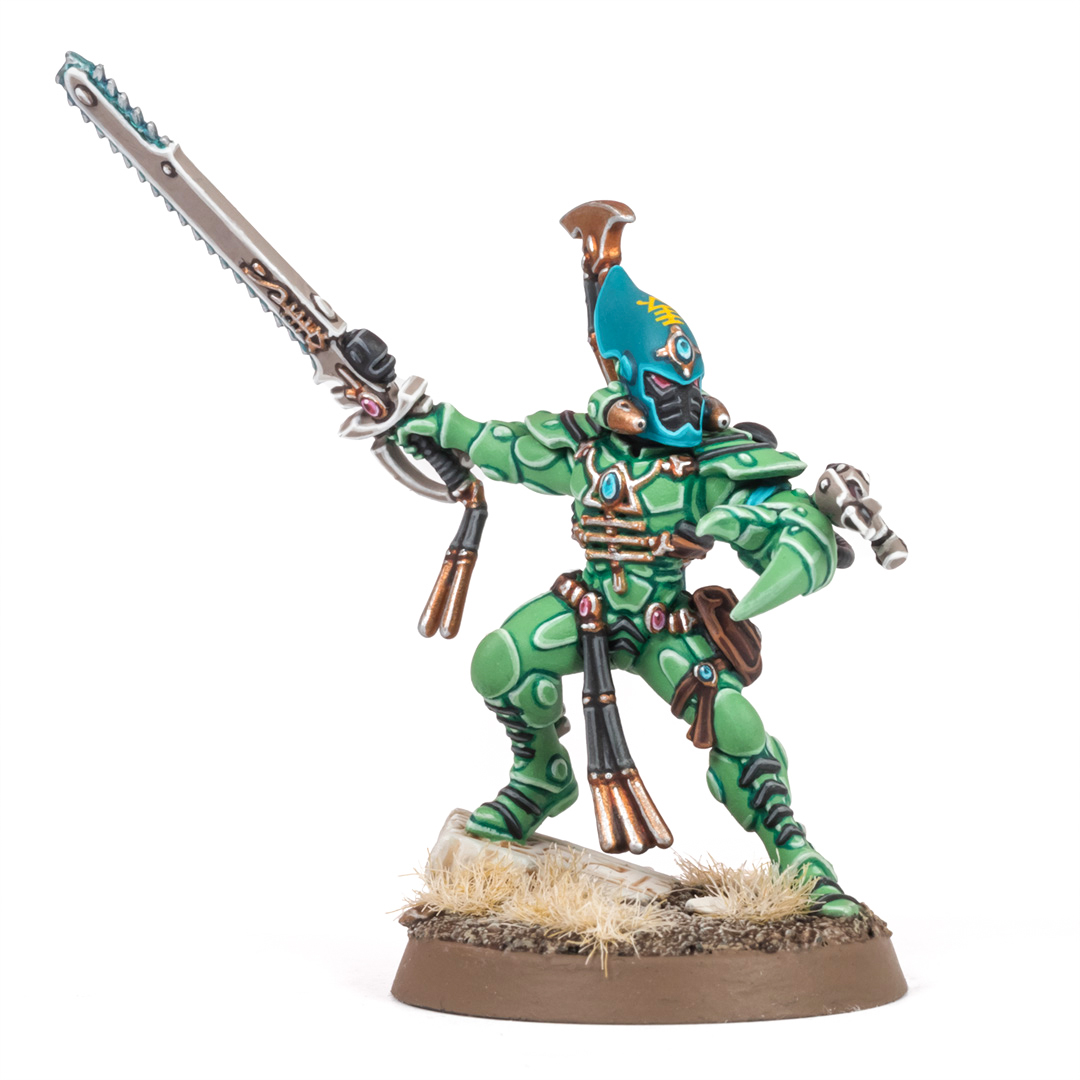
Do you think of getting started with Warpaints Fanatic? In this video, I’m going to paint a Striking Scorpion Exarch from start to finish using only Fanatic paints from The Army Painter, and I’ll share all of my findings and issues along the way, so you can find out if these are the right paints for you.
Usually, I make sure that my paint reviews are as balanced and unbiased as humanly possible. The following video will be a more personal affair, I’m just going to paint a miniature from start to finish with the new Warpaints Fanatic and tell you unfiltered what I like and what I don’t like so you can draw your own conclusions. By the way, I’m not part of The Army Painter’s Factory Team or part of their social media bubble. I received these paints for free as samples, like most of the paints I review for Tale of Painters, but I don’t take any payment and I don’t give companies any say in what videos and content I make. I painted this model purely for research because as I regularly test paints on YouTube I need to gain practical experience with each range.
For priming, I just used a dark green spray primer, it’s a thin coat of Renegade Green that I had leftover from my review of Colour Forge’s primers. A lighter green would have been better, for example, Sick Green from the Vallejo Hobby Paint range. The Army Painter also has several green Colour Primers, but I’ve had recurring issues with clogged nozzles and cans losing their pressure, so I can’t recommend them anymore. I hope they’ll upgrade their primers just like they did with their Warpaints range.
As you can see in the video I applied the primer quite thinly because I planned to basecoat the model with an airbrush to test how Warpaints Fanatic behave. Let’s see how that goes.
ToP Tip 1 – Airbrushing with Warpaints Fanatic
As I’ve mentioned in my Warpaints Fanatic review, most of the colours are rather thick, and you have to add quite a bit of thinner to make them flow well through the airbrush. I used Vallejo Thinner, but The Army Painter also has its own airbrush thinner. As a rule of thumb, it’s always a good idea to stick to the same brand as the paints you want to dilute.
In my first attempt, the paint was too thin, as you can see in the video. In my next attempt, it was too thick, and I got these ugly splatters. However, once I found the right ratio of paint and thinner, which was around 2 to 3 parts of thinner and 1 part of paint, Warpaints Fanatic sprayed well. I’m using Wild Green from the Deep Green triad here which is the perfect base colour for the Striking Scorpion paint scheme I had in mind. I could also have applied this as a zenithal gradient over the dark green primer, but I wanted the classic flat Games Workshop look.
So here comes the first thing I’ve learned: Yes, you can airbrush with Warpaints Fanatic, but it requires some experience. If you’re more of a beginner, or are more of a brush painter like me and don’t get out the airbrush that often, pre-thinned airbrush paints like Warpaints Air or Game Color Air from Vallejo will make your life much easier. Since I started using these paints, I’ve been able to reduce the number of blockages and clogs by about 90%. Feel free to let me know in the comments whether I should make a video/review about Airbrush paints.
Now, with the airbrushing done, I started painting the base. I always drybrush the base at the beginning, not the end, because I don’t want to accidentally hit the feet of my completed paint jobs with stray pigments. For shading the rocks, I used Light Tone Wash, and for the sand, Strong Tone Wash, which I diluted with a bit of Fanatic Wash Medium. My Wash Medium had sediments in the bottle, a bit like cloudy apple juice, but once dried, I didn’t notice anything unusual. But you should keep an eye on this and use a different medium if necessary. In fact, Contrast Medium is my favourite medium for thinning washes and One Coat paints, but it’s quite expensive. I found that Dispel Magic from Scale 75 is a good and affordable alternative.
ToP Tip 2 – The flexible triad system
With the base done, I wanted to pick the colours for highlighting and shading the Exarch’s suit, the largest part of the model. It’s always a good idea to work from the inside out and from the largest areas to the smallest details. I wanted to be guided by the flexible triad system, so for the highlights, I went one step lighter than my base colour Wild Green, which was Ferocious Green. For the shadows, I tried the darkest green of the triad, Angel Green. It was serviceable, but not quite what I had in mind because I wanted to lean into the cool green hue of the armour with a teal. So next, I tried the darker greens from the teal triad, but they were too muted for my taste.
Ultimately, I used Speedpaints for shading, namely a mix of Shamrock Green and Raging Sea. To be honest, I could have just used Aeldari Emerald Contrast paint, but because I said I wanted to use only Warpaints Fanatic, I decided to stick to Army Painter products for this video, and mixed a similar emerald colour with Speedpaints.
Last but not least, I needed an even brighter green than Ferocious Green for the second edge highlight, but in the Deep Green triad this was already the brightest colour. So I looked around the other triads and found Mossy Green, the brightest colour in the Desaturated Cool Green triad.
So, despite wanting to follow the flexible triad system for the green Aspect Warrior suits, in the end, I had to combine colours from more than one triad and even Speedpaint to achieve the desired result. In fact, in my Warpaints Fanatic review, I pointed out that not all of the triads are laid out in the same way. Some cover all tones from light to dark in evenly spaced increments, others lean more towards the brighter side. To help you navigate the Warpaints Fanatic range, I’ve hand-painted all 216 colours on plasticard and photographed them professionally:

This hand-painted swatch is available in my Patreon shop for a small donation (or by becoming an Autarch tier member). I also have swatches for Citadel Colour, Vallejo Game Color, AK 3rd Gen, and Two Thin Coats – all cross-compatible with each other so you can compare colours across different brands. Check out my shop for details.
So, this is my advice number two: See the flexible triad system more as a starting point, and don’t be shy to combine colours from various triads or your existing collection.
ToP Tip 3 – Thinning Fanatic paints
Now that the colours for the armour have been selected, it was time to put those shadows and highlights on the model. I panel-lined the Exarch with my Speedpaint mix and tidied up the armour with the Wild Green base colour. For the first highlight, I applied Ferocious Green to the edges of the suit, and I must say, Warpaints Fanatic made that harder than I thought.
As mentioned earlier, most Fanatic paints are relatively thick and need to be thinned with water to flow well from the brush without smudging details. Additionally, while the drying time is a bit longer than that of Citadel Colours and the old Warpaints, it’s definitely not as long as that of the paints I use most of the time these days, which are Two Thin Coats, Pro Acryl and the new Vallejo Game Color. In fact, for some reason, Fanatic paints tend to thicken relatively quickly, even on a wet palette, as you can see in the video.
This meant that highlighting required some practice, as I always had to keep an eye on the flow of the paint to achieve smooth and sharp highlights. In addition to that, I also noticed that some of the lighter colours, such as Ferocious Green, tend to break apart quickly when thinned. I have illustrated this on a test model in the video.
So I found highlighting with Warpaints Fanatic initially frustrating. Fortunately, there is a solution: the Warpaint Stabilizer Medium. Unlike many other acrylic mediums, the Stabilizer is completely transparent and also quite thin. When I used it for dilution instead of water, not only did the flow properties improve, but the drying time and thus the working time became also a bit longer. With this, layering and highlighting became much easier for me.
So, this is number 3: If you want to unlock the full potential of Warpaints Fanatic, be sure to get a bottle of Stabilizer Medium. It’s also the perfect companion for glazing.
Just to be clear though: Not all colours pose the same problems when diluted, it seems to affect merely the lighter colours with lower opacity. Here you can see Mossy Green, which is my second highlight colour, for which I also used a little bit of Stabilizer Medium to improve the flow. But for the lighter colours from the teal triad, like Hydra Turquoise and Neptune Glow, which I used for highlighting the helmet, plain water was perfectly fine. Don’t get me wrong, I think a lot of people will be very happy with these paints.
ToP Tip 4 – Colour matching Warpaints Fanatic
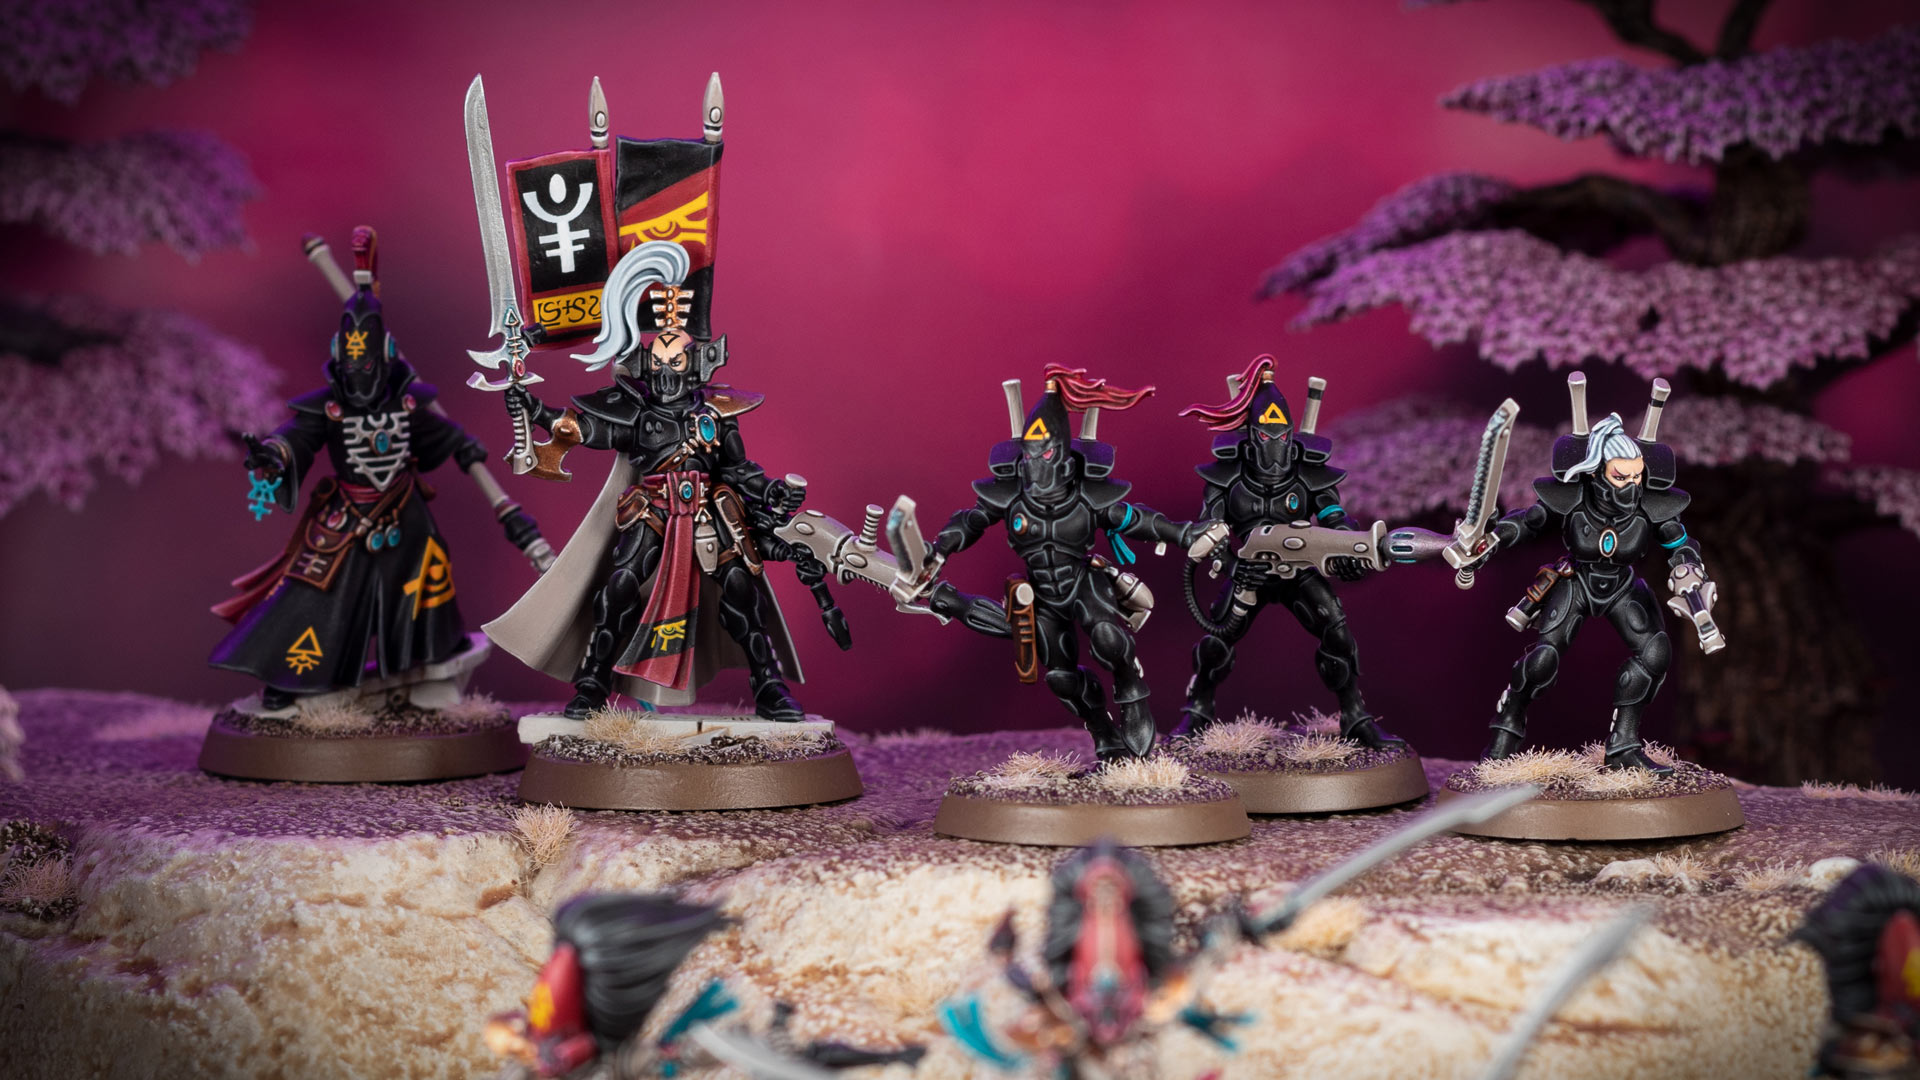
So after getting a handle on my dilution issues, I proceeded to work through the various details of the model. I wanted the Striking Scorpions to be part of my existing Ulthwé and Craftworld Iybraesil collection. I painted all these models way before the release of Warpaints Fanatic, using a wild mix of different paint ranges, including Citadel, Vallejo, and old Warpaints. But for this video, I wanted to try replicating my existing colour palette using Warpaints Fanatic only. After all, the Fanatic range has 216 colours, so there should be plenty of options, right?
Well, yes and no. While I found replacements for most of the colours I used in my original paint scheme, there were three or four that posed a bit of a challenge: Rakarth Flesh, Deathclaw Brown, the old Vermin Brown, and to some extent, Doombull Brown, all from Games Workshop.
Warm, orange-brown tones are missing in the Fanatic Range; all the brown colours tend to be somewhat muted. Carnelian Skin was an acceptable match for Citadel’s Doombull Brown, my original base colour for the leather pouches and straps. However, to replace Vermin Brown and Deathclaw Brown, which I used for highlighting the leather, there was no way around mixing colours. For this, I lightened Carnelian Skin with successive amounts of Lava Orange, one of the lighter colours from the orange triad.
More challenging was finding a replacement for Rakarth Flesh, which I originally used for the wraithbone weapons. Rakarth Flesh has quite a unique shade, it’s a greyish beige with a hint of red. To concoct a matching hue from Warpaints Fanatic, I had to experiment quite a bit with various mixes. In the end, I came up with a mix of about 1 part of Obsidian Skin, 2 parts of Gargoyle Grey, and 2 parts of Command Khaki, which was quite a good match.
So, this is my finding number four: The Warpaints Fanatic range offers a broad selection of 216 colours. And yes, the colour palette covers all the corners you’d expect from a miniature paint range. It includes all primary colours like yellow, green, red, and blue, secondary and tertiary colours, metallics, washes, and so on. But in direct comparison, individual colours seem to be a bit different from most other ranges despite the wide selection. Especially the warm greys, bone colours, browns, and skin tones are quite different from, for example, their counterparts in the Citadel Colour range.
Because I know many of you are interested in transitioning to the Warpaints Fanatic range, I’ve started to make these hand-painted charts not only for Warpaints Fanatic, but all major paint ranges like Citadel and Game Color paints. As they are compatible with each other, they allow you to compare colours, convert your old paint schemes, or follow tutorials from White Dwarf or Games Workshop’s YouTube channel with non-Citadel paints. You can grab these on my Patreon.

This hand-painted swatch is available in my Patreon shop for a small donation (or by becoming an Autarch tier member). I also have swatches for AK 3rd Gen, Vallejo Game Color, Warpaints Fanatic, and Two Thin Coats – all cross-compatible with each other so you can compare colours across different brands. Check out my shop for details.
ToP Tip 5 – Fixing the finish
So, after some more work, this is what my Striking Scorpion Exarch looks like. I hope you enjoy my take on this iconic Aspect Warrior shrine, and if you’re interested, I also made a complete step-by-step-tutorial for this model.
In my Warpaints Fanatic review, I noted that the Fanatic range dries to a satin finish. The finish is slightly less glossy than the old Army Painter Warpaints, but not as matte as, for example, Vallejo Model Color or newer paint ranges like AK 3rd Gen, Two Thin Coats, Pro Acryl, or the new Vallejo Game Colors. I’d say they are equivalent to the finish of Citadel paints, so don’t throw these away, their finish complements the Fanatic range quite nicely. Matte paints are often less scratch-resistant because the resins used are less durable. Additionally, glossy paints and also varnishes are smoother on a microscopic level, providing less traction for abrasion.
As I read in the comments of my Fanatic review video over on my YouTube channel, many of you actually prefer a satin finish. Personally, the finish is not super important to me since I always varnish my models in the end, which changes the finish anyway. I do this not only for protection, but to unify the finishes of the various paint ranges I use, which may have different levels of mattness. However, I must say that I find matte paints more pleasant to work with while painting. This is maybe a YouTuber thing, but when I film for videos, I need very strong light sources, which can cause more distracting reflections with glossier paints. Especially when highlighting black, this can sometimes be challenging for my eyes. Do you also use a strong desk lamp and have ever noticed this, or is it just me?
And if you want to know how to find the perfect matte varnish that truly leaves your miniatures matte without ruining them with a cloudy or frosty finish, then be sure to check out this post:
Let me know about your thoughts and experiences with the Warpaints Fanatic range below. See you soon, and happy hobbying!
Tale of Painters is the unofficial Warhammer hobby magazine run by hobbyists like you. Support our work by using the affiliate links from our partner stores for your next orders so we can continue to bring you fantastic FREE content every day:


![]()
![]()
Or support us directly:


