
In this tutorial I’ll show you how I paint the iconic purple-grey white of my Nighthaunt models. Using an airbrush and zenithal layers, the whole process is super quick and gives a wonderfully three-dimensional finish. After all, being Nagash’s thrall for all eternity is one thing – painting an army for all eternity is quite another.
This tutorial assumes that you are familiar with the fundamental techniques of painting Warhammer miniatures. I will guide you step-by-step through the paints and techniques I utilized. Since my paint collection is quite varied, I will offer suitable alternatives from the current Citadel paint range [in brackets] whenever I use a paint that is not from Games Workshop or is out of production. However, if your goal is to replicate the exact outcome displayed, I suggest expanding your paint collection.
You’ll find a list of all the paints used in this tutorial at the end of the post.

How to paint purple Nighthaunt
Airbrushing & base
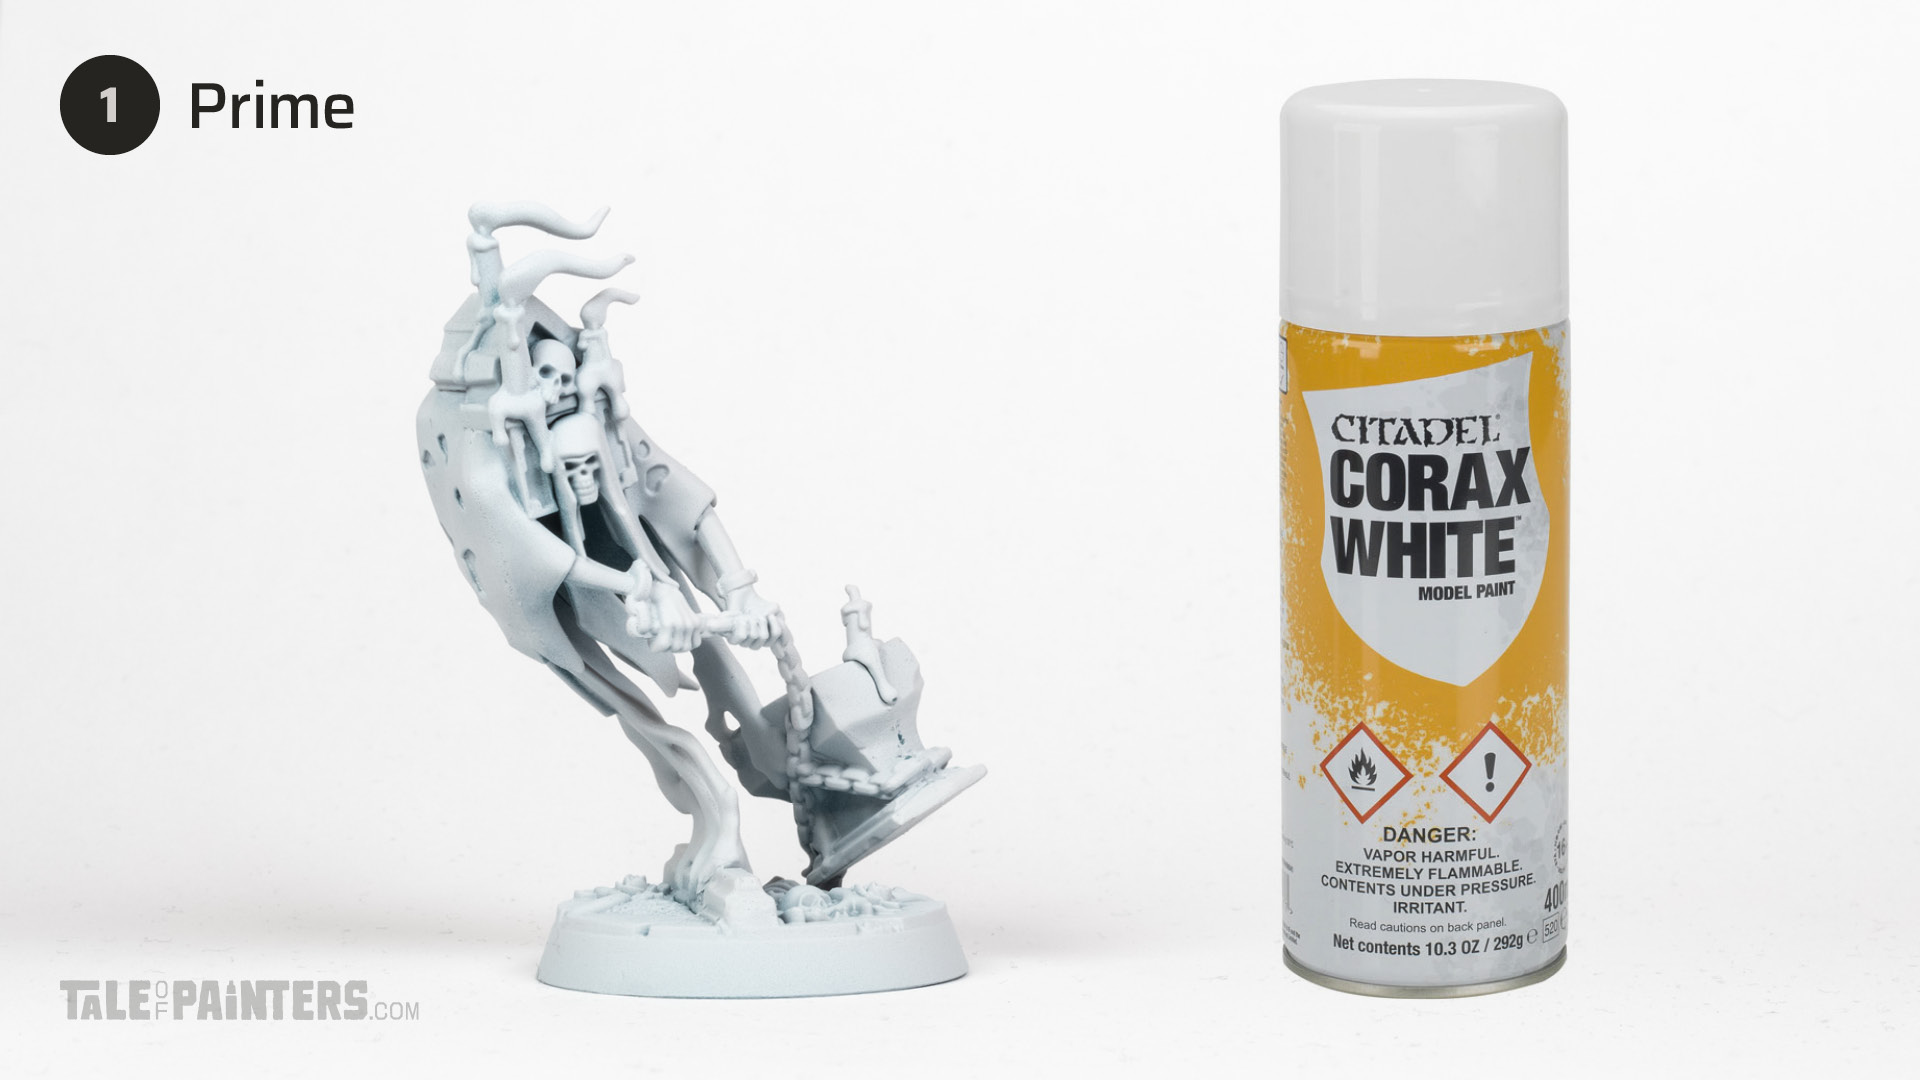
After assembling the model begin by priming the model(s) with Corax White spray (it’s OOP by now, you can also use White Scar or a light grey primer like Grey Seer).
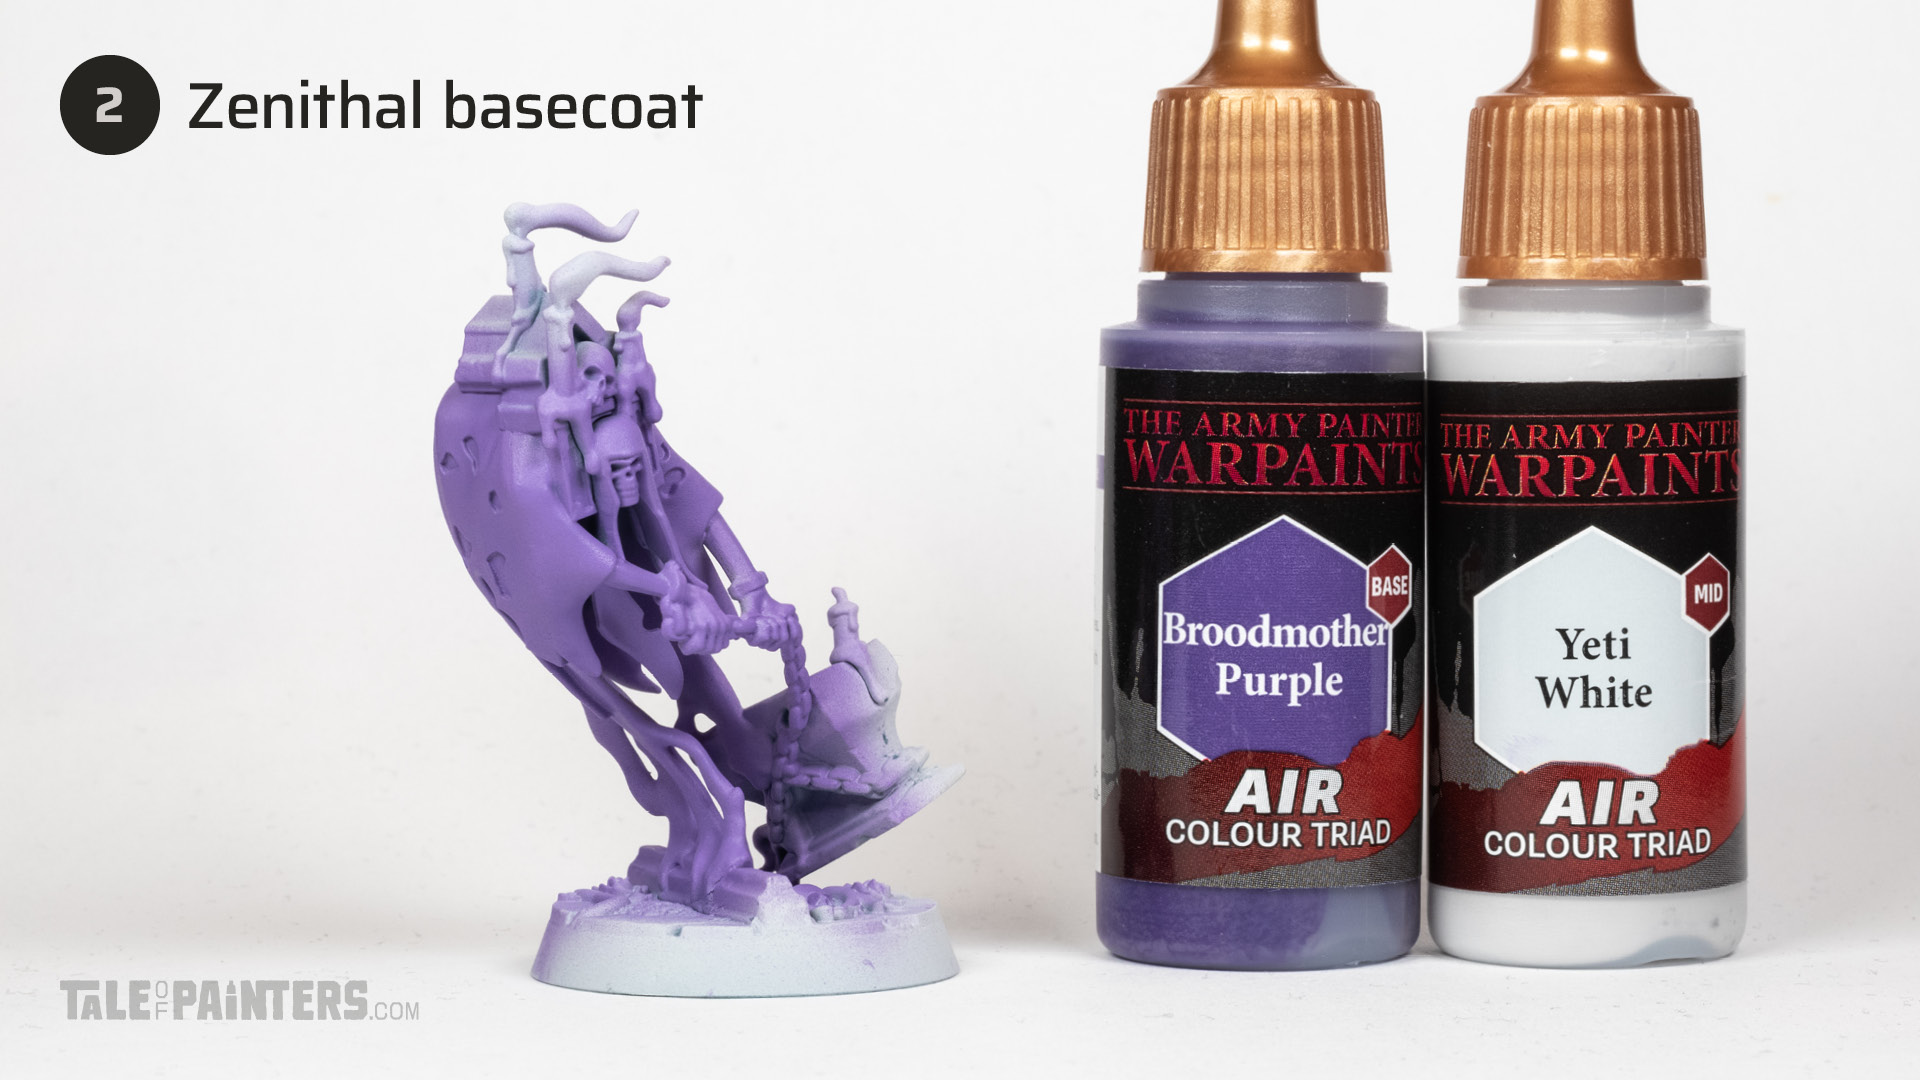
With an airbrush, basecoat the spectral bodies with an approx. mix of 2 parts Warpaints Air Broodmother Purple and 1 part WPA Yeti White.
You could also just use Warpaints Air Alien Purple and skip the mixing, but I decided to mix a custom colour to come as close to my original paint scheme which I created before Warpaints Air were released. The mix is supposed to match Purple Worm from The Army Painters D&D range.

Apply a zenithal highlight of Warpaints Air Yeti White, by spraying at an angle of approx. 45°.

Paint the sandy texture on the base with Mechanicus Standard Grey.
The Nighthaunt models from the Warhammer Underworlds warband The Headman’s Curse all come with scenic bases. In this tutorial I’ll take you through how I paint the dark green stonework, the same ruins carried on the back of The Bearer of the Block. You can find the full step-by-step in my XXL Nighthaunt tutorial on Patreon.
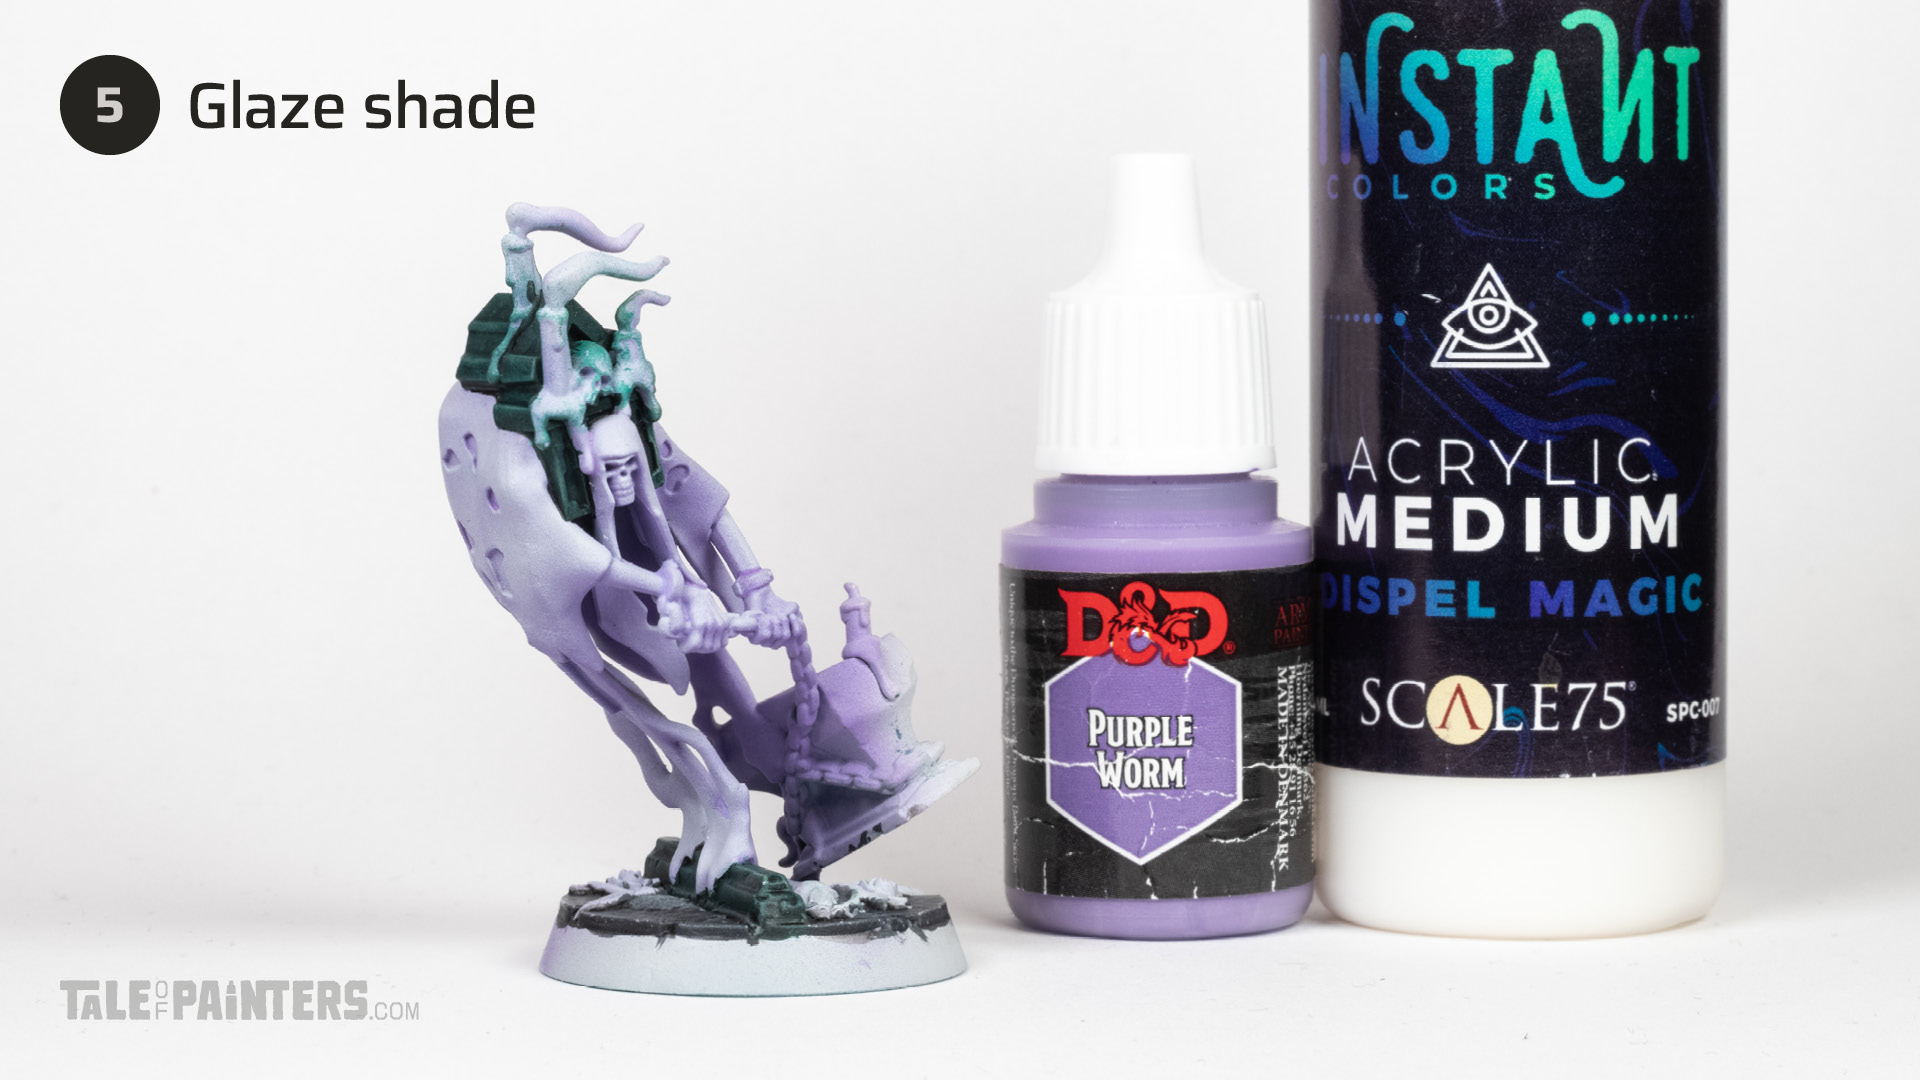
Thin Purple Worm from The Army Painter‘s D&D range [or a Naggaroth Night / Corax White mix] with Scale75 Dispel Magic medium [or Contrast Medium] to a glaze-like consistency. By building up multiple thin glazes, shade the recesses and folds on the top of the model.
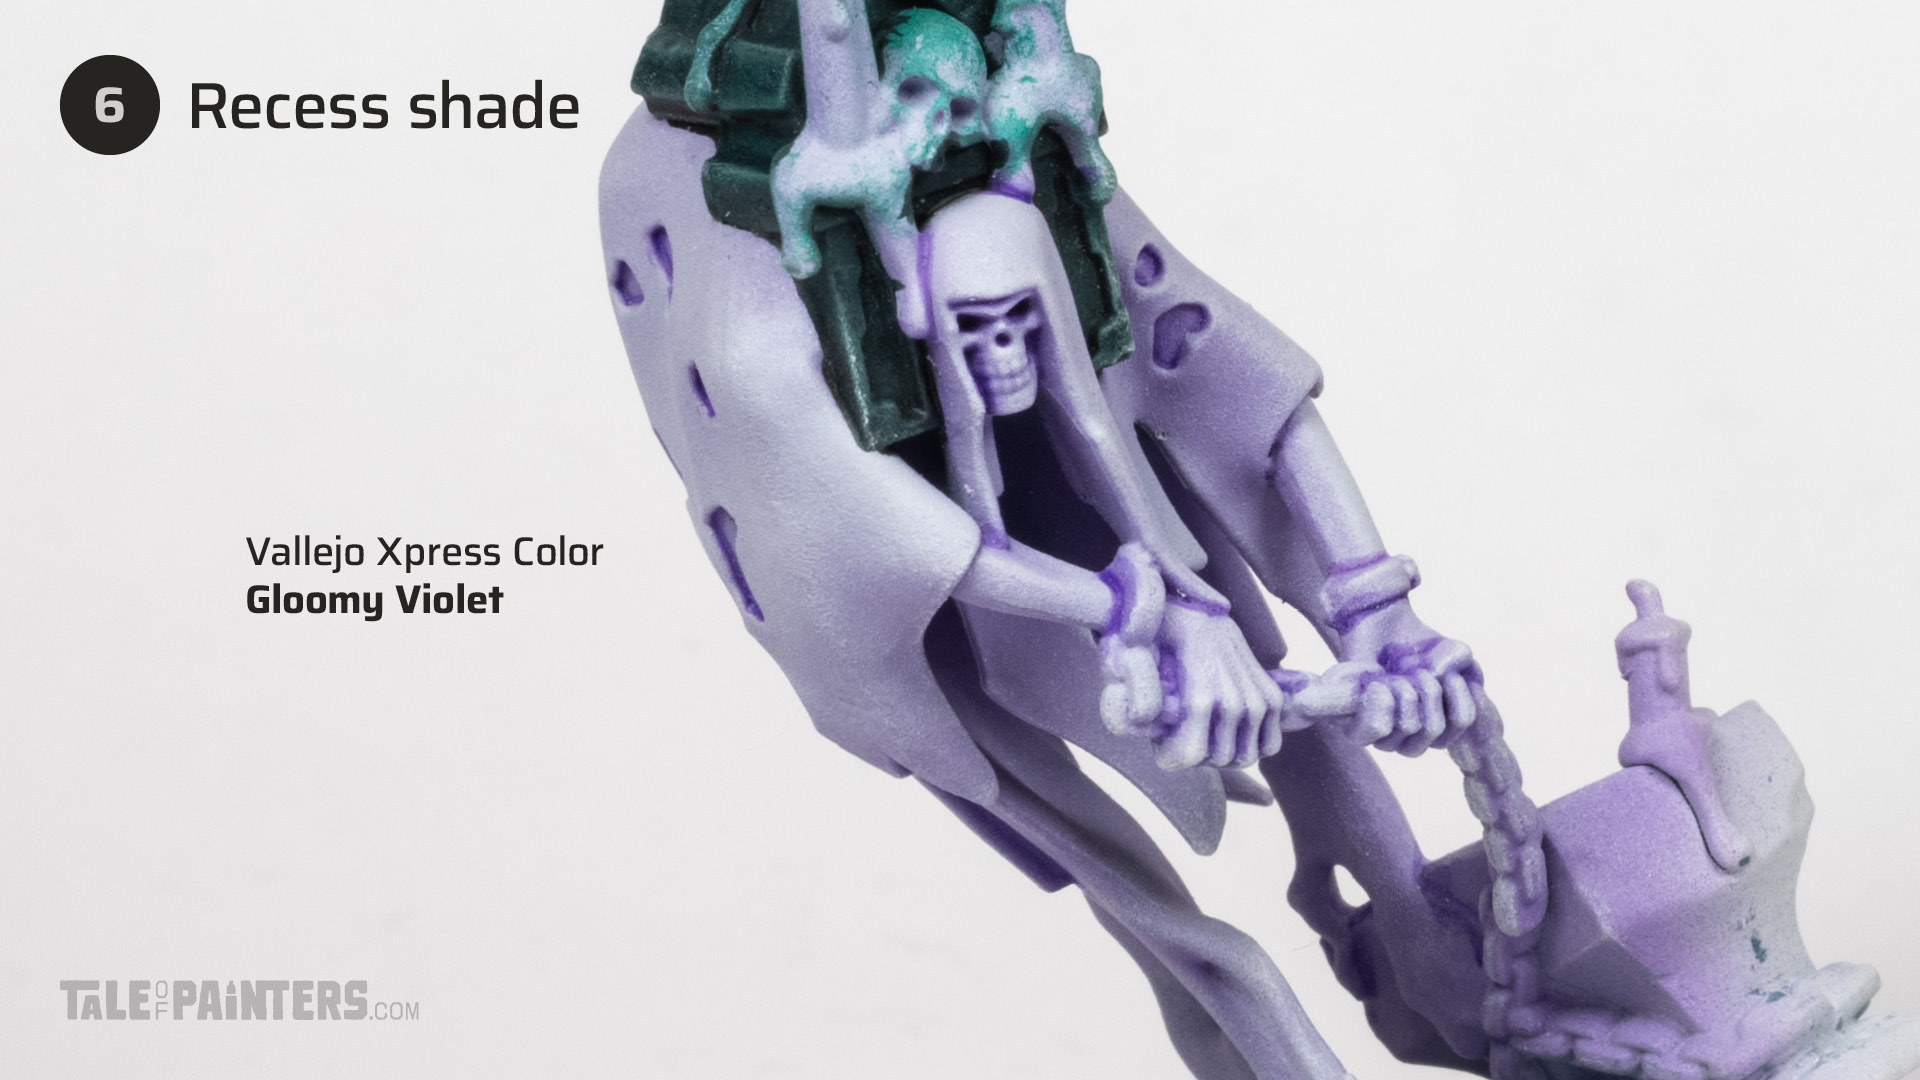
For more definition, thin Vallejo Xpress Color Gloomy Violet [or Leviathan Purple] with Contrast Medium and apply in the deepest folds and recesses, for example between the fingers, eye sockets, and where the different layers of robes meet, or where other objects such as chains meet the body.

Gently drybrush the model with Corax White. Use a soft round make-up brush. Focus on the underside of the model to add some more definition to the purple areas. Also hit the sandy texture of the base.

Gently drybrush the bodies with Vallejo Game Color Dead White [or White Scar or a white of your choice].
We‘ll complete the bodies and bases at the end.
Aged steel

Basecoat the steel with Vallejo Model Air Steel [or Stormhost Silver].

Give the chains and chainmail a wash of Warpaints Fanatic Dark Tone wash [or Nuln Oil].
Give flat areas such as sword blades two coats of new formula Nuln Oil (or Dark Tone Wash mixed 1:1 with Contrast Medium) instead. Let the model dry horizontally so that the wash doesn‘t gather at the tip (or base) of the blade. Thinned Vallejo Mecha Color Dark Steel [or Leadbelcher] with a little bit of black can even out a patchy result.


Build up rust by applying multiple coats of Reikland Fleshshade.

For an even deeper rust effect, thin Gore-grunta Fur with Contrast Medium and stipple this mix sparingly in the rusted areas.
For the deep scratches, I applied some thinned Troll Slayer Orange. At this stage I also painted the executioner’s block and the candle, which I take you through step by step in my extended XXL Nighthaunt tutorial on Patreon.
Bone
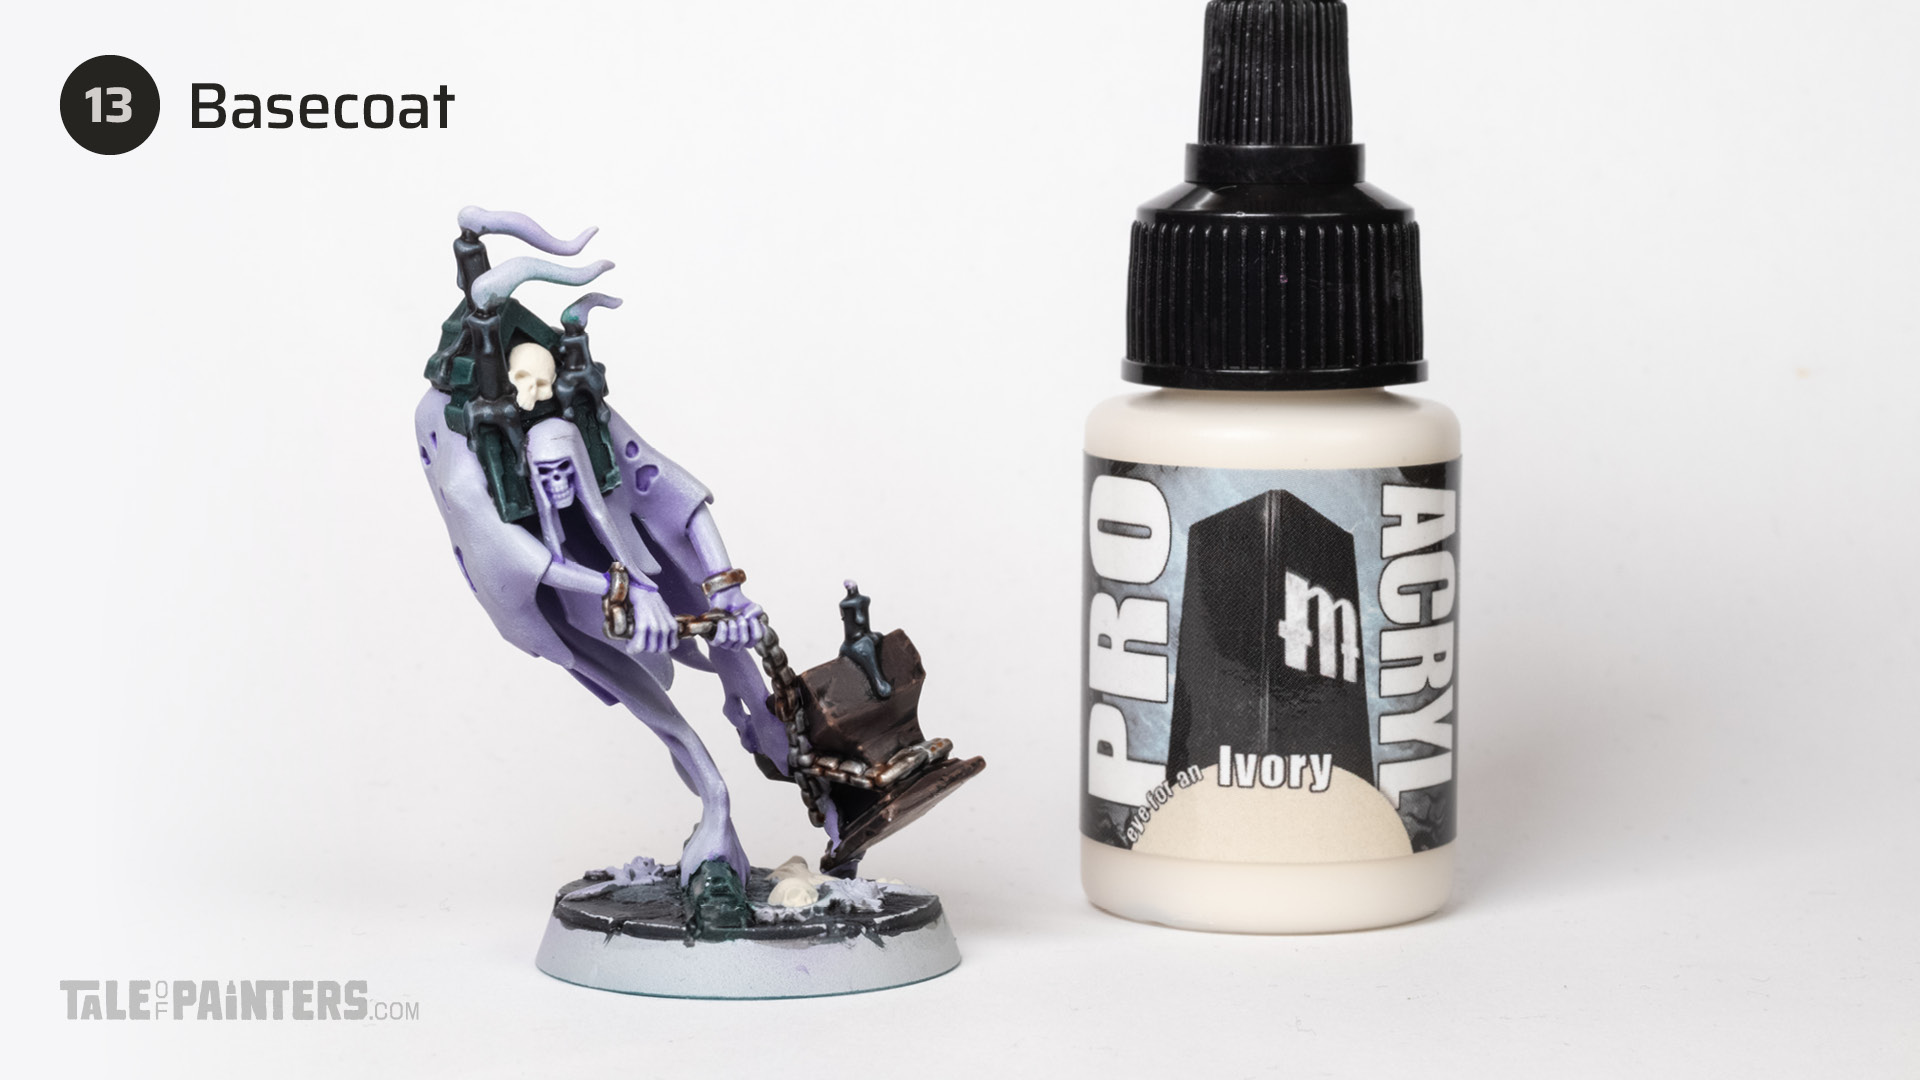
Basecoat any skulls and bones with ProAcryl Ivory [or Wraithbone]. Multiple thin coats will be necessary.

Thin Wyldwood about 1:6 with Contrast Medium and apply it over the bone details. Soak up any excess so that it doesn‘t pool on flat areas like the foreheads. Once dry, I applied a second coat in the eye sockets.

To remove any pooling or uneven areas, mix a tiny bit of Formula P3 Beast Hide [or Gorthor Brown] into ProAcryl Ivory [or Wraithbone] and layer this over any areas you want to smooth out.

Highlight the bone with Pallid Wych Flesh.
How I painted the turquoise glowing candles is covered in this free tutorial.
Aged copper
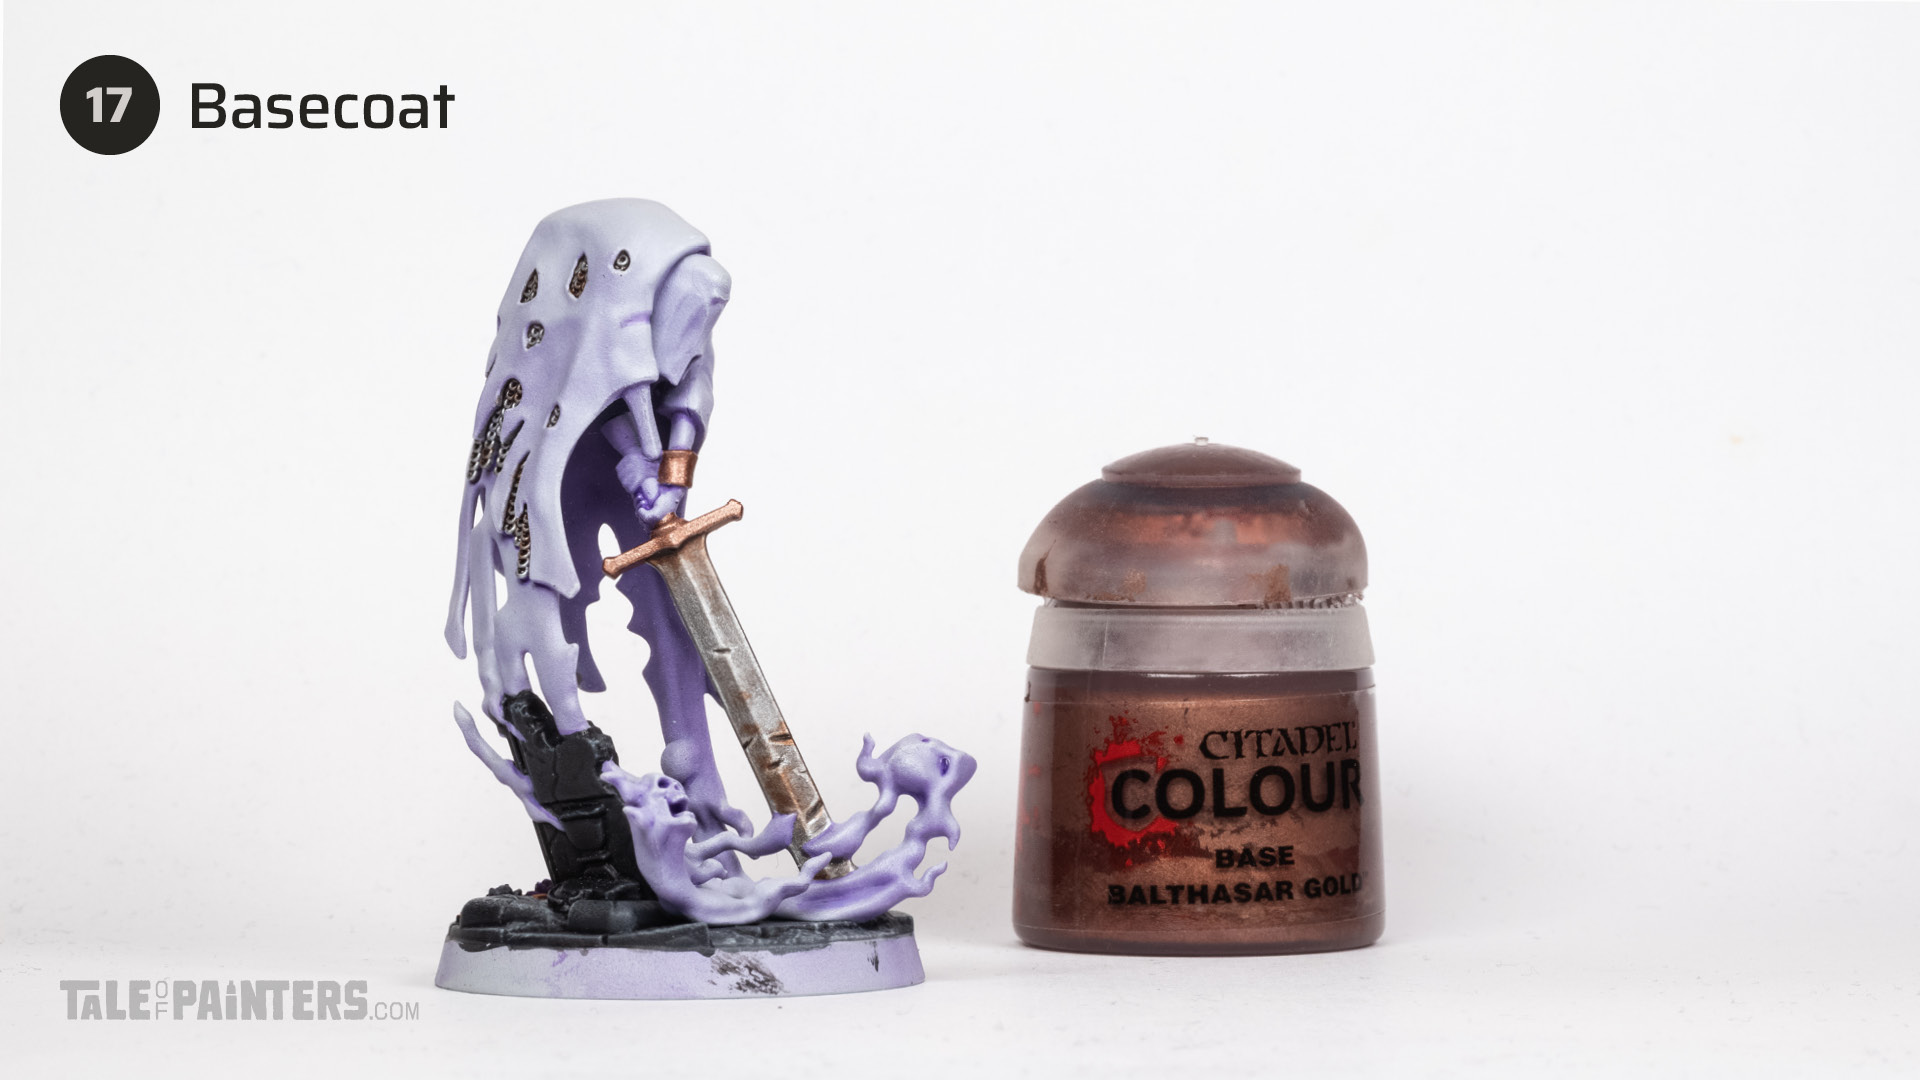
Basecoat any copper details with Balthasar Gold.
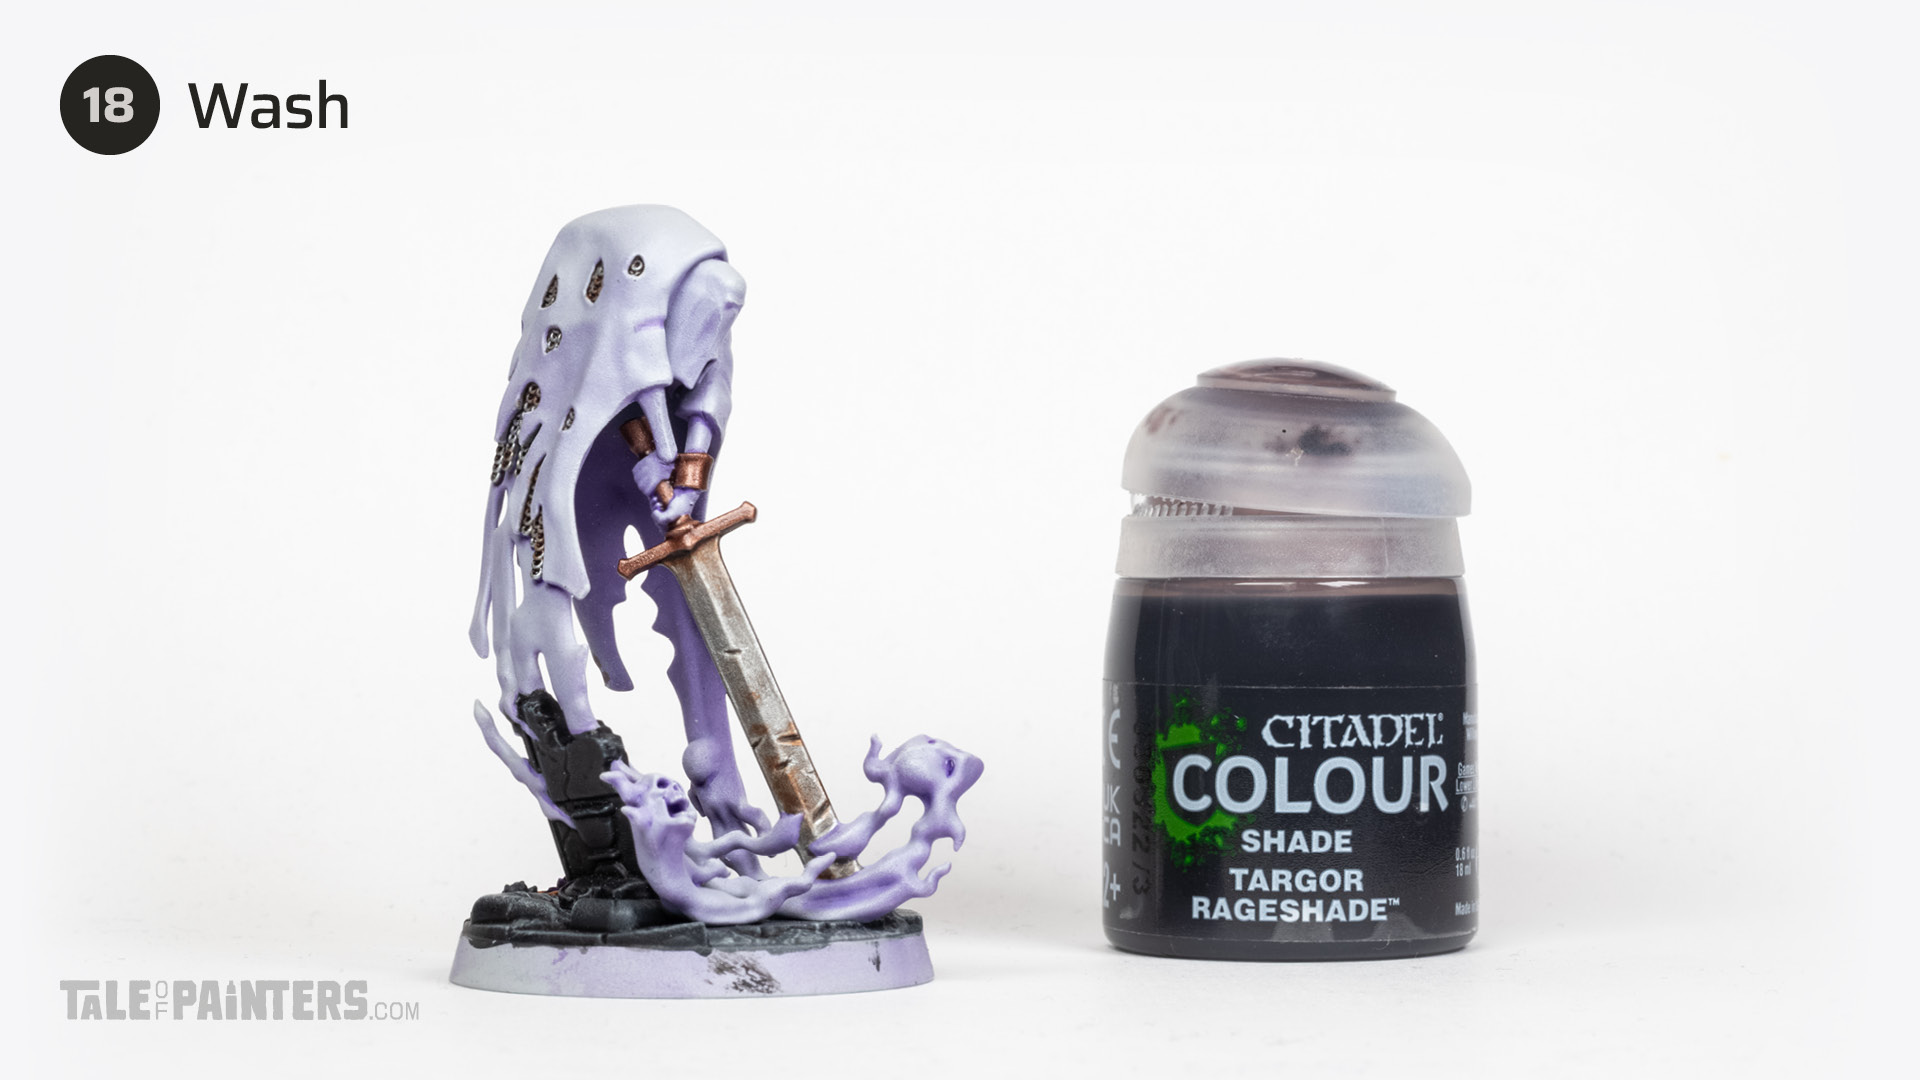
Wash the copper with Targor Rageshade.

Build up verdigris with multiple coats of Coelia Green-shade, focussing on recesses where natural verdigris would occur.

Thin Warpaints Wizards Orb [out of production, use Sybarite Green instead] about 1:2 with Contrast Medium to add more depth to the verdigris.

Apply an edge highlight of Green Stuff World Gladius Bronze [or Hashut Copper].
Final touches and base
At this point, I gave the model a good look and corrected any mistakes. If you need to touch up messy areas on the purple-grey bodies, mix a little bit of Naggaroth Night in Corax White to match the spot you want to paint over. Apply thin layers to blend it in. A wet palette helps tremendously here as you can add successive amounts of Naggaroth Night on your palette and quickly switch back and forth between lighter and more purple tones.
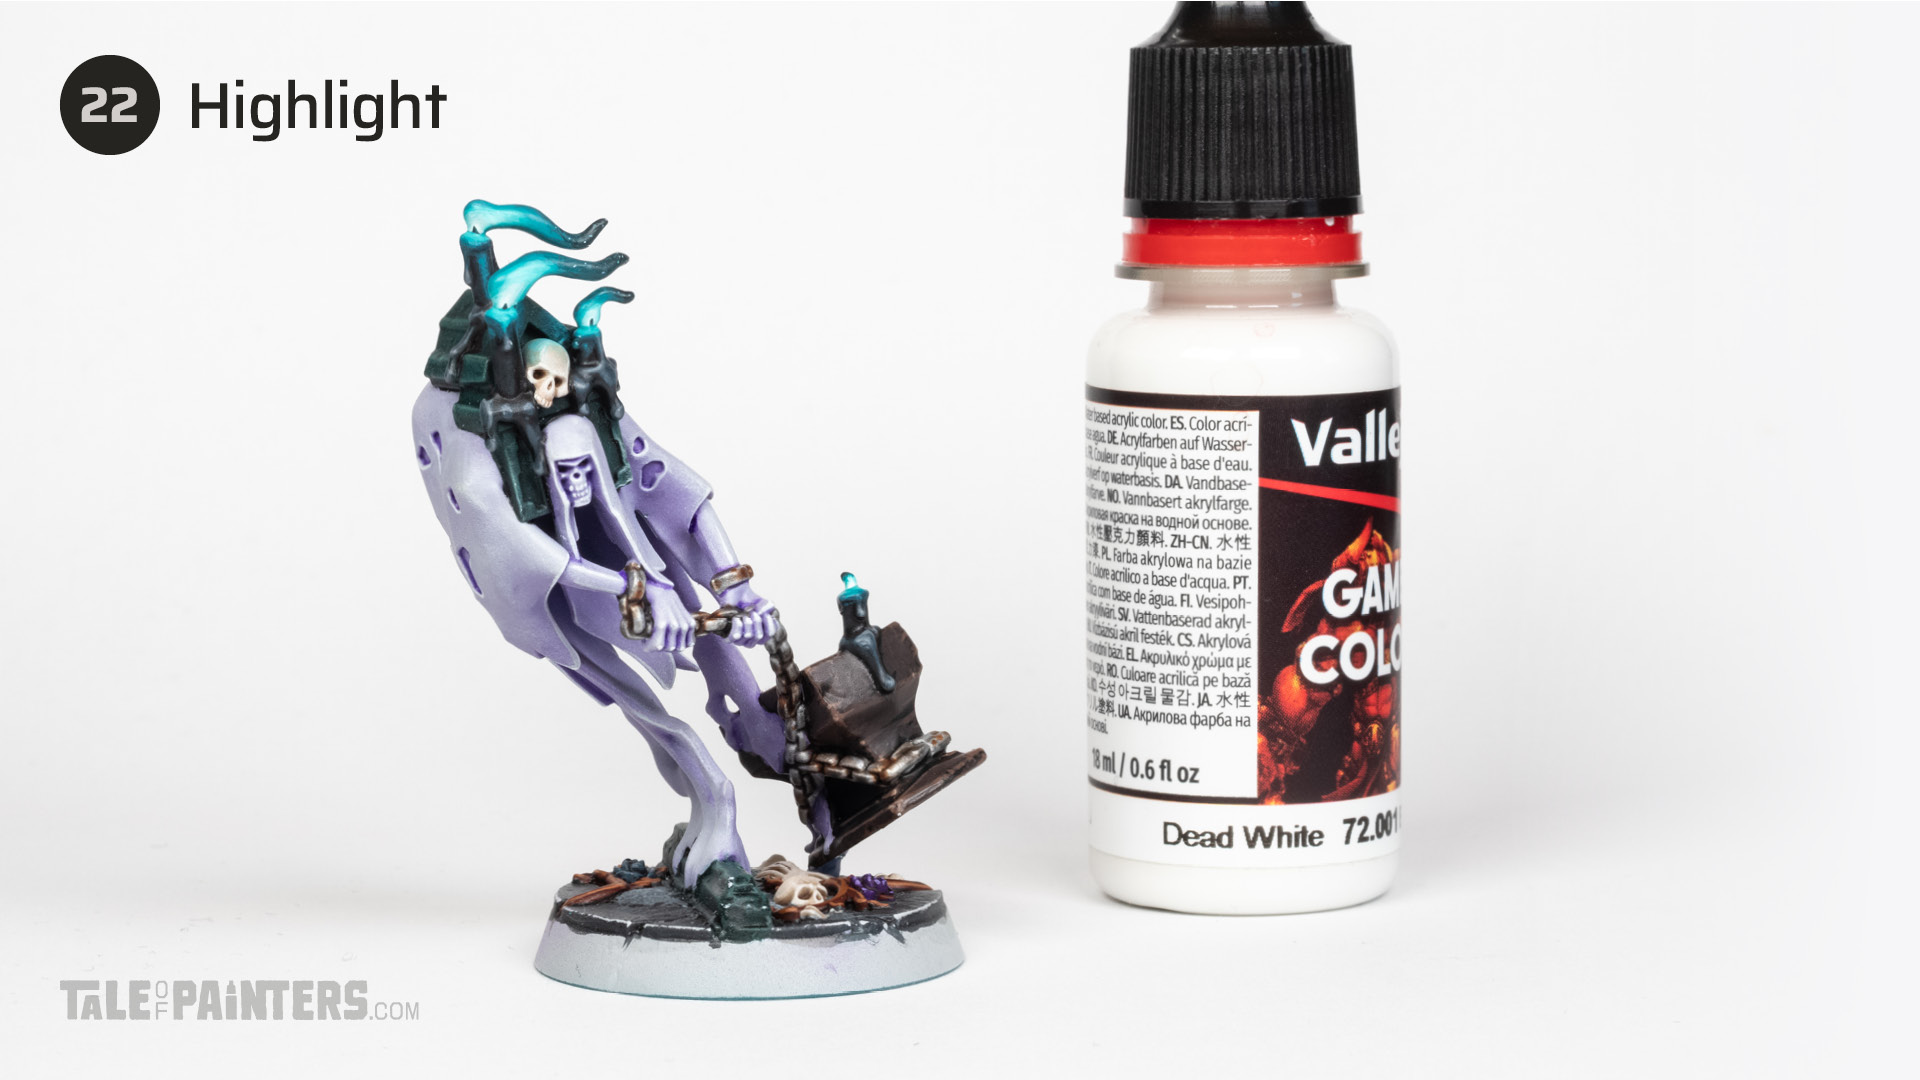
To add some more definition to the spectral bodies, pick out the sharpest edge and focus points such as the
skullish grimace and knuckles with slightly thinned Dead White [or White Scar or your favourite white].

Wash the sandy texture on the base with a 1:1 mix of Warpaints Dark Tone [or Nuln Oil] and Strong Tone [or Agrax Earthshade], careful not to hit any parts of the model.
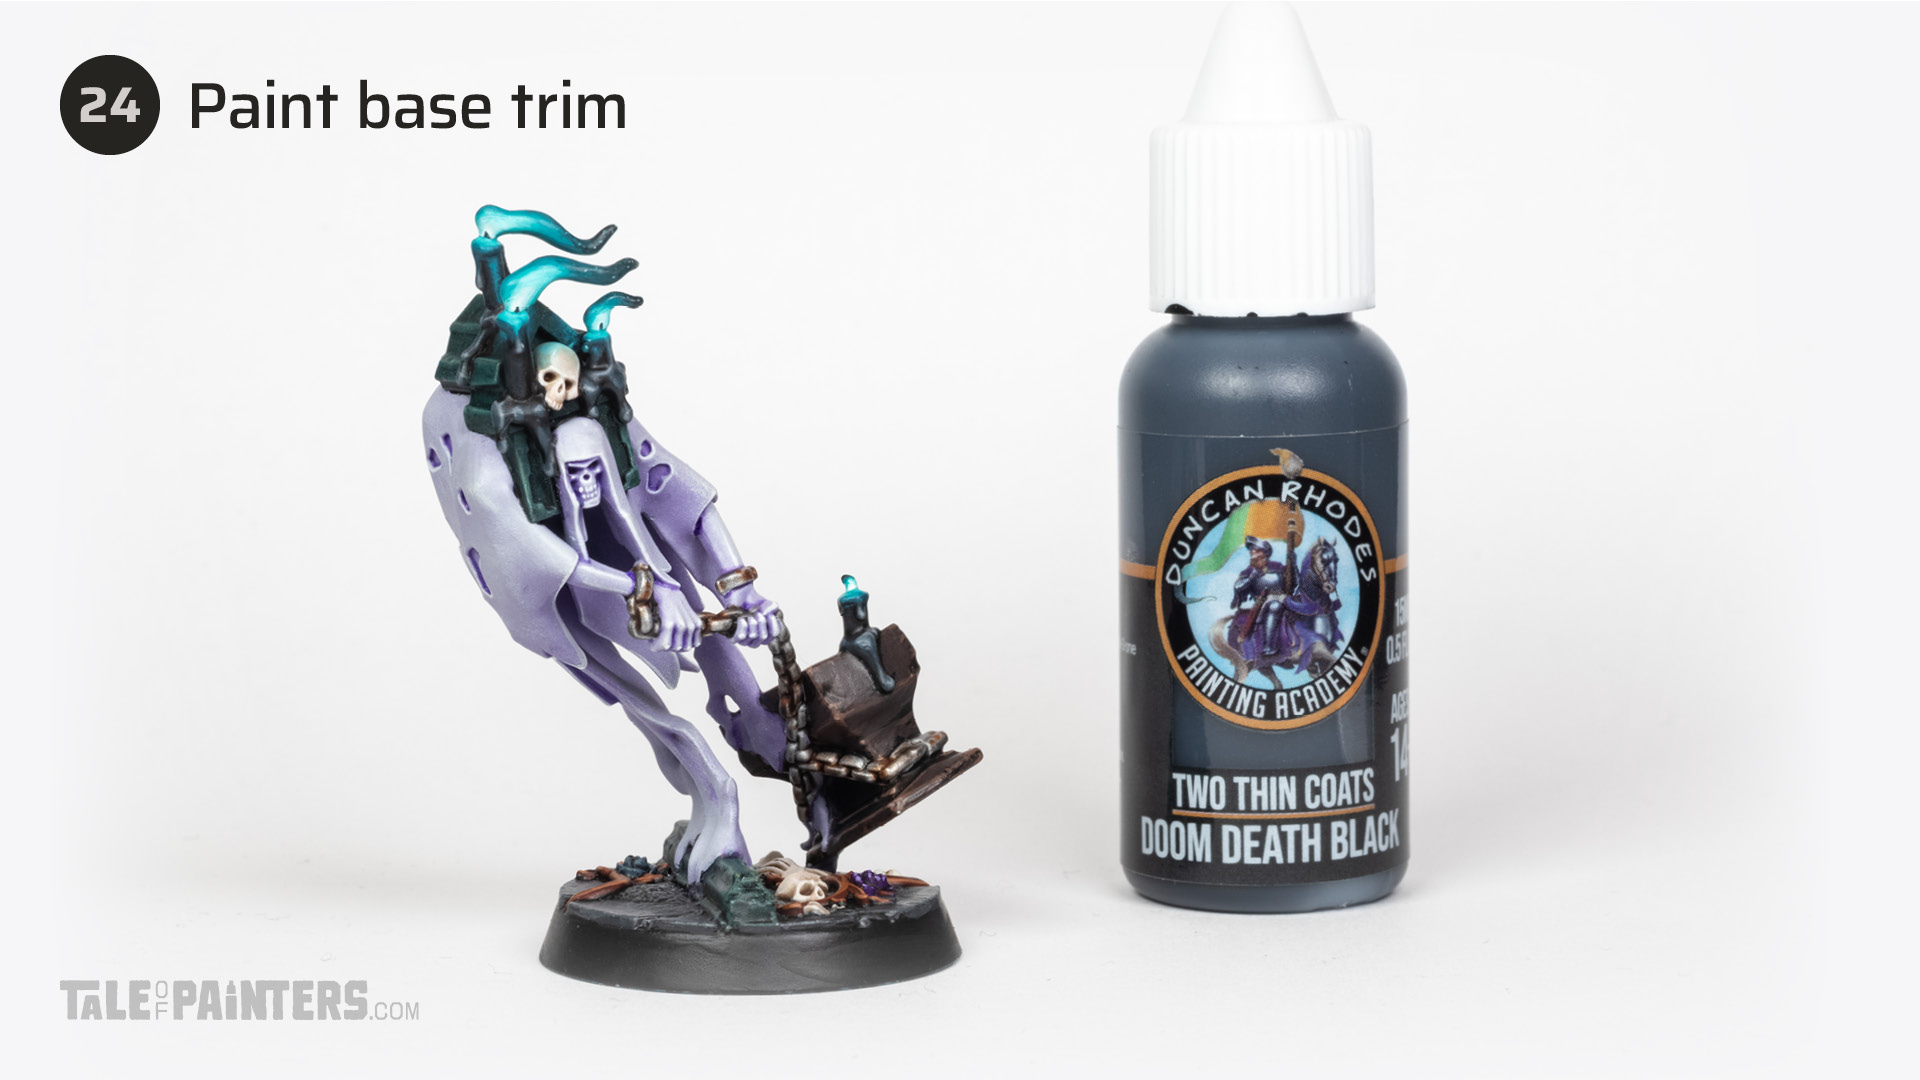
Paint the trims of the base with Two Thin Coats Doom Death Black [or Abaddon Black].
Finally, I varnished the model with my custom mix of ultra matt and matt varnish, if you don’t have an airbrush I can recommend Mr Topcoat Premium Flat (you can find a list of more of my matt varnish recommendations here).
Bearer of the Block painted by Stahly

Congratulations – here’s the finished Bearer of the Block, doomed to toil for Nagash for all eternity. Thanks to airbrushing and drybrushing you can get 80% of the model done in no time, and then it’s just a matter of picking out the details. You can find more pictures of my The Headman’s Curse warband here.
You can grab the complete step-by-step tutorial for my Nighthaunt over on my Patreon (by becoming an Dire Avenger tier member or above). Also includes additional tutorials for turquoise hexfire and glow effects!
Paints you will need for this tutorial:
Citadel (Games Workshop)
- Balthasar Gold
- Coelia Greenshade (Shade)
- Contrast Medium
- Corax White
- Gore-grunta Fur (Contrast)
- Mechanicus Standard Grey
- Nuln Oil (Shade)
- Pallid Wych Flesh
- Reikland Fleshshade (Shade)
- Targor Rageshade (Shade)
- Wyldwood (Contrast)
Vallejo
- D&D Purple Worm [or Naggaroth Night / Corax White mix]
- WPF Dark Tone Wash [or Nuln Oil]
- WPF Strong Tone Wash [or Agrax Earthshade]
- Warpaints Wizards Orb [OOP, use Sybarite Green instead]
The Army Painter Warpaints Air
Other
- GSW Gladius Bronze [or Hashut Copper]
- P3 Beast Hide [or Baneblade Brown]
- Pro Acryl Ivory [or Wraithbone]
- Scale75 Dispel Magic Medium [or Contrast Medium]
- Two Thin Coats Doom Death Black [or Abaddon Black]
Has my tutorial inspired you to join the Nighthaunt? Then feel free to use our affiliate link to expand your collection:
You can find the latest GW releases at our 🇬🇧/🇪🇺 partner stores Wayland Games, Element Games, and Firestorm Games, at 🇩🇪 Taschengelddieb and PK-Pro, and at 🇺🇸 Noble Knight Games with a welcome discount of up to 20% over RRP. Using our links helps to support Tale of Painters at no additional cost to you, so thank you very much for using them!
Hope you enjoyed this tutorial. If so, leave a comment or reaction below, and if you got any questions, leave them here so I can answer them for you.
Tale of Painters is the unofficial Warhammer hobby magazine run by hobbyists like you. Support our work by using the affiliate links from our partner stores for your next orders so we can continue to bring you fantastic FREE content every day:


![]()
![]()
Or support us directly:


