
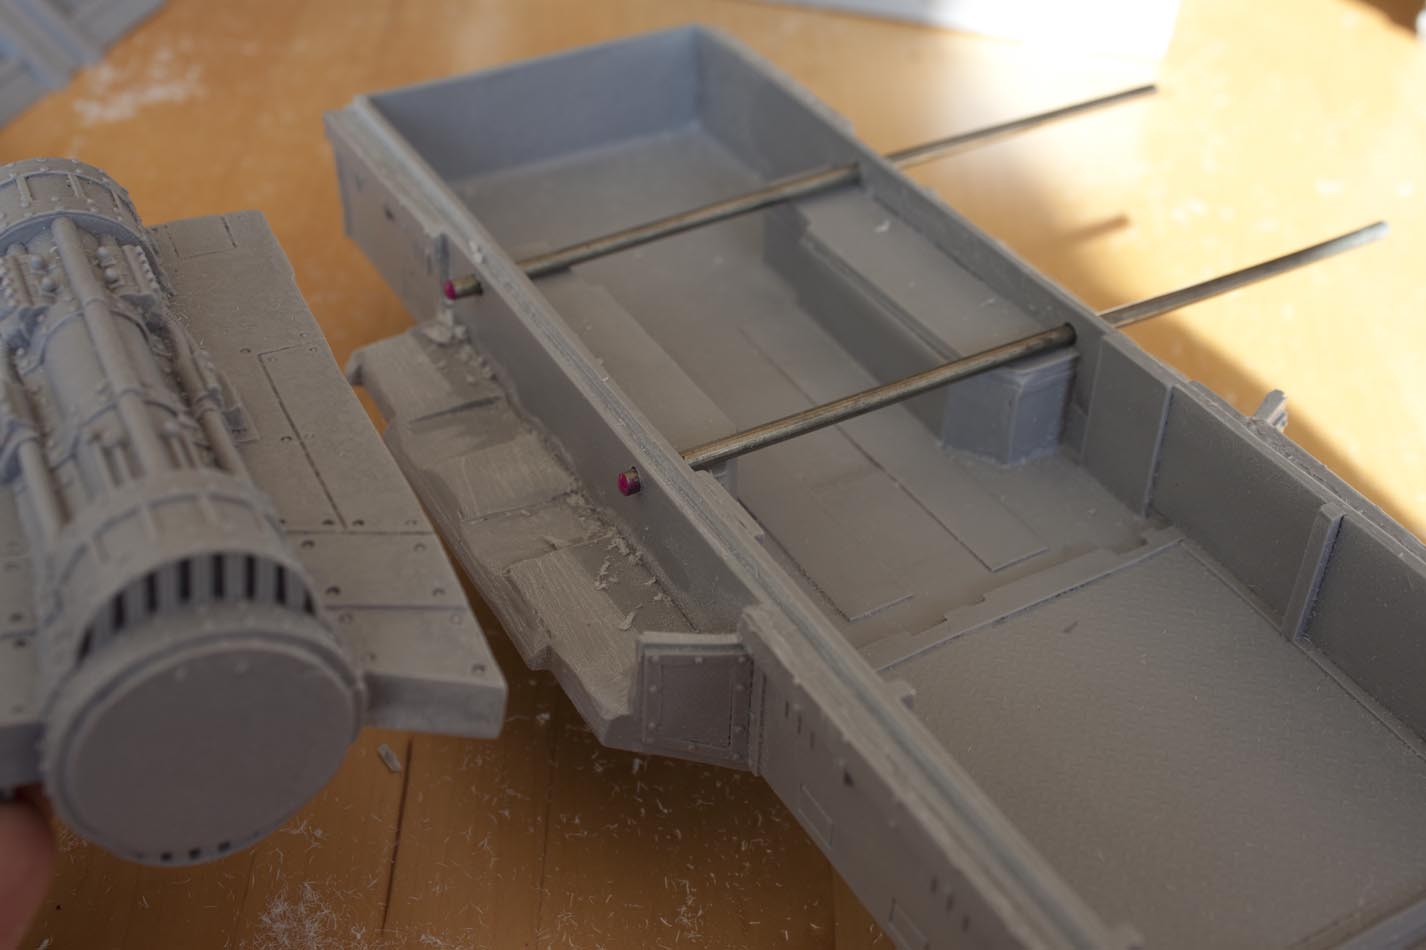

In the last blog I touched upon a few of the tools I use for big resin models, this included cutting the rod and drilling the holes. In the first picture you can see the rod in place. The picture shows two rods but after dry fitting one rod I found this to be strong enough on it’s own so I took the second rod out.
In the second picture I’ve added bright paint to the end of the rods and then pressed the wing up against it to accurately mark where I need to drill. This trick is great and works on small scale pinning too.
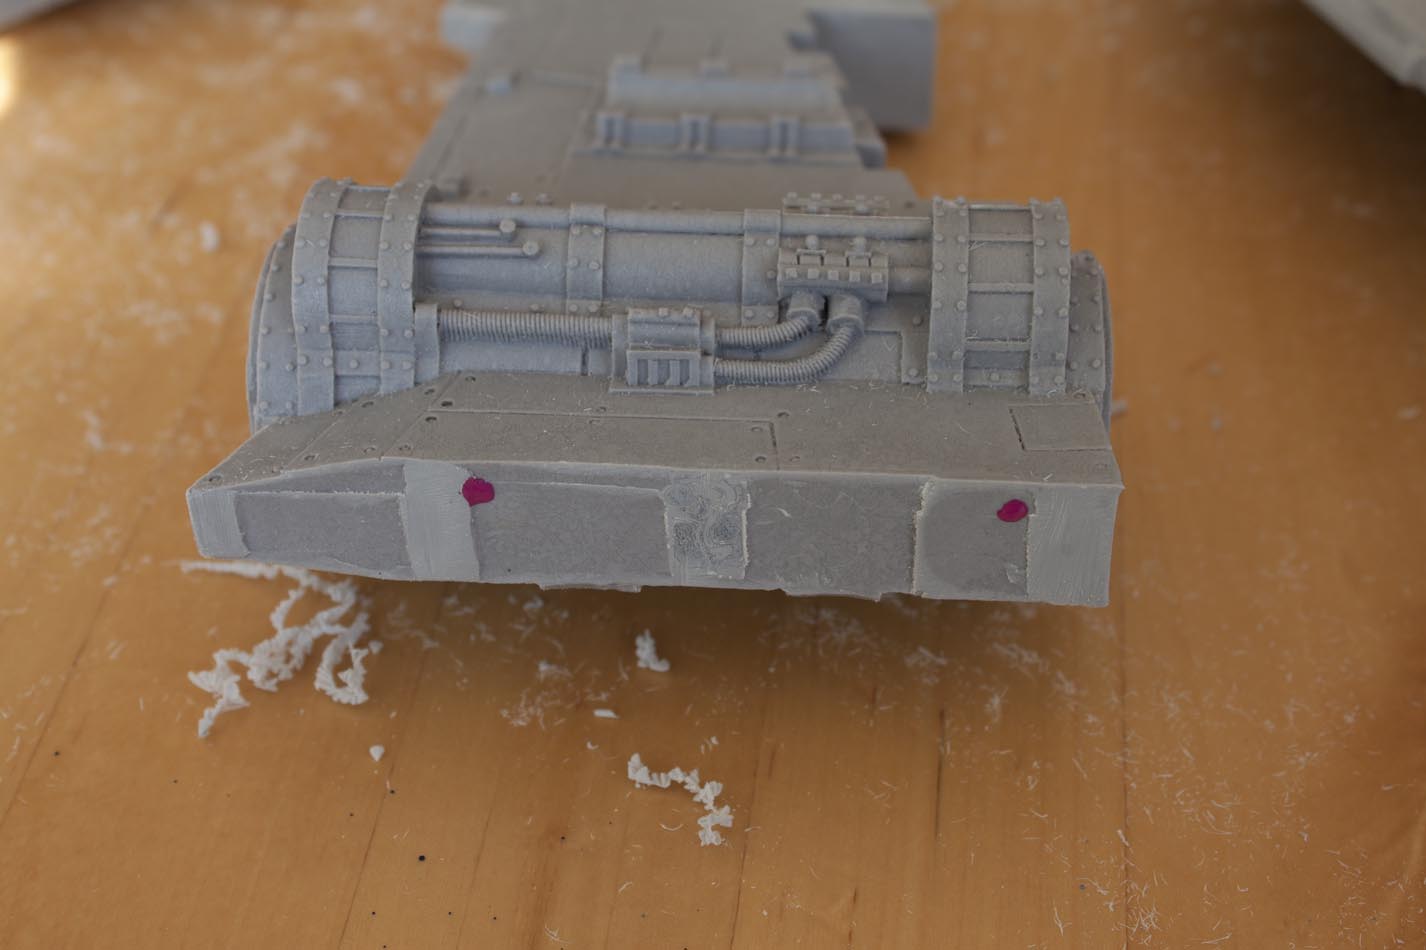

The pic above shows the paint blobs of where I had to drill. The final picture shows the wings in place with the single rod supporting the wings. It took hours of filing with the Dremel and the hand files to get the wings to fit snug and more importantly level. These are still all loose pieces and nothings been glued yet. It still needs more heating, bending and filing to get the body to fit together well.
Next time on the blog we look at interior detail of the model.

4 Comments
Leave a Reply
Tale of Painters is the unofficial Warhammer hobby magazine run by hobbyists like you. Support our work by using the affiliate links from our partner stores for your next orders so we can continue to bring you fantastic FREE content every day:


![]()
![]()
Or support us directly:


Hi Phill, it's coat hanger. At a guess it's 5mm. It's really tough. You can't cut it with clippers. It's either dremel or hacksaw (hacksaw is so hard to get going on it though).
It's not an alloy, and it's not aluminium. I'm guessing steel, but it's what ever metal coat hangers are made of.
Hiya,
What thickness of rod is used here? Is it steel?
Hey Messenger of Death, hopefully you don't have any post for me today 😉
I've got the spare pin and all holes are drilled but it's just not needed. Where the front of the wing meets the body there is like a corner where the wing fits into and holds in place. I don't need to glue the wings because of this. To take the wings off I have to lift the front of the wing, rotating on the rear support pin to get the wing to clear that corner and then slide off.
If I put the front pin in I'd have have to cut the corner off and glue it straight to the wing.
I hope to use this in games, the 900pts cost will bring my Apocalypse Ultramarines up to 14,000pts. So cool.
Thanks for taking the time to comment mate.
I'm green with envy. Have you considered keeping the second pin just for the extra durability… especially, if you plan on using this in games. Don't want to risk it taking a fall and a wing snapping off.
Already learnt a few things from watching your process. Never would have thought of using a hair dryer to reshape resin.
Messanger