
Hey there! A lot of people don’t like working with decals. Bubbles or the satin sheen make them often look like a foreign matter on your models. However with the right tools it’s not very hard to acchieve a nice painted-on look, blending your transfer with the rest of the model. Check out this tutorial and learn how.
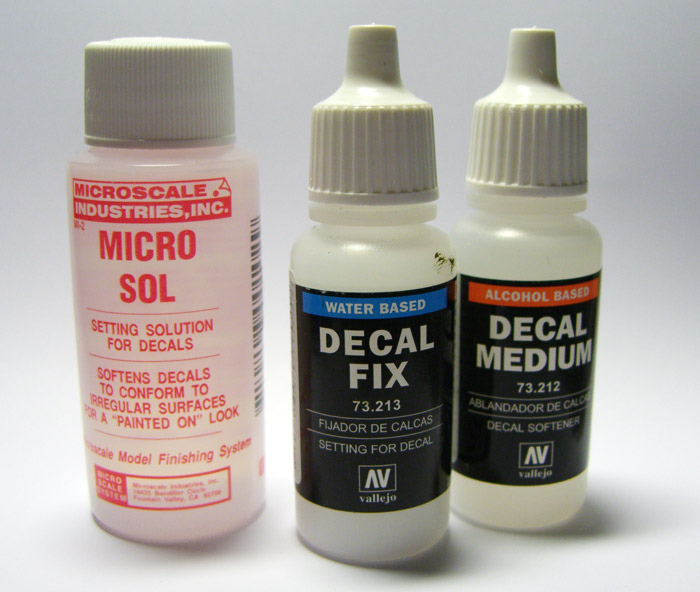
To get going, you need some proper products instead of the plain old H²O. Various modelling companies offer special solvents for decals, among them Vallejo, Revell and Microscale Industries. I tried the Vallejo ones but wasn’t too impressed, their solvent isn’t strong enough. I’d recommend getting Micro Sol and Micro Set.
Ok, what do we need those too products for? Micro Set contains the same adhesive that you have on the back of your transfer in fluid form and helps to create a stronger and more resistant bond to the model. Micro Sol on the other hand is a softener that kind of “melts” the decal so it attaches better to the shape of the model, coming in very handy for curved and irregular surfaces.
This is how the magic works:

1. First you need to prepare the place where you want to apply the decal with a coat of gloss varnish. This makes an even surface for a better grip, plus it protects your paintjob from the agressive solvents. Get out your transfer sheet and cut out the desired decal. If you want to attach your decal to a curved surface, it’s a good idea to add some vertical cuts where possible to prevent creases.

2. Put the decal for 20 to 30 seconds into water. Get out your Micro Set and apply it to the surface. When the decal is ready, hold the sheet with a pair of tweezers and carefully push the decal itself to the model with the tip of your damp brush. Use your brush to move the decal to the desired place and wet it again with Micro Set if needed. Then let it dry.

3. The decal looks very matte now, but the edges are still very present. Or, in case of a curved surface, the decal might not have fully adapted, so slap on a good amount of Micro Sol. Now let it dry and don’t touch the decal, as it is very damagable in this softened state. A single application might not be enough, in my experience you need 2 or 3 applications for even surfaces, and 5 to 6 for round ones. Just remember to let every coat fully dry before applying another. Finally spray on a coat of matte varnish to remove the glossy sheen of the Micro Sol and to even out the last bumps. And there you have it: Decals that look like painted on, only noticable when you come very close.
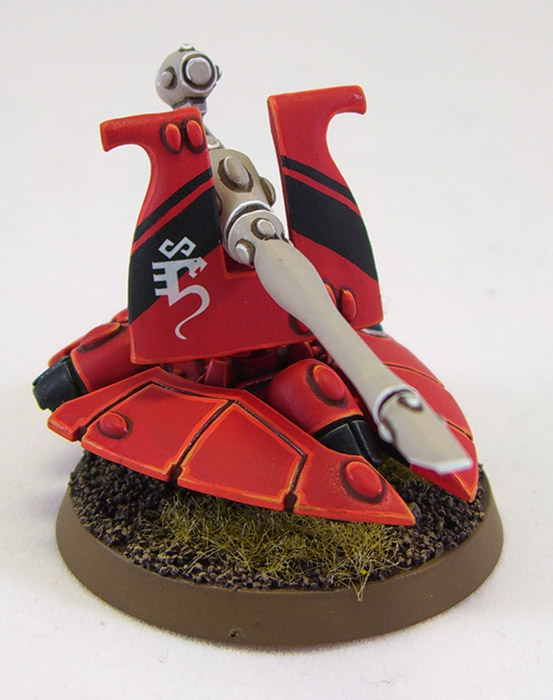
As you can see, I’ve used this technique on all my Eldar vehicles:


Do you like our tutorials and reviews? Here is what you can do to support us: Disable your Ad Blocker or place your next Wayland Games order by clicking here or on the banner on the right. Thank you very much, we appreciate any help to keep us going!
2 Comments
Leave a Reply
Tale of Painters is the unofficial Warhammer hobby magazine run by hobbyists like you. Support our work by using the affiliate links from our 🇺🇸 / 🇨🇦 partner stores for your next orders so we can continue to bring you fantastic FREE content every day:


Or support us directly:


Nice tutorial. I absolutely agree about the gloss varnish.
Great tutorial… I've been looking at using transfers more for my tanks. Previously I used to paint details on but its just too time consuming! I highly recommend the gloss coat prior to using transfers, even if you only take that alone from this, it just makes such a difference! You can get rid of the shine, and any difference from the tranfer by using a matt varnish anyway!