
Hey guys, this is a is part 2 of a guest post from our mate Marked_by_Chaos (a.k.a. James) on Warseer. If you have missed part 1click here. He attended the ‘Eavy Metal Masterclass at Warhammer World and noted as much painting advice down as possible, straight from the mouthes of the ‘Eavy Metal team. This is a must-read for any serious painter! Now, over to Marked_by_Chaos…
Painting red
Due to the nature of red paint you often need to build up the paint in more stages (this would be true of certain other colours such as yellow).
For a rich red (with the previous citadel paints) the following stages seem to be popular with the ‘Eavy Metal team:
1.
Scab Red/Mechrite Red mix
2.
Red Gore
3.
Red Gore/Blood Red mix
3.
Blood Red (the mid tone)
4.
Blazing Orange highlight
5.
Blazing Orange/Skull White or Vomit Brown final highlight
6.
If the colour has become too orange (or pink) glaze down with very watered down red glaze i.e. one part wash to 5-10 parts water. The new Bloodletter glaze might be useful for this stage.


These stages appear broadly compatible with the new citadel paint progressions. Generally Blood Red or an equivalent is the natural mid tone (although it may not be the most predominant shade of colour on the model. Vomit Brown or an equivalent was apparently viewed as a good colour to mix in for highlighting in order to avoid creating a pink or orange effect. Always remember you are painting red not orange or pink. For that reason the ‘Eavy Metal team often use a glaze to reassert the redness of the colour.
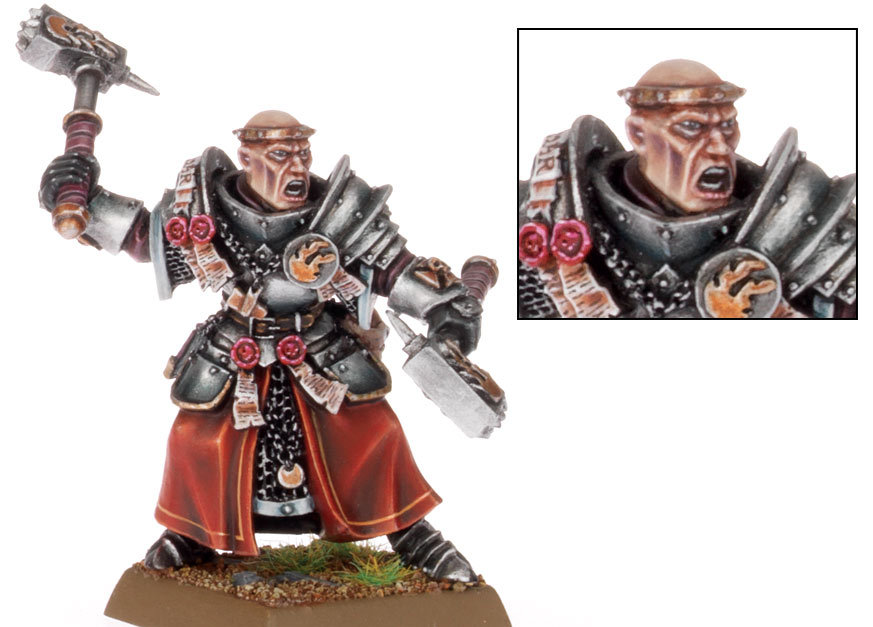
Painting Faces
After applying the base coat use a glaze (i.e. watered down paint rather than the new glazes) to add depth. When glazing use a drop of an appropriate wash or matt medium to help the paint pool in the recesses. For the next stage apply a wash to the darkest recesses. Devlan Mud or an equivalent is a popular for this stage.
Next reapply the base coat ensuring that you leave the glaze and wash effects in the recesses. Then apply a mid tone to raised areas ensuring that you do not cover over all of the previous stages.
When painting up the neatening stages with the reapplication of base coat and the mid-tone smooth out the transitions up to the lighter shades by drawing the brush from recesses to highlight areas i.e. from recess under the cheek to the cheekbone. This helps to create a natural blend (presuming that you work reasonably quickly with appropriately thinned paint). However, take care to avoid the lighter shades pooling in recesses and destroying the shading created in previous stages. For subsequent highlights add progressively more white.


Particularly with the ‘Eavy Metal style you can afford a fairly big differential between the shaded and highlighted areas to accentuate features with the contrast. Remember that the ‘Eavy Metal style is an exaggerated reality or a more cartoonlike expression of reality. You need the contrast to make the models catch the eye, particularly from a distance. The final highlights on faces can be very light and higher than equivalent highlights elsewhere on the model. The ‘Eavy Metal style involves going up often to pure white final highlights
A neat trick for applying a realistic texture to lips is to use the base or mid-tone for the lips and then stipple on lighter tone sparingly to create a slightly cracked effect.
Remember to leave the face alone once you are happy with the effect. When shading and highlighting faces, take your time to think about the placement of brushstrokes. Do not succumb to temptation to keep tinkering excessively as this will end in disaster if you disrupt the earlier stages and lose the effect of the earlier shading and transitions or apply the lighter highlights too broadly and make the face too pale.
Metallics
With metallics it is even more important to water down the paint due to the notably thicker nature of the paint. Use several thin coats to create smooth coverage that does not obscure detail.
When applying the basecoat it is often useful to start with a non-metallic dark colour mixed in (i.e boltgun metal and chaos black or shining gold and scorched brown). This can help with coverage and add depth. The new base layer metallics seem based on this concept.


Take care when using washes. They can be great for creating a weathered look. However, due to the matt quality of the washes or shades they will dull down the metallic effect and can end up making the area look yellow or grey rather than gold or silver. It can sometimes be better to use a glaze to shade, particularly if you are aiming for a brighter metal finish.
When applying the lighter coats after the base coat draw the paint away from the recesses to the lighter areas in thin coats leaving the shade effect progressively toward the recesses. When applying the final highlights Mithril Silver is a popular final colour. However, it should be used sparingly in order to avoid changing the colour (i.e. making gold look silver).
As mentioned above an alternative to shading and highlighting is to work in reverse and start with a lighter colour and glaze down.
Hair
When painting hair there are two particular concerns. Firstly, you want to avoid losing the contrast and definition of the strands of hair. Secondly, you need to ensure that the highlights do not change the colour of the hair (i.e. turning red hair orange or pink). The same principles can equally apply to fur.


A useful highlighting tip is to apply the lighter highlights toward the tips of the hair. Also avoid using black to paint the hairline as it looks unrealistic.
An effective result can be achieved with the following stages (particularly for tussled hair):
1.
Paint the base coat (sufficiently dark for depth and contrast)
2.
Paint group of strands, particularly on tussled hair with the mid tone.
3.
Highlight prominent strands within the mid tone areas. Make sure that the base coat is left in the prominent recesses.
4.
Paint the very lightest highlights toward the tips of the hair and the most prominent edges.
5.
If the colour has been altered by over application of highlights consider applying a thin glaze to knock back the highlights and restore the colour.
And that was the second and final part. Thanks Marked_by_Chaos for these invaluable notes! Disclaimer: Models painted by the ‘Eavy Metal team/Games Workshop. Pictures used without permission.
Do you like our tutorials and reviews? Here is what you can do to support us: Disable your Ad Blocker or place your next Wayland Games order by clicking here or on the banner on the right. Thank you very much, we appreciate any help to keep us going!


Nothing less than the finest advice I've gotten on painting this style! 🙂
Thank you Stahly!
These 2 eavy metal posts are awesome. Thankyou and hello from australia.