
There is a brand new Warcry Starter Set being released on July 29 2023 and instead of the usual cardboard gaming mat, it comes with a flimsy paper one. I decided not to complain on the internet (when did that ever achieve anything) and instead thought I’d be pro-active and make a 3D version and share it with everyone.
This tutorial uses a lot of sharp and dangerous tools, so be careful and if you’re young or inexperienced ask an adult for help.
Materials and Tools you’ll need:
- 3D print files (free download)
- 10mm thick plywood board (22x30in)
- Circular Saw to cut the board
- Sandpaper to smooth board edges
- 3D printer with a print bed of at least 210x210mm
- Craft knife
- Clippers
- Superglue
- Strong wood glue
- Sand/gravel mix
- Black undercoat spray
- Clear coat varnish spray
- Sponge
- Large paint brushes
- Milliputt modelling putty
- Glass bubbles filler powder OR Bi Carbonate of Soda
- PVA glue
- White acrylic paint
- Medium grey acrylic paint
- Teclis Blue paint
- Baharroth Blue paint
- Skrag Brown paint
- Airbrush (optional)

I quickly 3D modelled the floor tiles and coffins in CAD software. I’m no 3D artist so they’re pretty basic, but they are free for you to download and print yourself. If you don’t have a 3D printed it’s pretty easy to replicate these shapes and cut them out of plasticard. The main walkways on my board are just plasticard sheets cut our to look like square paving slabs. The chains can be made using cheap costume jewellery chains.
Step 1. Coffins


With all your pieces printed out it’s time to assemble the coffins. The coffins need to be chained shut to stop the dead rising and joining Nagash’s ranks. I made the 3D printed chains flat on one side and you just cut them to size and bend them round the coffin pieces. You’ll need to glue them in place with superglue. Repeat this for all the coffins (have as many or as little as you want).
Step 2. Layout
Cut your plywood board to size (30″ x 22″) using a circular saw and sand the edges smooth so you don’t get splinters. My board is 10mm thick to help combat warping. One side of the board is going to be subjected to moisture from glues and paint and could warp. I found the 10mm thick board warped very little. If you don’t want it to warp at all, when you’ve glued the sand to one side, apply glue to the other side so both sides dry and warp evenly.

With the chained coffins assembled and the large cracked floor pieces printed and the plasticard square footpaths cut its time to layout the graveyard. I glued these in place using Gorilla Wood Glue. Around the large cracked tiles I used milliput to blend them into the board.
Step 3. Sand

Apply strong wood glue liberally to the board and sprinkle on your sand/ fine gravel mix. Work outside on an old sheet or tarp so you can can catch the excess.
Step 4. Undercoat

Undercoat the board outside with black spray paint.
Step 5. Clearcoat

The strong Gorilla Wood Glue should do a pretty good job of holding the sand and gravel on, but to be doubly sure I gave the board a good coating of Clear Coat spray.
Step 6. Painting

Using a sponge dab grey paint all over the board. If you use a brush you risk knocking off loose large gravel pieces. Mix white into your grey and dab on lighter shades.
Step 7. Detail Painting

Now the board is completely grey you can paint the detail. Using an airbrush (or drybrush if you don’t have an airbrush) apply Teclis Blue to the cracked areas of the large flooring and the cracked coffin lids. Then go over this with the Baharroth Blue and finally White paint in the cracks. Paint the chains with Skrag Brown.
Step 8. Snow

So, I’ve done this the old fashioned way with a mixture of 50% Bi Carb, 30% pva glue and 20% white acrylic paint, but you shouldn’t copy me, this way can lead to the snow yellowing over time. I’m hoping the white paint and clear coat sealant will prevent this but you should use Glass bubbles filler powder instead. Always wear a mask when dealing with fine powders. Keep away from children.
Using my snow mixture I slapped it on the board in patches using a make-shift spatula I made from a plasticard off cut. This is messy so work outside or on a tarp sheet.
Step 9. Varnish

Now the board is fully painted and covered in snow, give it a few coats of a matt varnish. This will help stop the bicarb oxidising and turning yellow and it will make it more harder wearing for gaming purposes. You’re done! Congratulations.


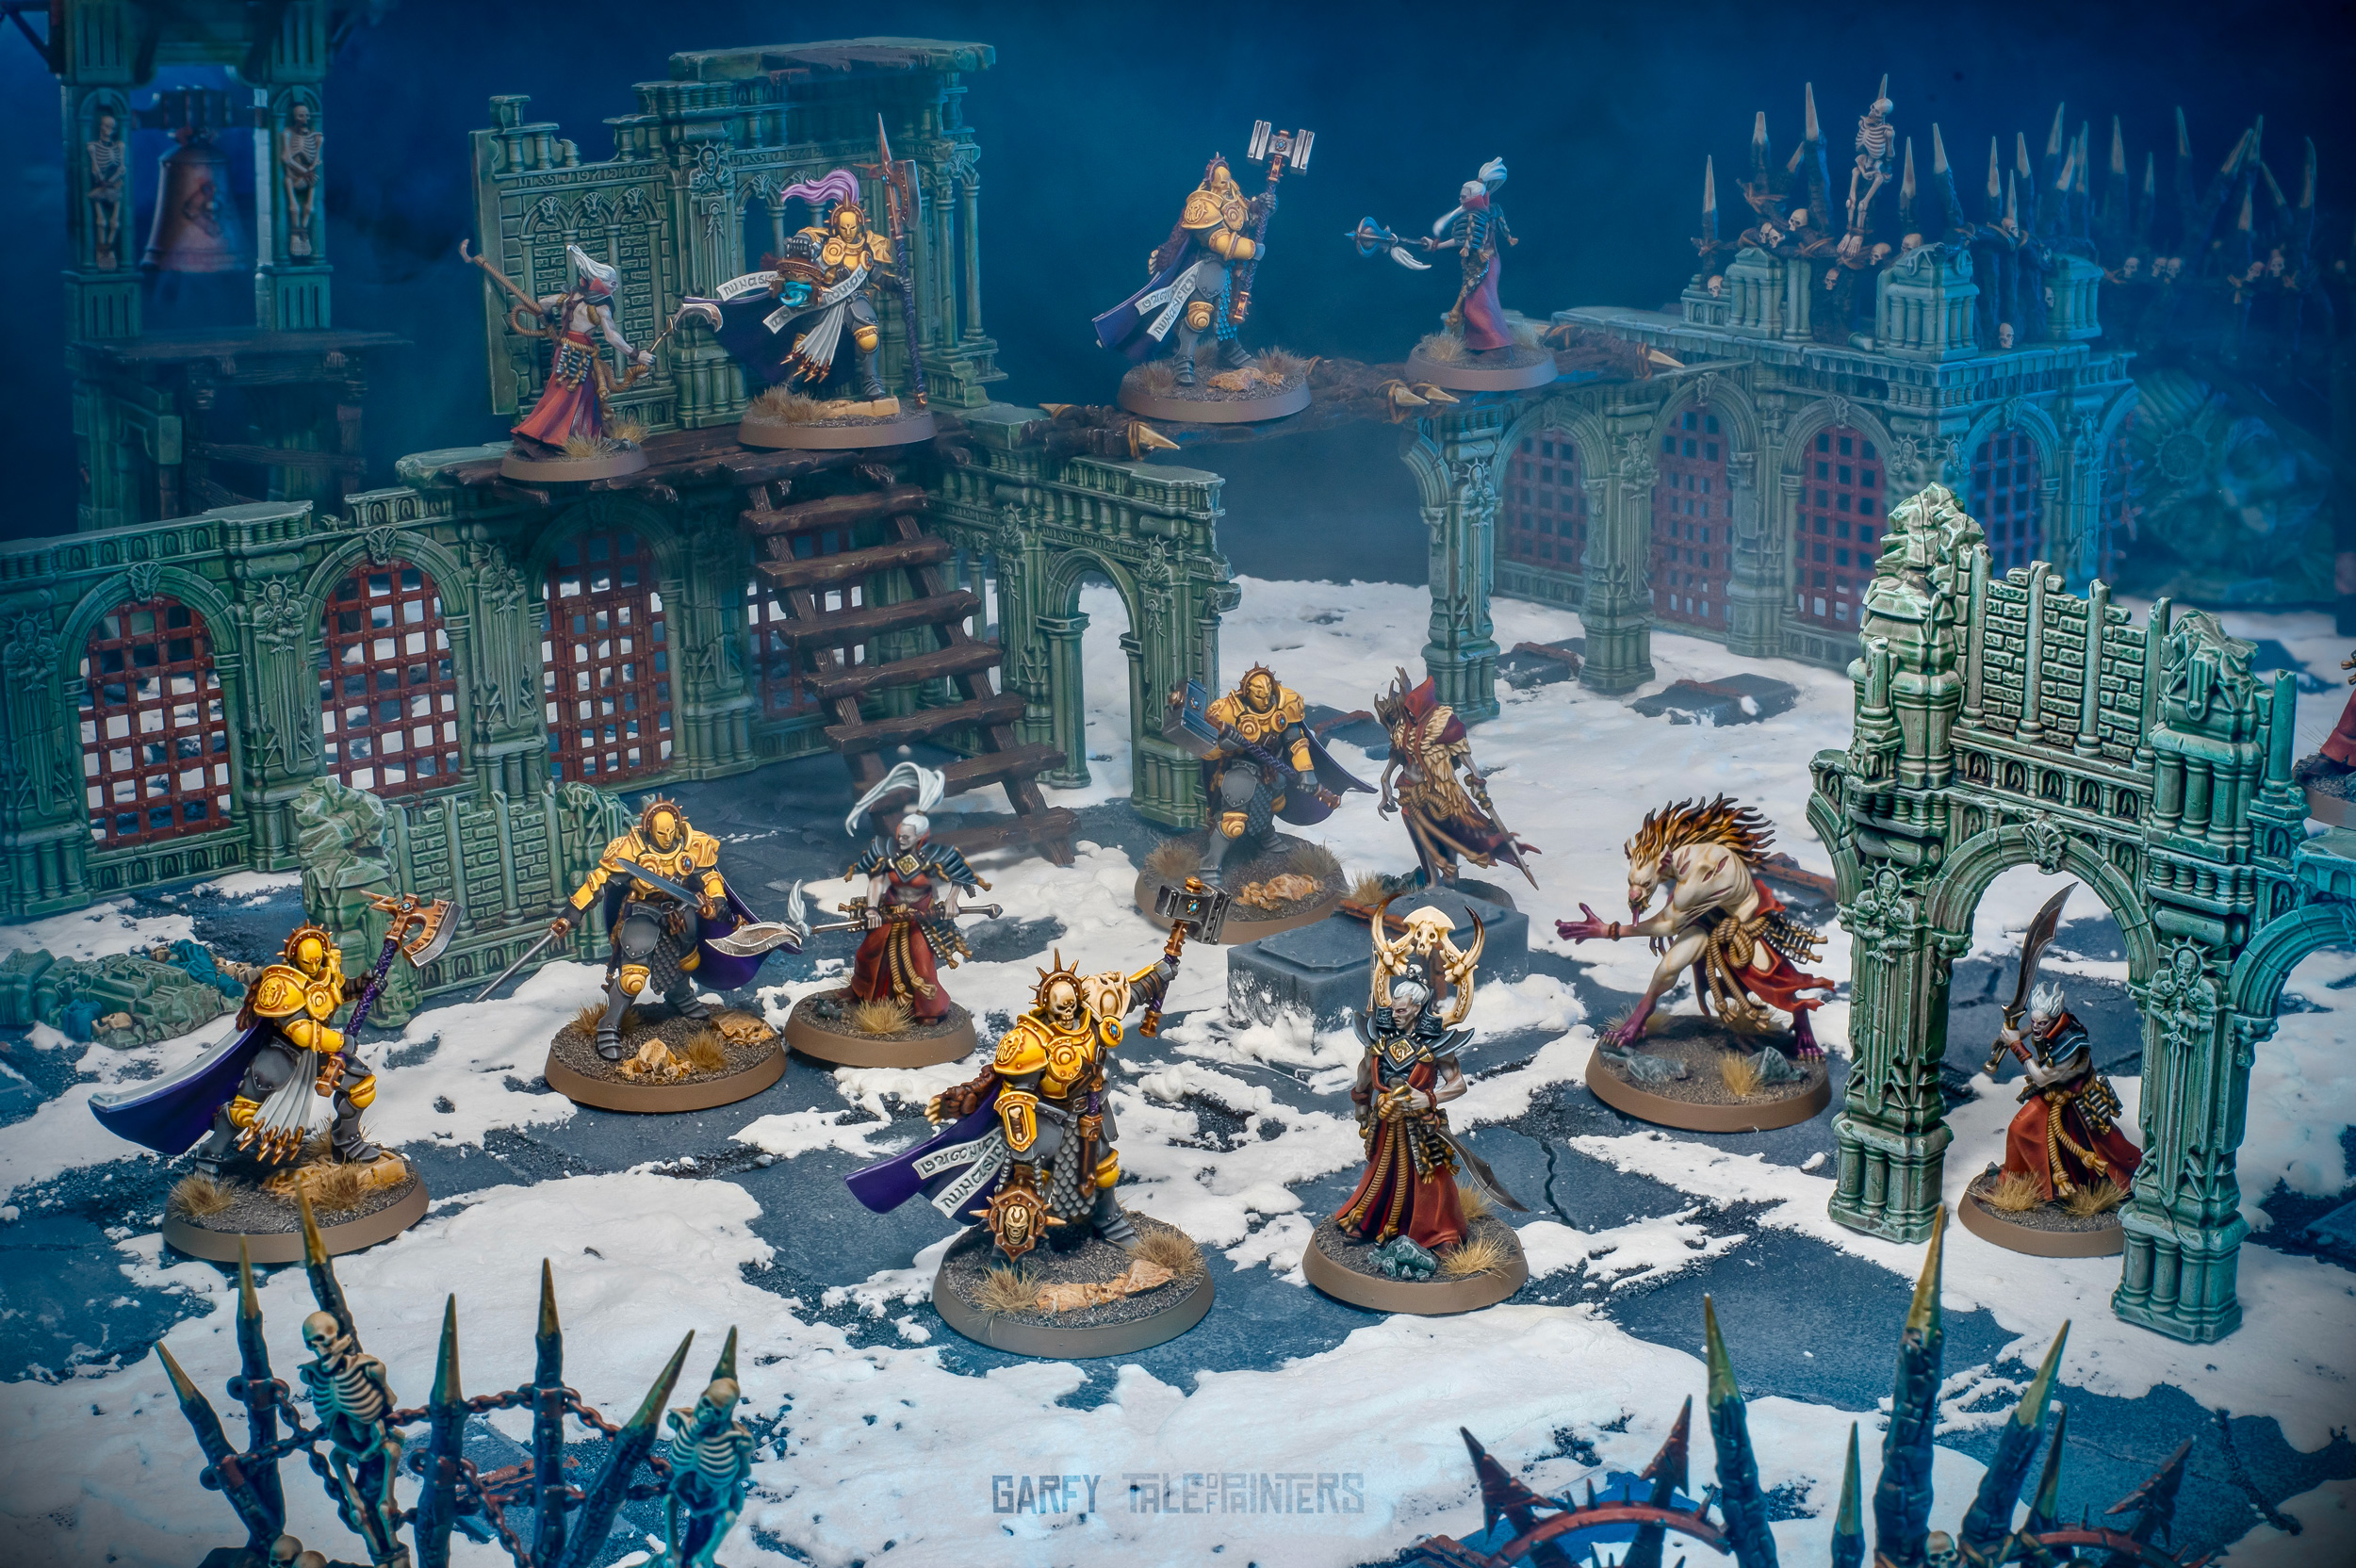
The finished board in all its hard wearing, 3d glory. No risk of paper gaming mats tearing here.
This project took me about a week to complete but that included drawing and printing the 3d printed parts. A lot of the time spent was waiting for things to dry. If you collate all the materials in advance it would be possible to knock this out in a weekend.

Here’s an example Warcry board set up using the ruined terrain from the first Warcry launch box:

The Warcry: Crypt of Blood starter set, featuring the aforementioned paper mat and a new set of Soulblight graveyard terrain, will be up for preorder this Saturday, 29 July. You will find an unboxing and review on Tale of Painters very soon. Until then, happy gaming!

7 Comments
Leave a Reply
Tale of Painters is the unofficial Warhammer hobby magazine run by hobbyists like you. Support our work by using the affiliate links from our partner stores for your next orders so we can continue to bring you fantastic FREE content every day:


![]()
![]()
Or support us directly:


The skill here is amazing, I must give this a try for a scene for 40k perhaps? Thank you for taking teh time to produce and share such a good guide.
How lumpy is the snow as a final product? Does the terrain lay more or less flat against the board surface?
Snow is lumpy. You can stand stuff on it, it’s not going to be flush but it’s usable.
Cool and very helpful process article. Thanks for doing this!
Thank you Mech frog.
Can you clarify whats the glass bubbles filler powder? The links are not helpful (unless the answer is in the video).
Link was directing to the wrong place. I’ve updated it. Should take you to here https://www.mbfg.co.uk/glass-bubbles-filler-powder.html