
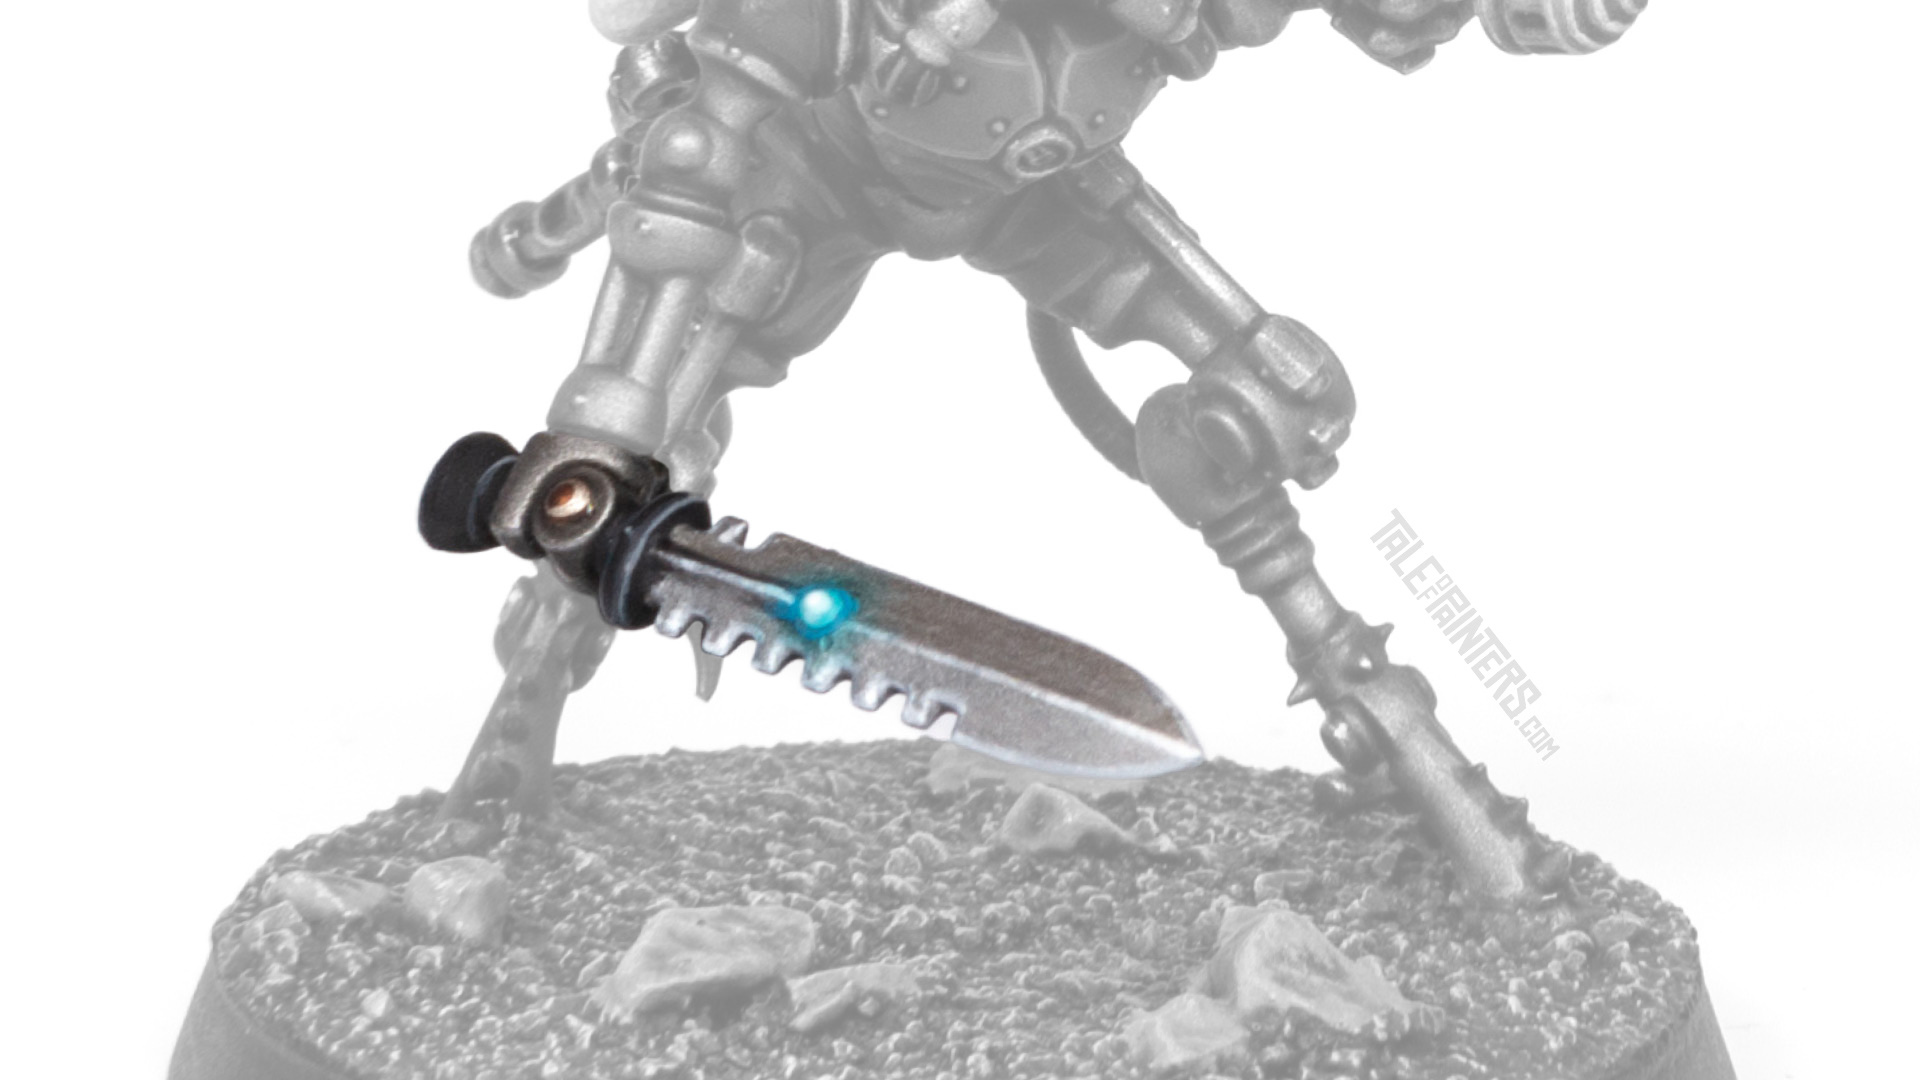
Check out this tutorial and learn how to paint power swords by adding Contrast glazes and turquoise paint to the sword’s power node. You can recreate this easy glow effect in just five steps.
This tutorial assumes you know the basic grips of painting Warhammer miniatures. Step-by-step I explain all the paints and techniques I used. I have a rather eclectic paint collection, so when I use a paint that is not from Games Workshop (or out of production), I’ll try to provide you with suitable alternatives from the current Citadel paint range [in brackets]. However, if you want to achieve exactly the same result as shown, I recommend expanding your paint collection. You’ll find a list of all the paints used in this tutorial at the end of the post.
Easy power swords painting guide
I started by basecoating the blade with Vallejo Mecha Color Steel [or Ironbreaker or Iron Hands Steel], then applied a recess wash of Basilicanum Grey thinned with Contrast Medium around the power node. Finally, I highlighted the blade with Vallejo Mecha Color Light Steel [or Runefang Silver or Stormhost Silver]. Now you can proceed with painting the glow effect:
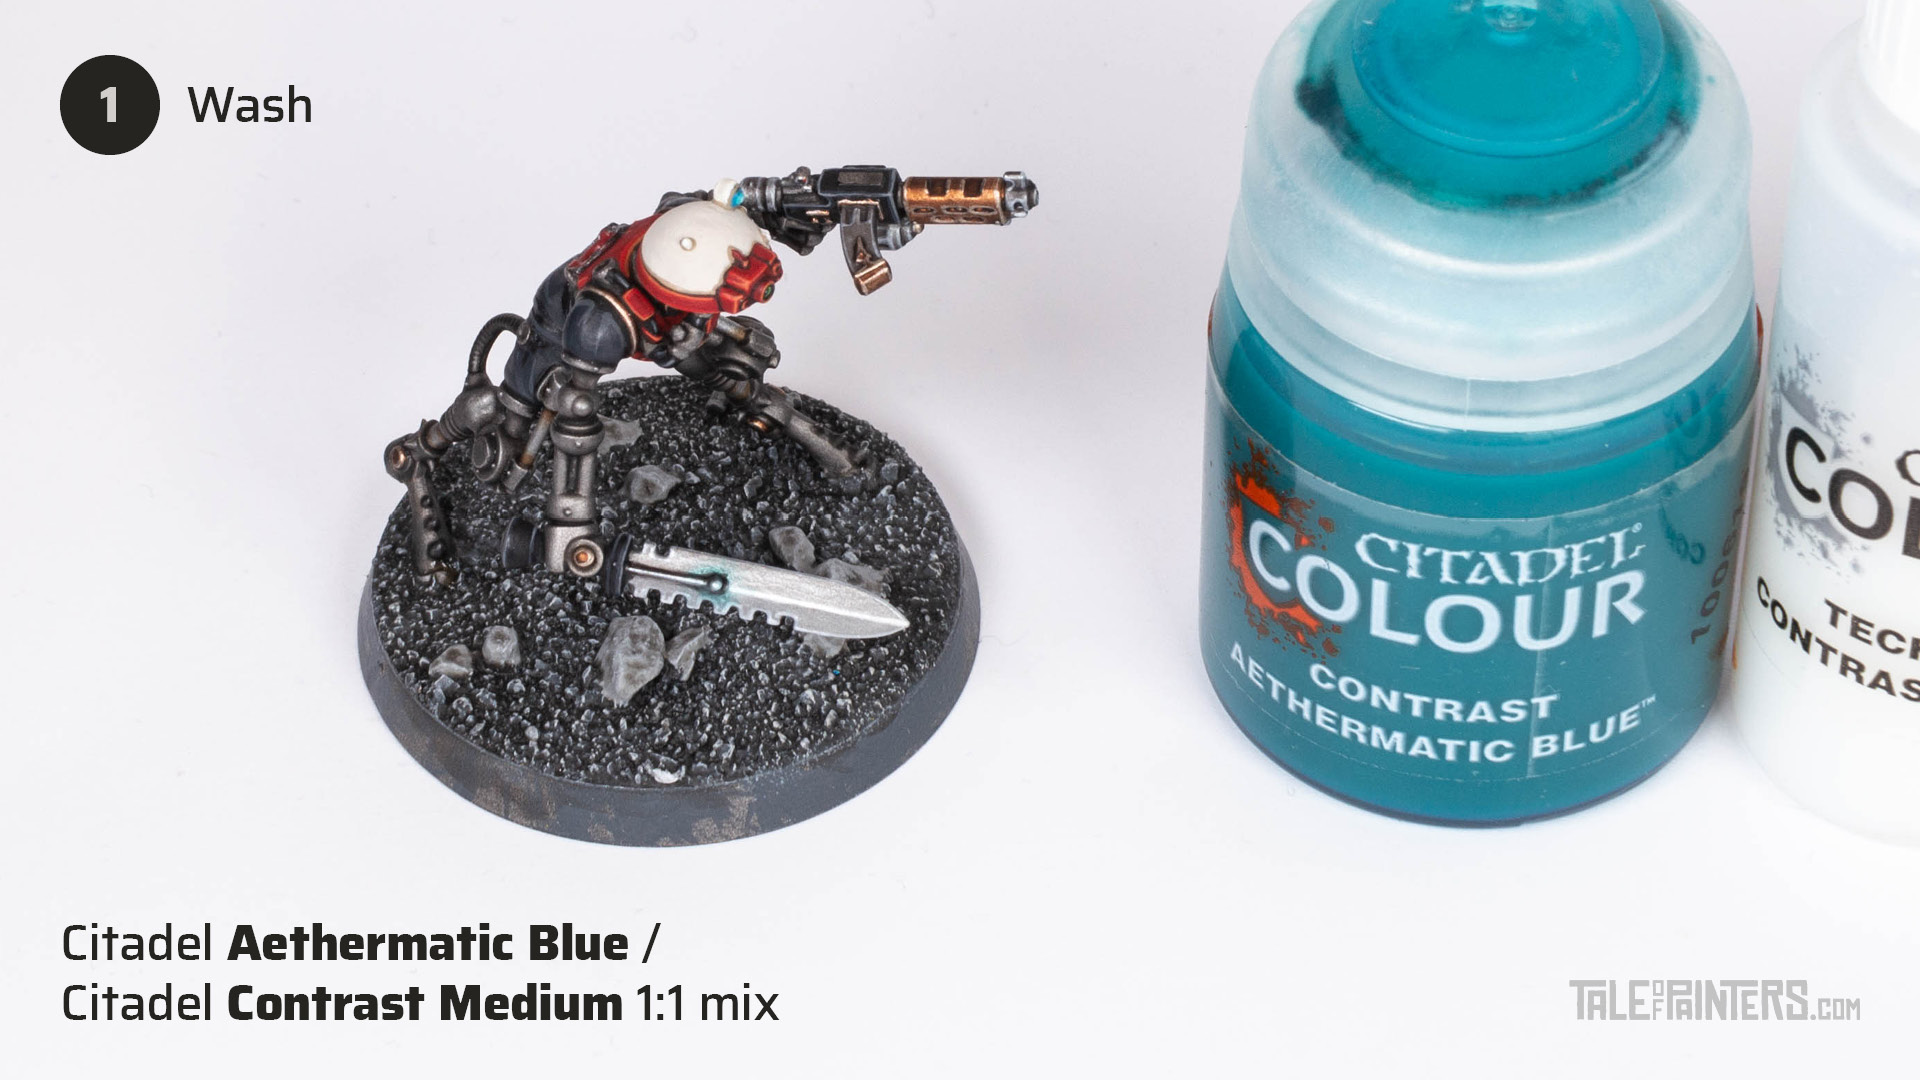
Thin Aethermatic Blue 1:1 with Contrast Medium to create a glaze and wash it around the power node.
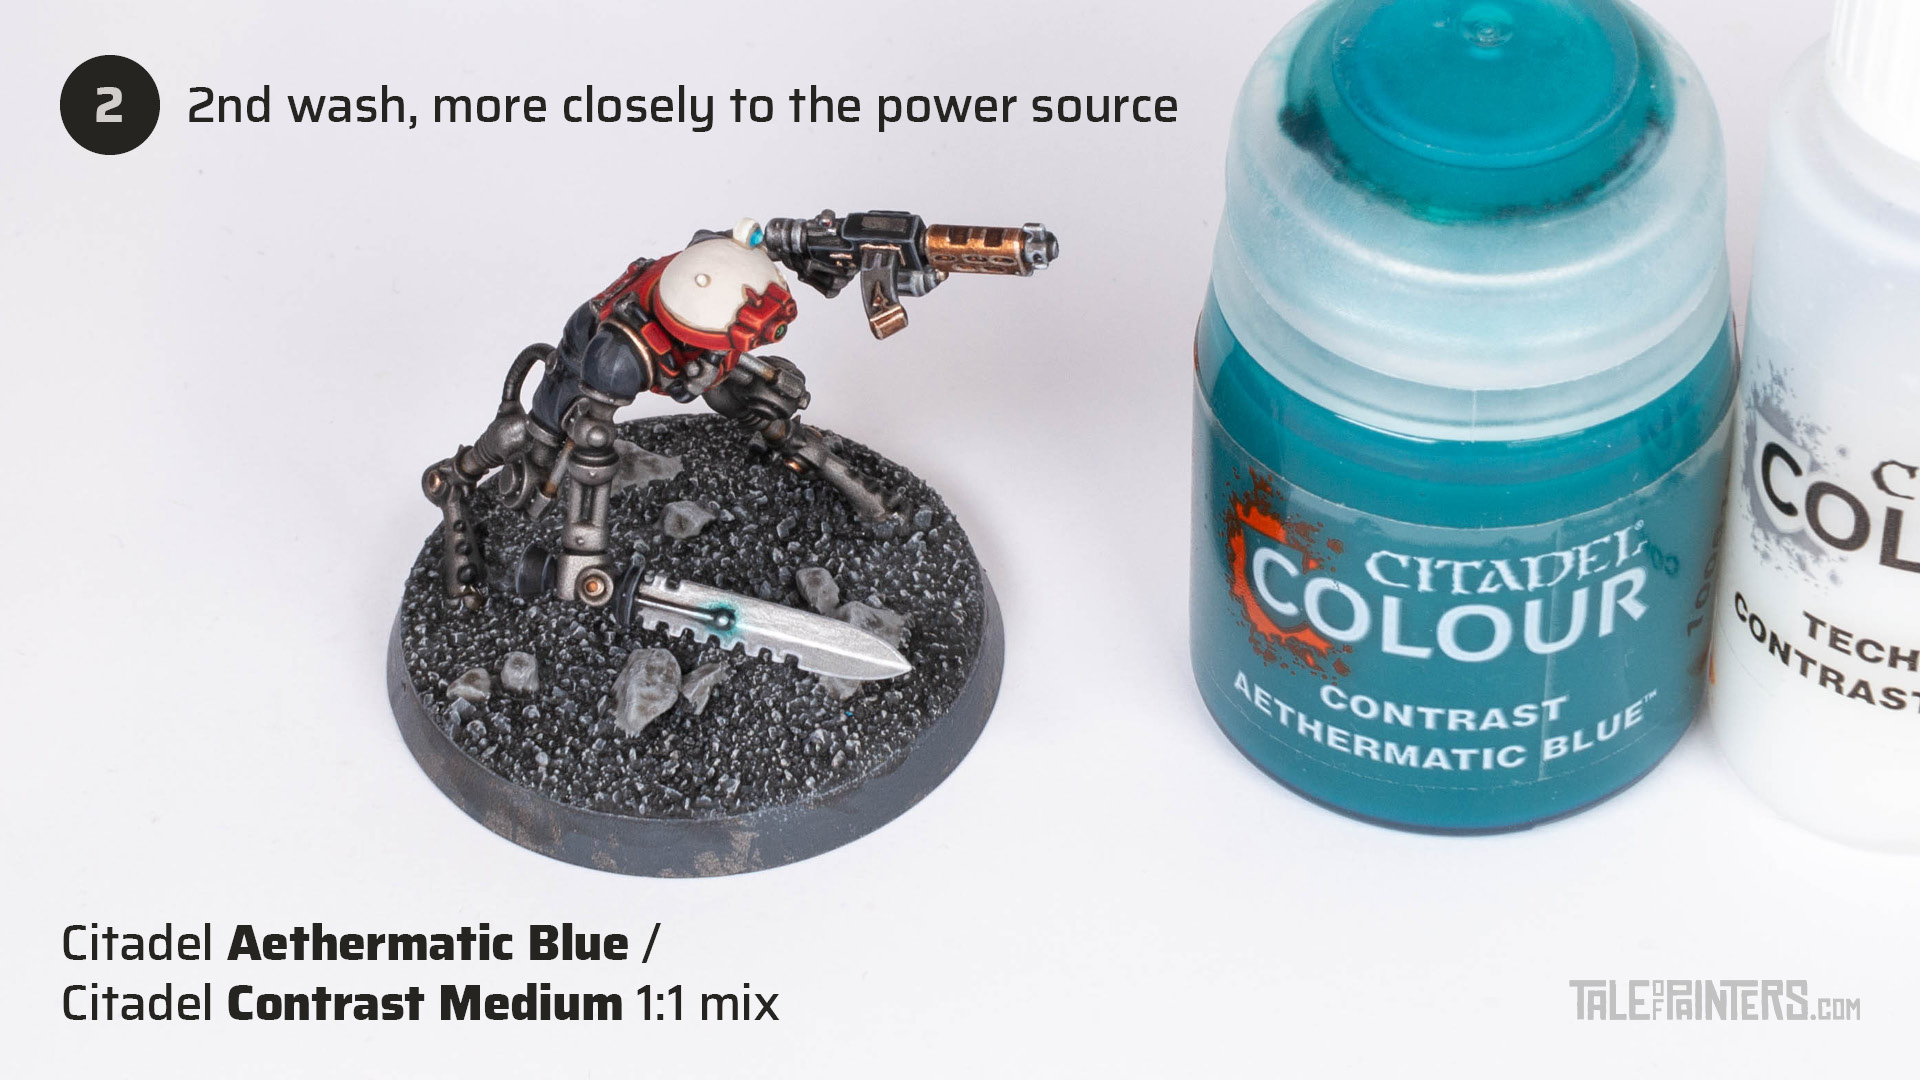
Repeat this process, but this time, apply the wash more closely to the power source.

Layer the power node with Vallejo Game Color Falon Turquoise [or Ahriman Blue, Temple Guard Blue or The Army Painter Warpaints Hydra Turquoise].
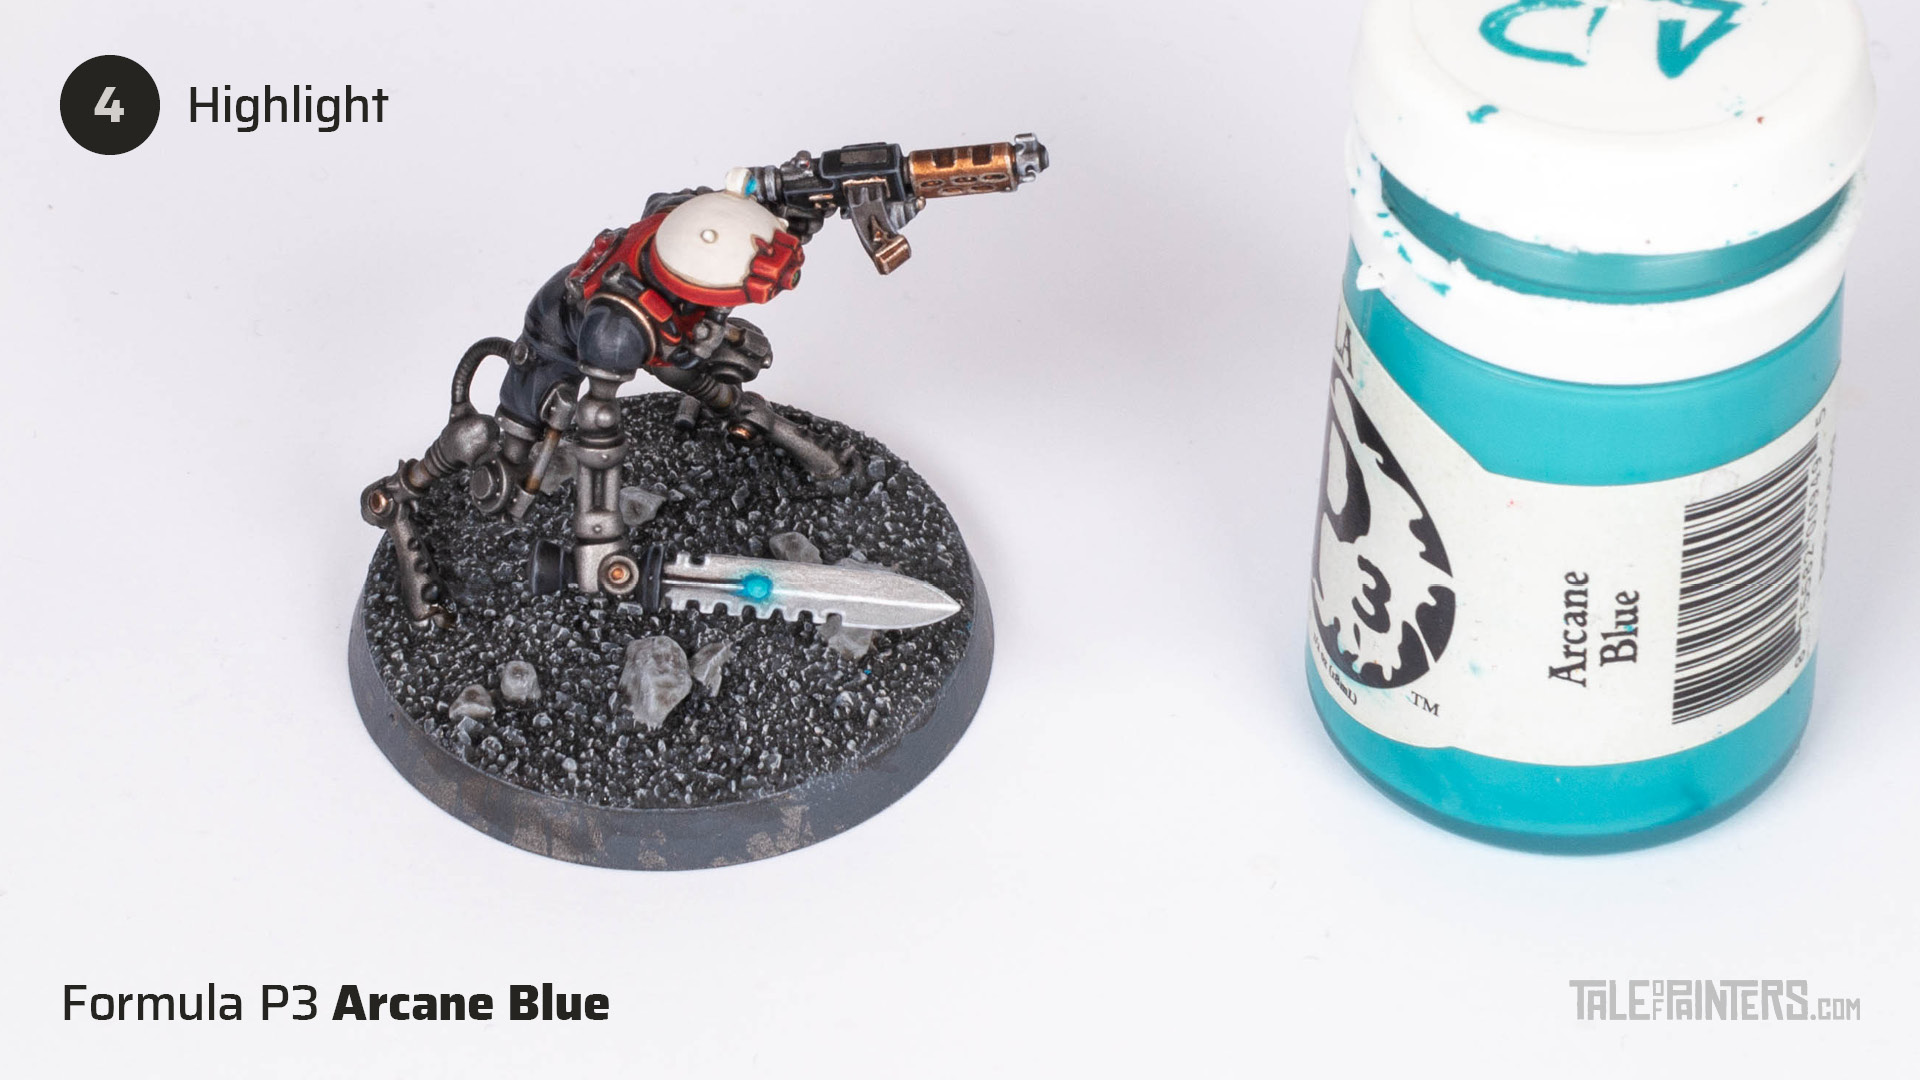
Highlight the node with Formula P3 Arcane Blue [or Baharroth Blue or Warpaints Royal Cloak].
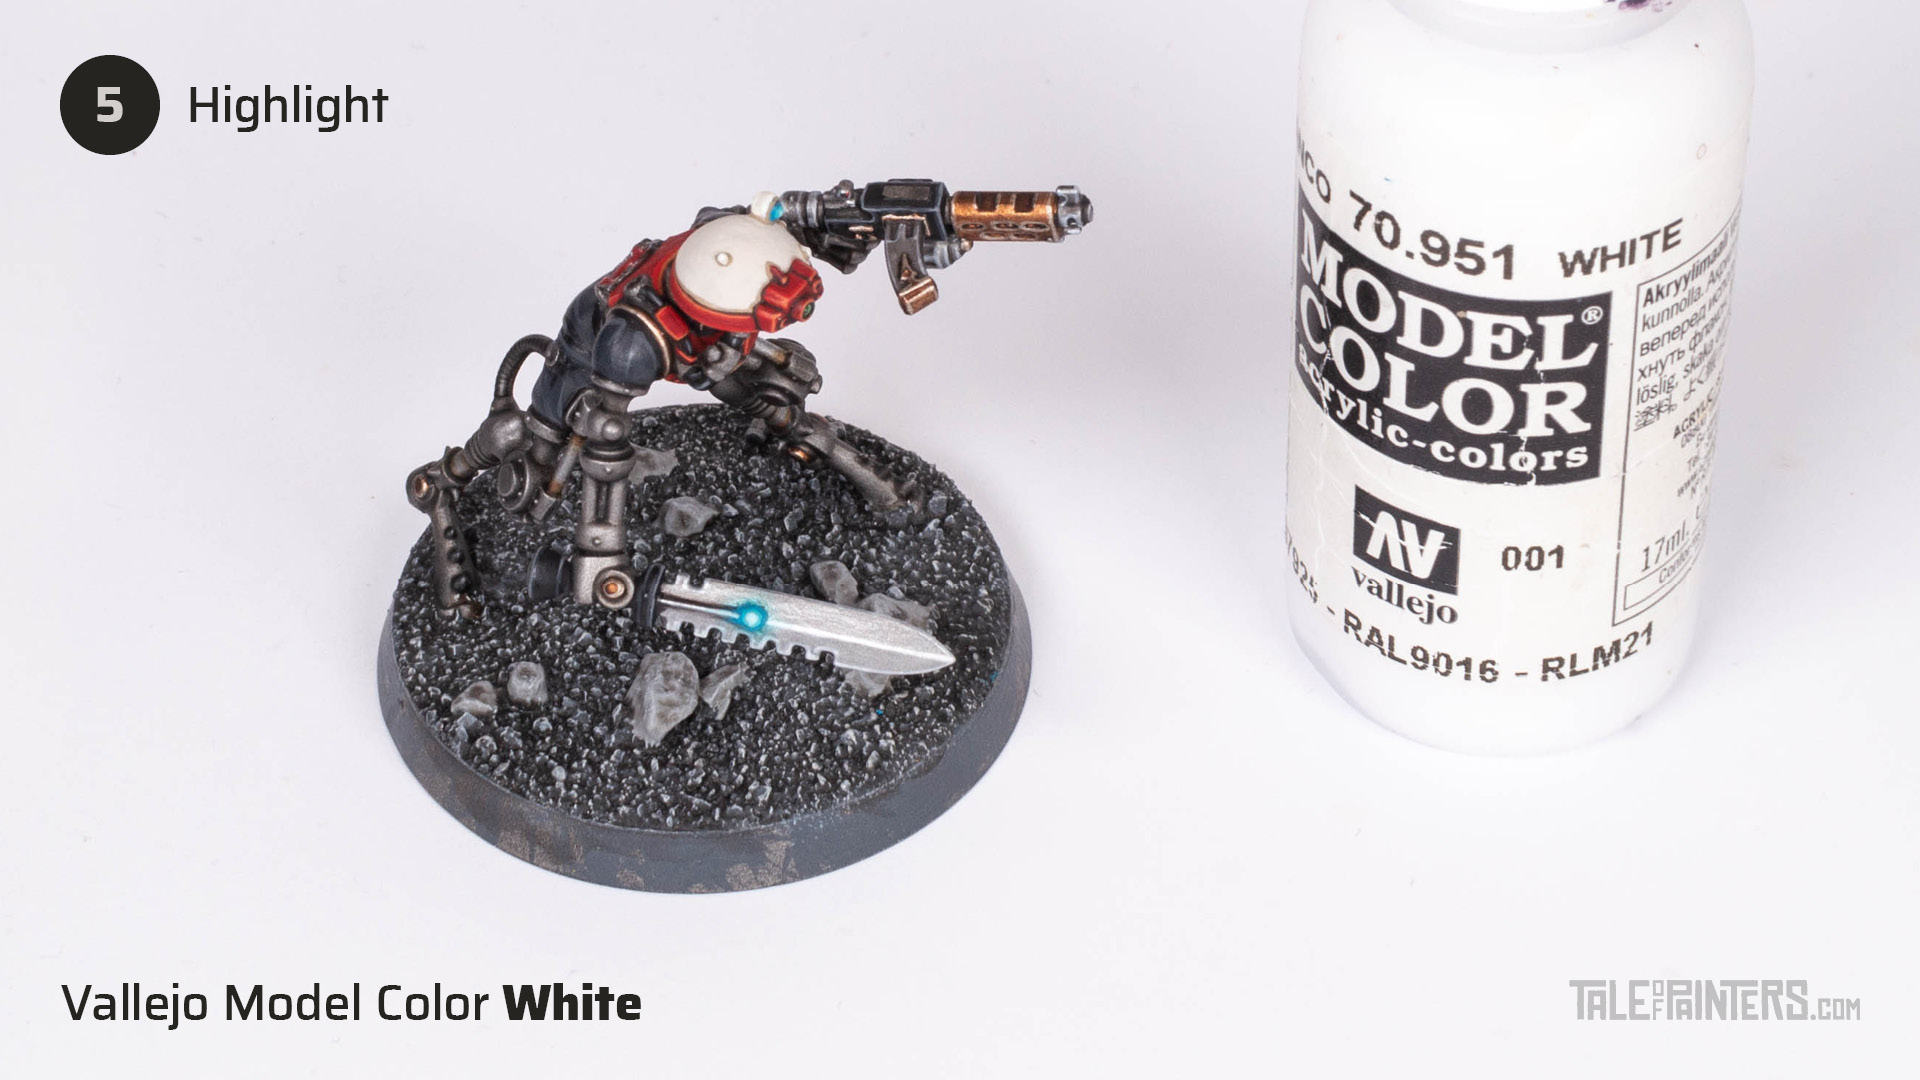
Complete the effect by highlighting the node with two thinned coats of Vallejo Model Color White [or White Scar or Warpaints Matt White].

Here we have the finished Sicarian Infiltrators from my Adeptus Mechanicus Kill Team I painted for the first edition of Kill Team. The turquoise blue lenses were painted exactly as described in steps 3 to 5, I just skipped the additional glazing. You can find a list of paint recipes for my Metalica scheme in this post, or check out my Patreon for a complete Metalica step-by-step tutorial with over 70 steps.

Paints you will need for this tutorial:
Citadel (Games Workshop)
Aethermatic Blue
Contrast Medium
Formula P3
Arcane Blue [or Baharroth Blue or Warpaints Royal Cloak]
Vallejo
Game Color Falcon Turquoise [or Ahriman Blue, Temple Guard Blue or The Army Painter Warpaints Hydra Turquoise]
Model Color White [or White Scar or Warpaints Matt White]
If you need to expand your paint collection to follow the tutorial, check out our partner stores Wayland Games and Element Games, which offer an amazing range of paints at a discount.
Do you prefer a more crystalline effect? Then check out Garfy’s power sword tutorial:
I also made a tutorial for lightning effect Witchblades that is also perfectly suitable for power swords:
Hope you enjoyed this tutorial. If so, leave a comment or reaction below, and if you got any questions, leave them here so I can answer them for you.
Tale of Painters ist das inoffizielle Warhammer-Onlinemagazin VON Hobbyisten FÜR Hobbyisten. Unterstützt unsere Arbeit, damit wir euch auch weiterhin mit neuem Content versorgen können. Nutzt dazu gerne die Links von unseren 🇩🇪 / 🇦🇹 Partnerläden für euren nächsten Einkauf:


Oder unterstützt uns direkt:

