

This is the penultimate tutorial in this series. After Bifur, I just have to post Oin and I’m done. Read on to find out how to paint Bifur in 15 steps.
This tutorial assumes you have a basic understanding of how to paint. For the beginners, I will explain the techniques as I go along. Each picture below shows four chronological steps. Underneath each picture are the corresponding instructions. Each step shows the paint I used during that step. It’s good to have reference material close to hand to check colours. I used google images for film stills and Games Workshop’s 360º pictures on their website were a great help.
Paints you will need for this tutorial:
Black Undercoat (technical)
Cadian Fleshtone (layer)
Bloodletter (glaze)
Rhinox Hide (base)
Kislev Flesh (layer)
Stormvermin Fur (layer)
Administratum Grey (layer)
Pallid Wych Flesh (layer)
Gorthor Brown (layer)
XV-88 (base)
Balor Brown (layer)
Mournfang Brown (base)
Karak Stone (layer)
Ironbreaker (layer)
Nuln Oil (shade)
Agrax Earthshade (shade)
Stirland Mud (texture)
In case you need to expand your paint collection, head over to Wayland Games or Slave to Painting, which both stock a huge selection of paints at competitive prices.
Undercoat the model. The details are small, so I hand undercoated the model (rather then use a spray) with Imperial Primer.
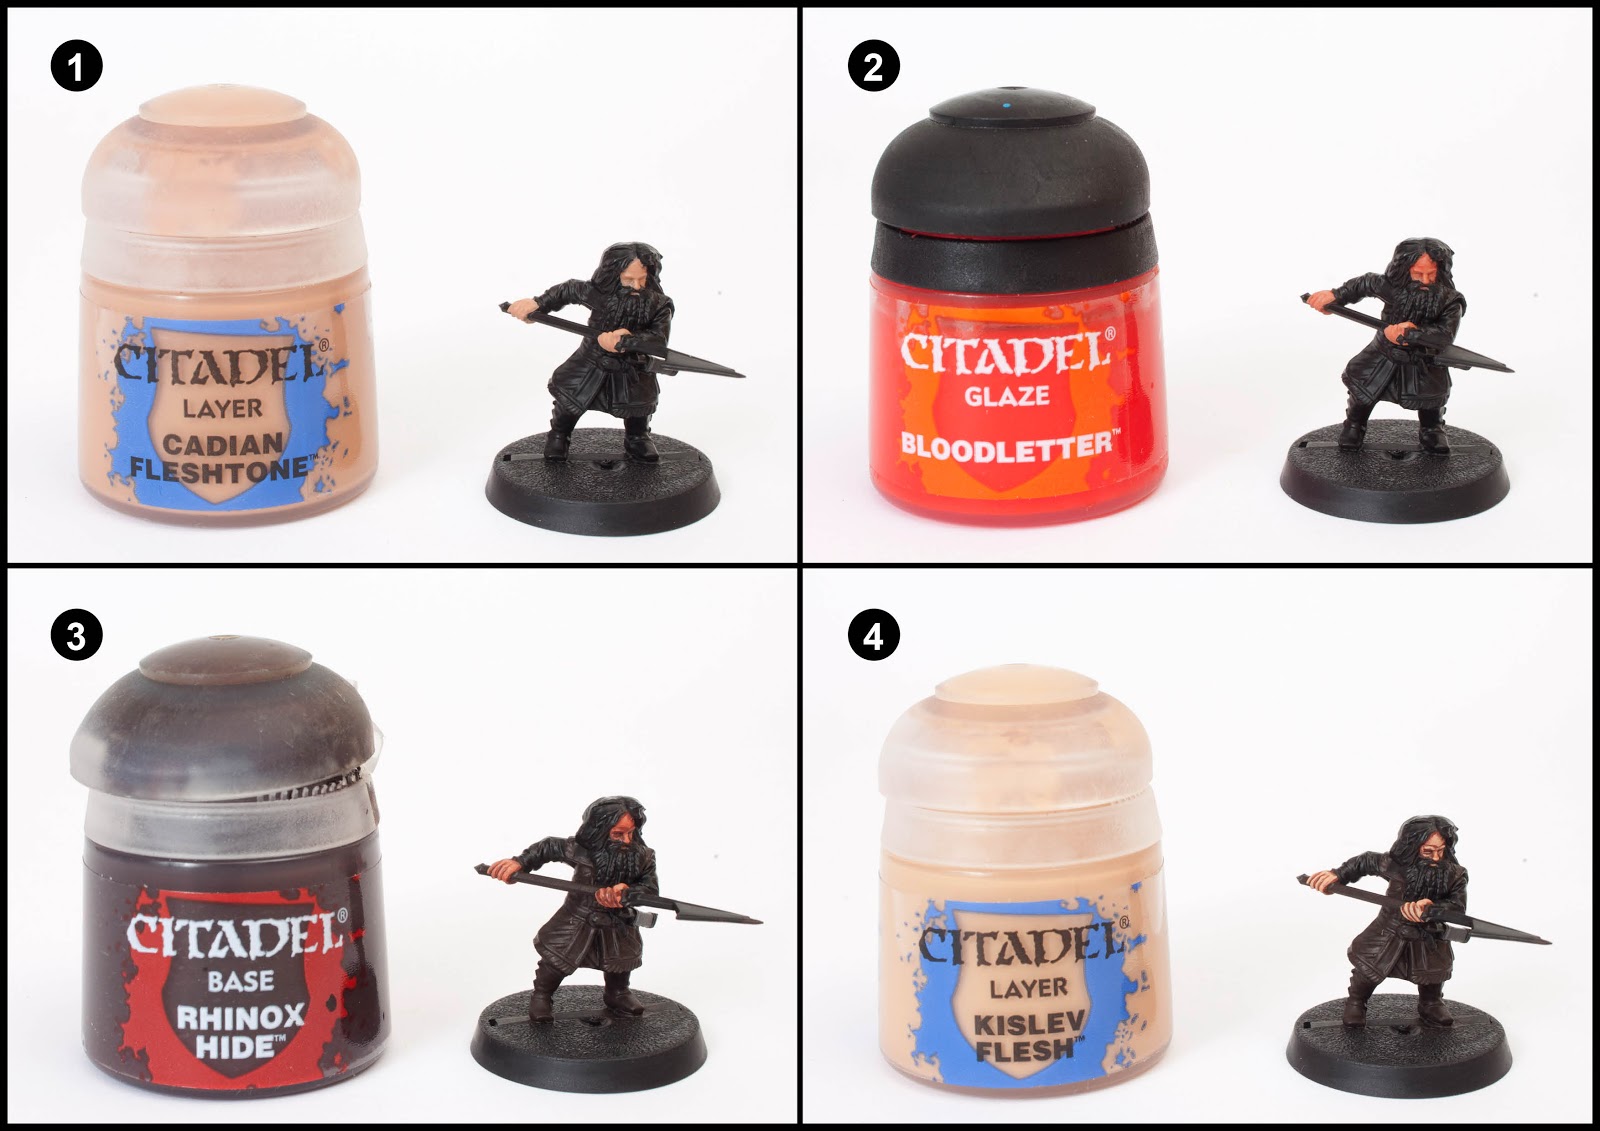
1. I painted the face and fingers with Cadian Fleshtone. I painted around the beard.
2. I changed the hue of the skin using Bloodletter glaze. Dwarves are a little more red in complexion then humans.
3. I watered down Rhinox Hide heavily and then shaded around the eyes, nose, inbetween the fingers and around the face. Then paint the weapon’s shaft, the entire over coat and boots with Rhinox Hide (don’t water this down)
4. I highlight the face and fingers with Kislev Flesh. Also if you’re feeling brave, this is the opportunity to paint the eyes with a thin black line and two white dots.
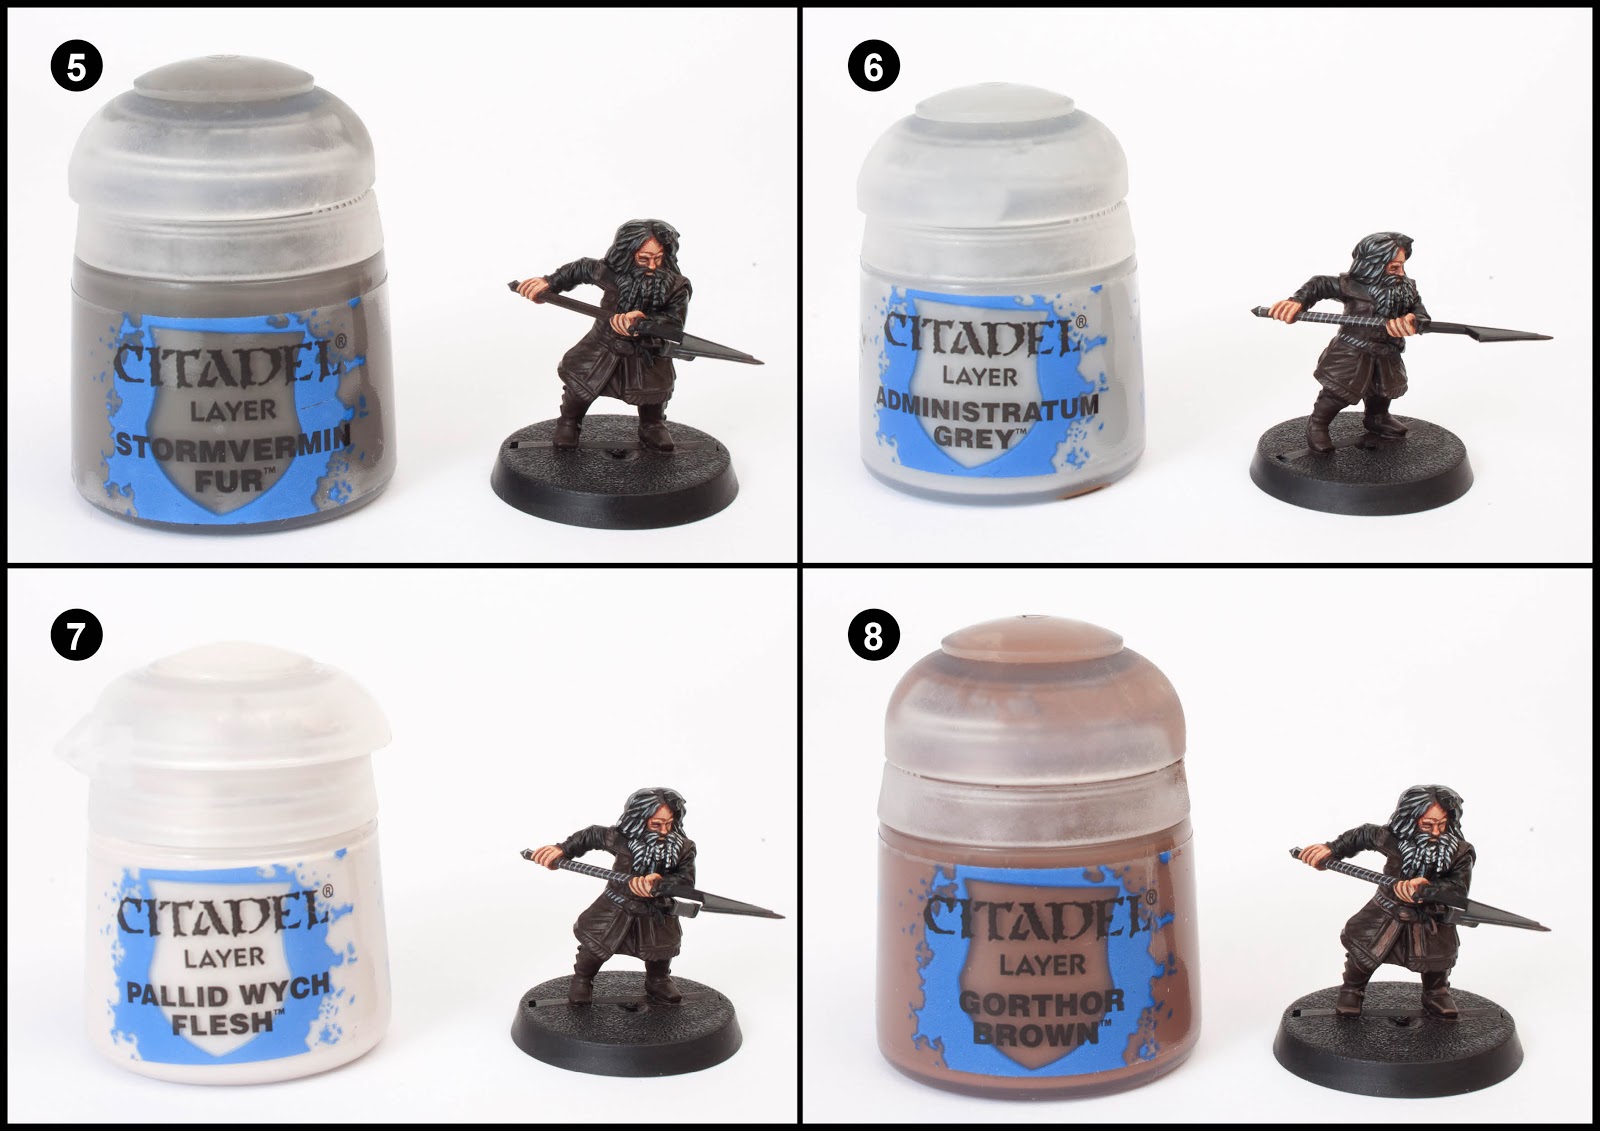
5. Highlight the hair and beard Stormvermin Fur, small, thin, flicks of paint are perfect.
6. Highlight the hair and beard again with Administratum Grey. Paint some thin diagonal lines of Administratum Grey on the weapon’s shaft and the belt.
7. Highlight just the moustache and beard with Pallid Wych Flesh.
8. Highlight the boots and edges of the belt with Gorthor Brown. Paint the vertical recessed panels on the overcoat with Gorthor Brown.

9. Paint the sleeves and scabbard with XV-88. Pick out the fringing around the hem of the overcoat and around the shoulders with small lines of XV-88. Paint the diagonal panels of the overcoat with XV-88.
10. Highlight the previous stage apart from the sleeves with Balor Brown.
11. Heavily water down Mournfang Brown into a wash consistency and apply it it to the sleeves. Shade the diagonal panels by painting along the lower edge with this mix.
12. Highlight all the raised areas of the overcoat, sleeves, boots and fringing with thin lines of Karak Stone.

13. Using Ironbreaker, paint the following areas: buckles on the boots, the belt buckle, the knife’s scabbard edging, the knife’s handguard and pommel, the main weapons blade and the piece of weapon sticking out of Bifur’s forehead.
14. Wash all the metal areas with Nuln Oil. Then wash the boots and hair (not NOT the beard) with Nuln Oil.
15. Wash the sleeves with Agrax Earthshade.
Finally base the model in a way which fits in with your collection. I used Stirland Mud texture paint highlighted with Karak Stone and the base edge was painted with XV-88. Static grass and scrub were glued on in small clumps.

For more Hobbit tutorials check out my Bilbo, Gandalf, Thorin, Gloin, Bombur, Ori, Dwalin, Balin, Kili, Dori, Fili, Nori, Bofur, Radaghast and Goblin tutorials. If you found this tutorial useful, let me know in the comments.
Do you like our tutorials and reviews? Here is what you can do to support us: Check out the websites of our sponsors, place your next orders at Wayland Games by clicking here or on the banner on the right. Thank you very much, we appreciate any help to keep us going!

7 Comments
Leave a Reply
Tale of Painters is the unofficial Warhammer hobby magazine run by hobbyists like you. Support our work by using the affiliate links from our partner stores for your next orders so we can continue to bring you fantastic FREE content every day:


![]()
![]()
Or support us directly:


you deserve a bloody medal for all each and every tutorial that you have posted. Thank you very, very much 🙂
Thank you for the kind words 😀
ah, you did a leet job on the eyes on this one, eh? =)
leet job? What's that mean mate?
sorry, it's a positive expression, used among video gaming community (at least in North America) 🙂
great job on this one
Thank you for all the hard work!!
You're welcome 😀