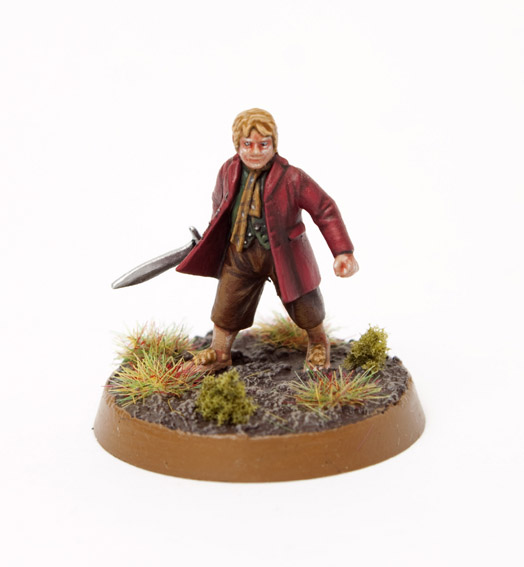


As documented in my review of The Hobbit box set and Stahly’s review of White Dwarf, it has been mentioned there are no detailed painting guides for the new Hobbit models. If you want those then GW want’s you to buy them for the iPad. Here at Tale of Painters we believe in FREE tutorials and I’m pleased to present to you a comprehensive 21 step guide to paint Bilbo Baggins using the latest GW paints.
Each picture below shows six chronological steps. Underneath each picture are the corresponding instructions. Each step shows the paint I used during that step. it’s good to have reference material close to hand to check colours. I used google images for film stills and Games Workshop’s 360º pictures on their website were a great help.


1. I hand undercoated the model with Imperial Primer. I didn’t want to risk clogging the details with spray.
2. I painted all the skin areas with Cadian Fleshtone. Don’t forget the ears like I did.
3. I wanted to give my skin a red tone so I lightly glazed it with Bloodletter.
4. I then highlight the skin with Kislev Flesh.
5. One final highlight used sparingly of Pallid Wych Flesh.
6. The hair was painted with a couple of coats of Balor Brown.


7. Wash the hair with Seraphim Sepia Shampoo.
8. Highlight the hair with Ungor Flesh.
9. Paint the waistcoat with Waaagh Flesh.
10. Highlight the waistcoat with Loren Forest.
11. The trousers are then painted with Mournfang Brown
12. Shade the trousers with watered down Rhinox Hide. Lahmian Medium is great for this.


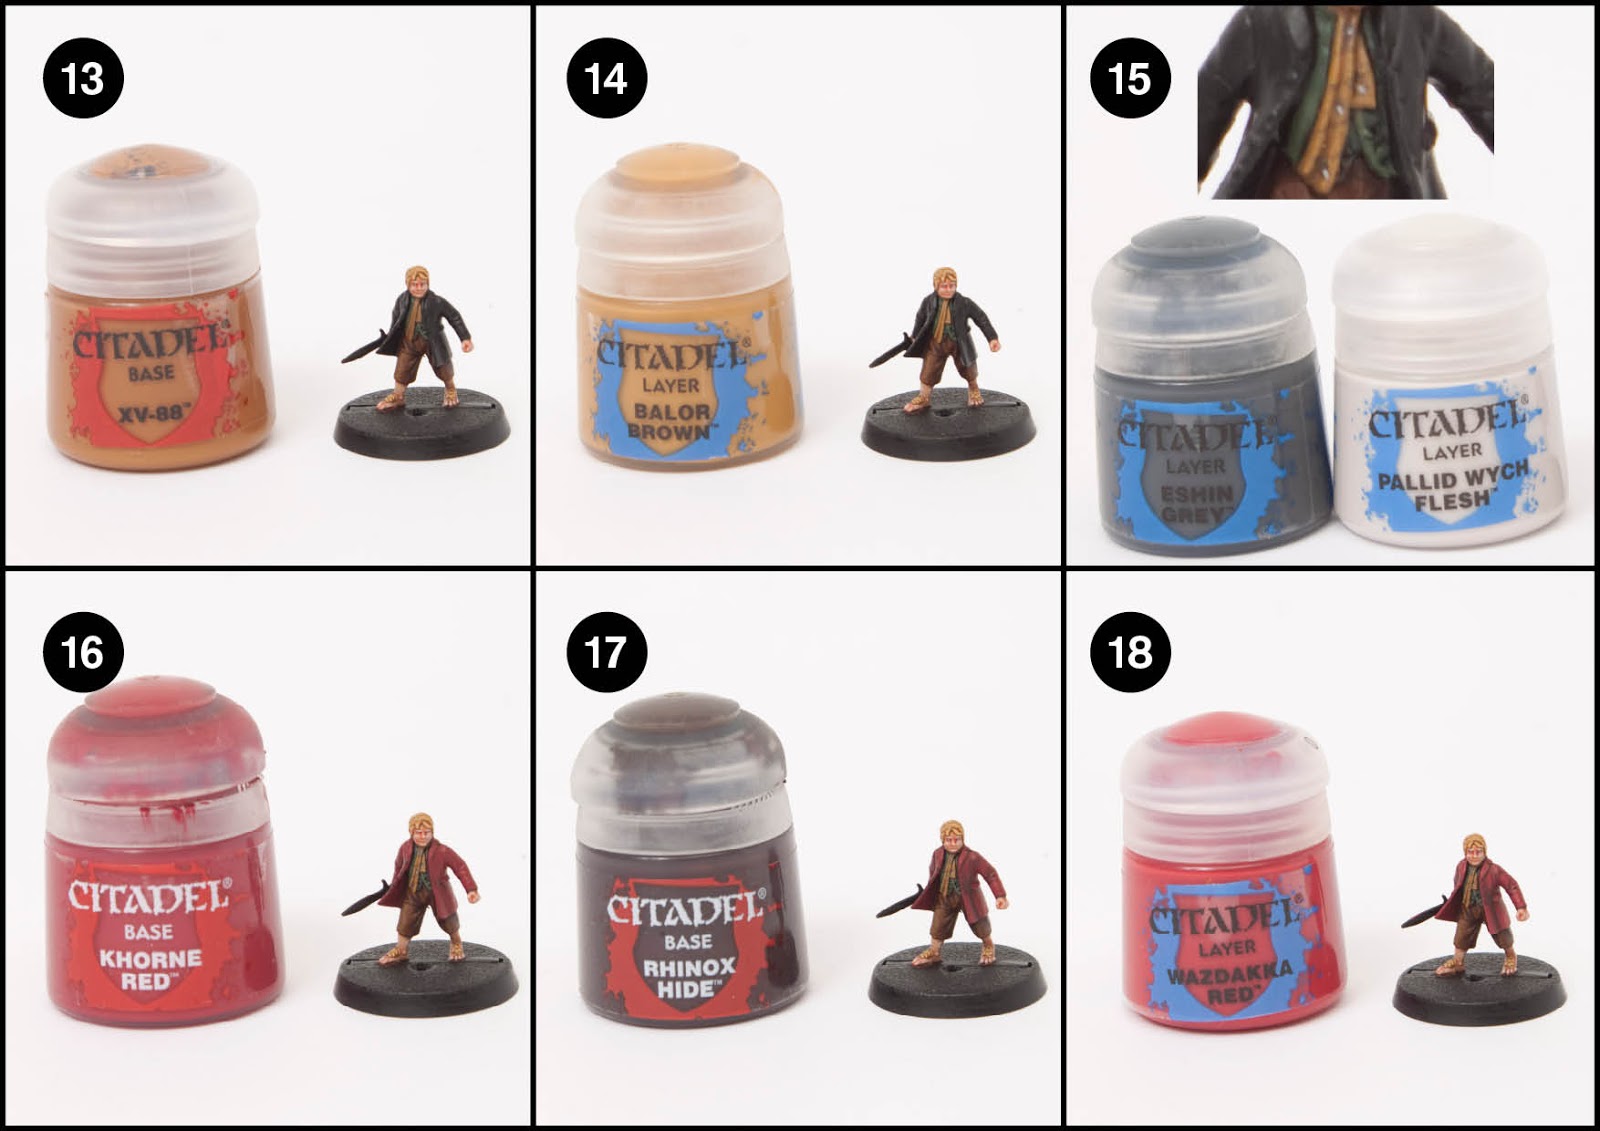
13. Highlight the trousers with XV-88 and paint the scarf with this colour.
14. Highlight the scarf with Balor Brown.
15. If you’re feeling brave enough paint the scarf pattern on with Eshin Grey. It’s just some microscopic lines and dots. Dot the spots with some Pallid Wych Flesh.
16. Use Khorne Red to paint the jacket.
17. Watered down (or Lahmian Medium) Rhinox Hide is used to shade the jacket in the same way the trousers were shaded.
18. Highlight the jacket with Wazdakka Red.


19. Paint Bilbo’s sword Sting with Runefang Steel. This blade is so small it doesn’t require a lot of work. I just shaded lightly with very watered down Abbadon black. Don’t forget to paint Bilbo’s buttons silver as well.
20. Paint the base with the Citadel Texture paint of your choice. I chose Stirland Mud.
21. I painted the base rim with XV-88, and highlighted the texture with Baneblade brown. Some static grass and scrub was added to finish the model off.


This model was an absolute joy to paint. He is so small it makes a refreshing change from the Thunderhawk and Hierophant I painted earler on in the year. I’m really looking forward to painting more from the set now. Maybe a Gandalf tutorial will be next if this one proves popular.
Do you like our tutorials and reviews? Here is what you can do to support us: Check out the websites of our sponsors, place your next orders at Wayland Games by clicking here or on the banner on the right. Thank you very much, we appreciate any help to keep us going!


Thanks for this. I just followed it for my bilbo. Want to do more hobbits now 🙂
Thank you so much for this fantastic guide. You helped me pretty much into this hobby and I even got compliments for my first works.
Keep up!
Great guides buddy. I've used your guides for my thirteen dwarves from goblin town box set and I'm now using them as a base line for my barrels out of bond set 🙂
Fantastic to hear. Please send me pictures via our Facebook page. I would love to se them.
This means a lot to me. Thank you.
Thanks for all of your great tutorials for this boxed set – even as a seasoned hobbyist (16 years) with 22 fully painted armies, your guides have been invaluable for painting my minis! You should know that every hobbyist I've spoken to so far has also used your guides for these particular models. Awesome stuff.
Please send me a picture when you're done. Probably easiest to post it on our facebook page.
Hi, I'm just about to purchase Riddles in The Dark and this tutorial is perfect for me as I've only painted a few things. Can I ask what brush you reccommend for such small details like the scarf? I purchased a GW fine detail brush but it was already frayed and it's impossible to highlight accurately no matter how neat I try to be! Thanks.
It's all about the tip. I can paint thin lines with a slightly larger brush so long as the tip is sharp. Brush care is important and you can get brush soaps which do make a difference but the bottom line is clean the brush thoroughly. Dry it. Don't ever dip the brush bristles all the way into the paint up to the ferule. Twist the brush when drying on a tissue to help keep the point.
Thanks, that makes sense. So far the best highlights I've done have been using a standard brush with a nice tip. I look forward to trying your tutorials 🙂
Thank you kindly for doing this. I've been thinking of buying this set because I love painting models from the LotR set, but I wasn't sure where to start on such detailed models. Thanks again!
You're more then welcome. YOu'll get a lot of enjoyment out of this set. The diversity of models means there are plenty of challenges and new skills to learn. I learnt new techniques and honed my skills painting this slightly smaller scale. Looking forward to trying out some of the fabric patterning effects on my Chaos Cultists in 40k.
featured today at GW's What's New Today: http://www.games-workshop.com/gws/wnt/blog.jsp?pid=6400016-gws
Great tutroial as usual!
Fantastic! Really looking forward to the other painting guides for the rest of the company! Thank you and well done!
Amazing things here. I'm very glad to peer your article. Thank you so much and I am looking forward to contact you. Will you please drop me a e-mail?
Also visit my web blog amphora tobacco
These tutorials are not only good for tips on painting the model in question but for applying different tecniques to my future models too. Great work, don't stop doing what you're doing.
I love this tutorials, that's the reason I visit this web on a daily basis, I always find something interesting.
I really like the tip of the Bloodletter for the skin.
And I already looking forward for that Gandalf tutorial!
Excellent tutorial. it's down to articles like this (and others) that keep me visiting. Each poster brings new ideas and styles that keep me enthused about painting my own models
Cheers fellas