
In this tutorial I’ll show you how to paint a cool realistic heat bloom effect, perfect for all kinds of melta and flamer weapons found in Space Marines and Imperial Guard. It’s super easy and doesn’t require an airbrush, so what are you waiting for.
This tutorial assumes you know the basic grips of painting Warhammer miniatures. Step-by-step I explain all the paints and techniques I used. I have a rather eclectic paint collection, so when I use a paint that is not from Games Workshop (or out of production), I’ll try to provide you with suitable alternatives from the current Citadel paint range [in brackets]. However, if you want to achieve exactly the same result as shown, I recommend expanding your paint collection. You’ll find a list of all the paints used in this tutorial at the end of the post.
Multi-melta muzzle burn painting guide
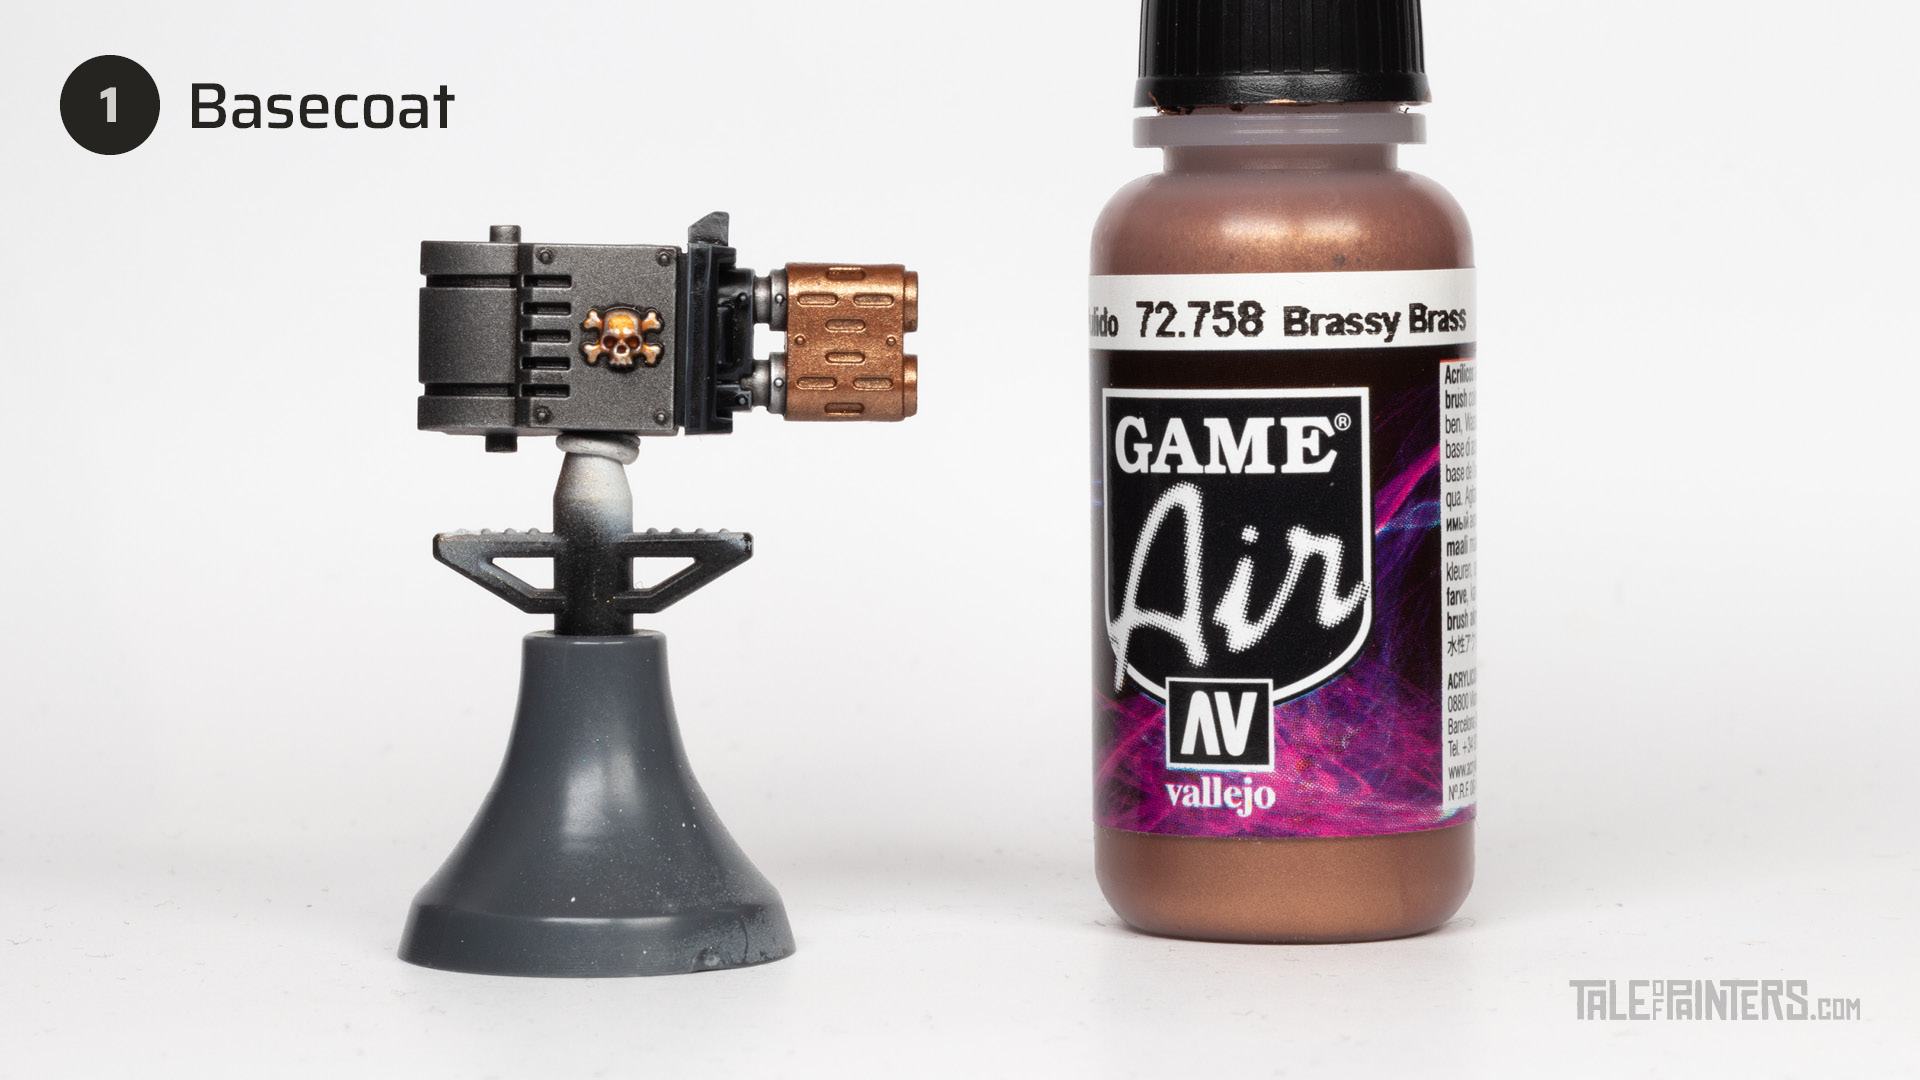
Basecoat the muzzle with Vallejo Game Air Brassy Brass [you can also use Game Color Brassy Brass or Brass Scorpion].
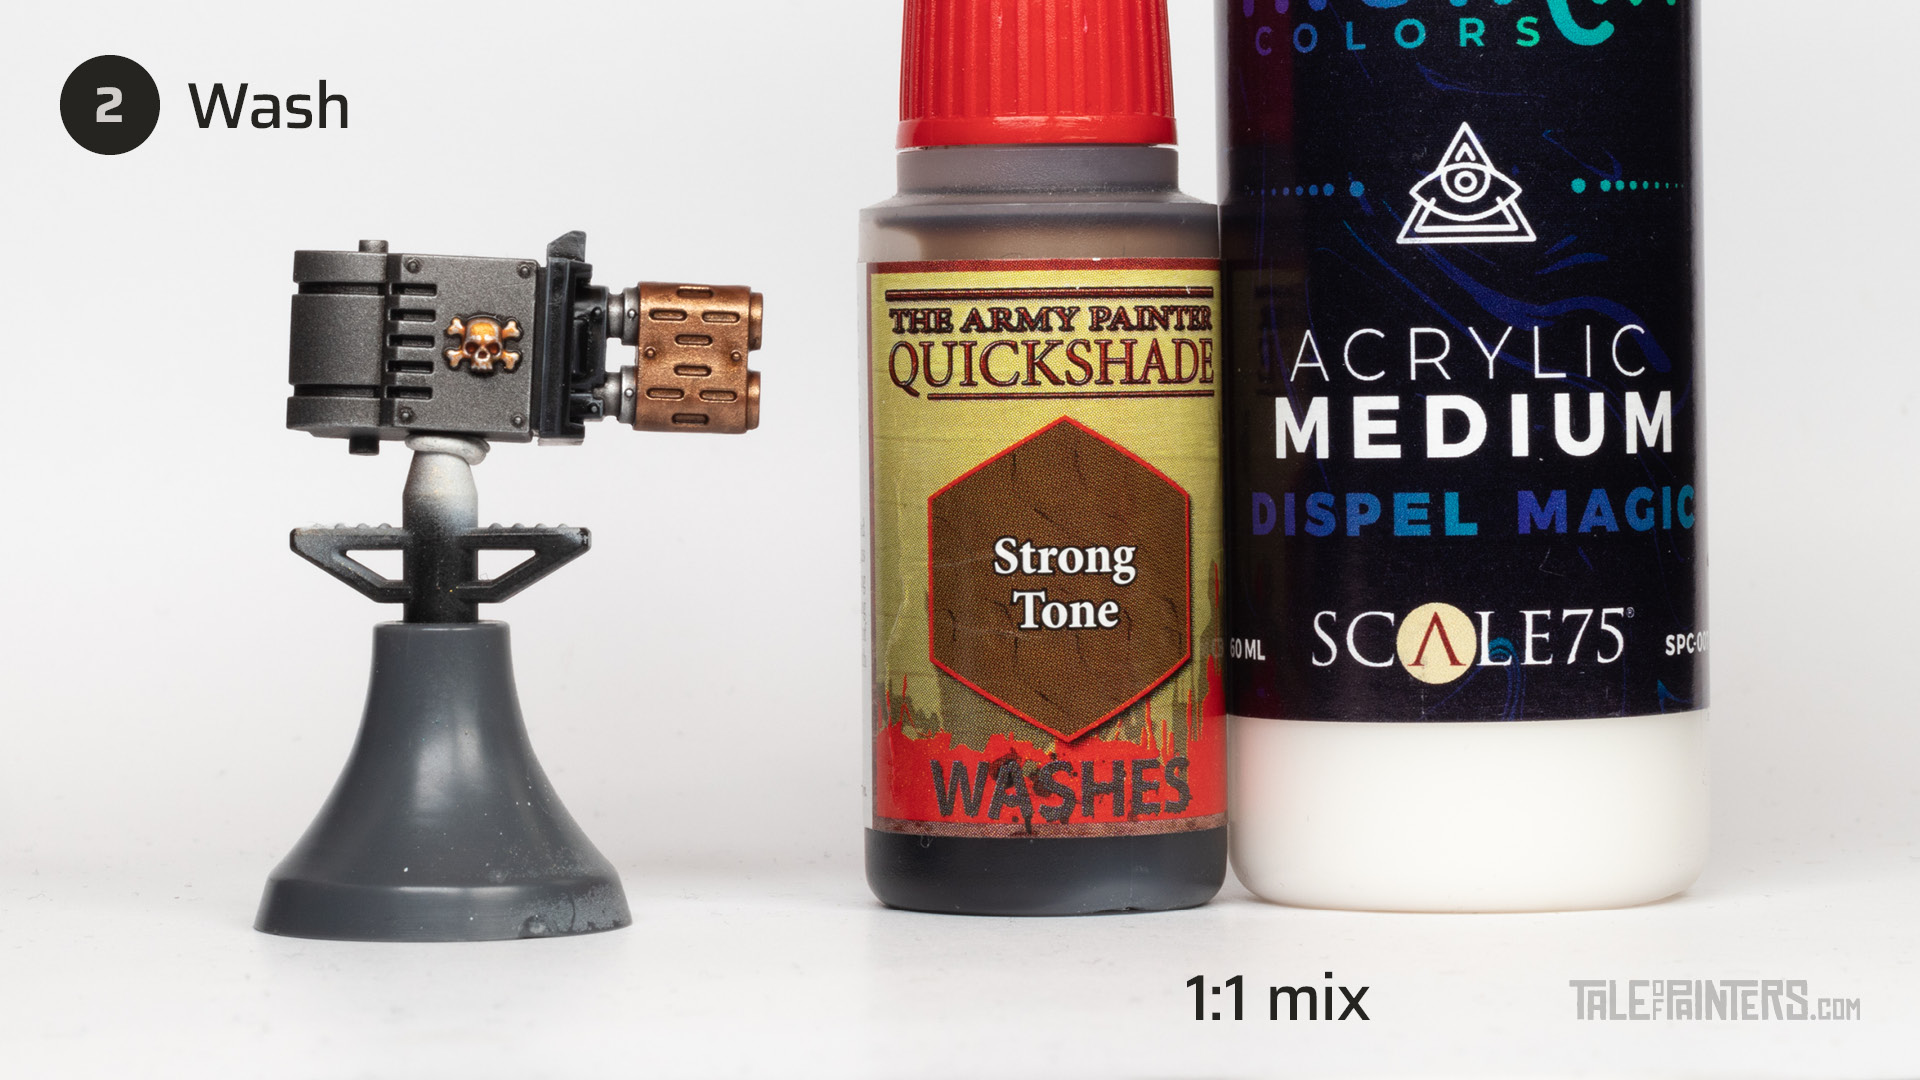
Create a 1:1 mix of The Army Painter Warpaints Strong Tone Wash [or Agrax Earthshade] and Scale75 Dispel Magic [or Lahmian Medium] and wash it all over. Try not to let it pool too much by soaking up any excess with a damp brush.
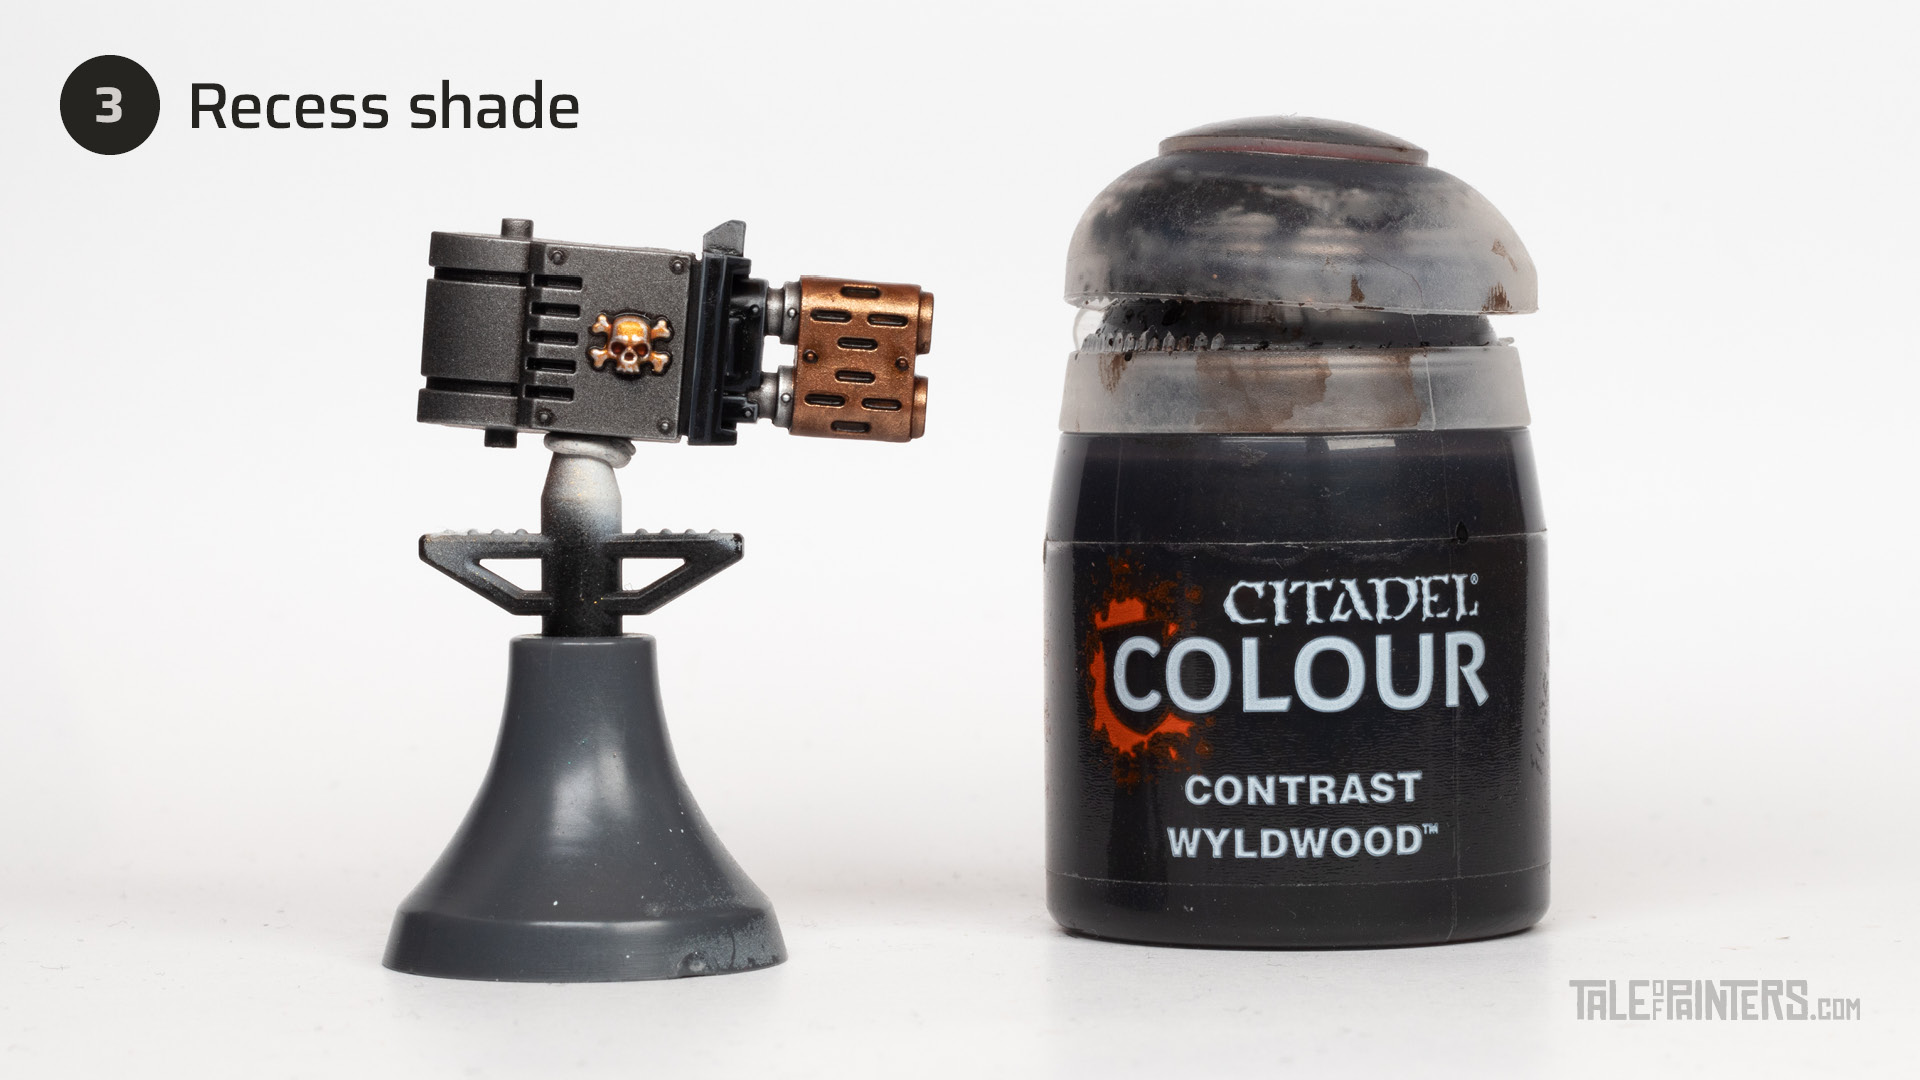
Apply a recess shade of pure Wyldwood around the rivets and the small openings.

Apply a thin edge highlight of Canoptek Alloy.
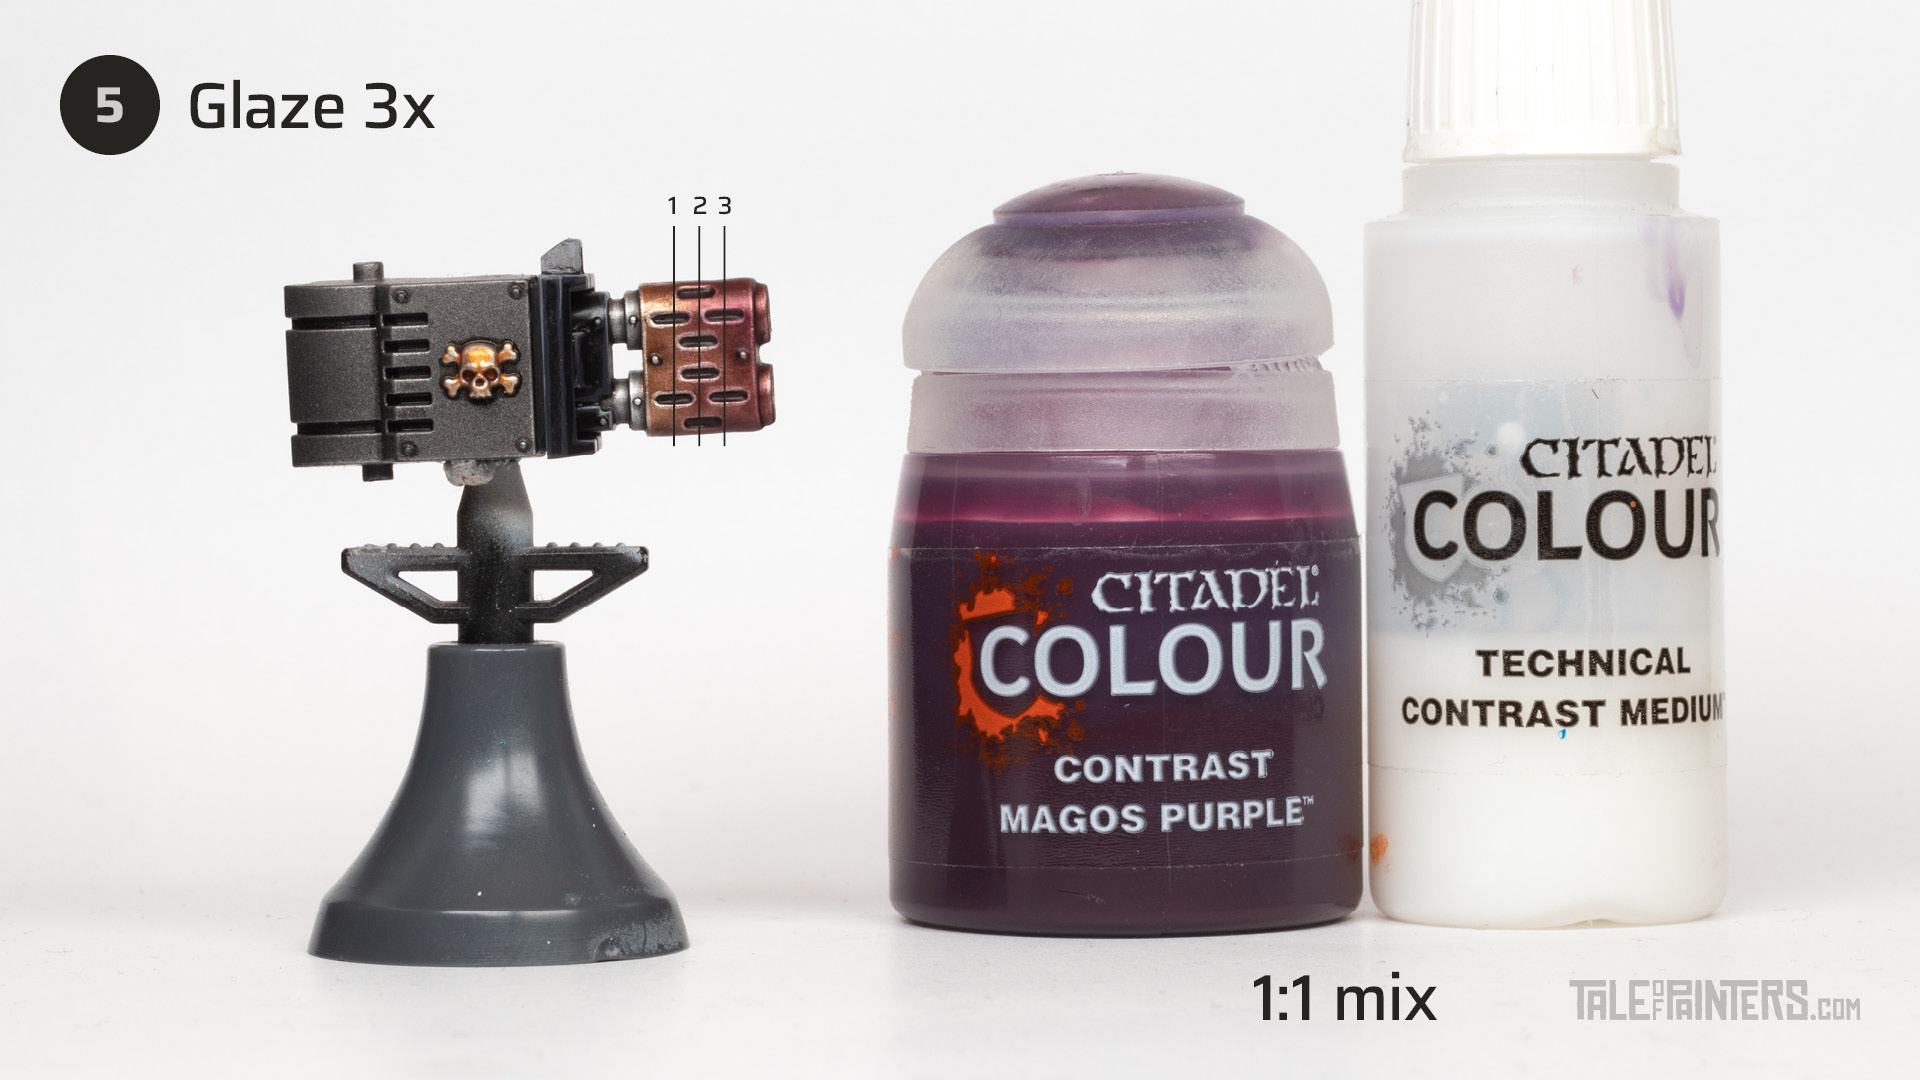
This is the fun part. Thin Magos Purple 1:1 with Contrast Medium and glaze the front of the muzzle. Keep it thin and don’t let it pool too much, you don’t want to use this like a wash. Repeat this process two times once dry, glazing 1 mm less each time to build up a gradient.

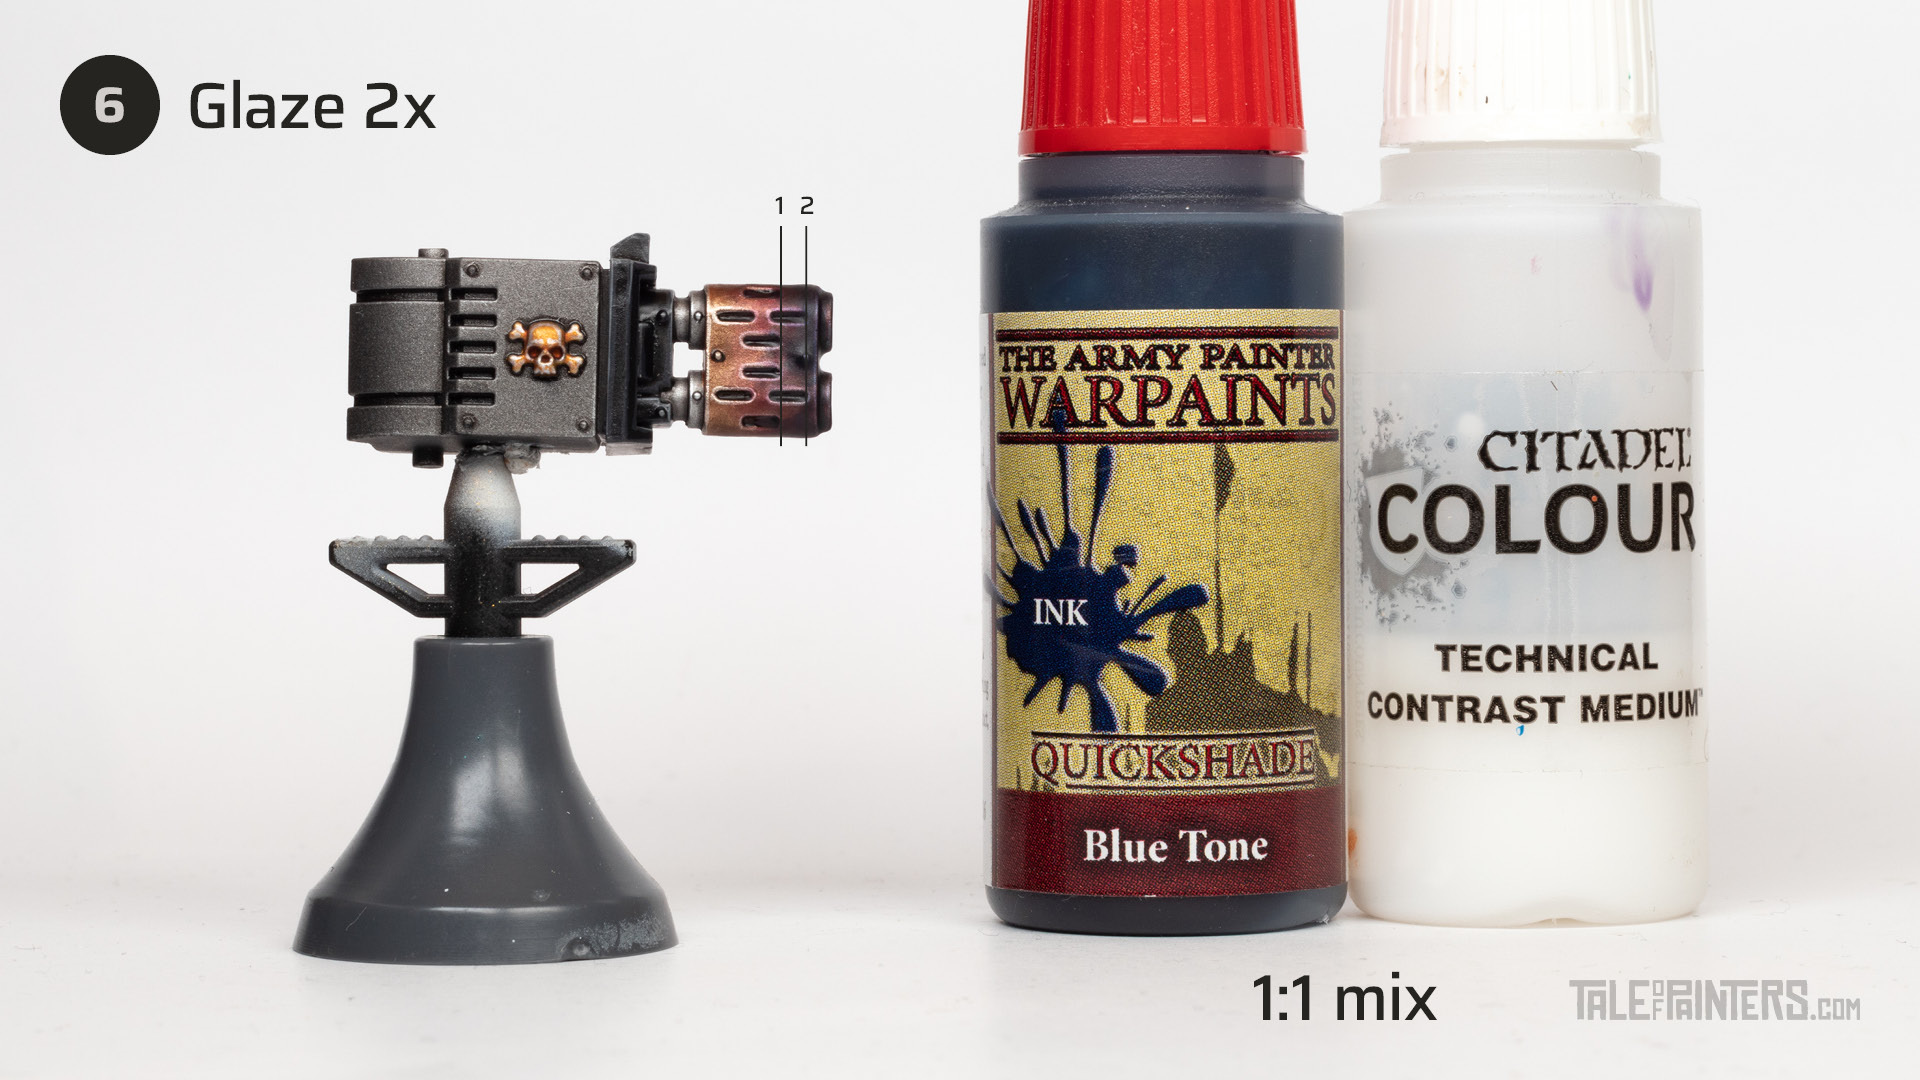
Make the gradient even darker by thinning Warpaints Blue Tone Wash 1:1 with Contrast Medium [or Ultramarines Blue and Contrast Medium about 1:3]and glaze the front of the muzzle two more times, moving further towards the front each time.
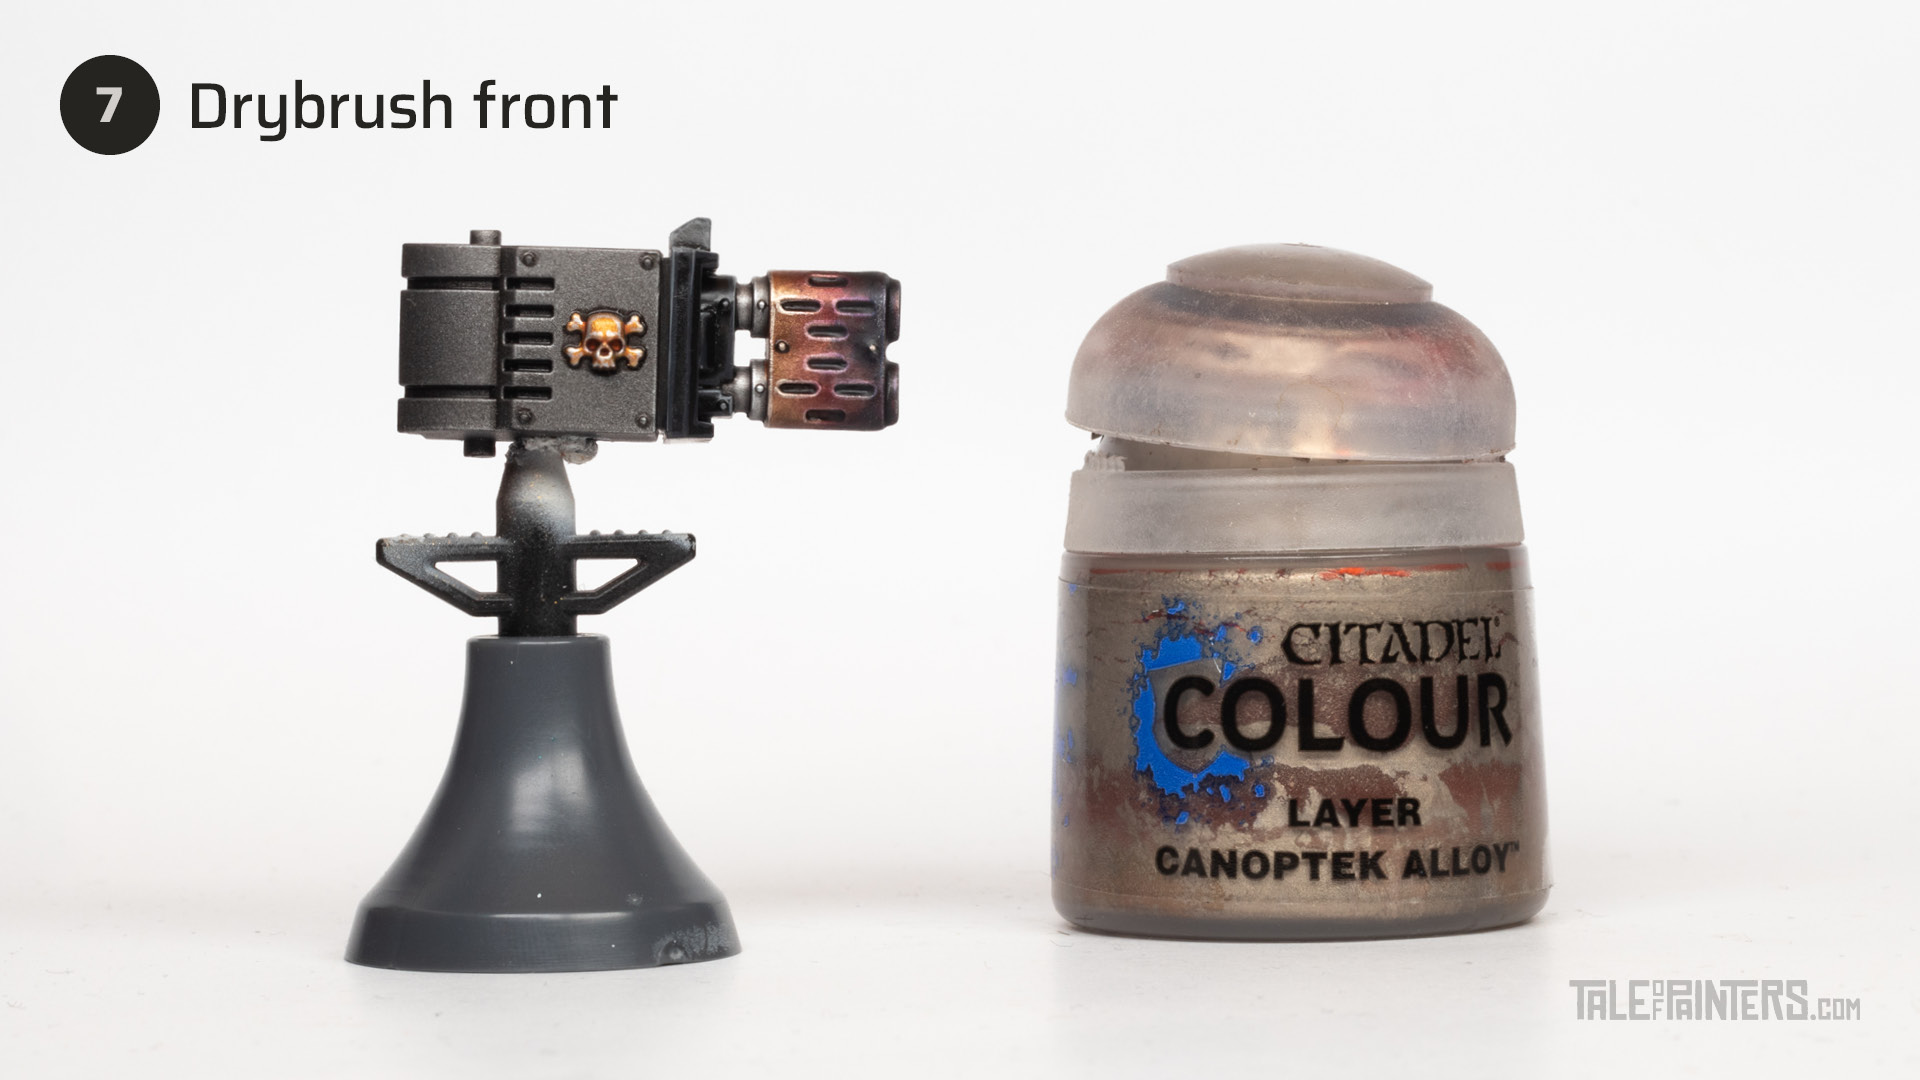
Drybrush the front of the muzzle carefully and gently with Canoptek Alloy to bring back some of the highlights we established in step 4. Voila!
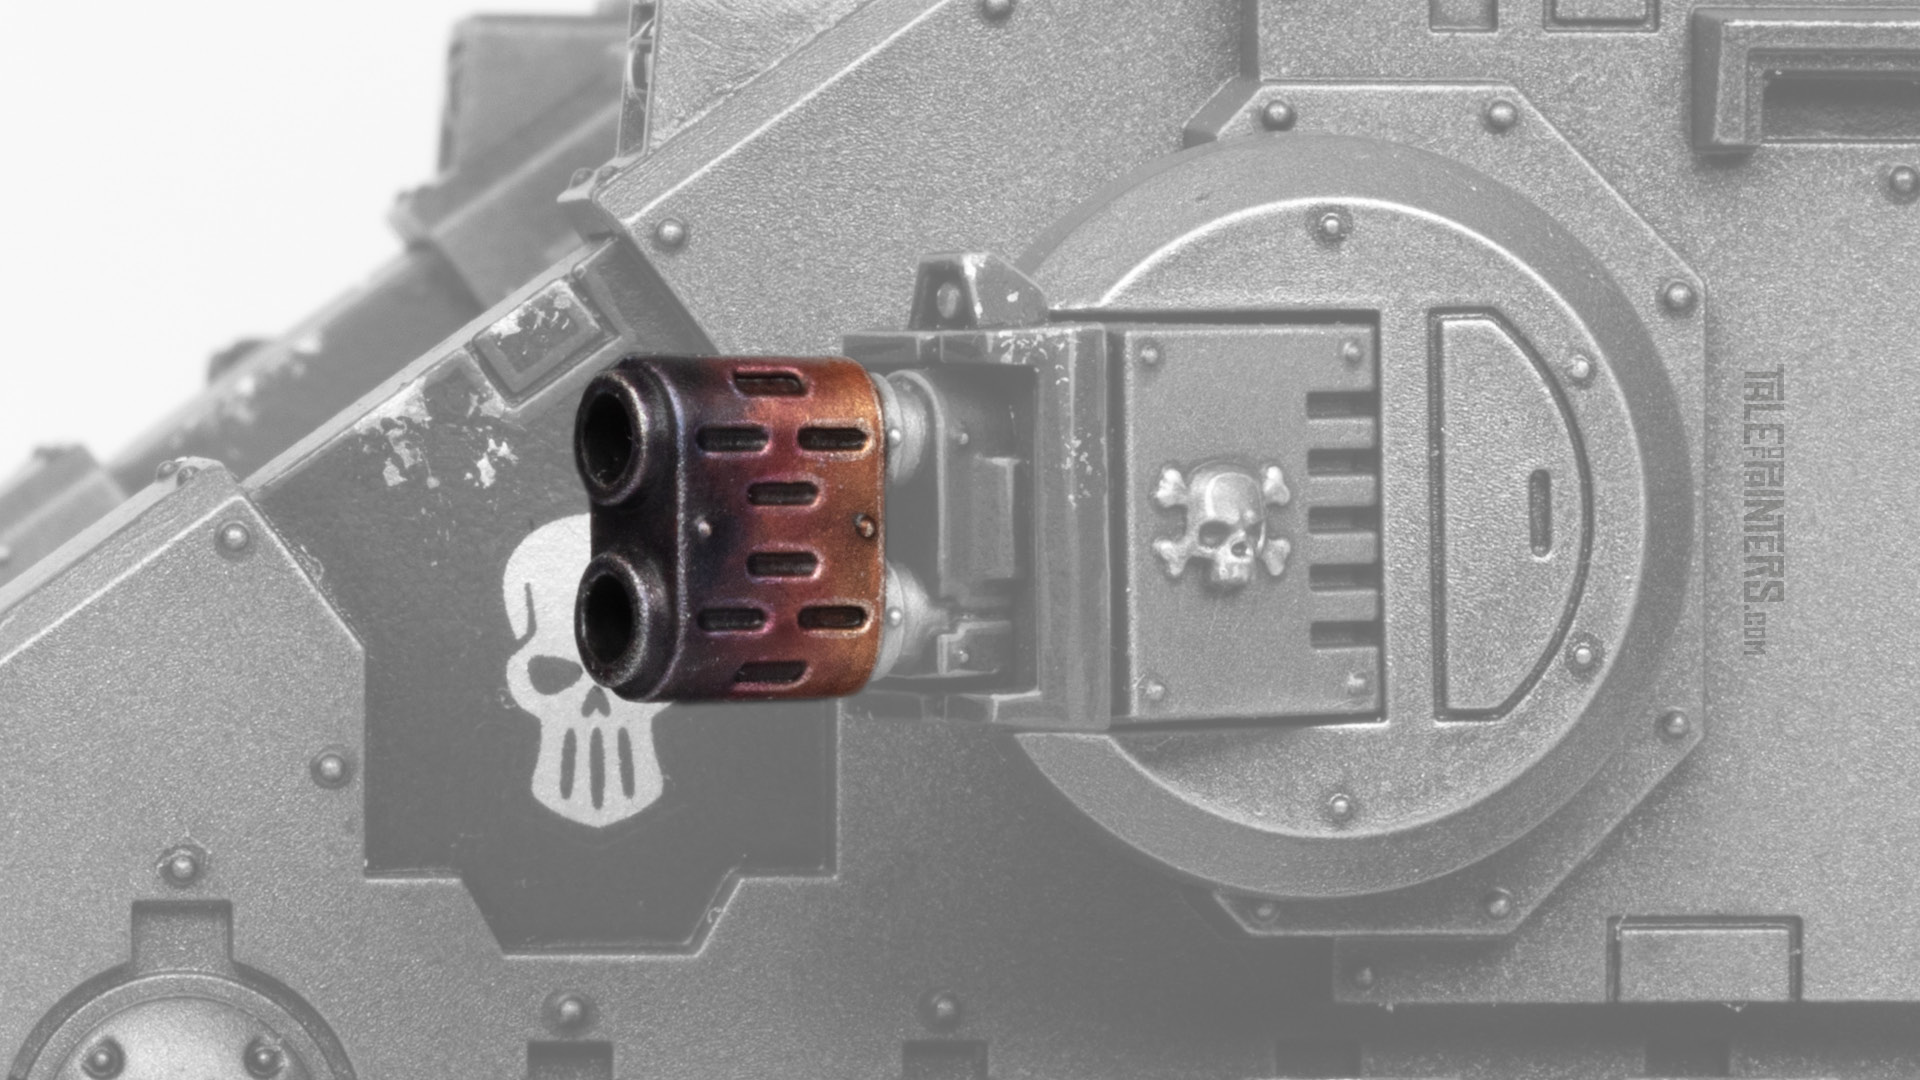
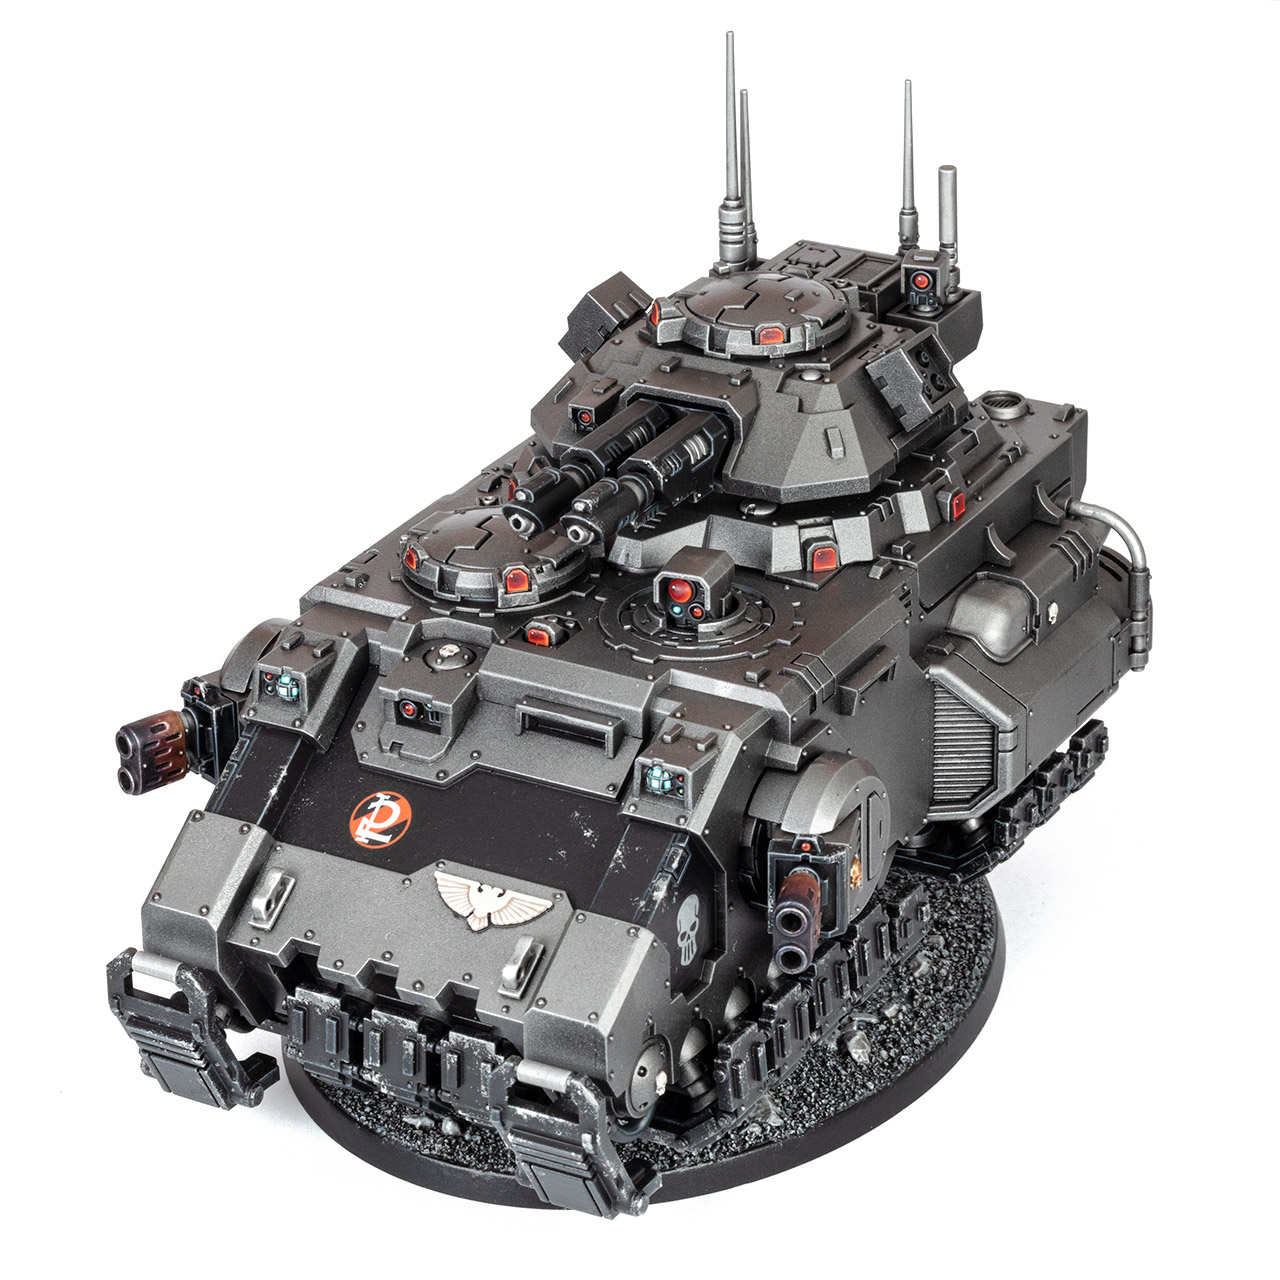
Here we have the completed effect on my Silver Skulls Primaris Gladiator. This technique works for all types of meltaguns, multi-meltas, or for example Primaris Eradicators’ melta rifles, but also flamers and many more. A tutorial for my Silver Skulls scheme can be found here.
Some more advice for when you start with a silver or steel basecoat instead of bronze: Start building up the gradient with a few coats of Seraphim Serpia thinned with Contrast Medium, before moving to Magos Purple and Blue Tone Wash. Also check out Silvernome’s tutorial for reference:
Paints you will need for this tutorial:
Citadel (Games Workshop)
Canoptek Alloy
Magos Purple
Wyldwood
Contrast Medium
The Army Painter
Blue Tone Wash [or Ultramarines Blue]
Vallejo
Game Color Air Brassy Brass [or Game Color Brassy Brass or Brass Scorpion]
Scale75
Dispel Magic Acrylic Medium [or Lahmian Medium]
If you need to expand your paint collection to follow the tutorial, check out our partner stores Wayland Games, Element Games, and Taschengelddieb, which offer an amazing range of paints at a discount.
And you don’t have to stop there, because in this tutorial, I show you how to paint muzzle flashes:
Hope you enjoyed this tutorial. If so, leave a comment or reaction below, and if you got any questions, leave them here so I can answer them for you.
Tale of Painters is the unofficial Warhammer hobby magazine run by hobbyists like you. Support our work by using the affiliate links from our 🇺🇸 / 🇨🇦 partner stores for your next orders so we can continue to bring you fantastic FREE content every day:


Or support us directly:


