
In this tutorial, I show you how to paint the MkVI Space Marines from the Age of Darkness box as “grimdark” Sons of Horus, with lots of weathering and battle damage. The whole paint scheme goes pretty fast with under 60 minutes for one model, and (almost) completely avoids edge highlights! And the best thing is that this tutorial can be adapted for any Legion or Chapter, you just have to change the colour of the armour. Let’s go.
This tutorial assumes you know the basic grips of painting Warhammer miniatures. Step by step I explain all the paints and techniques I used. I have a rather eclectic paint collection, so when I use a paint that is not from Games Workshop (or out of production), I’ll try to provide you with suitable alternatives from the current Citadel paint range [in brackets]. However, if you want to achieve exactly the same result as shown, I recommend expanding your paint collection. You’ll find a list of all the paints used in this tutorial at the end of the post.
Sons of Horus painting guide
Despite the limitations of the kit, I really love the new and rescaled MkVI Space Marine Legionaries from the Age of Darkness box. Perfect Rogue Trader nostalgia. Of course, the techniques explained in this tutorial work for all marks of power and Terminator armour, and can even be upscaled to paint larger models like the Contemptor Dreadnought and Spartan Assault tanks. Since many Horus Heresy players prefer to field larger armies, I designed my Sons of Horus paint scheme with speedpainting in mind. For this, I used scale-modelling techniques like airbrushing, enamel washes, and dry pigments. Don’t worry if you’re new to any of these techniques, I’ll explain everything along the way and provide you with suitable alternatives.
How to paint the armour
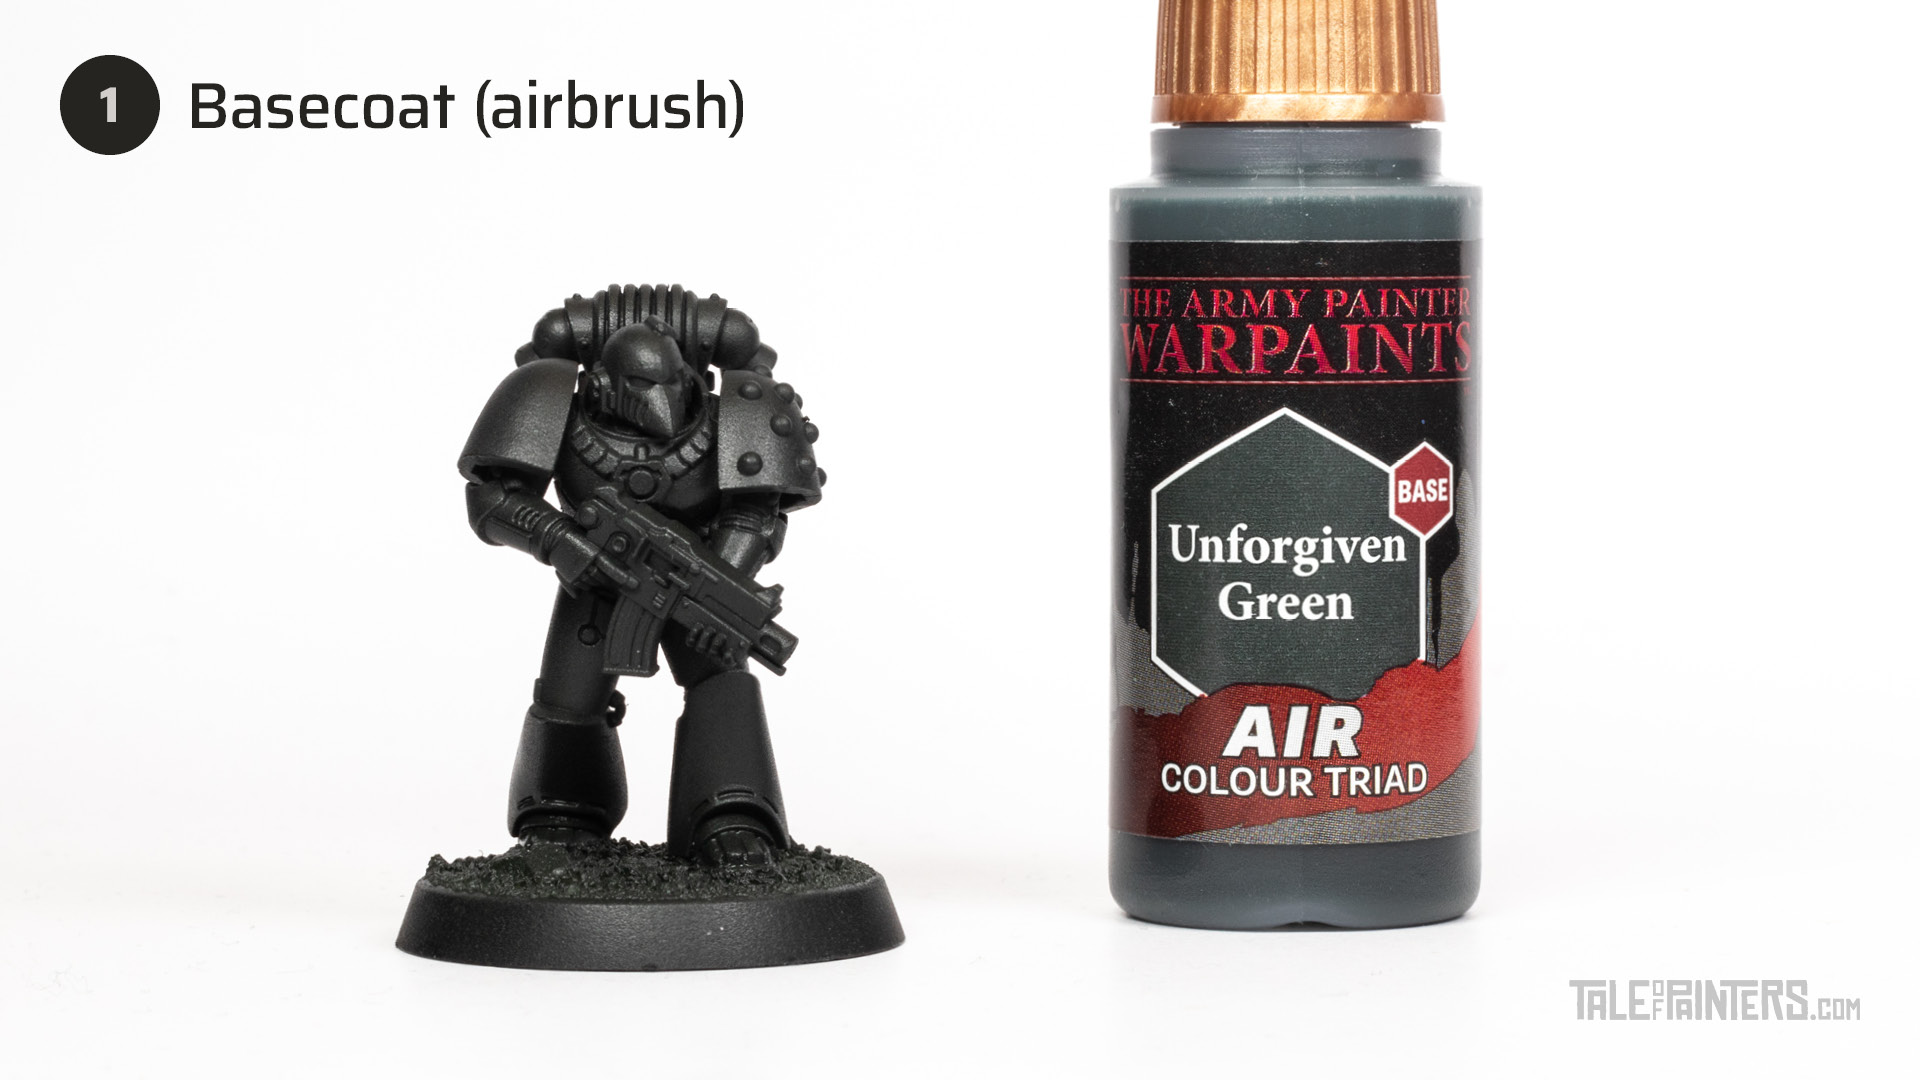
After a coat of your favourite black primer, spray your Legionary with The Army Painter Warpaints Air Unforgiven Green, taking care that you basecoat every nook and cranny.
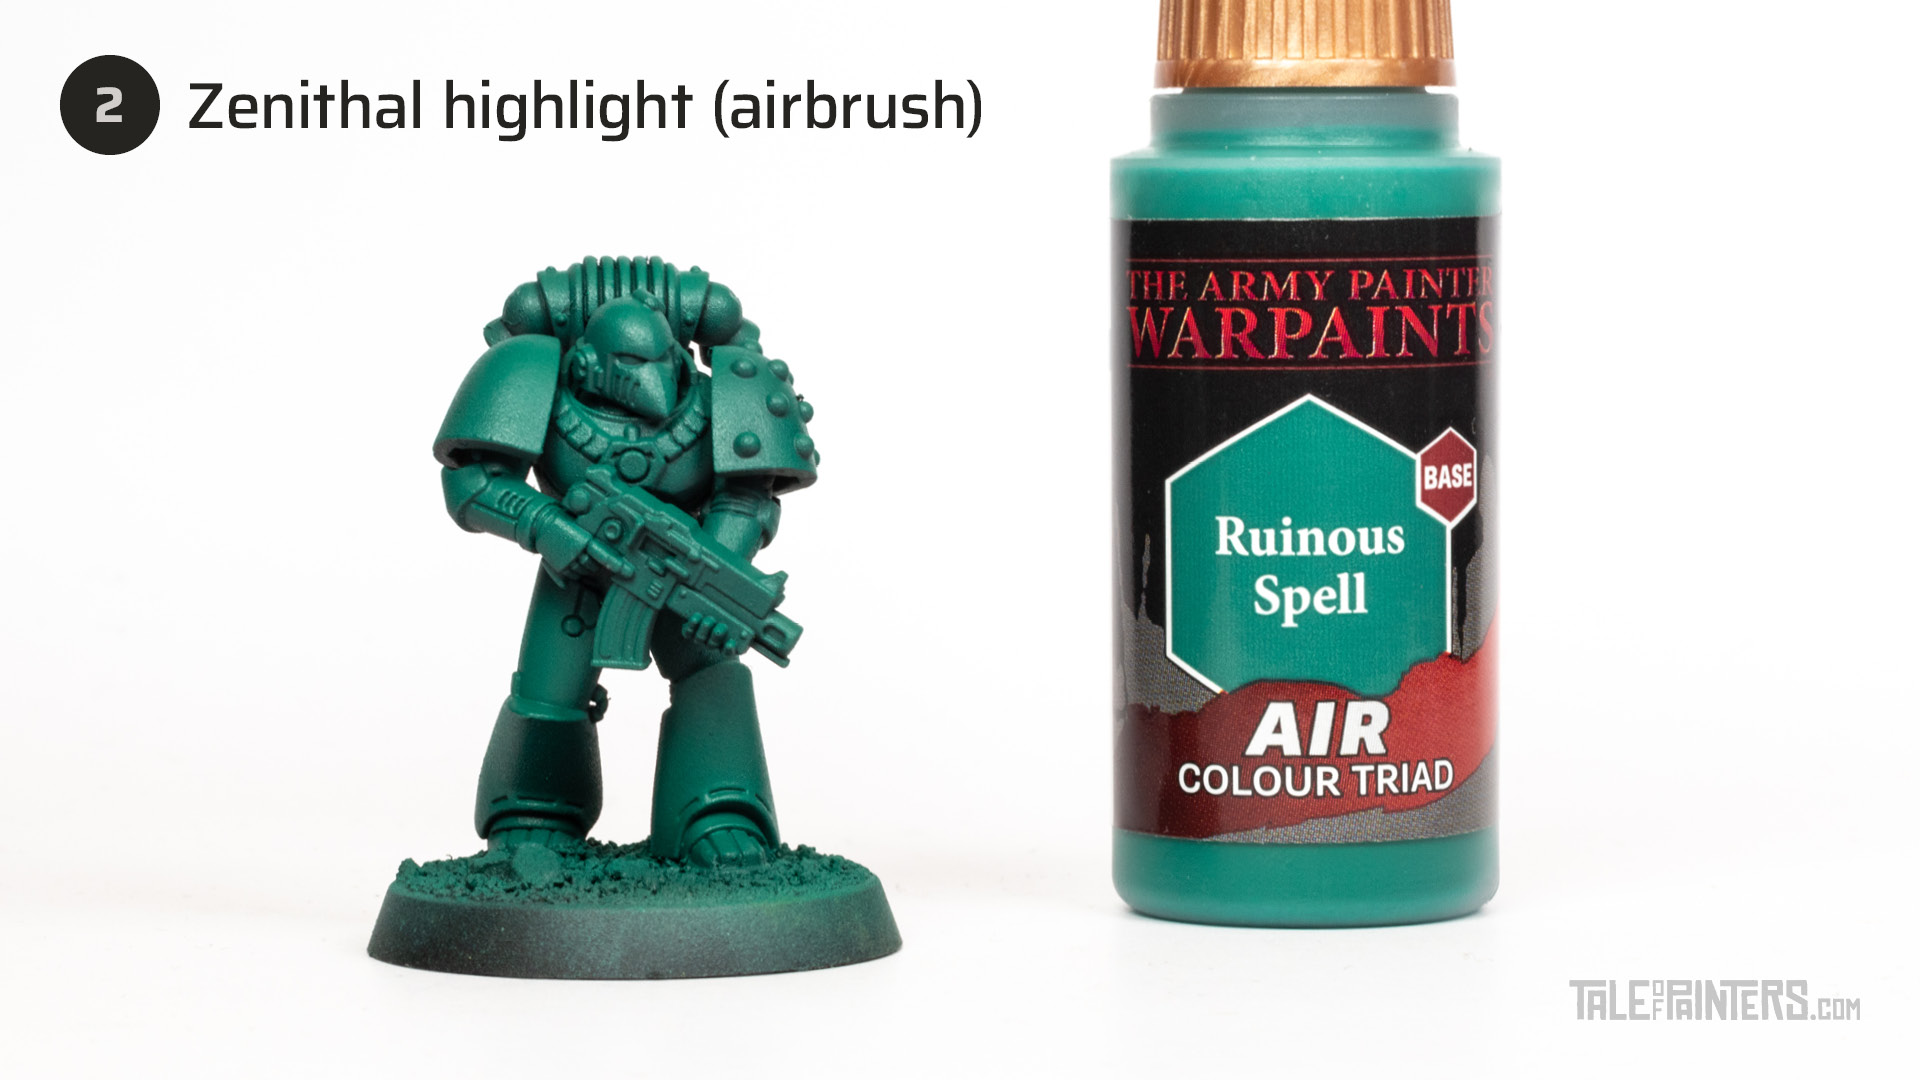
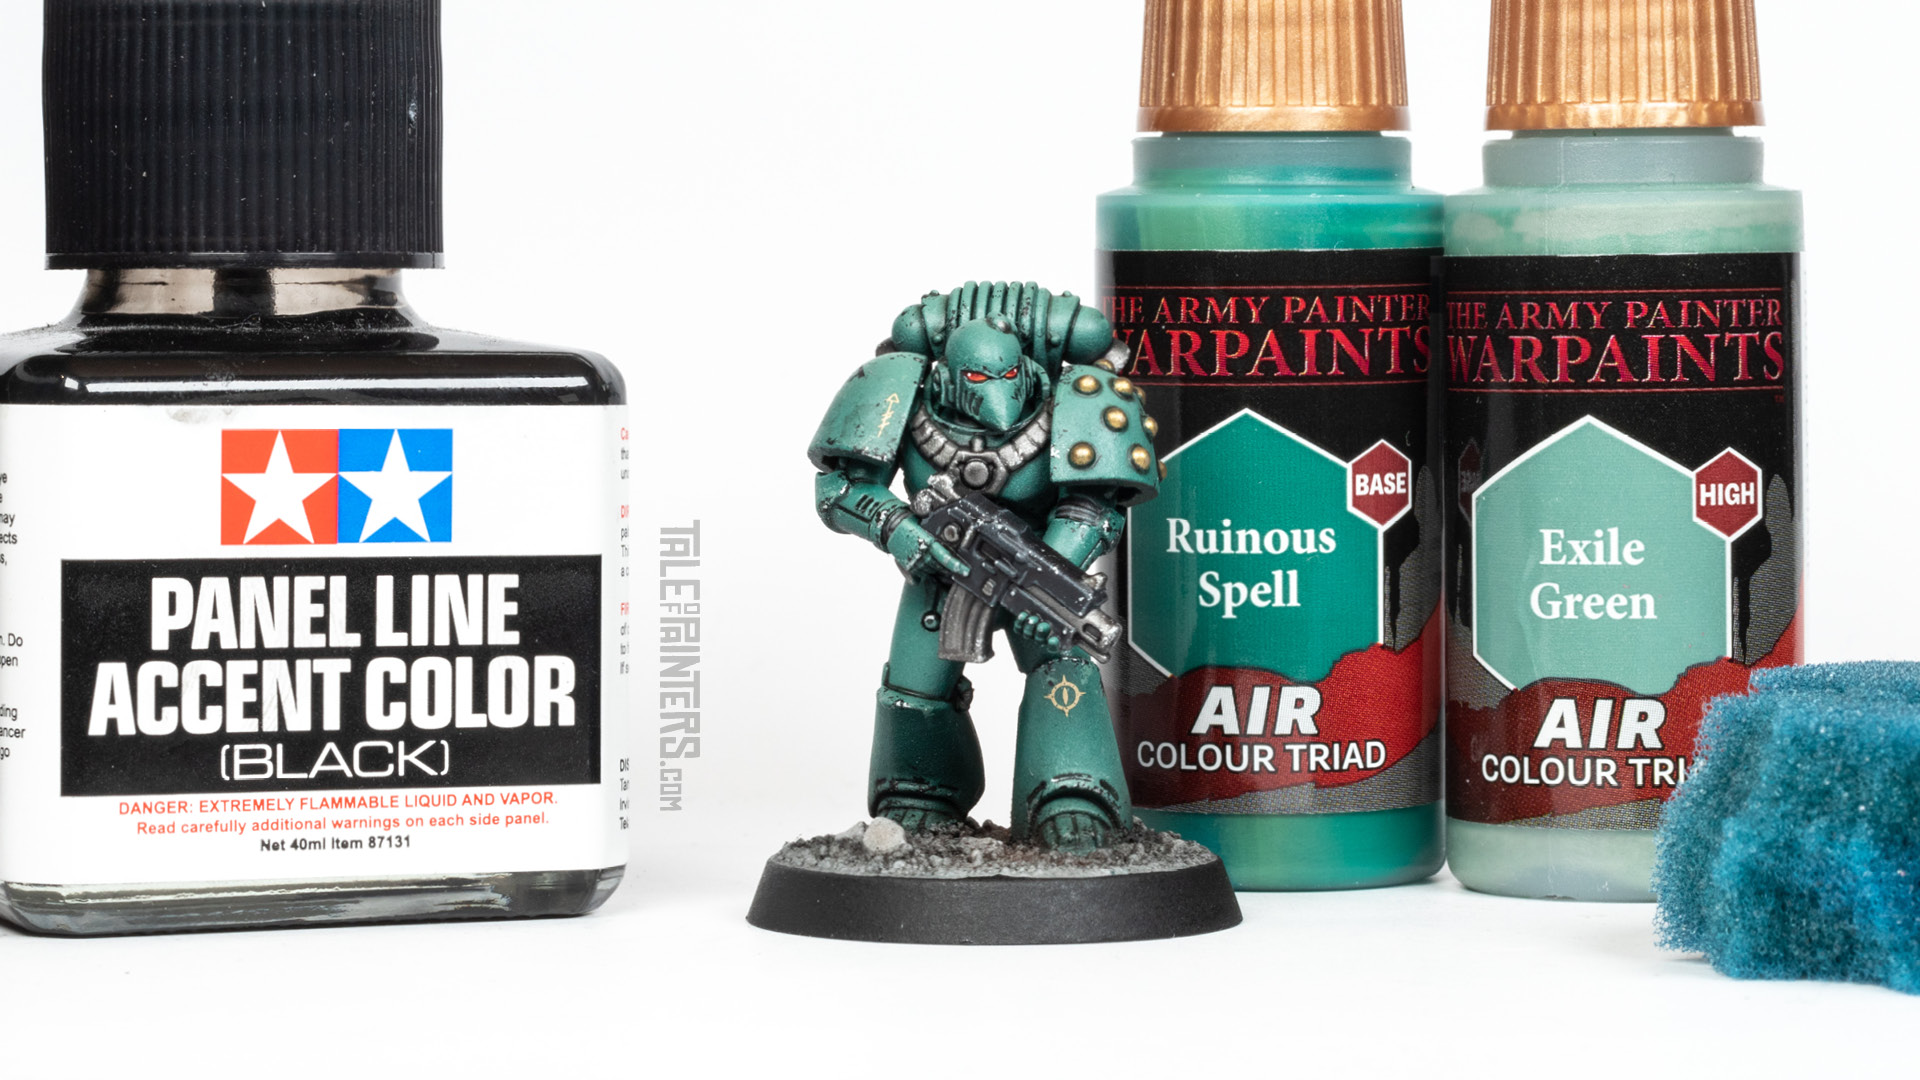
Next, spray your model with Warpaints Air Ruinous Spell from above at a low angle for a zenithal highlight. The deep jade green will add a lot of richness to the armour.

Finally, add another zenithal highlight with your airbrush, this time at a high angle with Warpaints Air Exile Green. This step gives the armour the characteristic pale green of the Sons of Horus.
But what if you don’t have an airbrush? There are two options here. Instead of airbrushing, you could use spray paints to create a green gradient. Start with a dark colour, then spray the lighter colour at an angle from above as a zenithal highlight. There are plenty of dark green spray paints, e.g. Caliban Green Spray from Games Workshop, Angel Green Colour Primer from The Army Painter, or Renegade Green Spray from Colour Forge, whereas the teal green of the Sons of Horus is more difficult to find. The only remotely similar spray paint I found was Rashaar Turquoise spray paint from TTCombat. The other option is to use a brush with a soft round head like cheap make-up brushes or Artis Opus Series D. Start with a black or dark green primer, dip the brush into Kabalite Green and wipe away the excess, then start stippling and overbrushing the model to build up the colour, while you leave the parts that are in the shade dark. Think of a drybrush, but with slightly more paint on your brush. Then repeat the process with Sons of Horus Green, aiming the brush only downwards, focussing on the areas that would naturally catch the light to create a gradient.
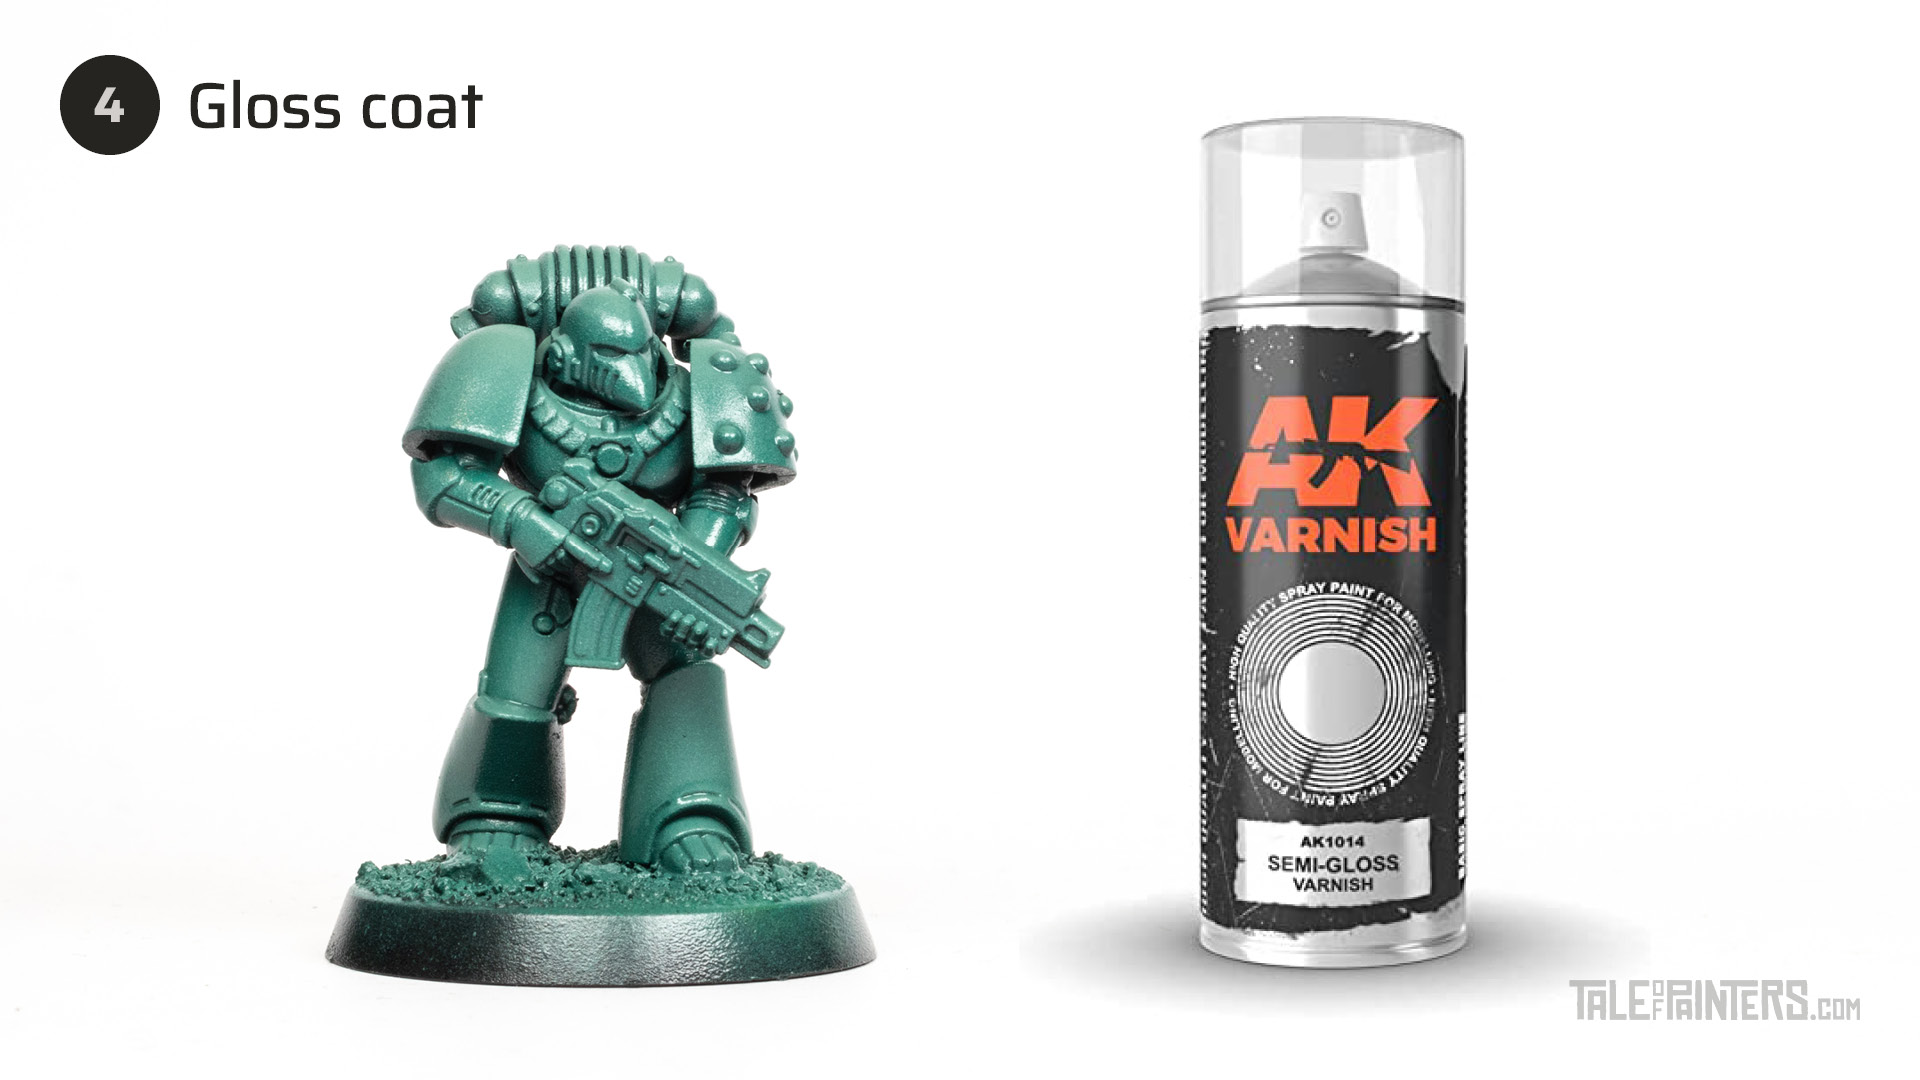
The next step is to protect the paint job from the enamel washes we’re gonna use to shade the model later, so seal the model with a coat of gloss varnish. I used AK Interactive Semi-Gloss Varnish Spray.
If you want to use an airbrush, use Polyurethane varnish, for example from Vallejo. Regular water-based acrylic varnish won’t be resistant enough for solvent-based paints and thinners. Note, however, that polyurethane varnish can dissolve thin layers of paint from washes and Contrast paints. If in doubt, apply a coat of acrylic varnish first before you apply the polyurethane varnish.
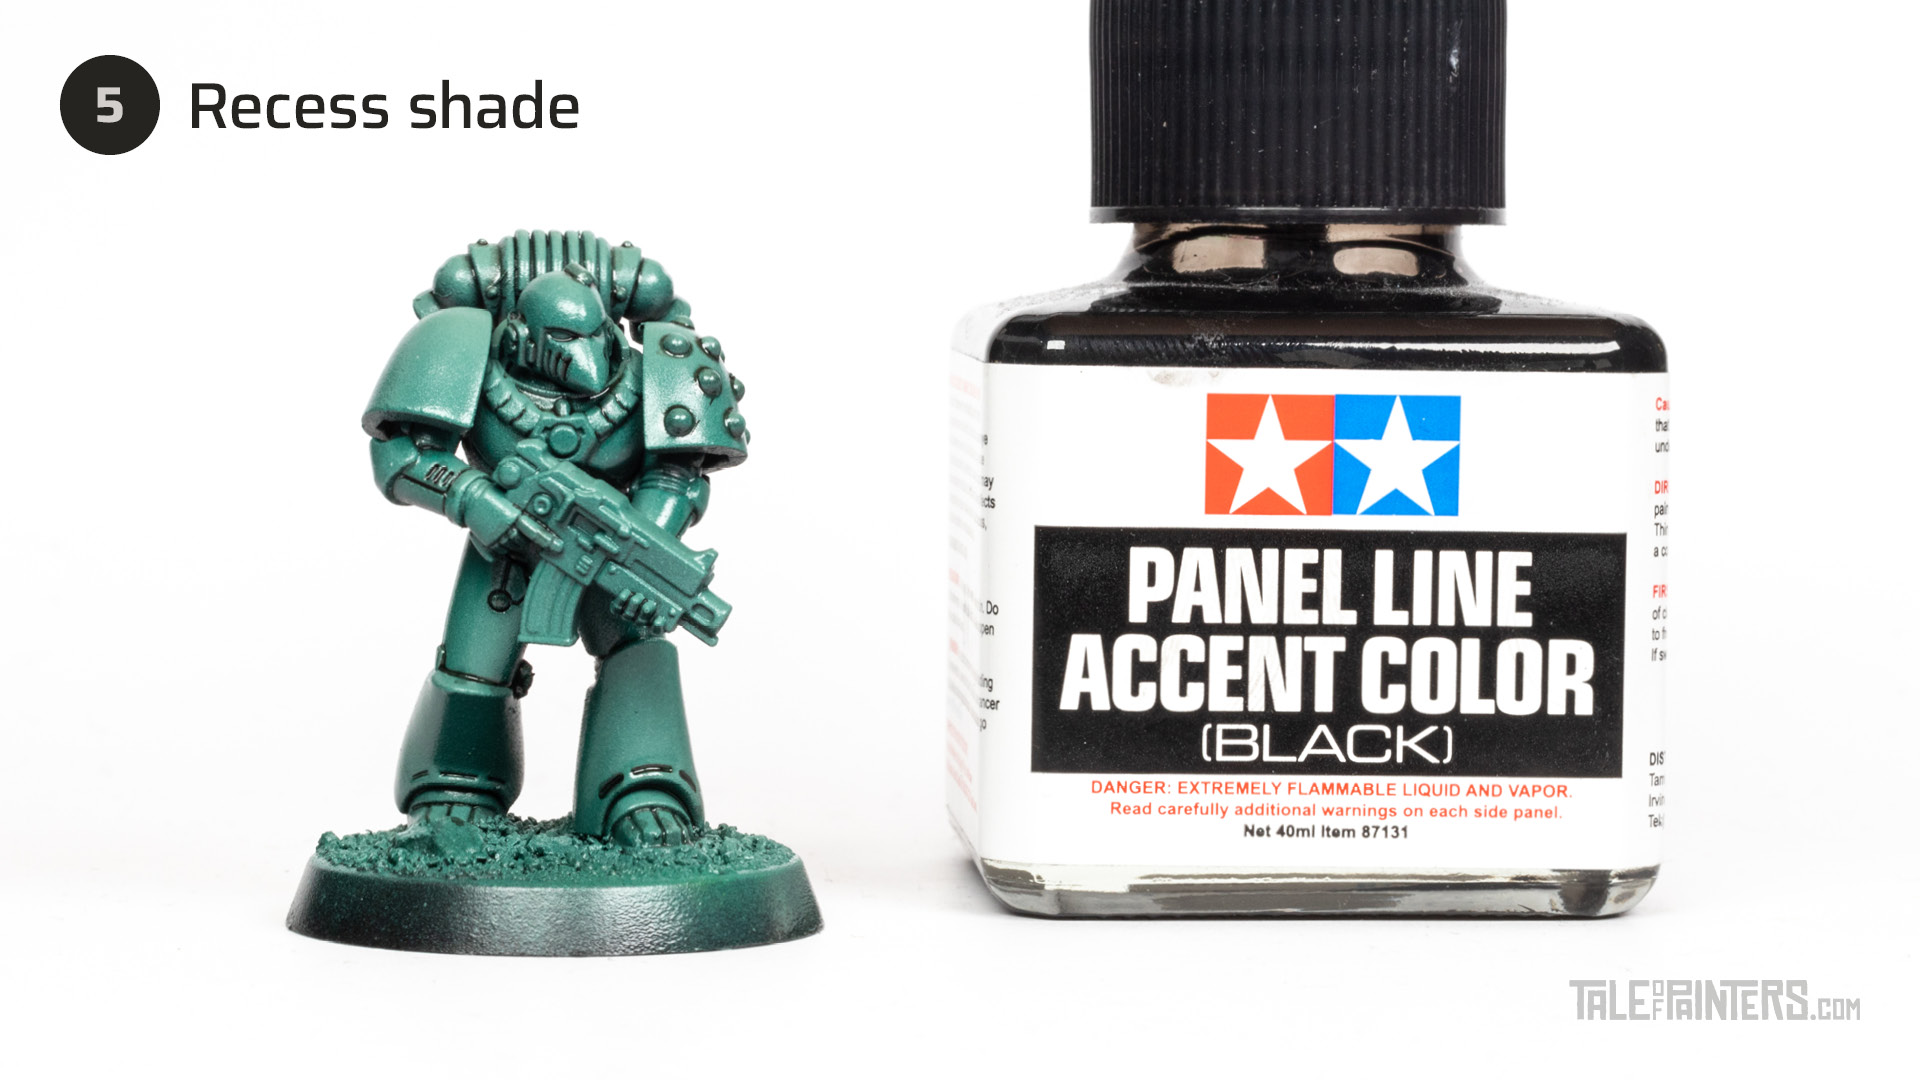
Shade the armour by applying Tamiya Panel Line Accent Color Black directly into the recesses of the armour. Because of the low surface tension and the smooth gloss coat, the enamel wash will run into the recesses almost by itself.
As an alternative to an enamel wash, you can also use black oil paint and thin it with solvent-based thinner or white spirit to a wash-like consistency. You could even use Nuln Oil, though it won’t be as easy to remove as an enamel or oil wash. If you’re new to enamel washes and oil paints, I recommend watching my beginner-friendly video here:
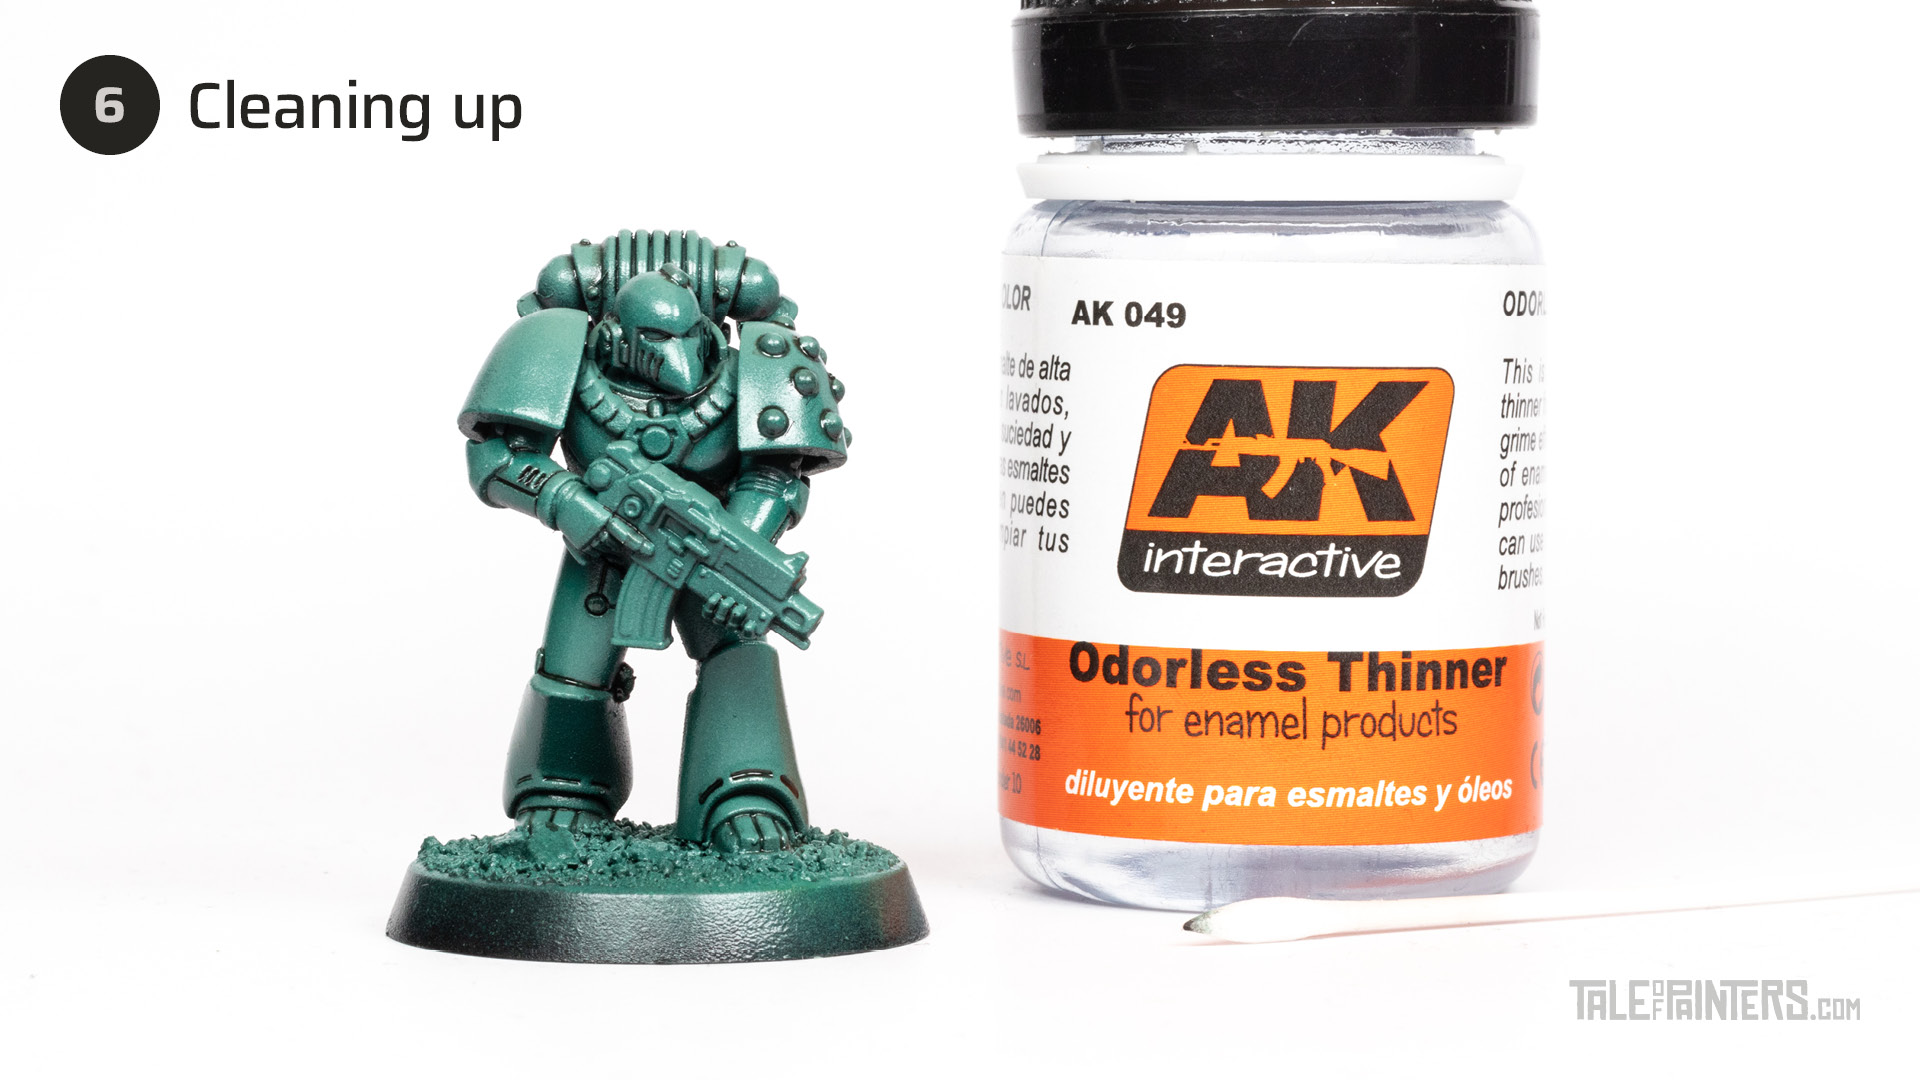
The best thing about enamel and oil washes is that you can remove them easily even after they’ve dried. Soak a cotton swab with Odorless Thinner or white spirit and carefully remove any excess wash, cleaning up the model. The gloss coat will protect the paint job underneath.
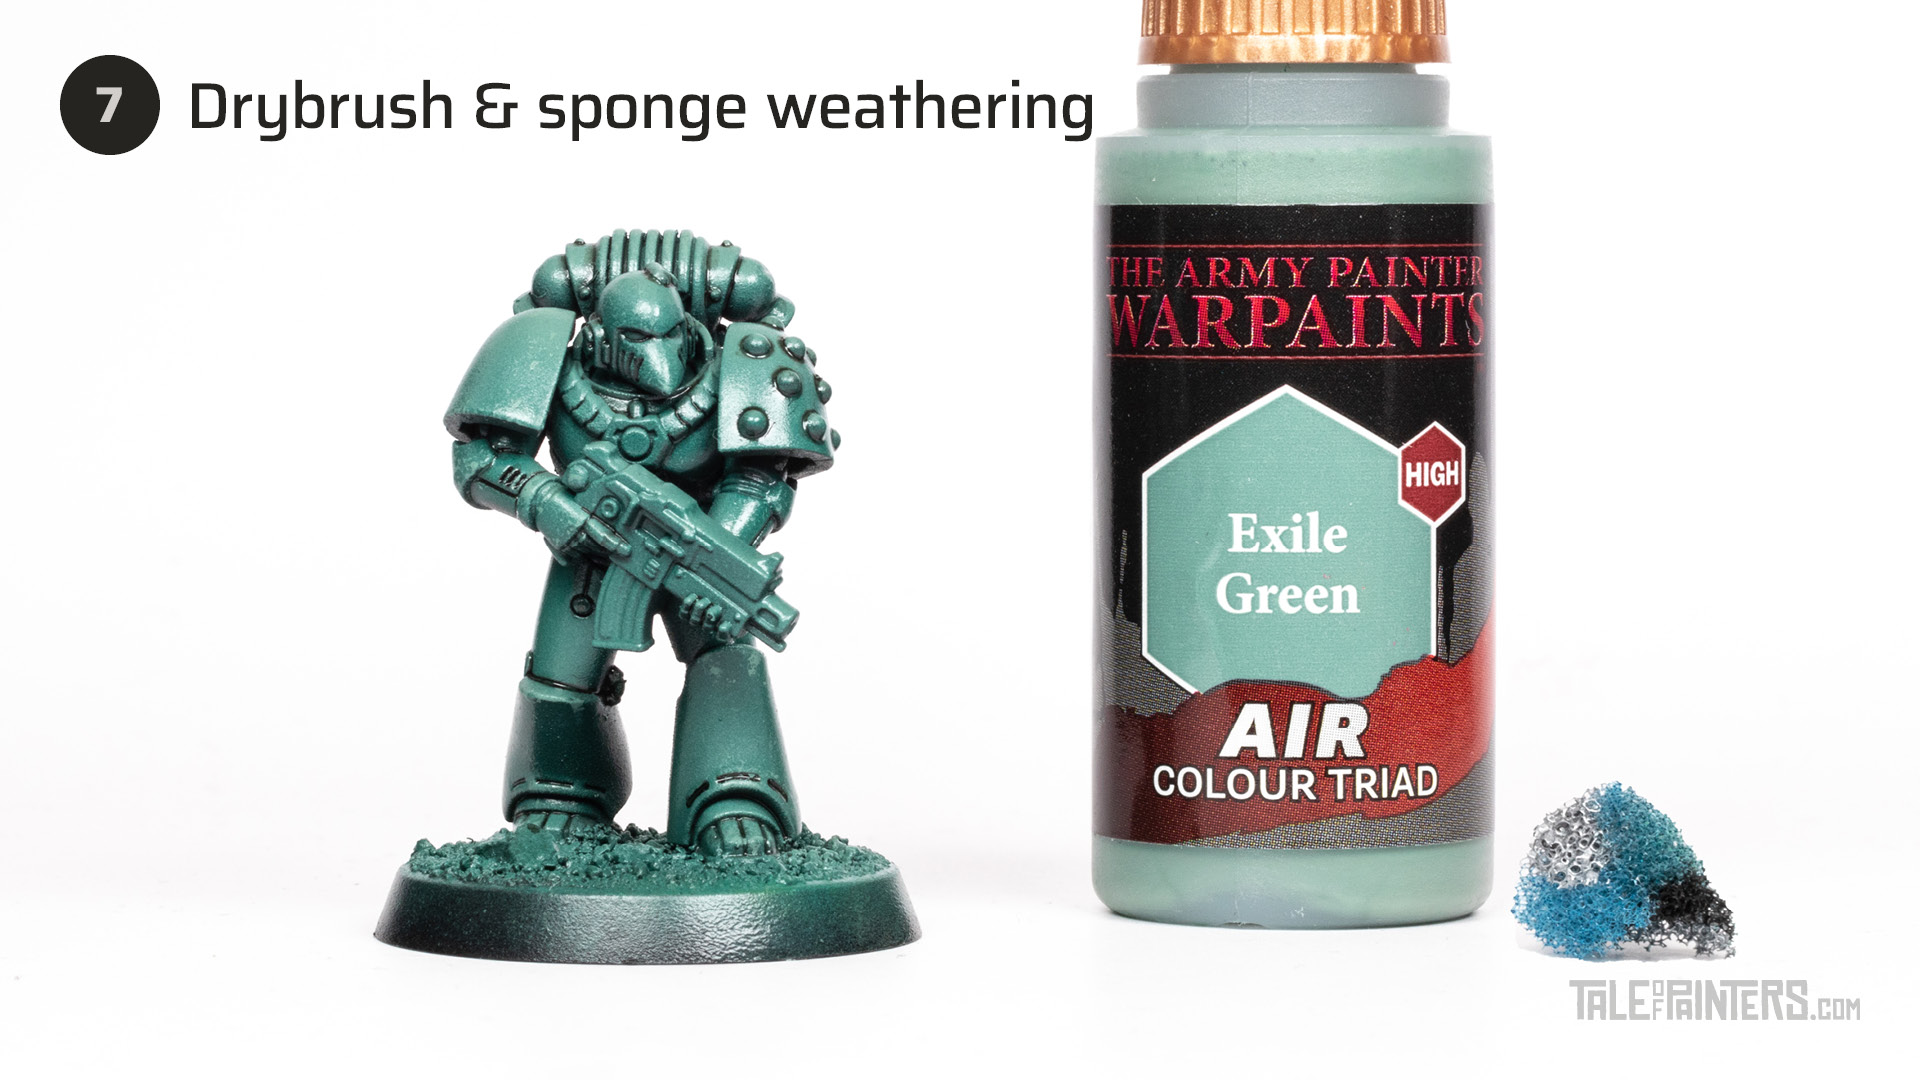
Carefully drybrush the model with Warpaints Air Exile Green, concentrating on the edges of the armour. As the Warpaints Air paint comes pre-thinned, leave it on your palette for a moment until the paint has thickened a little. When you’re ready, dab a little piece of blister sponge into the paint, remove any excess, and press it on areas where natural wear and tear would occur, to create random chips and marks.
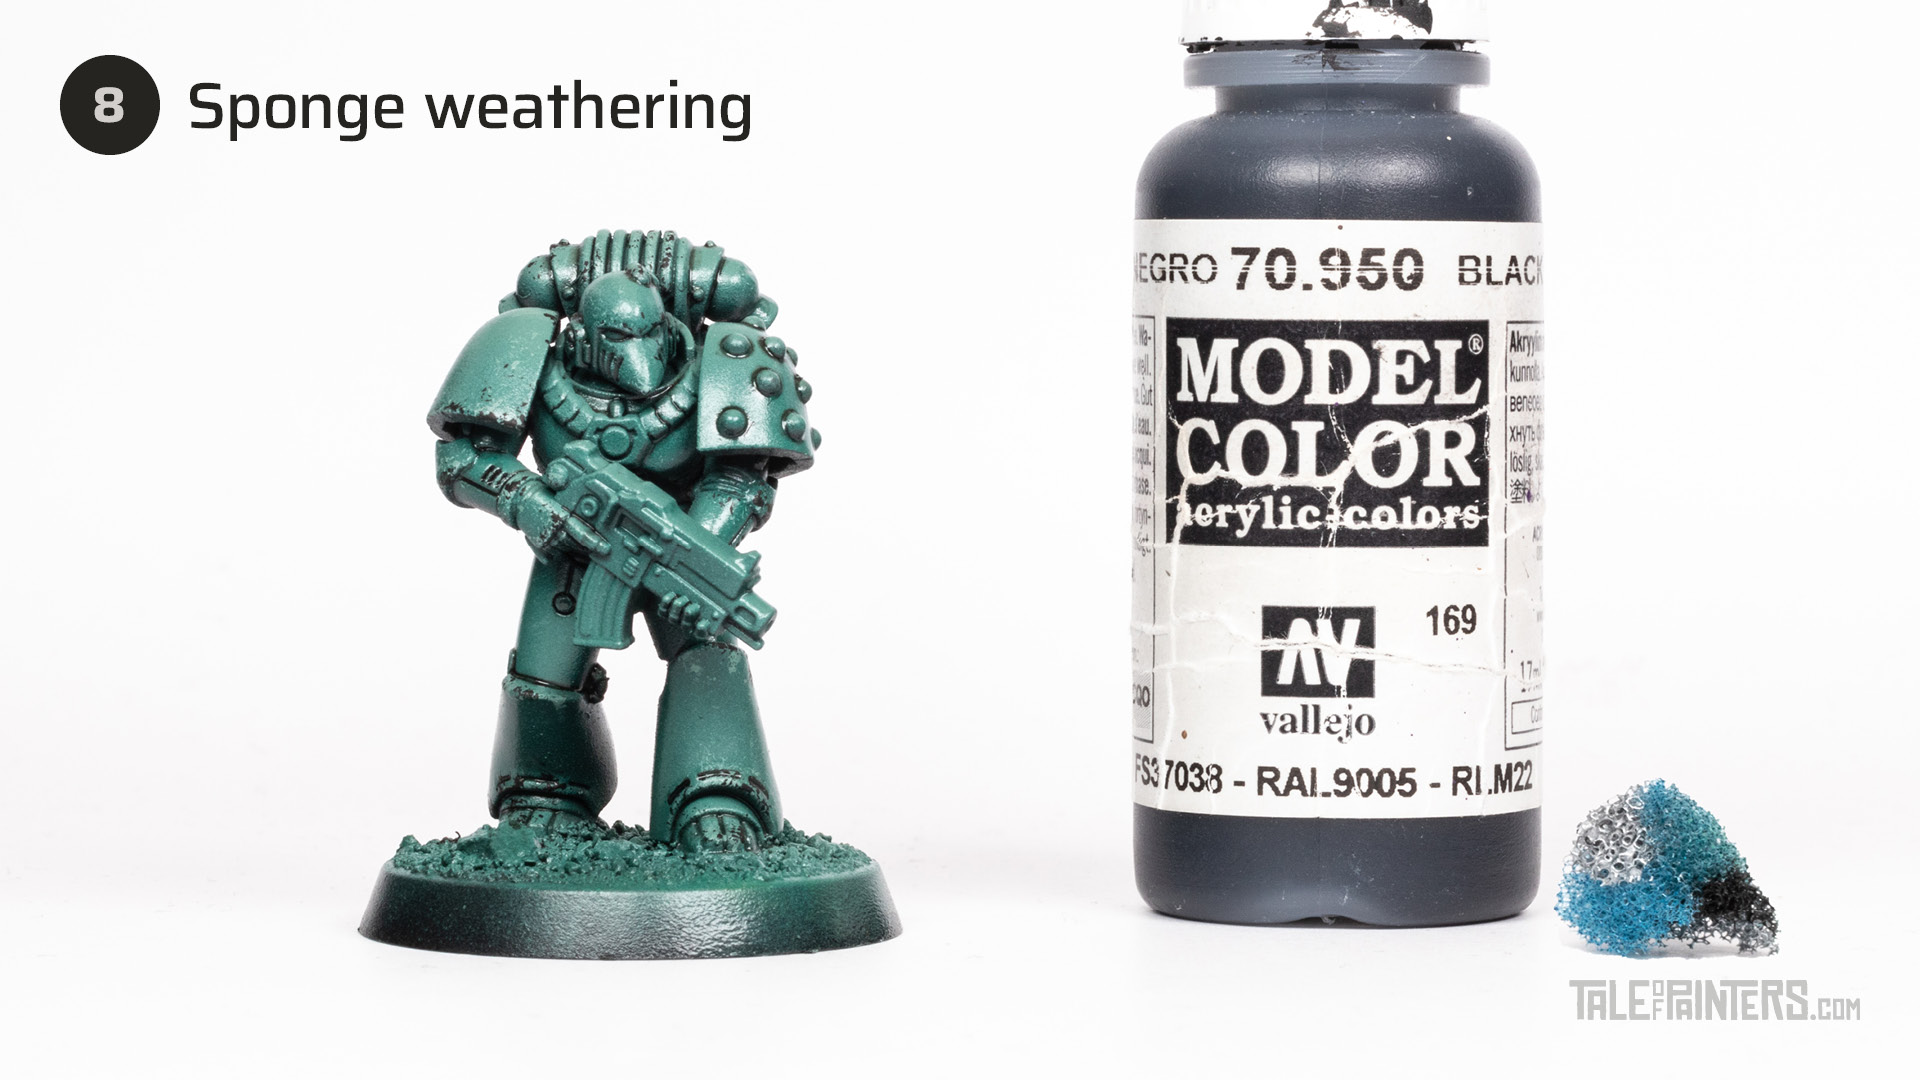
Repeat the sponge weathering process with Vallejo Model Color Black [or Abaddon Black]. Concentrate on the areas you hit with Warpaints Air Exile Green before, but be even more selective so some of the light green paint can still show through.
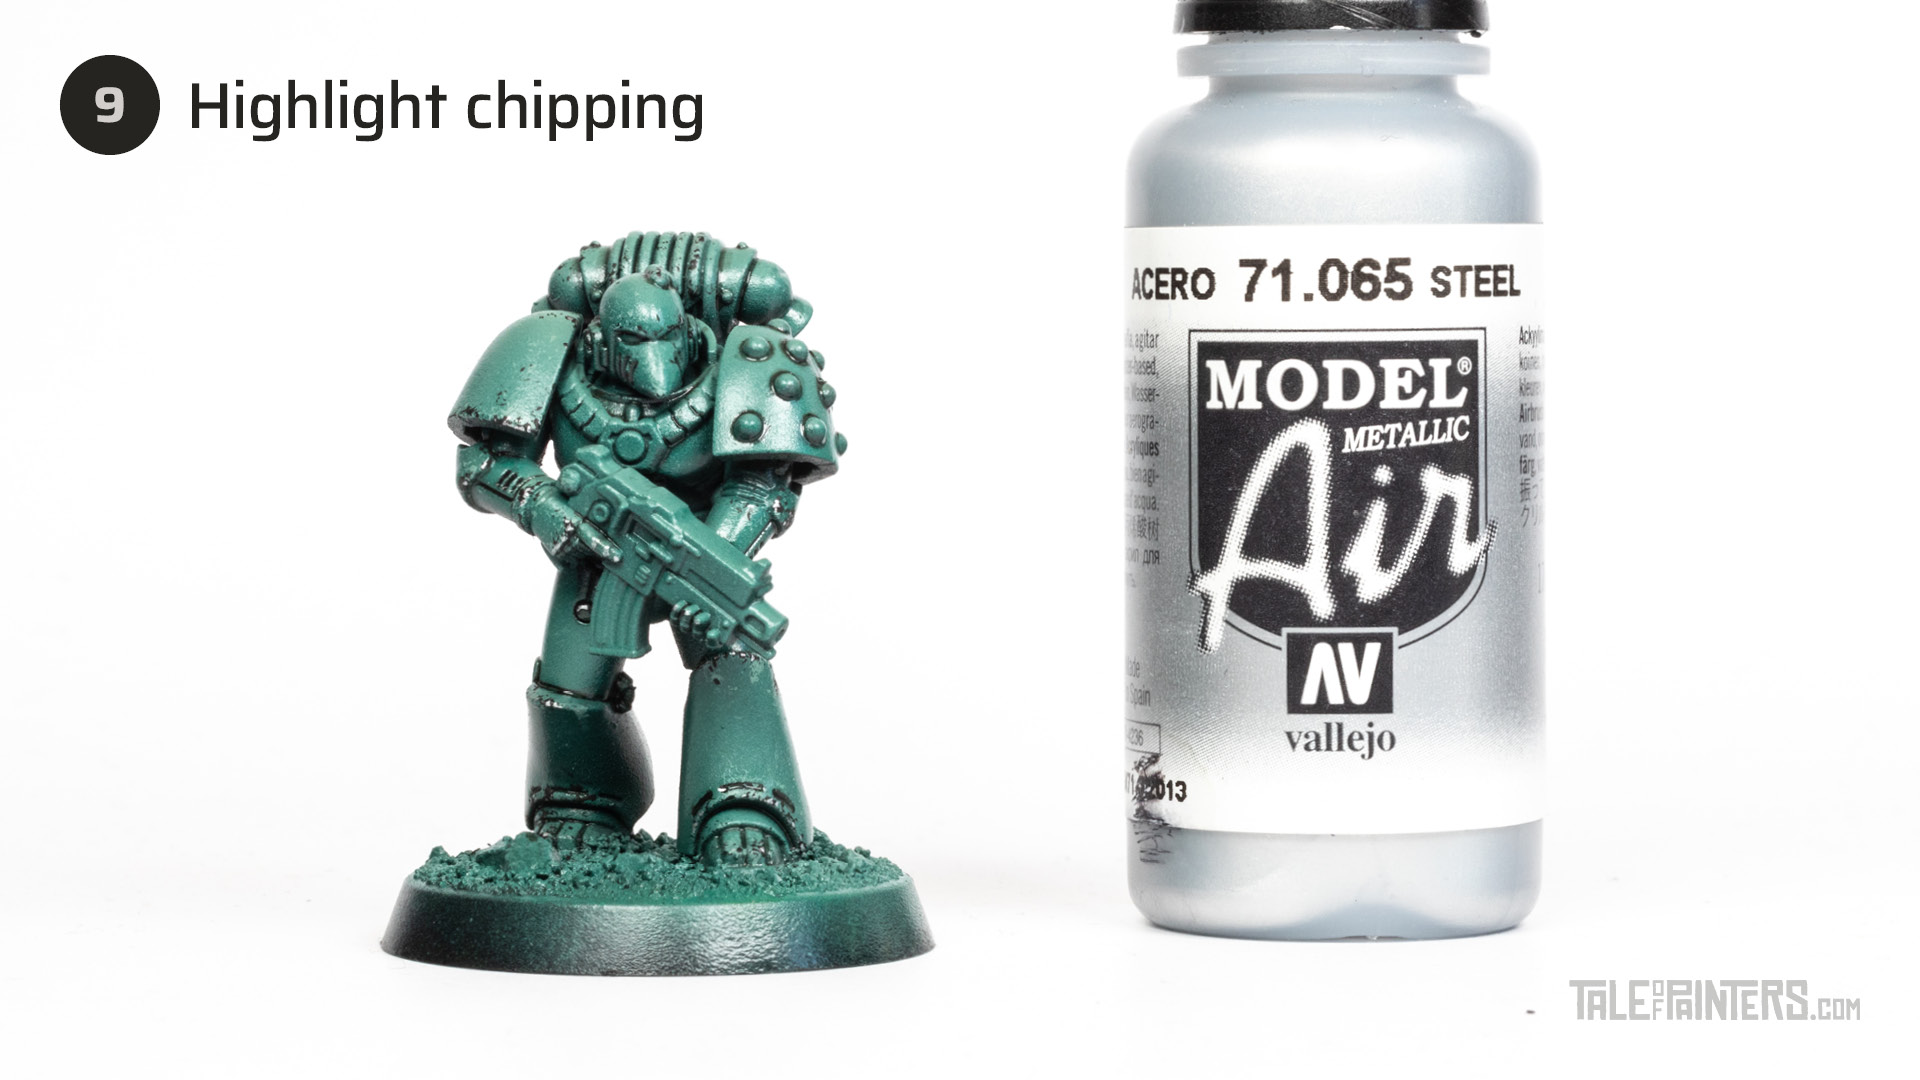
With the tip of a very small brush, pick out a few of the larger black chips with Vallejo Model Air Steel [or Stormhost Silver].
If you accidentally overdo it with the weathering, you can gently rub away the paint with a cotton swab and some thinner as described in step 6.
Painting the details
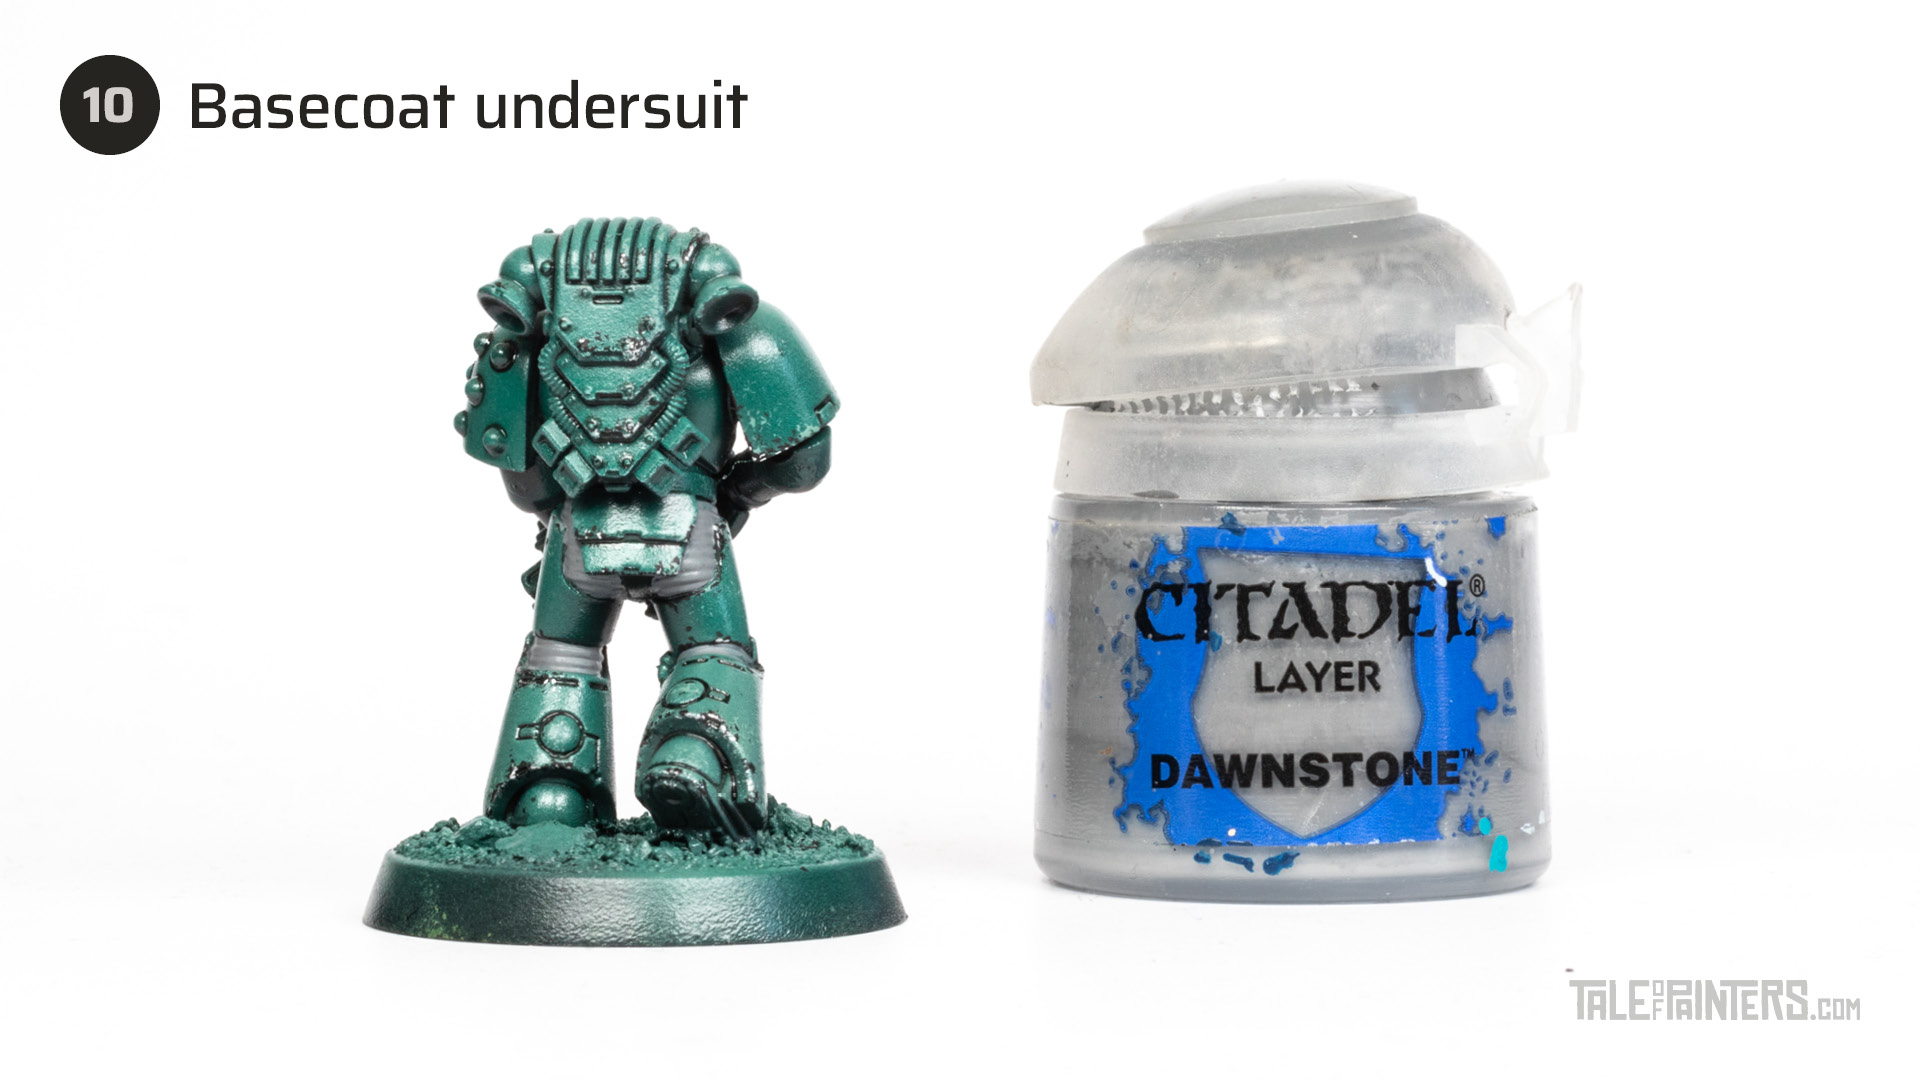
Next, basecoat the rubber undersuit with a few thin coats of Dawnstone.
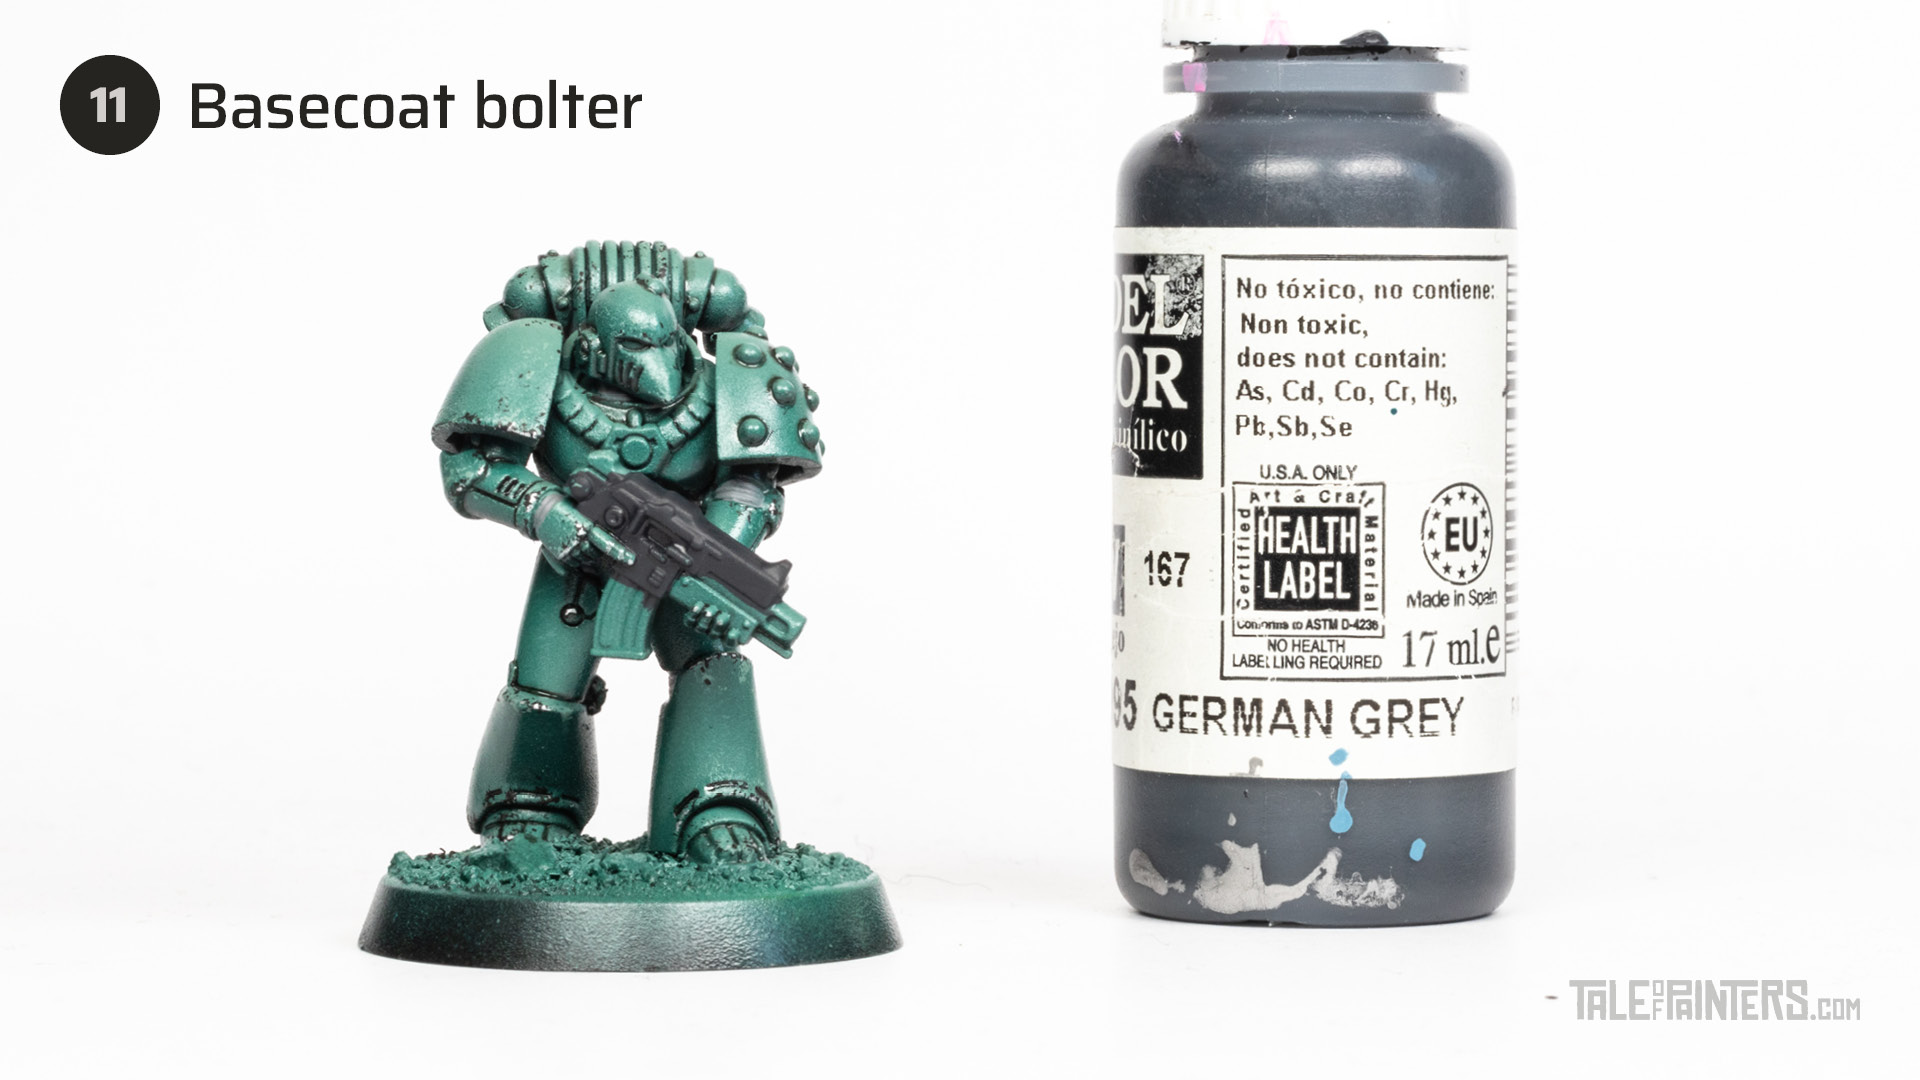
Then, basecoat the casing of the bolter with Vallejo Model Color German Grey [or Corvus Black].
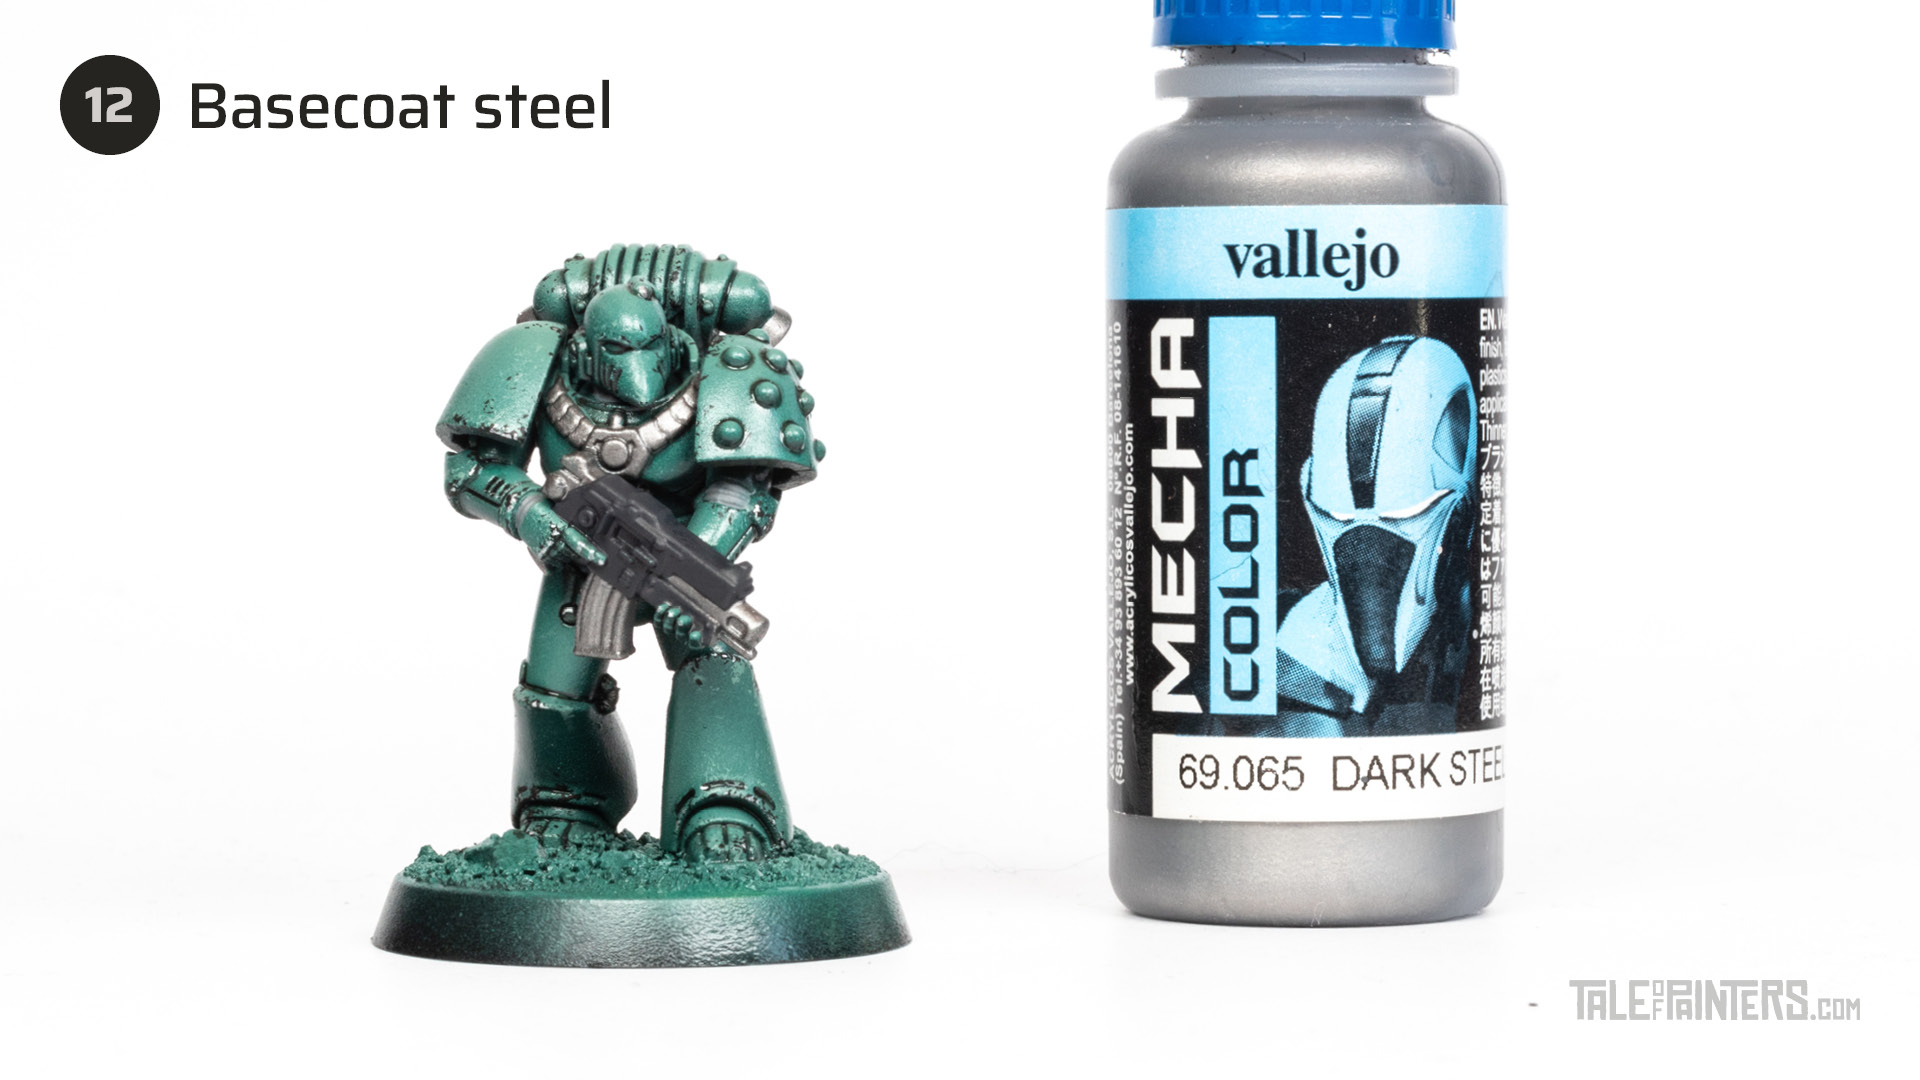
Proceed with painting all steel areas with Vallejo Mecha Color Dark Steel [or Leadbelcher].

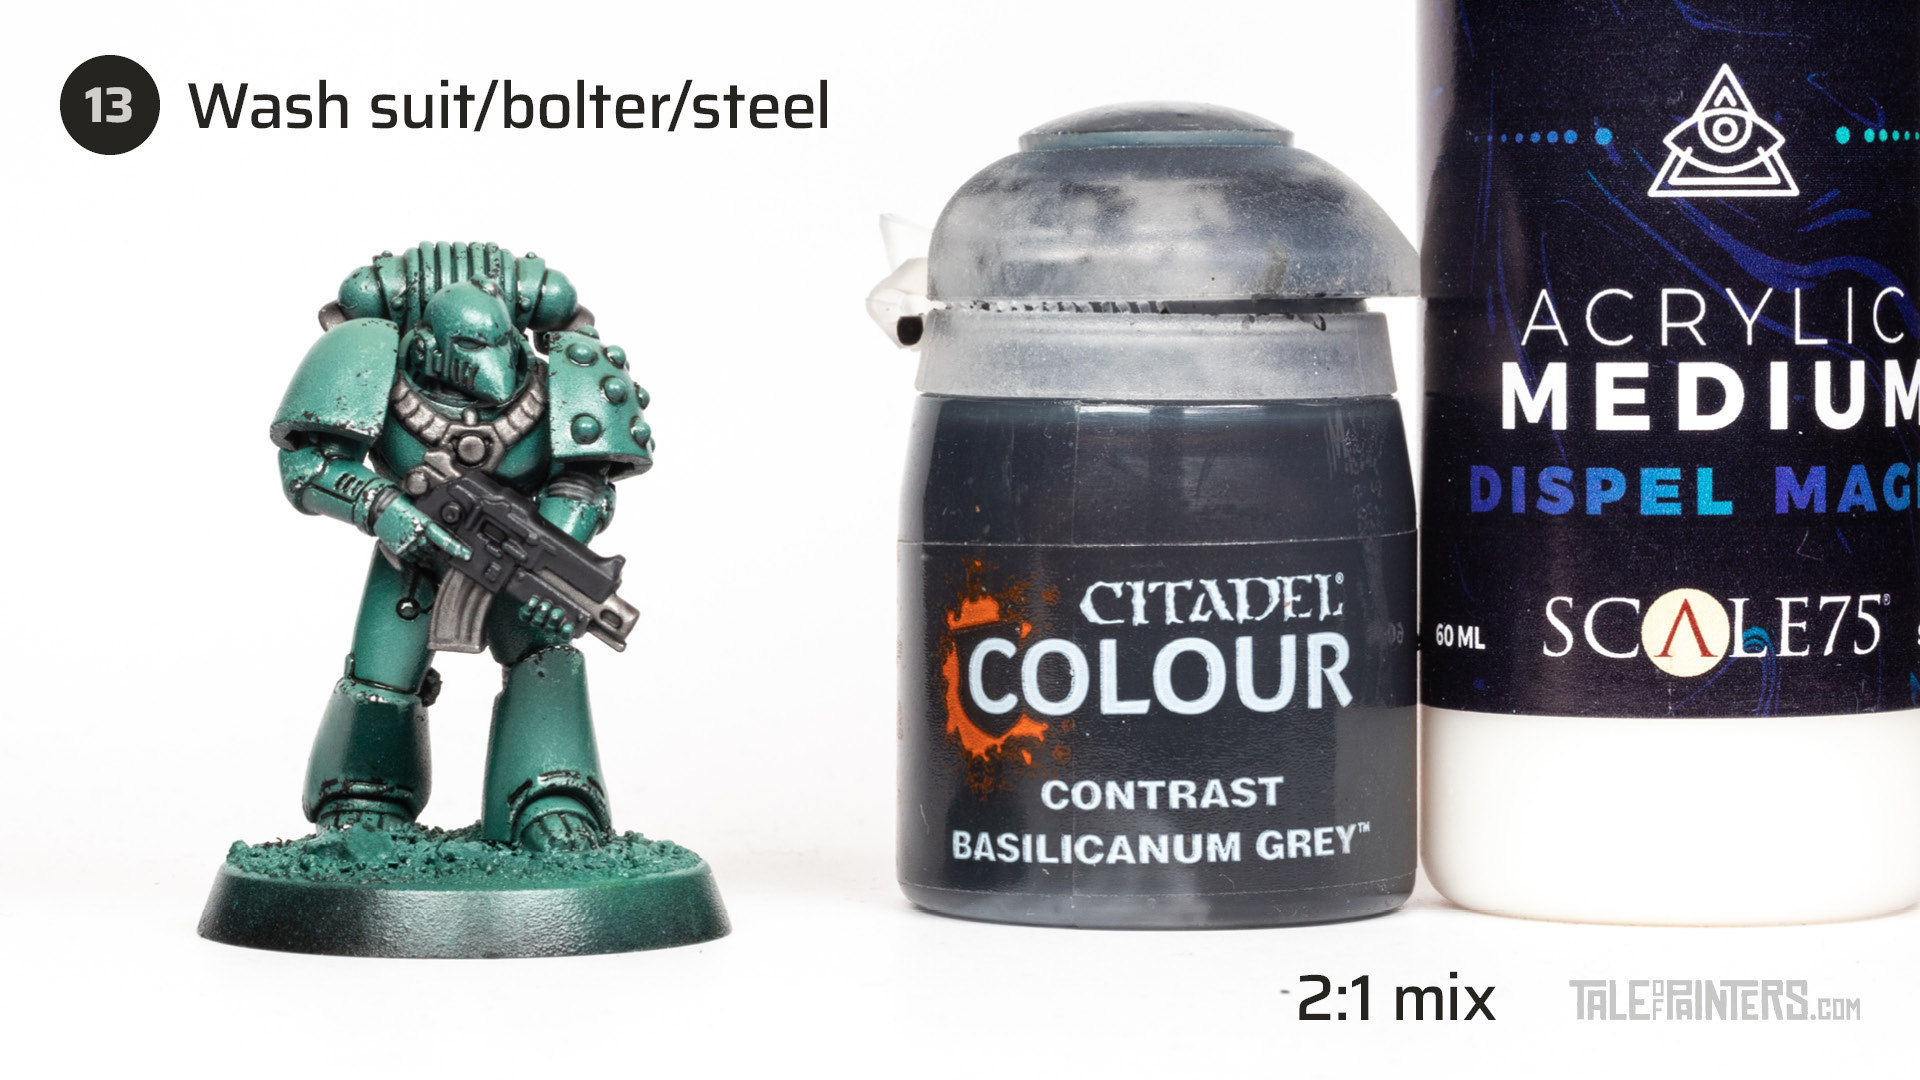
Thin Basilicanum Grey with Dispel Magic Acrylic Medium from Scale 75 [or Lahmian Medium] about 2:1 and apply it all over the undersuit, bolter, and steel areas.
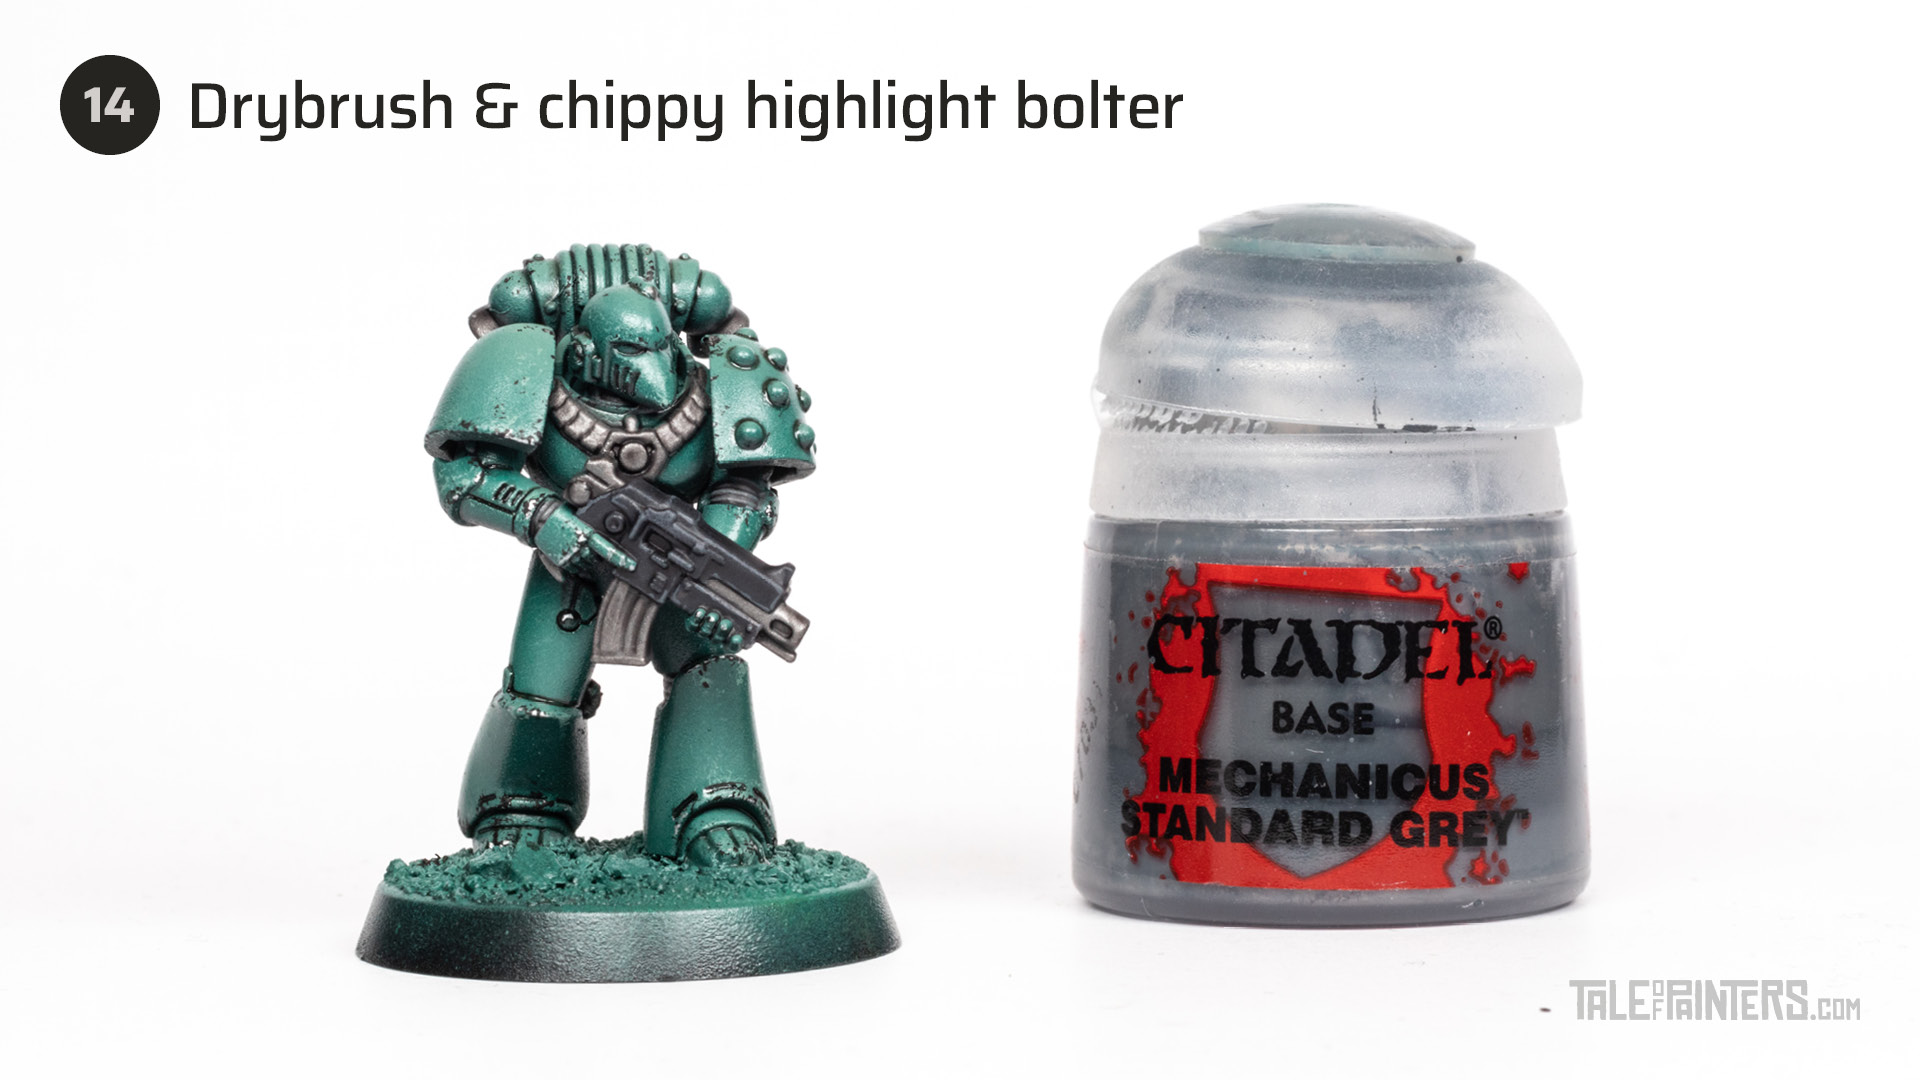
Once dry, carefully drybrush the bolter casing with Mechanicus Standard Grey and pick out a few edges with quick, chipped highlights. I know, I promised no edge highlights, but you really don’t have to be very neat here as we’re going for a used and beaten look.
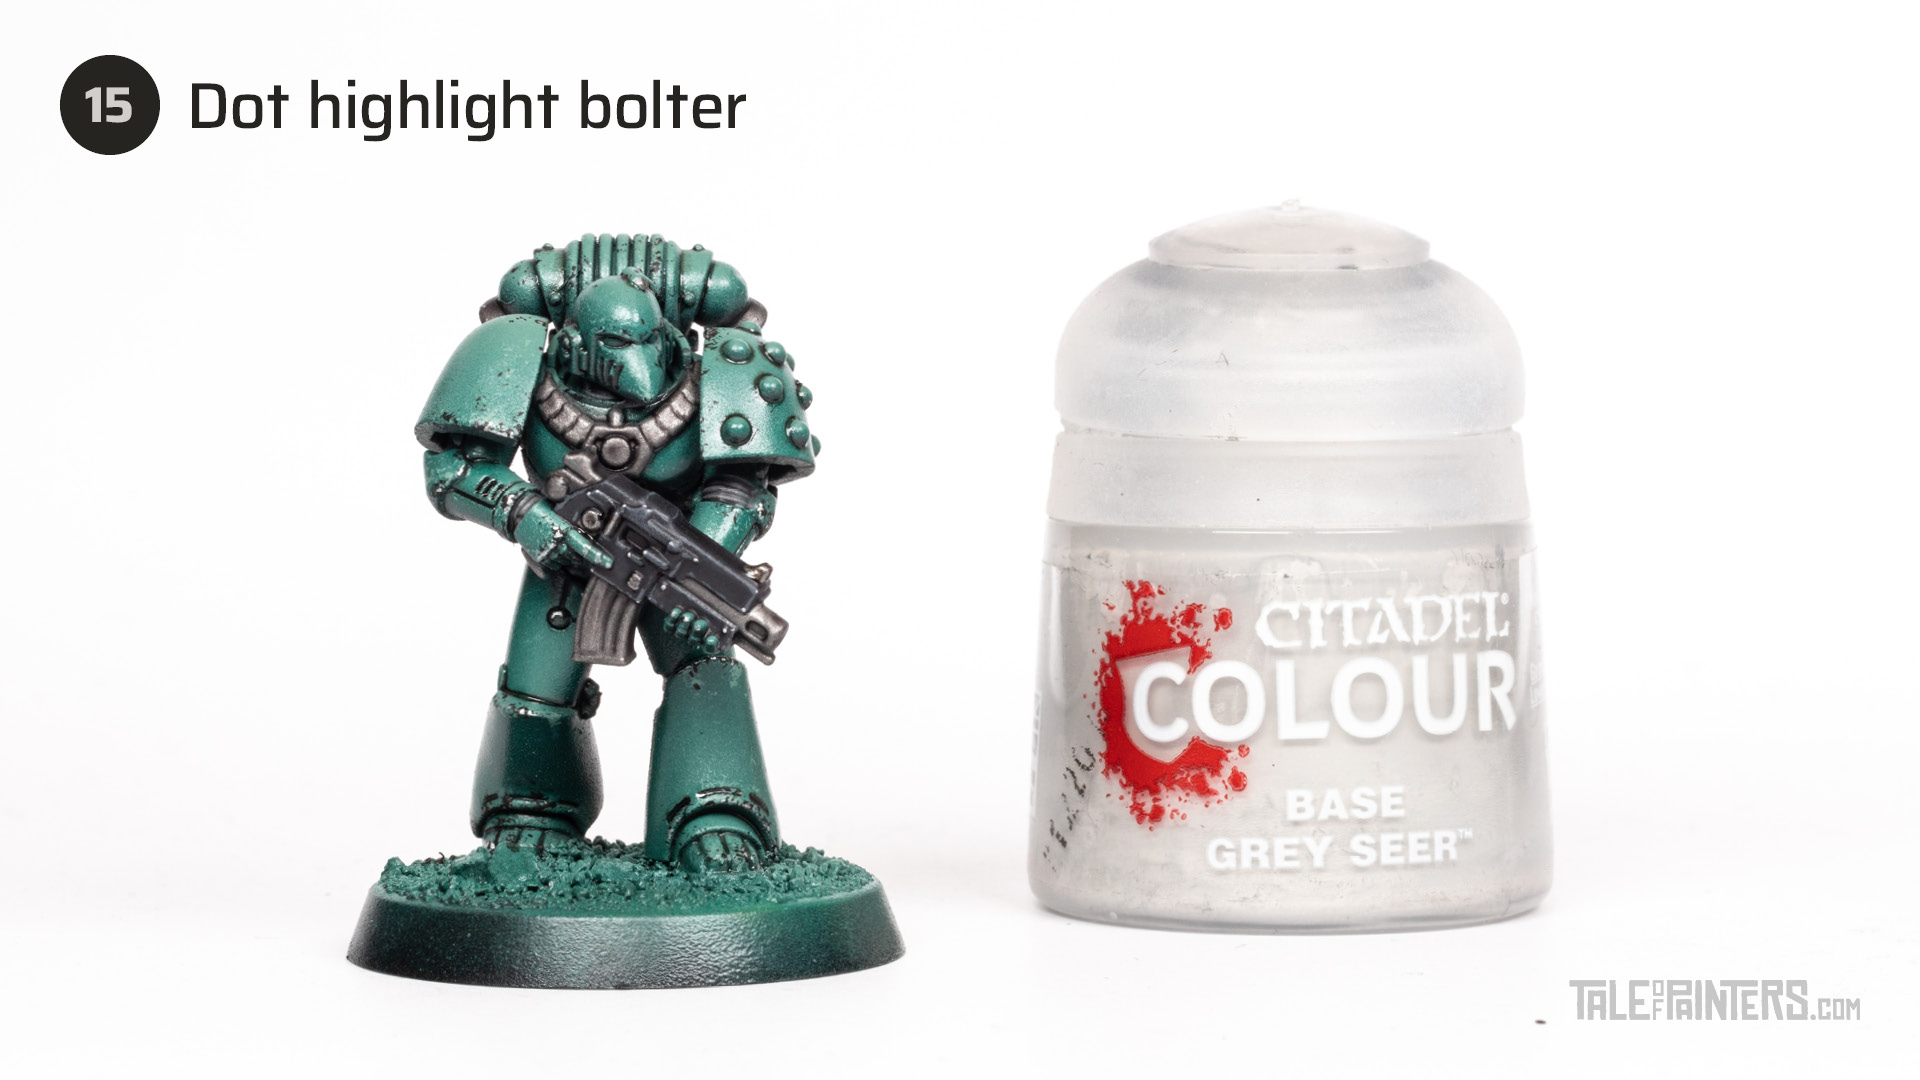
This is an optional step, but to add some more contrast to the bolter, apply a few small dots of Greyseer to the sharpest corners and rivets.

Bring out your piece of sponge, dip it into Vallejo Model Air Steel [or Stormhost Silver], and carefully add a few weathered spots to the steel details and the bolter casing.
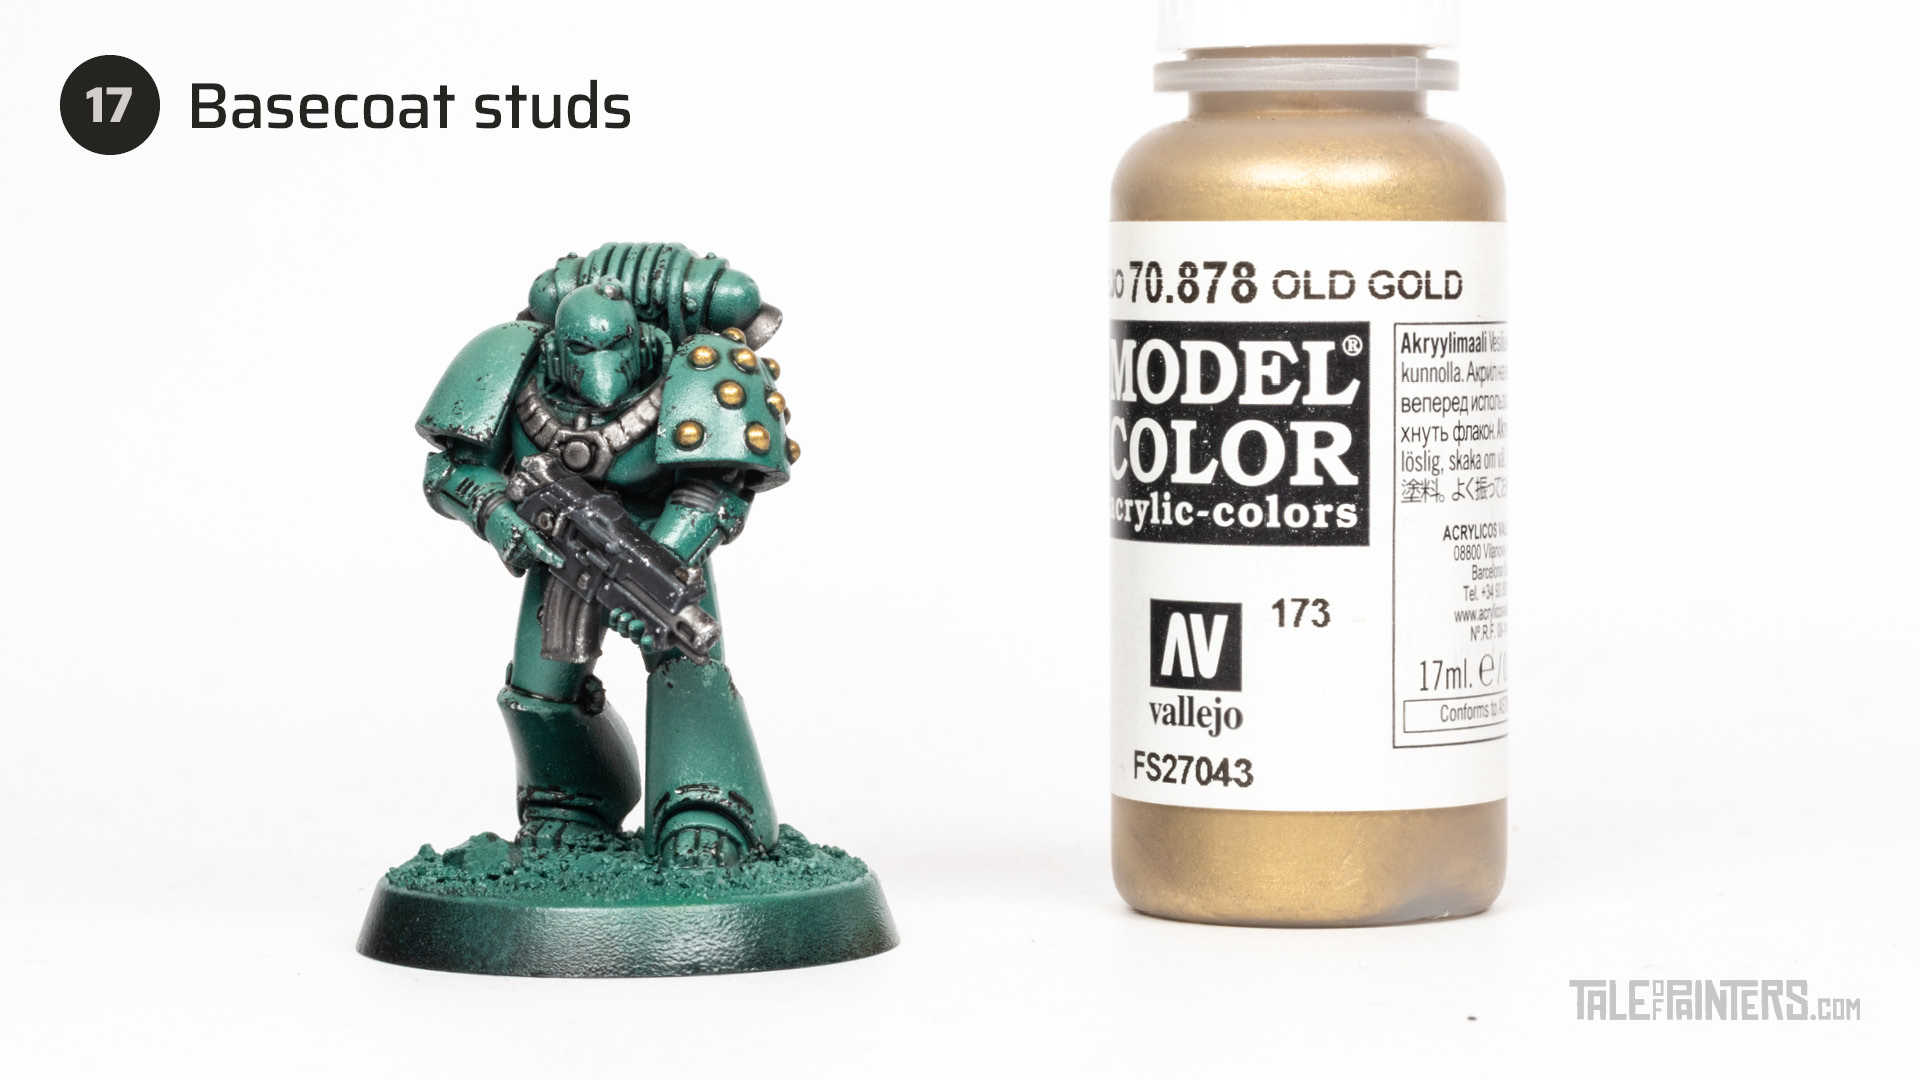
Paint the studs with a few thin coats of Vallejo Model Color Old Gold [the closest Citadel Colour would be Skullcrusher Brass].
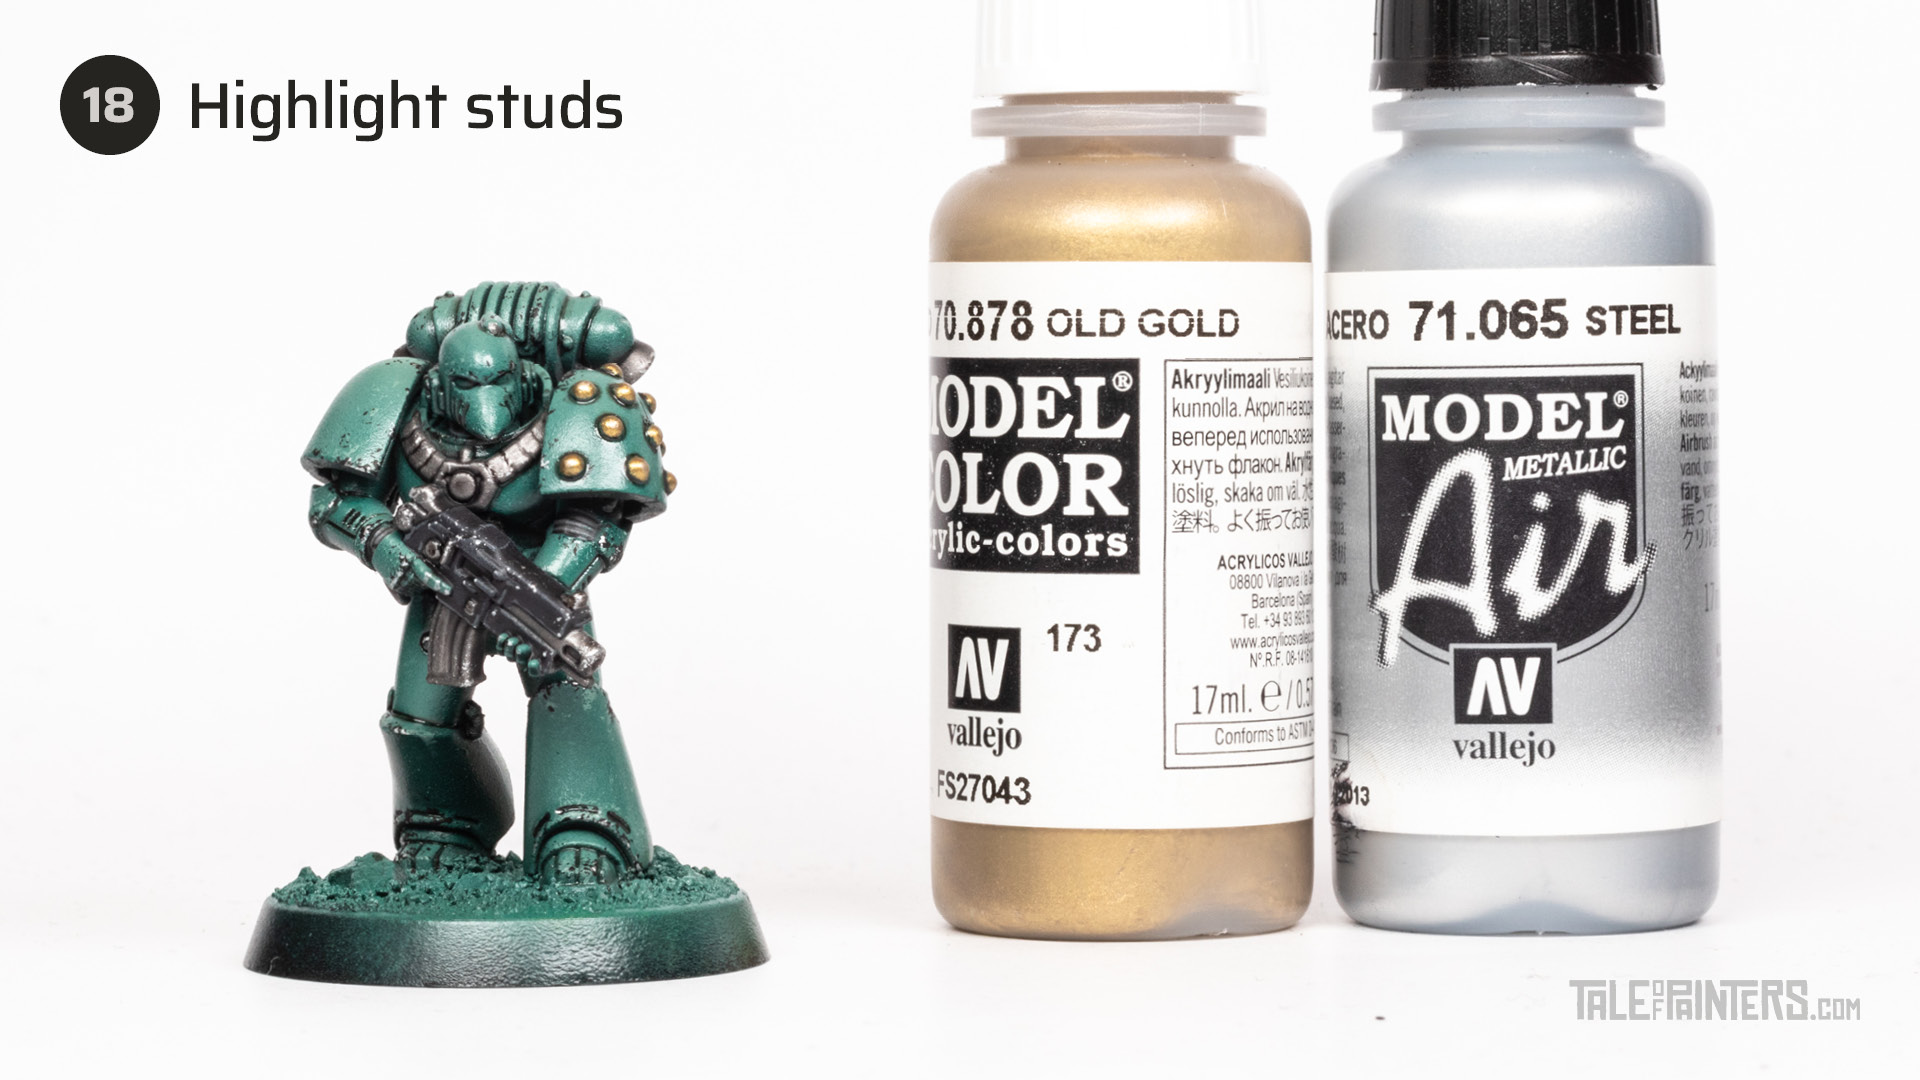
Then highlight the studs with a VMC Old Gold with a little bit of Vallejo Model Air Steel [or Stormhost Silver].
How to paint Space Marine eye lenses
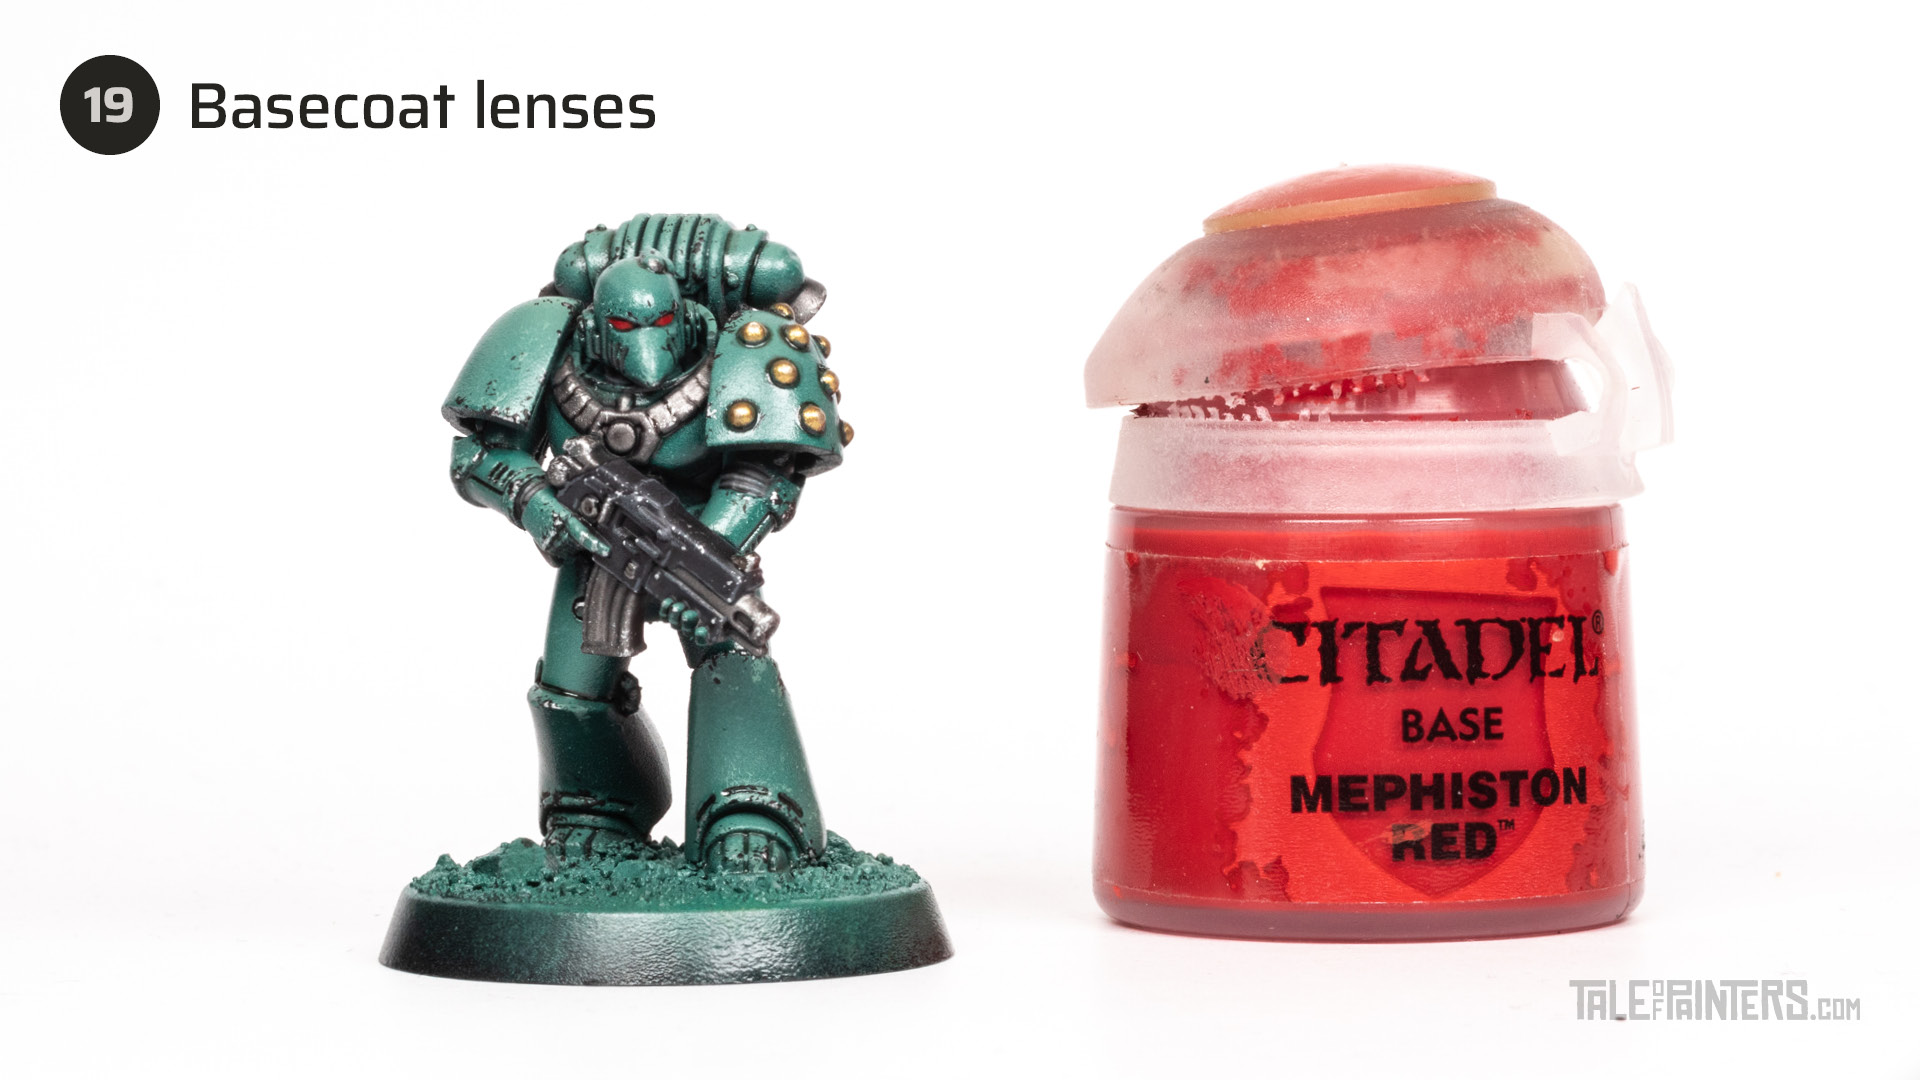
Now onto the lenses. Carefully paint the eye sockets with Mephiston Red.
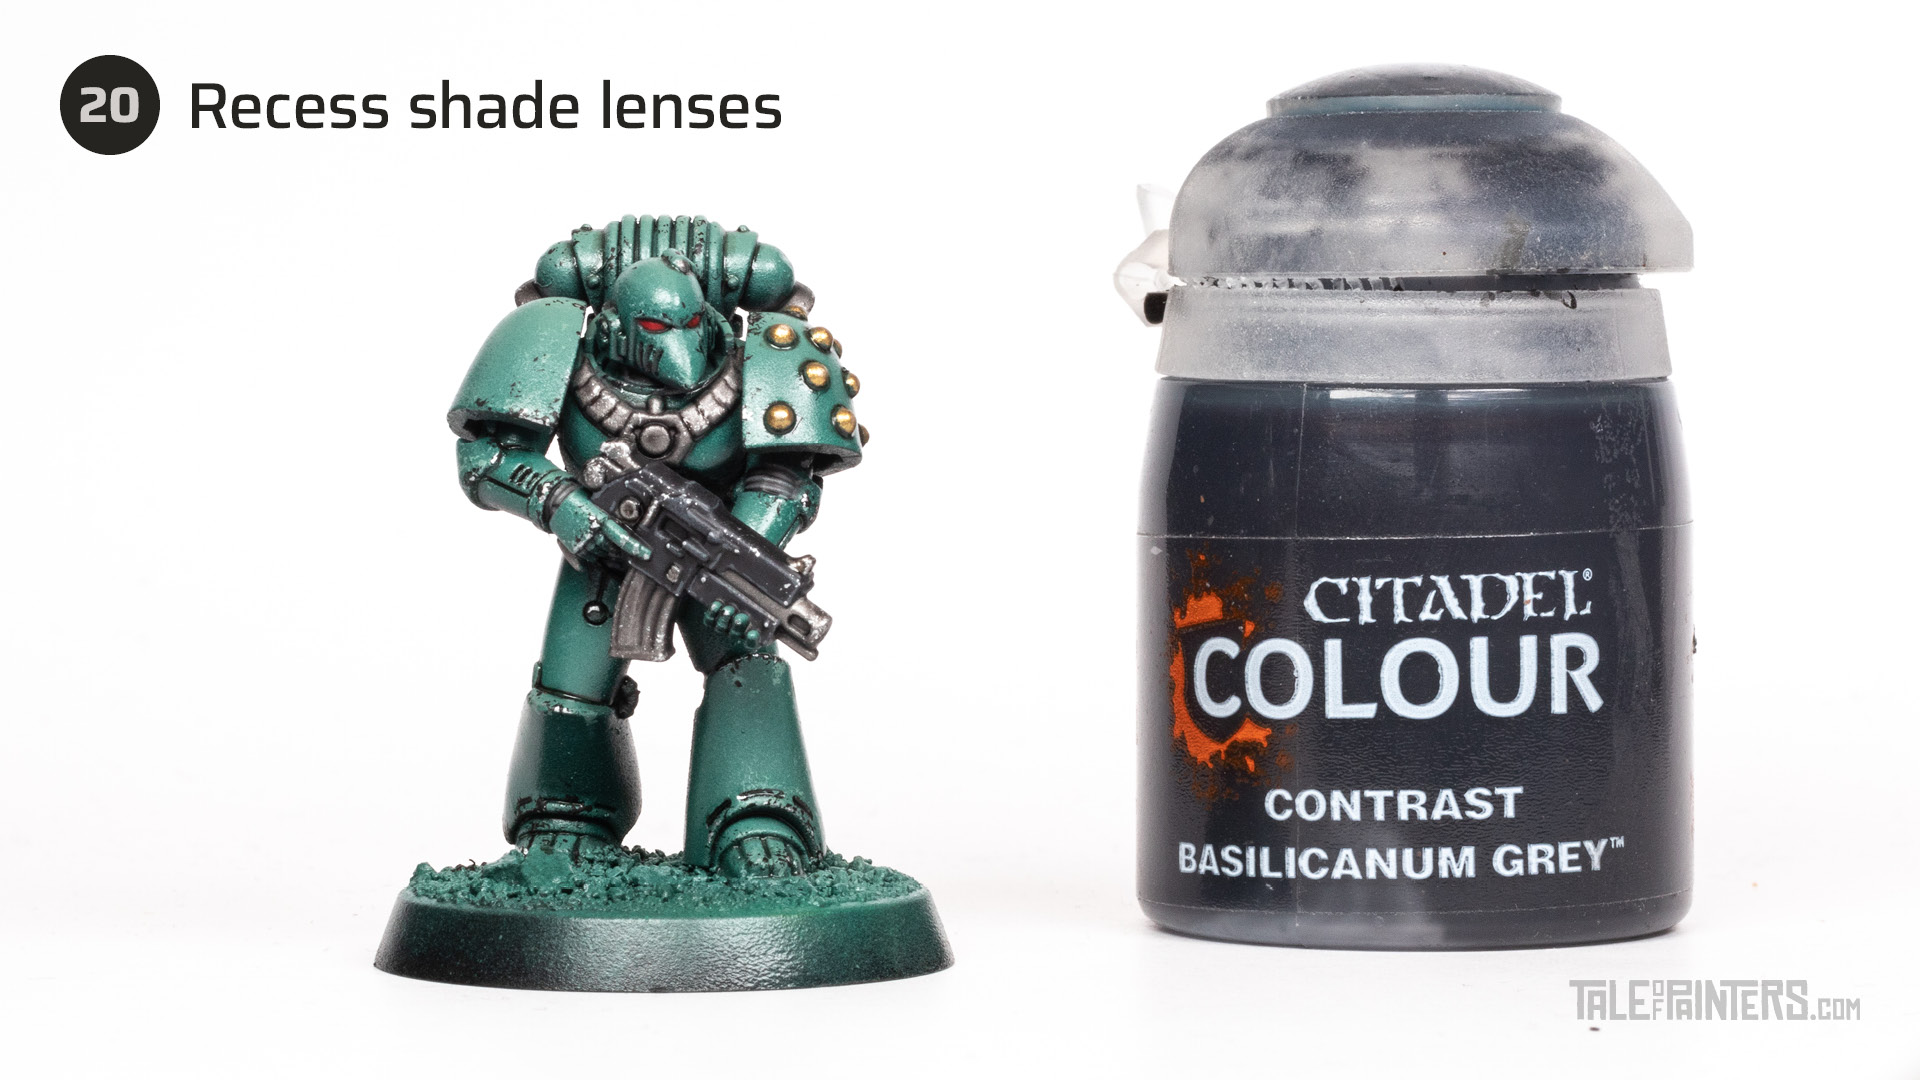
Then, use a thin brush and run Basilicanum Grey around the lenses to add some definition. If you applied too much, tidy up with Mephiston Red afterwards.
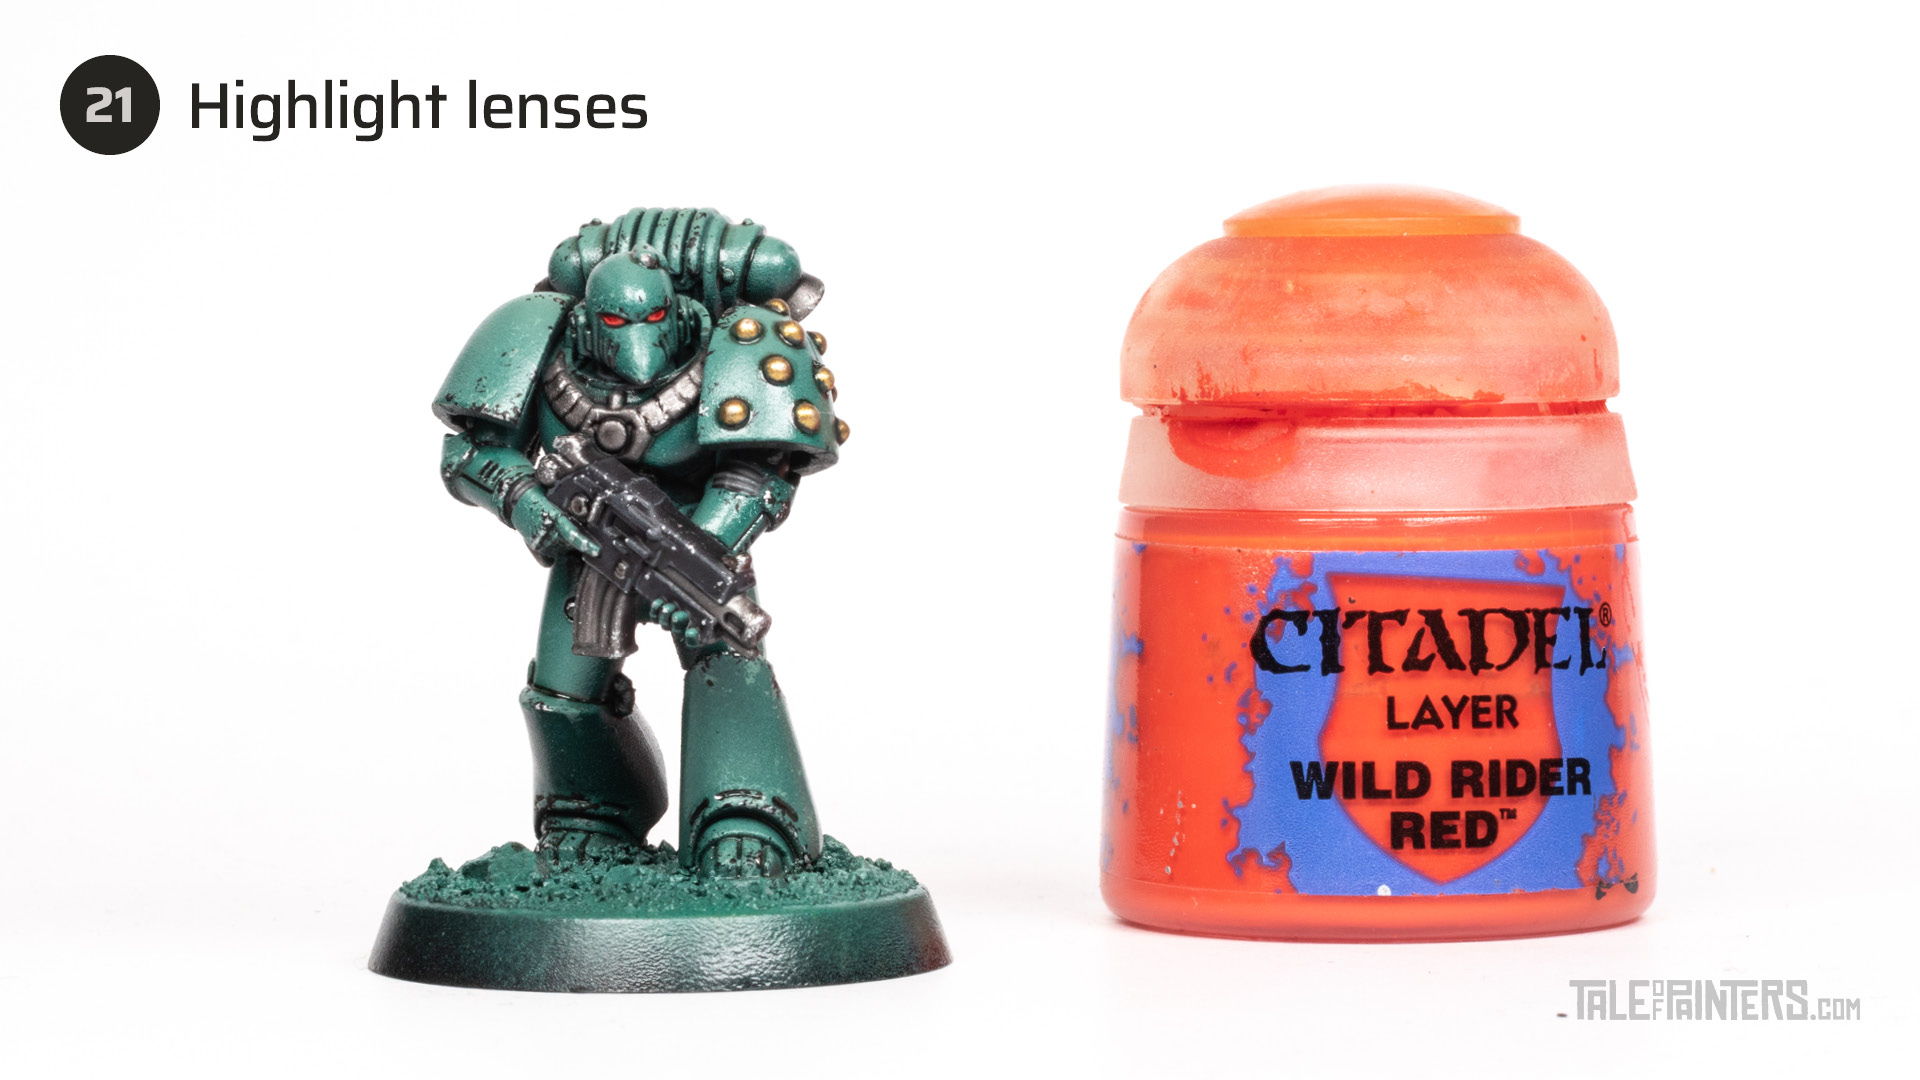
Next, highlight the lower half of the lenses with Wild Rider Red.
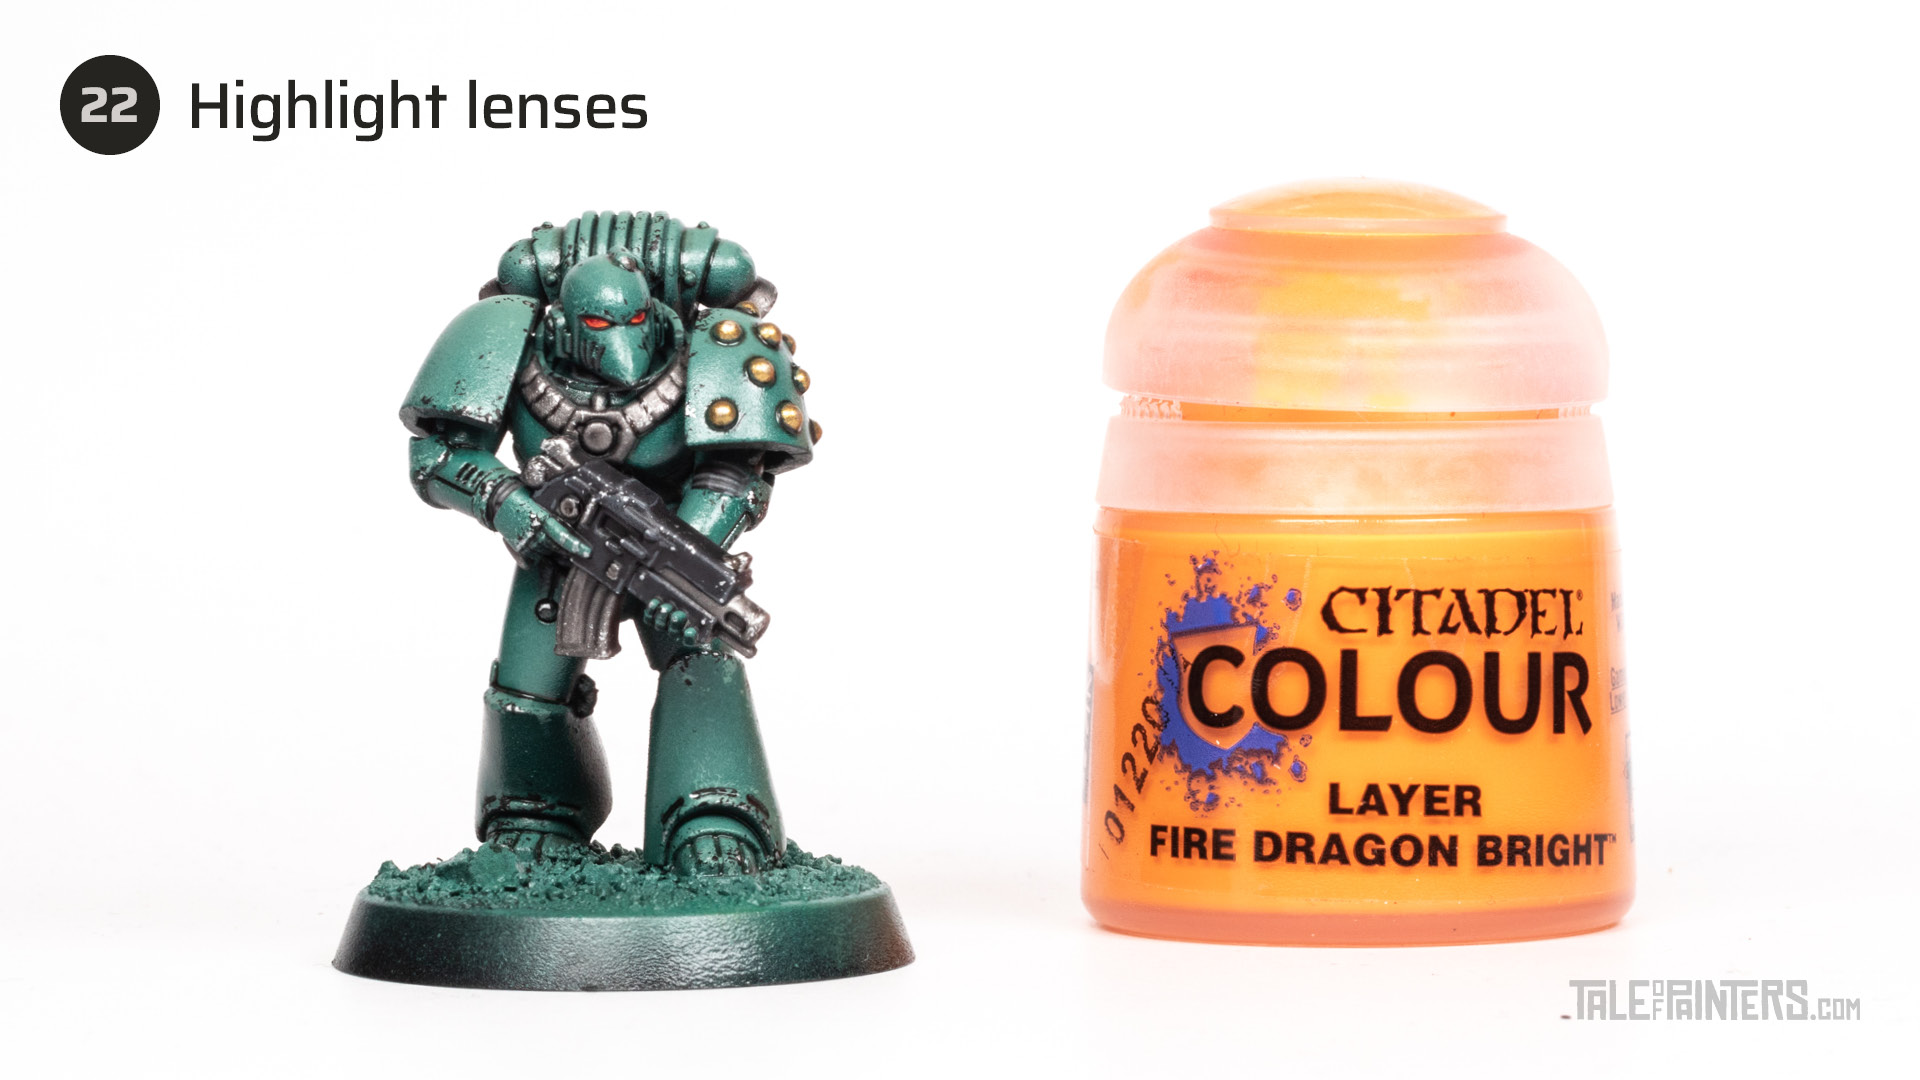
You can skip this step, but I wanted to spend some more effort on the lenses as the rest of the model is painted rather quick and dirty. Apply a very small highlight of Fire Dragon Bright to the front of the lenses only.
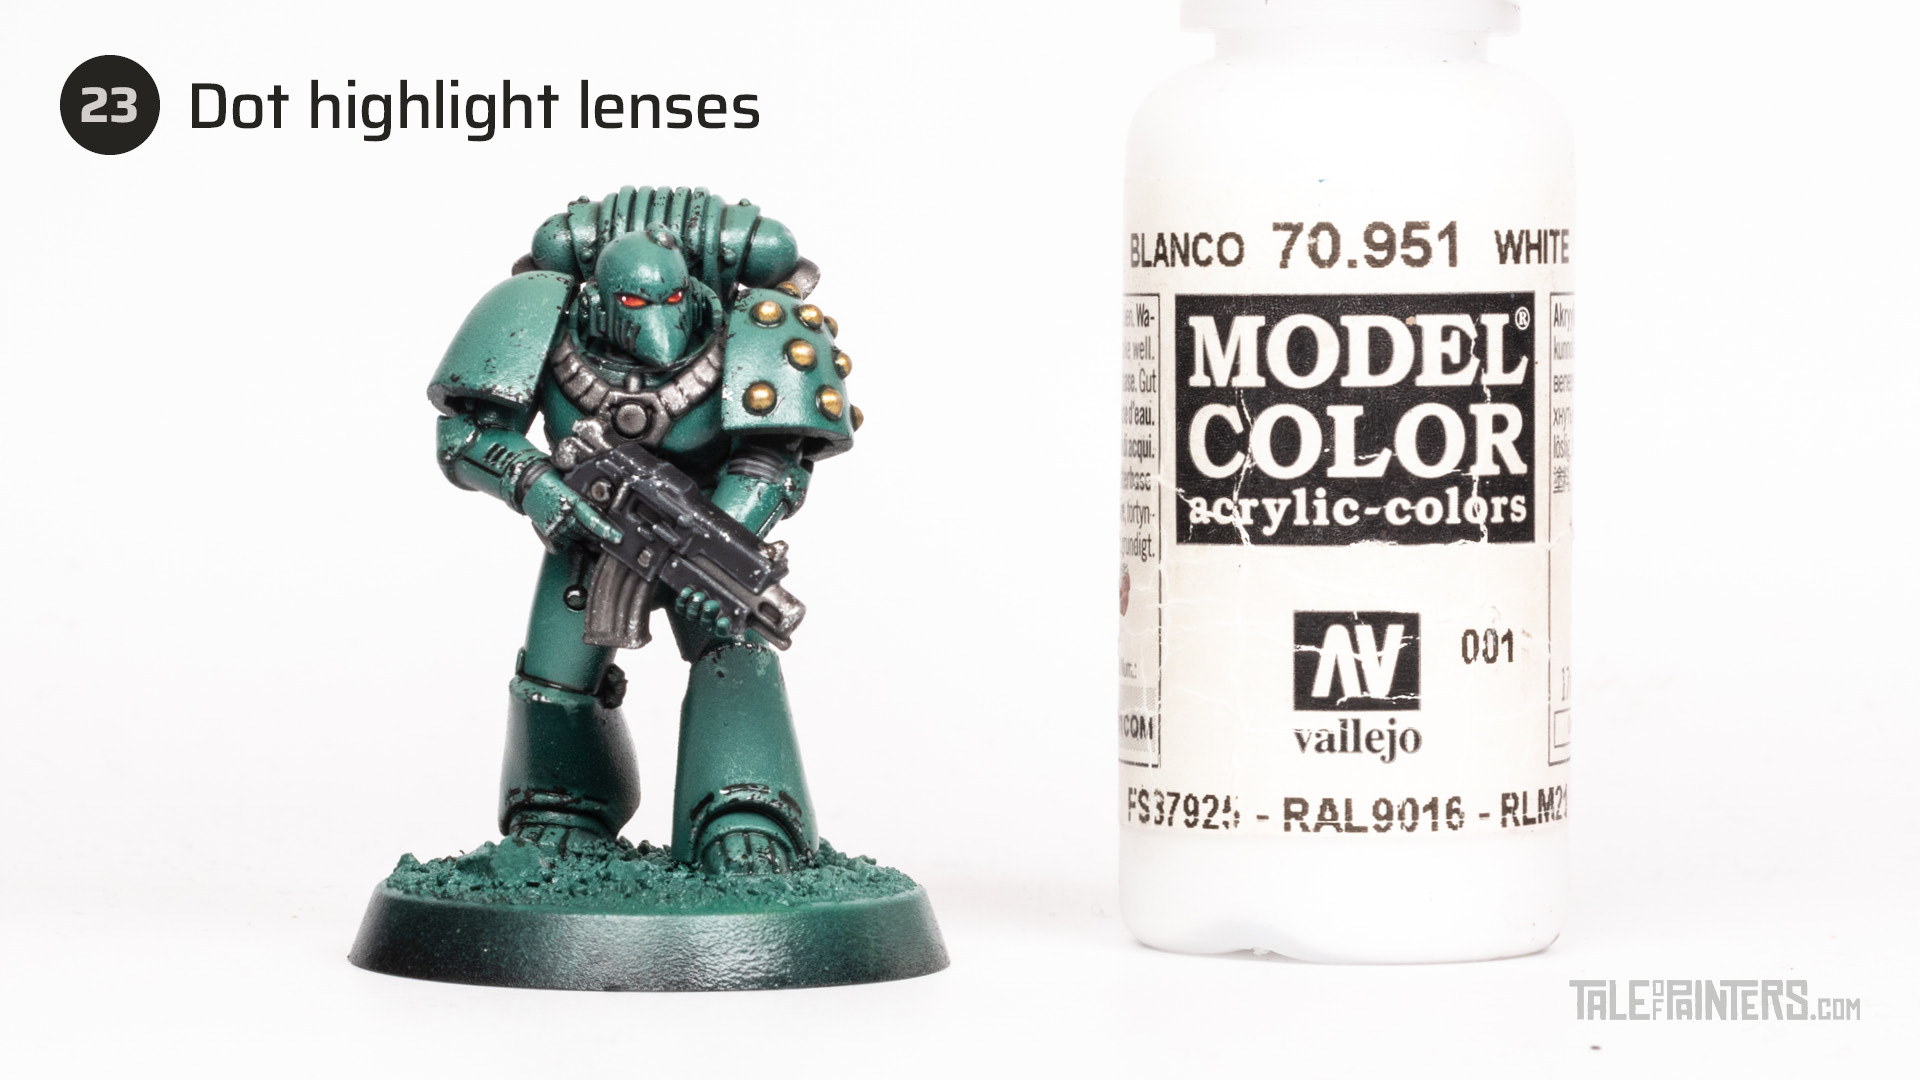
Finally, add a small dot of Vallejo Moedl Color White [or White Scar] to the corners of each lens.
Finishing touches & decals
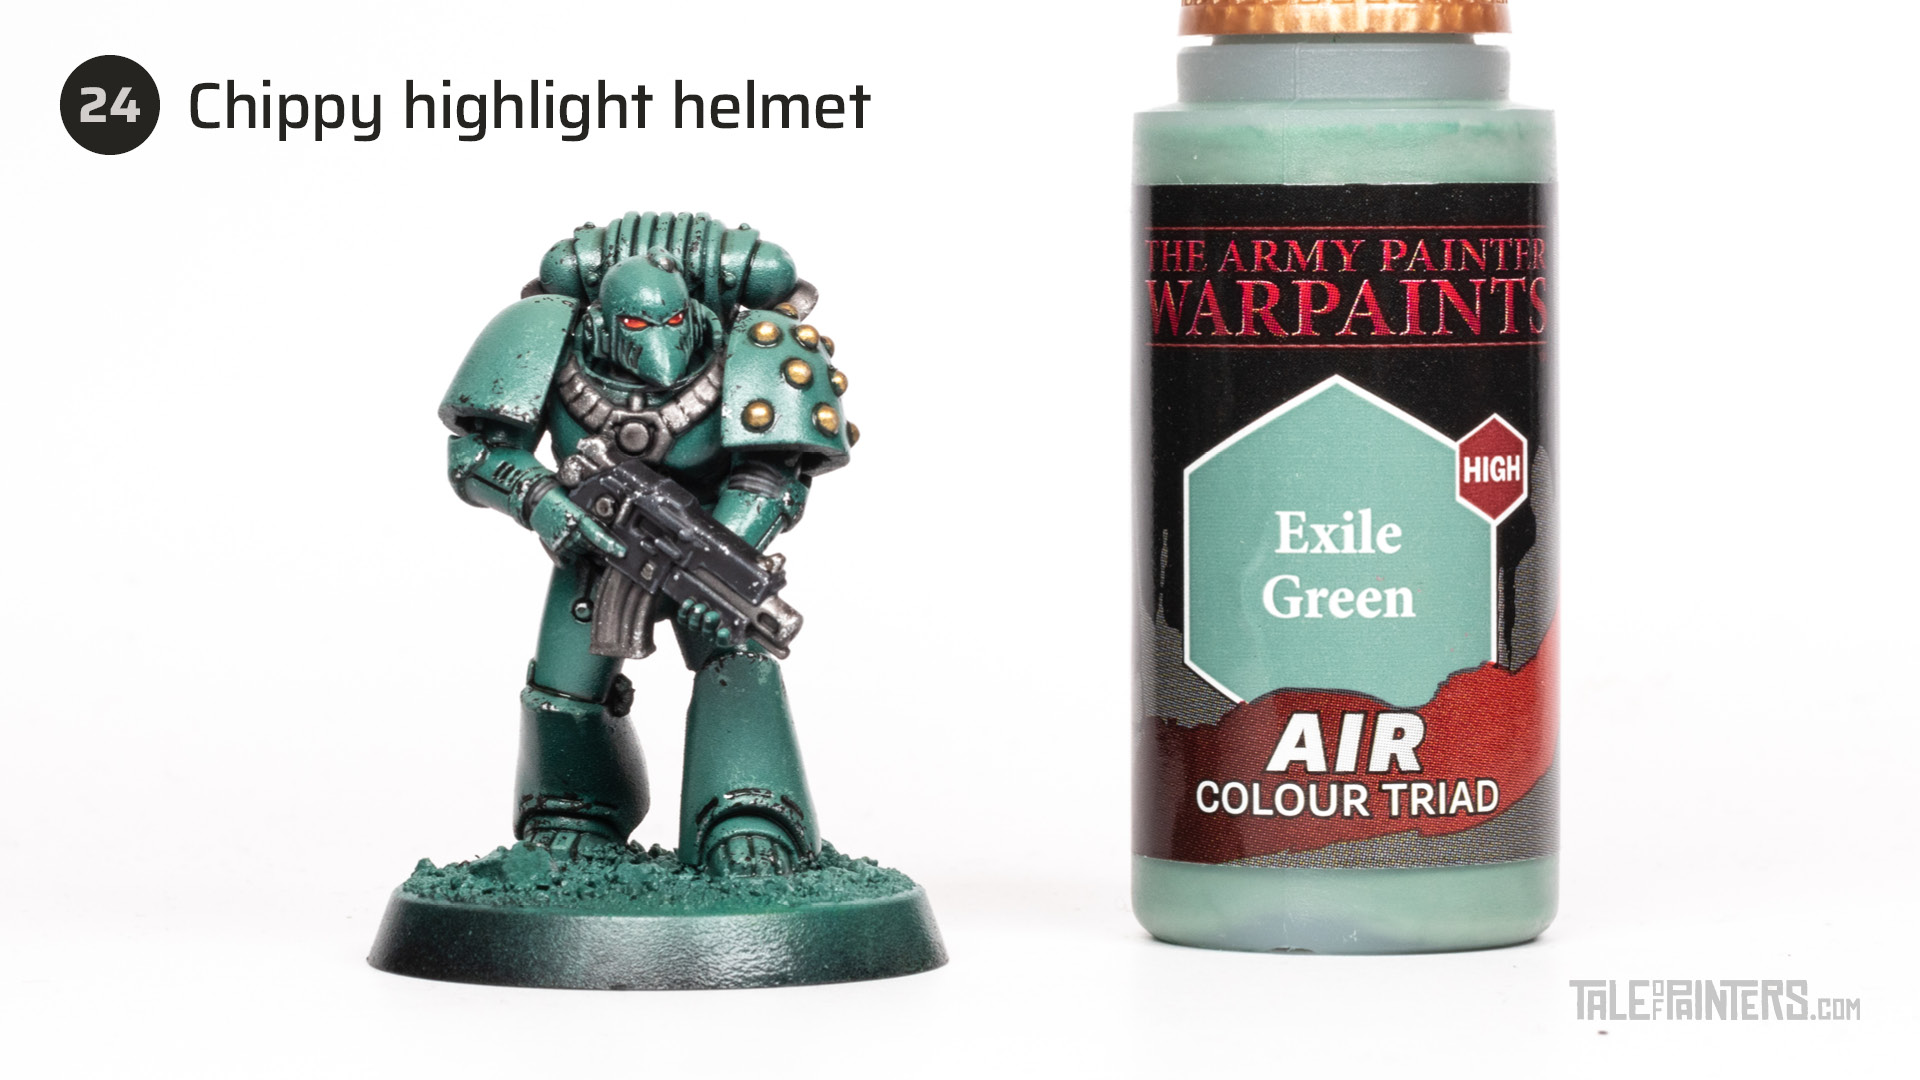
As the head is one of the main focal points of a model, I neatened up the drybrushed highlights of the helmet with a quick edge highlight of Warpaints Air Exile Green. You don’t need to be overly neat here as we want to go for an irregular, chipped look.
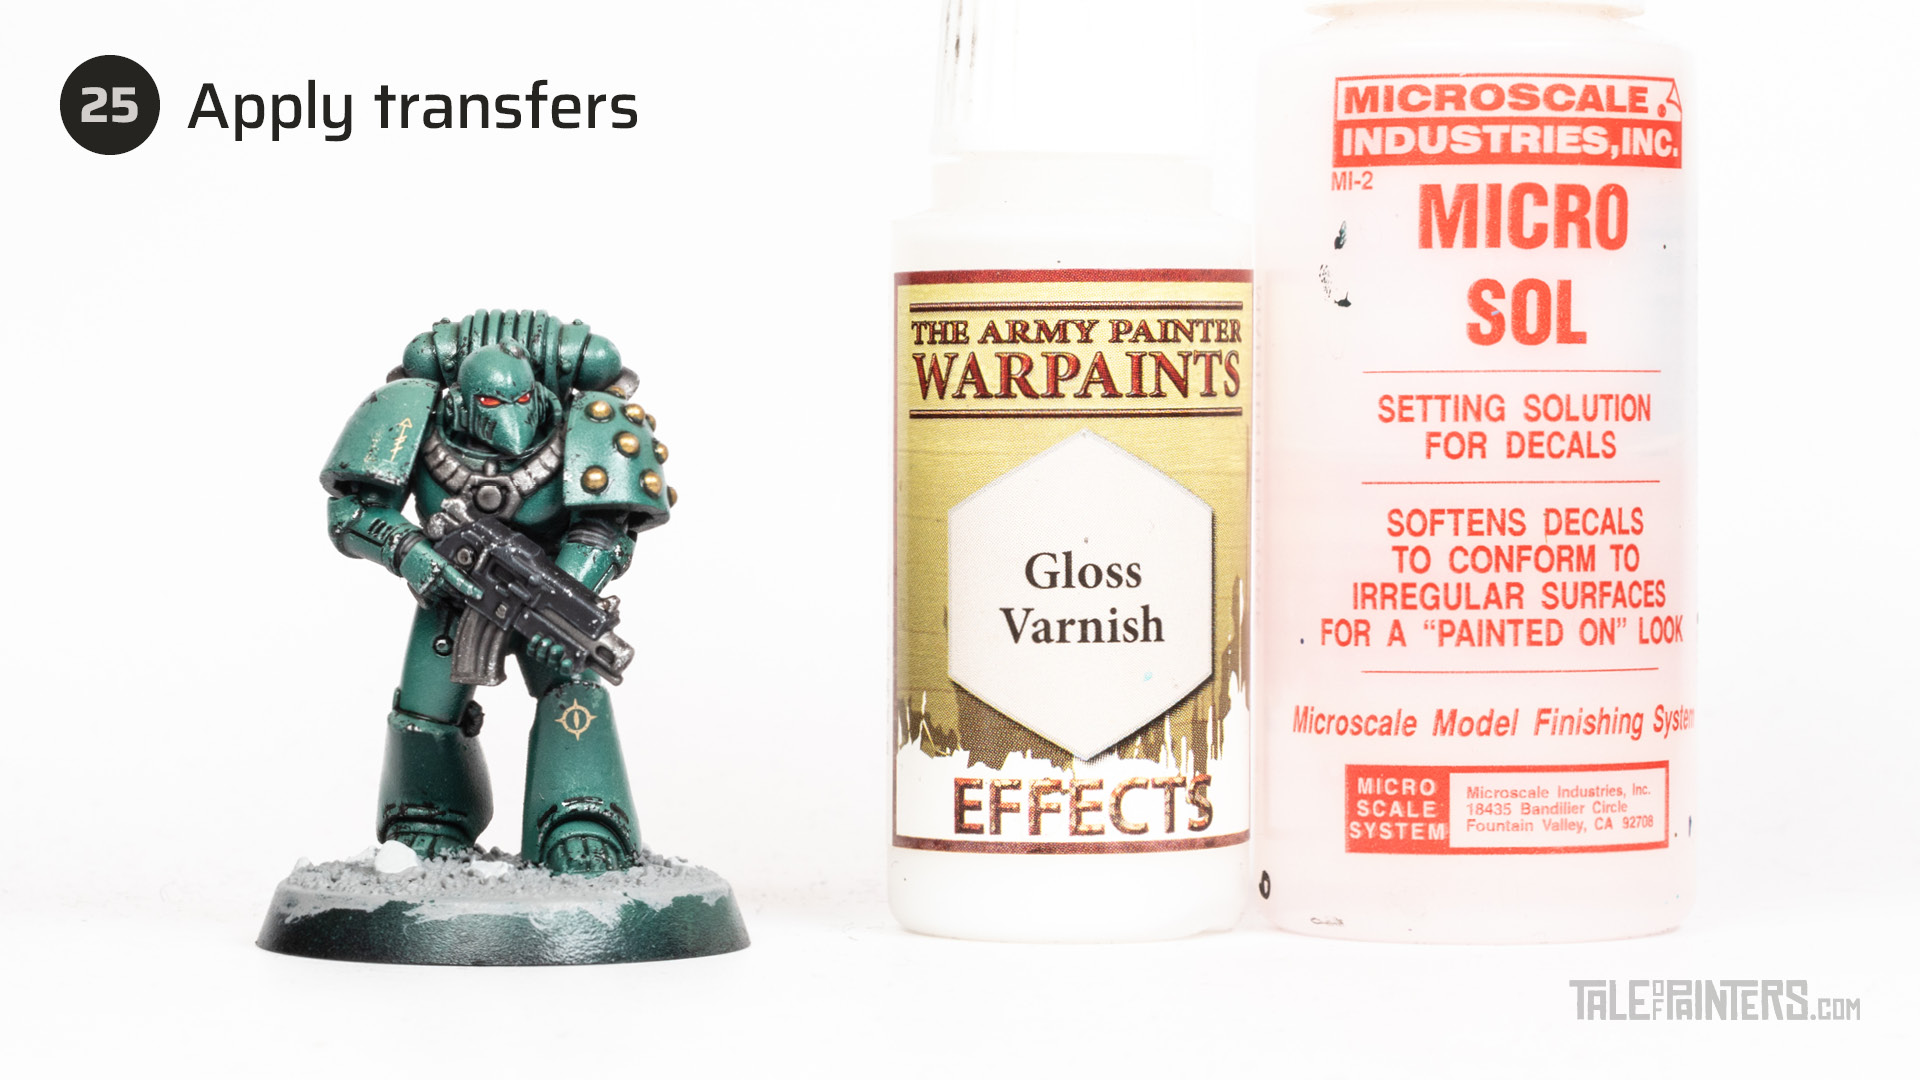
Next, we apply transfers. For this, seal the areas you want to add a decal to with gloss varnish, for example, Warpaints Gloss Varnish [or ‘Ardcoat]. Once dry, let the decal soak in water until it comes off, and put it into place. Once dry, apply multiple coats of Microsol from Microscale until the decal has fully adhered to the surface and visible edges have disappeared.
If you like, you can also add some weathering to the transfers. You could add some scratches and dents with your hobby knife while it is still on the decal sheet, or add some sponge weathering with the armour’s main colour later.
Painting the base
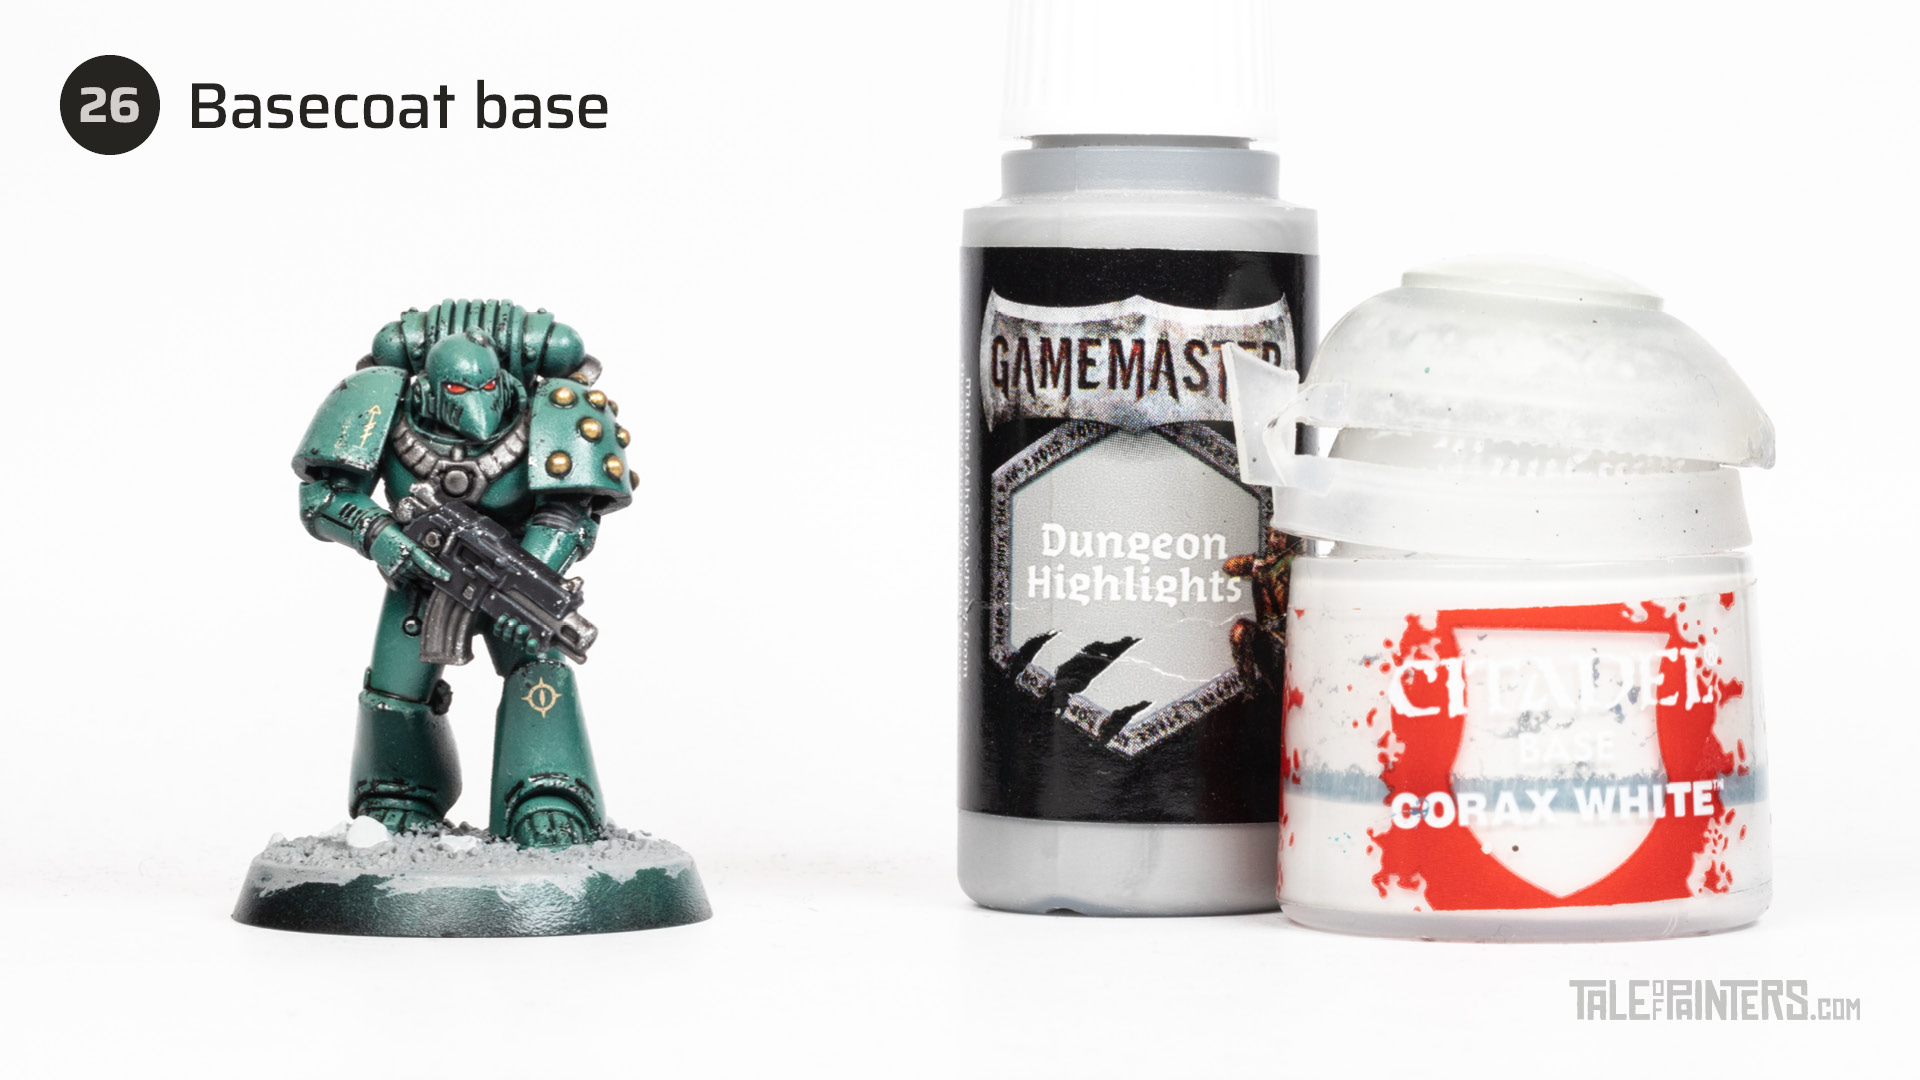
Basecoat the texture of the base with Warpaints Ash Grey, which is the same colour as Dungeon Highlight from The Army Painter’s Gamemaster ranger, or use Greyseer, and pick out the rocks with Corax White.
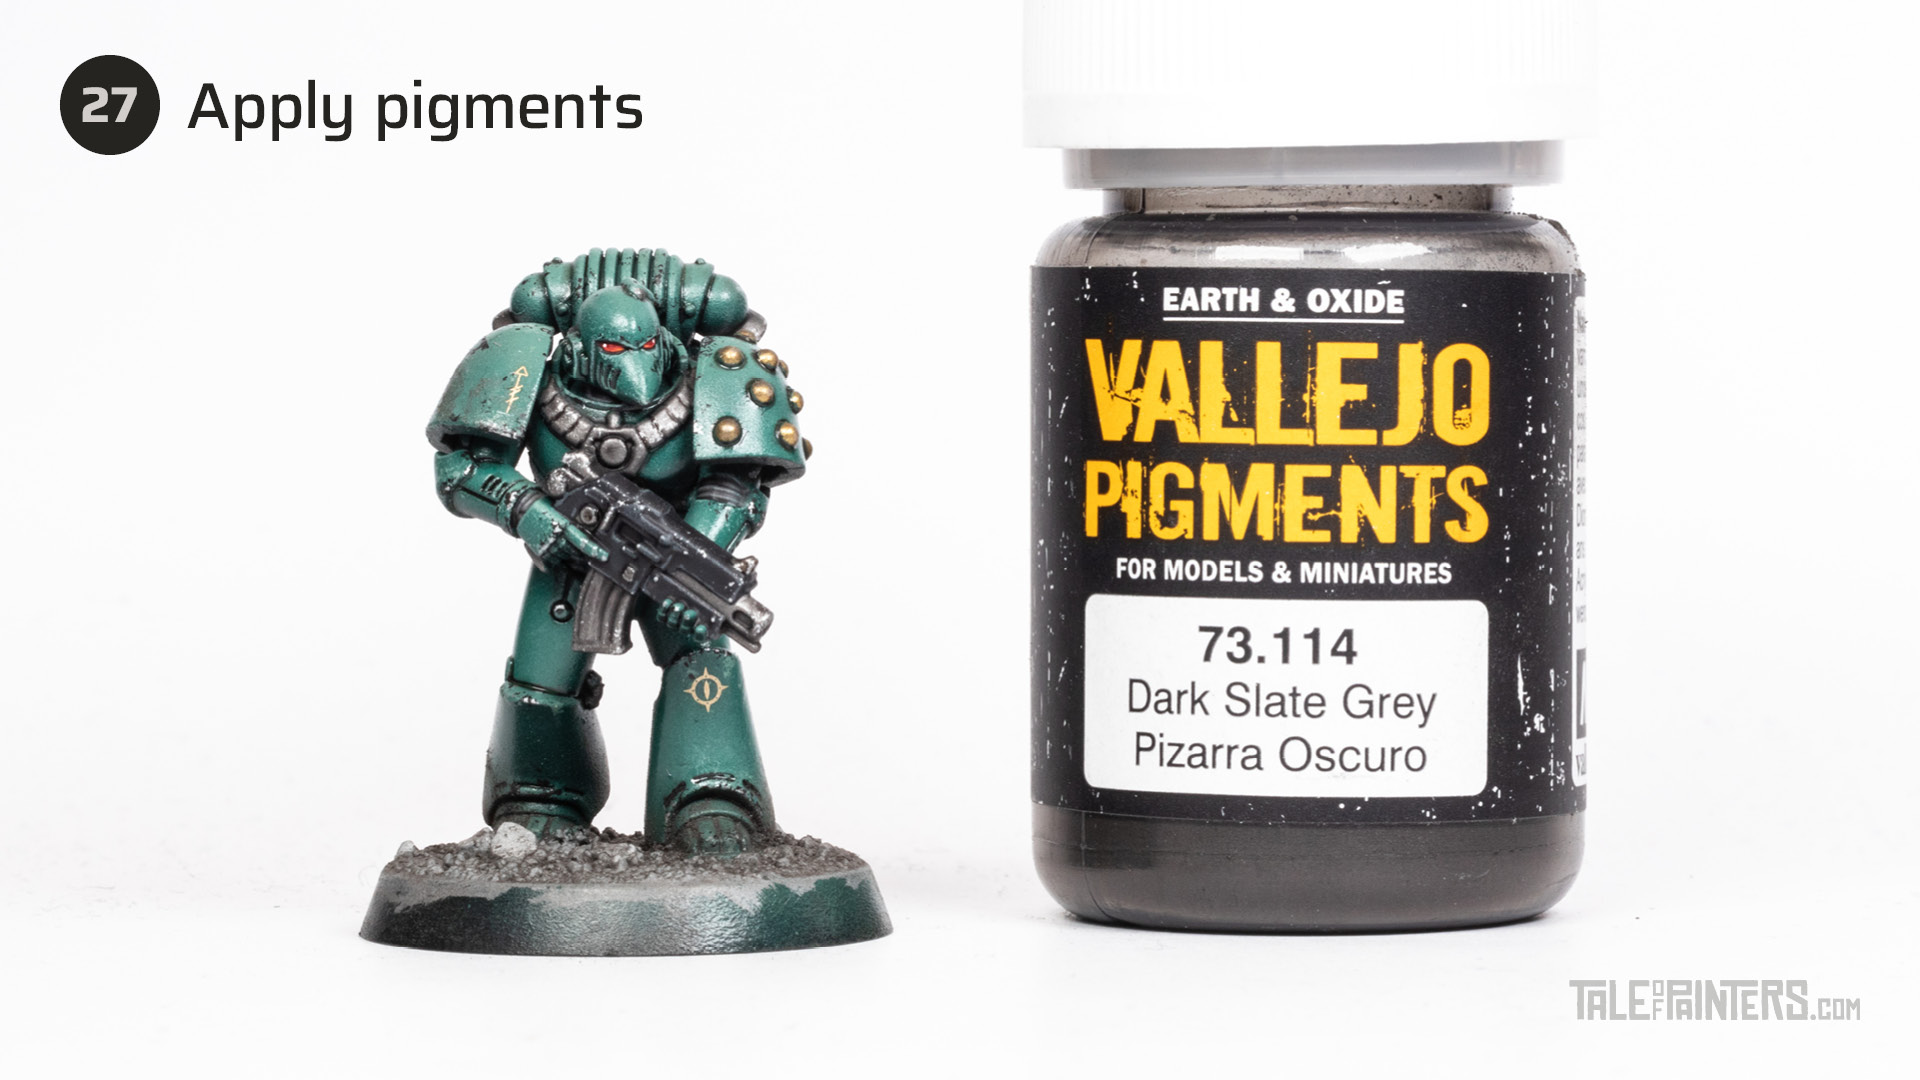
Now we want to use dry pigments for a realistic dusty effect. Use an old brush and work Vallejo Pigments Dark Slate Grey into the texture of the base, and also smear a little bit around the feet of the model.
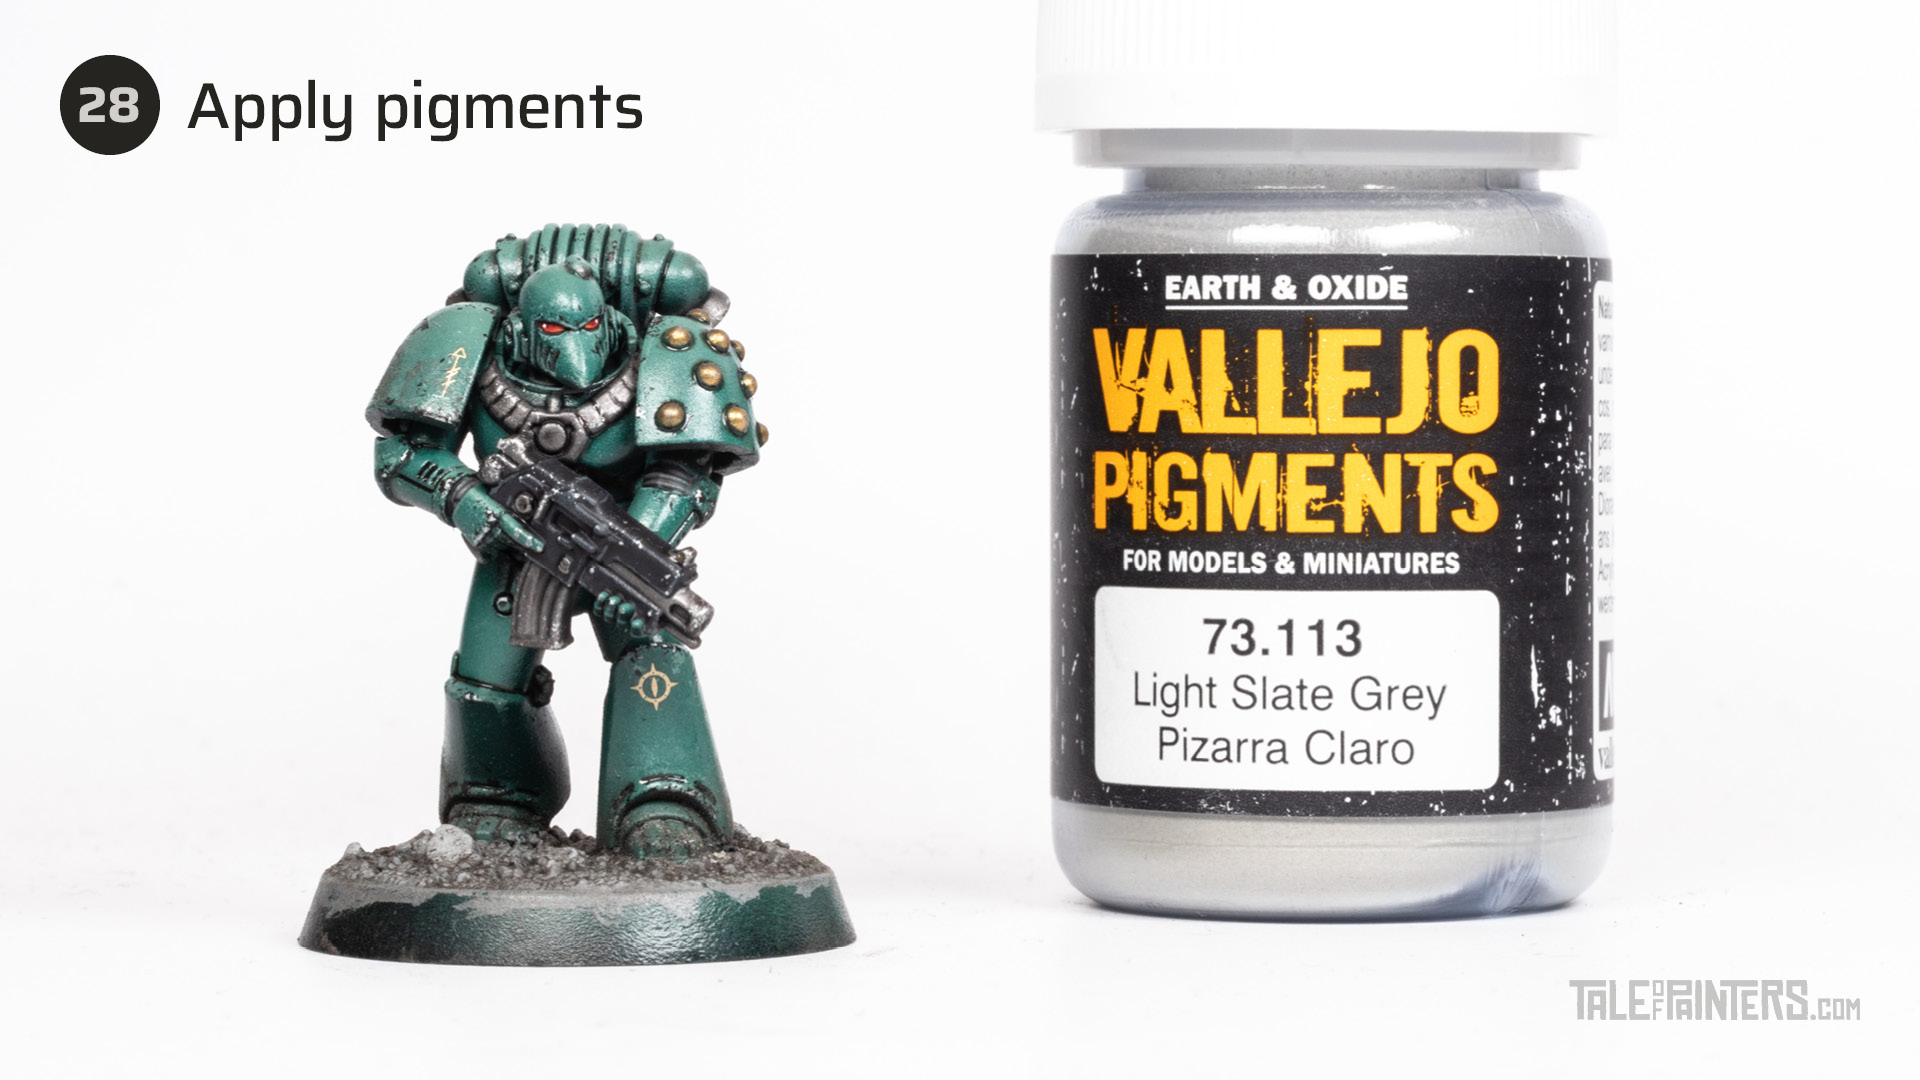
Next, work a little bit of Vallejo Pigments Light Slate Grey into the recesses of the feet.
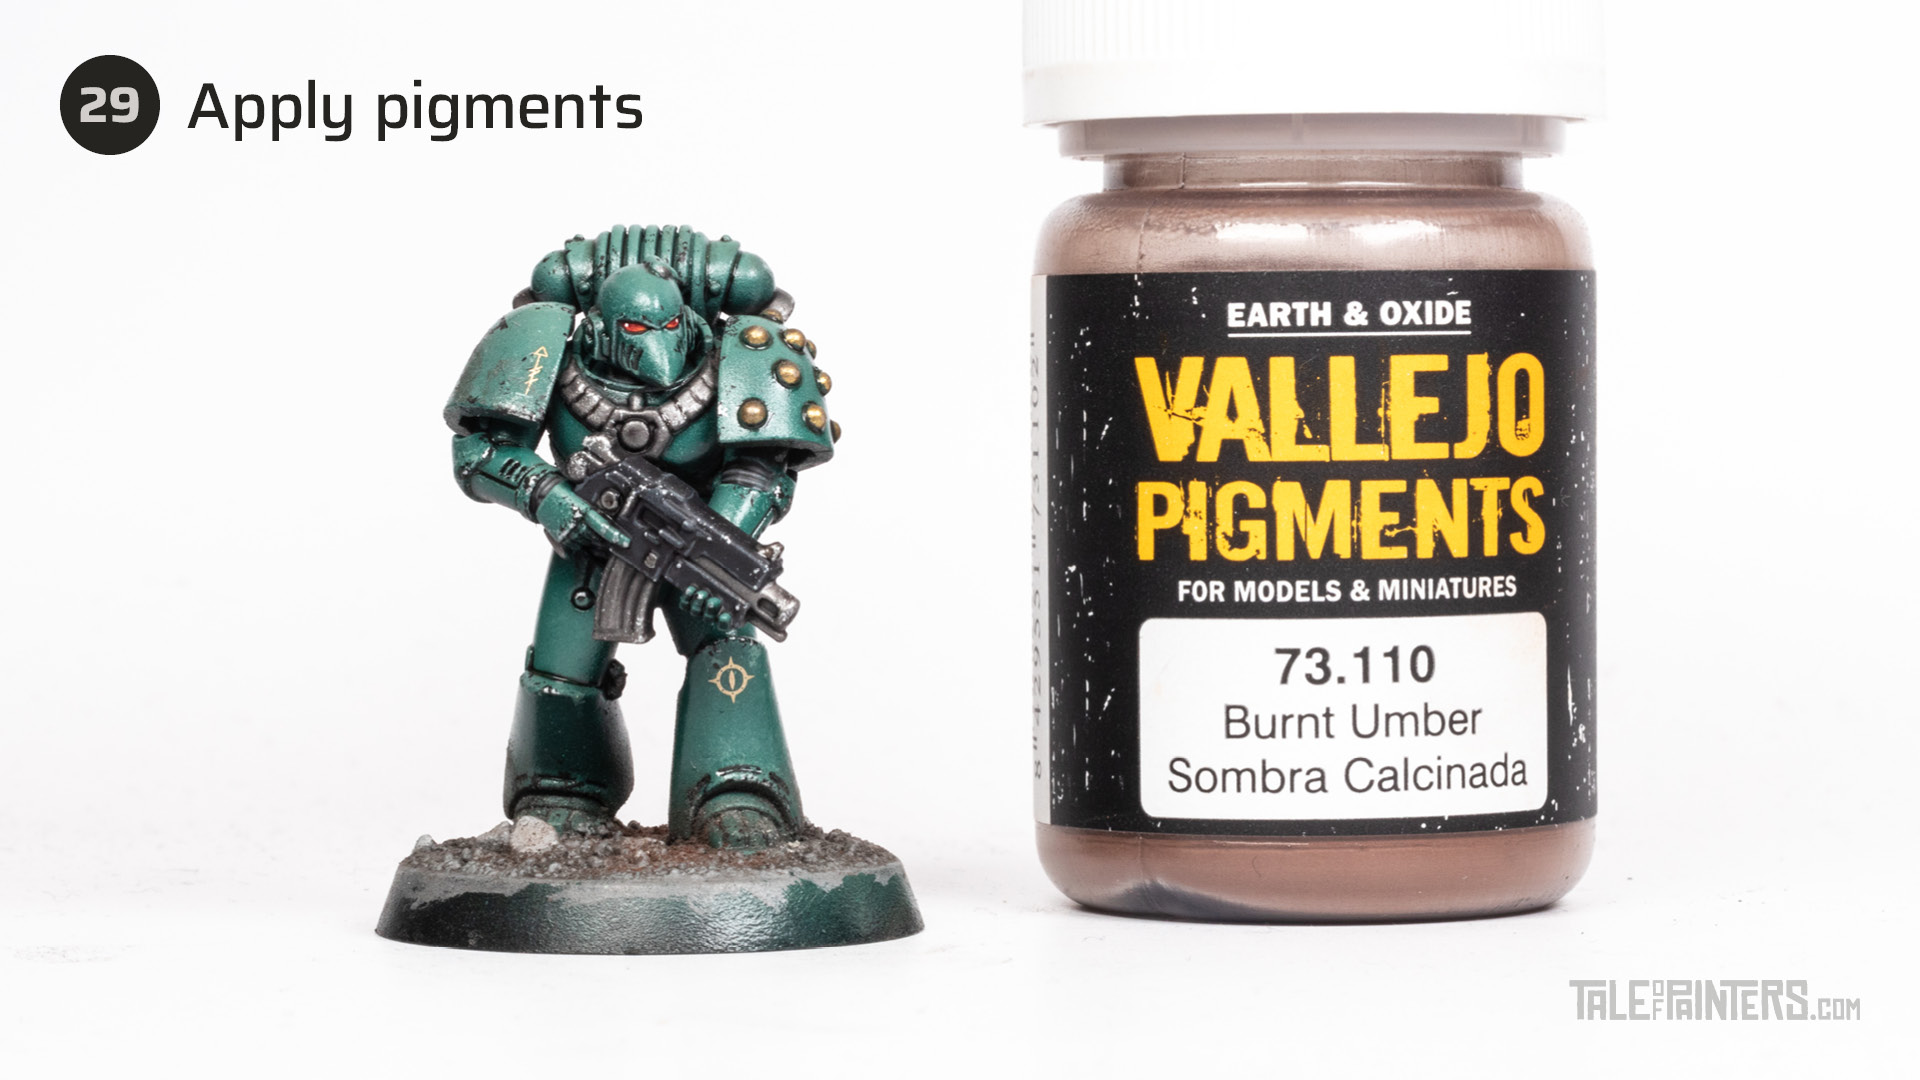
Finally, add a spot or two of Vallejo Pigments Burnt Umber and blend them into dark grey pigments to add some more variation to the base texture.
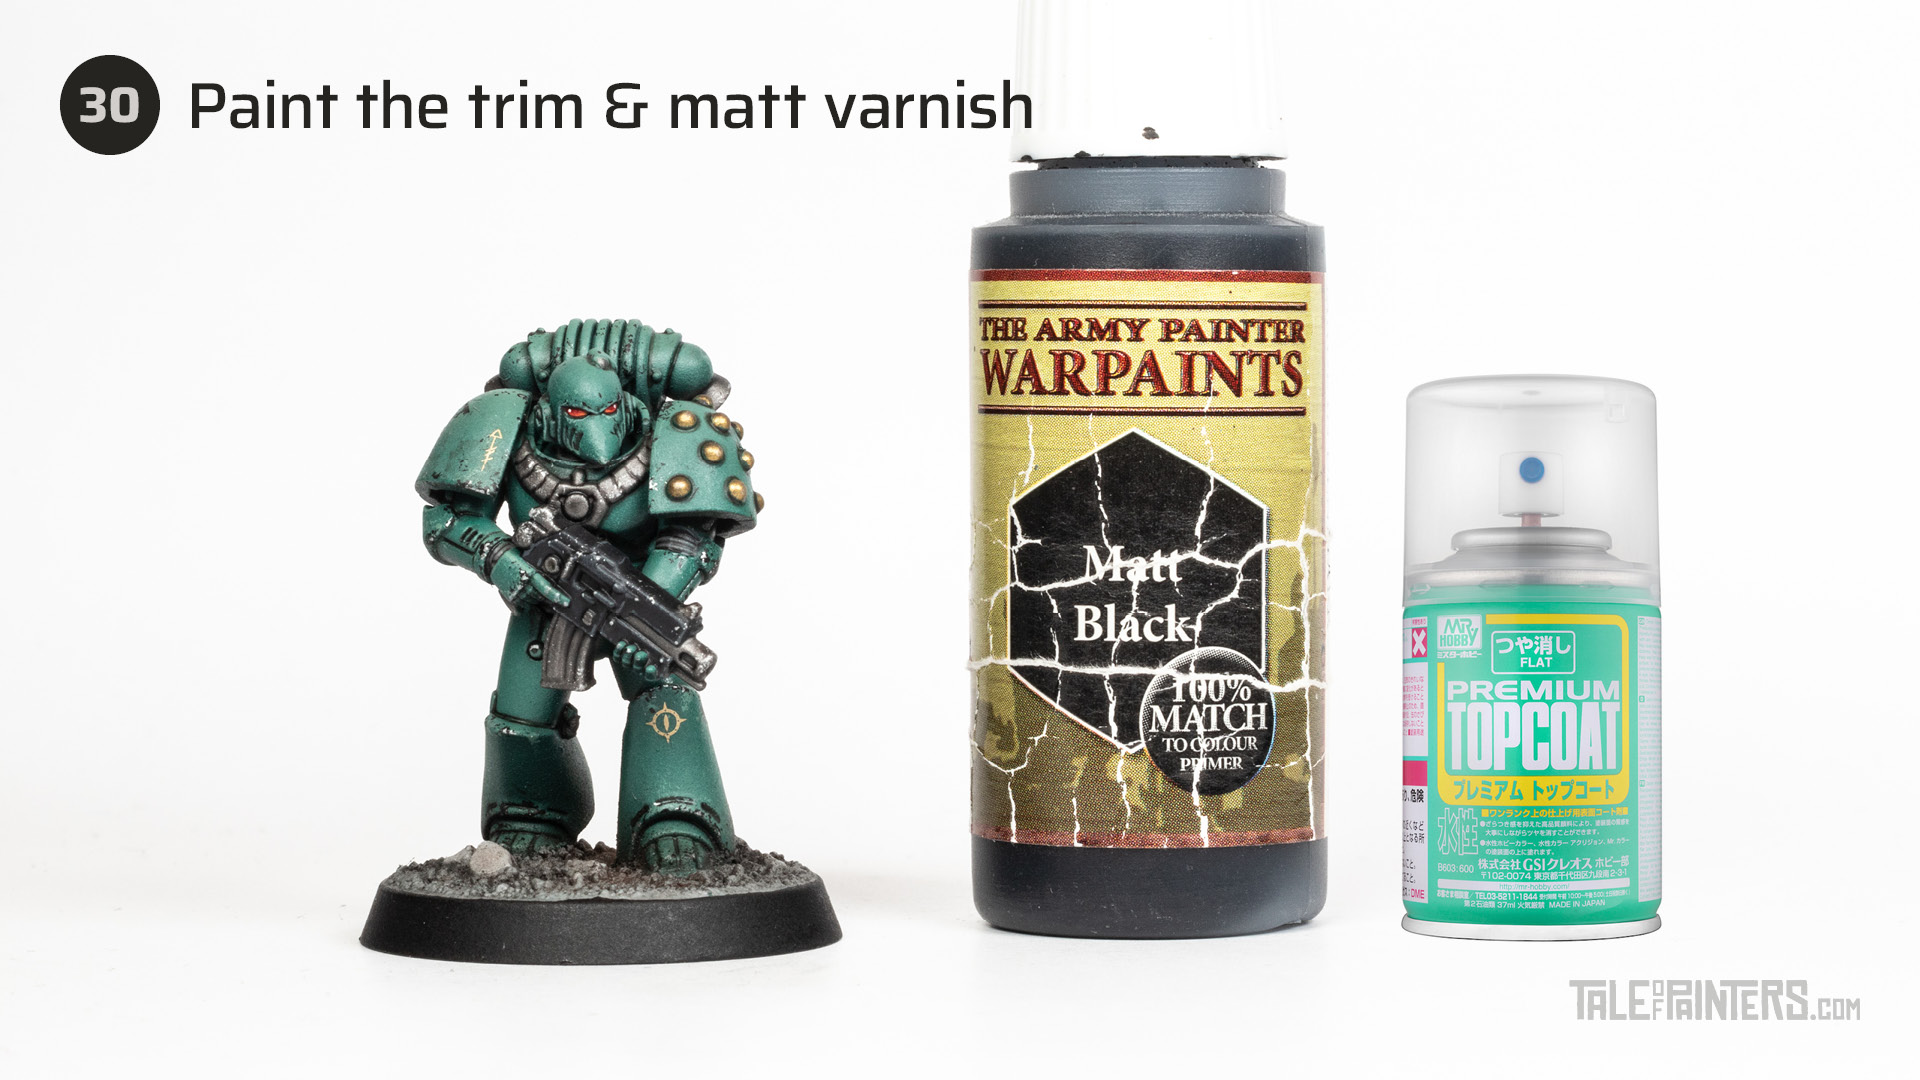
Now, all you need to do is to paint the trim of the base with Warpaints Matt Black [or Abaddon Black] and give the model a coat of matt varnish. I used Mr Premium Topcoat Flat from Mr Hobby, which is one of my favourite spray matt varnishes. For more of my favourite matt varnish products, check out my matt varnish guide here.
Pigments fade away when they become too moist and thus lose their dusty effect. Therefore, I gave the base a light dusting first to seal the pigments, let it dry, and then applied a second thicker layer of varnish all over the model.
Finished model & paint list
Here is the finished “grimdark” Sons of Horus MkVI Legionary. The painting took less than an hour, which is super fast by my standards. With batch painting, you could easily paint a squad of 10 in two or three evenings to make the Warmaster proud.
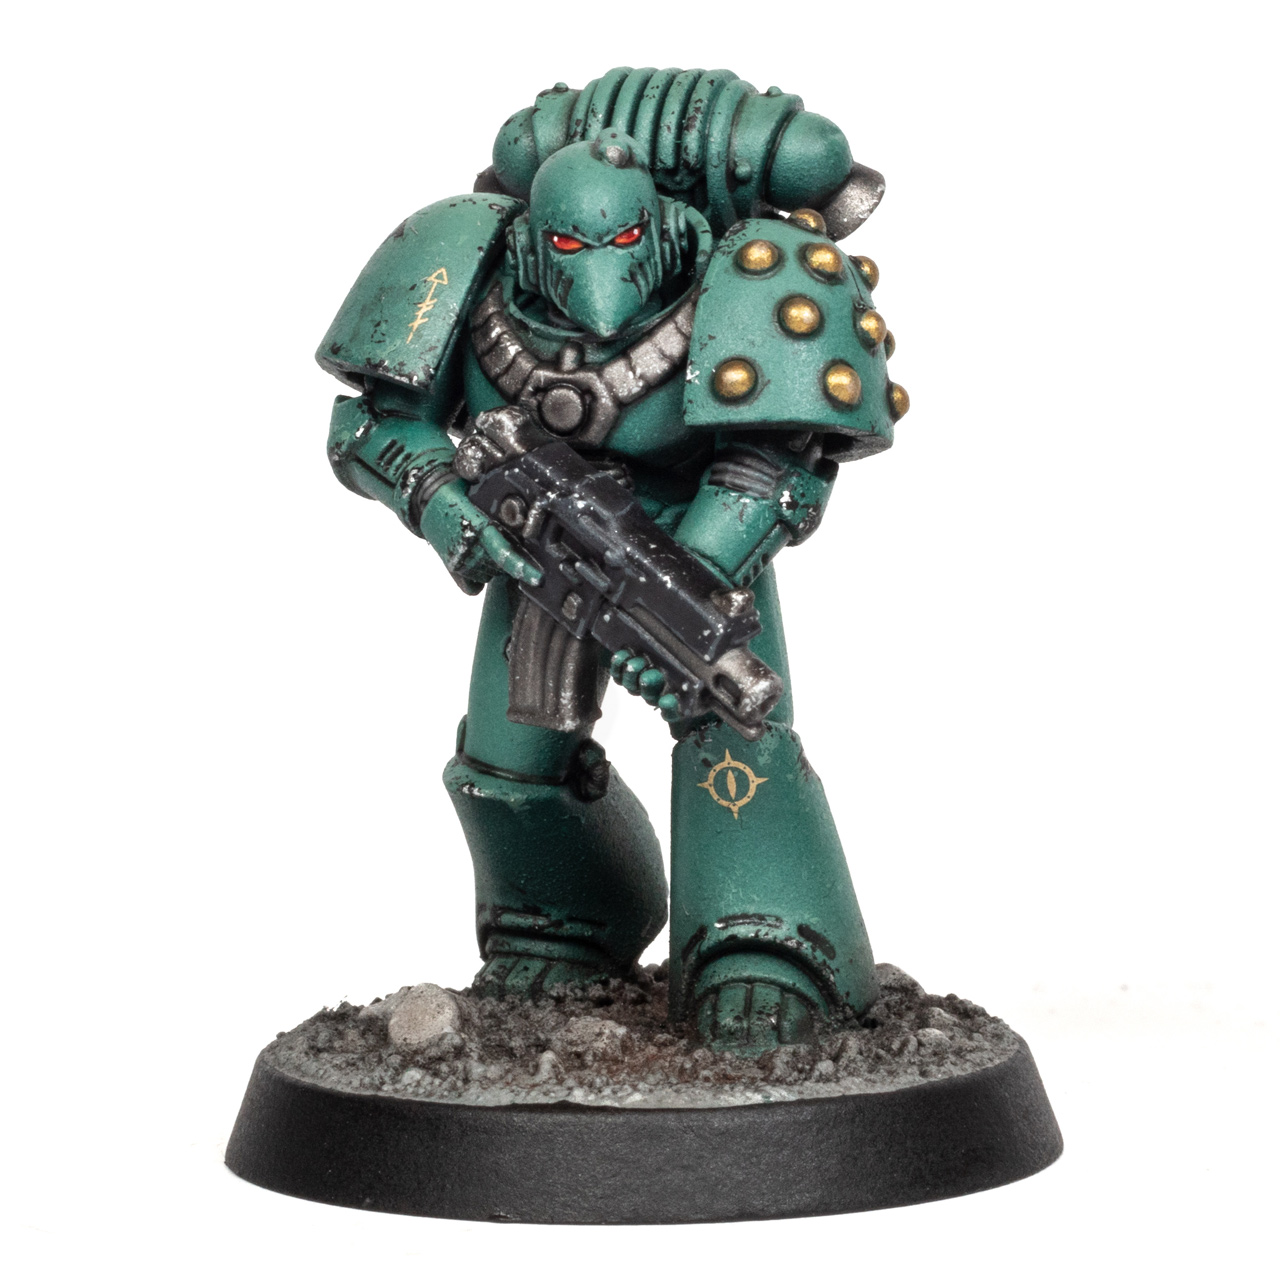
And the best thing is that this technique works for any legion or chapter! All you have to do is choose a suitable dark, medium and light colour for the armour, and a matching enamel wash or oil paint for shading.
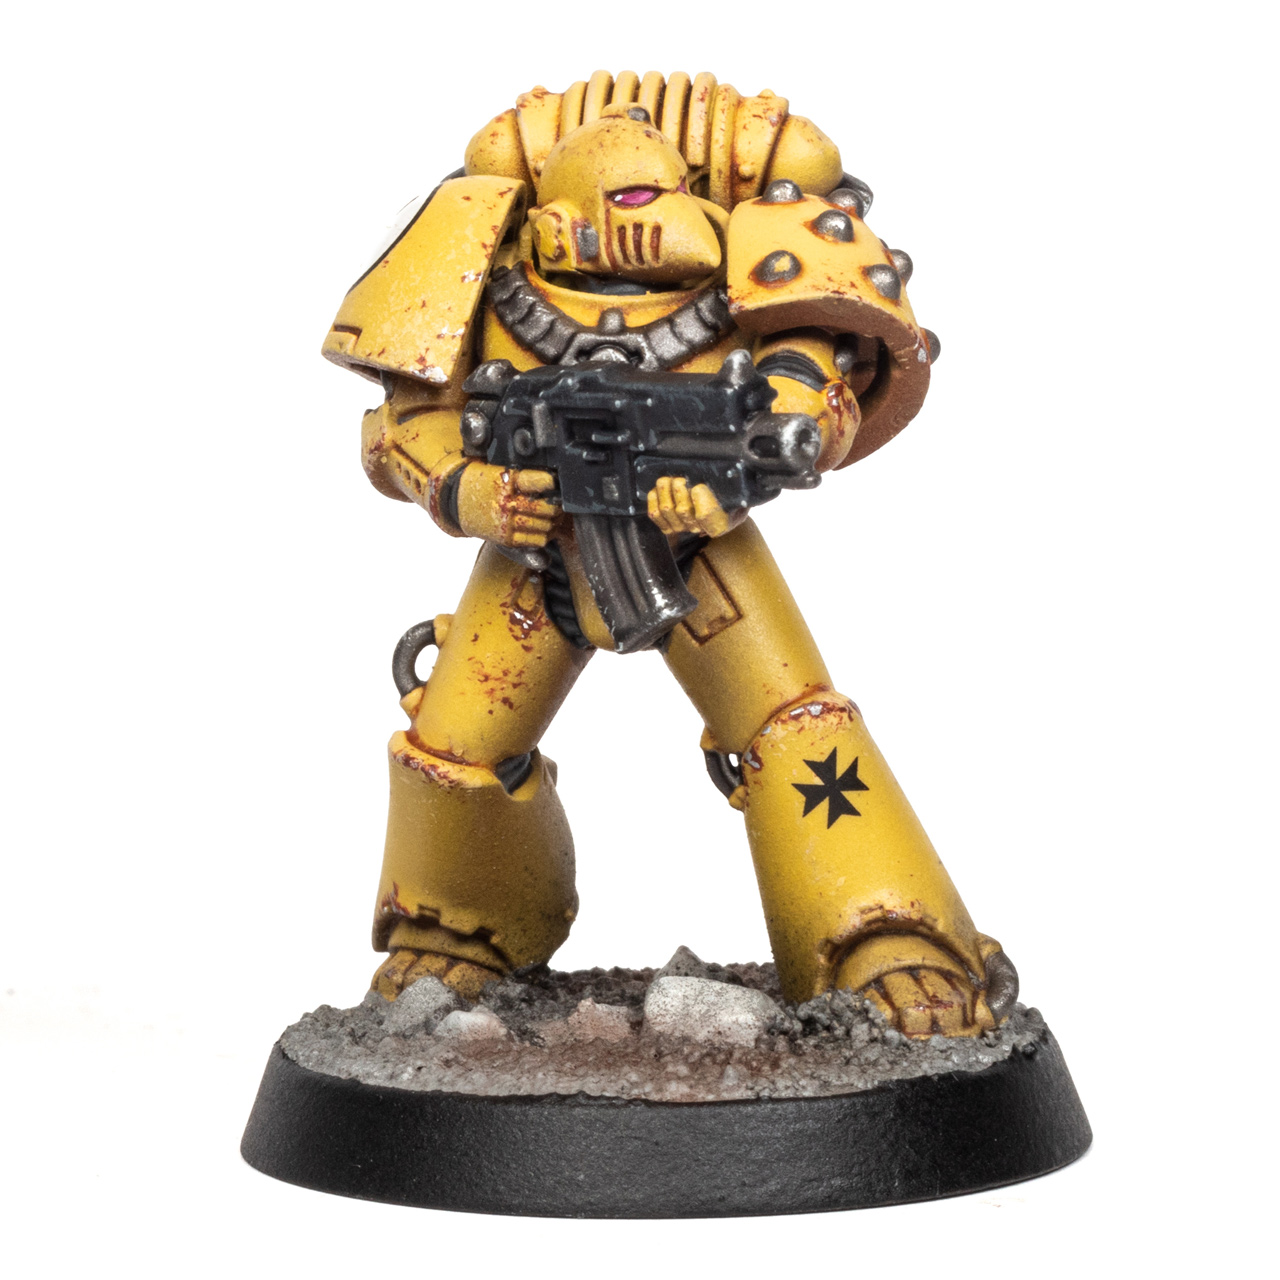
For painting this Imperial Fist, I followed the exact same process as for the Son of Horus. I just replaced the greens with Husk Brown, Daemonic Yellow, and Imp Yellow from The Army Painter’s Warpaints Air range, which I reviewed here, and used Abteilung 502 Dark Rust oil paint for the shading instead of the black panel liner, which I thinned with AK Interactive Odorless Thinner. Despite the yellow armour, I was able to finish the model as quickly as the Son of Horus, and I’m really fond of the slightly faded yellow hue of his war plate.
If you want to join the battle in the name of the Emperor or the Warmaster, you can get the Age of Darkness Box with the new MkVI Marines at our our partner stores Wayland Games, Element Games and Taschengelddieb with up to 20% discount and support us at the same time. Check out here if the box is still available:
Paints you will need for this tutorial:
Citadel (Games Workshop)
Mechanicus Standard Grey
Dawnstone
Greyseer
Corax White
Mephiston Red
Wild Rider Red
Fire Dragon Bright
Basilicanum Grey (Contrast)
Contrast Medium
Vallejo Model Color
VMC Black [or Abaddon Black]
VMC German Grey [or Corvus Black]
VMC White [or White Scar]
VMC Old Gold [or Skullcrusher Brass]
Vallejo Model Color Air
VMA Steel [or Stormhost Silver]
Vallejo Mecha Color
VMechaC Dark Steel [or Leadbelcher]
The Army Painter Warpaints
Unforgiven Green Air
Ruinous Spell Air
Exile Green Air
Ash Grey [or Greyseer]
Other
AK Interactive Semi-Gloss Spray Varnish
AK Interactive Odorless Thinner [or white spirit]
Tamiya Panel Line Accent Color Black [or any black enamel wash or thinned black oil paint]
Mr Premium Topcoat Flat
Scale75 Dispel Magic Acrylic Medium [or Lahmian Medium]
Microscale Microsol
Vallejo Pigments Dark Slate Grey
Vallejo Pigments Light Slate Grey
Vallejo Pigments Burnt Umber
If you need to expand your paint collection to follow the tutorial, check out our partner stores Wayland Games and Element Games, which offer an amazing range of paints at a discount.
Also check out Garfy’s Sons of Horus tutorial, which uses more classic techniques without airbrushing and enamel washes:
Hope you enjoyed this tutorial. If so, leave a comment or reaction below, and if you got any questions, leave them here so I can answer them for you.
2 Comments
Leave a Reply
Tale of Painters is the unofficial Warhammer hobby magazine run by hobbyists like you. Support our work by using the affiliate links from our 🇺🇸 / 🇨🇦 partner stores for your next orders so we can continue to bring you fantastic FREE content every day:


Or support us directly:


Fantastic! Thank you for making this and all your other tutorials. I learn things and am inspired every time I visit your sight!
Thanks for the kind feedback 🙂