

I’m not afraid to admit I was a little daunted at the prospect of painting Bofur. The small intricate freehand details were a true test. I might have to wear Stahly’s King of Accuracy Crown just for today.
Read on to find out how I painted Bofur; the 14th model in this tutorial series.
This tutorial assumes you have a basic understanding of how to paint. For the beginners, I will explain the techniques as I go along. Each picture below shows four chronological steps. Underneath each picture are the corresponding instructions. Each step shows the paint I used during that step. It’s good to have reference material close to hand to check colours. I used google images for film stills and Games Workshop’s 360º pictures on their website were a great help.
Paints you will need for this tutorial:
Black Undercoat (technical)
Cadian Fleshtone (layer)
Bloodletter (glaze)
Rhinox Hide (base)
Kislev Flesh (layer)
Jokaero Orange (base)
XV-88 (base)
Balor Brown (layer)
Mournfang Brown (base)
Baneblade Brown (layer)
Skrag Brown (layer)
Ushabti Bone (layer)
Karak Stone (layer)
Eshin Grey (layer)
Dawnstone (layer)
Administratum Grey (layer)
Iron Breaker (layer)
Stirland Mud (texture)
In case you need to expand your paint collection, head over to Wayland Games or Slave to Painting, which both stock a huge selection of paints at competitive prices.
Undercoat the model. The details are small, so I hand undercoated the model (rather then use a spray) with Imperial Primer.

1. I painted the face and fingers with Cadian Fleshtone. I painted around the beard.
2. I changed the hue of the skin using Bloodletter glaze. Dwarves are a little more red in complexion then humans.
3. I watered down Rhinox Hide heavily and then shaded around the eyes, nose, inbetween the fingers and around the face. Then paint the hair, beard, moustache, hand guards, weapon shaft and pouch on the belt with Rhinox Hide (don’t water this down)
4. I highlight the face with Kislev Flesh. Also if you’re feeling brave, this is the opportunity to paint the eyes with a thin black line and two white dots.
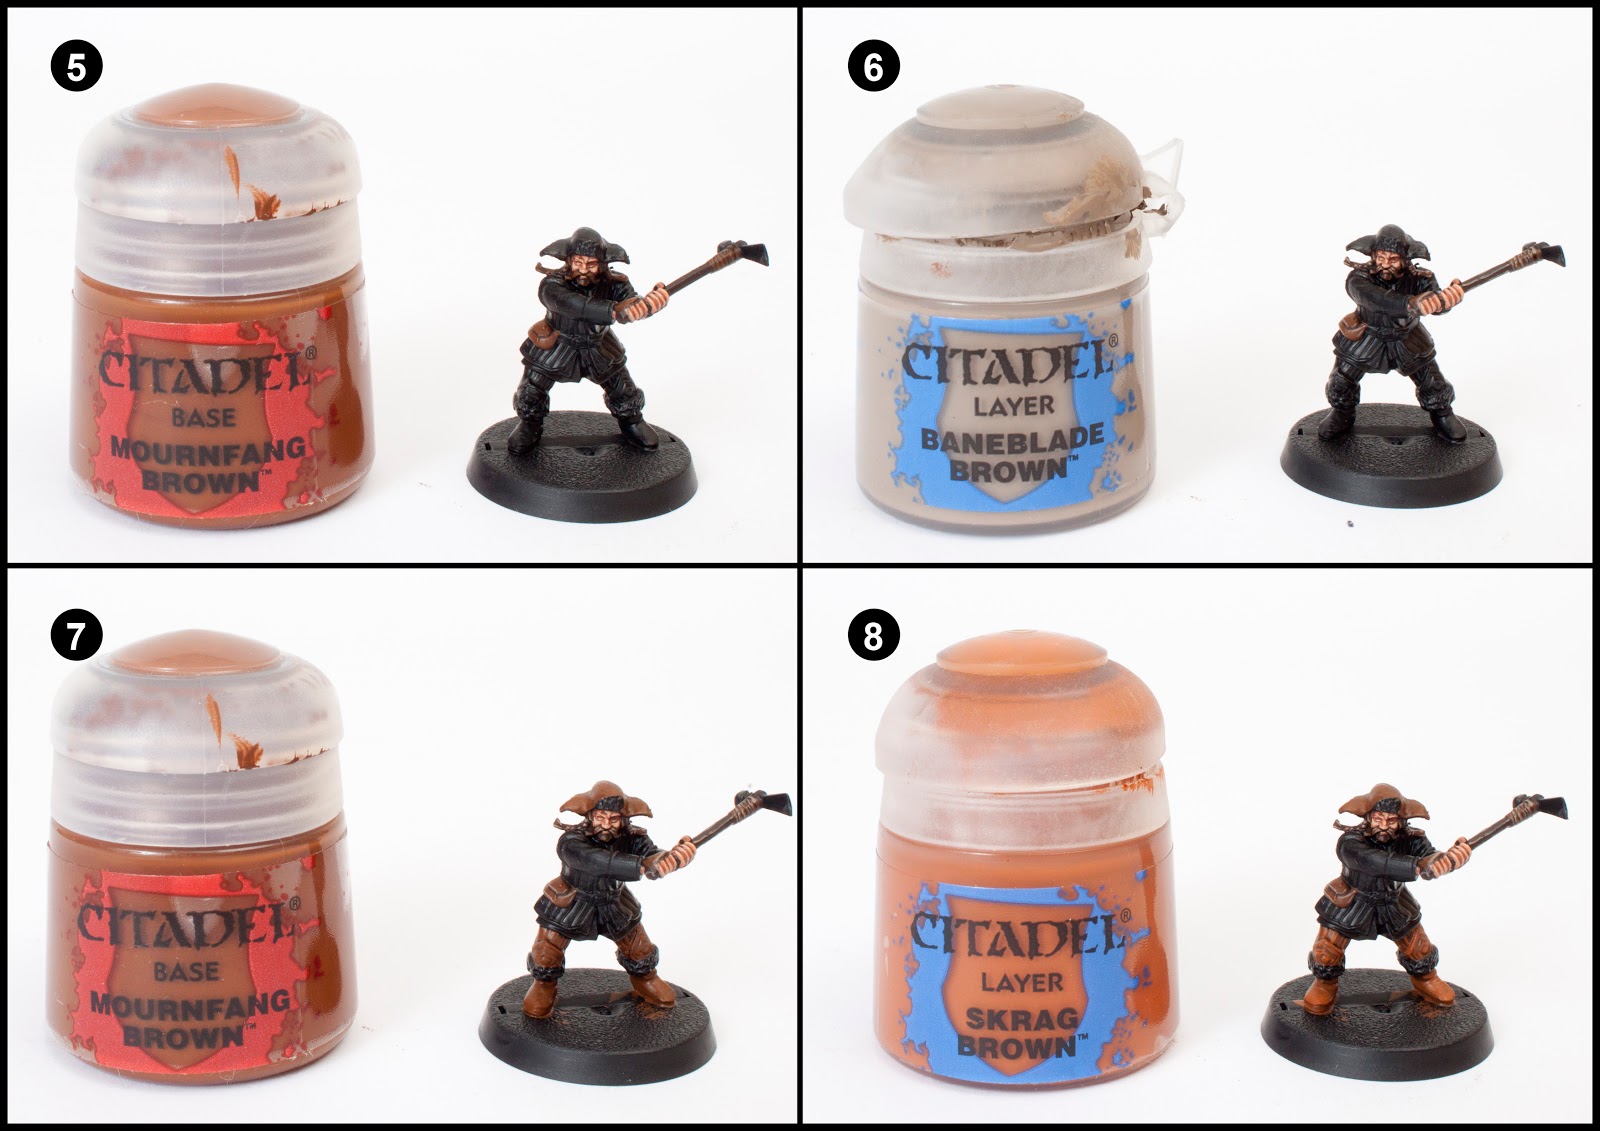
5. Highlight the beard, moustache, hand guards, cloth near the weapons head and pouch with Mournfang Brown.
6. Highlight the previous stage with Baneblade Brown. Add some grain lines to the shaft of the weapon using Baneblade Brown.
7. Paint the hat, boots and trousers with Mournfang Brown.
8. Highlight the boots with Skrag Brown. Then pick out the patterning of the trousers and knees with Skrag Brown. The trousers should have a large gap between each vertical stripe of Skrag Brown.

9. Highlight the previous stage further with Jokaero Orange. Thin lines work best.
10. Paint the fur on the boots, the tunic and the overcoat with XV-88.
11. Highlight the fur edged boots with Balor Brown. Then highlight the tunic and overcoat with Balor Brown. The overcoat has a series of raised parallel lines, paint these on leaving the previous layer colour showing in the recess. Don’t paint the cuffs of the overcoat.
12. Water down Mournfang Brown a lot and then run this colour into the recesses of the overcoat and over the fur.
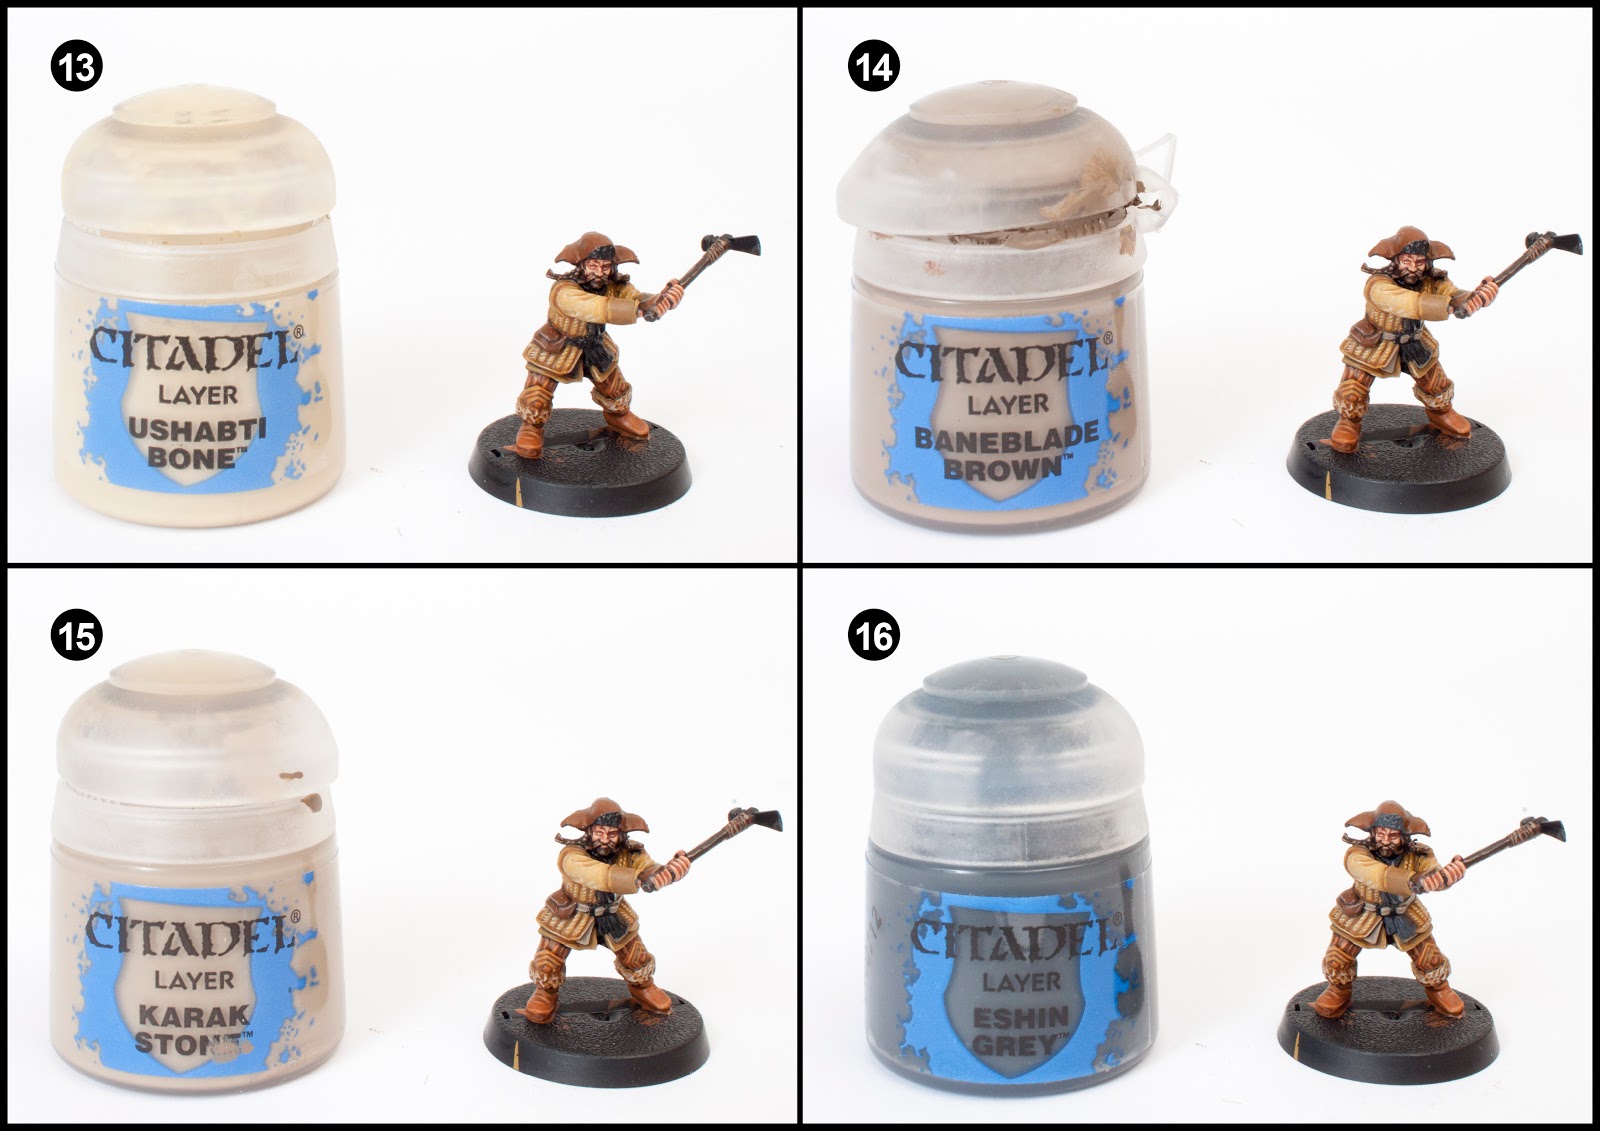
13. Highlight the fur and arm sleeves with Ushabti Bone. Then paint thin parallel diagonal lines on each of the raised vertical areas of the tunic.
14. Paint the belt and the garment between the tunic and overcoat using Baneblade Brown.
15. Highlight the previous stage with Karak Stone.
16. Paint the fur on the front and underneath the hat with Eshin Grey, then paint the Scarf

17. Highlight the hat’s fur and the scarf with Dawnstone.
18. Repeat the previous stage but use Administratum Grey for this step.
19. Feel free to skip this stage, trust me, I wanted to! It’s time to do the freehand. I find watering down Rhinox Hide or mixing in Lahmian Medium helps the flow of paint from the bristles, this in turns means the brush doesn’t drag making freehand smoother and more accurate. Click on the pictures above and below for close ups of the patterning (or use GW’s 360º view on their website). I also used Rhinox hide to quickly shade a few areas like the hat and creases in the boots.
20. Paint the belt buckle and weapon head with Ironbreaker.
Finally base the model in a way which fits in with your collection. I used Stirland Mud texture paint highlighted with Karak Stone and the base edge was painted with XV-88. Static grass and scrub were glued on in small clumps.


For more Hobbit tutorials check out my Bilbo, Gandalf, Thorin, Gloin, Bombur, Ori, Dwalin, Balin, Kili, Dori, Fili, Nori and Goblin tutorials. If you found this tutorial useful, let me know in the comments.
Do you like our tutorials and reviews? Here is what you can do to support us: Check out the websites of our sponsors, place your next orders at Wayland Games by clicking here or on the banner on the right. Thank you very much, we appreciate any help to keep us going!

16 Comments
Leave a Reply
Tale of Painters is the unofficial Warhammer hobby magazine run by hobbyists like you. Support our work by using the affiliate links from our partner stores for your next orders so we can continue to bring you fantastic FREE content every day:


![]()
![]()
Or support us directly:


Aaand finnished this scary model through your fantastic tutorial!
Thank you very much for this!
Wonderful tutorial, I just painted my first mini in more than 10 years thanks to your inspiration. On to the next dwarf 🙂
That's awesome to hear. Thanks.
just starting my dwarves, Glad I found this as it has way more value then just the screen shots and GW site, it is great to get a first hand approach and of course know how I can deviate from that to fit my style and paints available to me. Thanks, this is an amazing paint job. – Sithious
Very good tuto!
Now that GW tryes to charge 13€ to see good photos of their hobbit miniatures I was looking for some inspiration from blogs, and these tutorials are better than the original ones in GW webpage.
Thank you!
I love hearing from you guys. All the hard work was worth it to know the tutorials are really helping people.
This is a friggin' masterpiece, Garfy.
Thanks for sharing!
I would love to paint the trolls AND eagles, but I have other projects I need to dedicated some time to. Never say never though.
Fantastic as always! Well done, thank you for taking the time to do this. Your hobbit tutorials will determine what warhammer I buy as there is no point in painting unless I do so by masterclass, therfore I hope you do the Trolls or eagles!
Thanks again and well done!
Inspiring 🙂
Just wanted to let you know that i am baffled by the amount of detail in each of your Hobbit figure. I have followed your posts and each time it is amazing to see how well you recreated the behavior of each, especially with their faces !
Sorry for my poor english (im just a French guy) but congratulations to you (and by the way to your co bloggers). You are a source of inspiration !
Many thanks for doing these,
this looks very good! Great tutorial!
I couldn't imagine finishing the box without Your tutorials. Thank you very much and keep up the good work!
You do these tutorials incredibly well. Excellent stuff.
This one is the best of all!
The miniature is looking great! I am looking forward to painting mine.
Thank you Very Much!
Incredibly well done! Thanks for all of this effort – it really is making my life easier with this project!!