
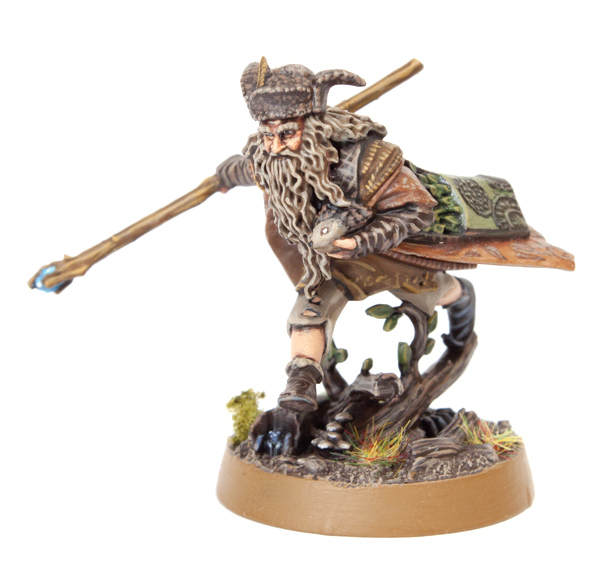
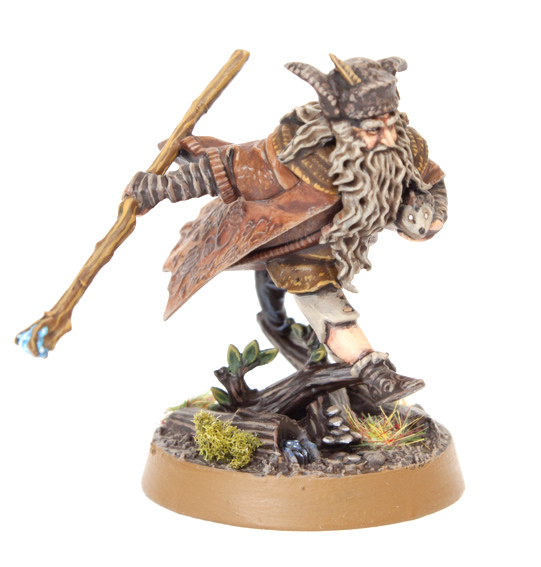
Due to overwhelming demand, I’m pleased to present Garfy’s comprehensive 28 step guide to painting Radaghast the Brown. Remember, all our tutorials on Tale of Painters are free. Tell your friends, post it on a forum. Let the world know. Tutorial after the jump.
This is probably the trickiest tutorial so far. I’ve tried to write extra notes and describe all the areas in detail. This tutorial assumes you have a basic understanding of how to paint. Each picture below shows four chronological steps. Underneath each picture are the corresponding instructions. Each step shows the paint I used during that step. It’s good to have reference material close to hand to check colours. I used google images for film stills and Games Workshop’s 360º pictures on their website were a great help.
Paints you will need for this tutorial:
Black Undercoat (technical)
Cadian Fleshtone (layer)
Bloodletter (glaze)
Rhinox Hide (base)
Kislev Flesh (layer)
Baneblade Brown (layer)
Agrax Earthshade (shade)
Karak Stone (layer)
XV-88 (base)
Balor Brown (layer)
Doombull Brown (layer)
Mournfang Brown (base)
Skrag Brown (layer)
Gorthor Brown (layer)
Rakarth Flesh (base)
The Fang (base)
Russ Grey (layer)
Loren Forest (layer)
Biel-Tann Green (shade)
Elysian Green (layer)
Teclis Blue (layer)
Temple Guard Blue (layer)
Pallid Wych Flesh (layer)
Lahmian Medium (technical)
Stirland Mud (texture)
In case you need to expand your paint collection, head over to Wayland Games or Slave to Painting, which both stock a huge selection of paints at competitive prices.
Undercoat the model. The details are small, so I hand undercoated the model (rather then use a spray) with Imperial Primer.
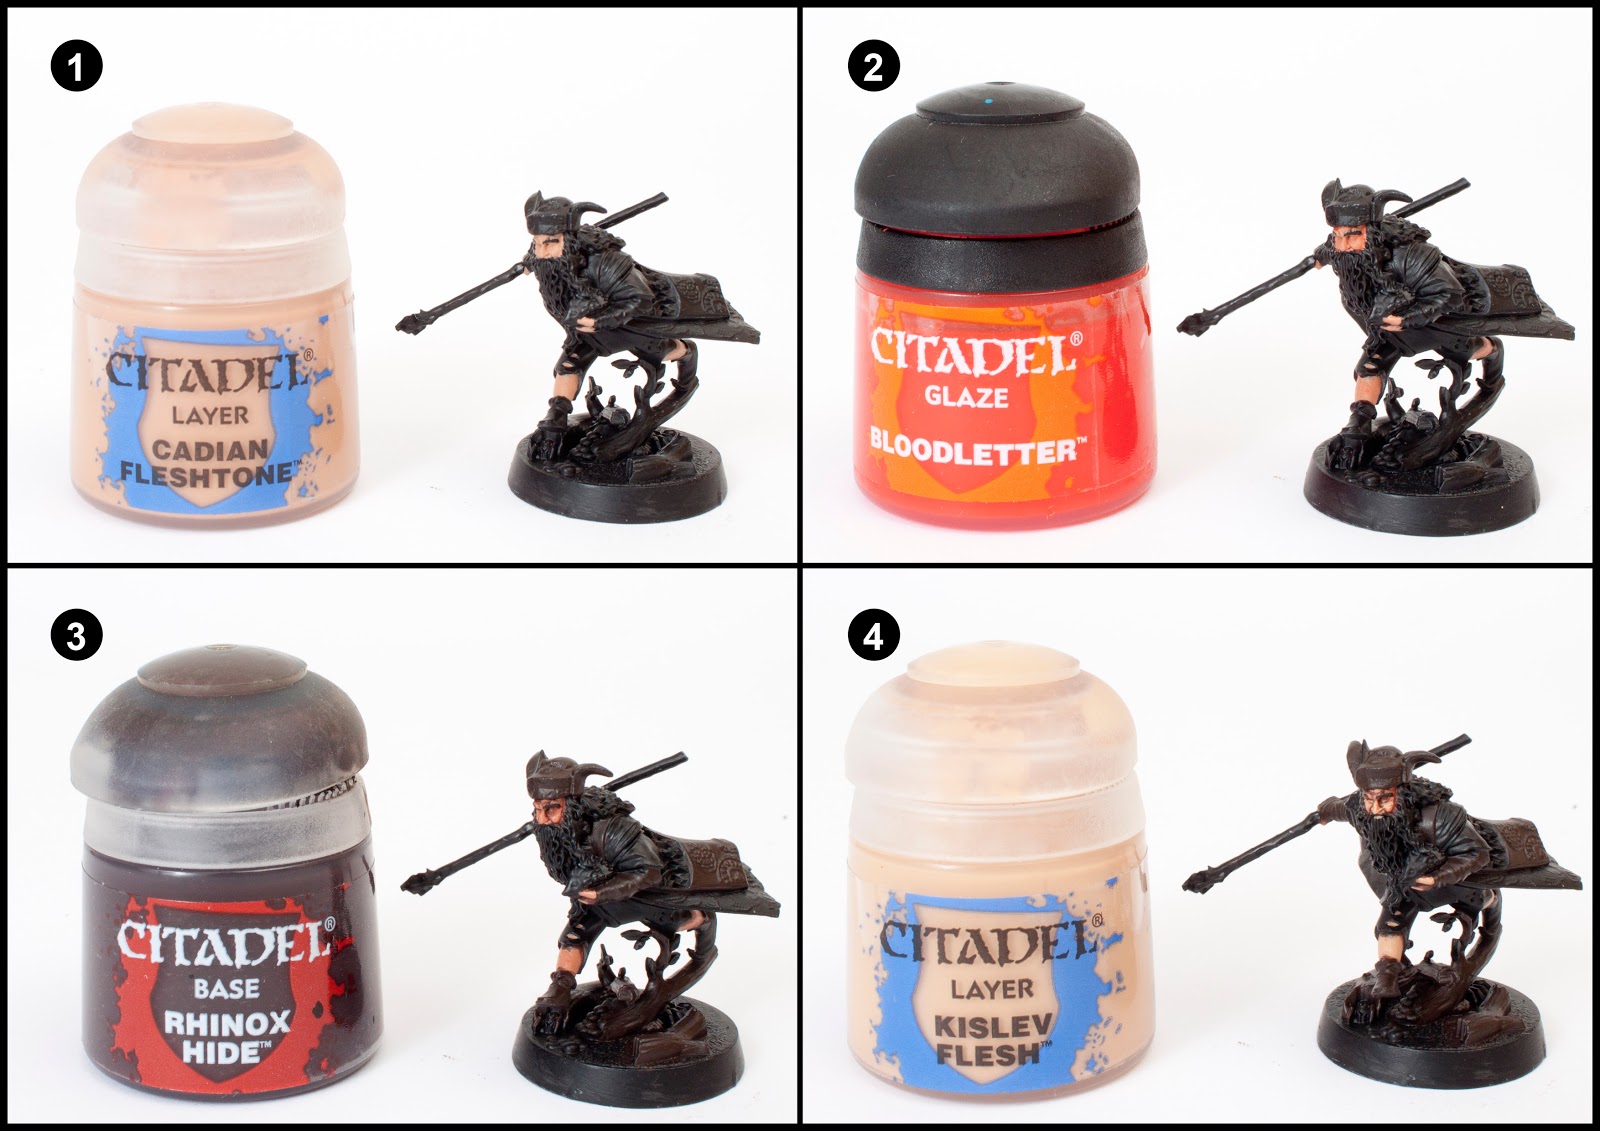
1. I painted the face, fingers and legs with Cadian Fleshtone. I painted around the beard.
2. I changed the hue of the skin using Bloodletter glaze.
3. I watered down Rhinox Hide heavily and then shaded around the eyes, nose, inbetween the fingers and around the face. Then using Rhinox Hide that hasn’t been watered down, paint the hat, forearm rag sleeves, bag, front boot, and logs on the base.
4. I highlight the face hands and legs with Kislev Flesh. Also if you’re feeling brave, this is the opportunity to paint the eyes with a thin black line and two white dots.
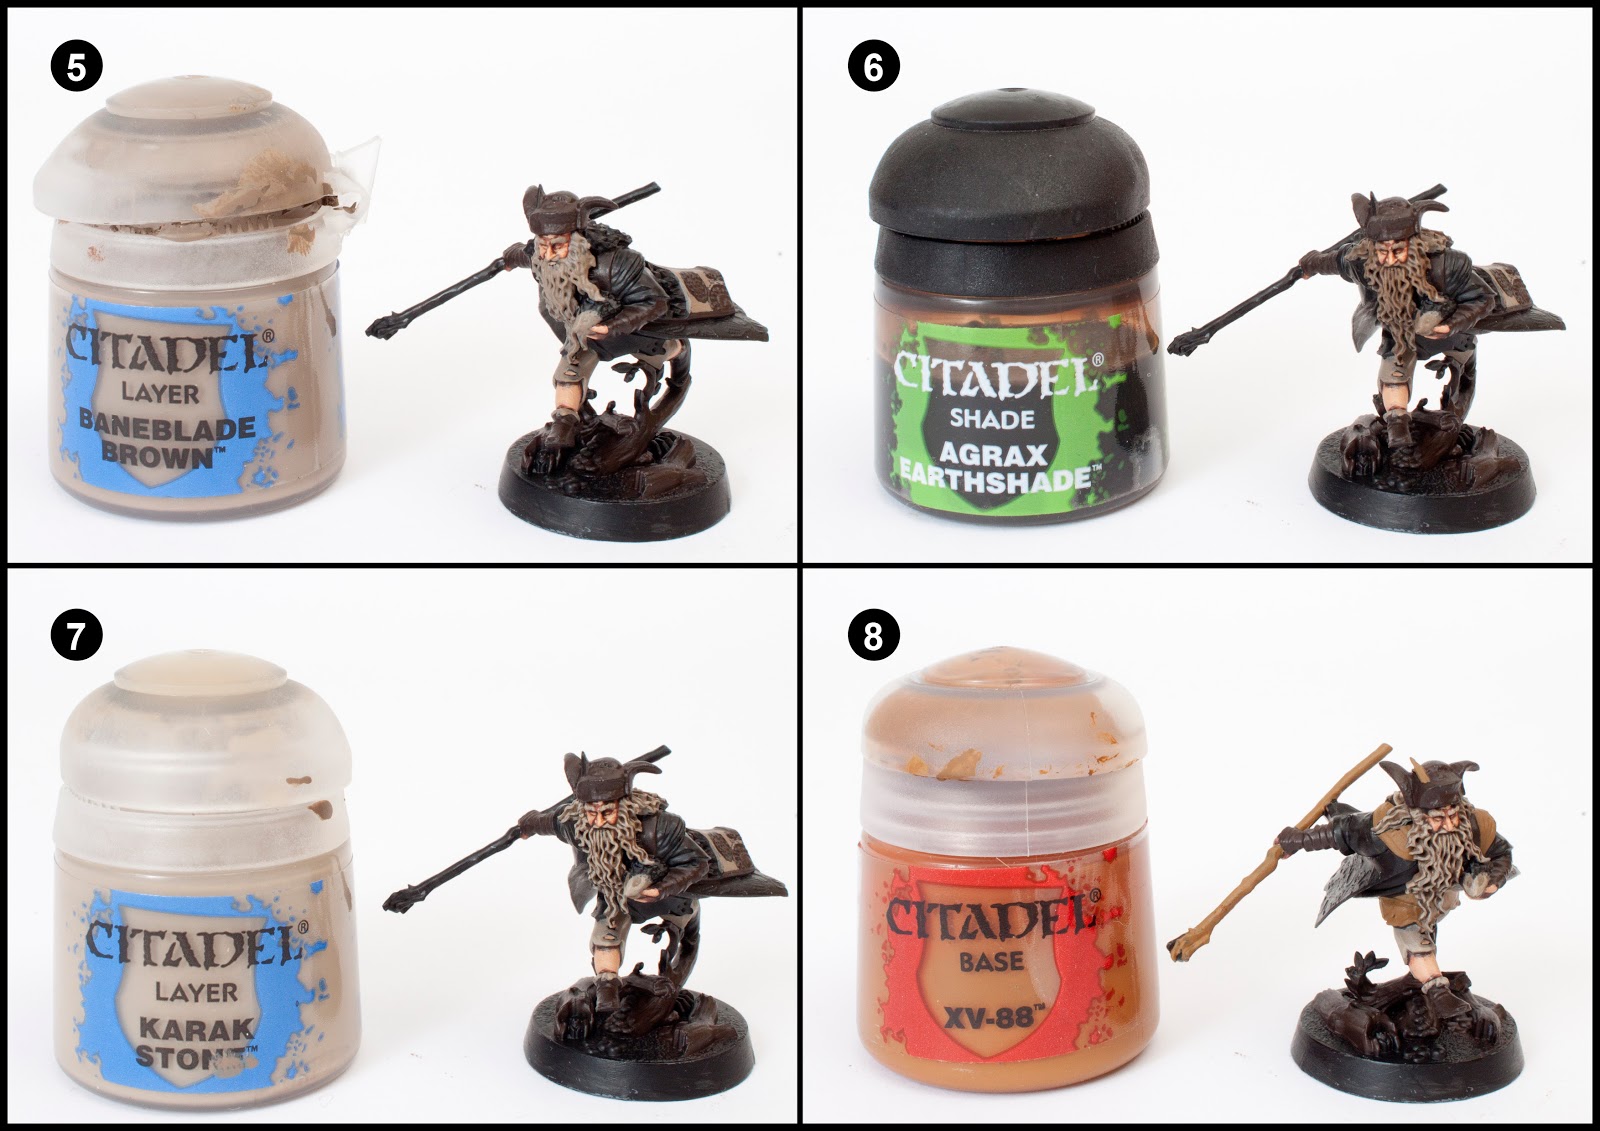
5. Use Baneblade Brown to paint the hair, beard, Sebastian the hedgehog’s face, trousers, front boot fur trim and the panel on the bag.
6. Wash the hair and beard with Agrax Earthshade.
7. Highlight the hair, beard, Sebastian the hedgehog’s face, trousers, front boot fur trim with Karak Stone.
8. Paint the staff, feather in the hat, lower tunic and garment around the shoulders with XV-88
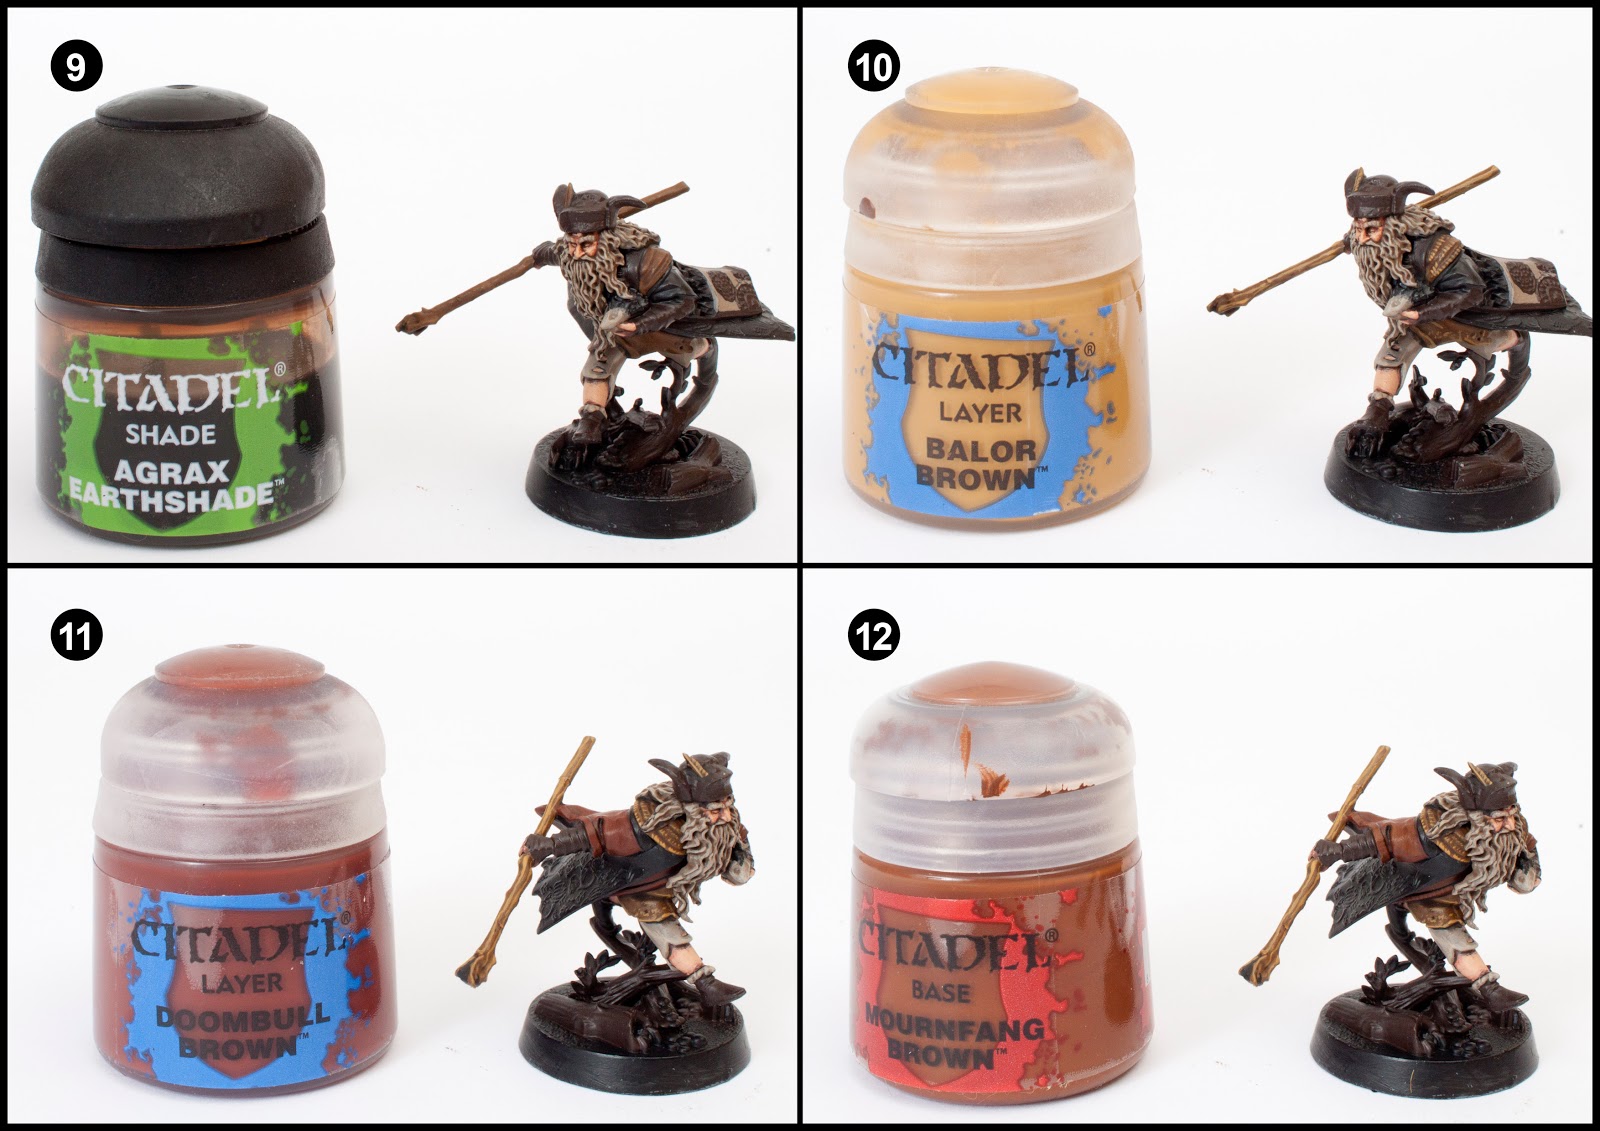
9. Use Agrax Earthshade to shade and change the colour of the areas painted in the previous stage (staff, feather, lower tunic and garment around the shoulders).
10. Use Balor Brown, to paint on some texture. Paint thin lines of grain on the staff. Highlight the lower garments and paint some random marks on it, Radaghast is a bit mucky after all. Then paint some small flecks of Balor Brown along the edges of the shoulder garment rags. Finally paint the lines on the feather.
11. Paint the inner coat and upper sleeves with Doombull Brown.
12. Highlight the previous stage using Mournfang Brown.
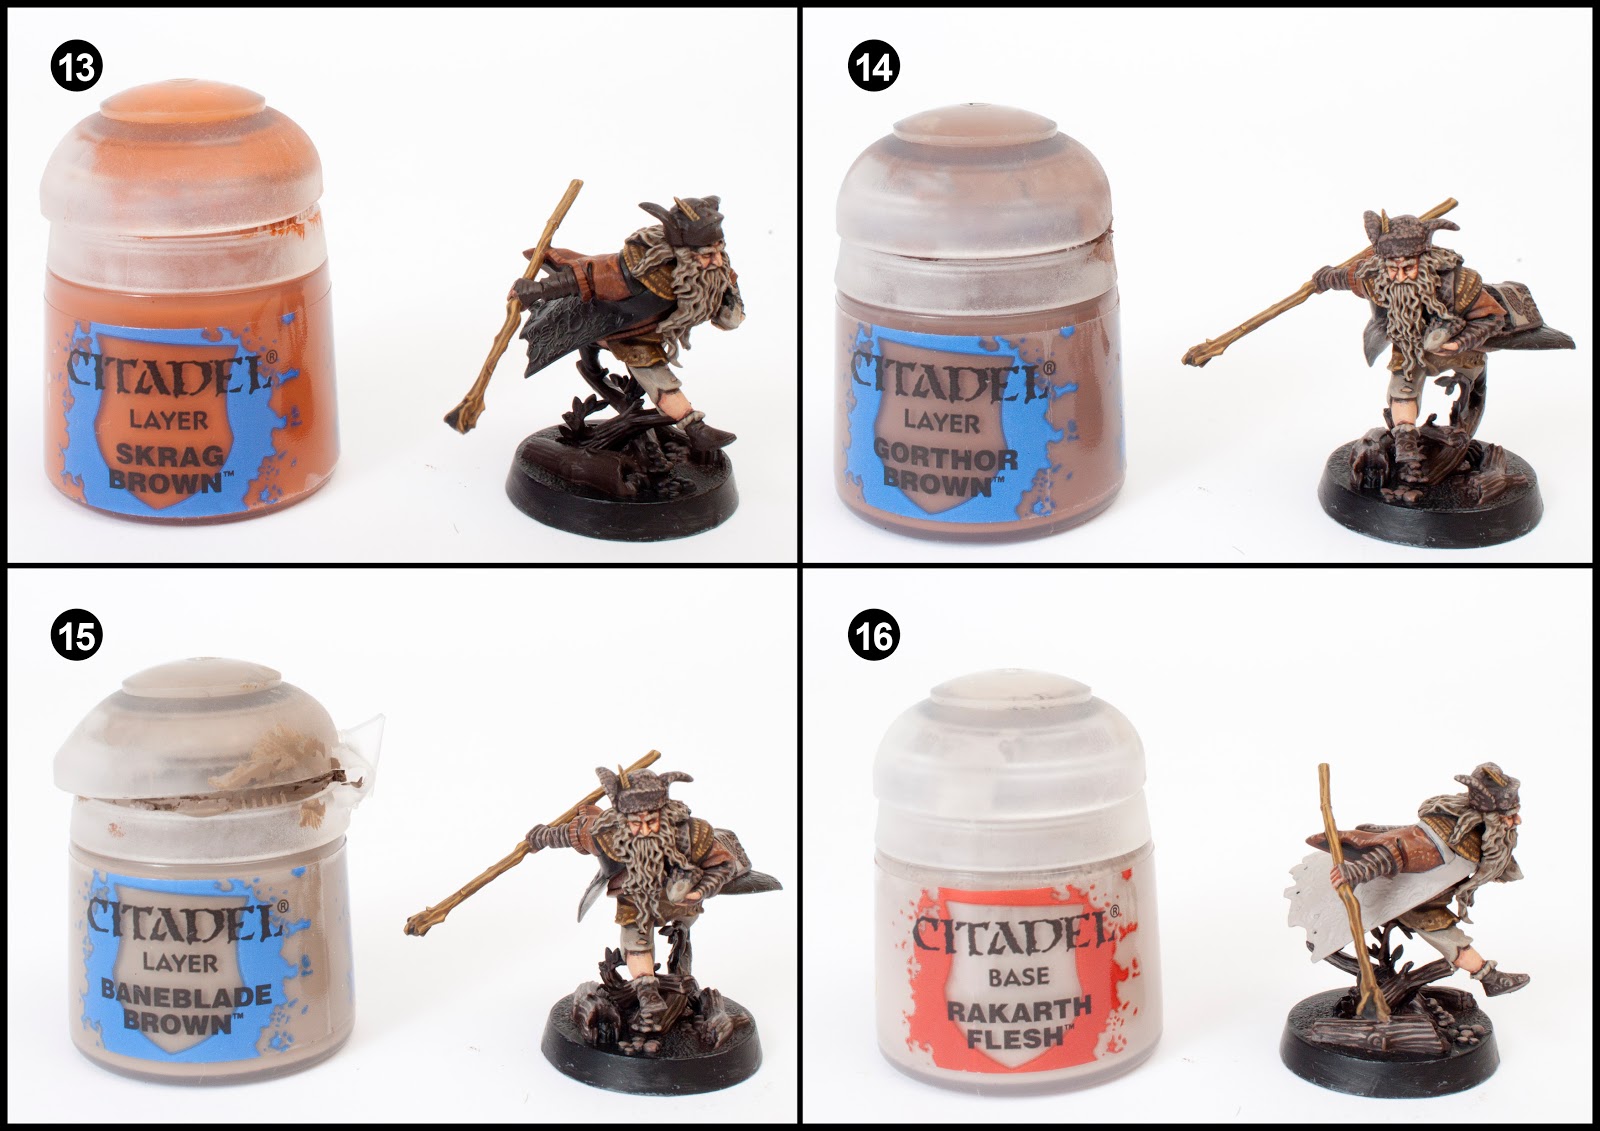
13. Along the edges of the sleeves and inner coat, paint small parallel lines of Skrag Brown. Then paint small random dots of Skrag Brown on the rest of the sleeves and inner coat. Be subtle, don’t be heavy handed.
14. Tricky stage this, so I will break it down into 6 sub phases.
14.1 Highlight the edges of the of the forearm rags with Gorthor Brown.
14.2 Paint diagonal cross line patterns of Gorthor Brown on the bag shoulder strap and edges of the bag.
14.3 Highlight Sebastian’s spikes with Gorthor Brown.
14.4 Paint thin line swirls on the front boot using Gorthor Brown.
14.5 Stipple on dots of Gorthor Brown onto the hat.
14.6 Paint the grain of the logs on the base with thin lines of Gorthor Brown and then paint the mushrooms on the base with the same colour.
15. Repeat all sub phases of step 14 but use Baneblade Brown to highlight these areas further.
16. Paint the overcoat with Rakarth Flesh. Despite this being a base paint, it will take two coats.
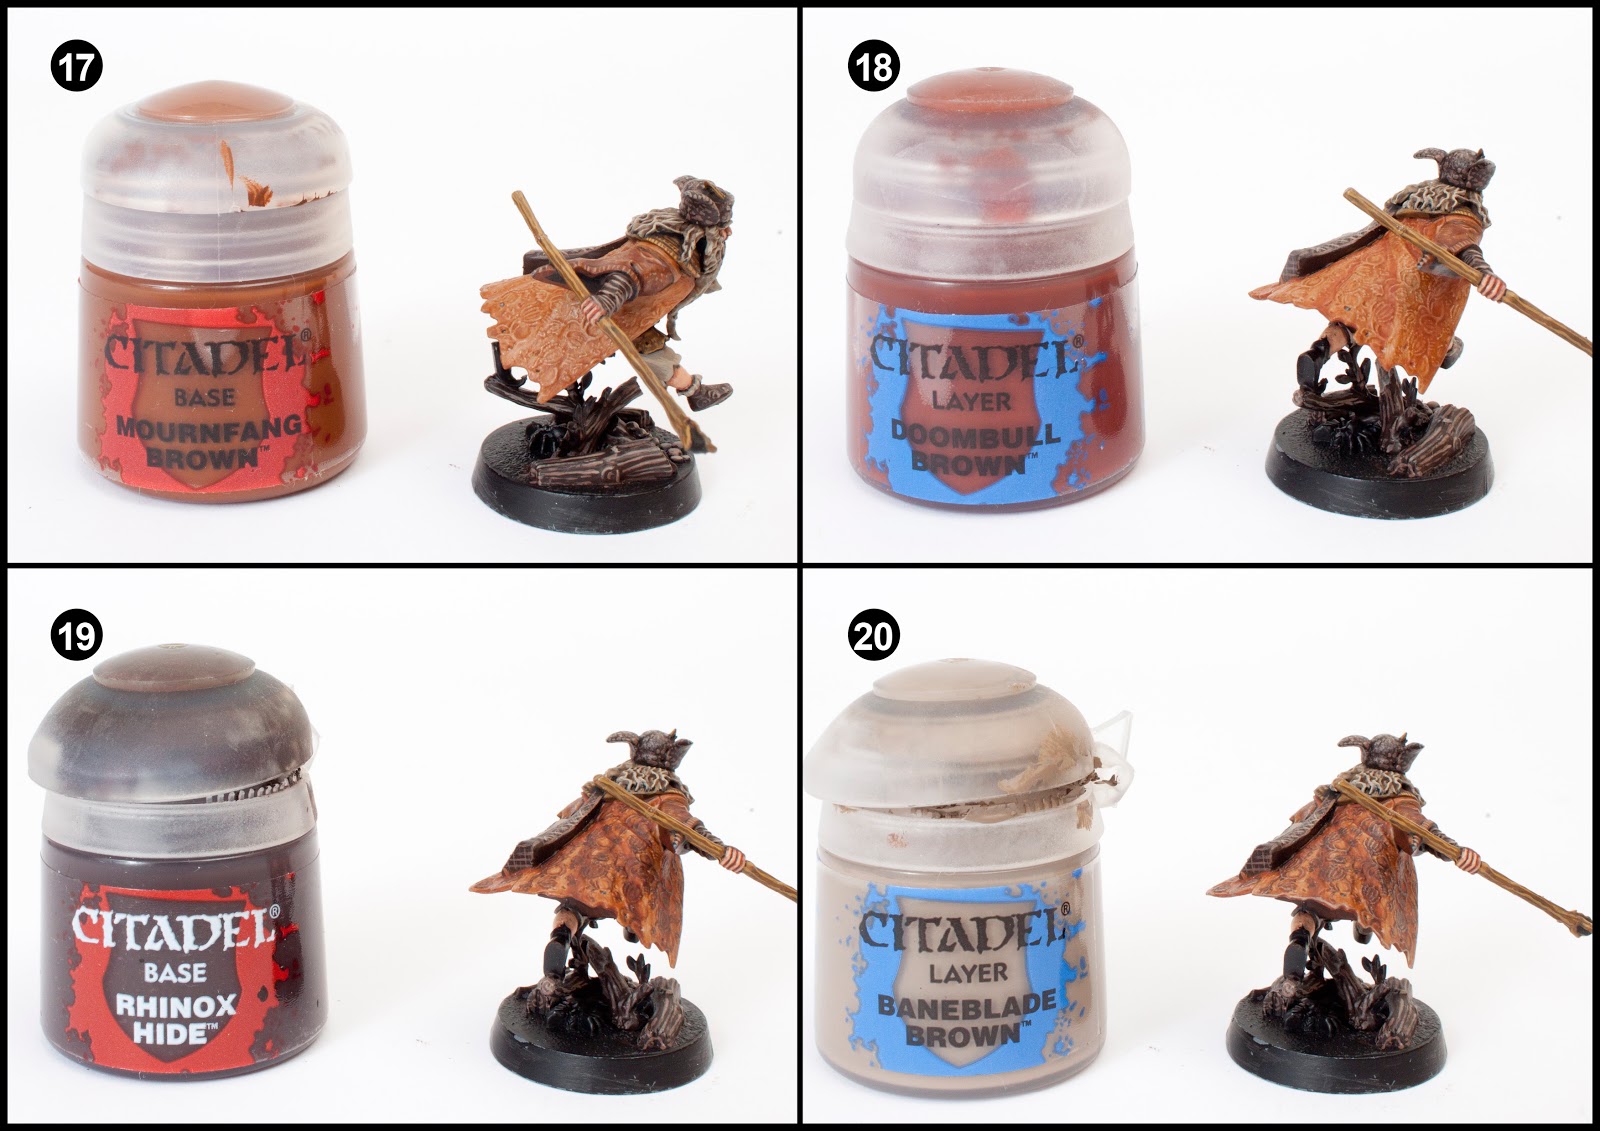
17. Mix Mournfang Brown with Lahmian Medium (80% Mournfang, 20% Medium) to create a wash. Wash the entire overcoat with this mix. Once dry, give it a light second coat.
18. Make another wash with Doombull and Lahmian Medium. Use this mix to shade the creases of the overcoat. Once dry you can go over this to darken up the shading.
19. Water down Rhinox Hide and paint all the raised areas on overcoat.
20. Lightly dry brush Baneblade Brown over the raised patterns of the overcoat. This requires a very light touch. Be subtle. Highlight the edge of the overcoat.
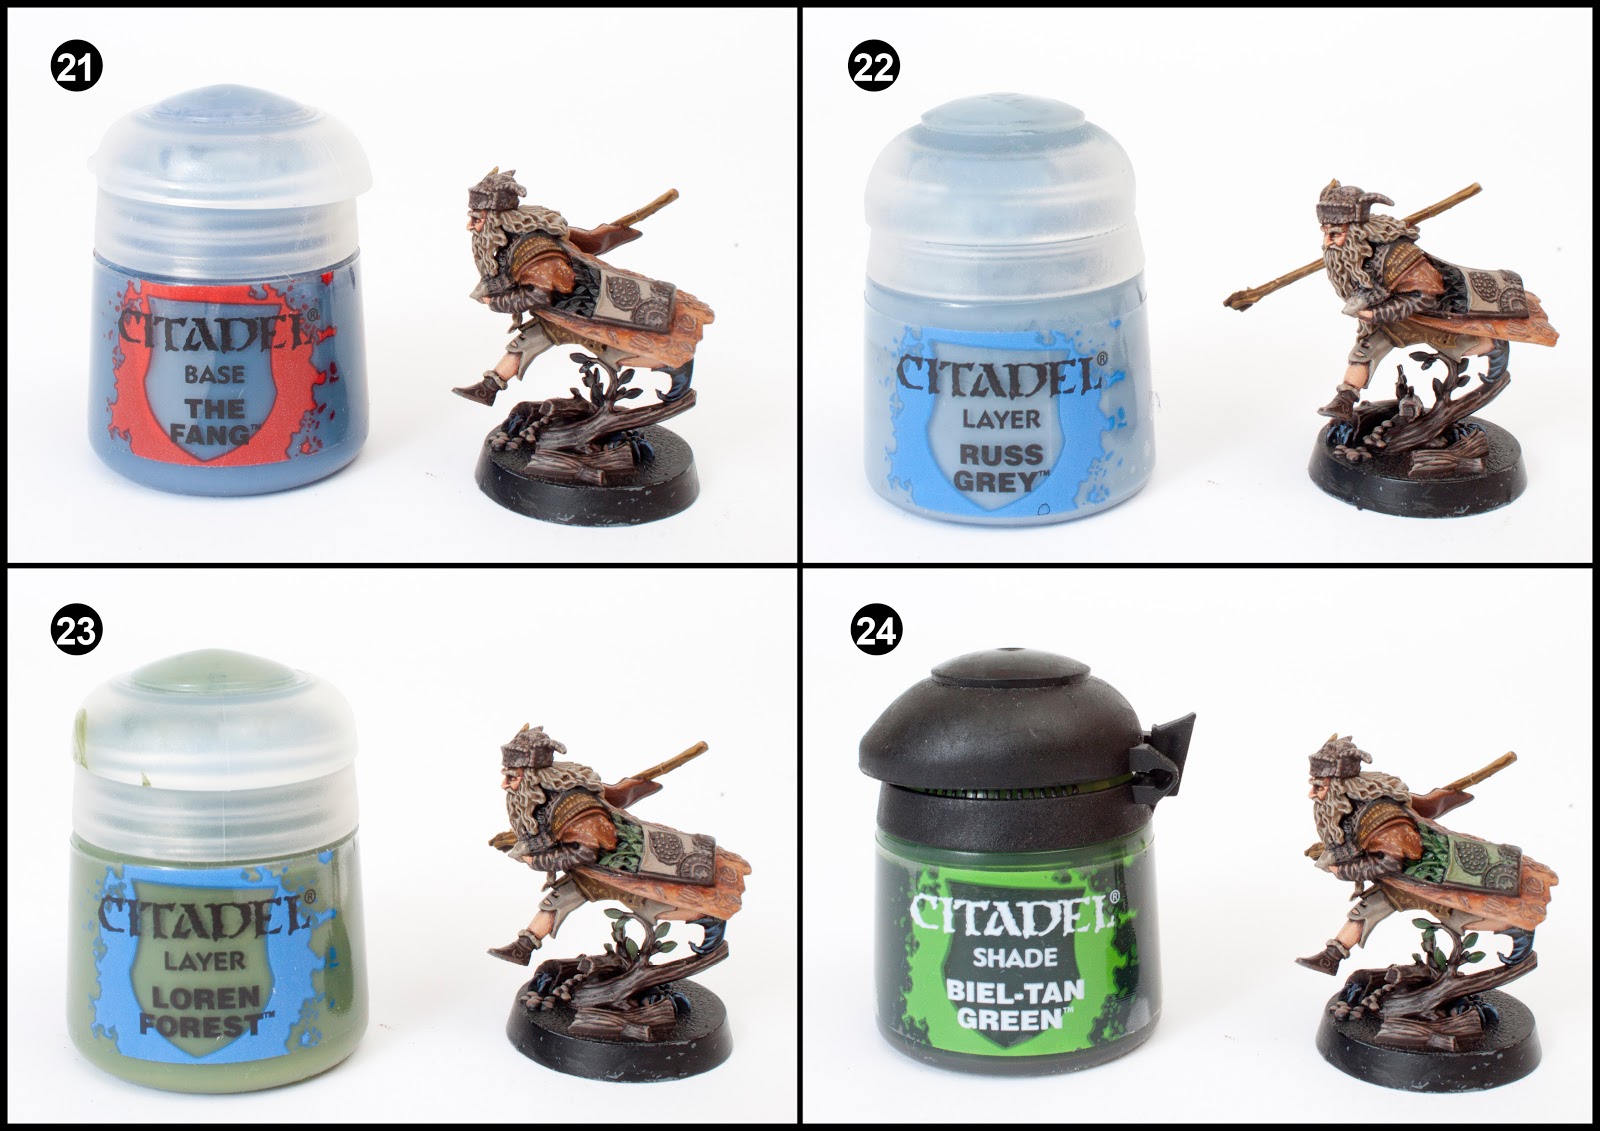
21. Highlight the two spiders and the rear boot with The Fang.
22. Highlight the previous stage further using Russ Grey.
23. Paint the leaves in the bag and the leaves on the branches with Loren Forest.
24. Wash all the leaves with Biel-Tan Green, then wash the large panel on the bag with Biel-Tan Green.
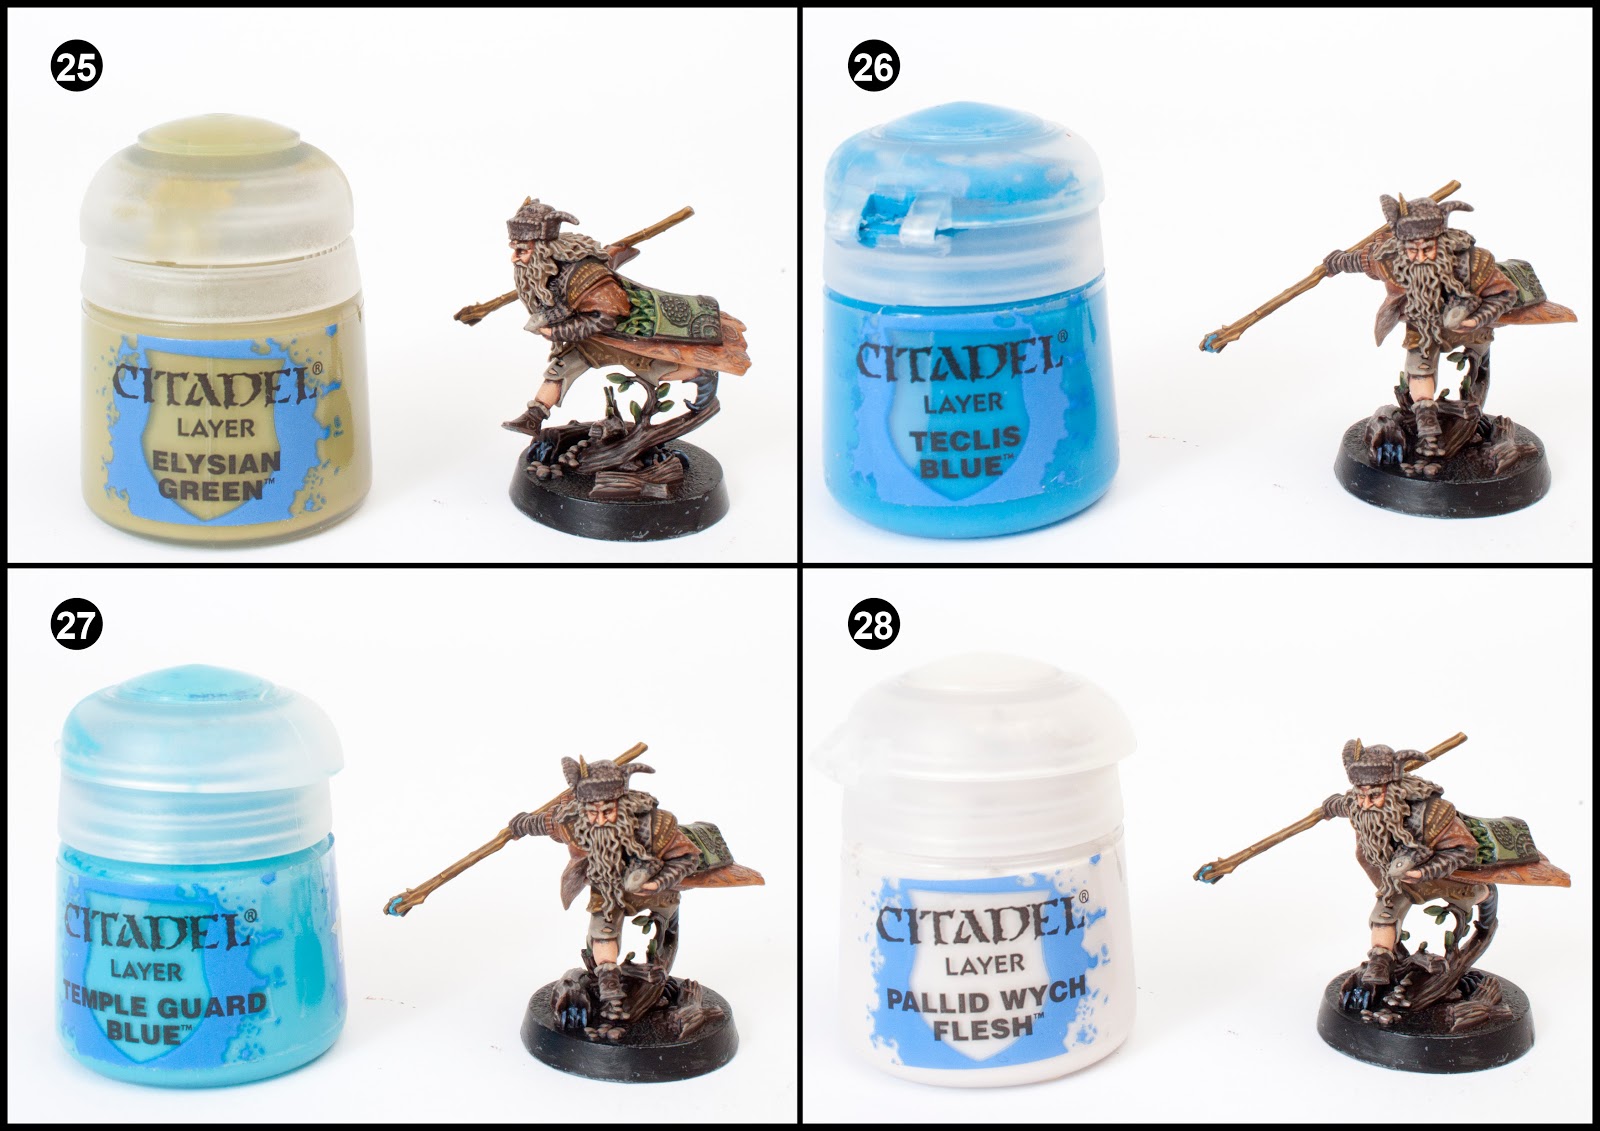
25. Highlight the edges of the leaves with Elysian Green.
26. Paint the gem at the end of the staff with Teclis Blue.
27. Highlight the gem with Temple Guard Blue.
28. Paint the eyes of Sebastian and the spiders with small dots of Pallid Wych Flesh. Paint some highlight lines on the gem using Pallid Wych Flesh. Highlight the mushrooms on the base using Pallid Wych Flesh. Don’t forget to dot Sebastian’s nose with a dab of Abaddon Black.
Finally base the model in a way which fits in with your collection. I used Stirland Mud texture paint highlighted with Karak Stone and the base edge was painted with XV-88. Static grass and scrub were glued on in small clumps.
For more Hobbit tutorials check out my Bilbo, Gandalf, Thorin, Gloin, Bombur, Ori, Dwalin, Balin, Kili, Dori, Fili, Nori, Bofur and Goblin tutorials. If you found this tutorial useful, let me know in the comments.
Two models left to paint… Oin and Bifur. Will I create tutorials? Keep checking back for all the latest news on this project.
Do you like our tutorials and reviews? Here is what you can do to support us: Check out the websites of our sponsors, place your next orders at Wayland Games by clicking here or on the banner on the right. Thank you very much, we appreciate any help to keep us going!

9 Comments
Leave a Reply
Tale of Painters is the unofficial Warhammer hobby magazine run by hobbyists like you. Support our work by using the affiliate links from our partner stores for your next orders so we can continue to bring you fantastic FREE content every day:


![]()
![]()
Or support us directly:


can i call this a step by step guide how to paint a master piece
You sir, are masterful. These tutorials are considerably better than the White Dwarf and 'Eavy Metal counterparts, well done.
It's comments like these that make me want to keep adding more tutorials to the site. I'm really pleased to know they're useful to many people.
I must say, your work is simply stunning and your tutorial is very easy to follow. I also found your blog via your Hobbit tutorials and now I'm an avid fan. Thank you again for doing these tutorials.
I've just discovered this blog and I think your work is a great help for all of us who dream with becoming good painters. Please, follow in this way. Here you have a new and faithful reader 🙂
awesome painter 🙂 thx guyz xp
Great work
Very good, the tutorials help me. I'm a young painter, so it's very cool.
He is looking awesome!
I will paint my Radagast very, very soon.
Thank you very much and please do create tutorials for Oin and Bifur!