
This is an introduction to Green Stuff with a couple of tutorials to try out to get you started. I then elaborate on how you can build upon these basics to get more complicated results.
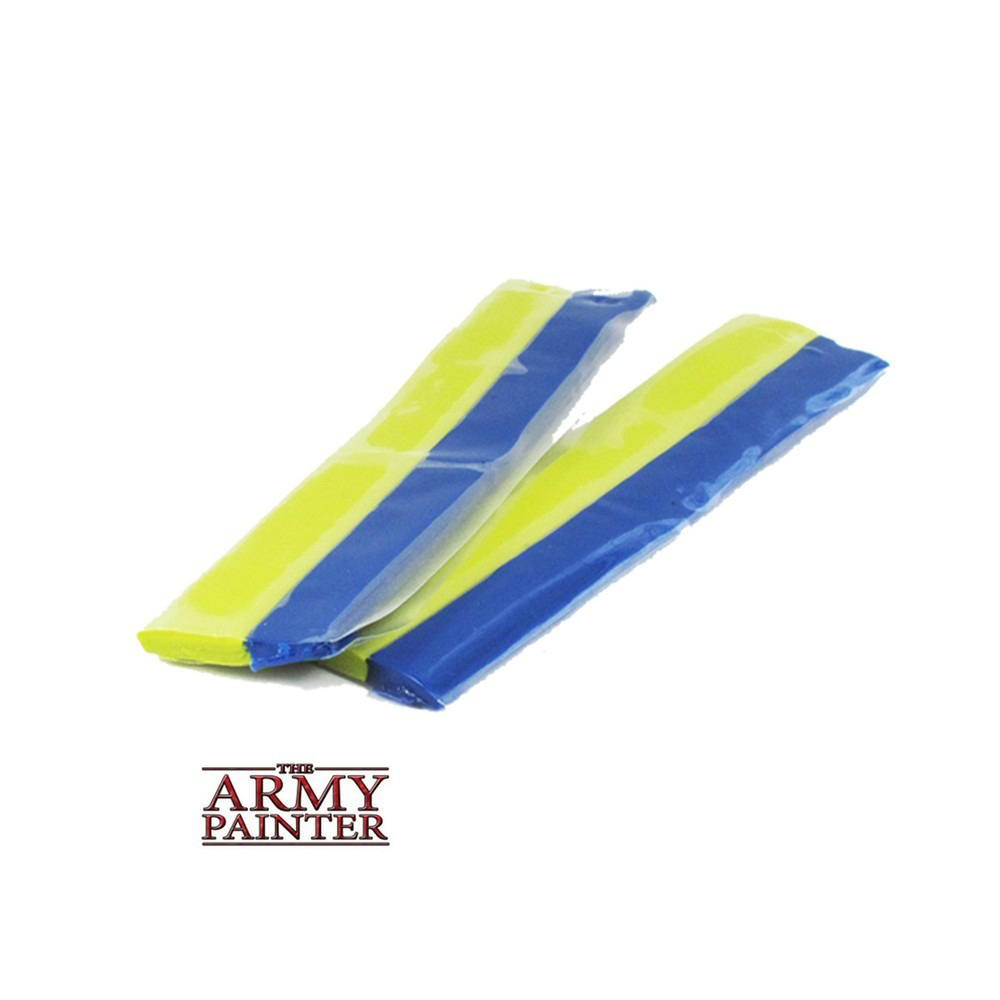
Green Stuff is a two-part epoxy putty used by hobbyists and modellers to sculpt with. The blue part is a hardener and the yellow part is the filler. Mixing both together creates a green putty that hardens at room temperature. By mixing varying amounts of blue and yellow together you can create a softer stickier yellowy green mix or a harder, crisper edged, faster drying bluey green mix.
When not in use Green Stuff should be stored in an airtight container. Green stuff can go off after time and become hard and difficult to mix. I have heard of people freezing Green Stuff to make it last longer but I can’t confirm if that works or not.
Warning
Greenstuff contains epoxy constituents so it is harmful if swallowed. It is also an eye irritant. if you have sensitive skin you will also suffer discomfort from the irritant.
Green Stuff sculpting tutorials
How to use Green Stuff for sculpting fur
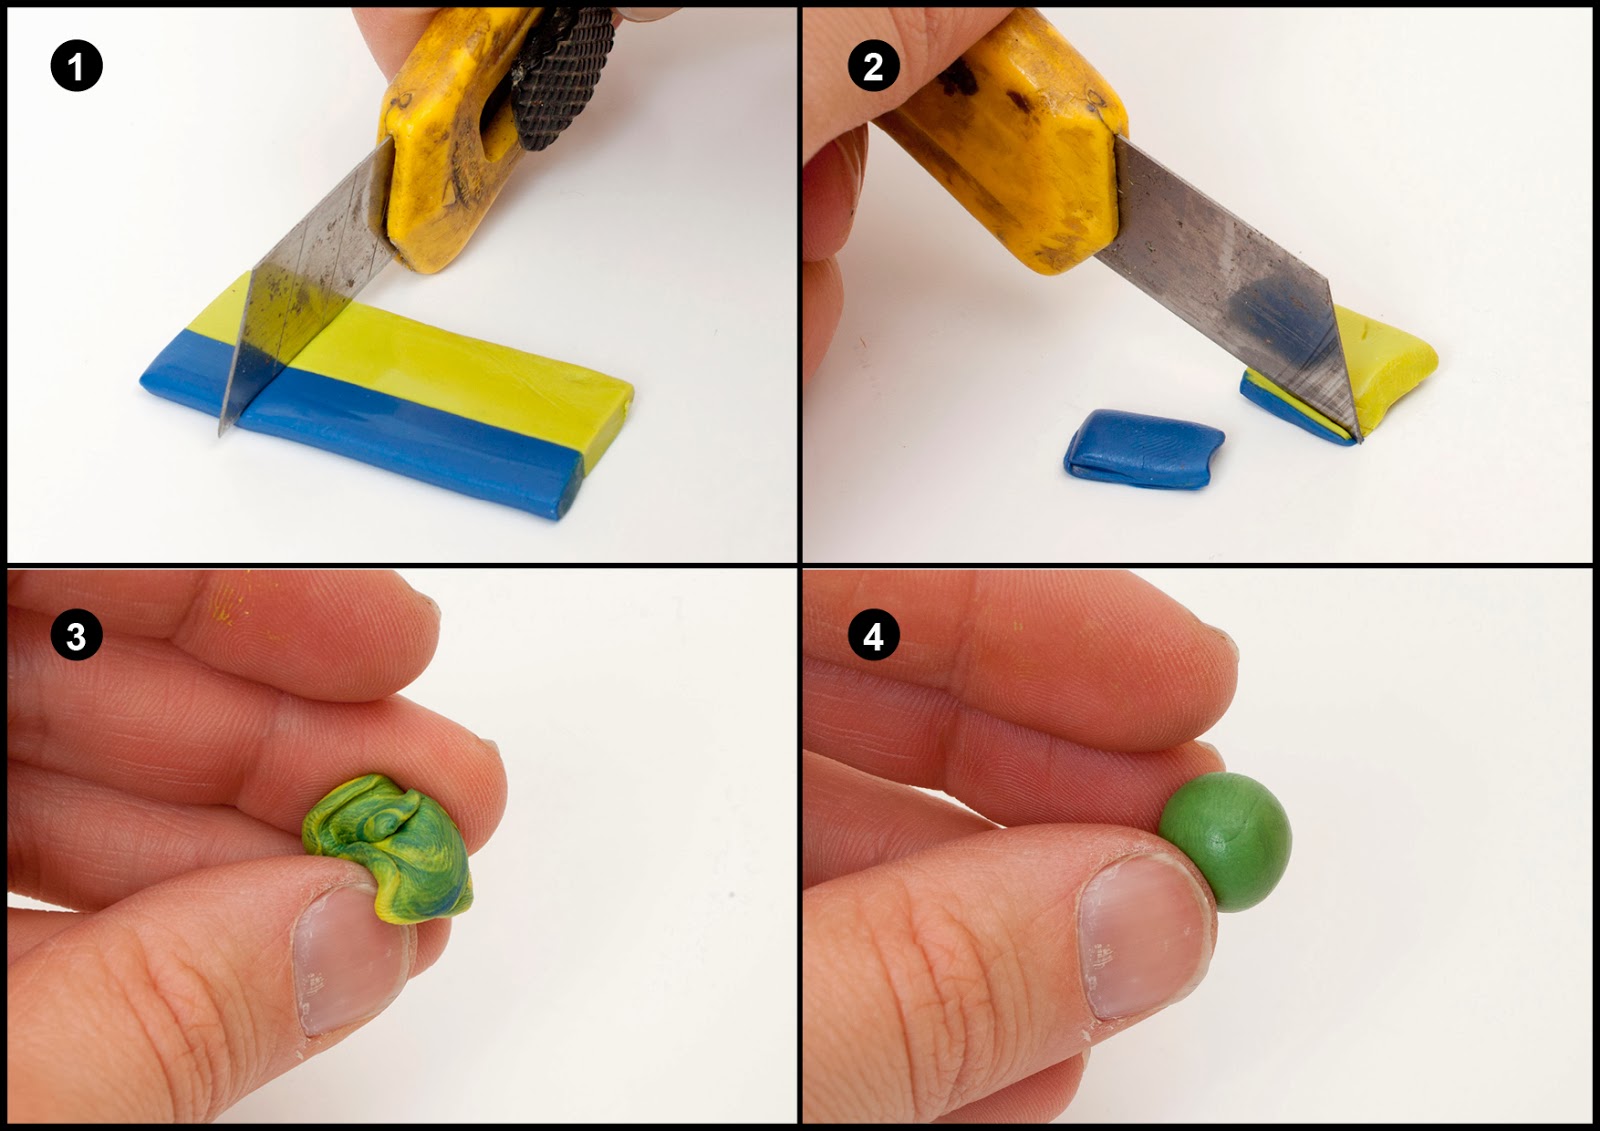
1. Use your craft knife to cut a section of blue and yellow putty.
2. Use your knife to cut away the piece down the centre where the putty joins. This has actually started to have the chemical reaction and is hard. Mixing this in with your greenstuff will leave you with bits of hard lumps in your greenstuff. Throw this piece away.
3. Mix the two remaining pieces together. You might want to wet your fingers to stop it sticking to you.
4. You now have modelling putty ready to use.
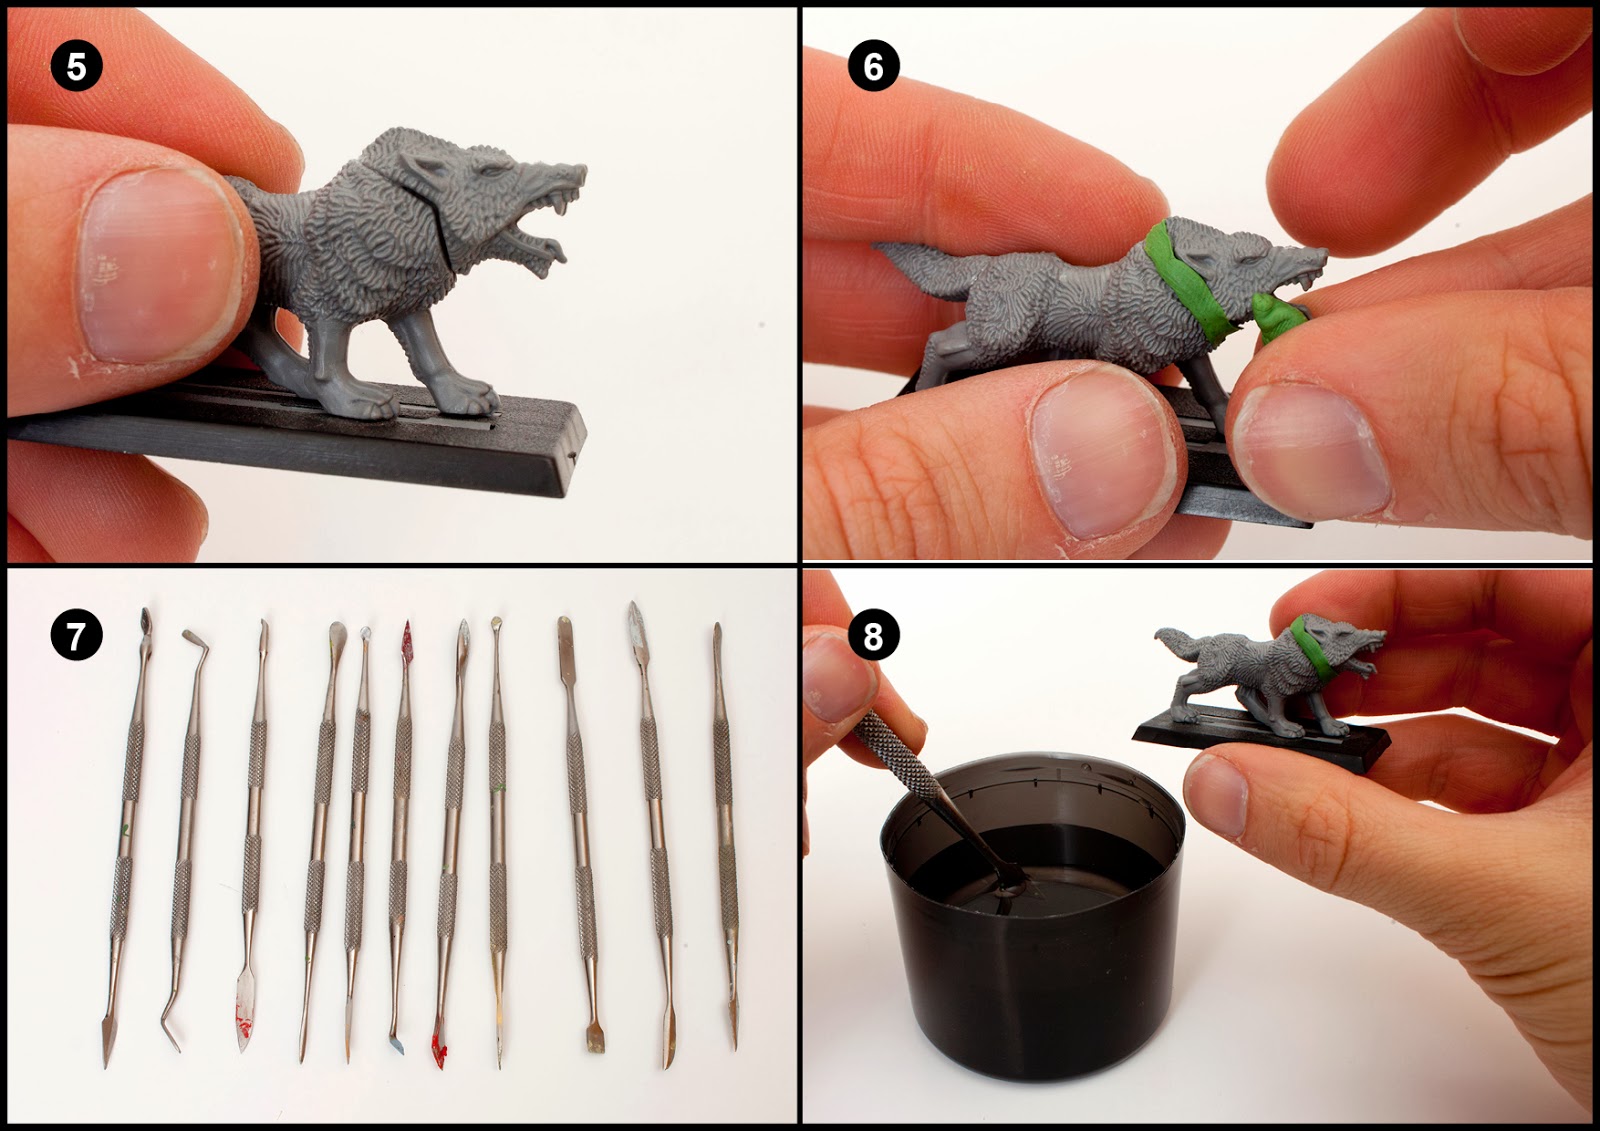
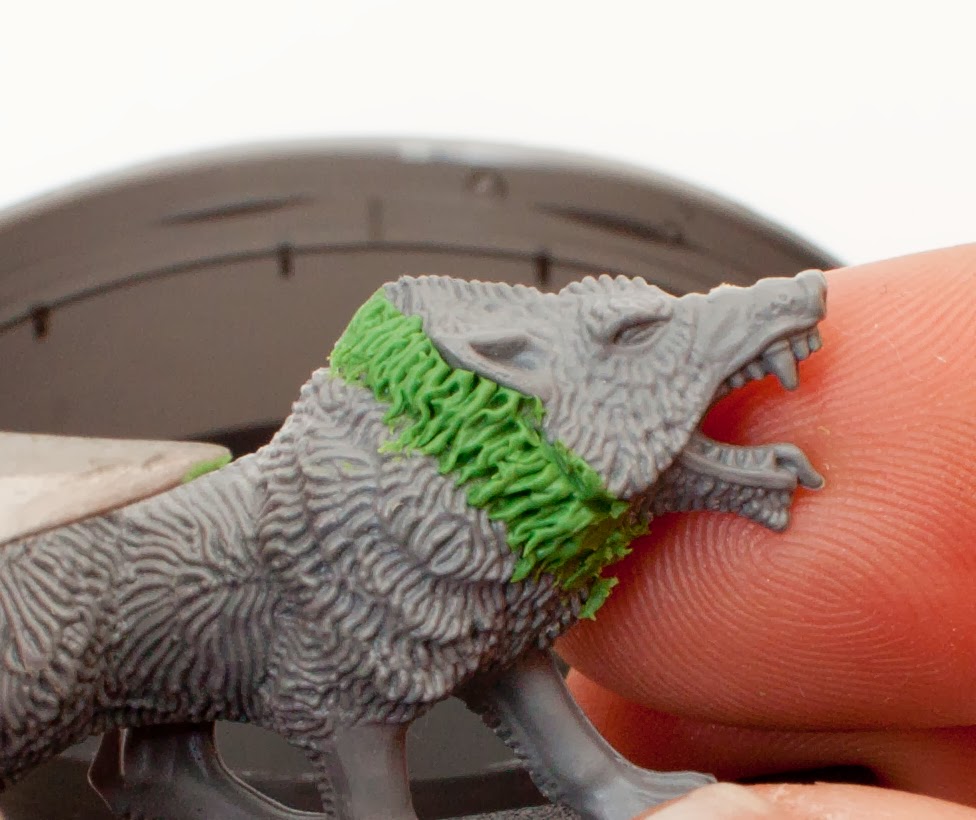
5. This plastic wolf model hasn’t been put together very well and has an unsightly gap where the parts meet. I’m going to use Green stuff to fix it.
6. Roll out a sausage of Green Stuff and push it against the gap.
7. You will need some sculpting tools. I bought these stainless steel sculpting tools for under £10 on eBay.
8. You will need a wet tool. I have used water in this example but other great options include olive oil, vaseline or KY Jelly. If you’re young and don’t know what KY is, go and ask your parents.

9. Using a pointy wet tool, make small indentations. These need to be close enough together to create “lines”.
10. Go over the “lines and add some curves. Push them slightly to create movement to the fur.
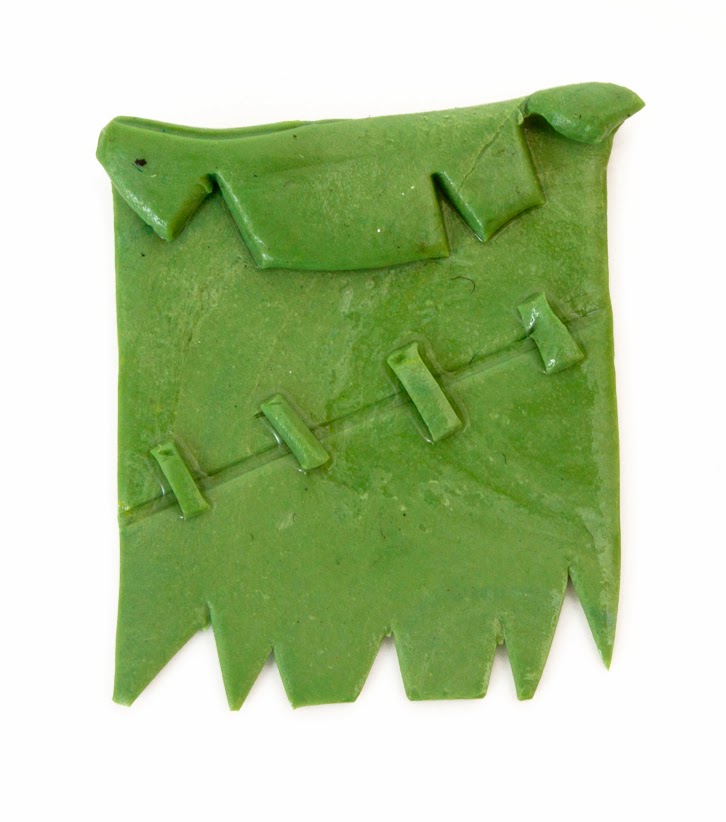
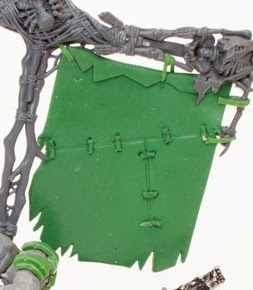
Sculpting a ragged banner
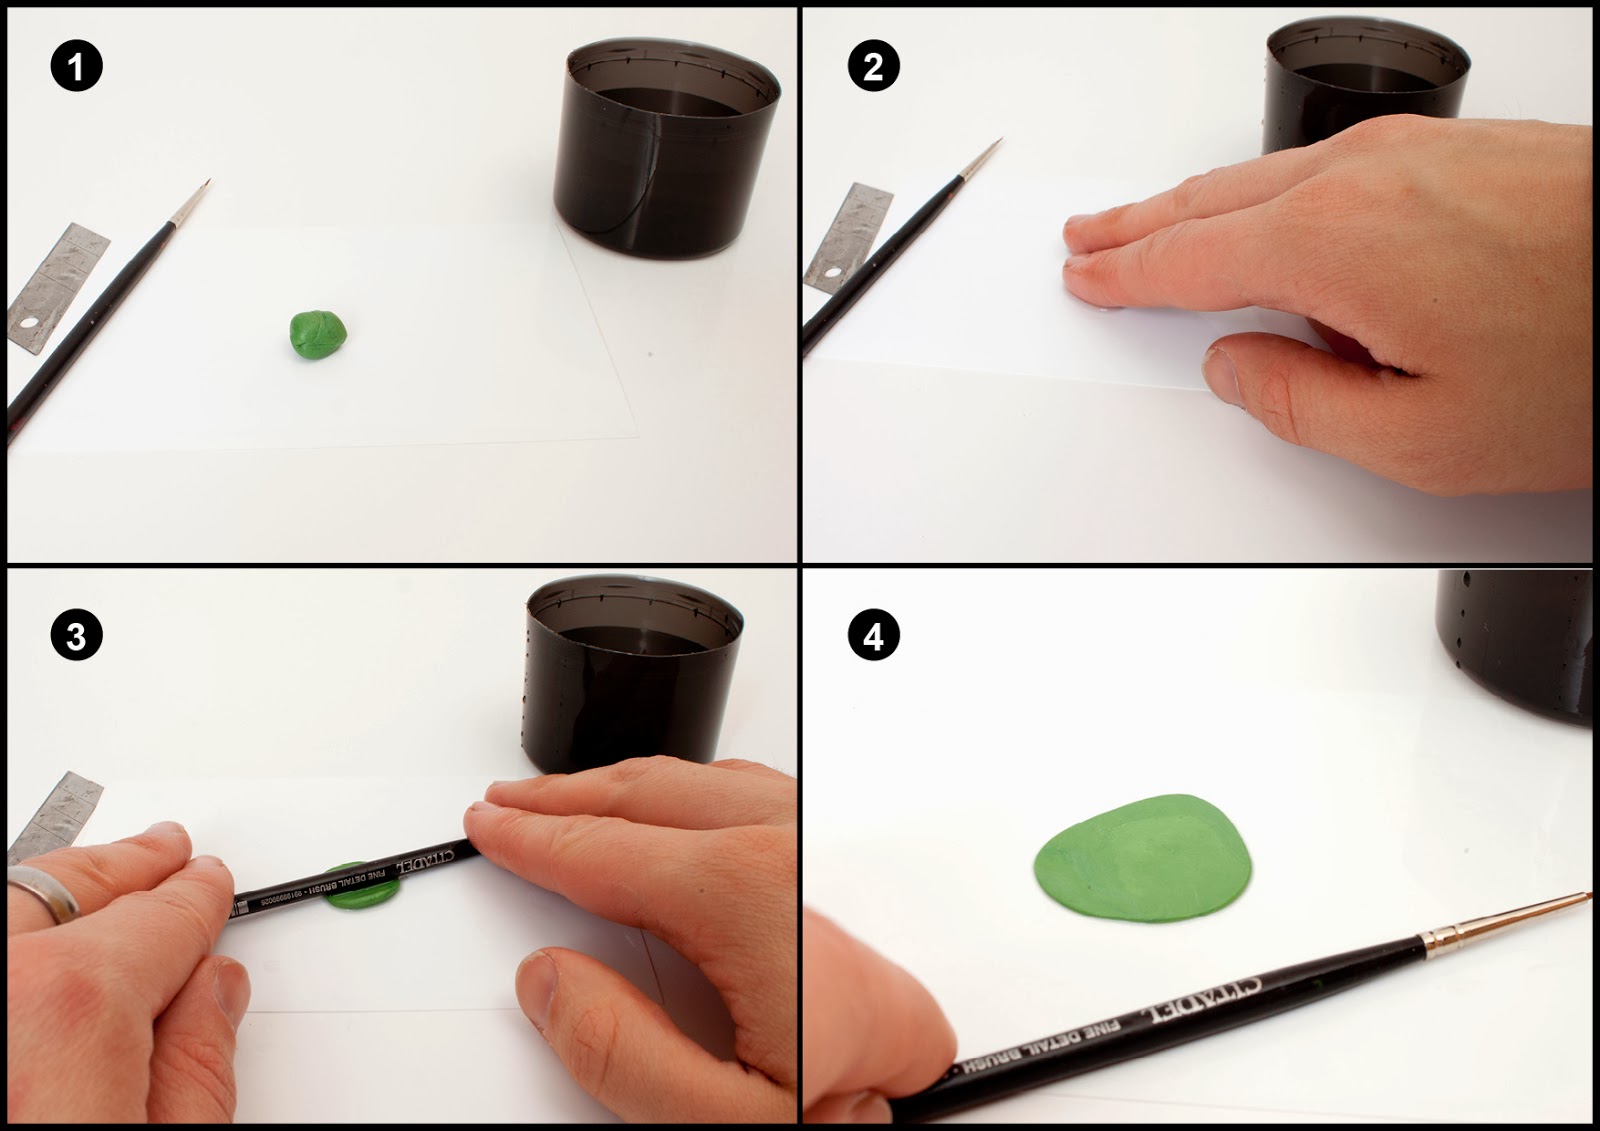
1. Find a smooth, non-porous, clean area to work on. Ceramic white tiles are perfect. Mix your putty together into a ball.
2. Wet the area with plenty of water or your other chosen method of lubrication.
3. Wet a paintbrush handle and roll out the Green Stuff.
4. Roll it out until it’s the thickness you want. Leave it to semi-cure for an hour or two.

5. The Green Stuff is a lot easier to cut when it’s “half dry” You’ll want to dismantle your craft knife and just use the blade so you can use it to press cut. You can’t use the knife like you would normally because the Green Stuff is too soft and would just drag with the blade. Make sure the blade is wet.
6. Trim all the edges square to get your basic banner shape.
7. Press-cut small triangles along the bottom to create the ragged effect.
8. Repeat step 7 for the top. Then fold it over.
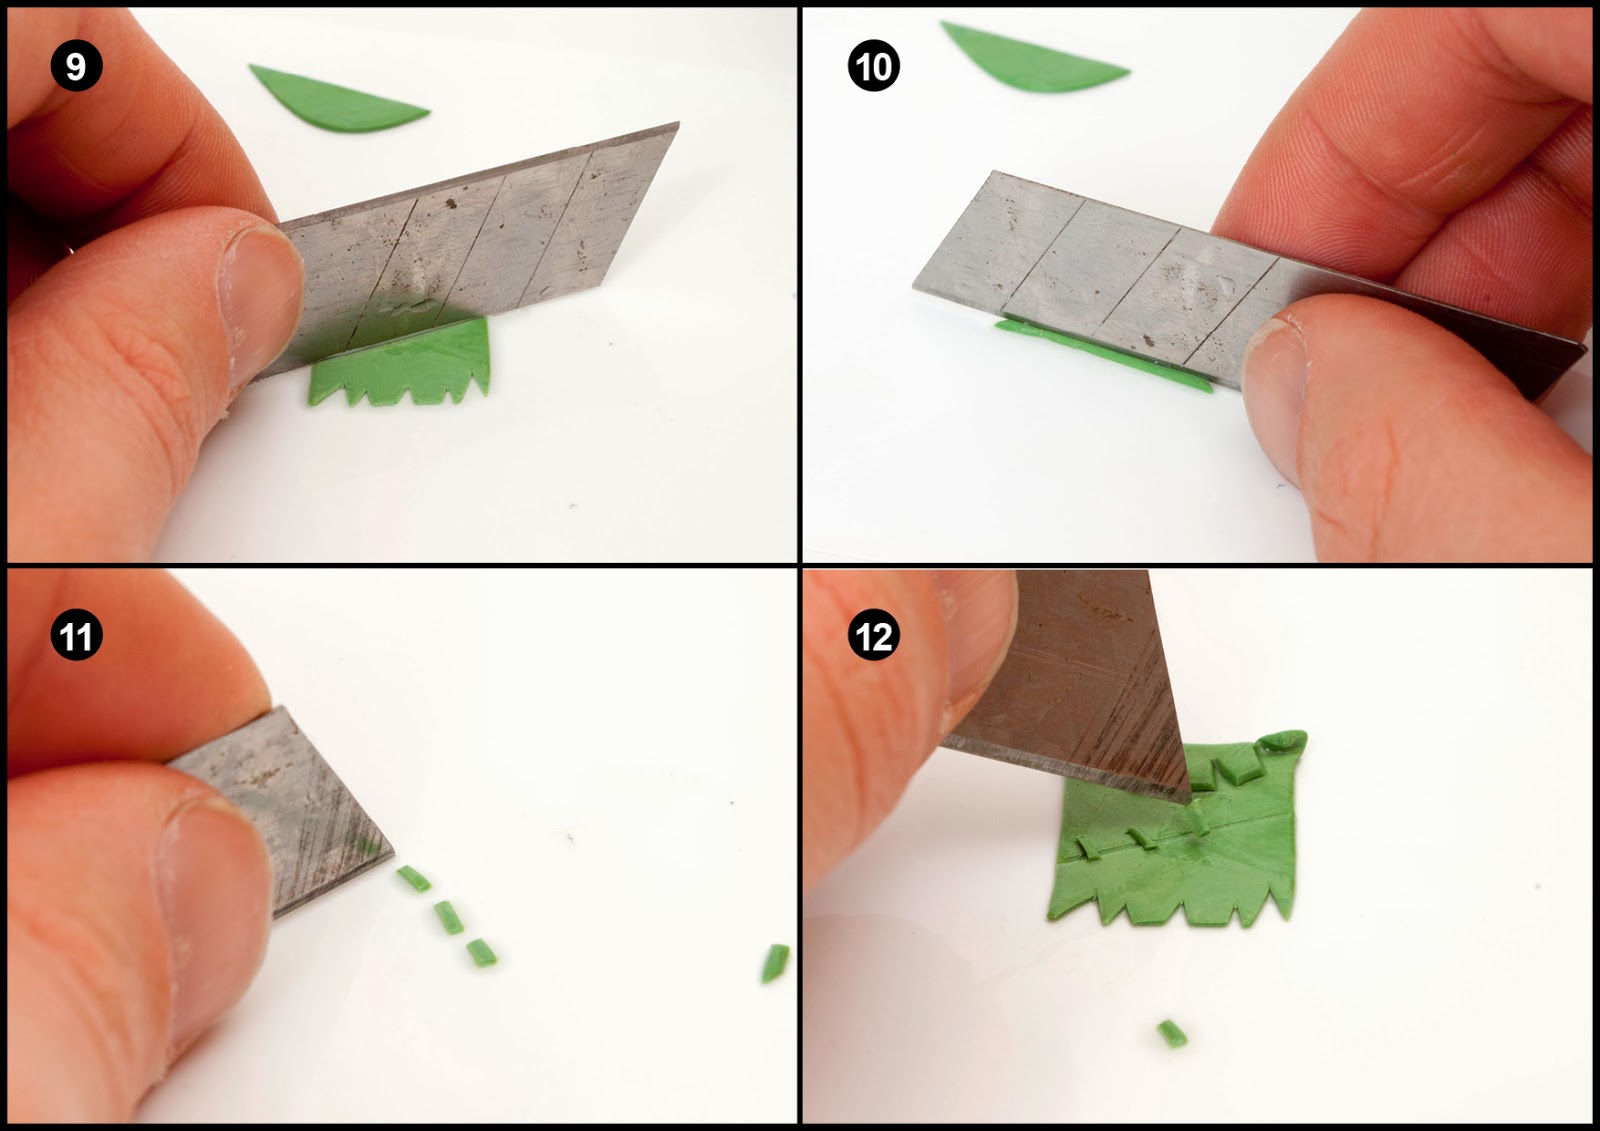
9. Use the non-sharp part of your blade to press a line into the greenstuff to resemble a join in the fabric.
10. Take one of the Green Stuff off-cuts and cut a strip. Remember to make sure your surface and tools are always wet.
11. Cut the strip into smaller pieces. These will become the stitching for the fabric joins.
12. Squirt a blob of super glue onto an old mixing palette. Use a pin or the tip of your knife to carefully lift one of the stitches, gently dab it in the super glue blob and apply it to the banner. Repeat for all stitches. Leave the banner to cure properly (24 hours is fine). Then repeat the process for the other side.
How to use Green Stuff for sculpting more complex designs
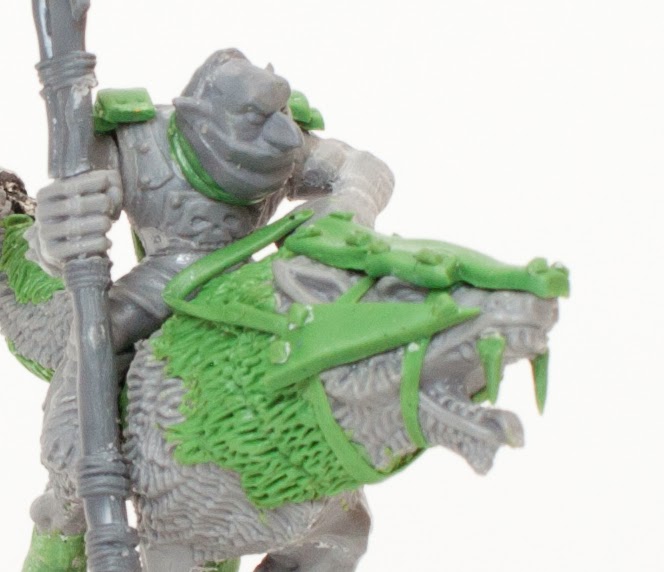
These simple techniques can be used to create all manner of different things. You can use the banner trick to create straps, saddles, harnesses and armour! It just depends upon how thick you roll it out. To add detail to your armour such as rivets you can cut a strip into small squares once it’s cured and then super glue on square rivets. If you prefer round rivets roll out a thin sausage, leave to cure and then slice up into thin discs and glue those on. You can change the size of the rivets based on the diameter you roll out the Green Stuff sausage.
You can also press designs and shapes into your Green Stuff armour/fabric pieces. I’ve heard people carve designs into soap and then press the designs into Green Stuff to make multiple repeat intricate armour designs.
Play and experiment with these basics. It’s a great introduction to sculpting. It’s much easier to work on all the pieces separately and then glue them in place once they’ve cured instead of trying to sculpt them in place.
And what’s the difference between Green Stuff and Liquid Green Stuff? Find out in this review:

14 Comments
Leave a Reply
Tale of Painters is the unofficial Warhammer hobby magazine run by hobbyists like you. Support our work by using the affiliate links from our partner stores for your next orders so we can continue to bring you fantastic FREE content every day:


![]()
![]()
Or support us directly:


Just came across this blog by Googling ‘introduction to Green stuff’. I’ve never used it before and am very hesitant to start. I’m looking to put together some banners for cavalry.
Now that I’ve read your tutorial I am feeling much more confident. Thank you!
Milliput is a great alternative to greenstuff. It hardens faster, about five minutes, so you have to be a little quicker with it. Also, it's water soluble, so you can blend it in well and it's easy to clean up before it drys. Go here:
http://www.milliput.com/
Great minds think alike 3DKEN , green stuff does not harden fully whenever i've used it . Always go back to good old milliput 🙂 Various types on offer as well plus a pack lasts ages and ages .
That was really a nice share.. Thanks.. It was very useful….Super Glue or Cyanoacrylate.
I have another method for small round rivets …….. cut open an old water filter, the material inside (once dry) is comprised entirely of small balls have your pick of the lot as there are all sizes in there, glue in place (tweezers are your biggest friend here) then paint, job is done everyone is happy
thanks Garfy. I have yet to dabble in green stuff, primarily because I didn't know what to do with it. this tutorial is just what the doctor ordered. much appreciated…!
Thanks a lot for this tutorial! 🙂
Now I am going to try it myself.
I would love to see the results.
Thanks for this, Garfy! I'm about to attempt green stuffing the transition joint between Finecast lord of change wings and a plastic daemon prince's back, so I'm in desperate need of help with my technique. Are there better and cheaper alternatives to GW's green stuff in your experience?
If you search for kneadatite on eBay you'll find 36" long strips for a very cheap price. It's the same stuff that GW sell.
g'day
just wanted to add that if your looking for tools, rubber tipped clay shapers are great for working gs, come in most standard brush sizes and soft or firm rubber (id suggest firm to start with but soft works as well), also practice, practice, practice
o yeah an NEVER buy gs from GW
I absolutely love those, they're also called colour shapers. I got a pack of several sizes, both firm and soft, and use them all the time. I definitely recommend them.
Great tutorial as usual, Garfy. Thank you!
For any one starting out with green stuff (or any other modelling putty) it is really worth experimenting with what forms and shapes the different tools can produce. Like Garfy I bought a big set of tools from ebay for not very much money. But its little worth having all the tools if you don't know what shapes you can make with them so roll out a strip of green stuff and attack it in different ways to see what happens! (that might be an interesting article for you Garfy!)
Another little tip is that you can also buy green stuff in 36" worth of strips on there too – (GW don't make this, they just re-package it!)