
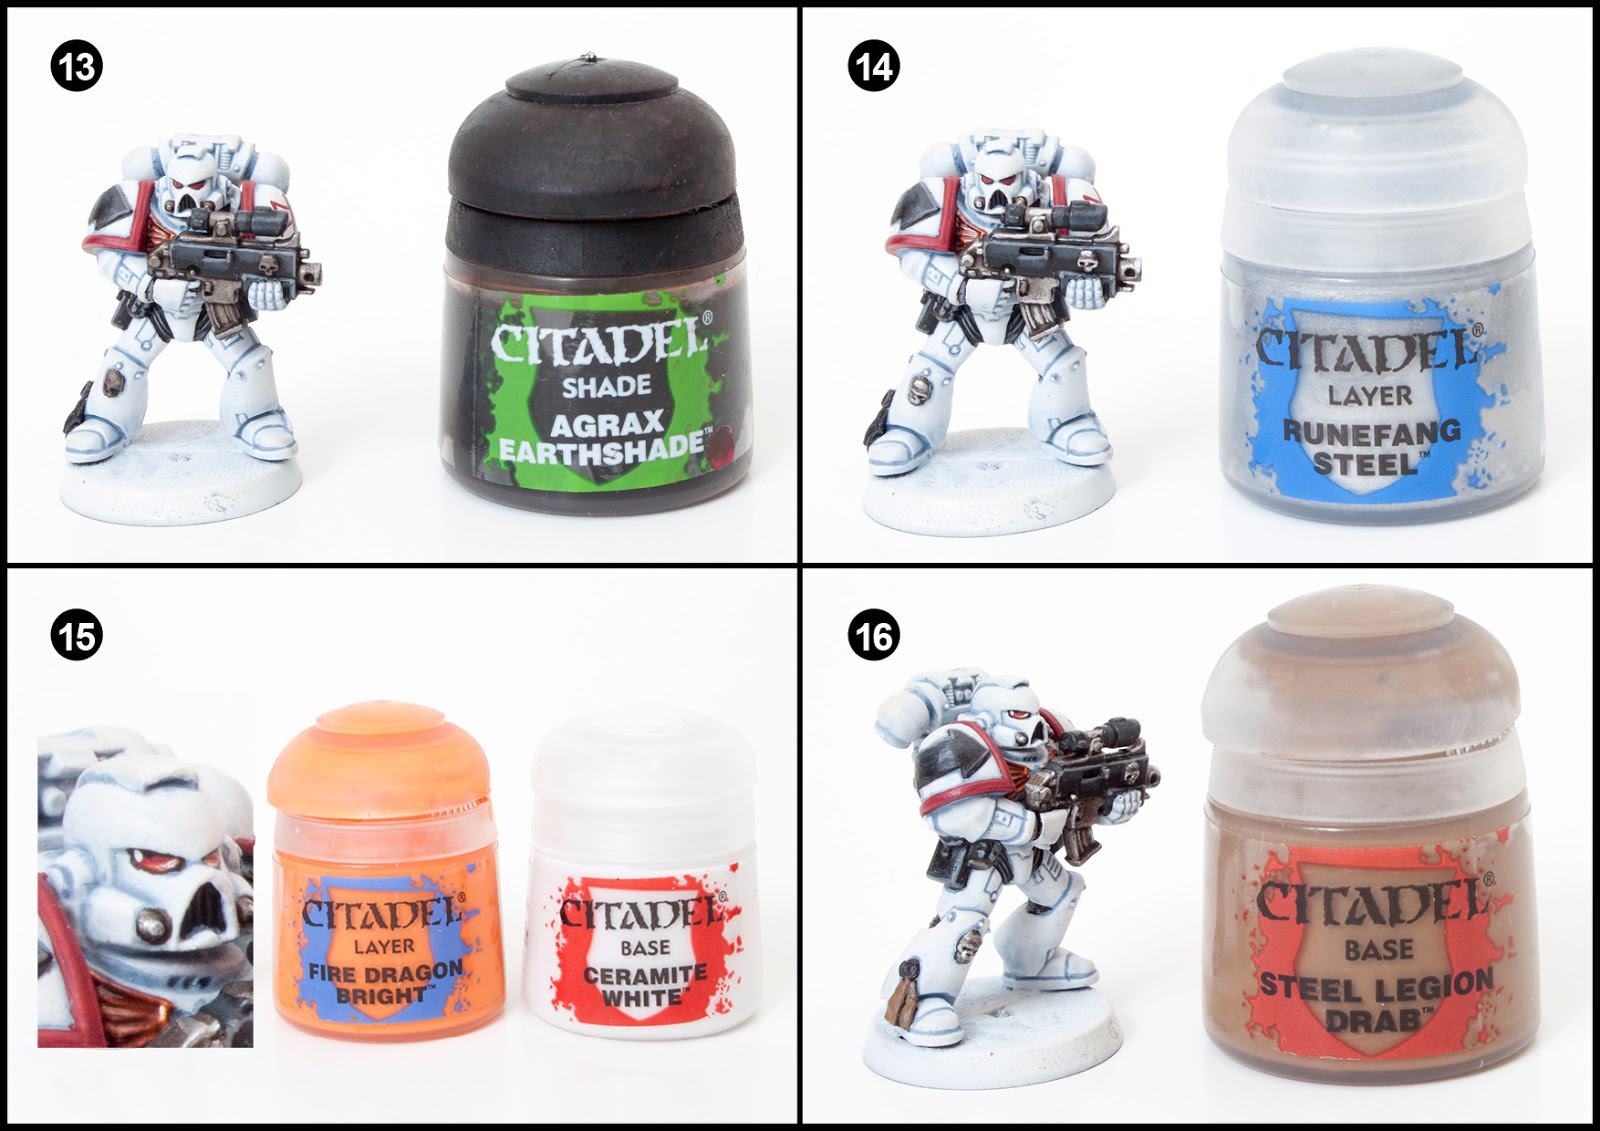
This is a tutorial explaining how to paint White Scar Space Marines using the latest Games Workshop paints. The model above was painted in 20 steps. I break each step down with a high resolution picture and detailed instructions. Read the full tutorial after the jump.
I’ve designed this tutorial so established painters find it interesting but also so new comers to the hobby can learn some basic and advanced techniques. I will use terms such as glazing and washing, don’t worry if you don’t know what these mean because I will elaborate and explain during that step.
Paints you will need for this tutorial:
White Undercoat spray
Fenrisian Grey (layer)
Russ Grey (layer)
Ceramite White (base)
Abaddon Black (base)
Khorne Red (base)
Wazdakka Red (layer)
Gehenna’s Gold (layer)
Rhinox Hide (base)
Eshin Grey (layer)
Dawnstone (layer)
Leadbelcher (base)
Agrax Earthshade (shade)
Rungfang Steel (layer)
Fire Dragon Bright (layer)
Steel Legion Drab (base)
Zandri Dust (base)
Evil Sunz Scarlett (layer)
Yriel Yellow (layer)
Armageddon Dust (texture)
In case you need to expand your paint collection, head over to Wayland Games or Slave to Painting, which both stock a huge selection of paints at competitive prices.
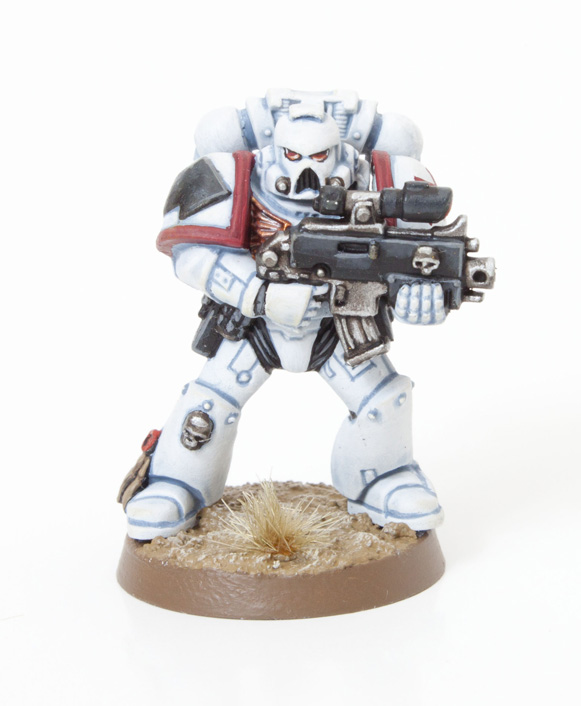
1. Undercoat the model white. I use GW Skull White Primer.
2. Next create a wash using 3 parts Lahmian Medium to 1 part Fenrisian Grey. Apply over all the armour a Citadel wash brush is good for this.
3. Using a fine detail brush and Russ Grey carefully line all the armour gaps and joins. A touch of water mixed in really aids flow.
4. Use Ceramite White and a touch of water (to smooth out the thick paint) and highlight all the armour sections leaving a little of the Fenrisian Grey wash showing though in the areas to donate shade/shadows.

5. Use Abaddon Black to paint all the detail that isn’t armour.
6. Use Khorne Redto paint the shoulder trims and chapter symbol. If you don’t want to paint the symbol by hand decals can be applied at the end of this tutorial.
7. Highlight the edges of the trim with Wazdakka Red.
8. Painting the chest eagle with Gehenna’s Gold. It’s always easier to leave the bolter off.

9. Create a wash using 3 parts Lahmian Medium to 1 part Rhinox Hide. Apply over all the chest eagle.
10. Highlight the upper halves of the black areas (bolter, pouches, tactical symbol etc) with Eshin Grey. Mix a smidgin of Lahmian Medium in to help blend the layer.
11. Edge highlight the previous stage with Dawnstone using a fine detail brush.
12. Basecoat all the metal areas with Leadbelcher.
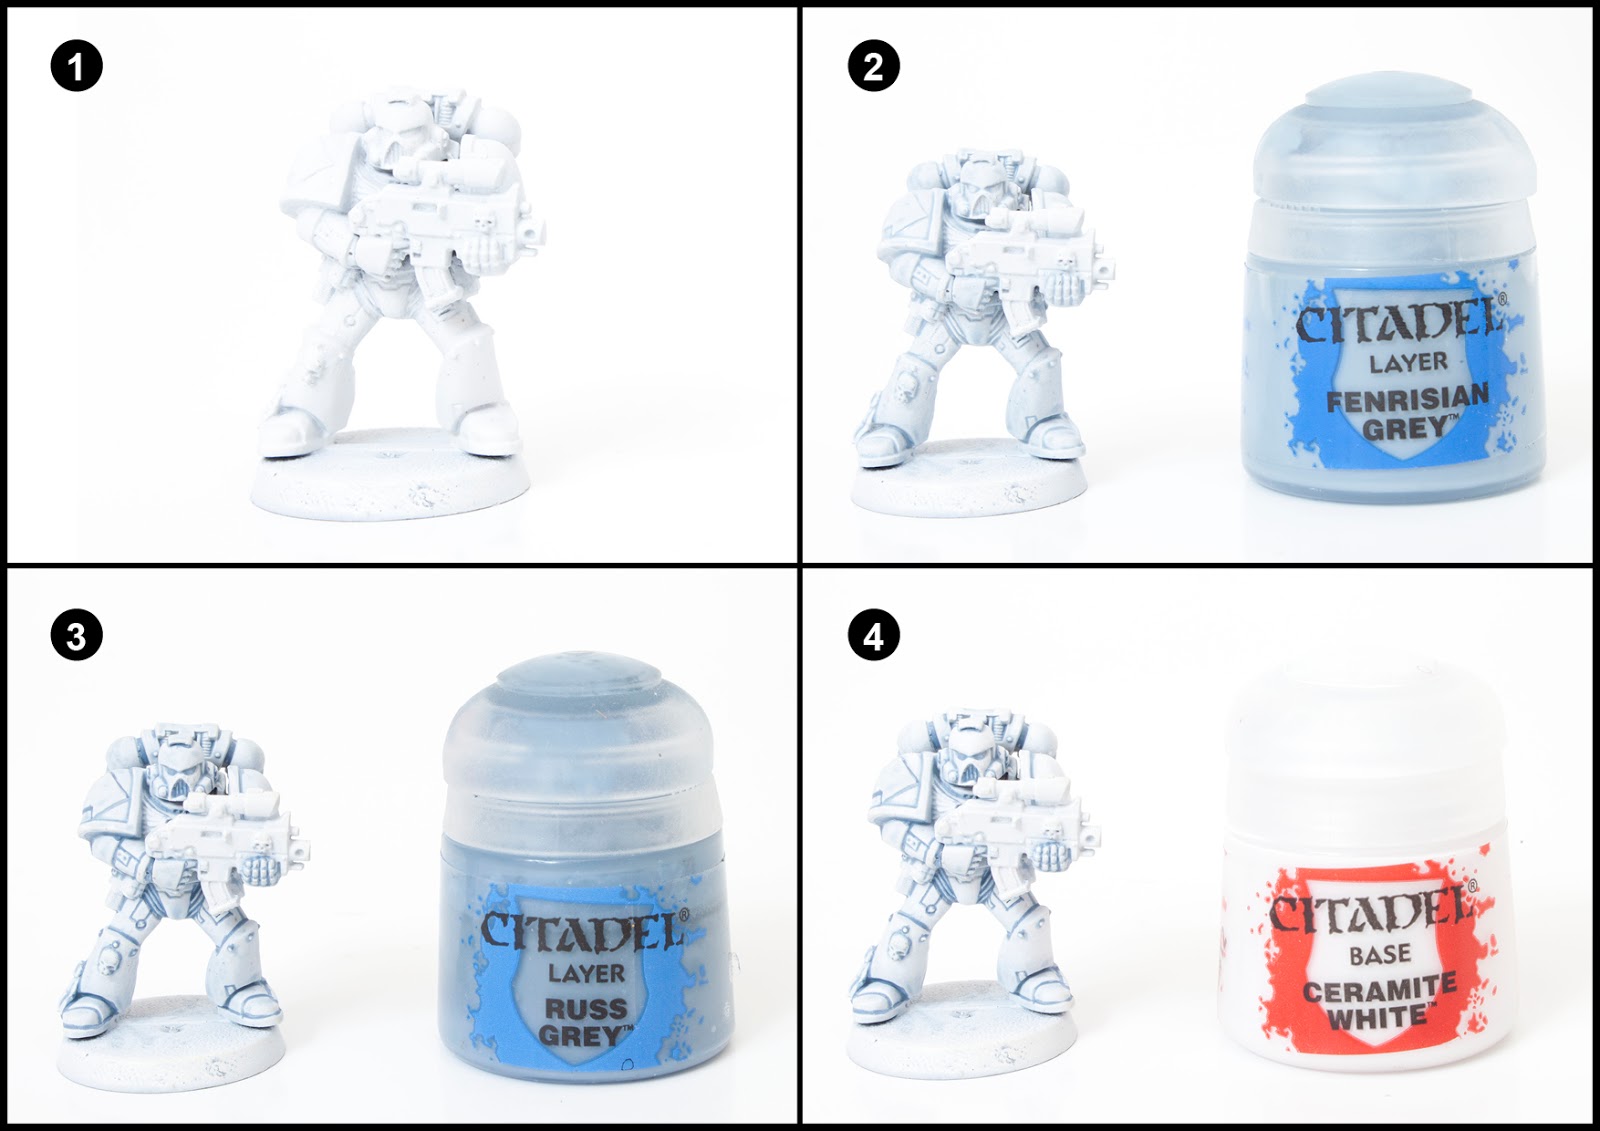
13. Wash the metal areas using Agrax Earthshade.
14. Highlight the edges of the metal using Runefang Steel and a fine detail brush.
15. For the eye lenses, paint two thirds of the lens with red which should start in the corner nearest the nose. Then paint a line of Fire Dragon Orange along the bottom of the lens. Finally dot the black corner with Ceramite White and run an even thinner line of white under the Fire Dragon Orange line.
16. Paint the parchment of the purity seal with Steel Legion Drab.

17. Highlight the parchment with Zandri Dust.
18. Use Evil Sunz Scarlett to paint the purity seal.
19. If you hand painted the shoulder icon or are panting over a decal then use Yriel Yellow.
20. Finally, base the model in a way which fits in with your own army or gaming table. I’ve used Steel Legion Drab for the rim, Armageddon Dust for the base top and then drybrushed with Screaming Skull. Drybrushing is a way of picking out raised detail quickly usually with a lighter colour. To dry brush you need load up your brush with paint and then wipe it off the bristles on a tissue until virtually no paint remains on the brush. Then rapidly and repeatedly drag the side of the brush back and forth over the area to be painted.
Keep checking back regularly as I have Iron Hands and Ultramarine tutorials still to post.
You can view the Imperial Fist tutorial using this link here.
Do you like our tutorials and reviews? Here is what you can do to support us: Check out the websites of our sponsors, place your next orders at Wayland Games by clicking here or on the banner on the right. Thank you very much, we appreciate any help to keep us going!

16 Comments
Leave a Reply
Tale of Painters is the unofficial Warhammer hobby magazine run by hobbyists like you. Support our work by using the affiliate links from our 🇺🇸 / 🇨🇦 partner stores for your next orders so we can continue to bring you fantastic FREE content every day:


Or support us directly:


Hey Garfy, thanks a lot for this Tutorial! I have looked around the Internet a while for a good and easy way to paint my new White Scars army – and your Tutorial was the best. Will use it on my whole army. What is about vehicles? I noticed that if I use a wash on a big surface it doesn`look good at all. More like puddles of color….I guess it is better to use the grey wash only around the edges when painting tanks, bikes etc.?
Would you show us how toi paint Apothecaries please?
I would literally adapt this guide if you want full white armoured Apothecaries.
I don't like how thin white scar is. I can control ceramite better by adding more medium.
Why would you use thinned Ceramite White for highlighting when White Scar is made for the purpose?
I made the wash stated in step two of the guide however when I apply it it seems to apply too thick, when looking at other wash creation guides on the interwebs they recommend a 3 medium : 3 distilled water : 1 paint mix, would the same stand for your fenrissian blue wash?
Epic guide btw, atttempting to do my own scar bike army using this 😀
This is a guide, you're free to adapt it as you feel. If you want to add water go for it. I didn't though.
Great tutorial! I would love to see more chapters 🙂
We had a little poll on our facebook page yesterday. It was to decide which tutorial I do next after Iron Hands and Ultramarines. Three main contenders came to the fore. Minotaurs, Sons of Horus and Salamanders. These then went to the vote. The winner of the vote was Sons of Horus, but because I love you guys so much I've decided to find the time to make all three.
These will start to go live during October.
So clean and nice. Simple too you sneaky git 😀
Great work, thanks for this breakdown. I see you plan to do Iron Hands and Ultramarines, what about Salamanders?
if enough people ask I might do requests.
I'm requesting 🙂
Looking great Garfy. I wish White Scars weren't a bike oriented army – I love the color scheme but not keen on a bunch of bikes.
Really enjoying these Garfy, such a high quality of painting, its really nice to see. The previous tutorial inspired me to dig out an old squad of metal scouts and start painting them as imperial fists.
Thank you for your sbs. I always wanted to make a white scars bike army, i was a little afraid for the white. I will try it now.