
Today I’m glad to present an extensive tutorial in 33 easy to follow steps. Create an atmospheric and effective paint scheme that is suitable for anything Nighthaunt from the lowly Chainrasp to the most dreadful Mortarch. Find out more after the jump.
This tutorial assumes you have a good understanding of how to paint. Underneath each picture are the corresponding instructions. Each step shows the paint(s) I used during that step. I have a rather eclectic paint collection, so when I use a non-GW or OOP paint, I’ll try to provide you with suitable alternatives from the current Citadel paint range [in brackets].
Paints I used for this tutorial:
Corax White Primer
Citadel Corax White
Citadel Dawnstone
Citadel Mechanicum Standard Grey
Citadel Eshin Grey
Citadel Incubi Darkness
Citadel Longbeard Grey
Citadel Screamer Pink
Citadel Emperor’s Children
Citadel Steel Legion Drab
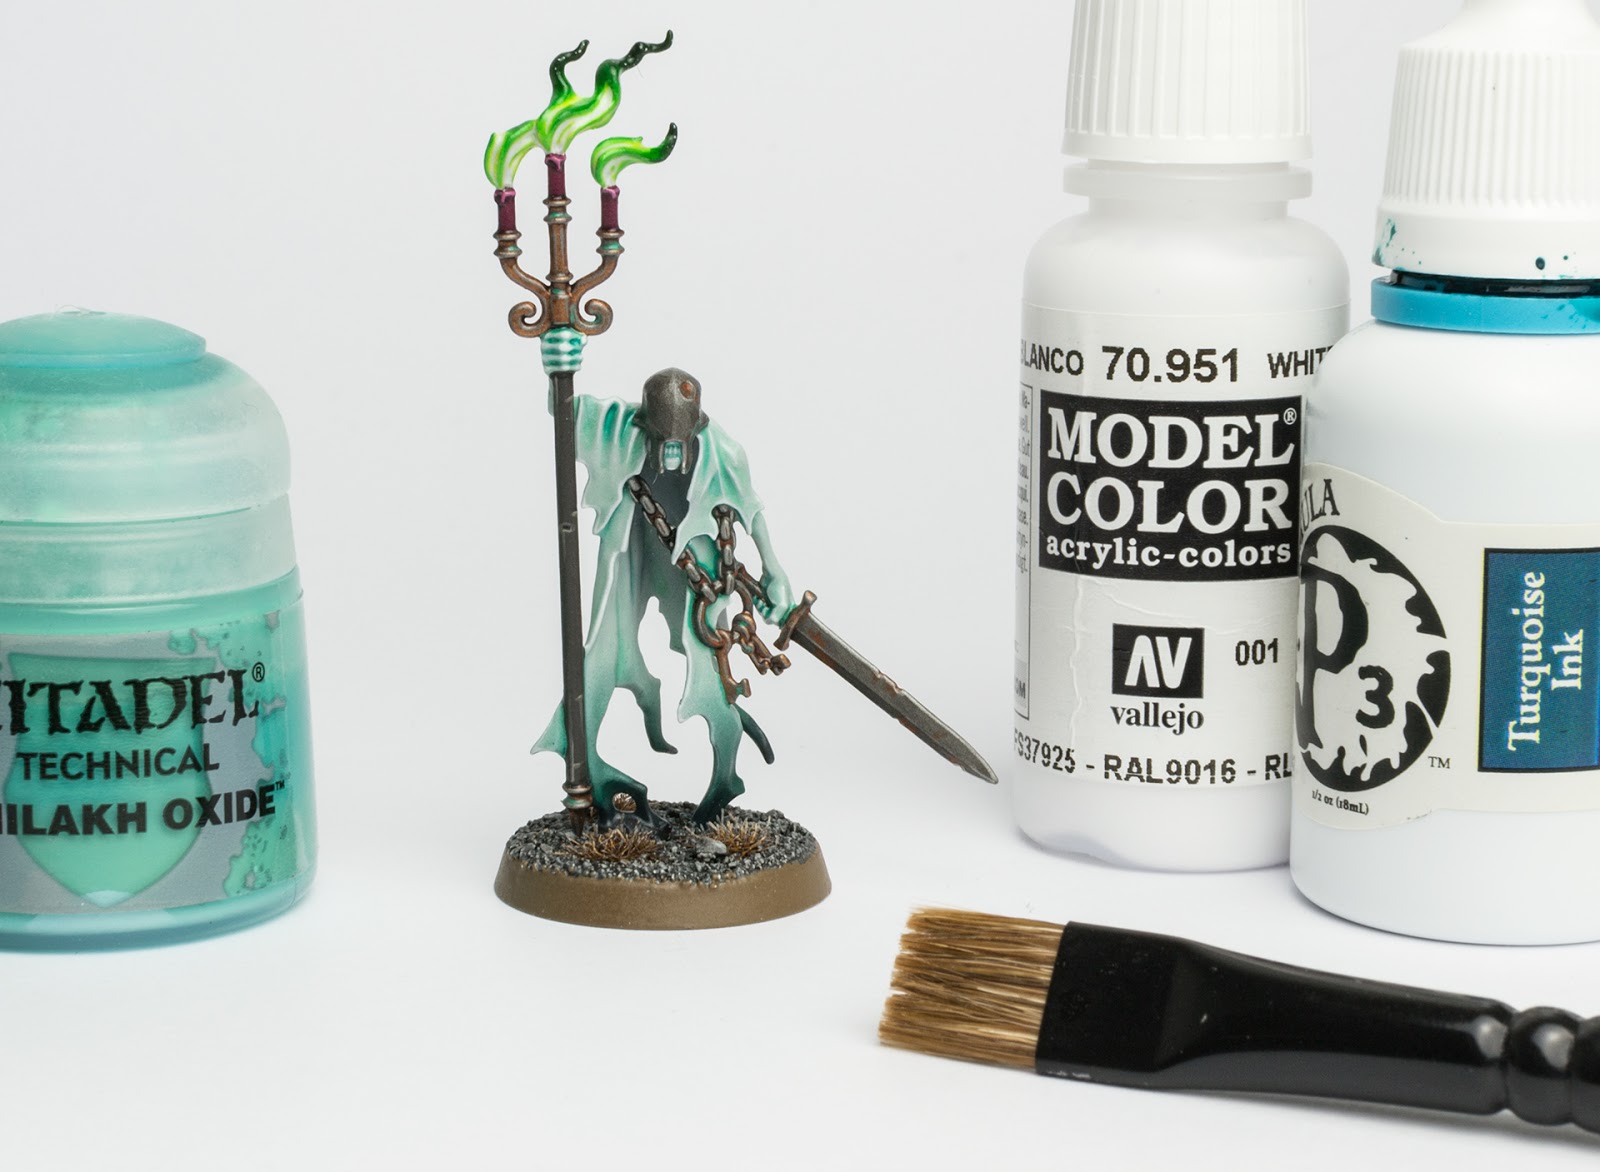
Citadel Nihilakh Oxide
Citadel Coelia Greenshade
Citadel Lahmian Medium
Citadel Charadon Granite (OOP) [Skavenblight Dinge]
Citadel Snot Green (OOP) [Warpstone Glow]
Citadel Dark Angels Green (OOP) [Caliban Green]
Army Painter Warpaints Strong Tone Ink [Agrax Earthshade]
Army Painter Warpaints Dark Tone Ink [Nuln Oil]
Army Painter Warpaints Gun Metal [Leadbelcher]
Army Painter Warpaints Plate Mail Metal [Ironbreaker]
Vallejo Model Color Black [Abaddon Black]
Vallejo Model Color White [White Scar]
Vallejo Game Color Brassy Brass [Gehenna Gold]
Vallejo Game Color Foul Green [Sybarite Green]
Vallejo Game Color Livery Green [Moot Green, see step 28]
Vallejo Game Color Scorpy Green [Moot Green]
Formula P3 Bastion Grey [Stormvermin Fur]
Formula P3 Trollblood Highlight [Stormvermin Fur, see step 19]
Formula P3 Turquoise Ink [Coelia Greenshade, see step 4]
In case you need to expand your paint collection, head over to Wayland Games or Element Games, which stock a huge selection of paints at competitive prices.

1. The model was primed with Corax White from Games Workshop, which is a light grey primer. I recommend applying three or four thin coats for a perfect coverage without smothering any details with paint.
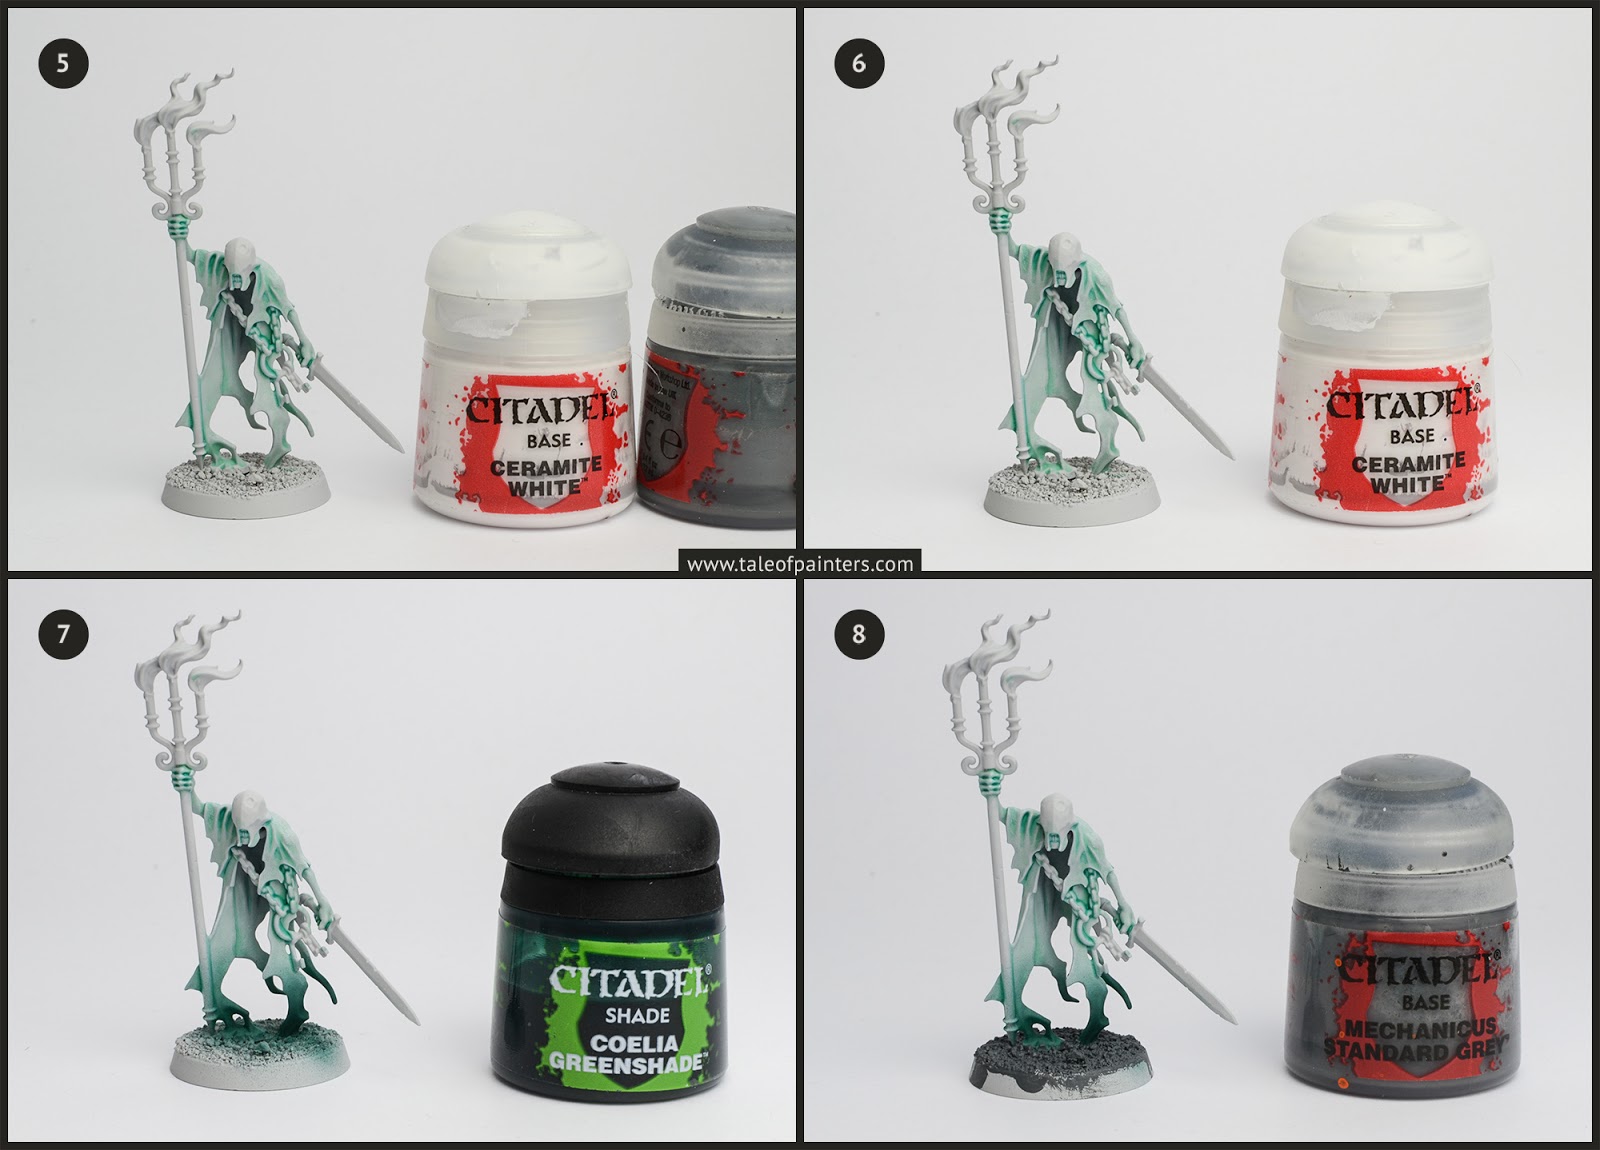
2. As there is no colour in the Citadel paint range that is a perfect match for Corax White, I prepared a mix of Ceramite White, Mechanicum Standard Grey and Formula P3 Bastion Grey (I started with a ratio of about 12:1:1 and then added more paint until I got a good match for Corax White; Bastion Grey can be replaced with Stormvermin Fur). I recommend mixing a whole pot of this, as you will need this mix quite a lot. Once I was happy with the mix, I used my Corax White equivalent to paint over any spots that the primer didn’t reach. [Update 2020: Games Workshop released a Corax White base paint by now, just use this instead]
3. I washed all the ghostly parts of the model with a 1:1 mix of Nihilakh Oxide and Lahmian Medium. Try not to drown the model with this wash, also do not let it pool on any flat, open areas. If you spot any pooling, use your brush to soak up any excess wash or try to push it into the recesses. Once the wash was completely dry, I used pure Nihilakh Oxide and directly applied it in any recesses that needed further shading.
4. I picked out the deepest shadows with a 1:2 mix of Formula P3 Turquoise Ink and Lahmian Medium [you can use Coelia Greenshade instead of Turquoise Ink, but I prefer Turquoise Ink as it adds more vibrancy].
5. I drybrushed the ghostly areas with my Corax White mix from step 2. Use a soft brush for this and slowly build up the effect. The drybrush will help to even out the spots where Nihilakh Oxide might have dried patchy. If there are still some patchy spots left, mix a little bit of Nihilakh Oxide in the Corax White mix and use it to paint over.
6. I applied a second, more gentle drybrush, this time with Corax White [you can use any pure white of your choice for this, e.g. White Scar]. Again, use a soft brush and don’t overdo it to avoid a chalky finish.
7. The fade on the ghostly areas was created with an airbrush. I built up the effect with several thin coats of pure Coelia Greenshade, concentrating on the lower parts of the ghostly robes. If you don’t have an airbrush, I recommend several glazes of Incubi Darkness thinned down heavily with water. Glazing with shades can often leave a blotchy finish. You could also skip this stage to speed up the process.
8. The texture of the base was painted with Mechanicus Standard Grey.

9. I drybrushed the sand with Longbeard Grey. Take care to not hit the lower parts of the model – using a small piece of paper held in place will help to “mask” any painted areas.
10. I applied a heavy wash of a 1:1 mix of Army Painter Warpaints Strong Tone Ink and Dark Tone Ink [Agrax Earthshade and Nuln Oil] all over the sand.
11. I picked out any larger rocks and gravestones with Vallejo Model Color Black [Abaddon Black]. I then diluted Incubi Darkness with a good amount of water and painted it directly into the recesses to add a gloomy, unreal hue to the rocks.
12. Once dry, I carefully drybrushed the rocks with Eshin Grey, followed by Dawnstone.

13. I painted all the metal with Warpaints Gun Metal [Leadbelcher].
14. The wooden parts got a basecoat of old Charadon Granite [Skavenblight Dinge is close].
15. I used Warpaints Dark Tone Ink [Nuln Oil] to shade the wood and metal. For the wood, I applied the wash selectively into the recesses, while the metal got an all-over wash.
16. I built up the rust effect with two to three thin coats of heavily watered down Skrag Brown.

17. The metal parts were then highlighted with Warpaints Plate Mail Metal [Ironbreaker].
18. I highlighted the wood with Formula P3 Bastion Grey [Stormvermin Fur].
19. A very thin second highlight was then applied to the wooden areas with Formula P3 Trollblood highlight [you could mix Stormvermin Fur with Pallid Wych Flesh or a little bit of white to match Trollblood Highlight].
20. I picked out the brassy parts with VGC Brassy Brass [Balthasar Gold is close].

21. The brass got an all-over wash with Warpaints Strong Tone [Agrax Earthshade].
22. Verdigris was added by painting Nihilakh Oxide into select recesses. I then added a bit of VGC Foul Green [Sybarite Green] to further enrichen the effect.
23. Then I highlighted the brass with Plate Mail Metal [Ironbreaker].
24. The candles got a basecoat of Screamer Pink.

25. I shaded the candles with a selective wash of Dark Tone Ink [Nuln Oil].
26. Then, I highlighted the candles with Emperor’s Children.
27. I thinned Vallejo Model Color White [your favourite white, e.g. White Scar] with Lahmian Medium to a wash like consistency and applied it all over the balefire flames. The white paint will gather in the recesses where the fire is brightest.
28. I built up the flame effect with a thinned coat of VGC Livery Green [Moot Green with a bit of white] and then Scorpy Green [Moot Green], leaving the recesses white.

29. I added several layers of thinned old Snot Green [Warpstone Glow], concentrating on the upper tips of the flames.
30. A final highlight of old Dark Angels Green [Caliban Green] was added to the uppermost tips.
31. I applied a fine edge highlight of thinned VMC White [White Scar] to all the ghostly parts. This enhances the highlights created by the white drybrush from step 6 and adds a lot of definition. It’s an optional step, you could do it only for your characters or concentrate on focus points like face and hands only to save some time.
32. A couple of layers of Incubi Darkness, thinned to a wash like consistency, was used to further darken the fade and blend the tips of the ghostly parts into the rocks and ground.


Finally, I painted the rim of the base with Steel Legion Drab and added some dark brown static grass. If you want to go for grey base trims like on the Studio models, use Stormvermin Fur instead.

Here is a completed unit of Chainrasps, all painted as explained.
This paint scheme was inspired to great lengths by Tyler Mengel’s stunning Nighthaunt army, for which he also created a tutorial. Check it out here for a slightly different spin on painting Nighthaunts.
How do you like my take on painting Nighthaunts? Have you found anything useful in this tutorial for your own projects? Let us know in the comments!
9 Comments
Leave a Reply
Tale of Painters is the unofficial Warhammer hobby magazine run by hobbyists like you. Support our work by using the affiliate links from our partner stores for your next orders so we can continue to bring you fantastic FREE content every day:


![]()
![]()
Or support us directly:


Random question from years later lol
for the specific nighthaunt model you’re using for example, How did you deal with the seam along the edge of the left shoulder?
I filled the gap with Liquid Green Stuff or a similar filler I’d say
looks most excellent. As P3 isn't stocked in my country, what would you recommended instead for Turquoise Ink?
Difficult, because the Turquoise ink is so vibrant. Best options would be Coelia Greenshade, it's much darker though but would tie into the gradient created in step 7, or you could try Terradon Turquoise thinned down with Lahmian or Contrast Medium, maybe with a little bit of Aethermatic Blue to brighten it up. Hope it helps 🙂
Cheers mate! very helpful
I like the sound of the mix, that Aethermatic blue looks great for possibly a bright bluish flame!
Damn…those look really cool, I don't do AoS but I have 1 Nighthaunt model that I might try this on…thanks man.
One of the best tutorials ever!
Yeah, nice one! Really appreciate the effort you put into this one. It will def improve my painting as I’ll use this scheme. Many thanks mate.
Thanks man, best tutorial!