

In this tutorial, I’m going to share terrain building skills I learnt in the 1990s from reading White Dwarf articles. This build is directly inspired from the article in White Dwarf issue 180 with some modern twists. After the jump, this tutorial will fully explain in detail how I made the ruins in the picture above.
Things you’ll need:
5mm thick plywood board
5mm thick foamcore board Foamcore is a piece of foam sandwiched between two sheets of card (available in artshops)
Electric Jigsaw or hacksaw
Metal Ruler
Pen (Sharpie is good)
Craftknife / Scalpel
Hot glue gun
E6000 glue
Superglue
Wood glue
Milliputt modelling clay (Yellow/Grey)
Filler (Polyfiller, wood filler etc)
600 grit sandpaper
Plasticard
Sand
Aquarium Gravel
Slate, small rocks
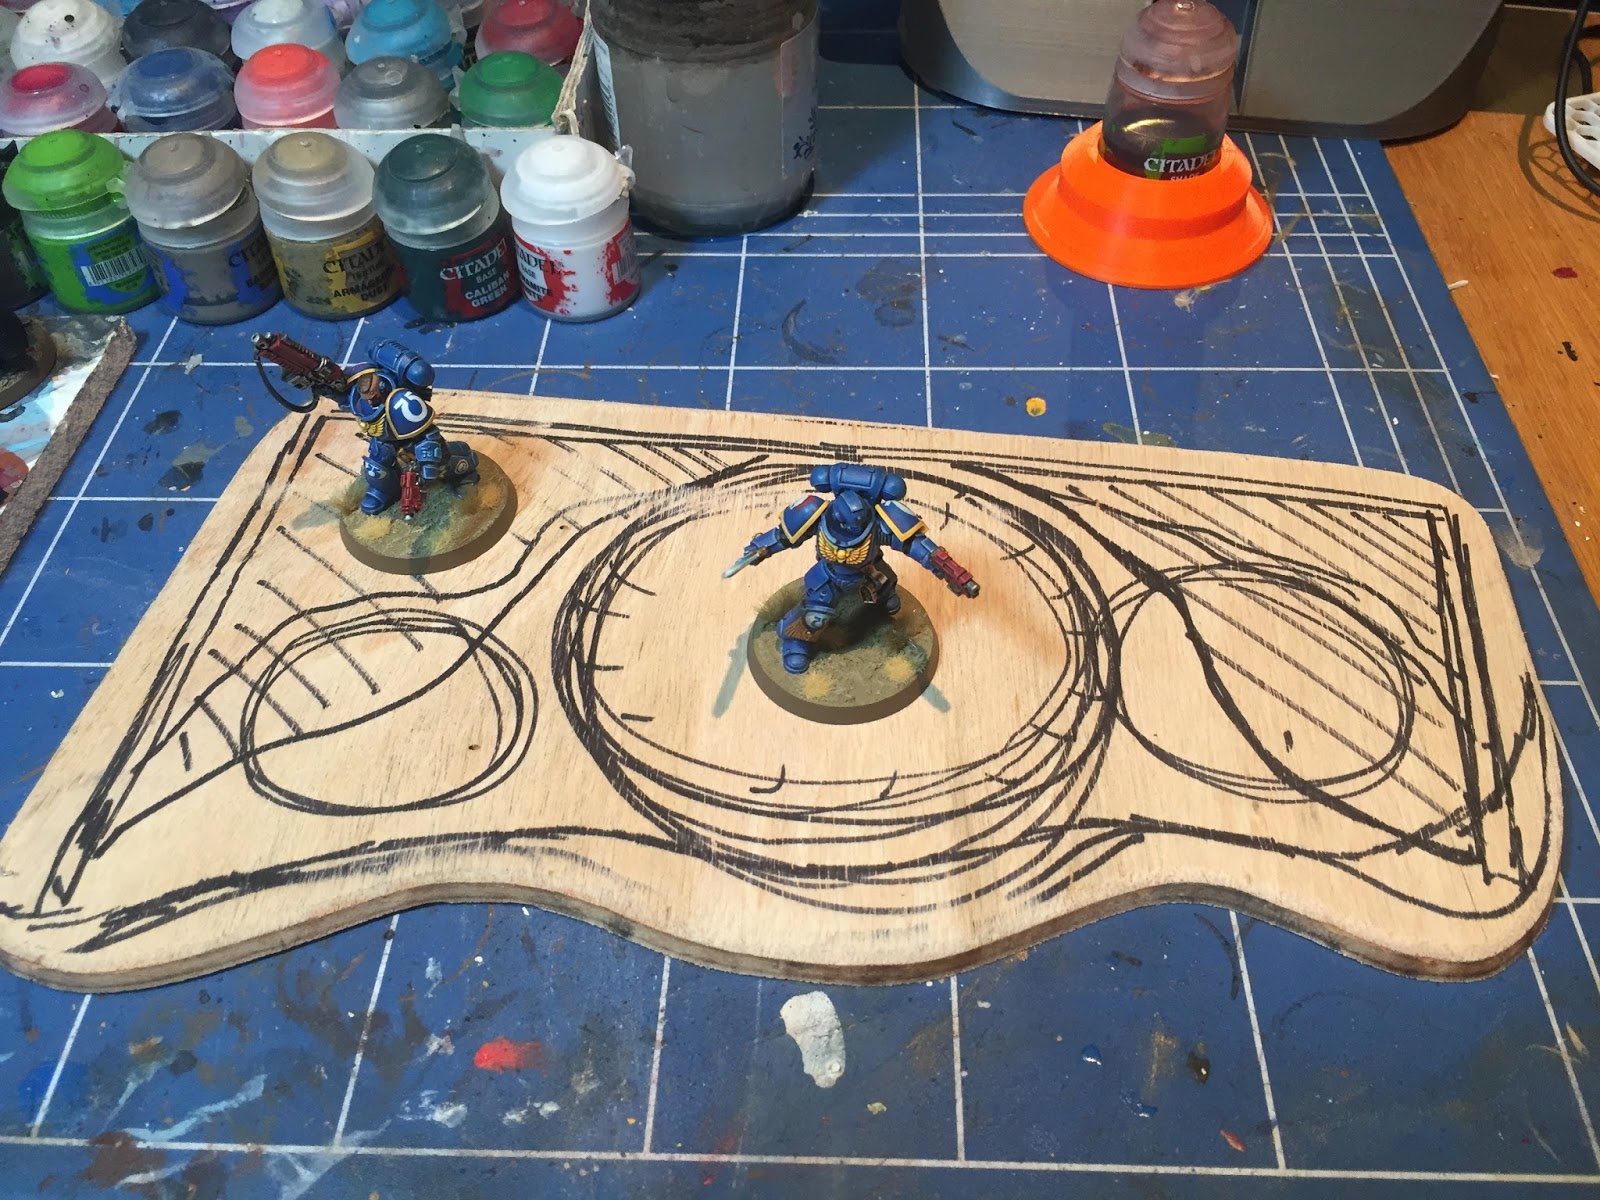
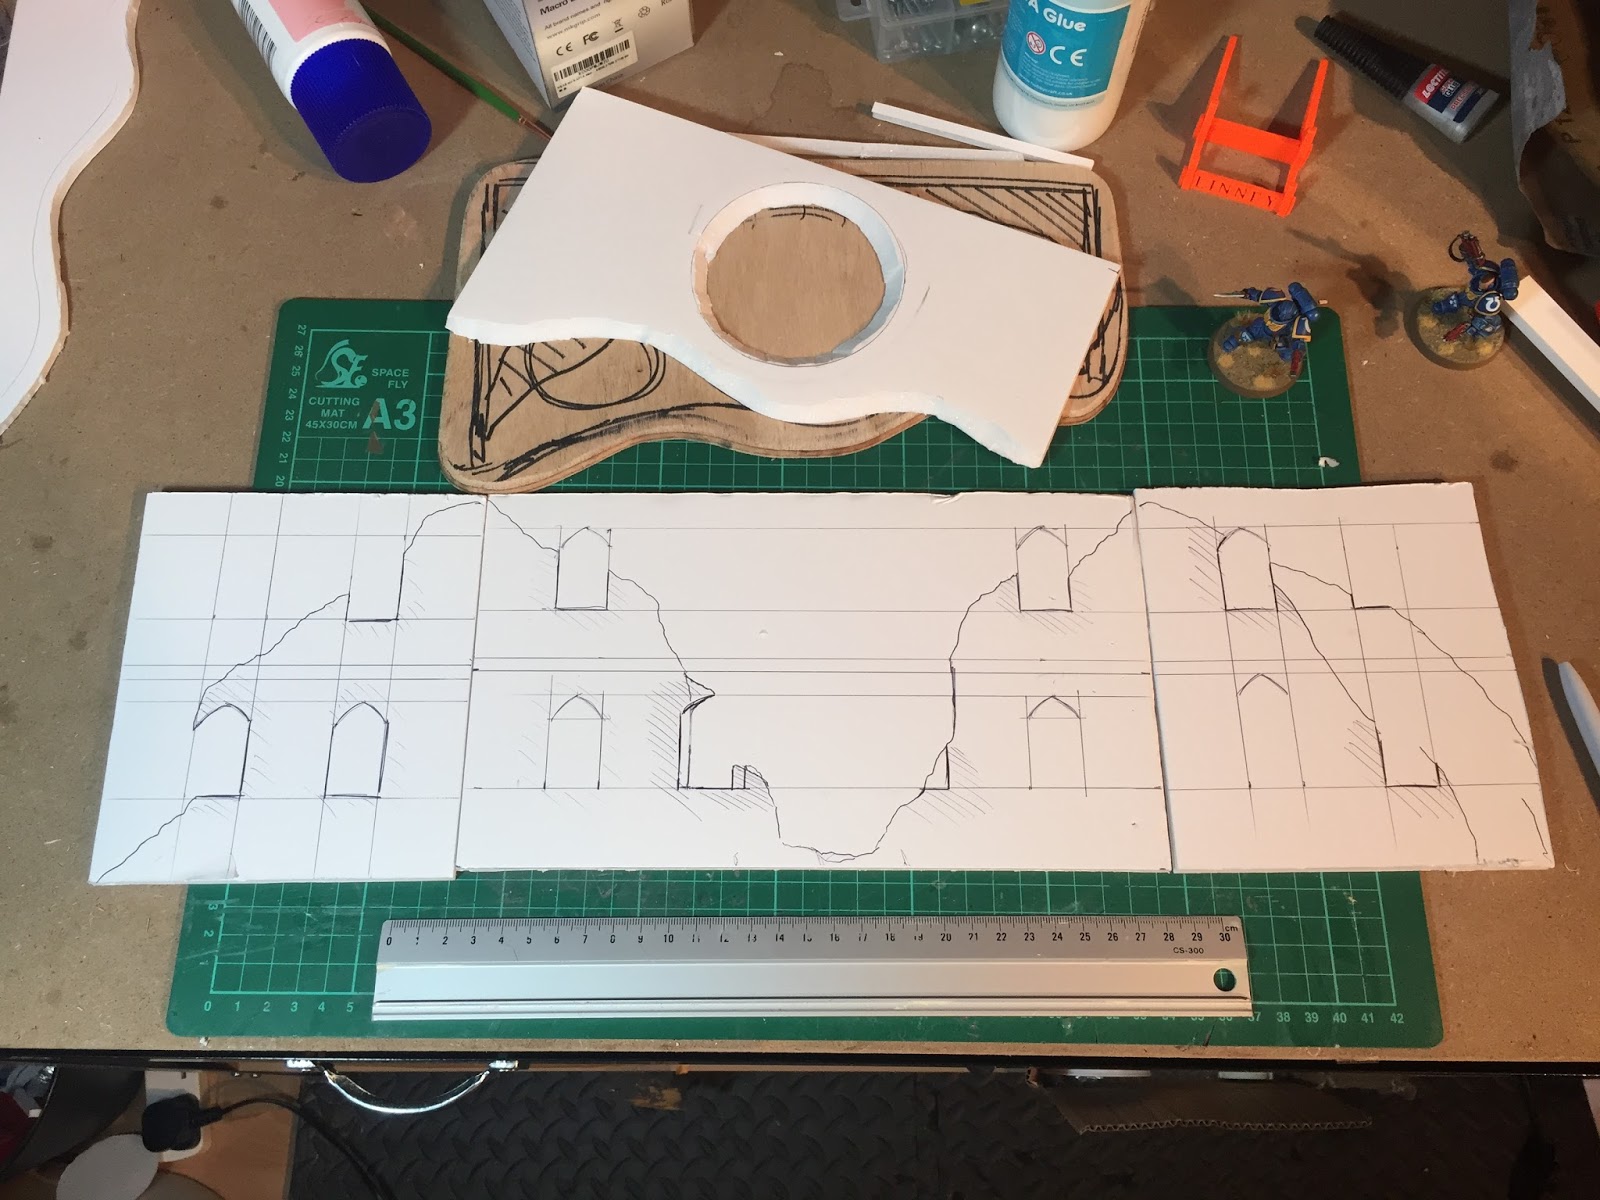
1.1 Sketch out your floorplan
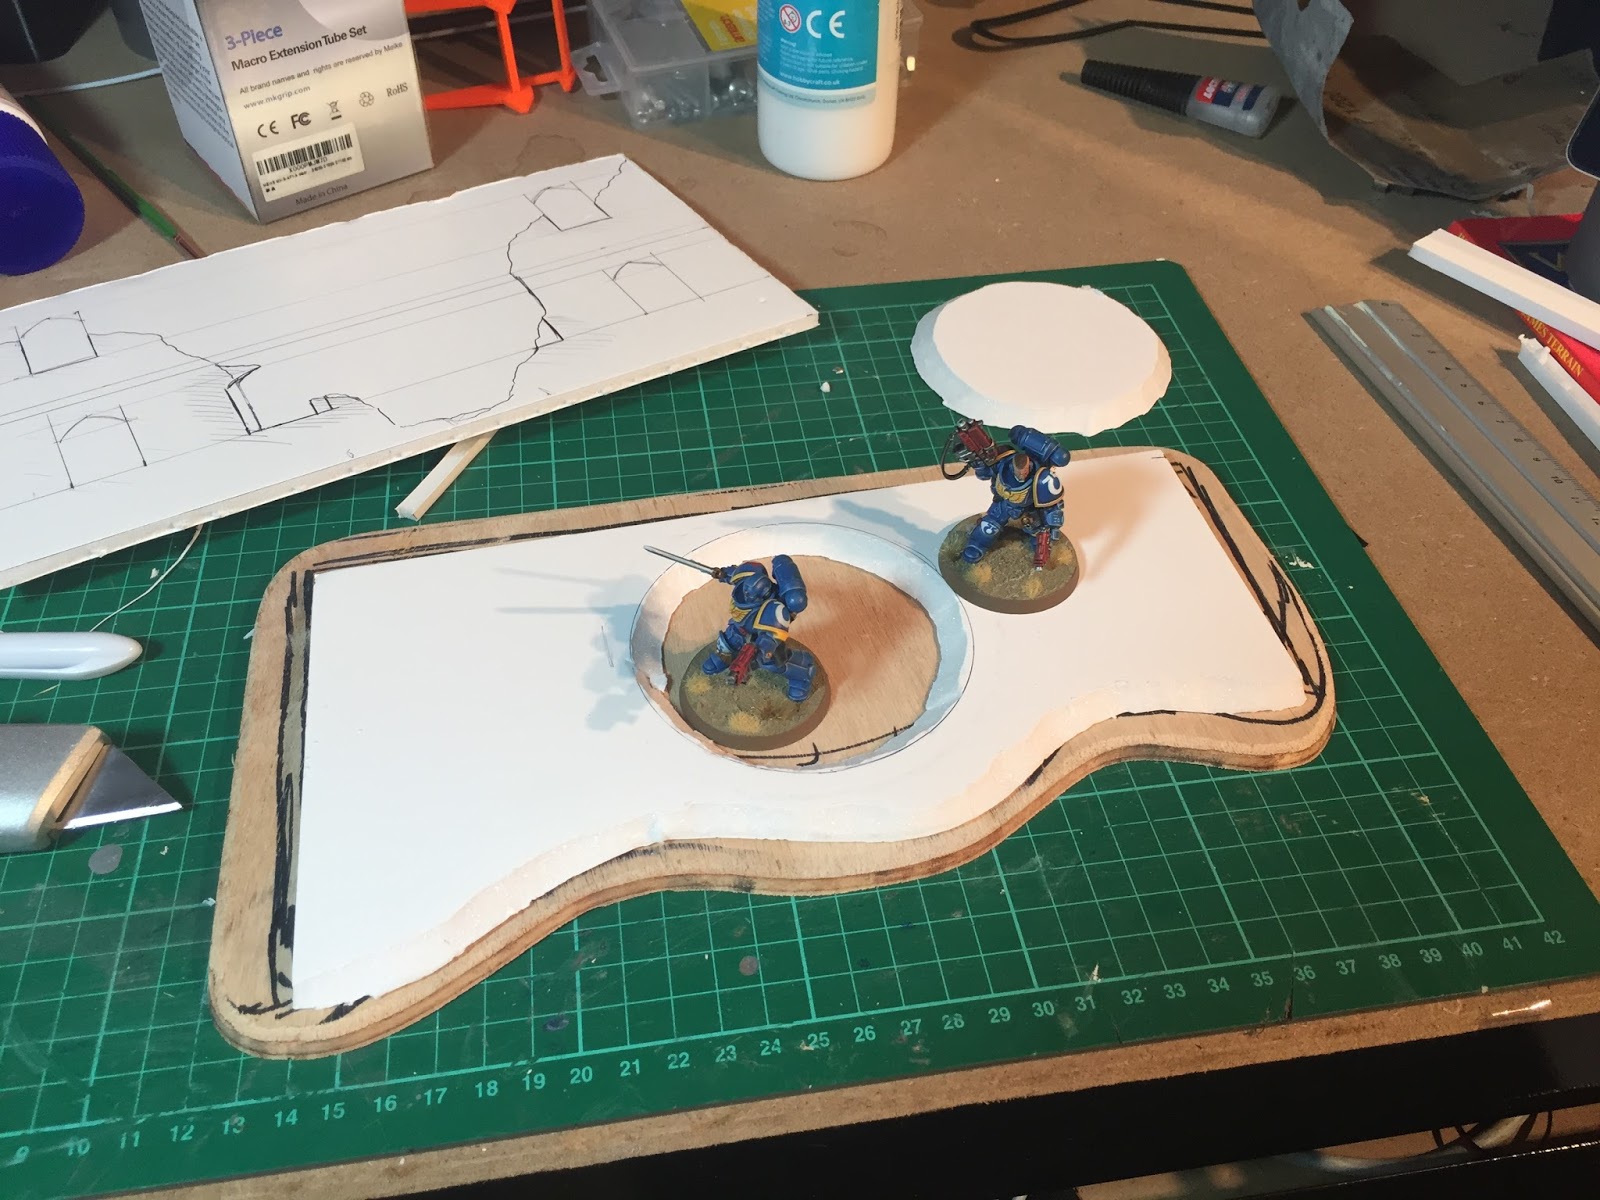
1.2 Cut the foamcore board to your floorplan
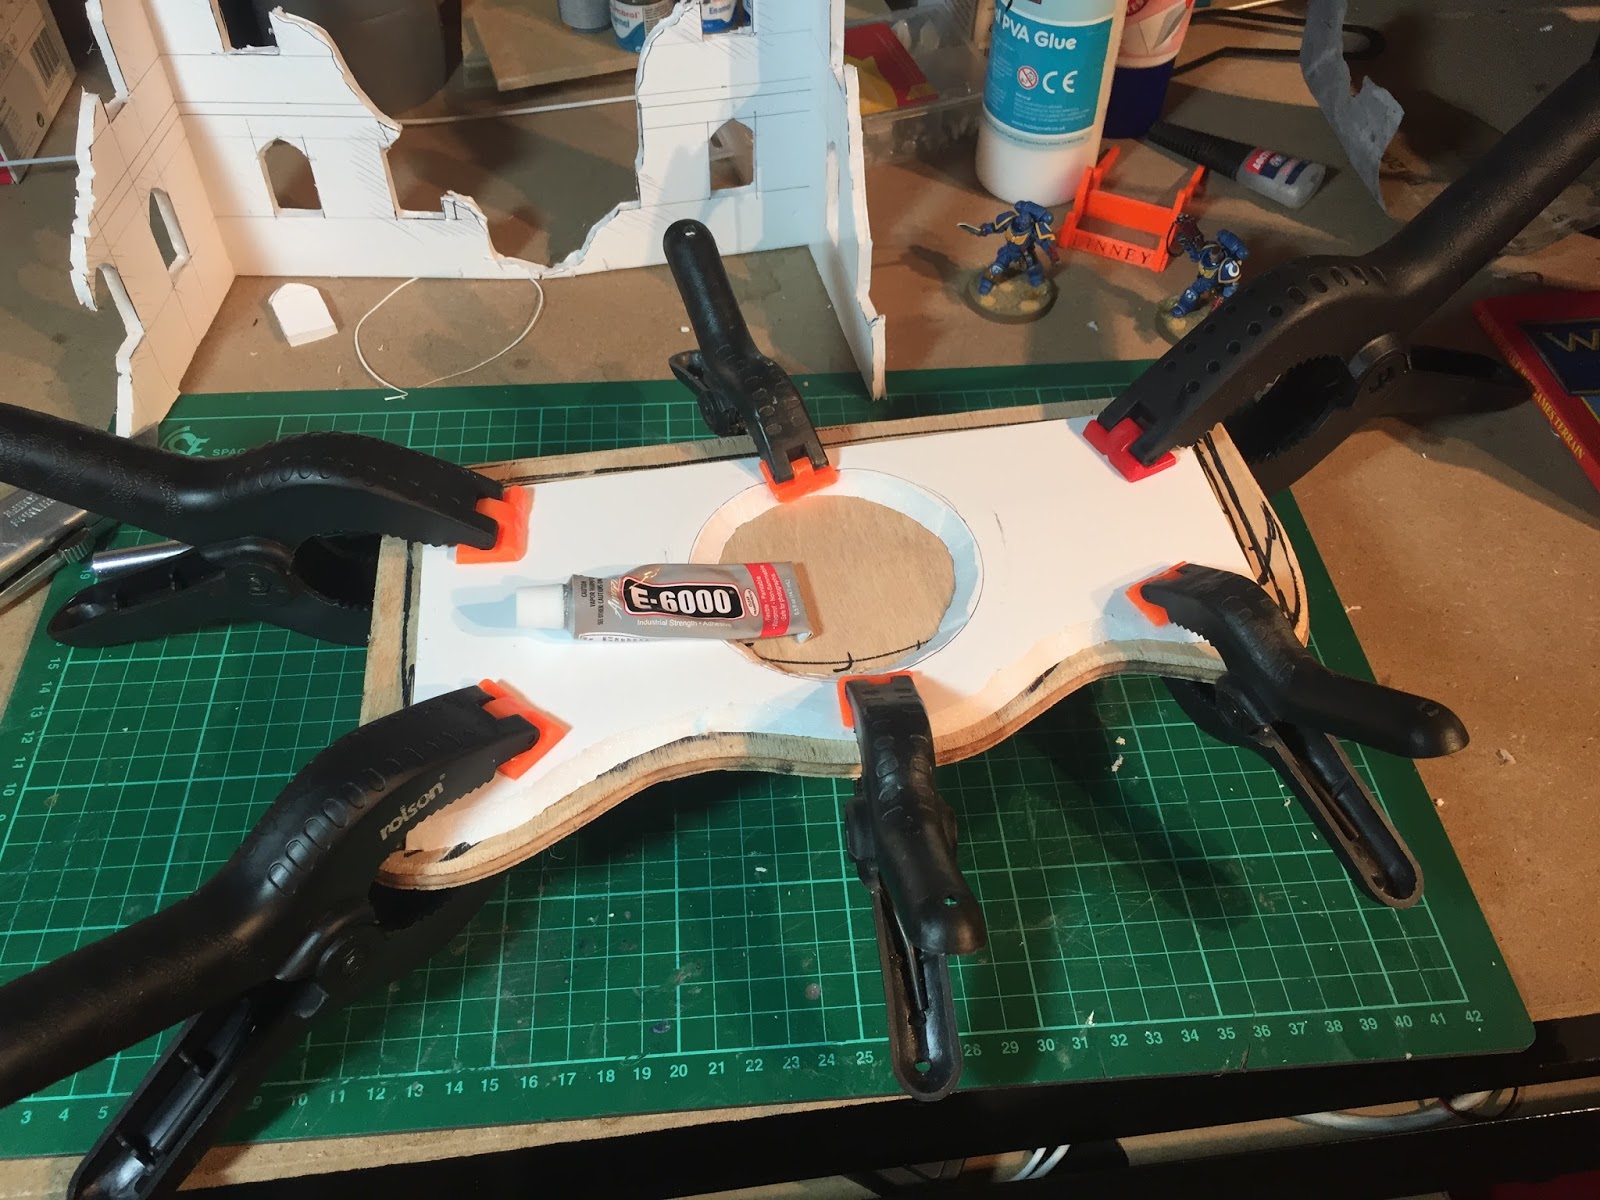
1.3 Glue the foamcore to the plywood base

1.4 Build the base up with another layer
Stage 1: The Base.
Sketch out the floor plan for your ruins roughly on the plywood. (pic 1.1). Once you’ve decided on your floorplan, draw the edge of the base. The base edge should be 10 to 15mm from the ruins/crater. Set the jigsaw bottom plate at an angle to give your base edge a tapered slope similar to a citadel miniatures base. Then cut a piece of foamcore (pic 1.2) to your floorplan using a craftknife. Keep the edges that the walls will touch at 90º but the other edges like the crater and front edge cut with a slope. Glue the foamcore to the plywood (pic 1.3). I use a flexible strong adhesive called E6000. You can use any glue that won’t shrink and warp the base out of shape. Use clamps or some heavy books on the two pieces until the glue sets. The final part of this stage is to cut another layer of foamcore and glue this on top of the last layer (pic 1.4).
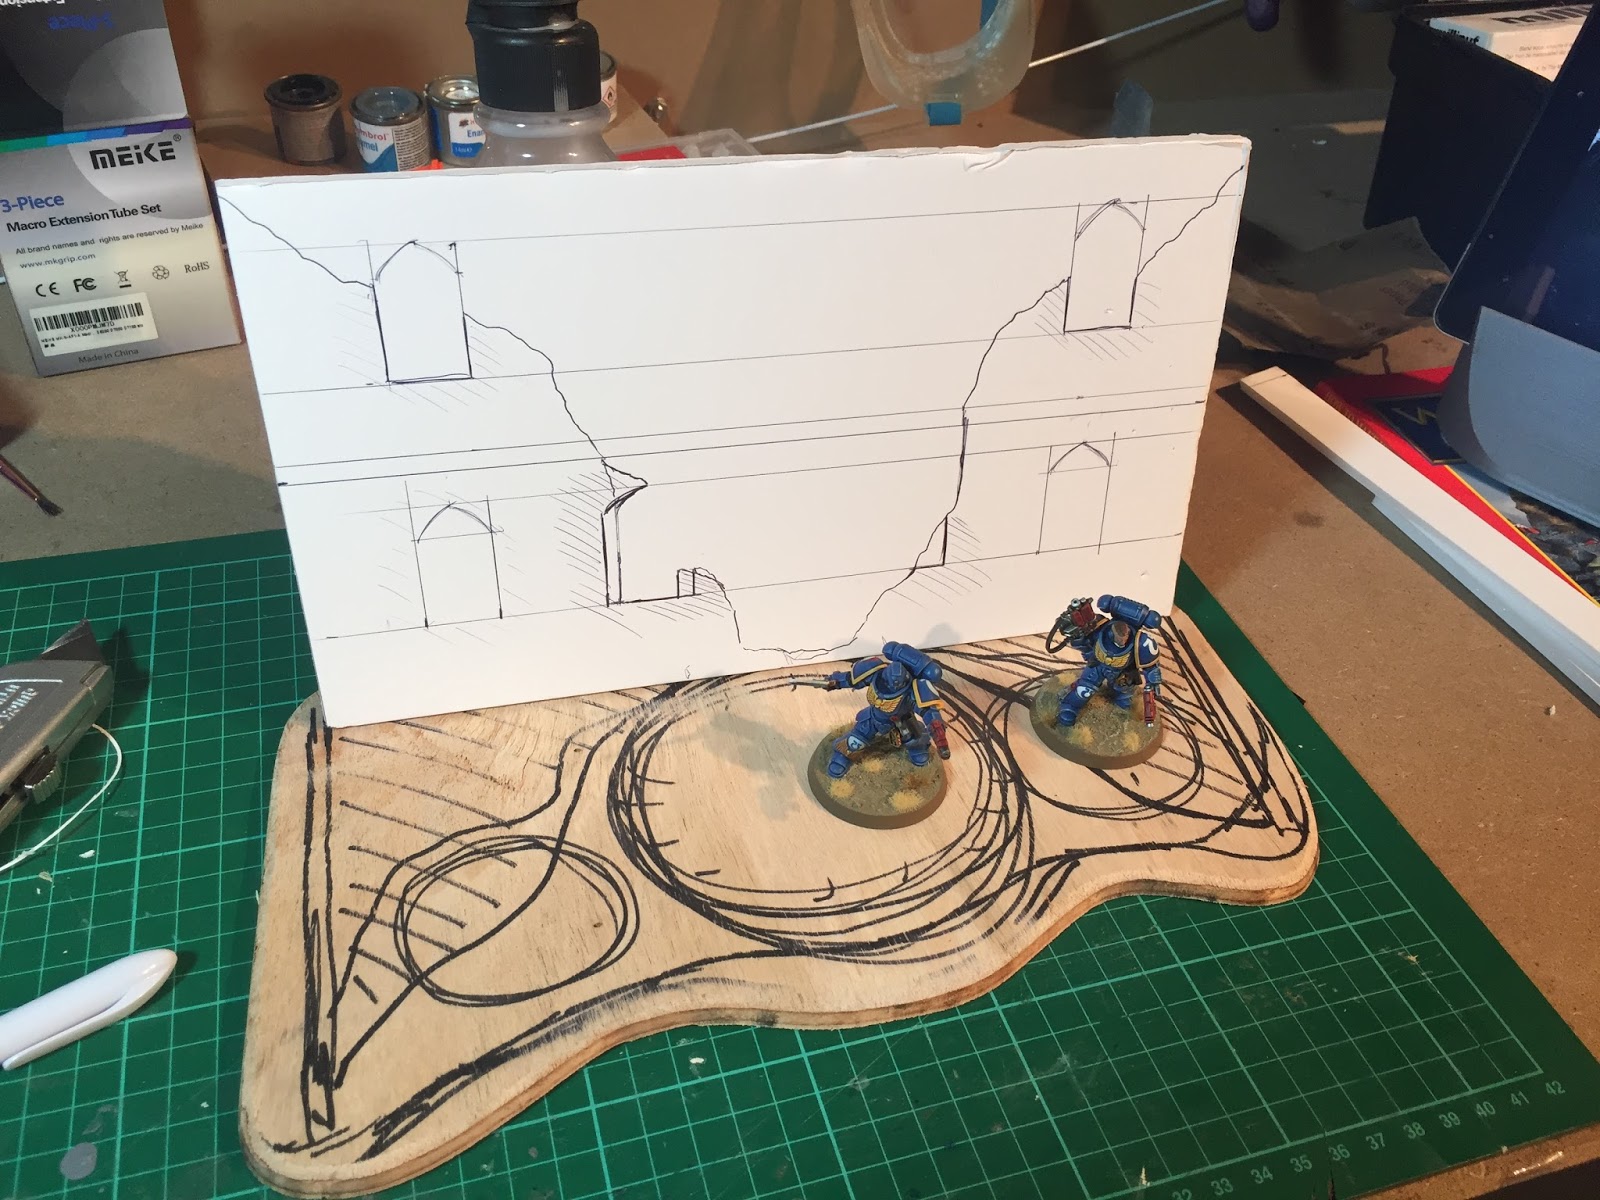
2.1 Measure and draw out the longest wall
2.2 Use the same measurements on the smaller walls
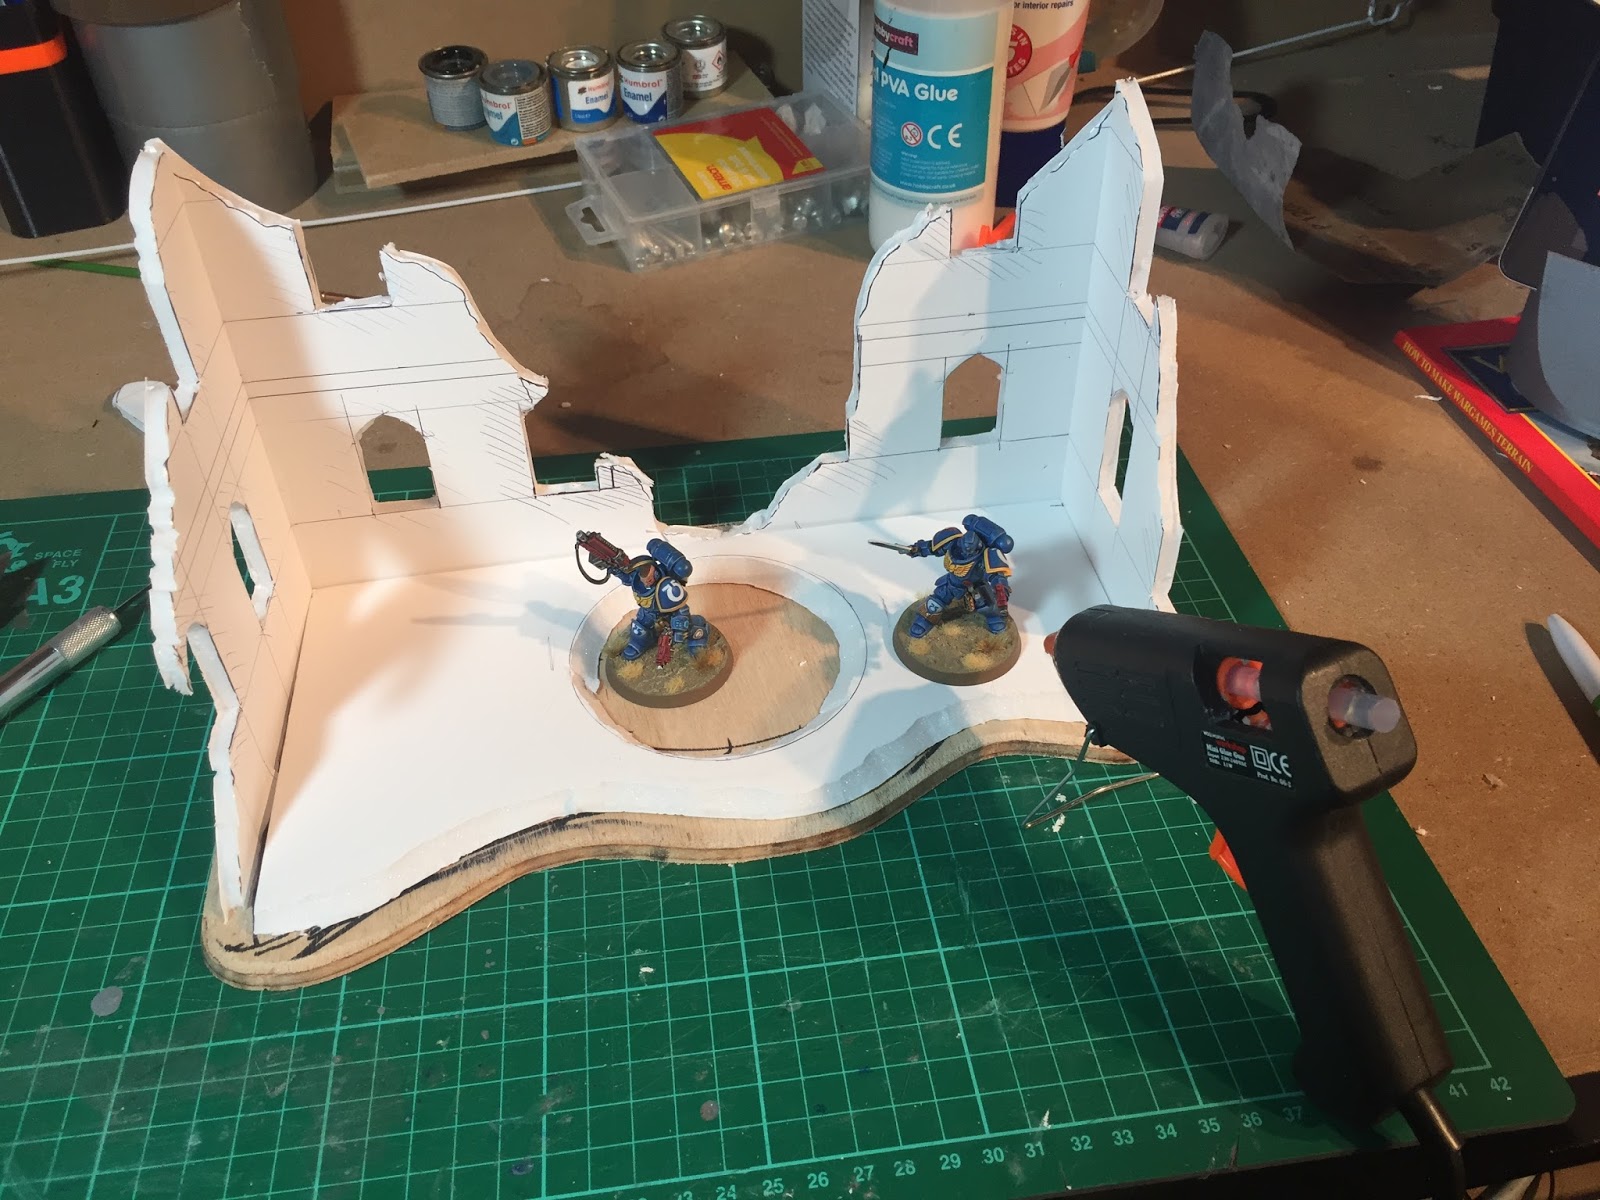
2.3 Hot glue gun the walls together
Stage 2: Building the Walls.
Using a pen and ruler measure out the height you want your floors and windows on the longest wall section (pic 2.1). It’s useful to have a few miniatures on hand to make sure the models will fit and be able to see through the windows. Then use these measurements to draw the designs onto the smaller walls (pic 2.2). Using a sharp craftknife or scalpel carefully cut out the designs. Don’t use a blunt blade and always cut away from yourself. Once cut out, use a hot glue gun to join the smaller walls to the long wall (pic 2.3).
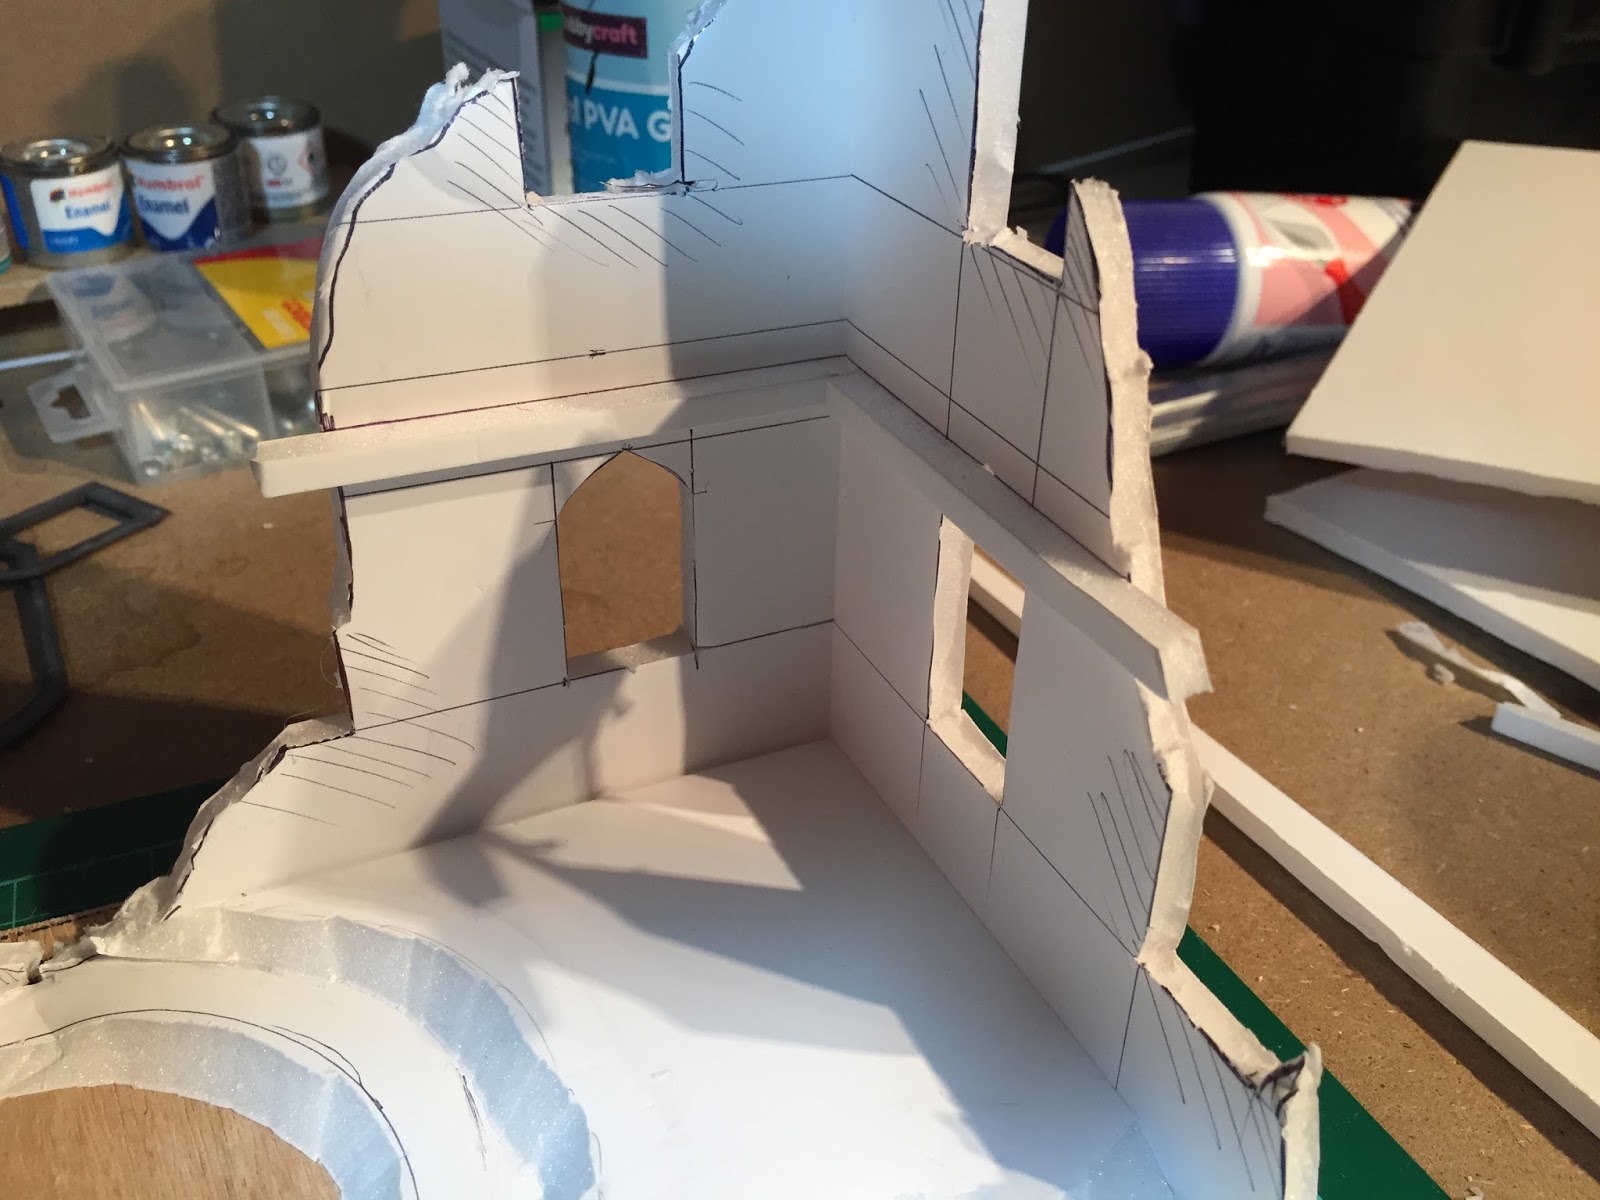
3.1 Superglue strips of foamcore just beneath where the first floor will go
3.2 Cut and superglue the floors on to the supports you just added.
Stage 3: Adding the floors.
Cut some thin strips of foamcore and superglue them to the walls (pic 3.1) just below where the floors will go. You can use superglue on the card surfaces of the foamcore but not on the foam. The foam will melt and dissolves so use the hotglue gun to glue the floors to the supports.
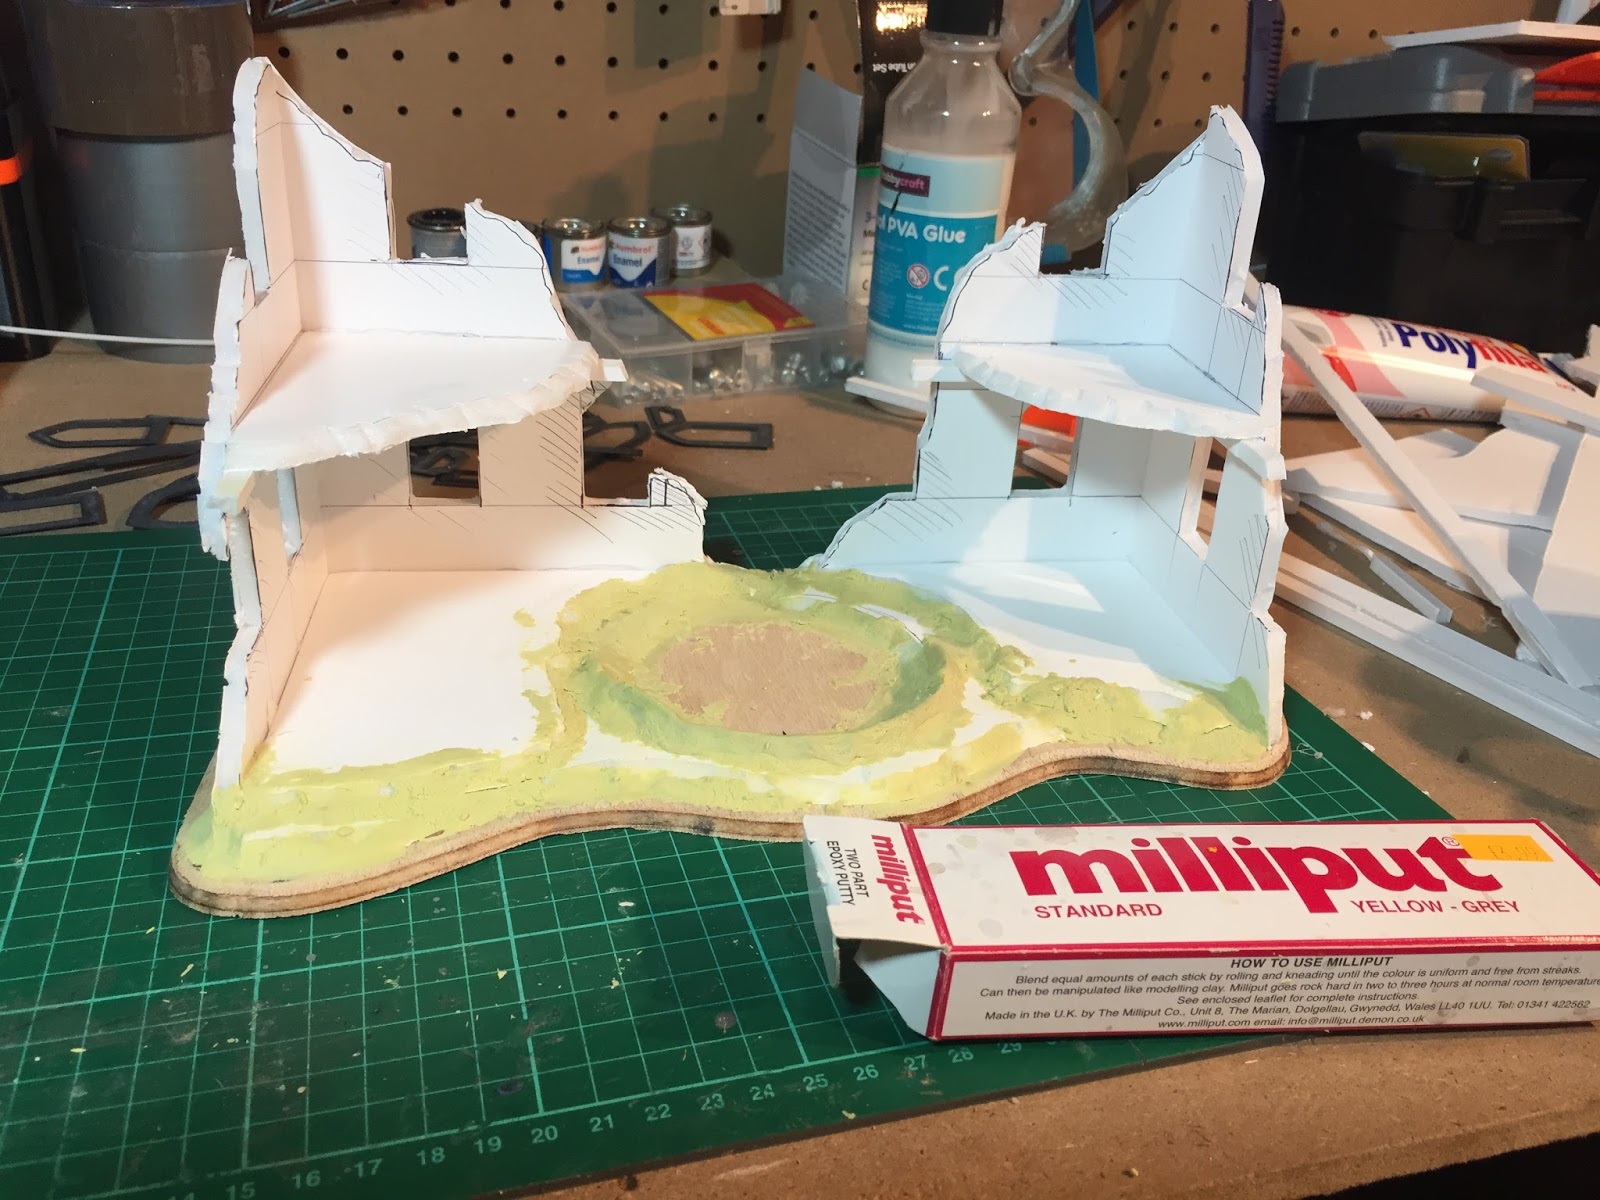
4.1 Shape and blend in the ruins edge with modelling putty.
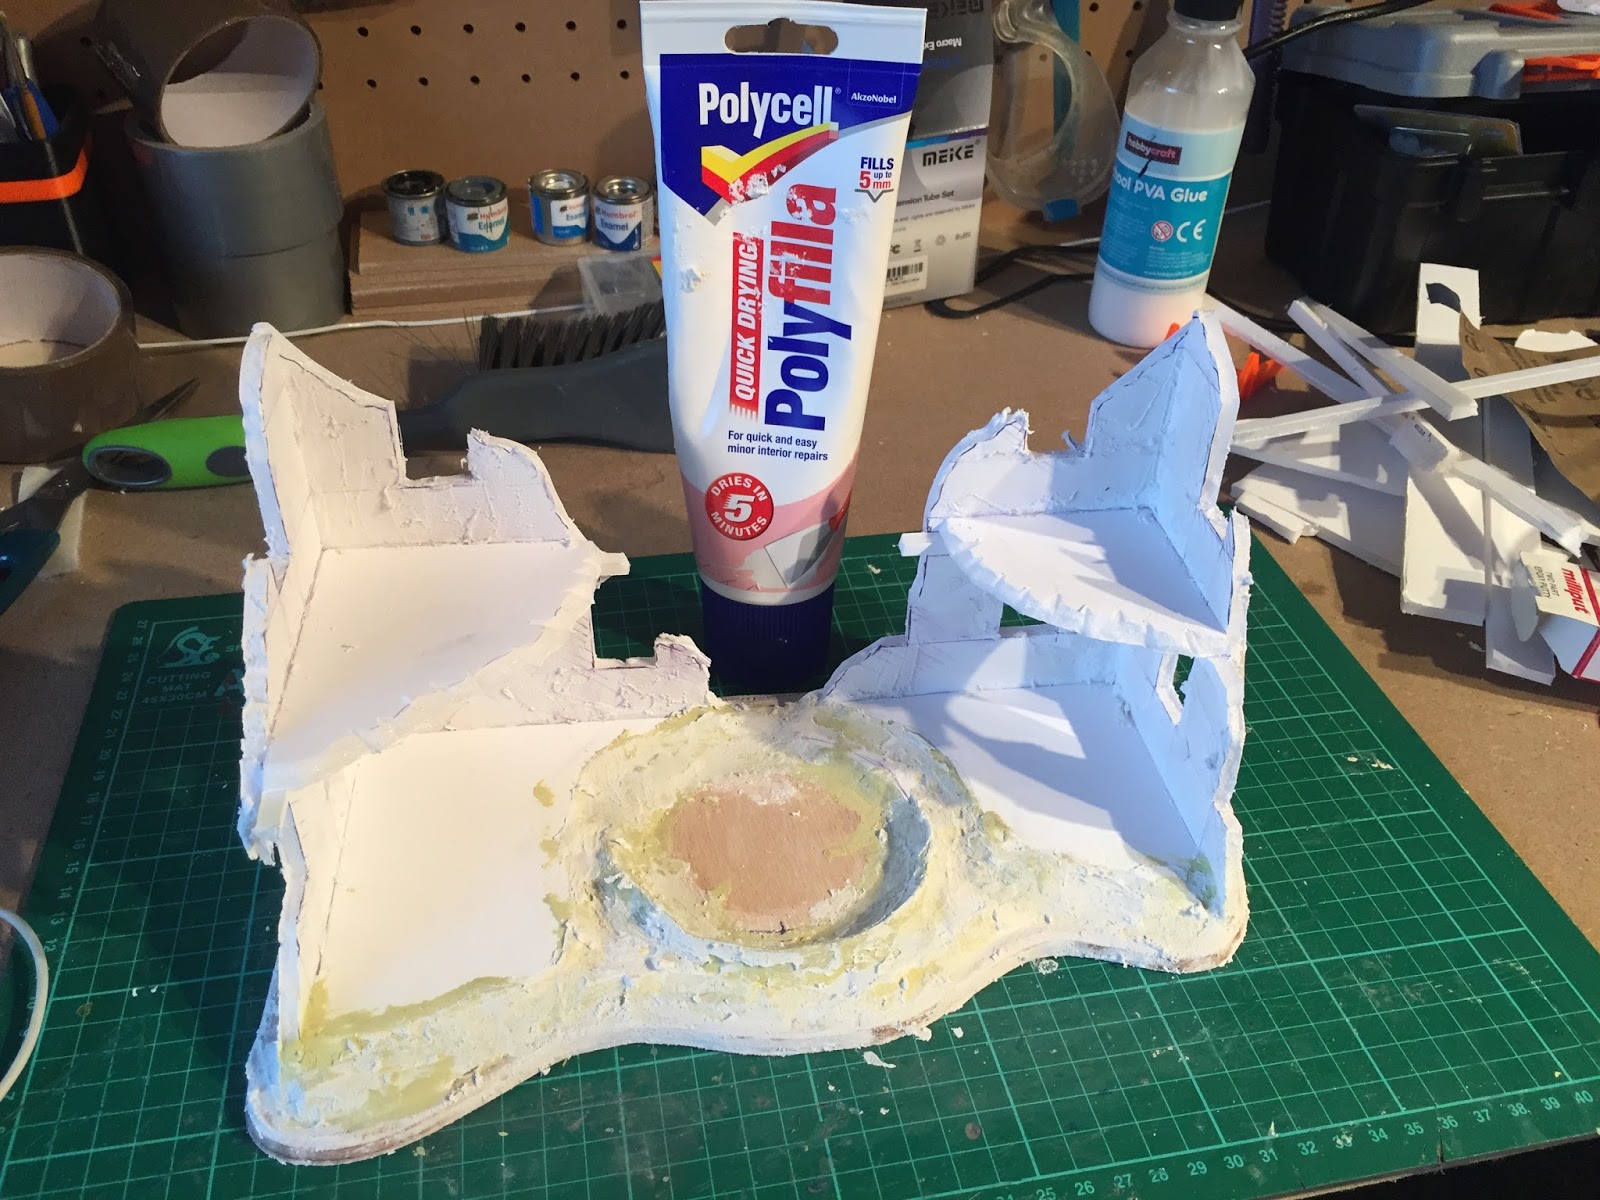
4.2 Use filler to further smooth and landscape the edges.
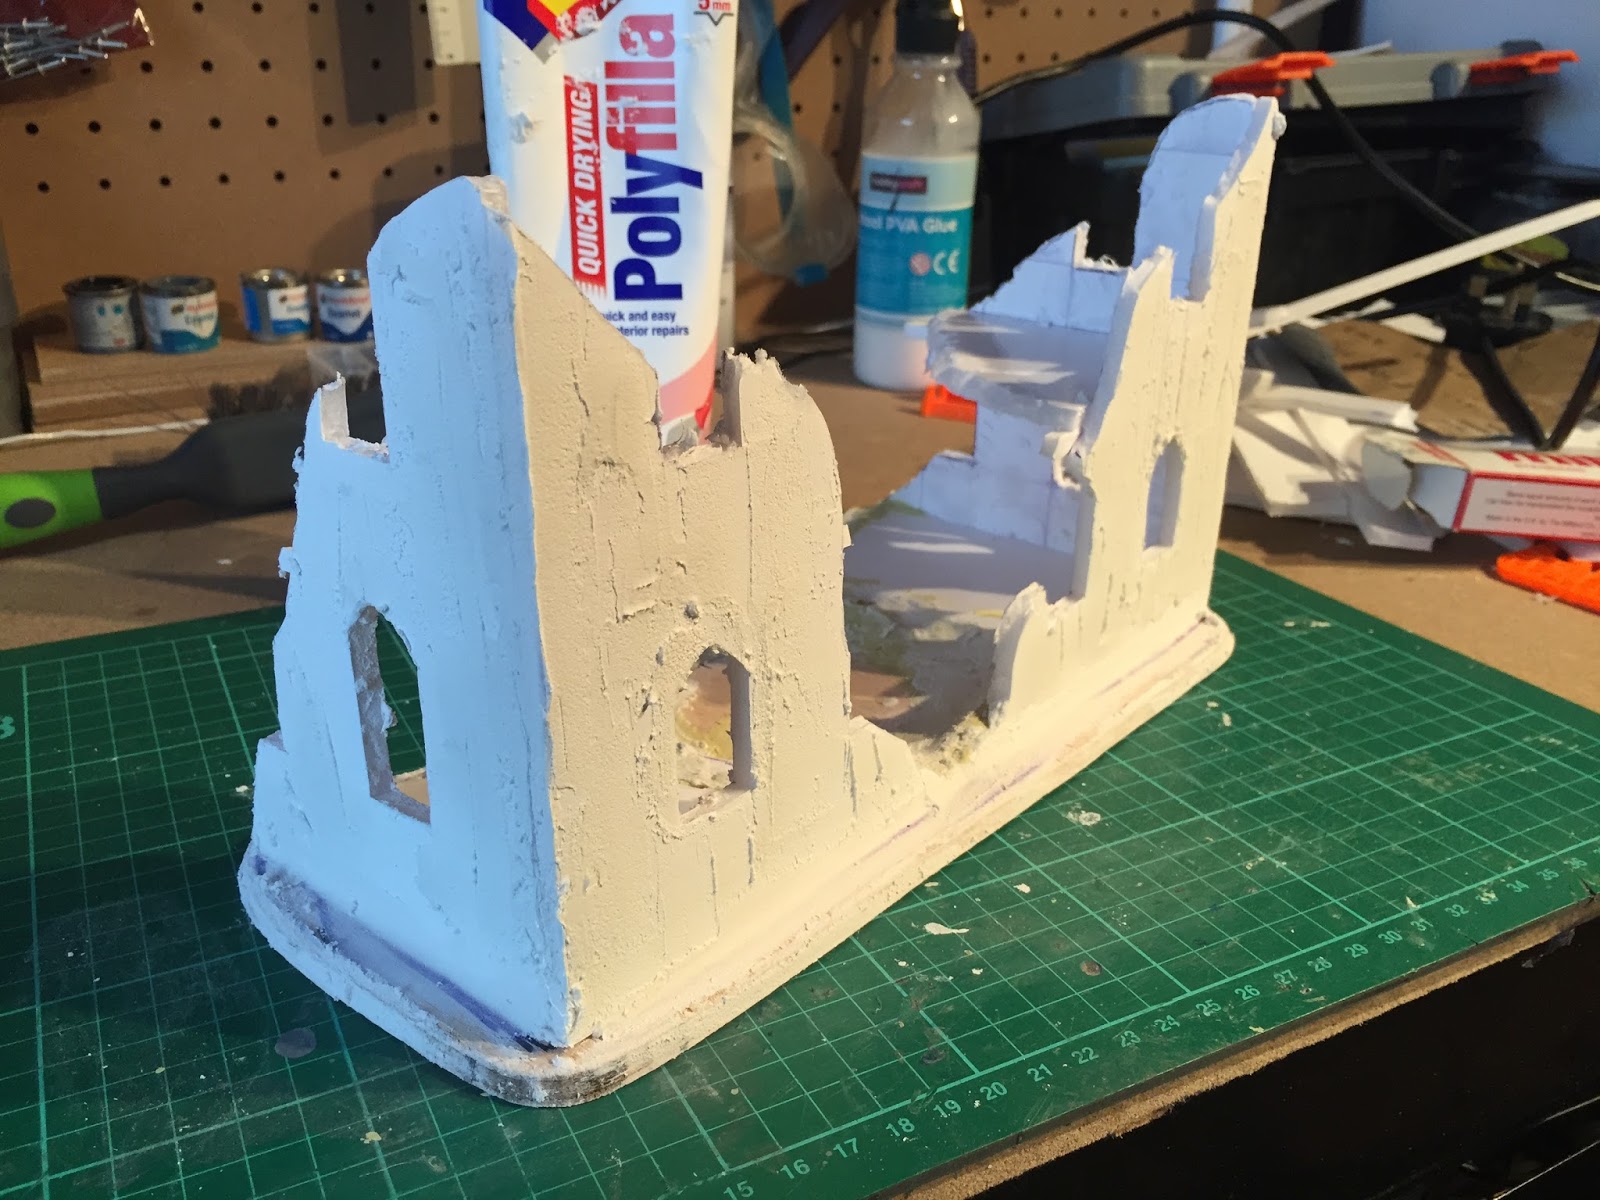
4.3 Apply filler to the walls.
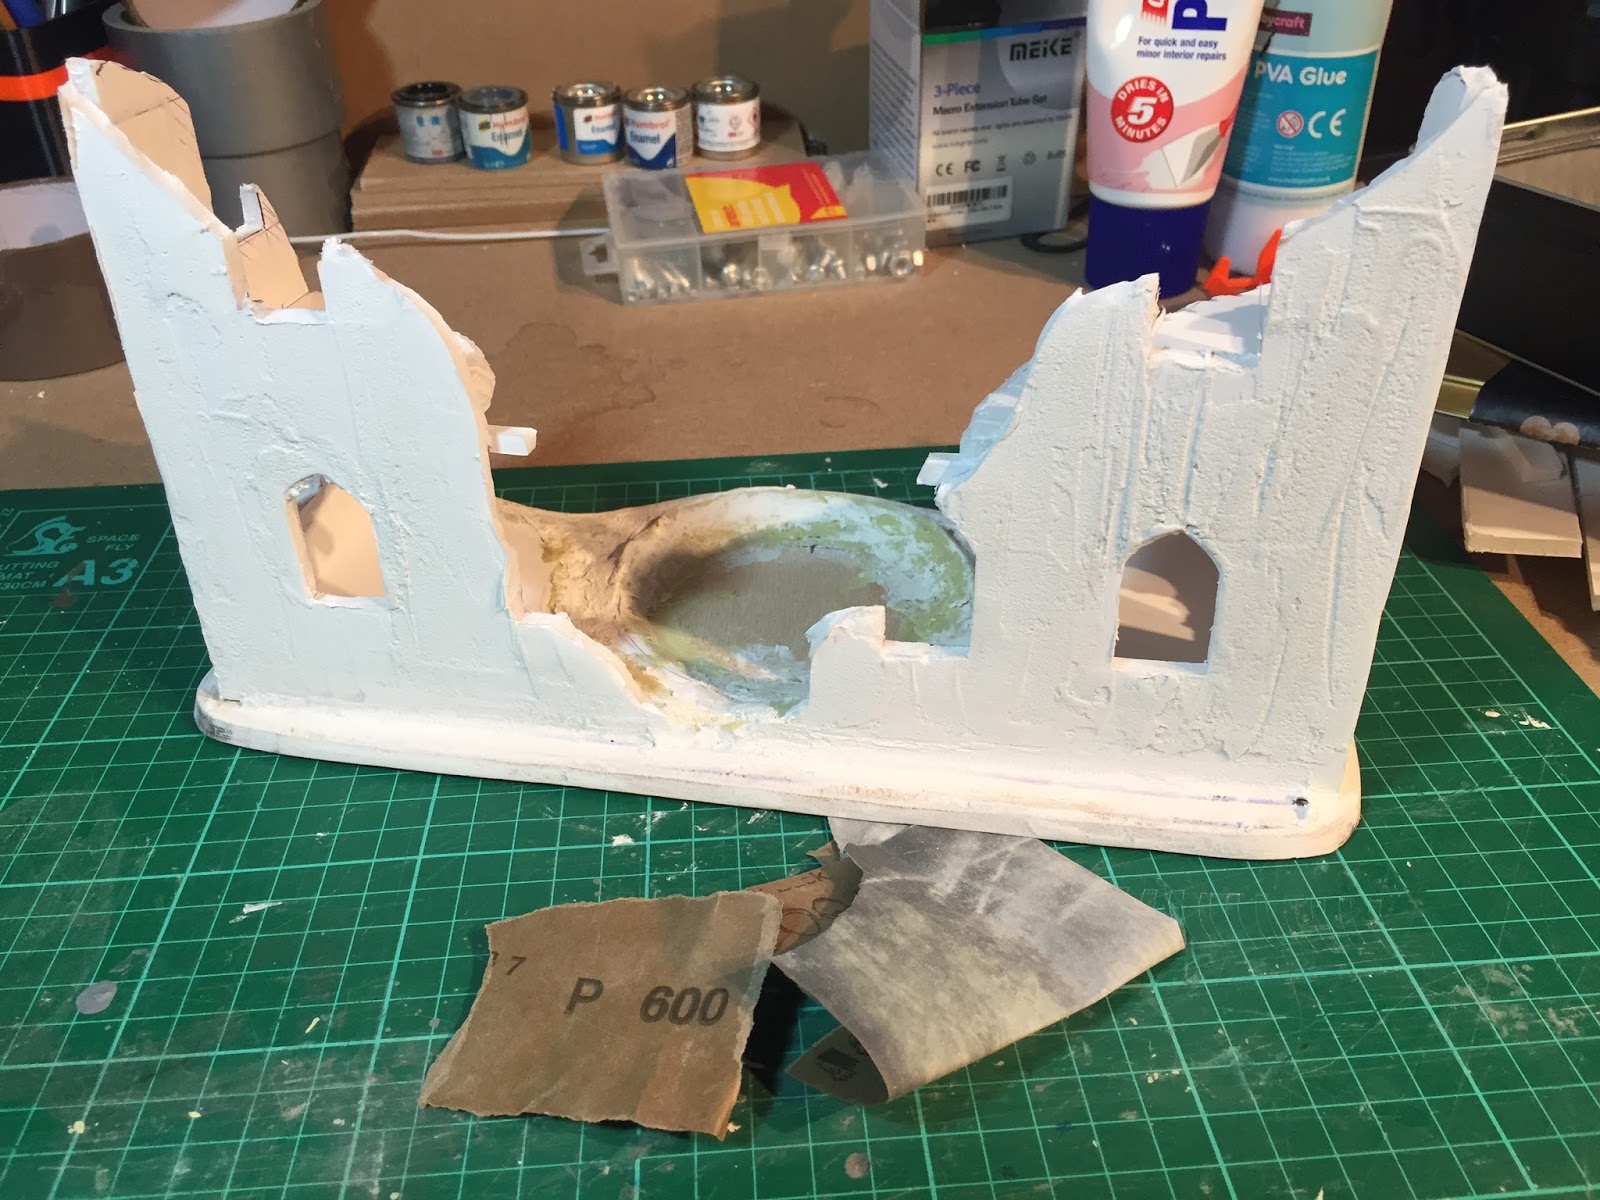
4.4 Lightly sand the walls with sand paper
Stage 4: Landscaping and texturing
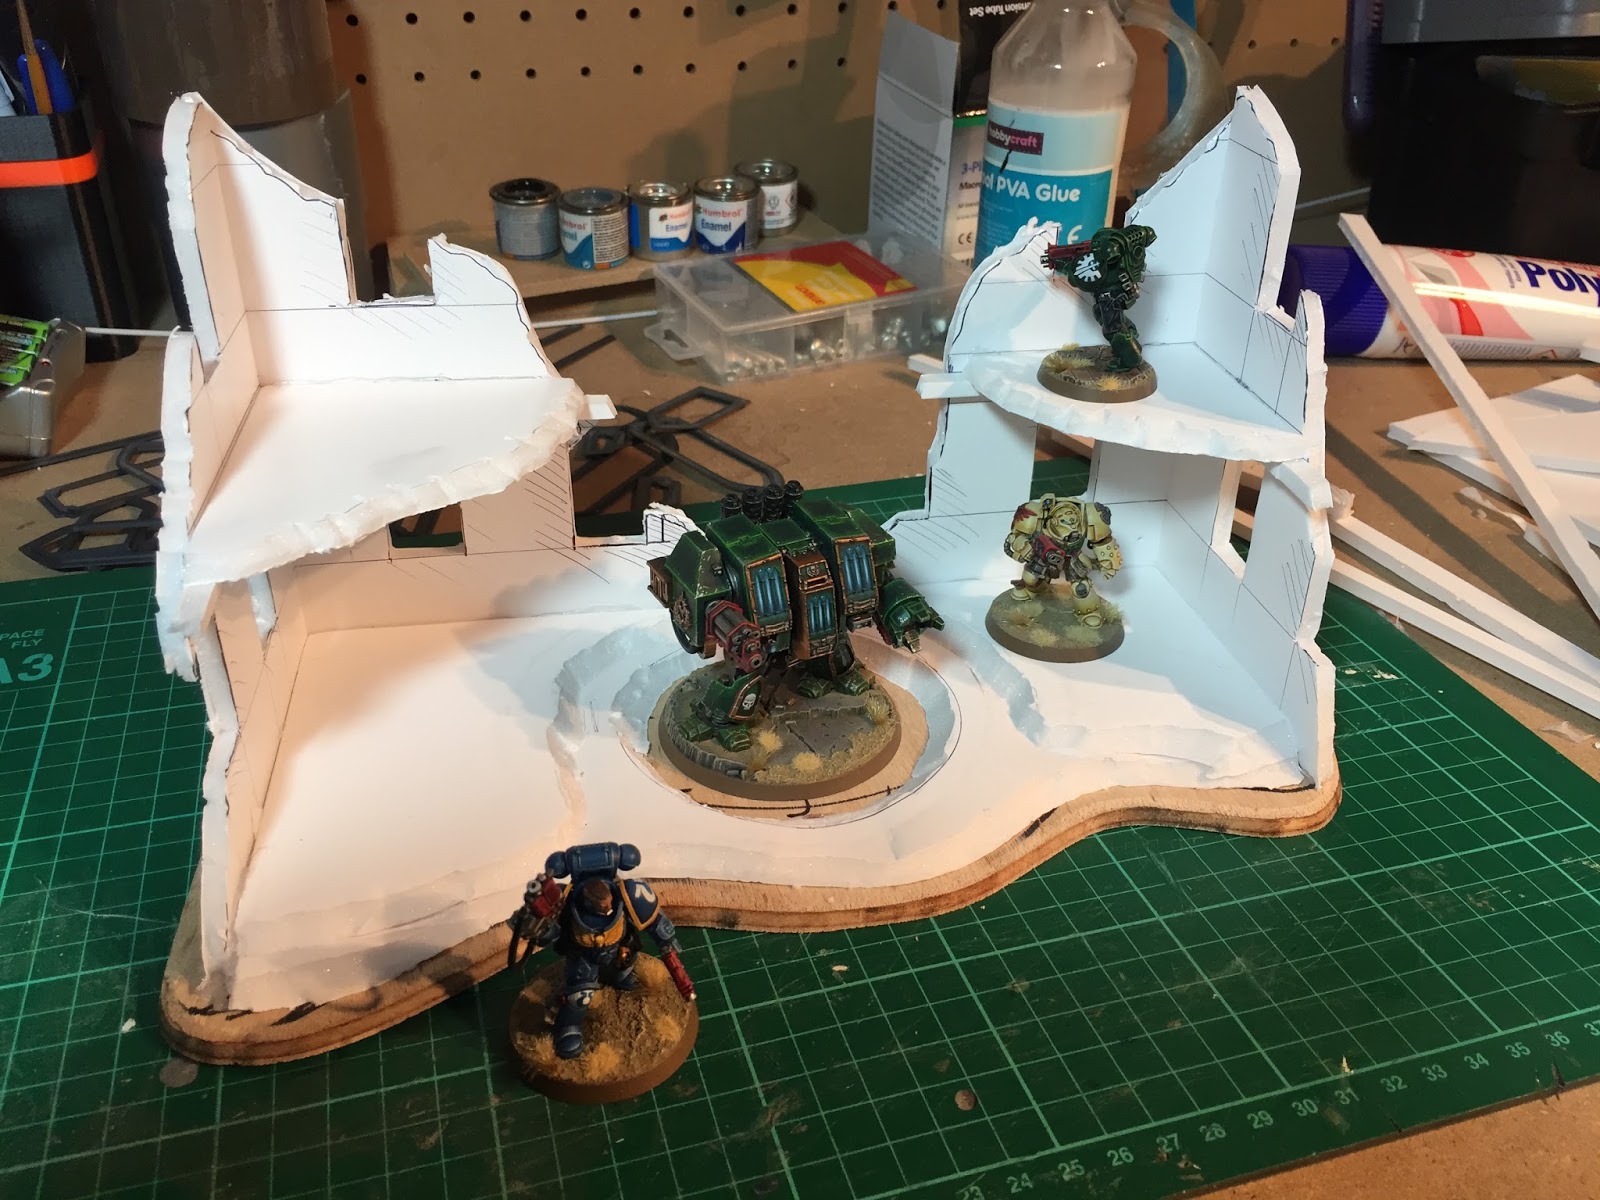
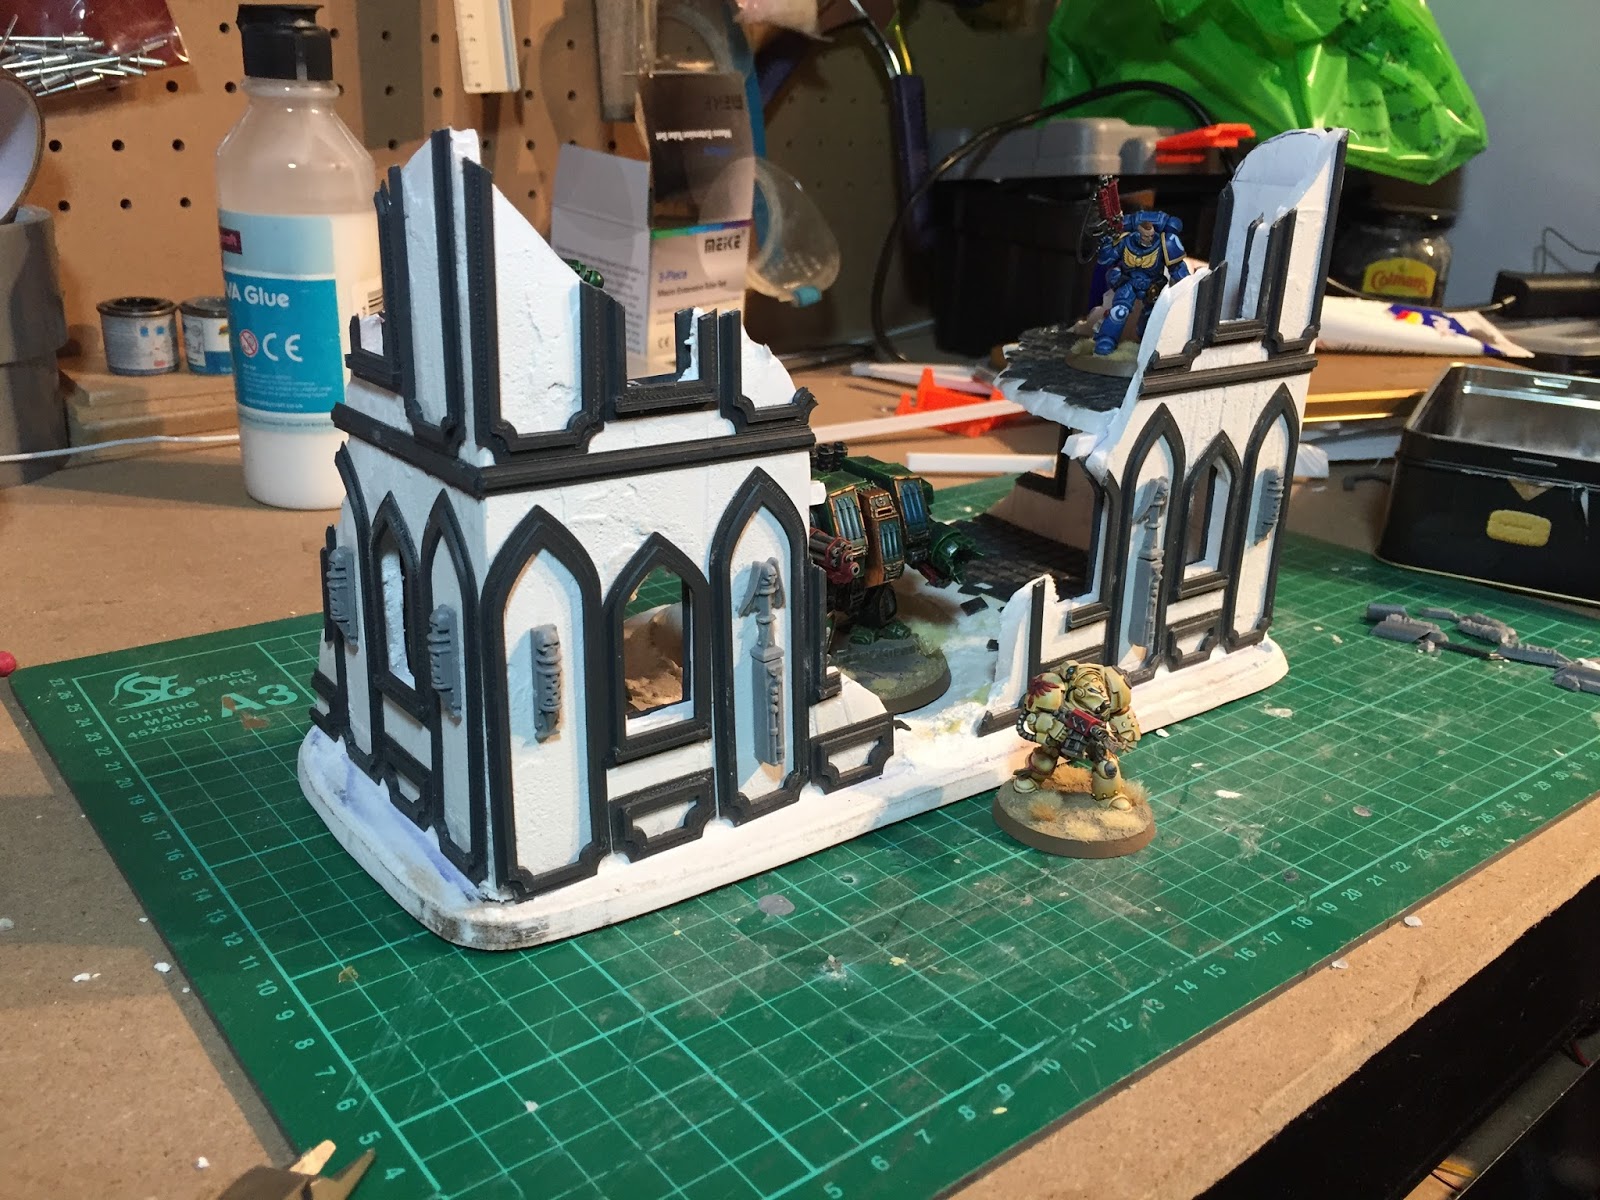
Mix the two part modelling putty together and then using your thumb, apply the putty to the crater and edges to landscape and shape the base (pic 4.1). Smooth out the landscaping further with polyfiller (pic 4.2). Continue using filler by applying it to the walls with a spare piece of plasticard as a spatula (pic 4.3). Don’t forget to use filler on the edge of the plywood base. Sand the filler on the base edge smooth and sand the walls lightly to leave some texture to them. Use a fine sand paper like 600 grit.
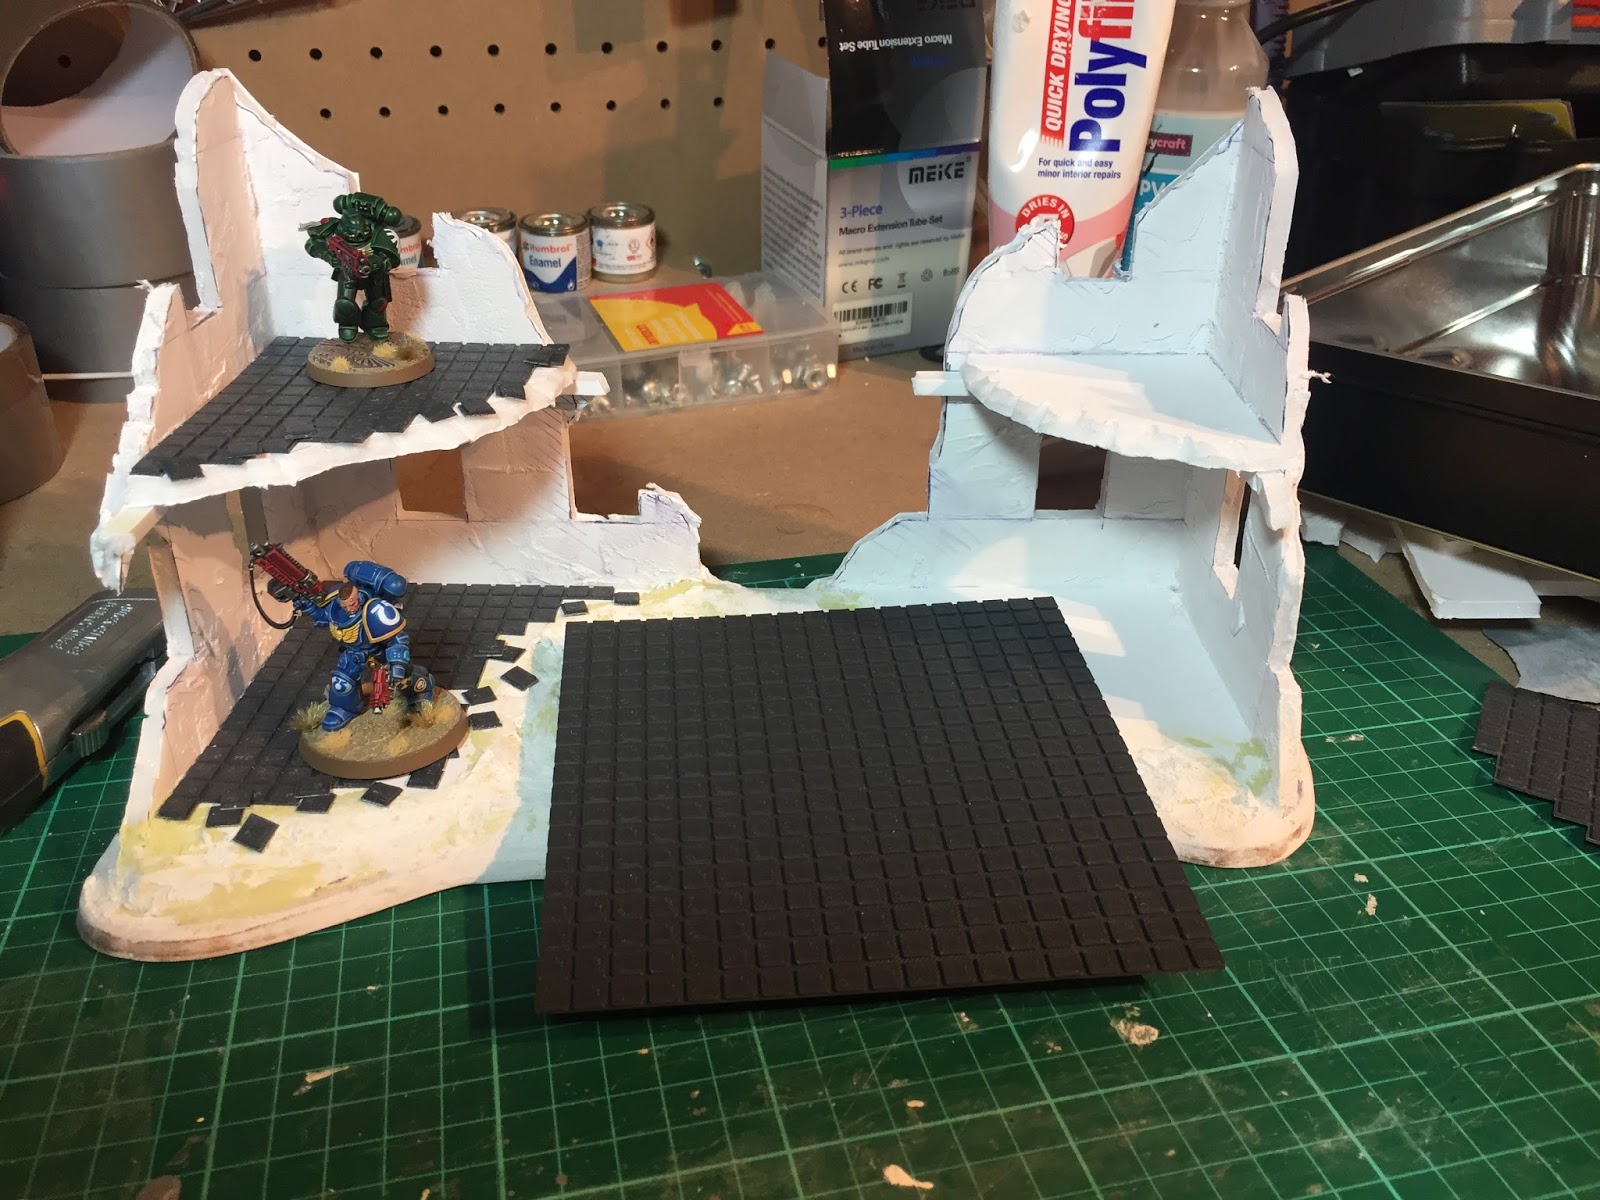
5.1 3D printed floor tiles cut to shape.
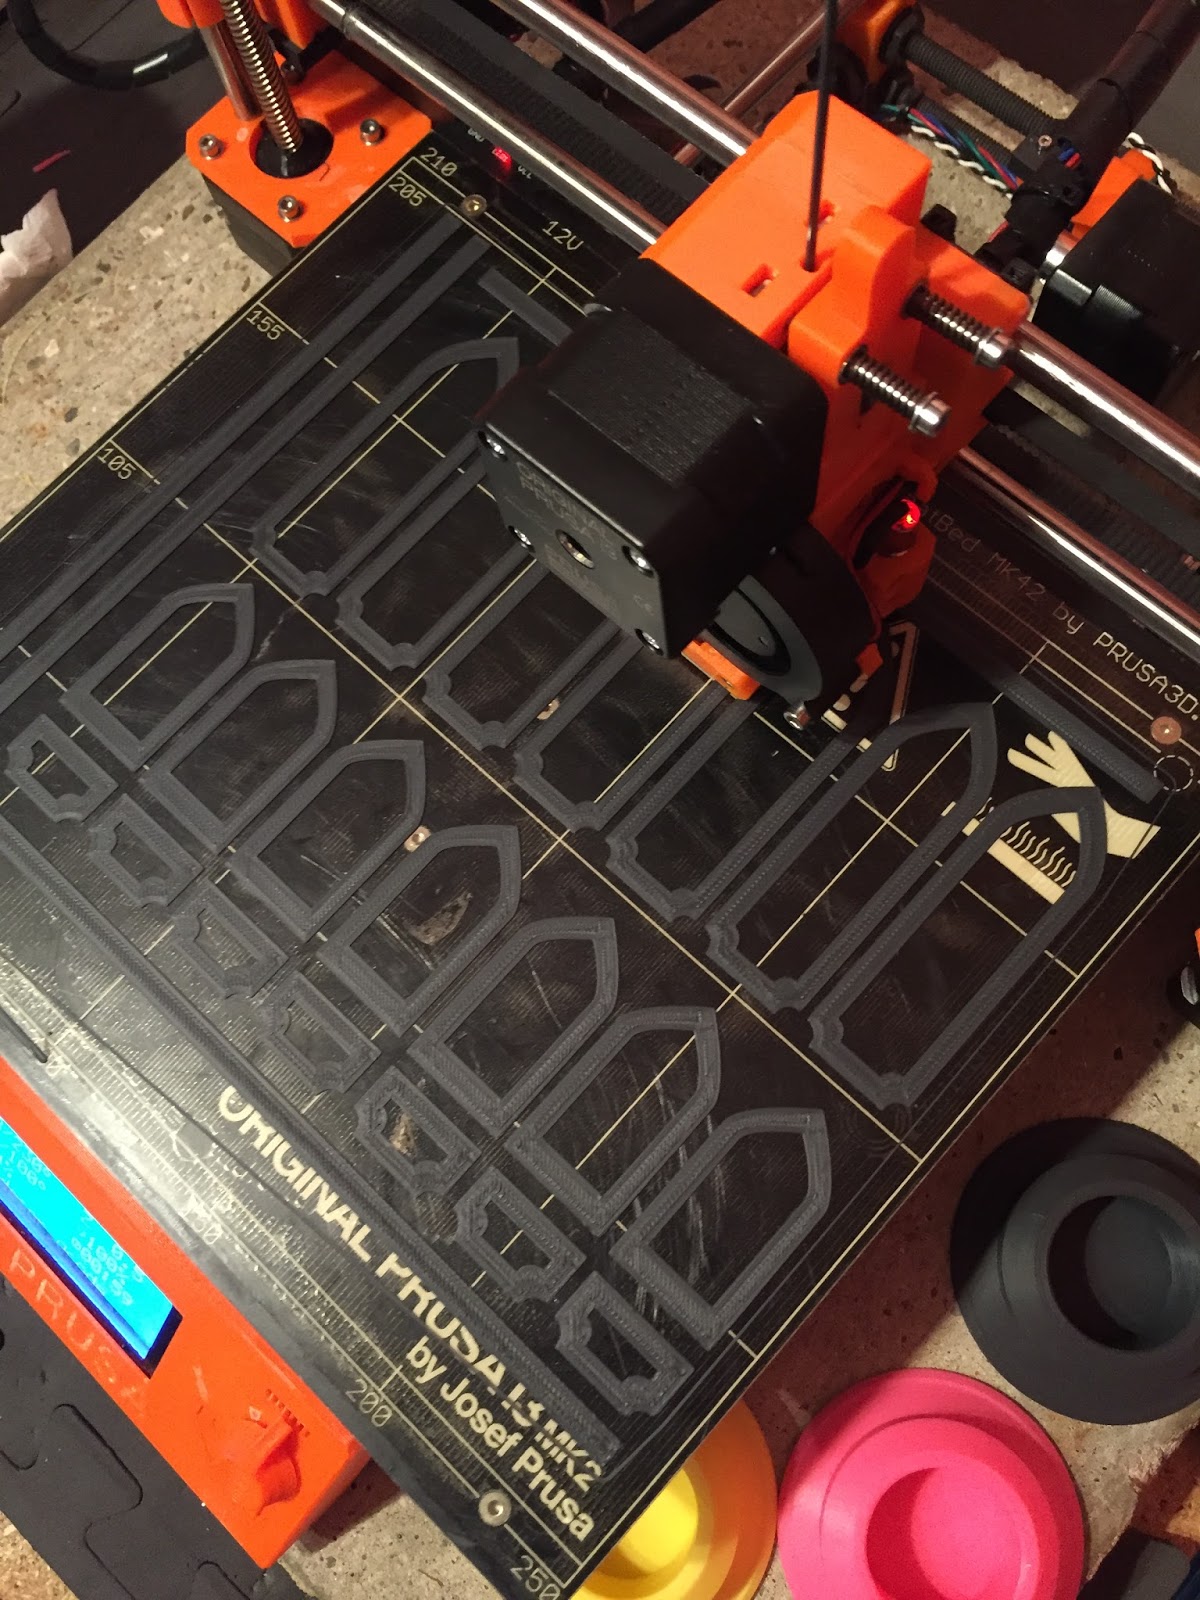
5.2 Printing wall details in progress.
5.3 Glue on your wall details
Stage 5: Interior Decor Detailing
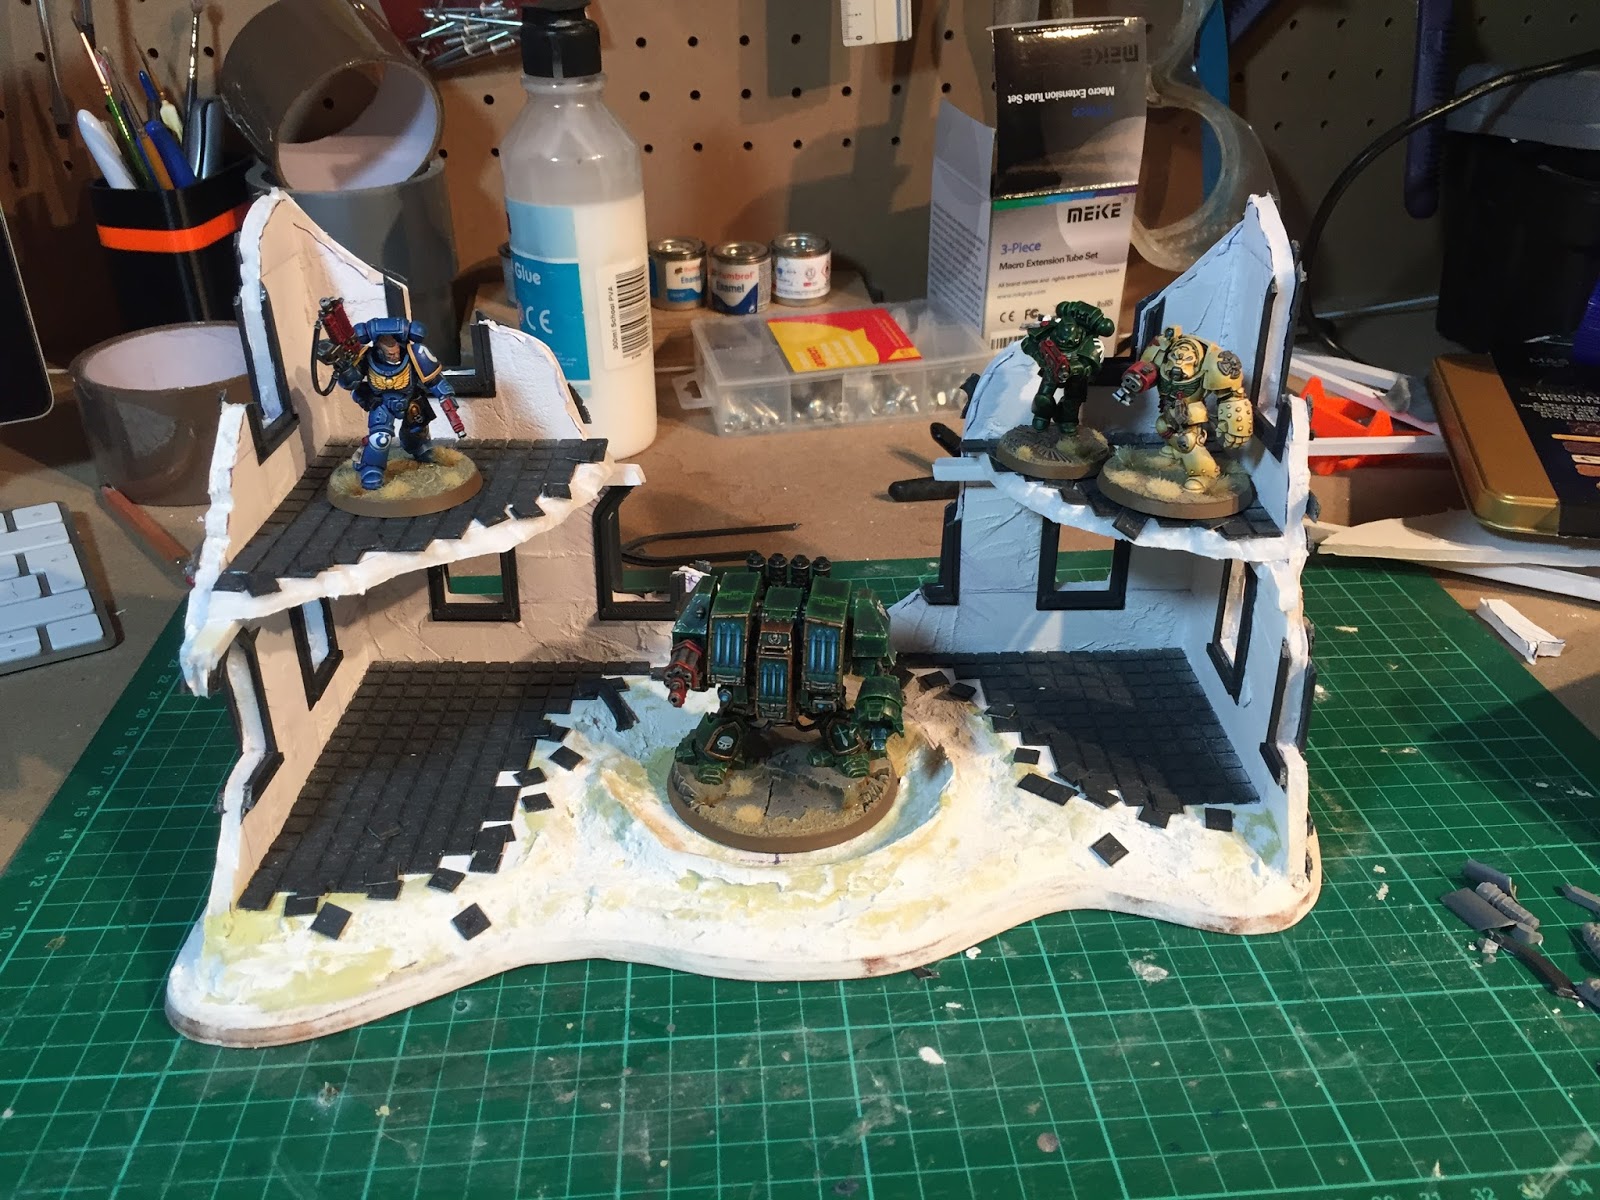
I’ve used my 3D printer (pic 5.2) to make floor tiles, window frames and wall details but if you don’t have access to a 3D printer you can buy terrain pieces and details from Shapeways. Or you can cut these shapes from thin cardboard (cereal box is good) or from 1mm thick plasticard. Plasticard is also available textured so you might find something suitable for the floor. Using a knife cut the floor tiles to size and glue on to the floor surface with superglue (pic 5.1). Cut lots of small loose tile pieces and superglue those to the floor in a scattered way. Using more superglue glue your wall details and window frames to the walls (pic 5.3). Wall details can also come from your bitz box. Skulls, weapons and other ornaments are perfect.
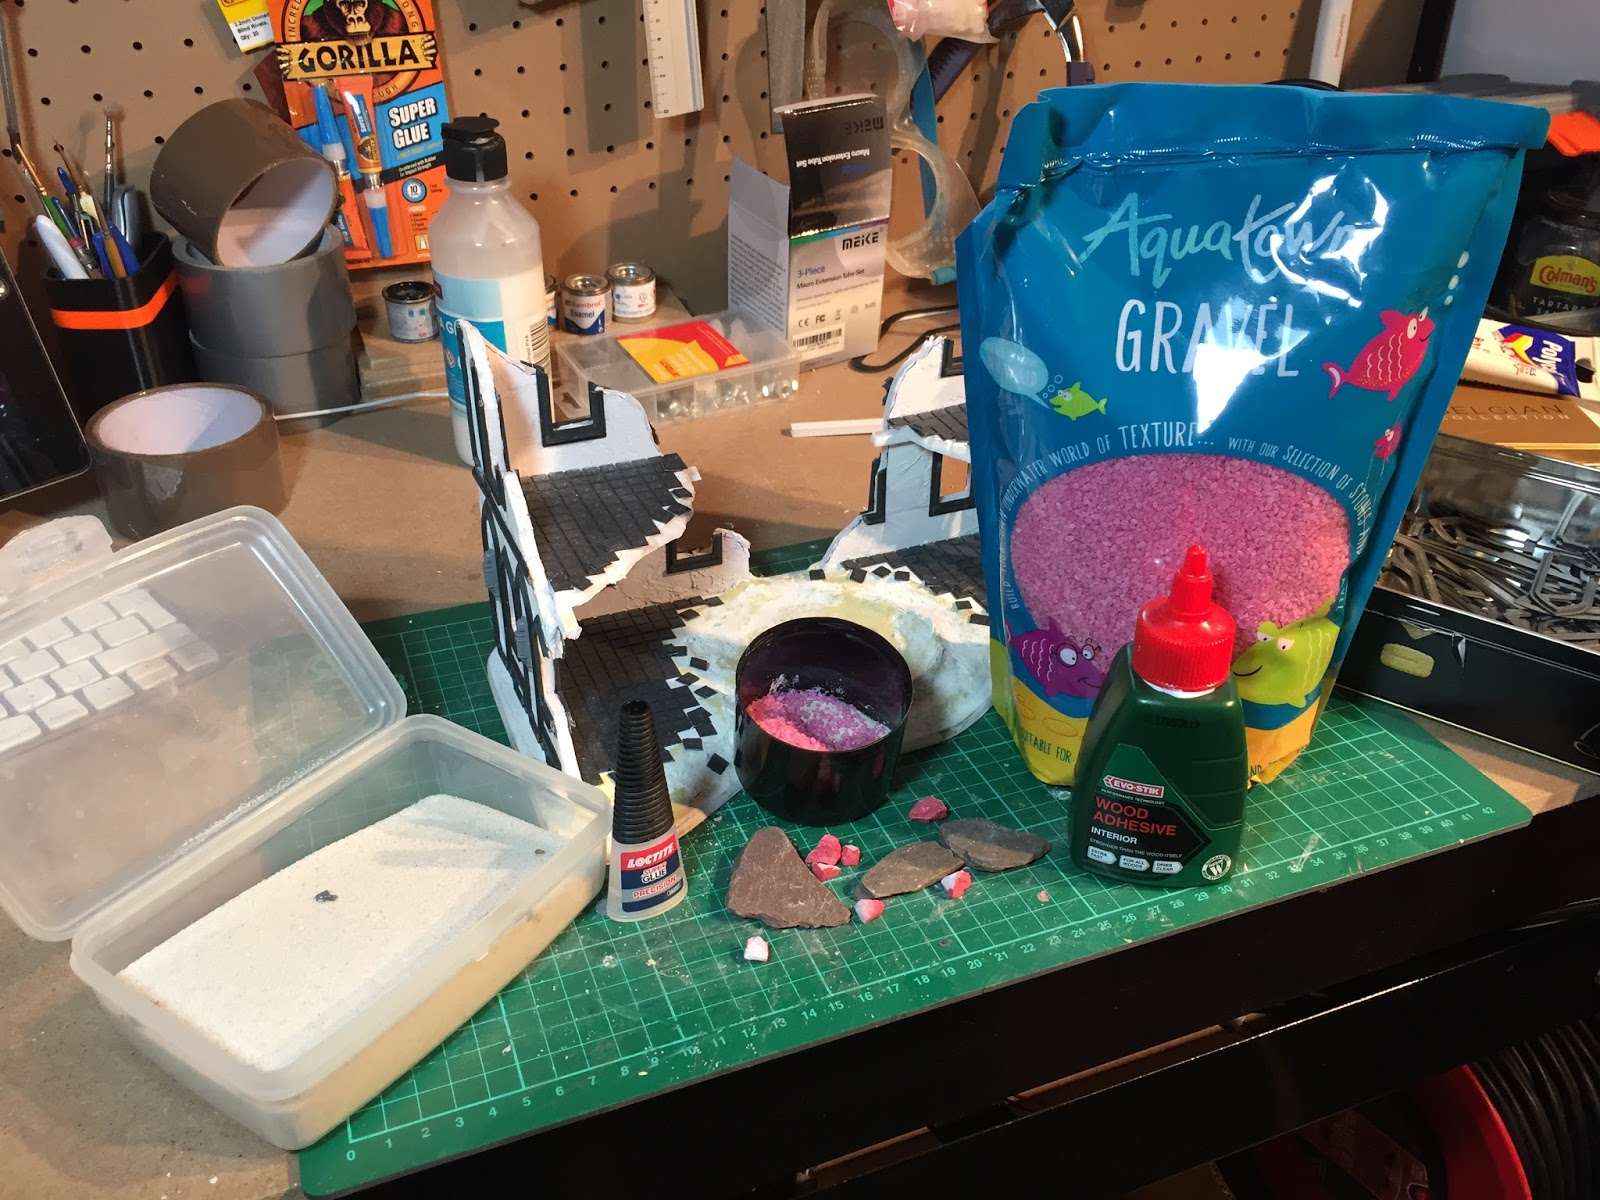
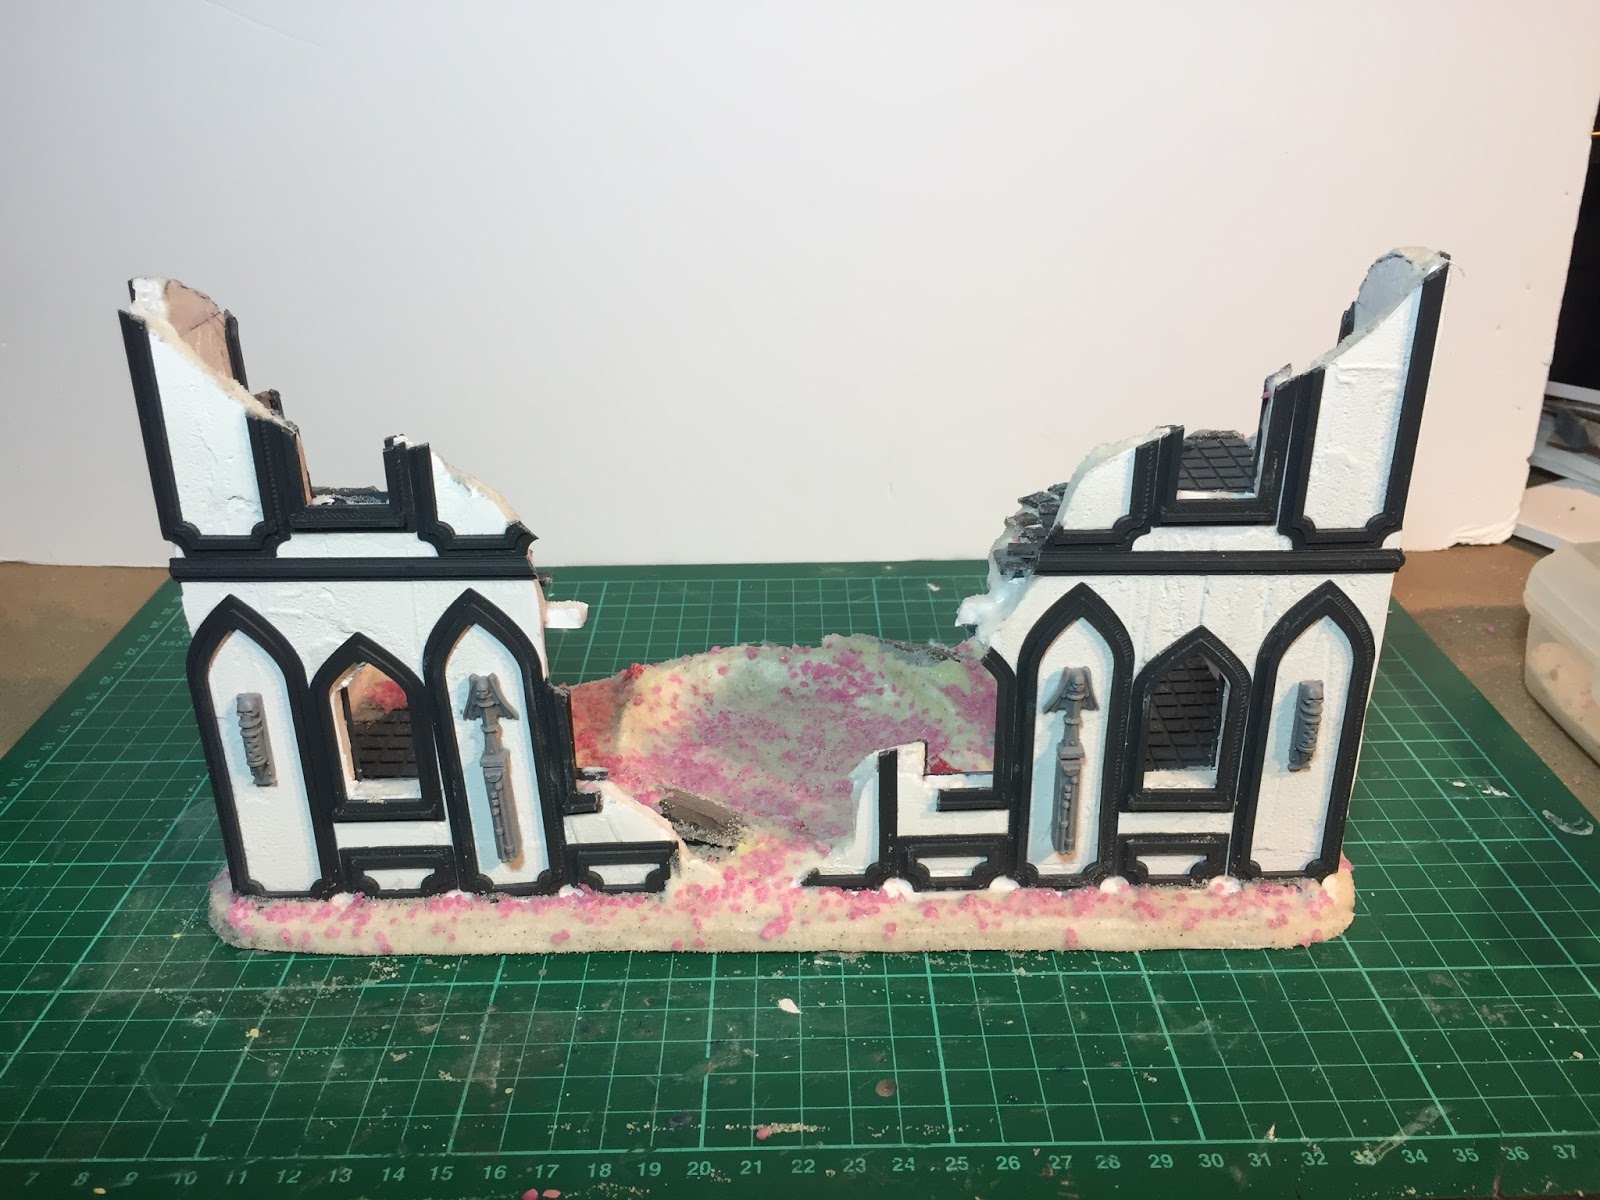
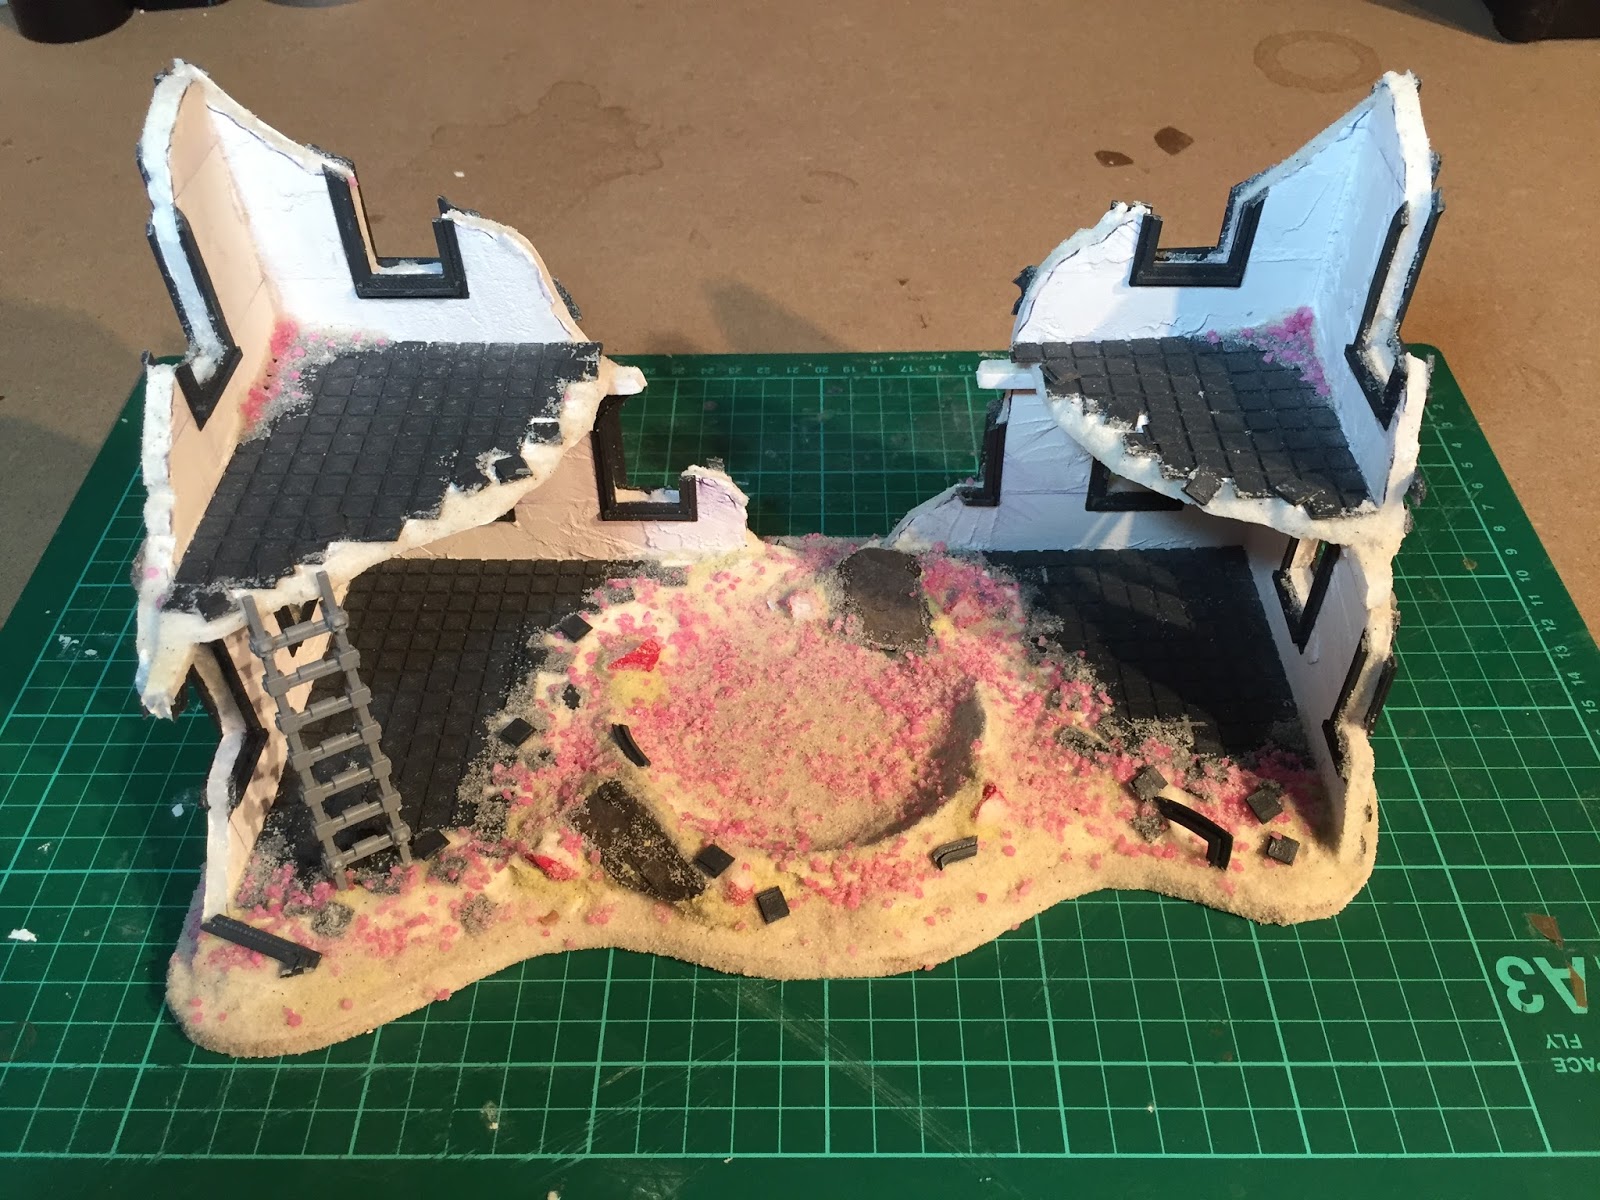
6.1 Sand, slate, rubble and aquarium gravel

6.2 Use milliput to stick the big slate and rock pieces down
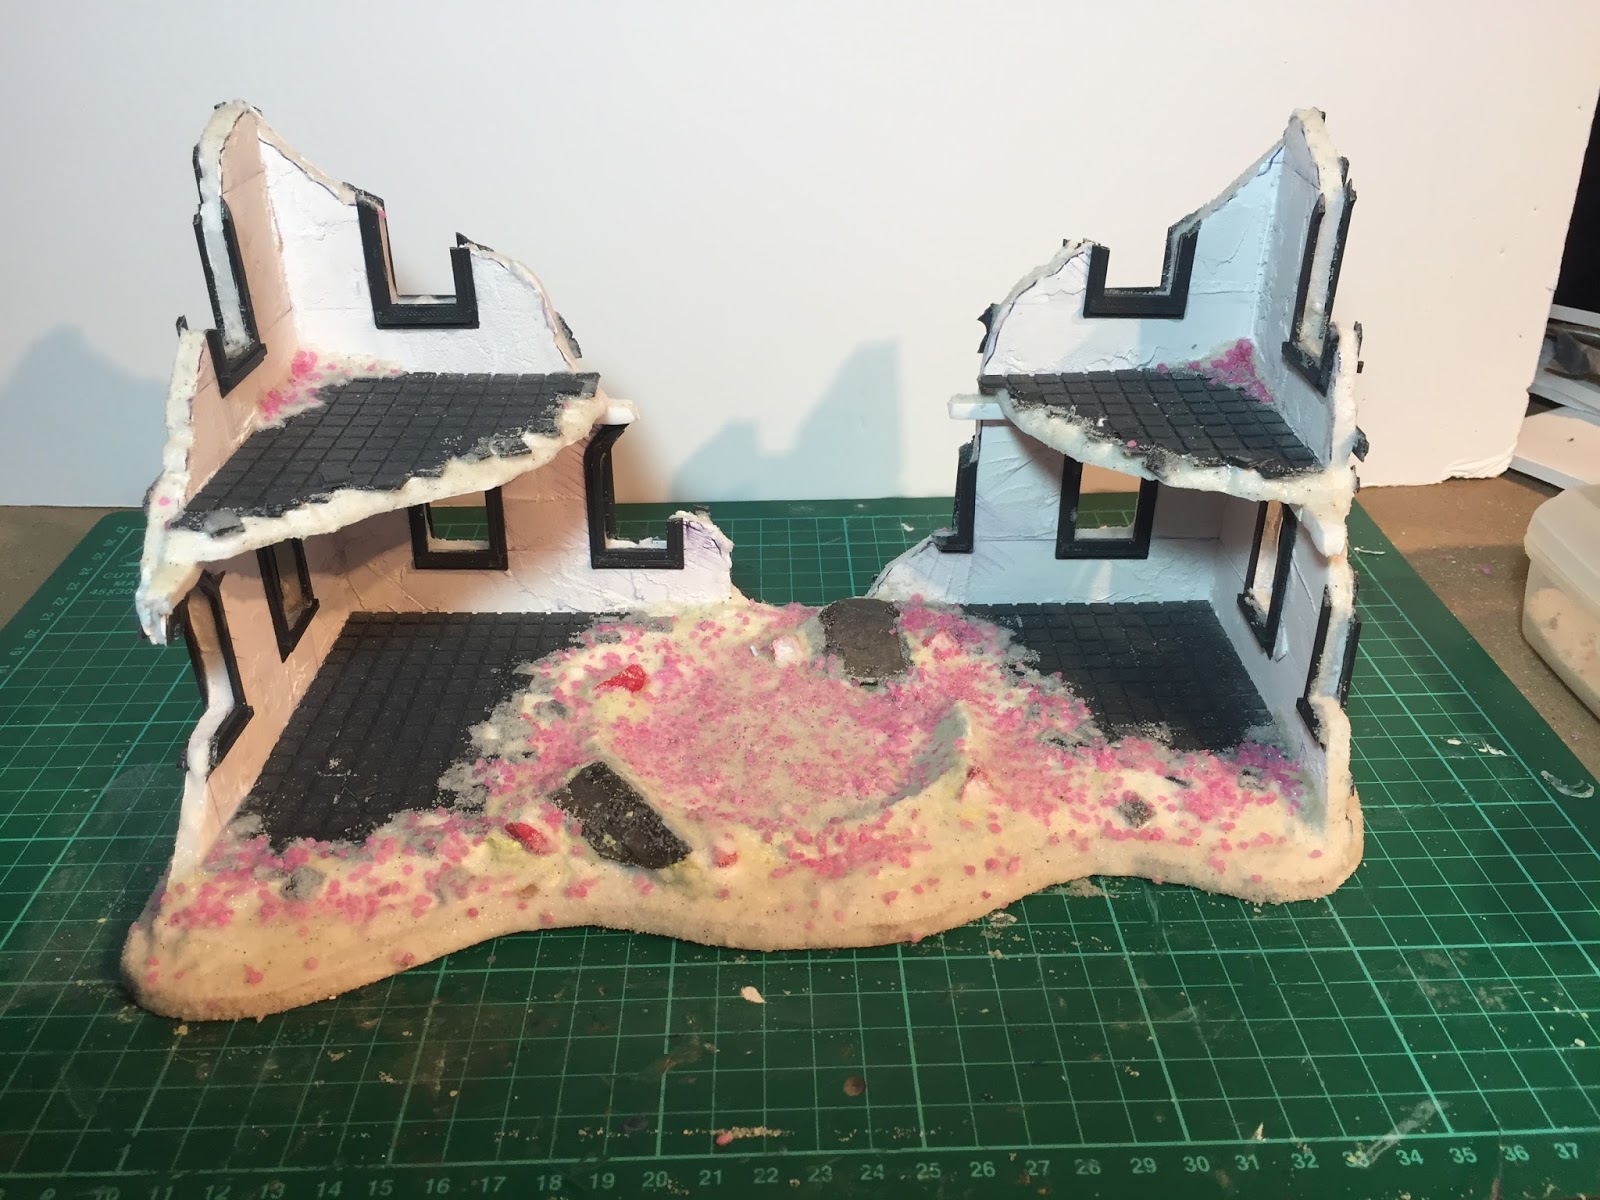
6.3 Cover in glue and tip on gravel and sand
6.4 Water down PVA glue (50:50) and paint over all the rubble and sand
6.5 Add surface level debris
Stage 6: Rubble.
Use milliput to create mounds and push the large pieces of slate and rocks into the putty (pic 6.2). Using an old brush you don’t mind wrecking, paint wood glue all over the areas you want rubble and then tip on the gravel and sand over the glue (pic 6.3). Don’t forget to glue sand to the edges of the ruined building so they have a crumbly masonry texture to them as well. Add some offcuts of floor tiles/window frames and anything from your bitz box as surface level debris. Just a dab of superglue should be enough to hold the bitz in place.
Leave this to dry for a while. Once dry, mix water and pva glue together to make a really runny mix (50:50) and paint over all the rubble to seal it in glue. You could also use a spray varnish instead or as well as.
Conclusion:
If you were to add up the cost of all the materials used in this tutorial then it would probably be more cost effective to buy a Citadel ruined building plastic kit. However all the materials bought would be enough to make an entire gaming table of ruins. That’s my advice as well. Plan out a table. How many ruins you need. The sizes. The heights. Everything and make all the ruins at once. It’ll be easier then one at a time.
If you’re planning an entire tables worth of ruins, you might want to make molds of wall sections and then make plaster casts. Using the plaster cast wall sections you can break them up and crumble them then you can make further molds and cast up resin ruined wall pieces and build up your ruins by gluing the cast resin ruin pieces together.
Make sure you come back soon when I share the second part of this tutorial on how to paint your ruined building.

19 Comments
Leave a Reply
Tale of Painters is the unofficial Warhammer hobby magazine run by hobbyists like you. Support our work by using the affiliate links from our 🇺🇸 / 🇨🇦 partner stores for your next orders so we can continue to bring you fantastic FREE content every day:


Or support us directly:


By chance do you have the stl files available for download?
Fantastic article. Inspired me to do some more terrain projects of my own. I am going to cheat a bit and use the Ryza-pattern ruins kit as a shortcut, and then incorporate the rest of the techniques outlined in the article. Thanks for putting this together.
What 3D printer do you use?
Original Prusa i3 MK2s
i like the use of 3d printer; can you provide i link to the layouts?
Haven't put them up for download. If you send a message on Facebook (Garfy Etherington) with your email, I'll send you the STLs.
i dropped you a email since i do not have facebook. Thank you.
Thanks for posting this Garfy. The 3d printed stuff is a bit more than some might manage, but it really makes the piece look nicer, and printers are becoming more and more accessible.
Although if you are going to 3d print tile, why not go for something more complicated? Fans, arabesques, and even regular rectangles in complicated patterns are hard to make by hand, but easy with a printer…
Yeah good shout on the more detailed pieces. Something for me to bear in mind on future builds. Cheers.
The 3d printer kind of kills the whole thing as a scratch build project. Sorry
I couldn’t disagree more. I still had to create my flat designs in illustrator, then I had to make them into 3d models. Then I had to set up the printer correctly to ensure they didn’t warp or lift. These are my creations, my designs. Wether I printed them or cut them out of card it’s scratch made. They weren’t shop bought or made for me. The 3d printer is just another tool, without me doing the creating the printer wouldn’t produce anything.
I think it’s a shame people don’t see the skill required to create and print. There isn’t a magic button that just makes it happen. A lot of work went into this. More so that if I had just cut them out of card.
So I’m sorry, but it is scratch built in every sense of the word.
I think it's more that people don't have access to a 3D Printer (which is very expensive), not that it doesn't require skill.
Cool & useful tutorial though.
Thanks. I totally appreciate that, that's why I mention about cardboard and plasticard alternatives in the tutorial.
Nice to see this style getting spread around again. I've got a lot of great memories of Cityfight battles back in 3rd Ed all through the Foamcore city my friend Sean made.
Great tutorial, thank you for posting. 🙂
Your welcome. Thanks for letting me know.
Or mounting/cereal box card for all the detailing. A little card goes a long way, especially if you stack different thicknesses on top of each other.
Also cable ties make an interesting detail as the ridged side looks fab.
You can download my free foamboard terrain templates here: http://www.40kaddict.uk/2011/02/terrain-is-everything-standard-template.html
I mention card and plasticard as alternatives in the tutorial. Good shout on the balsa wood and zip ties.
Lol. Scratchbuild and pulls out 3D printer…. rest of the tutorial is great, could do a less detailed window frames etc using balsa wood, easily crafted using xacto blade. Nice idea with base too, crater is a nice touch and tells the story of the destruction.