

Hello everyone, Silvernome here back again with another post! But instead of showing off something I’ve painted, I thought I’d share some insight into how I magnetized my Imperial Knights. This will work with any of the basic Questoris class kits (Paladin, Errant, Crusader or Warden), perfect for the next titan for your Imperium or Chaos forces!
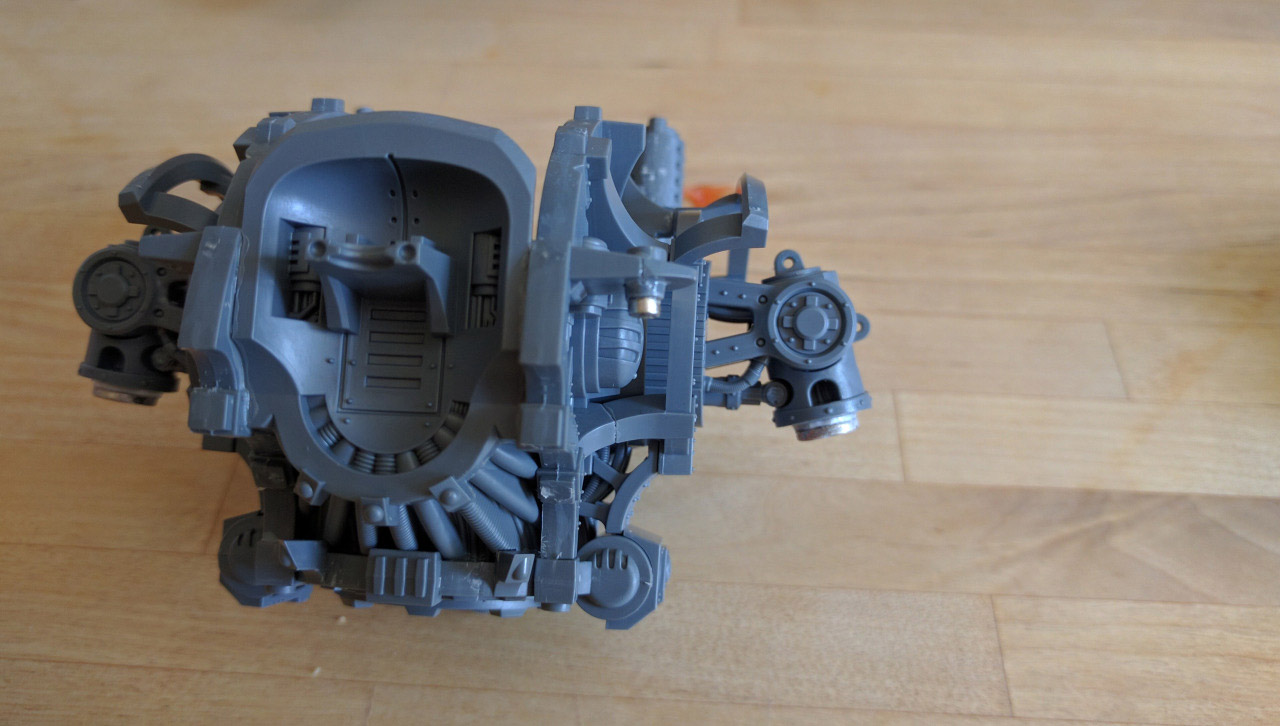
Torso Connections

Magnets: 1/4 x 1/16
On the bottom torso, I kept the nob on the bottom half intact and glued the magnet directly to it. Making sure it would still fit in the opening under the upper body component

Magnets: 1/4 x 1/16
On the inside of the upper torso, I took a piece of sprue and cut it to fit within the bottom of the Knight (about 1 ¾ long piece). Glued it in with some plastic glue and then after that dried, added some super glue for more support. I then attached the magnet to the bottom torso with some glue added. Put the top piece on the bottom piece so I could have the magnet touch the sprue bit.
Arms-to-Weapons Connection

Magnets: 5/16 x 1/16
After glueing the arm components together, I cut the knob off using a hobby saw. I realized after doing some dry-fitting of the magnets that I needed just a little bit of space under the magnet to have a better connection so I cut a piece of plastic card and put it between the magnet and the model (that’s the white part in the photo)
Magnets: 3/8 x 1/16
Before glueing together the top parts (pieces #20 and #21), you can fit a magnet in the top. No need to use a sprue or anything else to hold a magnet. Now this is a TIGHT fit, so using a hobby knife and file to smooth out the insides will help a lot for a tighter fit. But it will work!
Carapace Weapons

Magnets: 3/8 x 1/16
Smooth out the bit of plastic on the underside of the carapace and attach a larger magnet here. Since I was using the 3/8 size on the guns, they worked here as well.
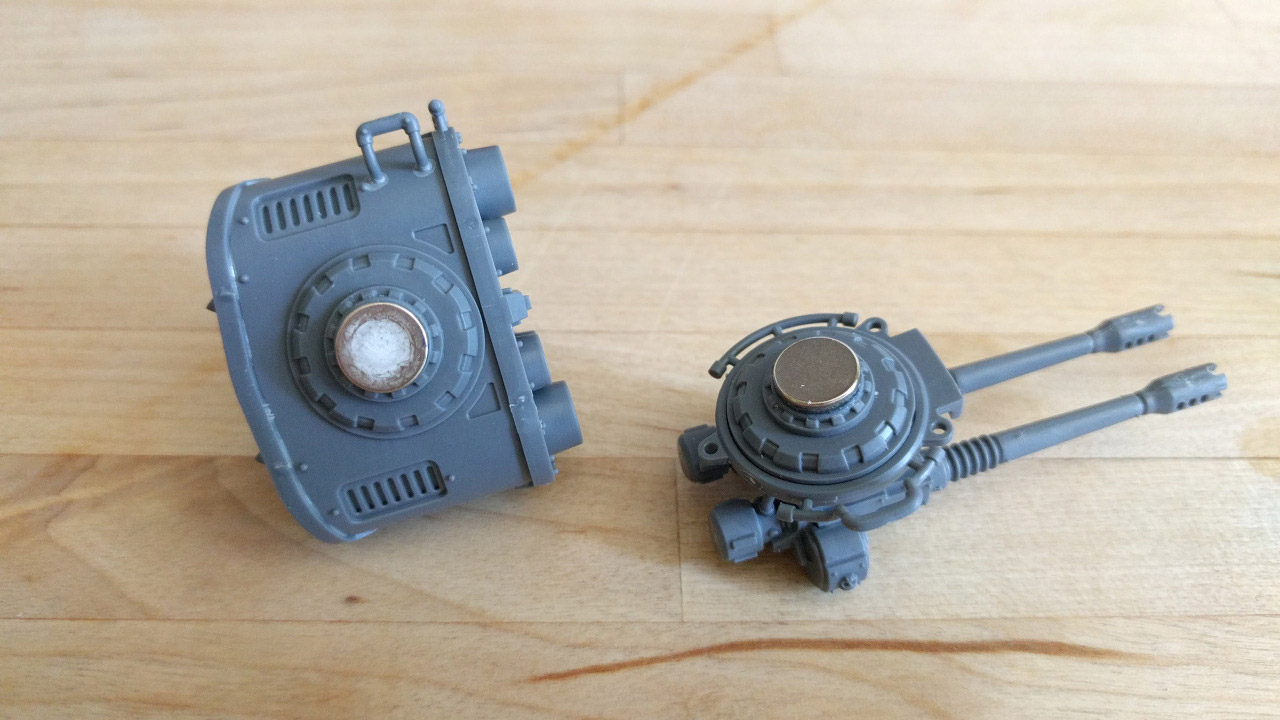
Magnets: 5/16 x 1/16
I smoothed out the bottom of the connecting pieces and glued on a 5/16th size magnet for both the missile launcher and autocannon Perfect fit and sits nicely on the top of the knight.
Chest Weapons
Magnets: 1/8 x 1/16
For part 99 (the U shaped bit with a straight end), I cut it off where the straight part starts to connect to the U shape. I attached a 1/8th size magnet to the straight end and glued in the piece like normal to the body

Magnets: 1/8 x 1/16
I glued on the U shape portion of part 99 to the guns and then put another 1/8 size magnet on top.
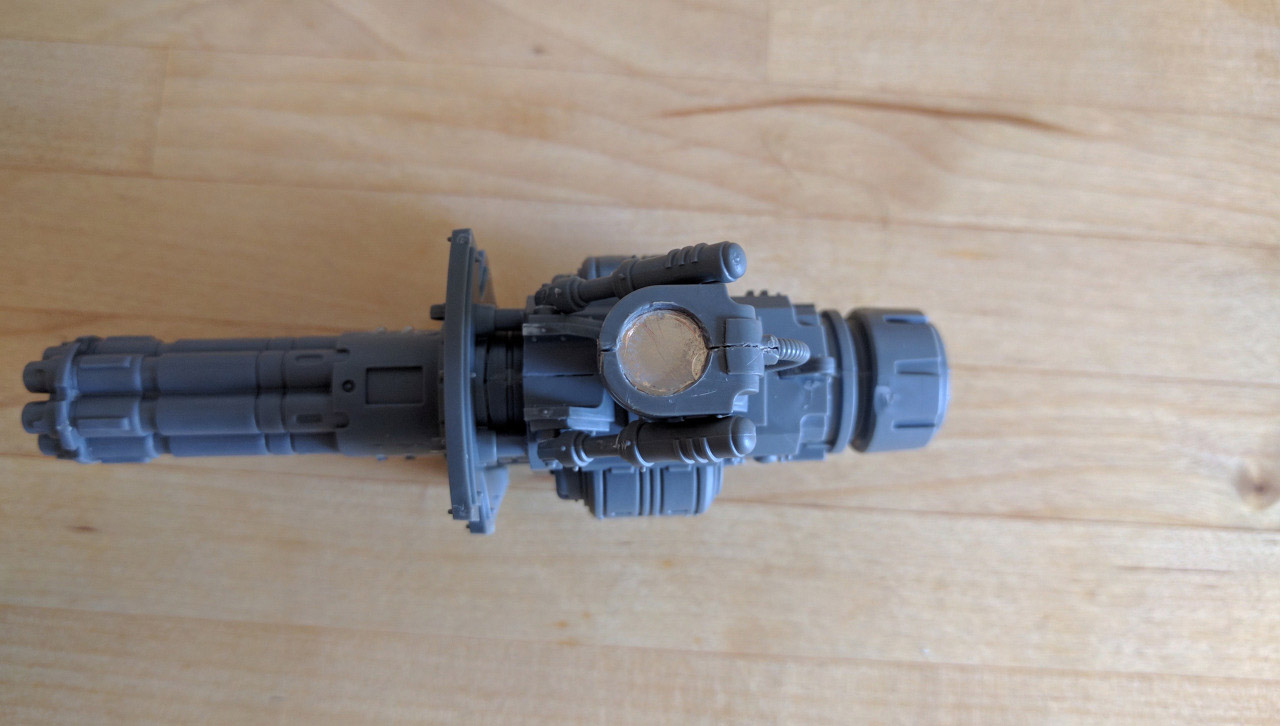
Battle Cannon / Thermal Cannon

Magnets: NONE!
I’ve seen quite a few tutorials working with magnets on the Battle / Thermal cannons. But instead, I came across this trick using telescoping plasticard tubing instead. So much less headache and works great!
Hope you found this tutorial helpful. I used the same technique on three of my own Death Guard themed Imperial Knights. Not only is it easy for swapping weapon loadouts but also for transporting your giant war machines!
You can also find me on Instagram:
2 Comments
Leave a Reply
Tale of Painters is the unofficial Warhammer hobby magazine run by hobbyists like you. Support our work by using the affiliate links from our 🇺🇸 / 🇨🇦 partner stores for your next orders so we can continue to bring you fantastic FREE content every day:


Or support us directly:


Such a great tutorial! Looking forward to using it on my own Imperial Knight!
Just an FYI but super glue wont reinforce a plastic to plastic join, as welds are much stronger than joins, and plastic glue is a weld. To reinforce poly to poly joints just increase the surface area of the joint by scoring the mating faces with a blade and or pins