

In today’s post I’ll share a complete step by step photo tutorial guide on how to paint flames. The perfect follow up tutorial to last week’s Scions of the Flame tutorial. More after the jump!
This tutorial assumes you have a basic understanding of how to paint. For the beginners, I will explain the techniques as I go along. Each picture below shows four chronological steps. Underneath each picture are the corresponding instructions. Each step shows the paint I used during that step.
Paints you will need for this tutorial:
Corax White (Base)
Flash Gitz Yellow (Layer)
Fire Dragon Bright (Layer)
Evil Sunz Scarlett (Layer)
Word Bearers Red (Layer)
Corvus Black (Base)
White Scar (Layer)
Troll Slayer Orange (Layer)
Khorne Red (Base)
Lahmian Medium (Technical)
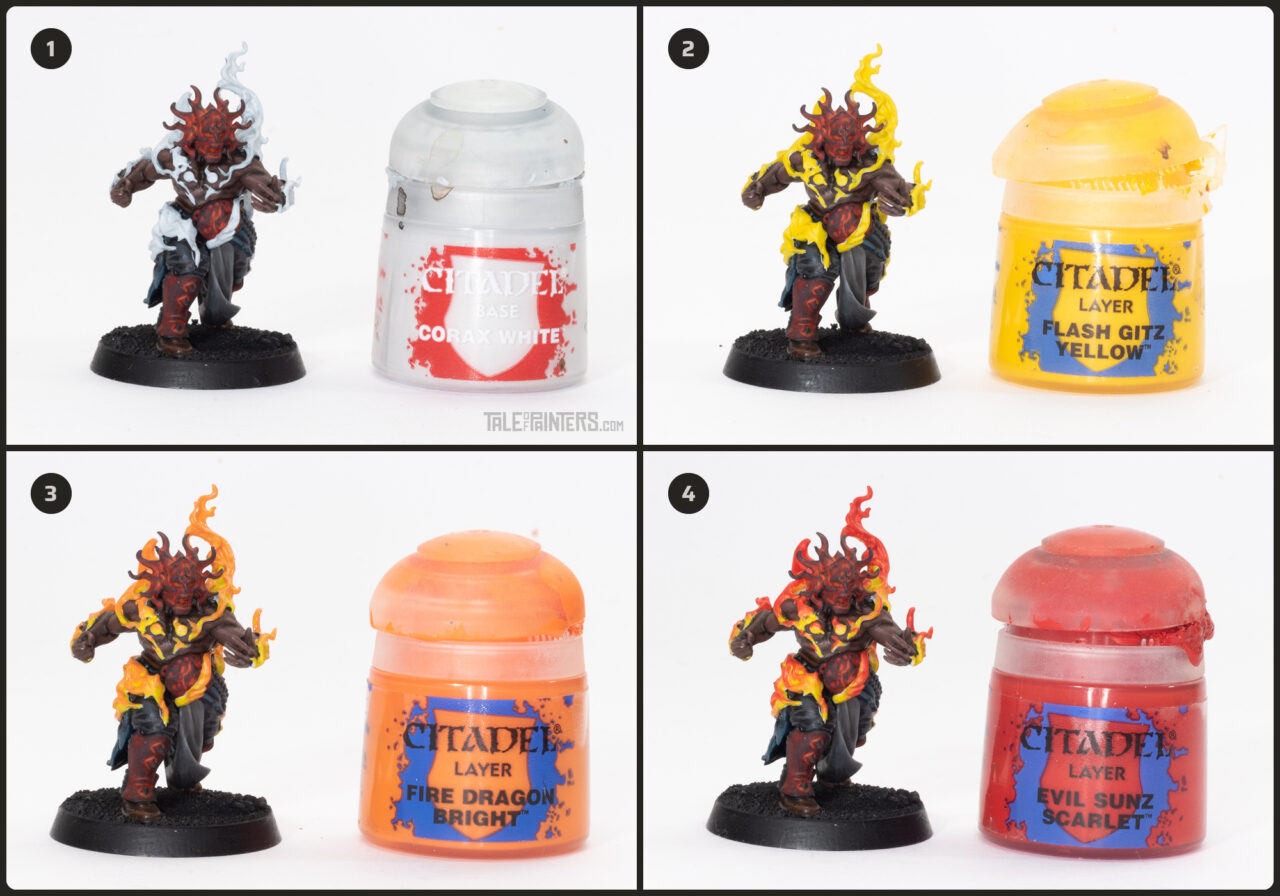
1. Paint two thin coats Corax White over the flame detail of the model.
2. Paint the flames Flash Gitz Yellow.
3. Splitting the flames up into groups paint the top two thirds of each group with thinned Fire Dragon Bright. Also make sure you leave the yellow showing through in the creases and recesses. The flame is at its hottest at it’s core so you want the recesses to look hot. Think of it as shading with light colours.
4. Paint the top half of each group of flames with Evil Sunz Scarlett. Making sure you leave the previous orange and yellow layers showing through in the recesses.
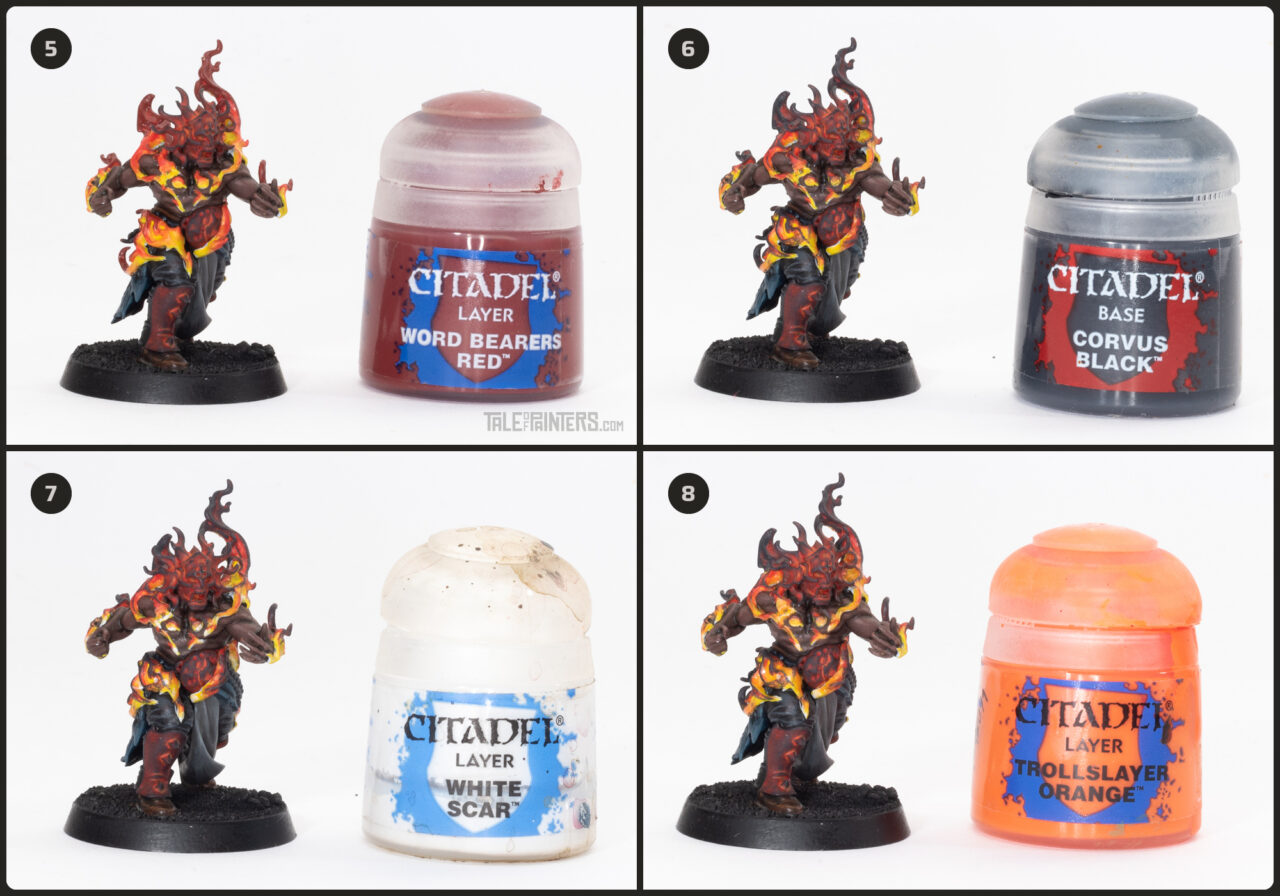
5. Drybrush the top third portion of each group of flames with Word Bearers Red.
6. Drybrush the tips of the flames with Corvus Black. You can lightly drybrush some of the highest points. Think of this as highlighting with dark colours.
7. Sparingly use watered down White Scar to add white hot heat to the deepest recesses.
8. Create a glaze by mixing 1 part Trollslayer Orange with 3 parts Lahmian Medium and then lightly paint it over areas where you want to soften some of the blending between the previous red and yellow layers.
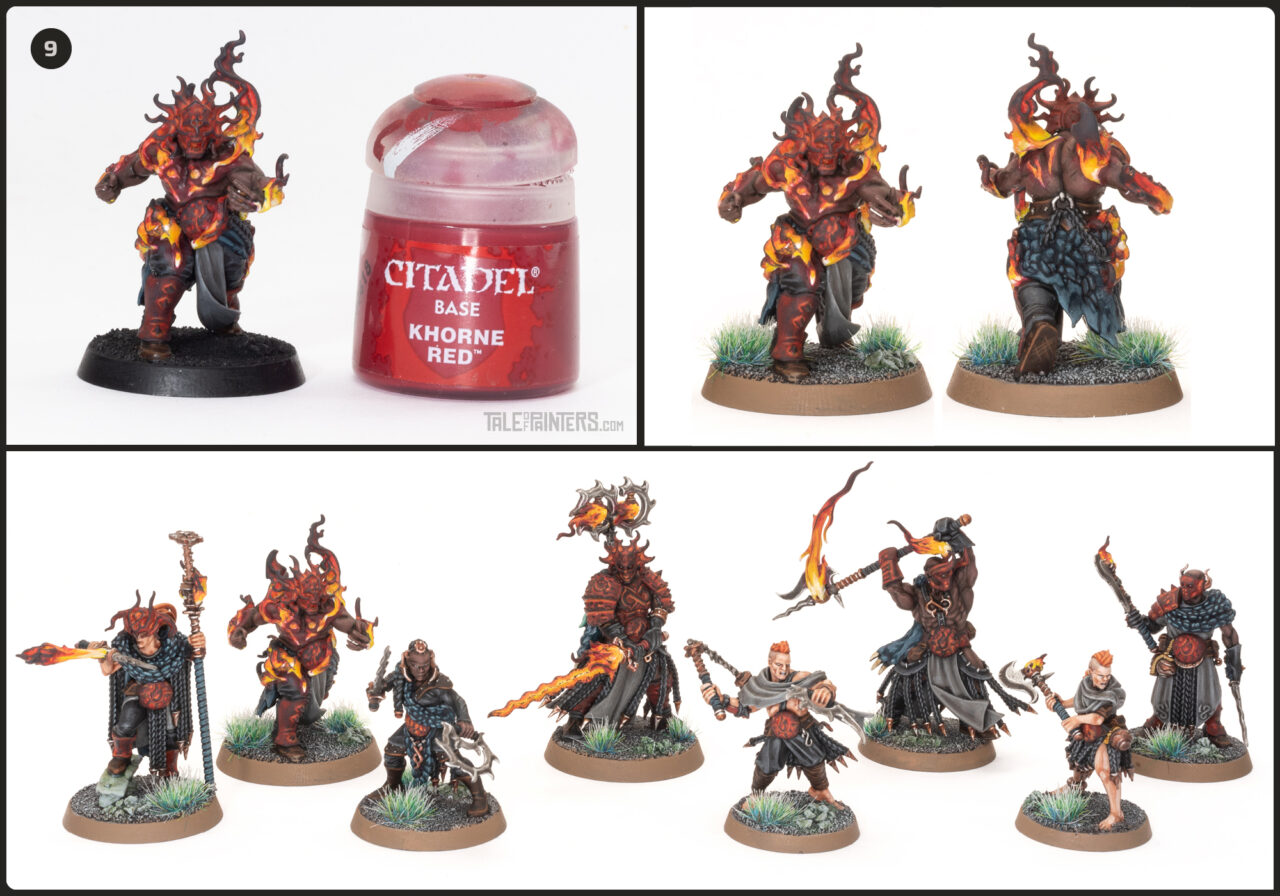
9. Create a glaze by mixing 1 part Khorne Red with 3 parts Lahmian Medium and lightly paint a thin translucent layer around the flames. Repeat to build up the intensity, but I tend to find less is more. You don’t it to look like it’s just red paint, I find it better if it’s translucent and you can see the paint job through the red. This is called OSL or Object Source Lighting.
Paint it’s base to match your army. I painted the sand on my base White and then washed it with Agrax Earthshade, then Basilicanum Grey, then drybrushed it with Celestra Grey. The base rim is Steel Legion Drab. Used Gamer’s Grass Tufts to decorate the bases.

2 Comments
Leave a Reply
Tale of Painters is the unofficial Warhammer hobby magazine run by hobbyists like you. Support our work by using the affiliate links from our 🇺🇸 / 🇨🇦 partner stores for your next orders so we can continue to bring you fantastic FREE content every day:


Or support us directly:


A really well explained and displayed tutorial!! I’ll be spreading knowledge of this. Thanks, Garfy.
Thank you for sharing tutorial for the paint flames and fire