In this post, I’ll show you how to paint Gorslav the Gravekeeper from Warhammer Quest Cursed City in 25 easy to follow steps. You’ll learn how I paint rotten flesh, aged yellow bones, a dirty shovel and more. Find out how in this tutorial.


This tutorial assumes you have a good understanding of how to paint Warhammer miniatures. With each picture is the corresponding instruction. Each step shows the Citadel paint(s) I used. You’ll find a list of all the paints used in this tutorial at the end of the post.
How to paint Gorslav the Gravekeeper


Undercoat the model black. I used a cheaper Halfords (UK Brand) of automotive primer. Once undercoated I gave it a quick thin coat of Abaddon Black.
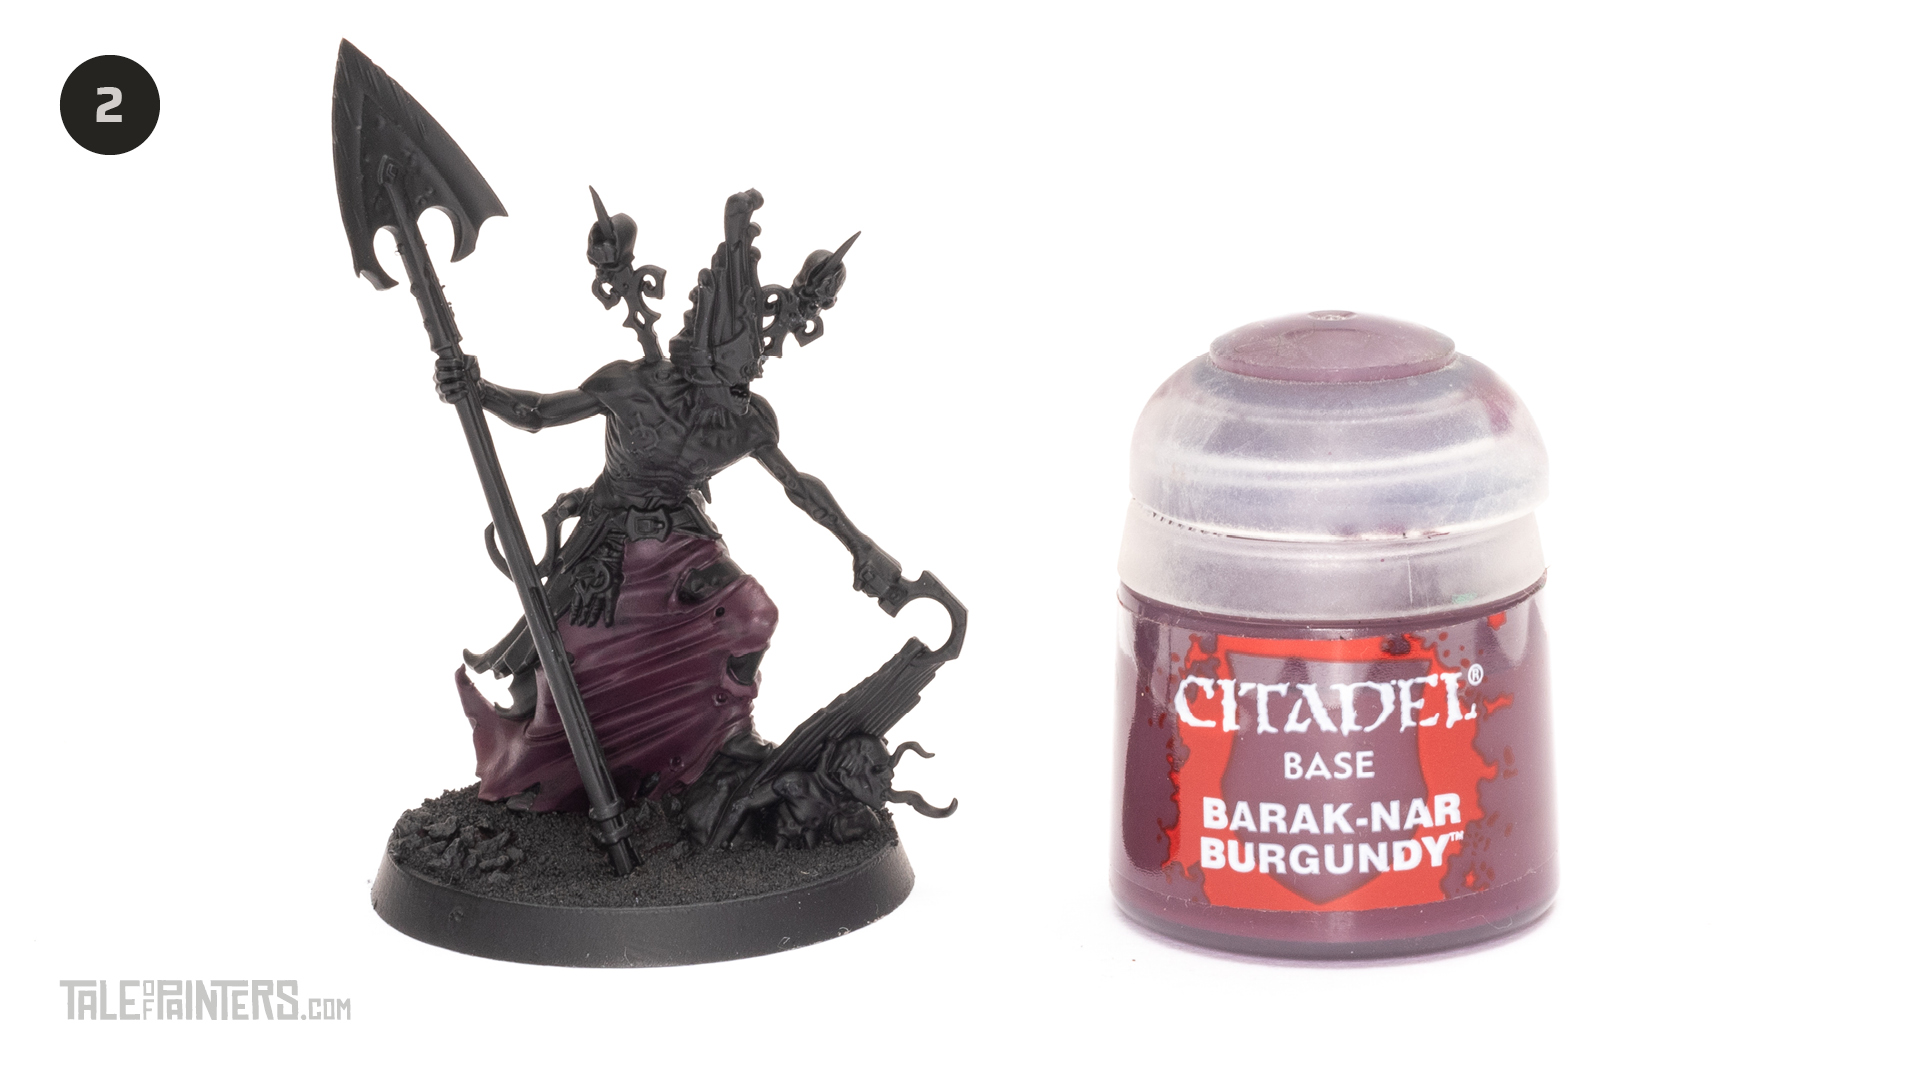

Basecoat the skirt with Barack-Nar Burgundy. Apply two coats that have been thinned with a touch of water.
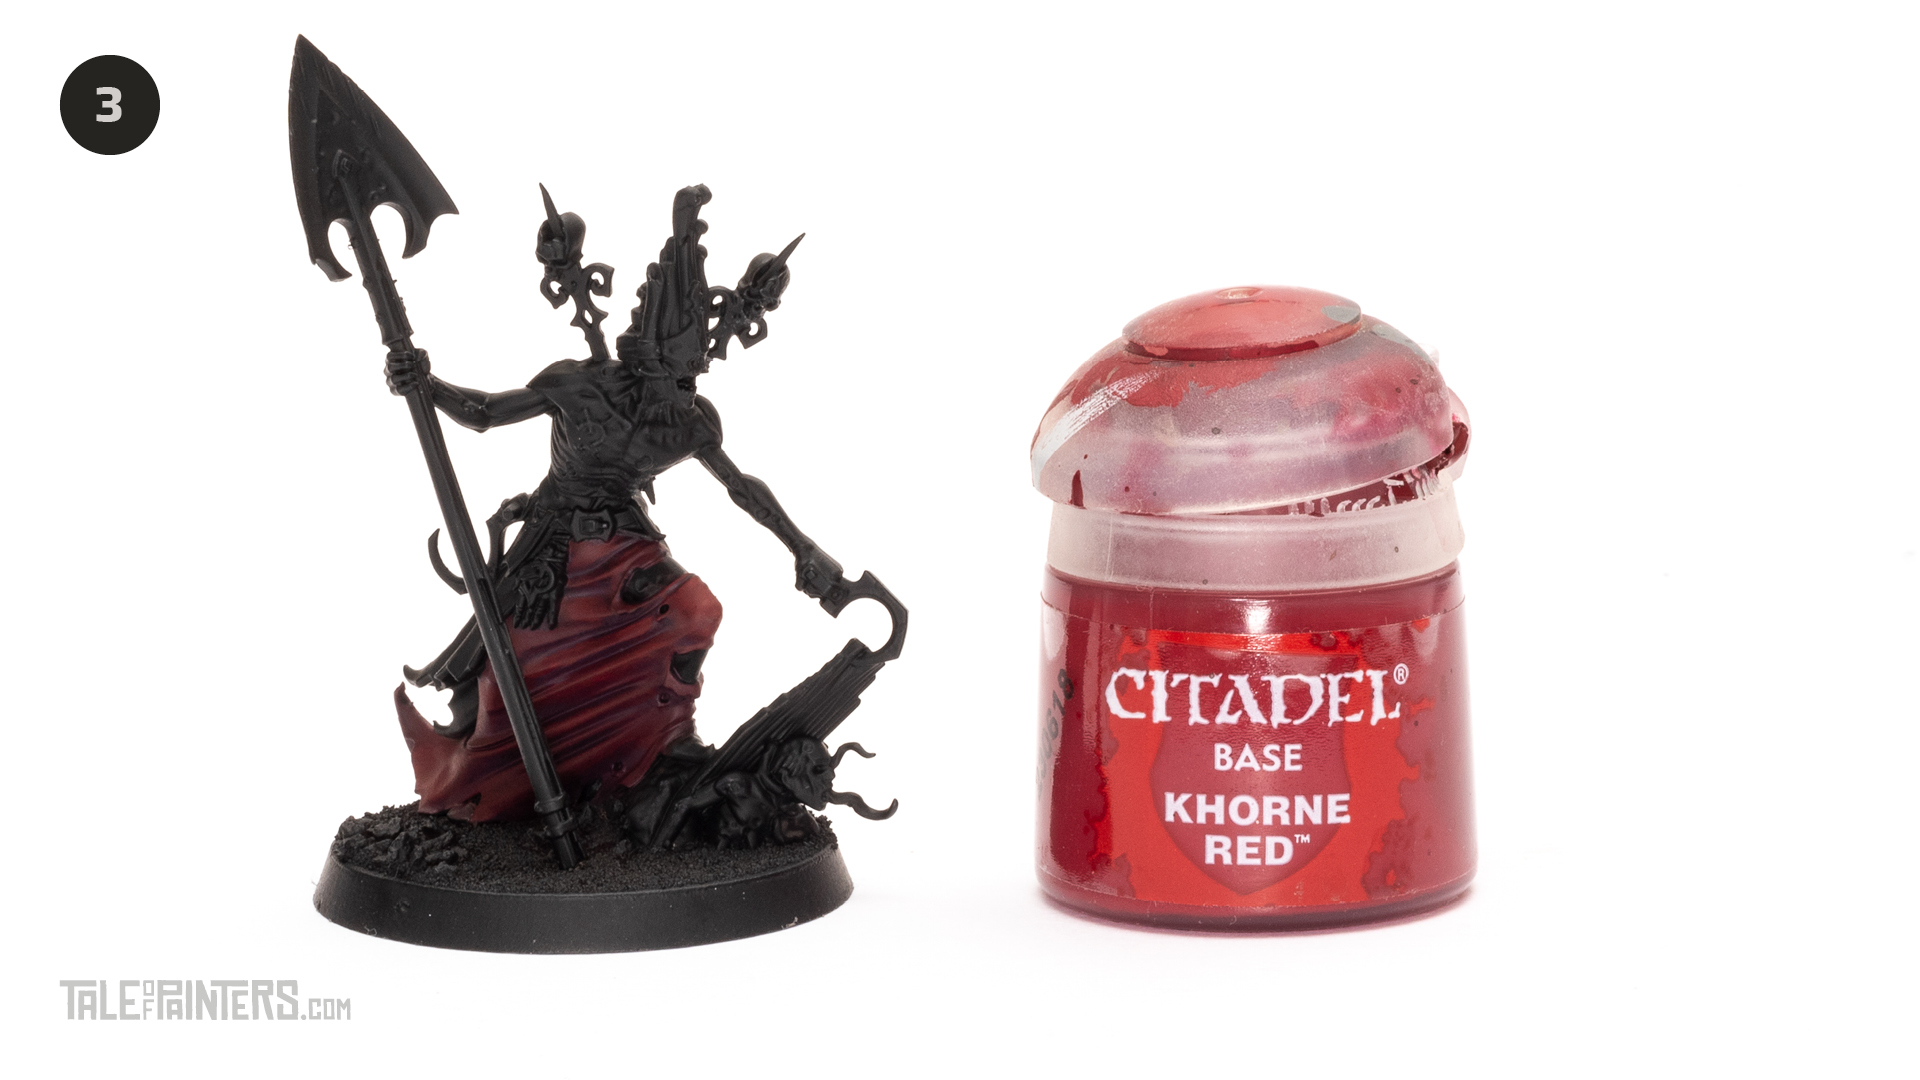

Highlight the skirt with Khorne Red leaving the previous layer showing through in the recesses.


Paint the fabrics on the back with Word Bearers Red. Apply two coats that have been thinned with a touch of water.


Repaint the fabrics on the back with Squig Orange thin this with water and apply around three coats to help it blend into the Word Bearers Red layer. Each layer you add should help with the blend transition.
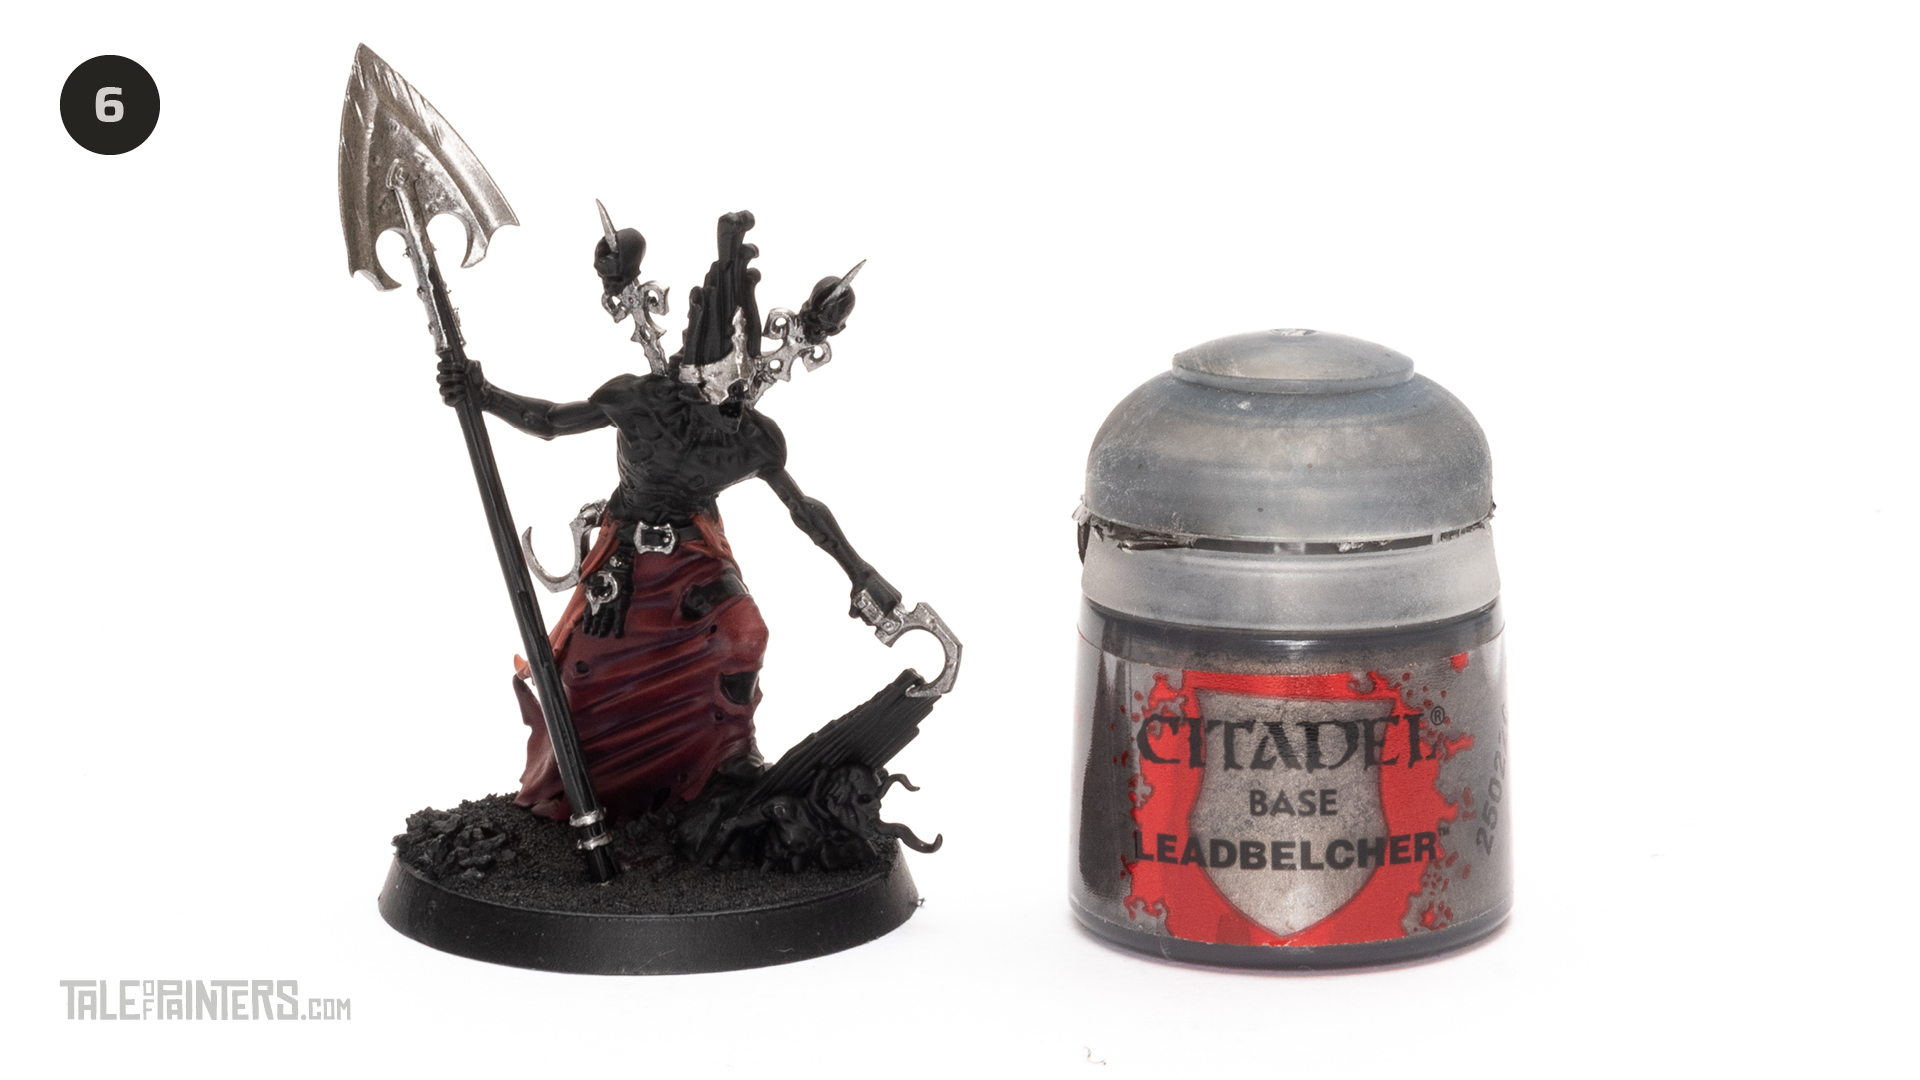

Paint the hooks, buckles, face plate, shoulder spikes and spade head with two coats of Leadbelcher
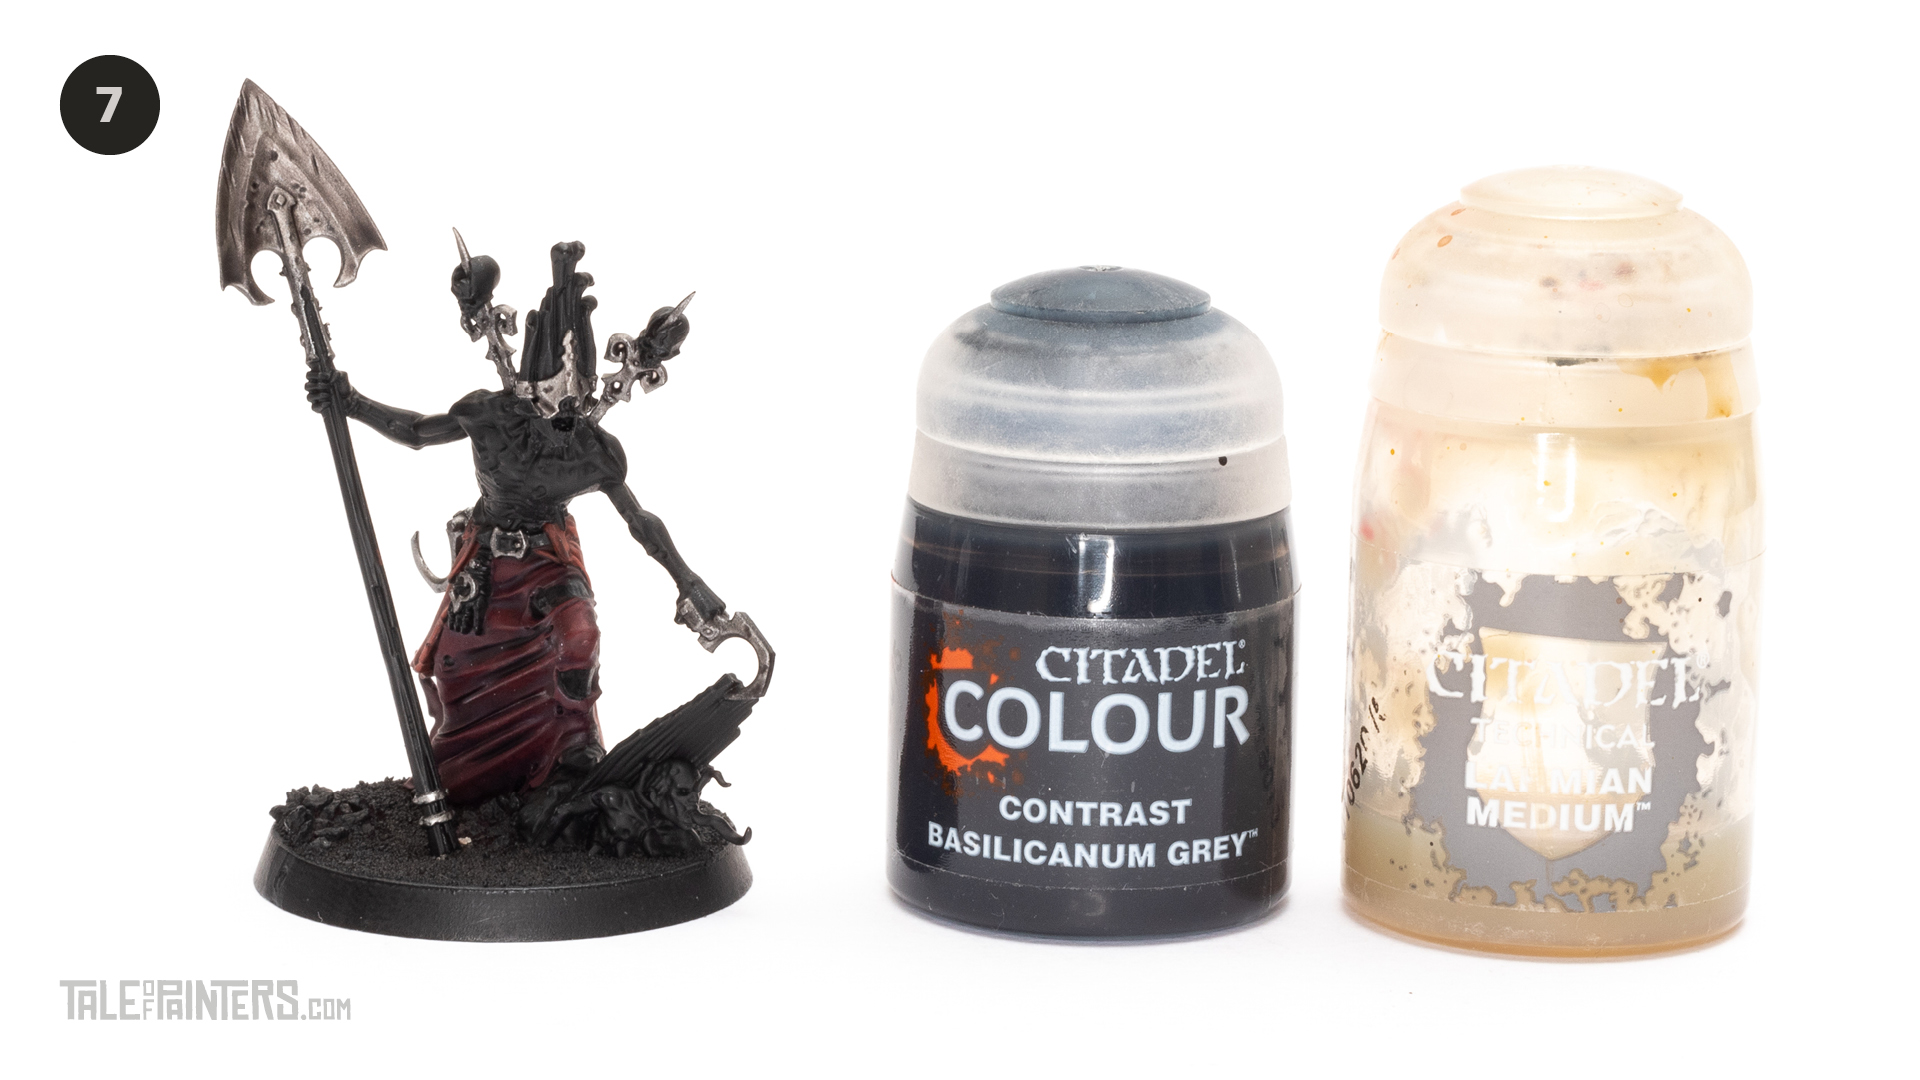

Create a 50:50 mix of Basilcanum Grey and Lahmian Medium and wash the entire miniature.
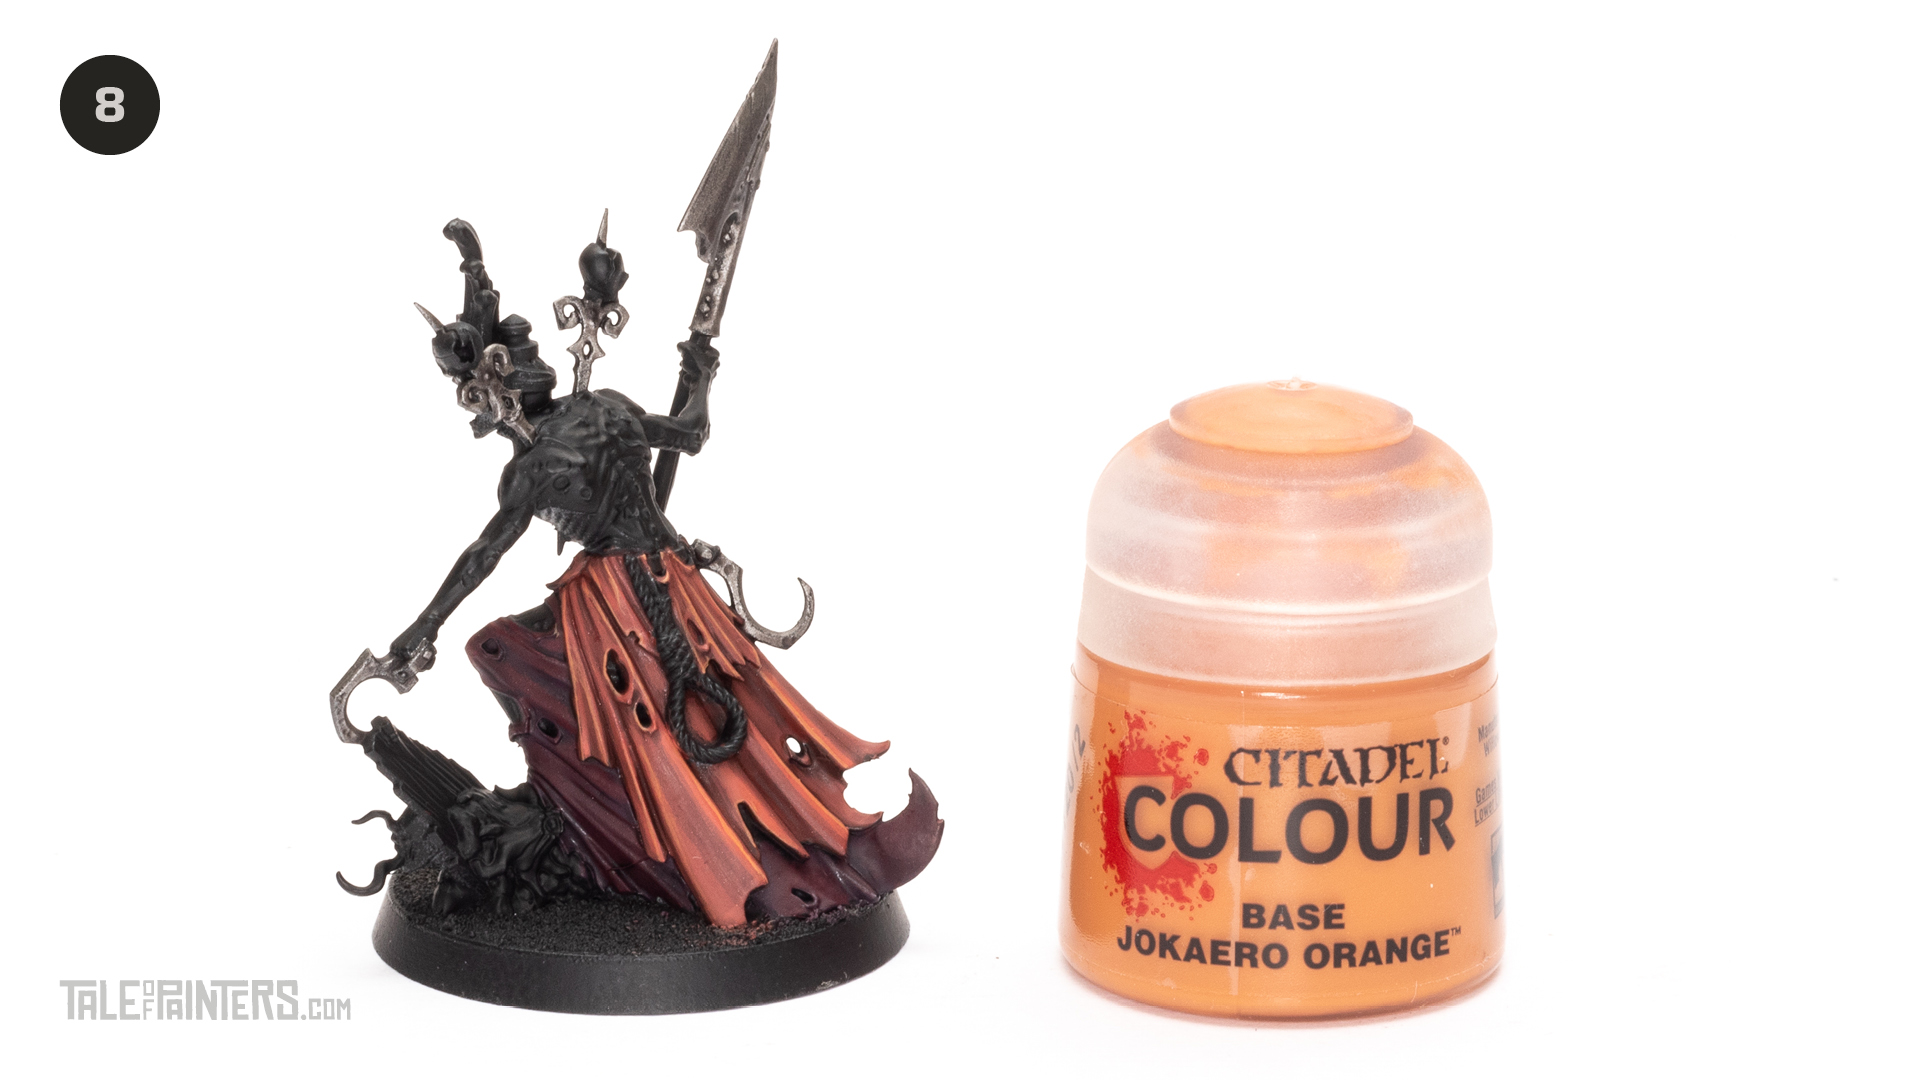

Edge highlight the fabrics on the back with thin lines of Jokaero Orange.


Edge highlight the skirt with thin lines of Mephiston Red.


Shade the metals with Gore-Grunta Fur sparingly. Careful pick out the recesses, don;t just wash it all over. Once dry repeat to increase the intensity of the shading.
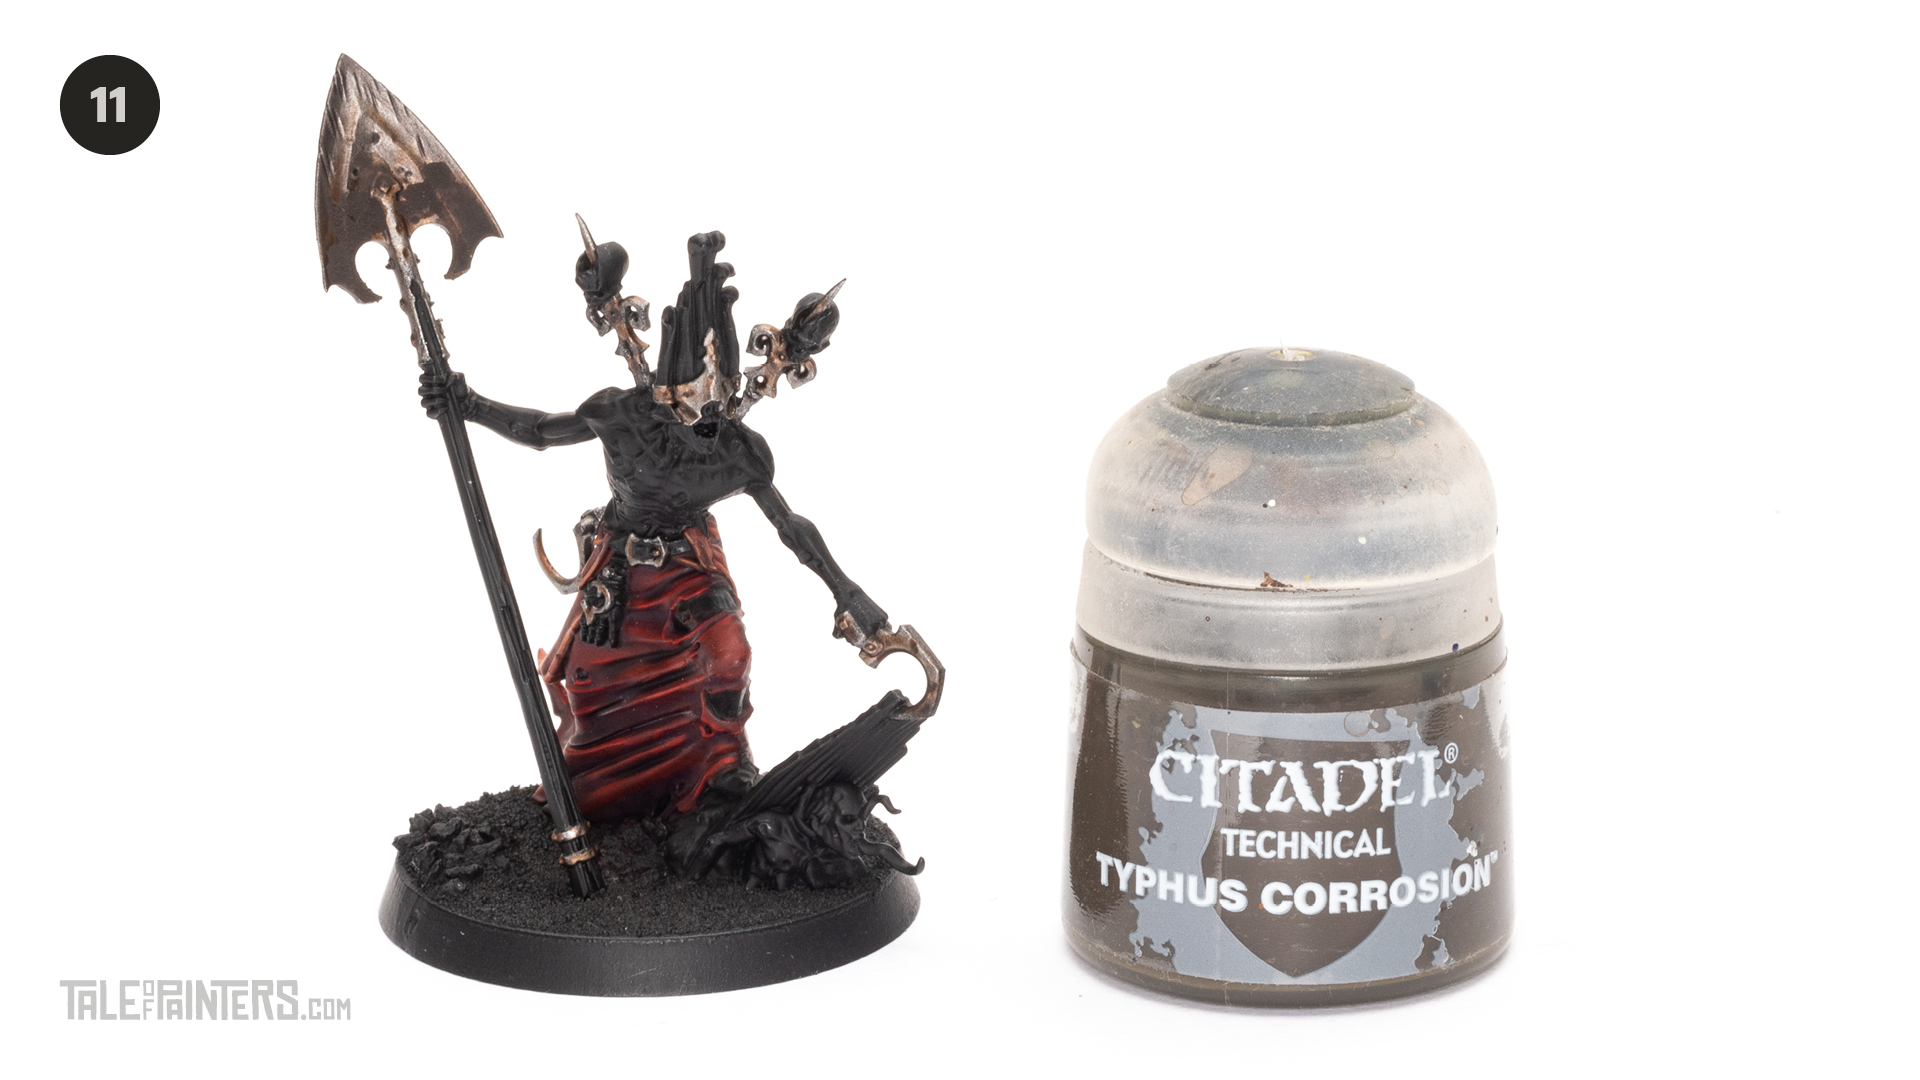

Paint some Typhus Corrosion on to the spade head. This paint has grit in it and is a nice way to add a mud texture to the spade.
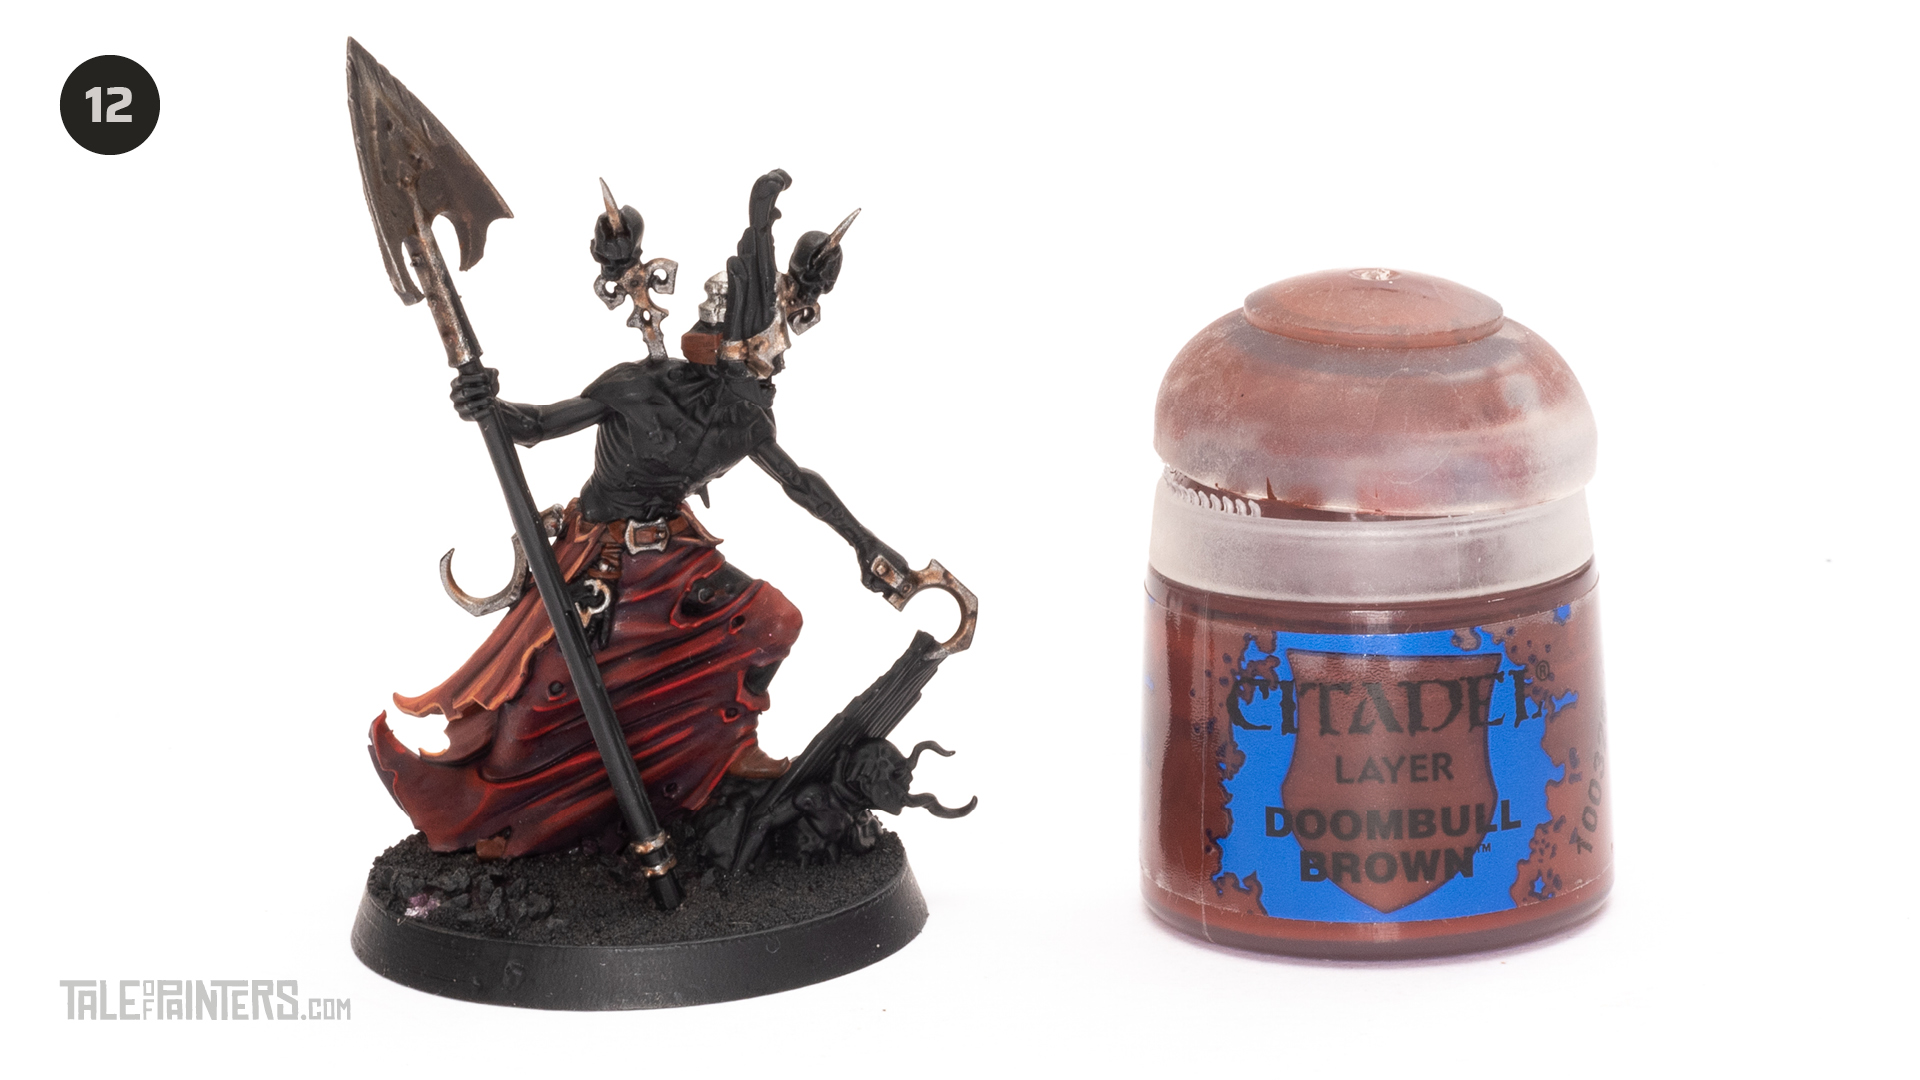

Paint the shoes and leather belt with Doombull Brown.


Paint any wood with two coats of Steal Legion Drab.
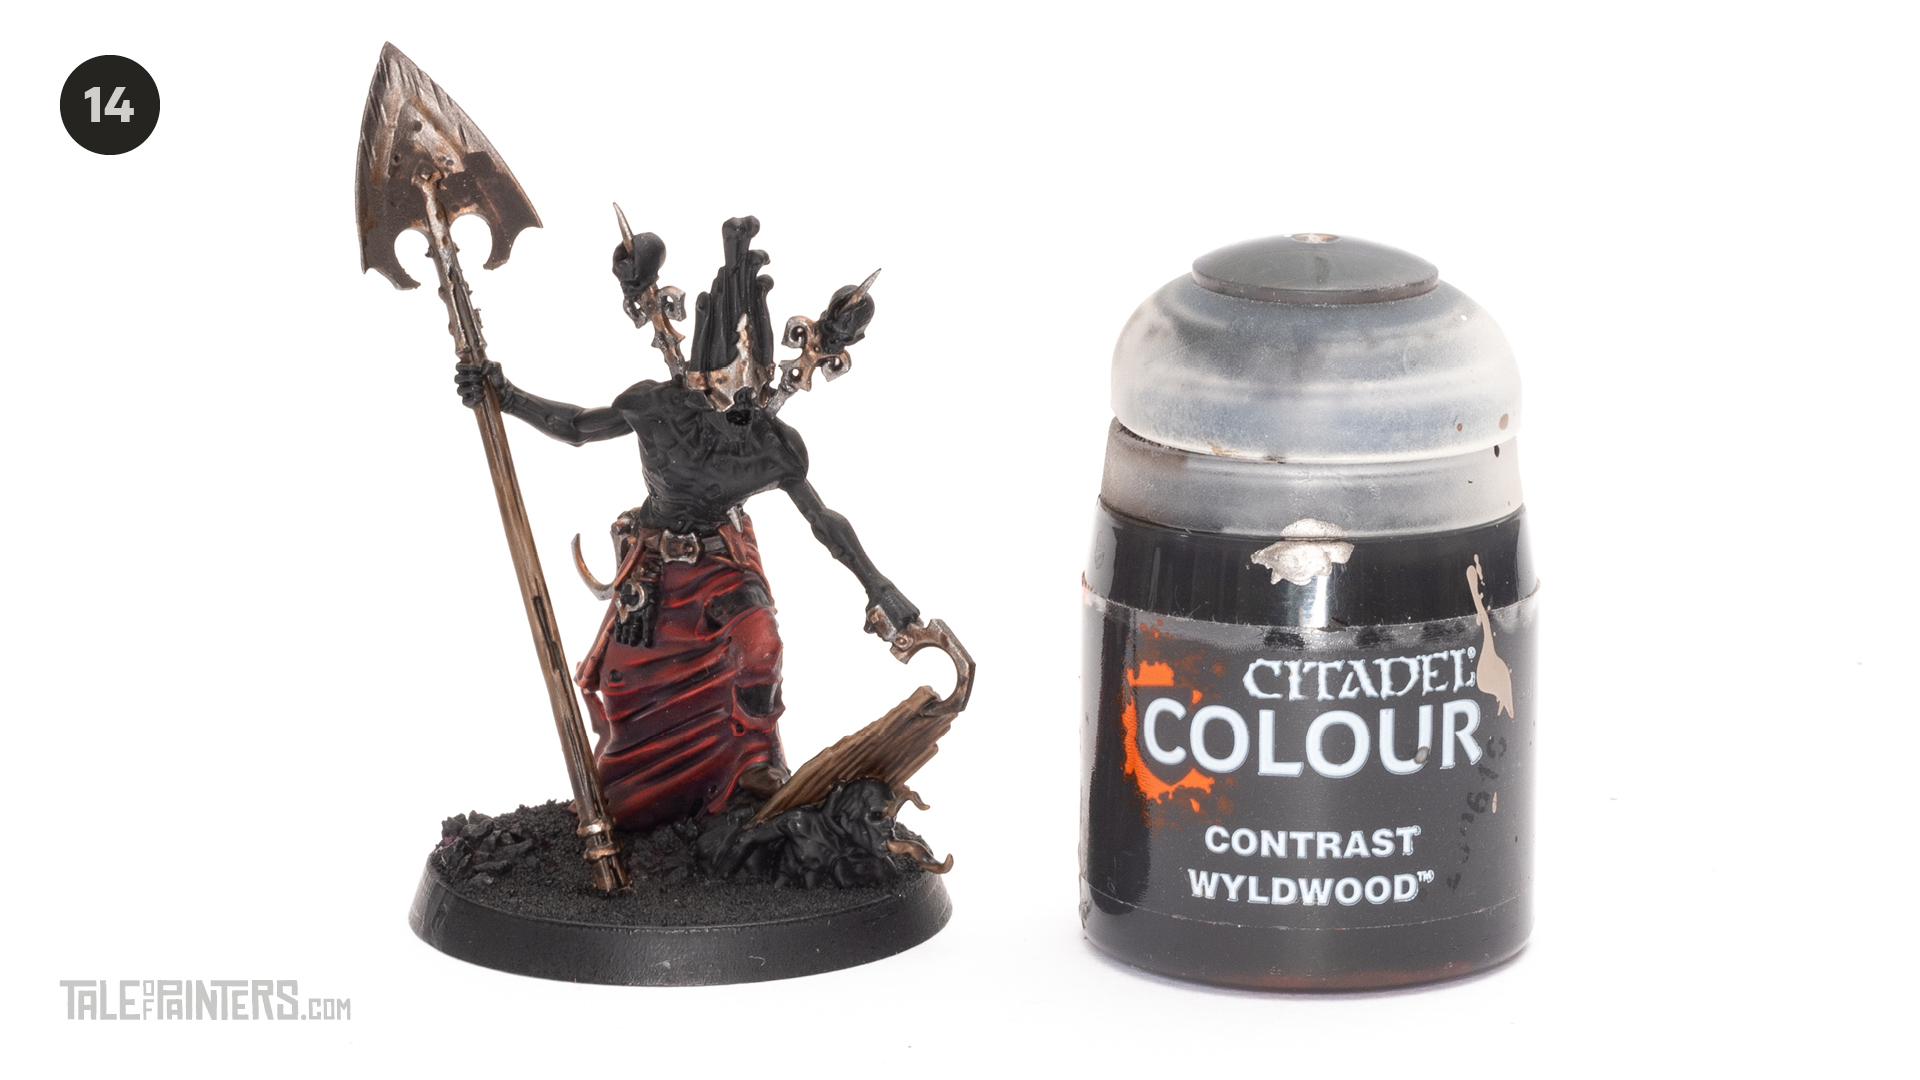

Wash the leather belt, shoes and wood and roots with Wyldwood Contrast.
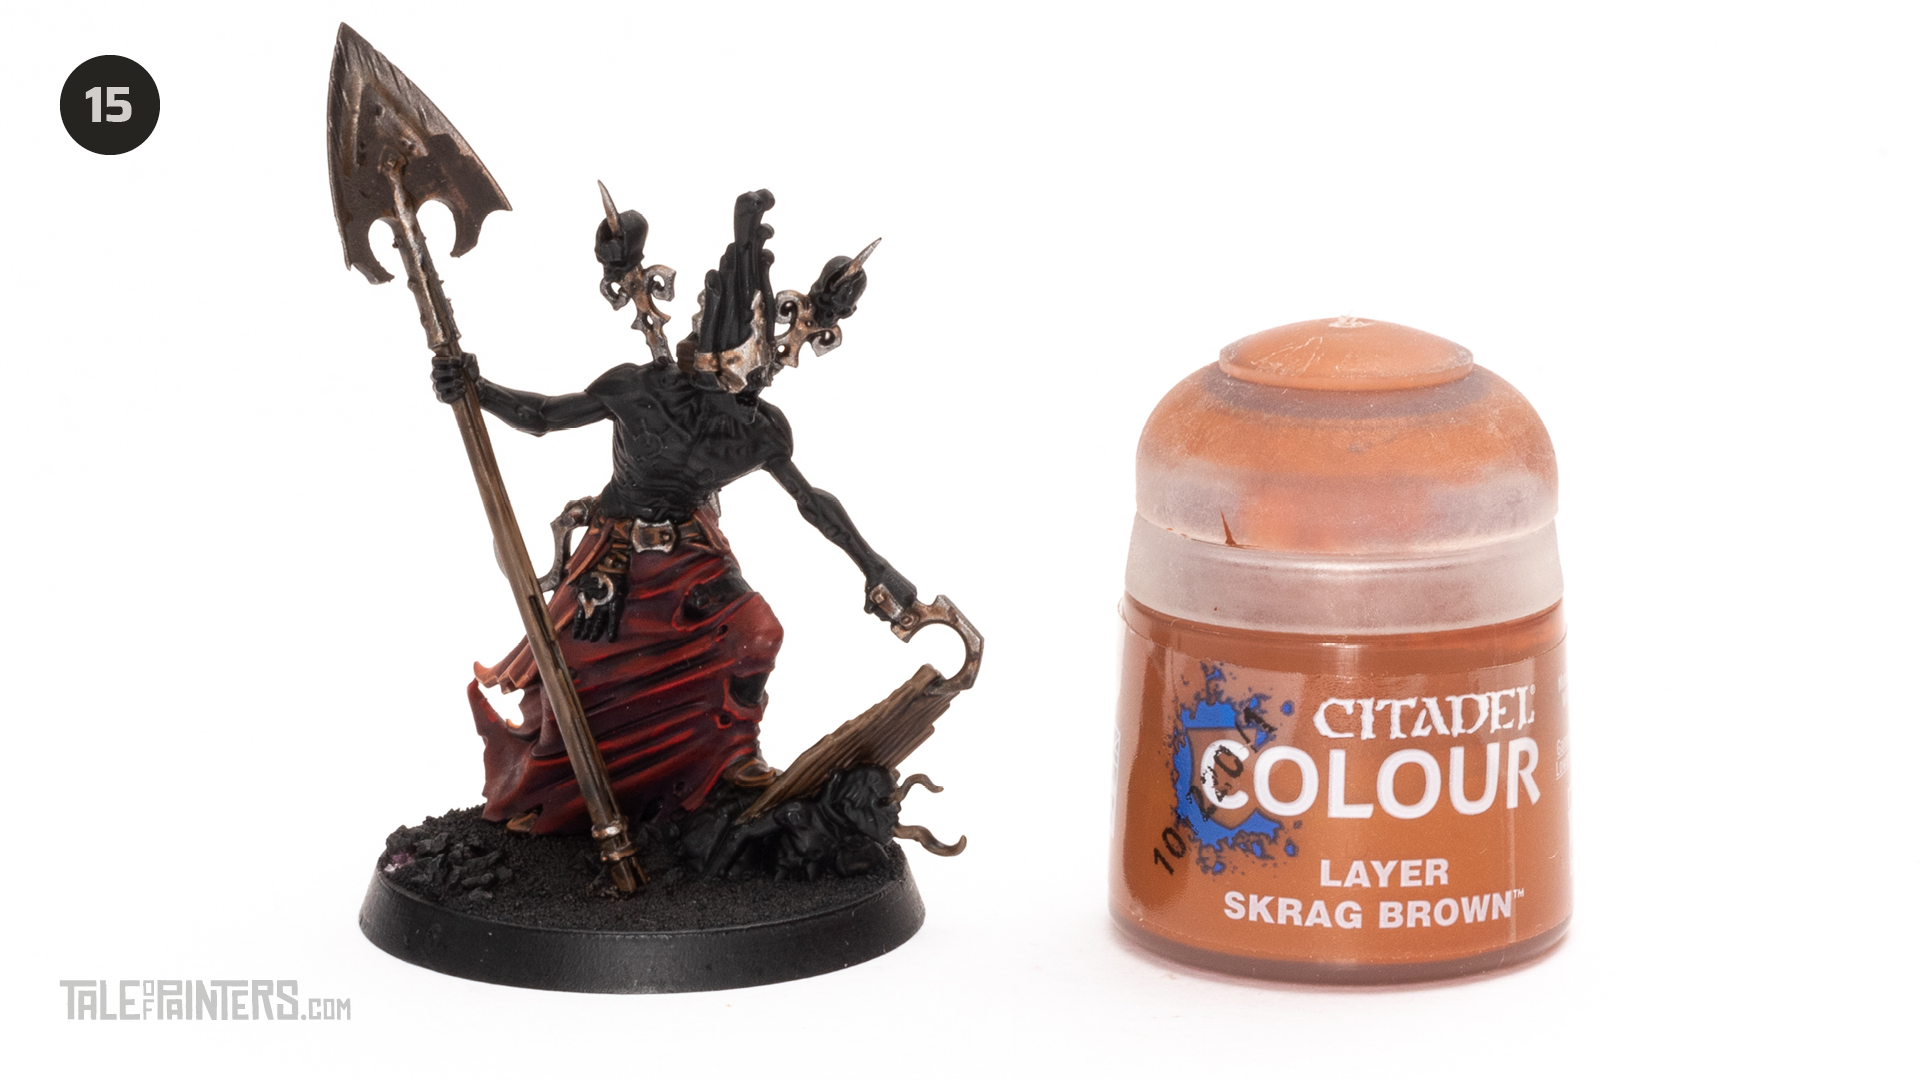

Edge highlight the leather belt with thin lines of Skrag Brown.
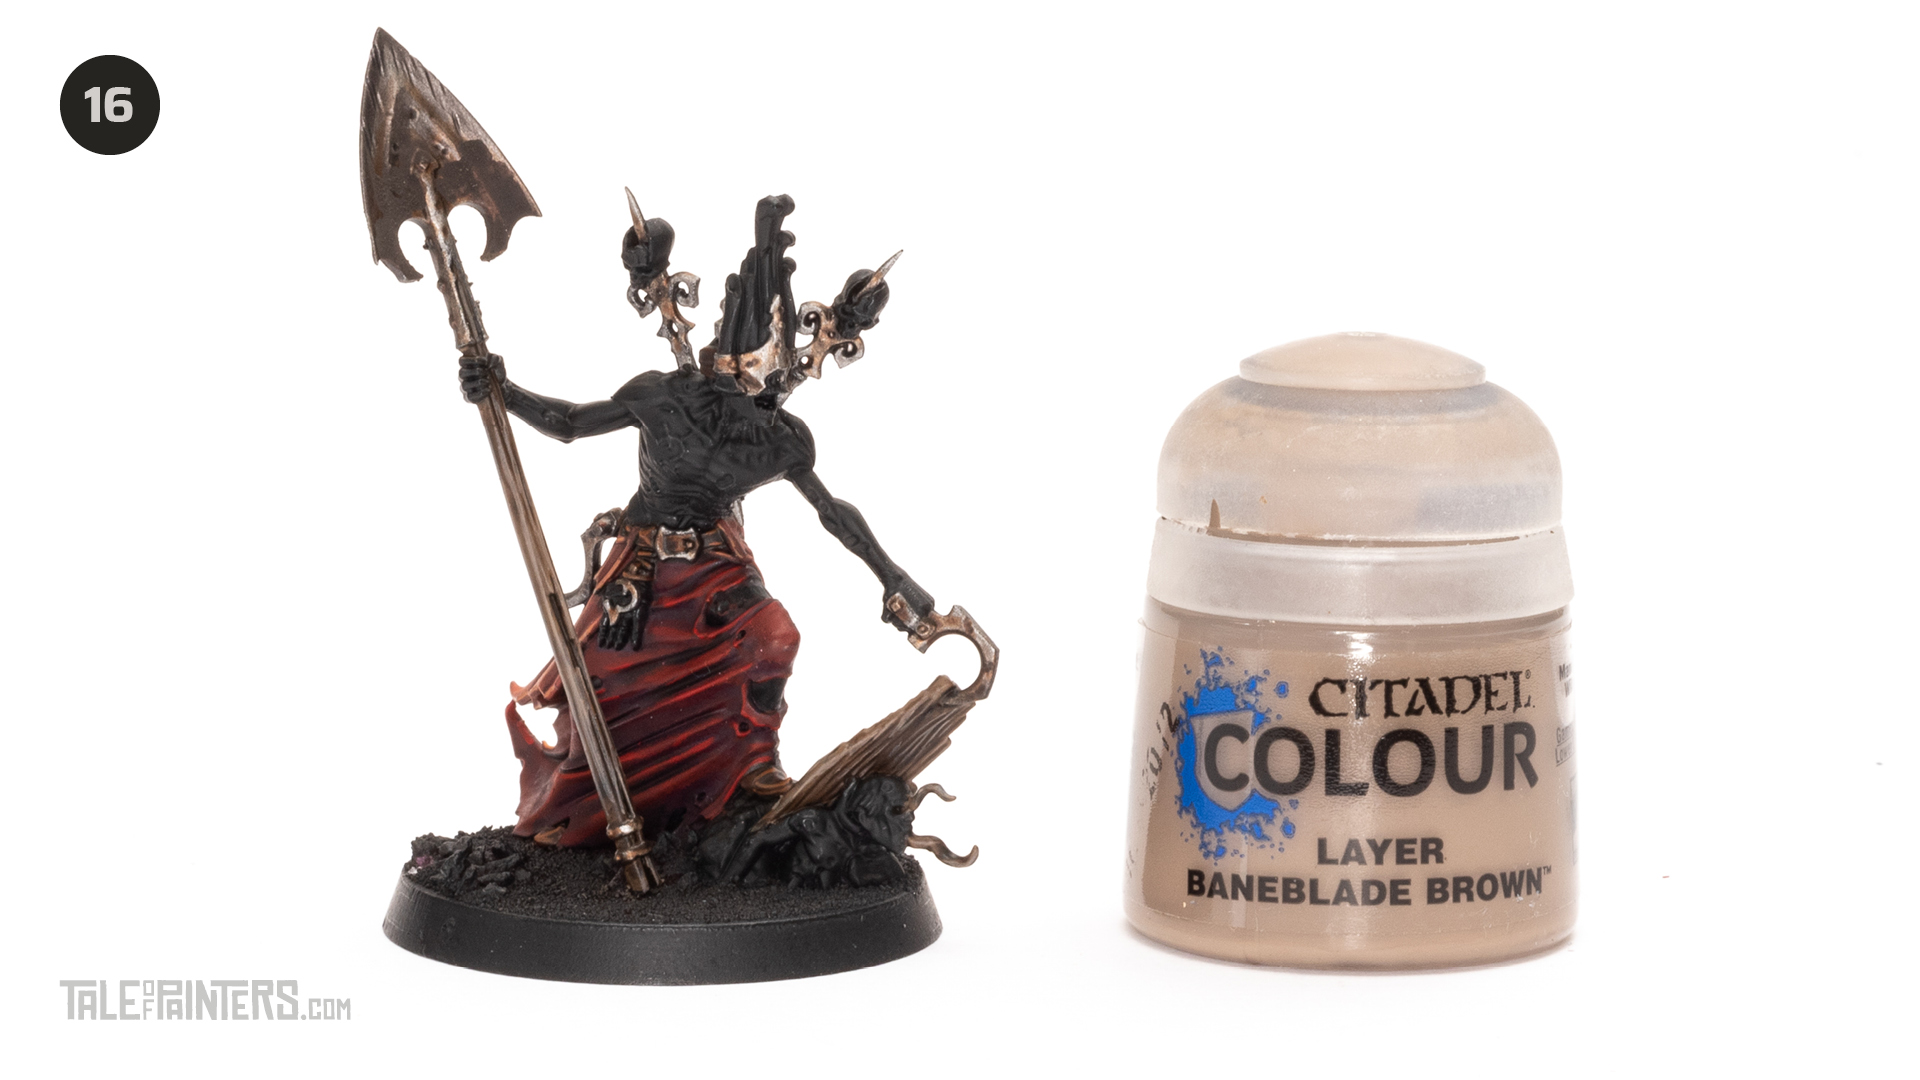

Edge highlight the wood and roots with Baneblade Brown, like you’re painting wood grain. Paint the rope on the back of the miniature with Baneblade Brown.


Apply some thin edge highlights to all the metals with Runefang Silver.
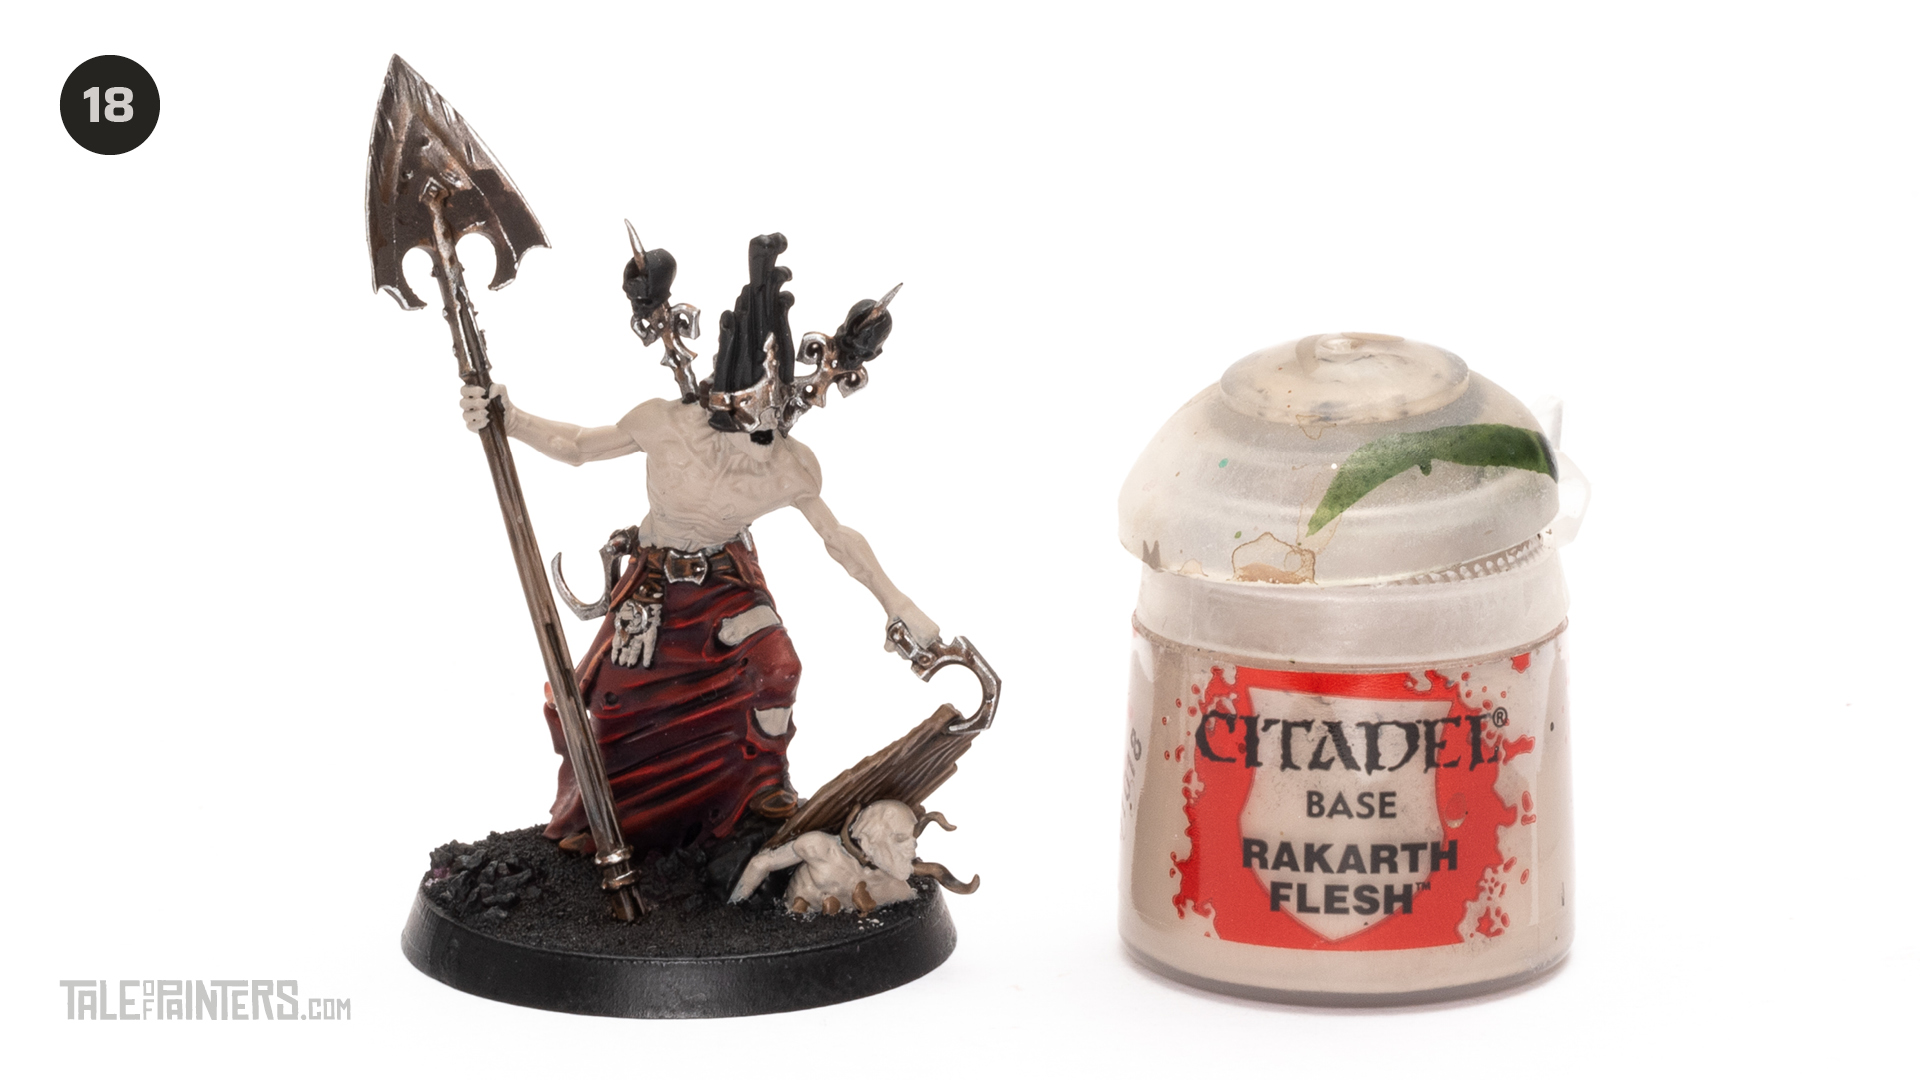

Paint the skin with Rakarth Flesh. This might take a couple of coats to ensure it’s a solid coat. Paint the zombie on the base at the same time.


Mix 3 parts Lahmian Medium with 1 part Contrast Graph-Charger Grey and wash over the skin to give it a desaturated, lifeless look.


Highlight the raised areas of the skin with Kislev Flesh, leaving plenty of the shaded areas showing through.


Highlight the edges of the skin with some thin lines of Pallid Wych Flesh. Thin the paint so it’s softer highlights not too harsh.
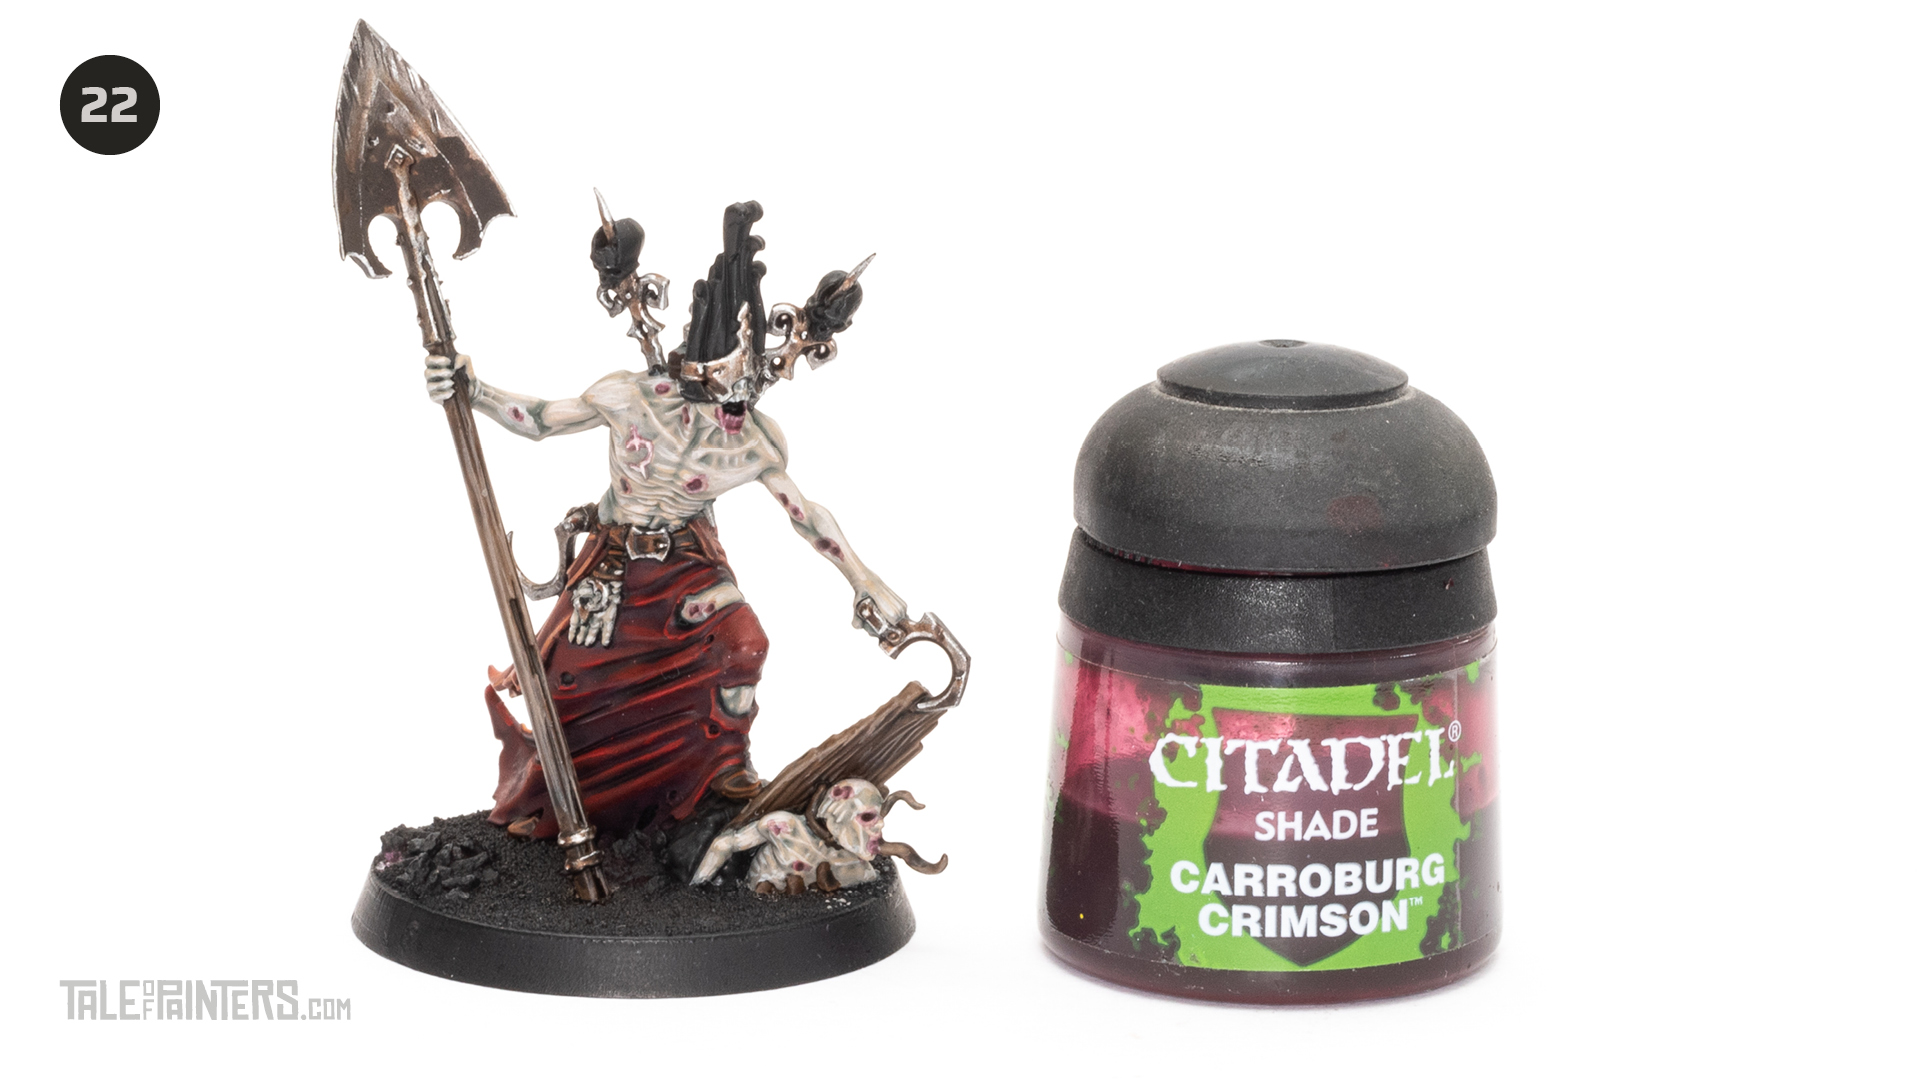

Paint the edges of the skin with uneven, splotchy patterns of Carroburg Crimson. Repeat this step once dry to increase the intensity. This will be matte and look like dried blood
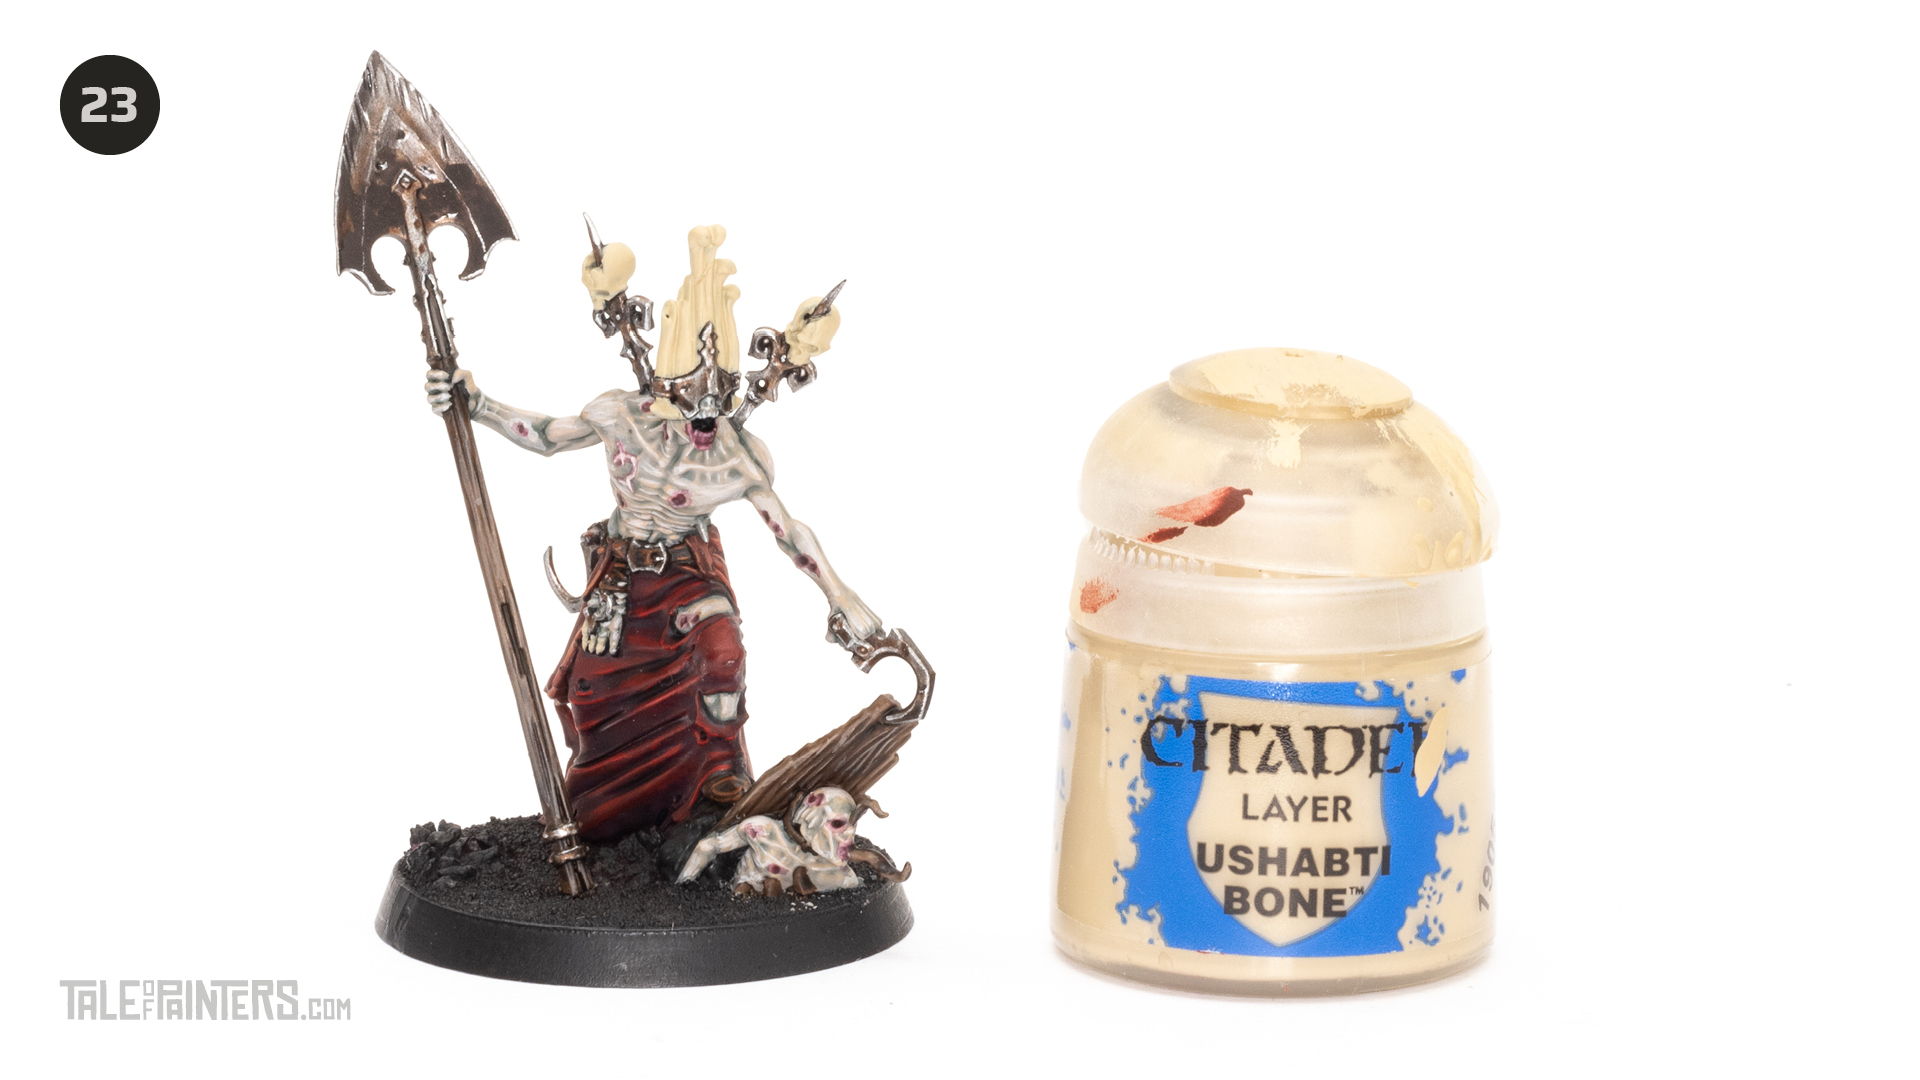

Paint the bone headdress and skulls with two coats of Ubshabti Bone. Highlight the rope with Ushabti Bone.
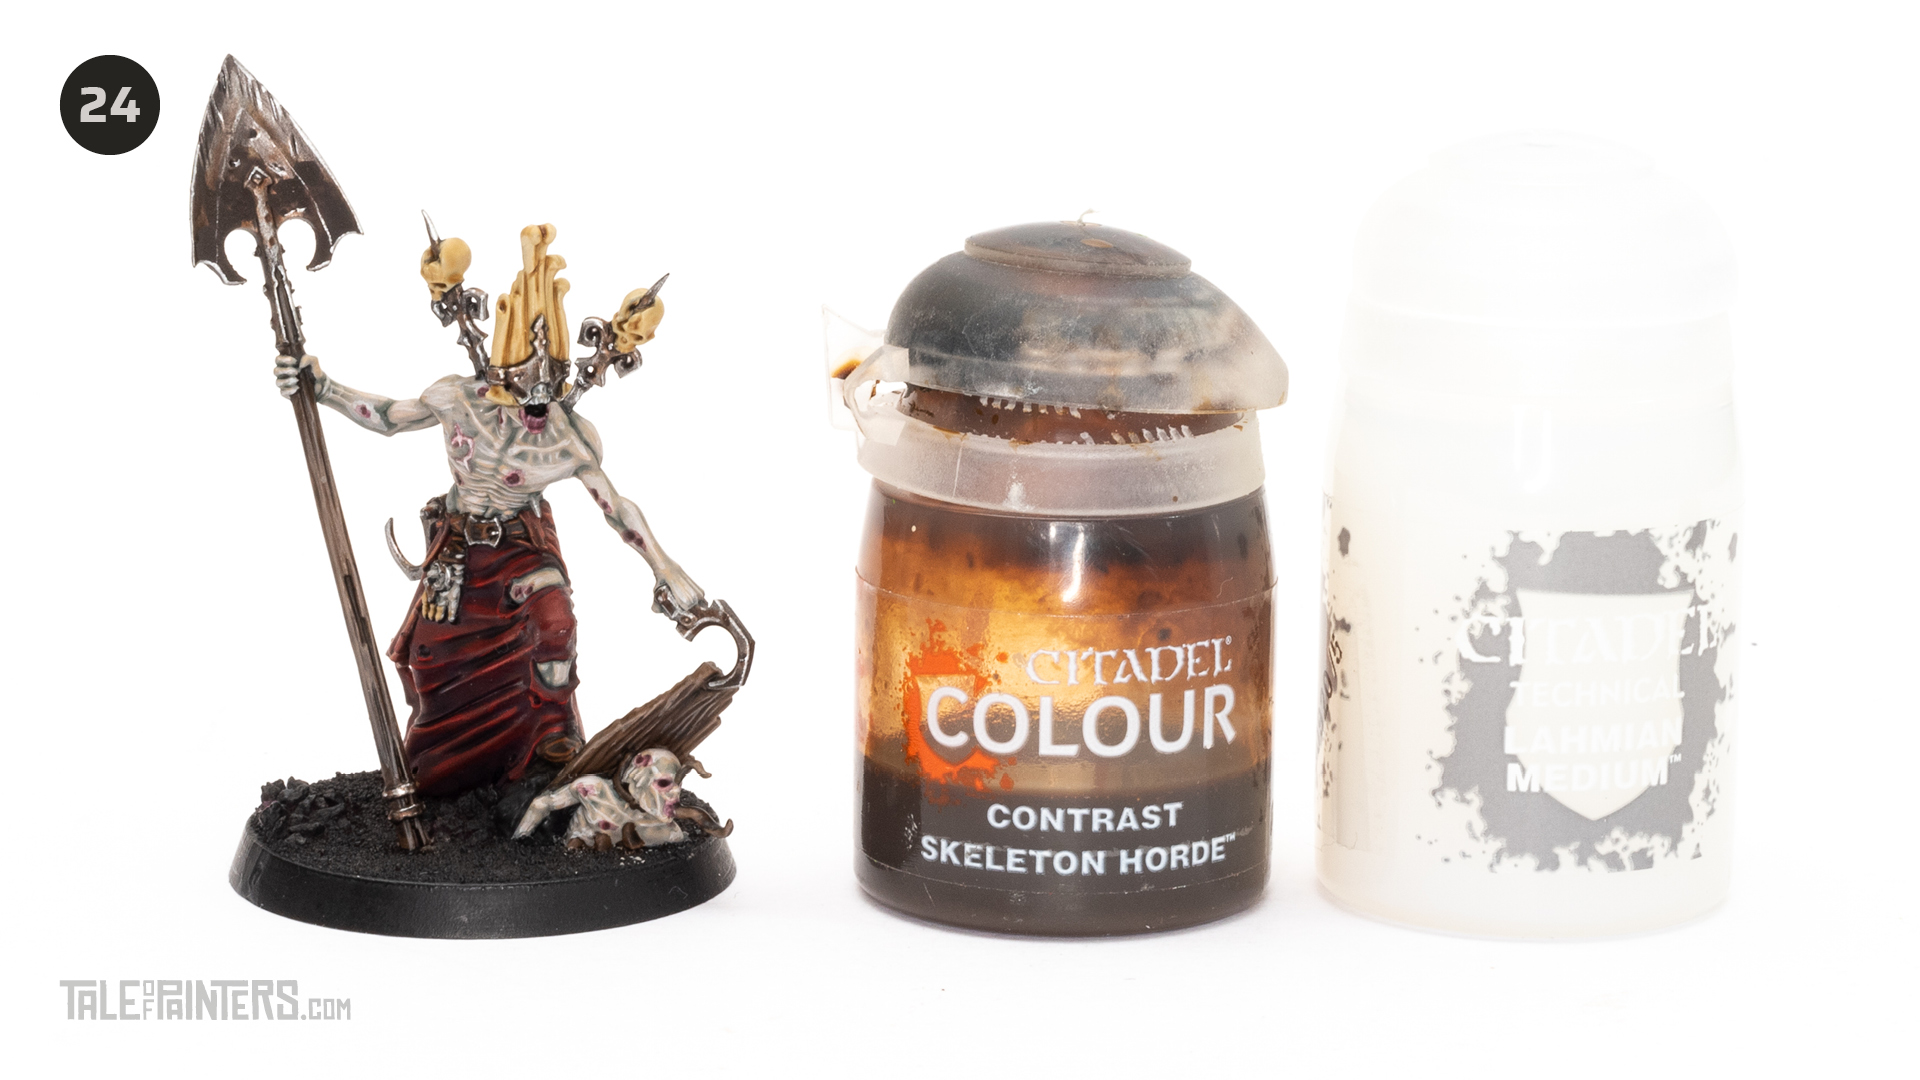

Wash the bone head dress and skulls. with 50:50 mix of Skeleton Horde and Lahmian Medium.


Highlight the bone head dress and skulls with Wraithbone.
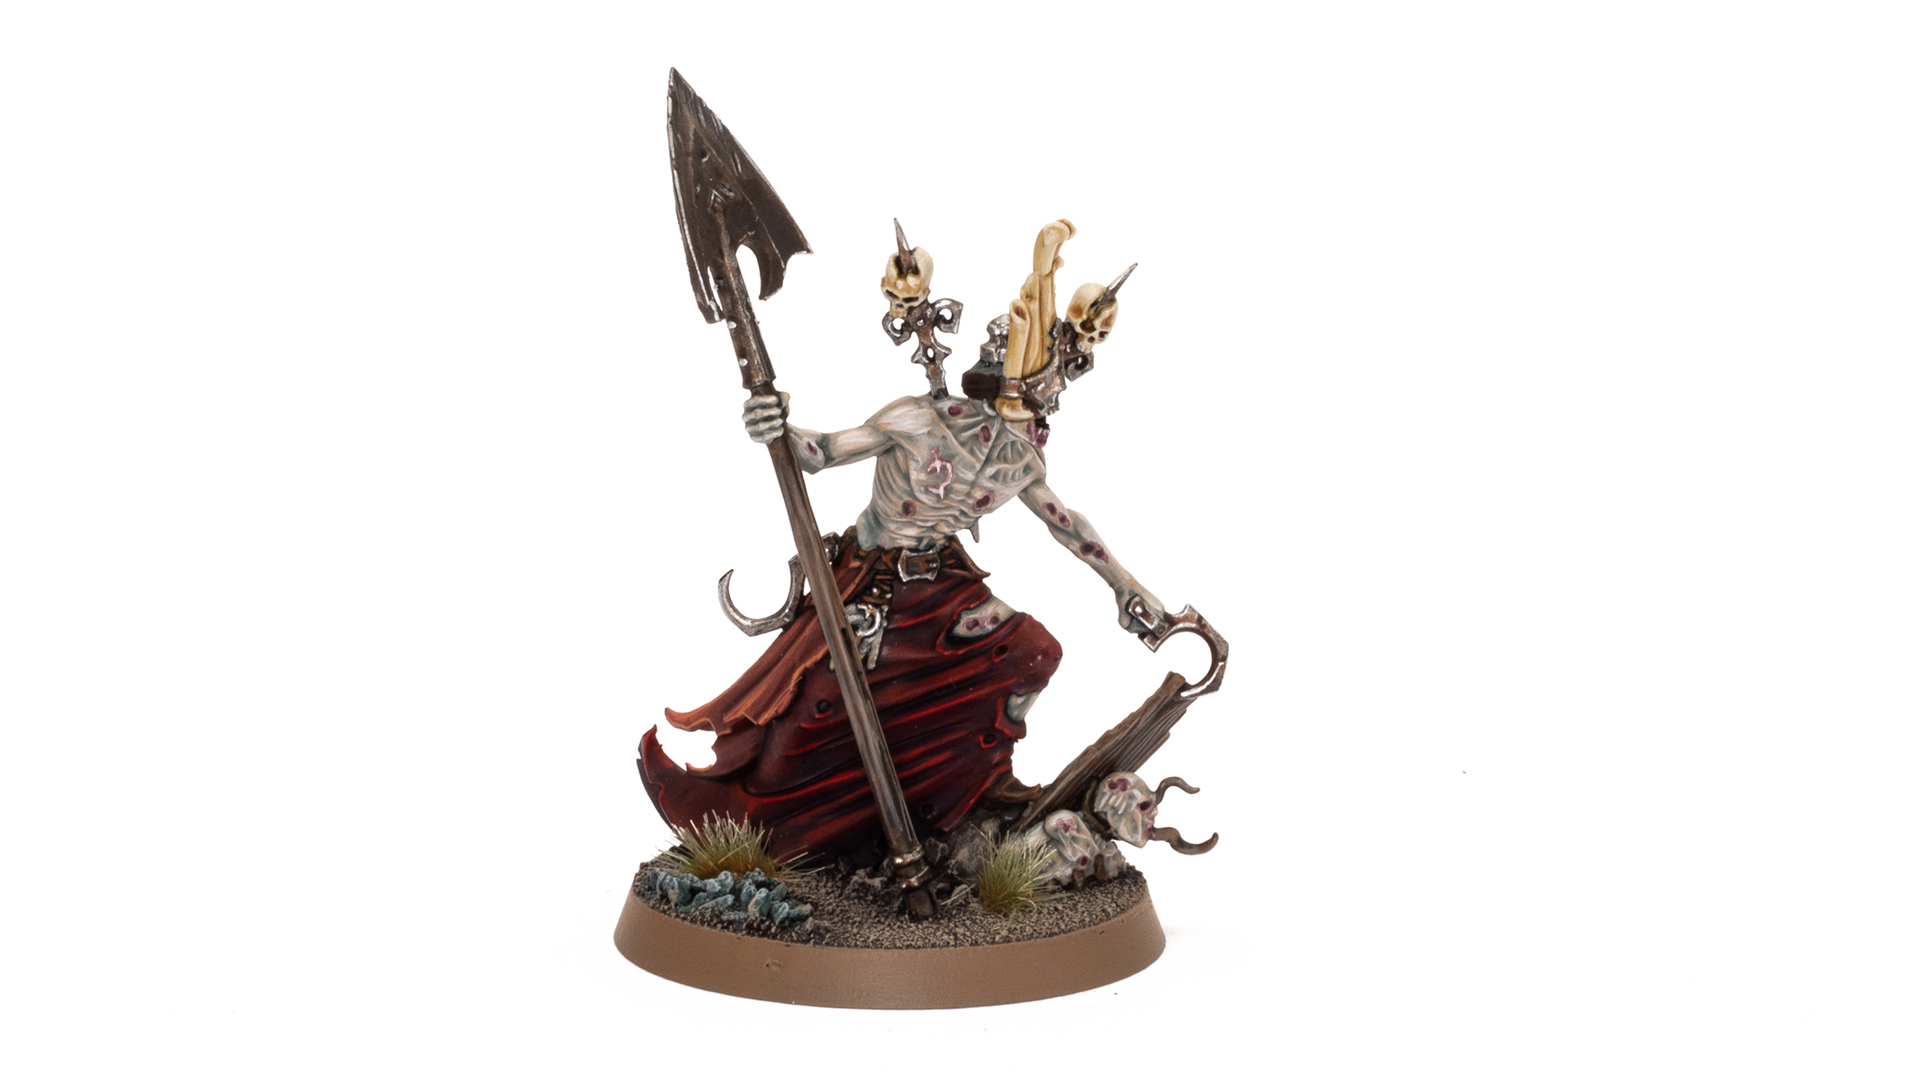

To paint the base, the sand is painted with Dryad Bark, drybrushed with Steel Legion and then final drybrushed with Karak Stone.
Paints you will need for this tutorial:
- Chaos Black Undercoat Spray
- Abaddon Black (base)
- Barack-Nar Burgundy (base)
- Khorne Red (base)
- Word Bearers Red (layer)
- Squig Orange (layer)
- Leadbelcher (base)
- Basilcanum Grey (contrast)
- Lahmian Medium (technical)
- Jokaero Orange (base)
- Mephiston Red (base)
- Gore-Grunta Fur (contrast)
- Typhus Corrosion (technical)
- Doombull Brown (layer)
- Steal Legion Drab (base)
- Wyldwood (contrast)
- Skrag Brown (layer)
- Baneblade Brown (layer)
- Runefang Silver (layer)
- Rakarth Flesh (base)
- Graph-Charger Grey (layer)
- Kislev Flesh (layer)
- Pallid Wych Flesh (layer)
- Carroburg Crimson (shade)
- Ushabti Bone (layer)
- Skeleton Horde (contrast)
- Wraithbone (base)
Paints you’ll need for the base:
- Dryad Bark (base)
- Steel Legion Drab (base)
- Karak Stone Layer
If you need to expand your paint collection to follow the tutorial, check out our partner stores Wayland Games and Element Games, which offer an amazing range of paints at a discount.
Check out my previous tutorials on How to Paint Corpse Rats and Bat Swarms, Ulfenwatch Skeletons, Deadwalker Zombies, Kosargi Night Guard, Vargskyr and Vyrkos Blood-born. Want to learn more about painting Warhammer Quest Cursed City models, stay tuned for more tutorials, in the mean time you can check out my review of Warhammer Quest Cursed City.
Hope you enjoyed this tutorial. If so, leave a comment or reaction below, and if you got any questions, leave them here so I can answer them for you.


[…] Swarms, Ulfenwatch Skeletons, Deadwalker Zombies, Kosargi Night Guard, Vargskyr, Vyrkos Blood-born, Gorslav the Gravekeeper, Torgillius the Chamberlain, Radukar the Wolf, Qulathis the Exile, Brutogg Corpse-eater, Emelda […]
[…] Swarms, Ulfenwatch Skeletons, Deadwalker Zombies, Kosargi Night Guard, Vargskyr, Vyrkos Blood-born, Gorslav the Gravekeeper and Torgillius the Chamberlain. Want to learn more about painting Warhammer Quest Cursed City […]
Hey, i can’t help myself but to thank you for those tutorials. It’s very technically affordable and well detailed. It improves my skill. I just still have problems manipulating the mediums. (i found your StD army when i was wondering if Iron Golem scheme would fit on StD army and i will use this scheme when the Cursed city will be painted !)