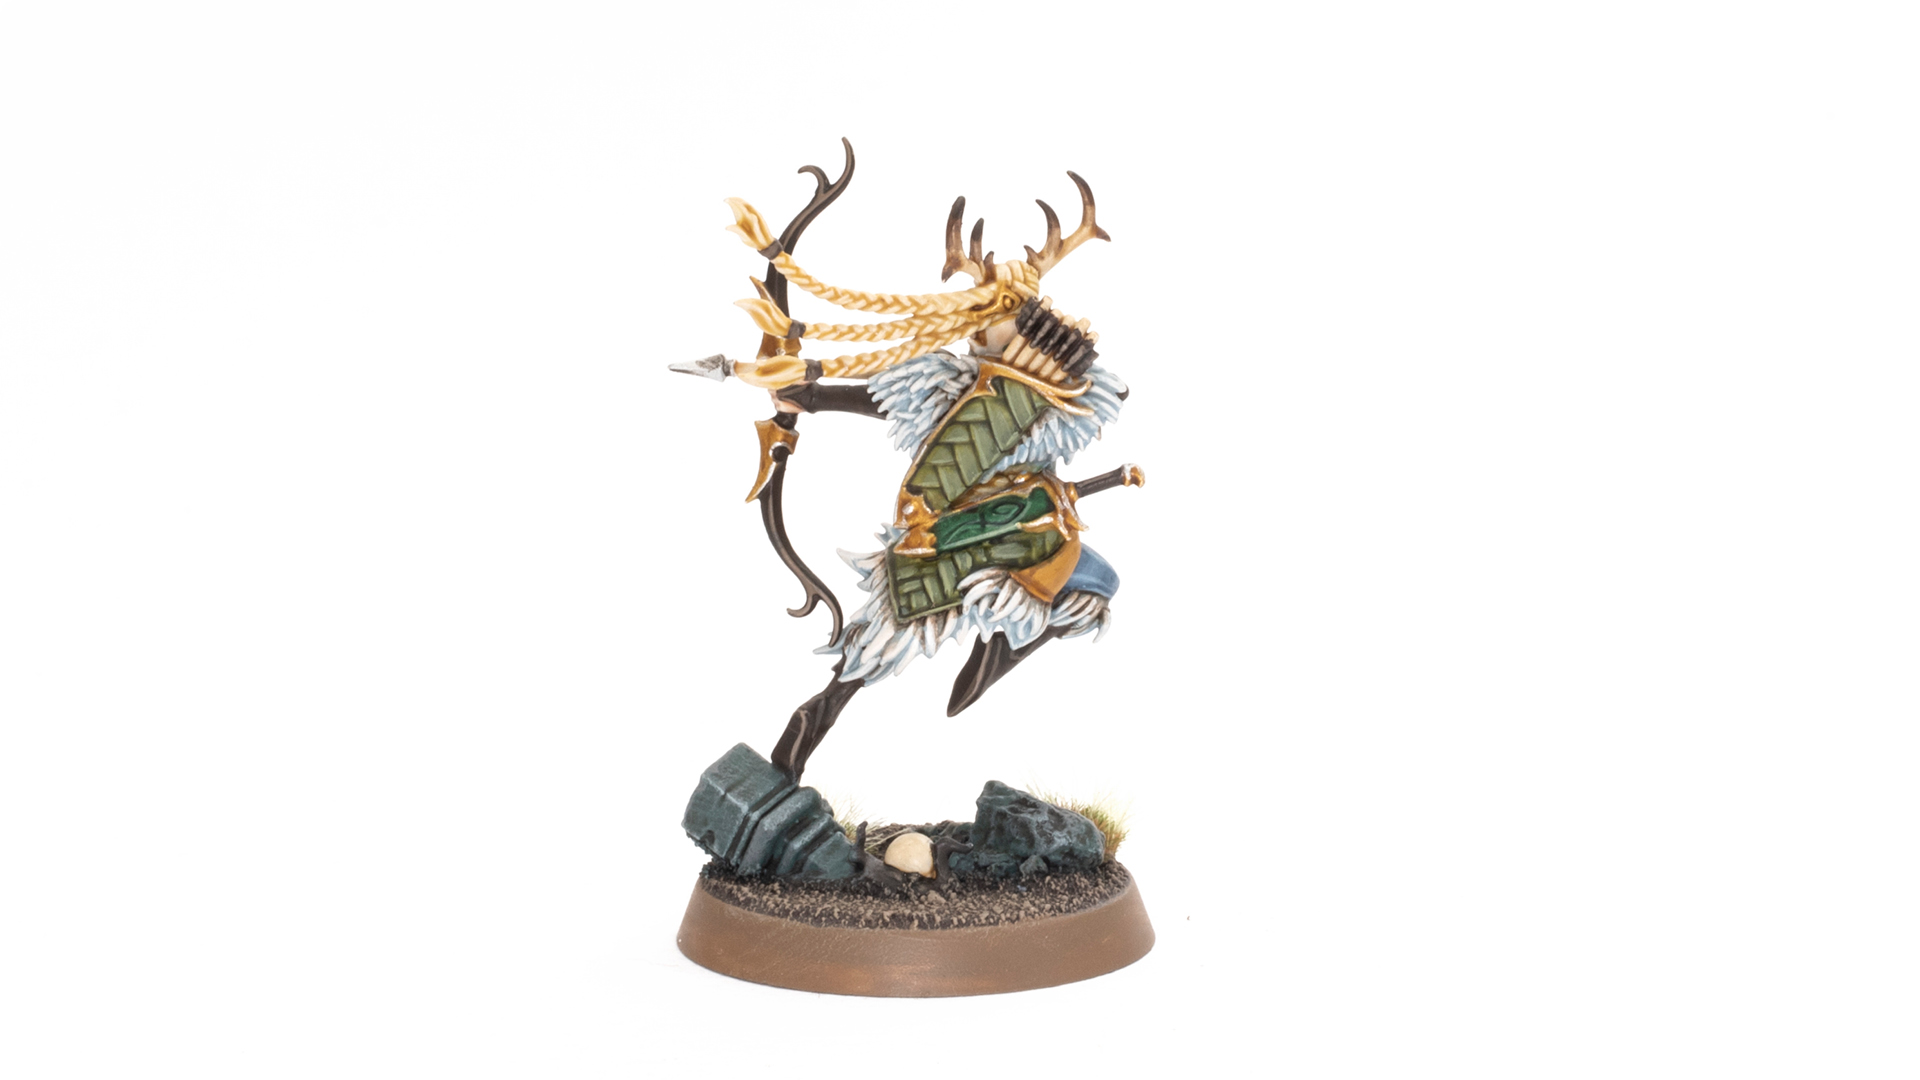
In this post, I’ll show you how to paint Qulathis the Exile from Warhammer Quest Cursed City in 26 easy to follow steps. You’ll learn how I paint elf flesh, forest green clothing, boney antlers and more. Find out how in this tutorial.
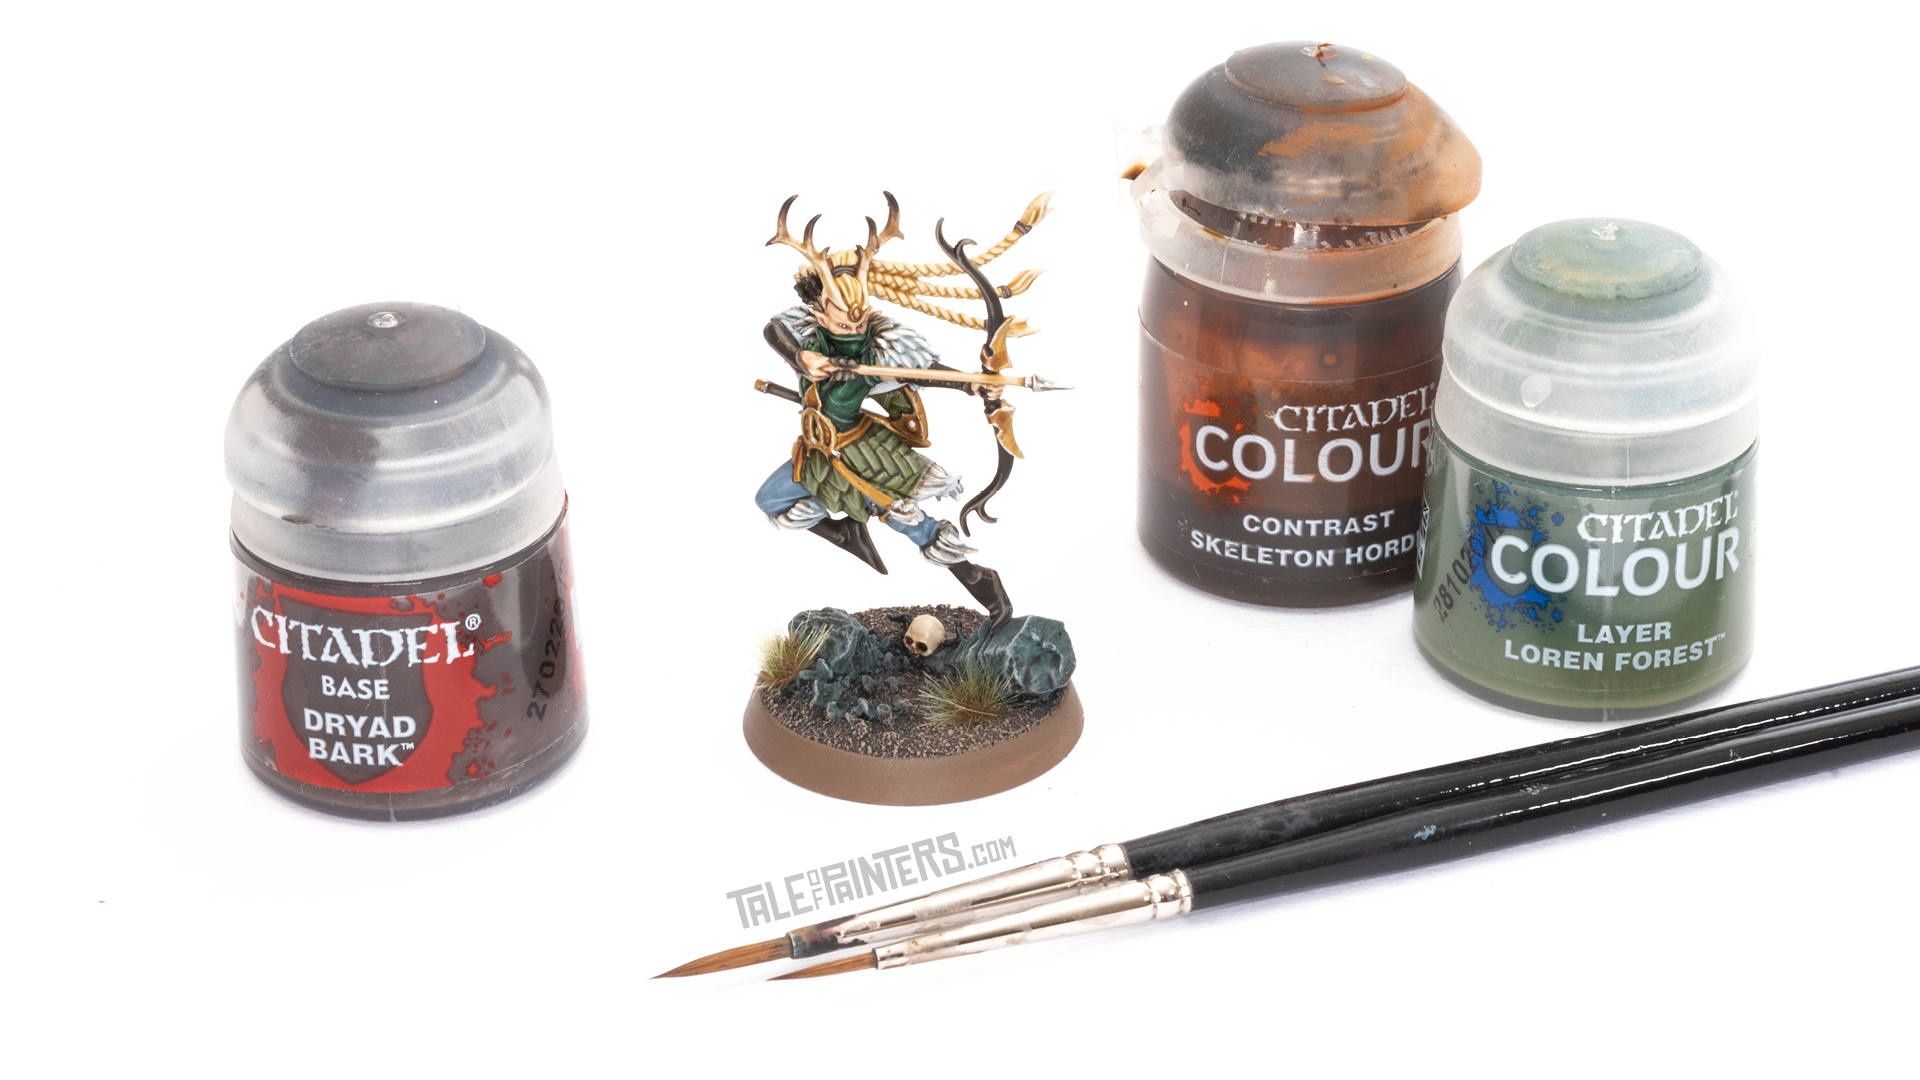

This tutorial assumes you have a good understanding of how to paint Warhammer miniatures. With each picture is the corresponding instruction. Each step shows the Citadel paint(s) I used. You’ll find a list of all the paints used in this tutorial at the end of the post.
How to paint Qulathis the Exile
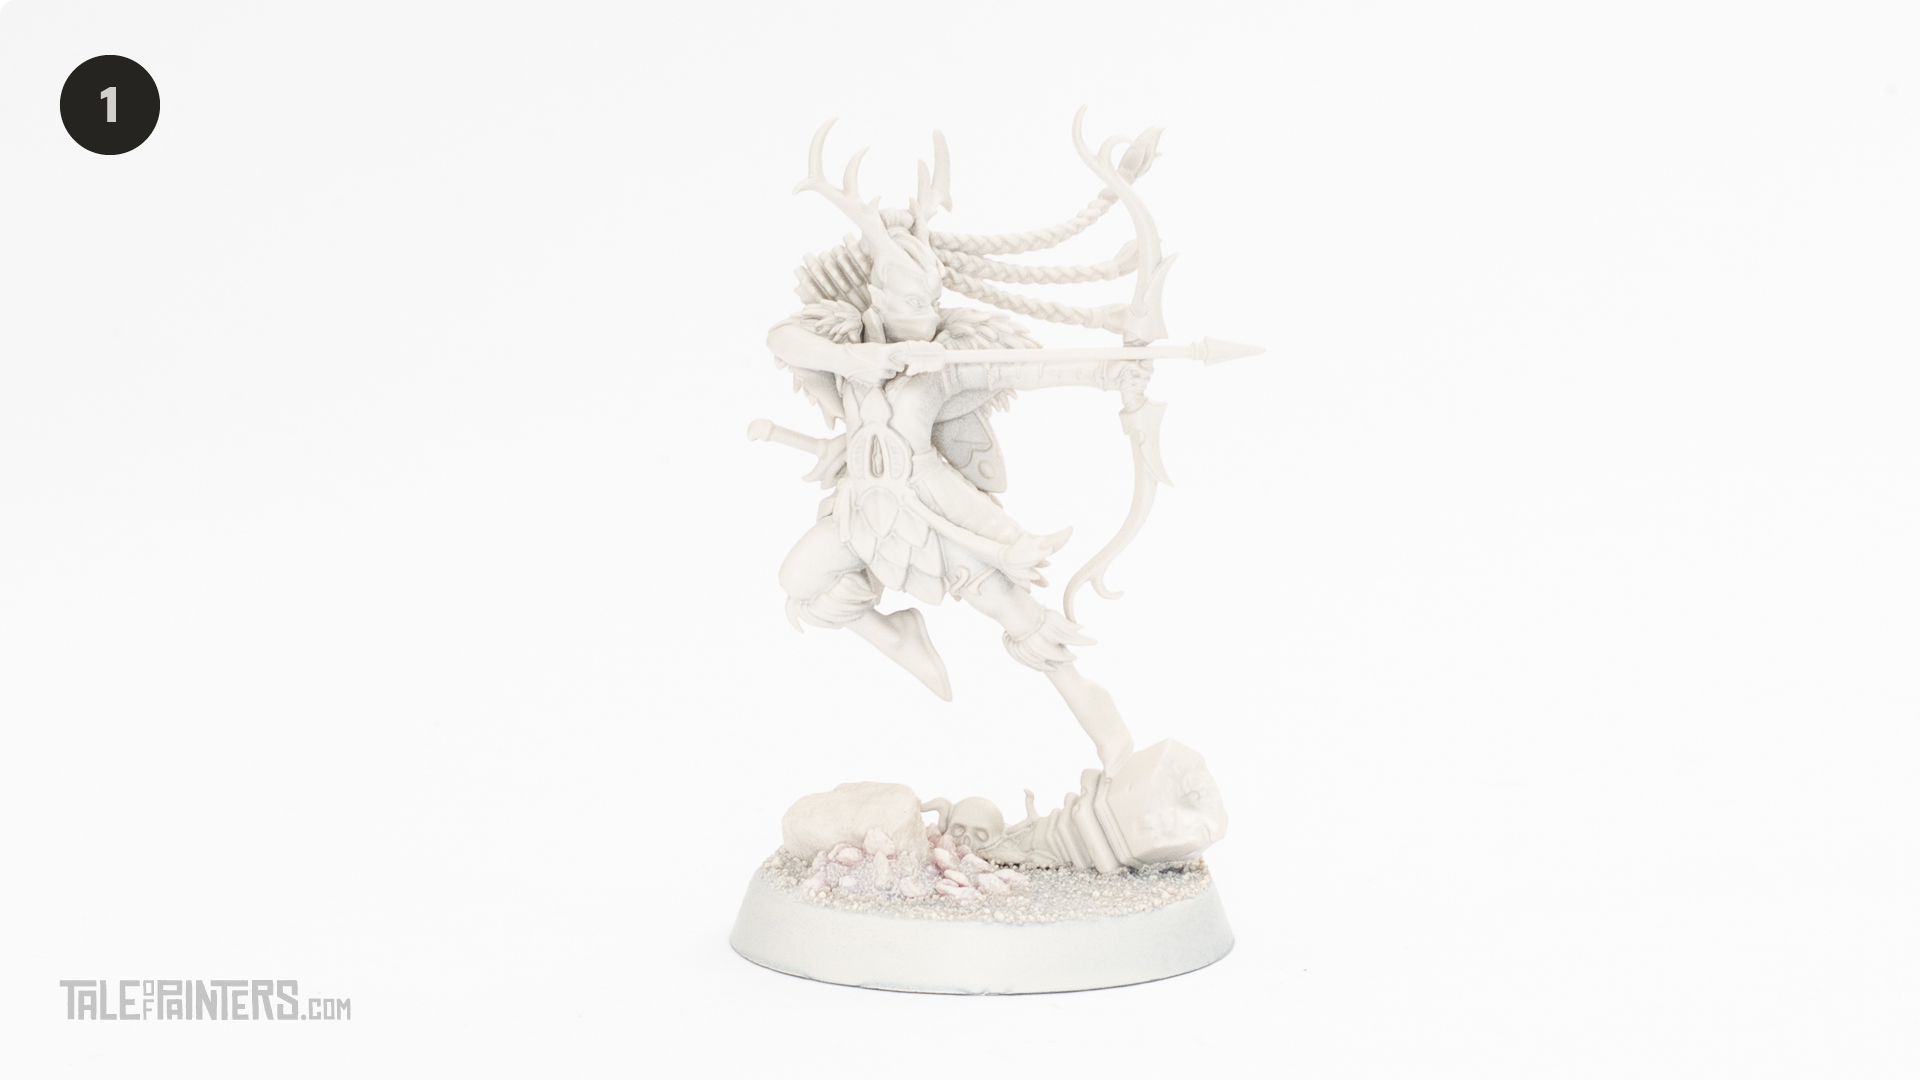

Undercoat your model with Wraithbone undercoat spray.
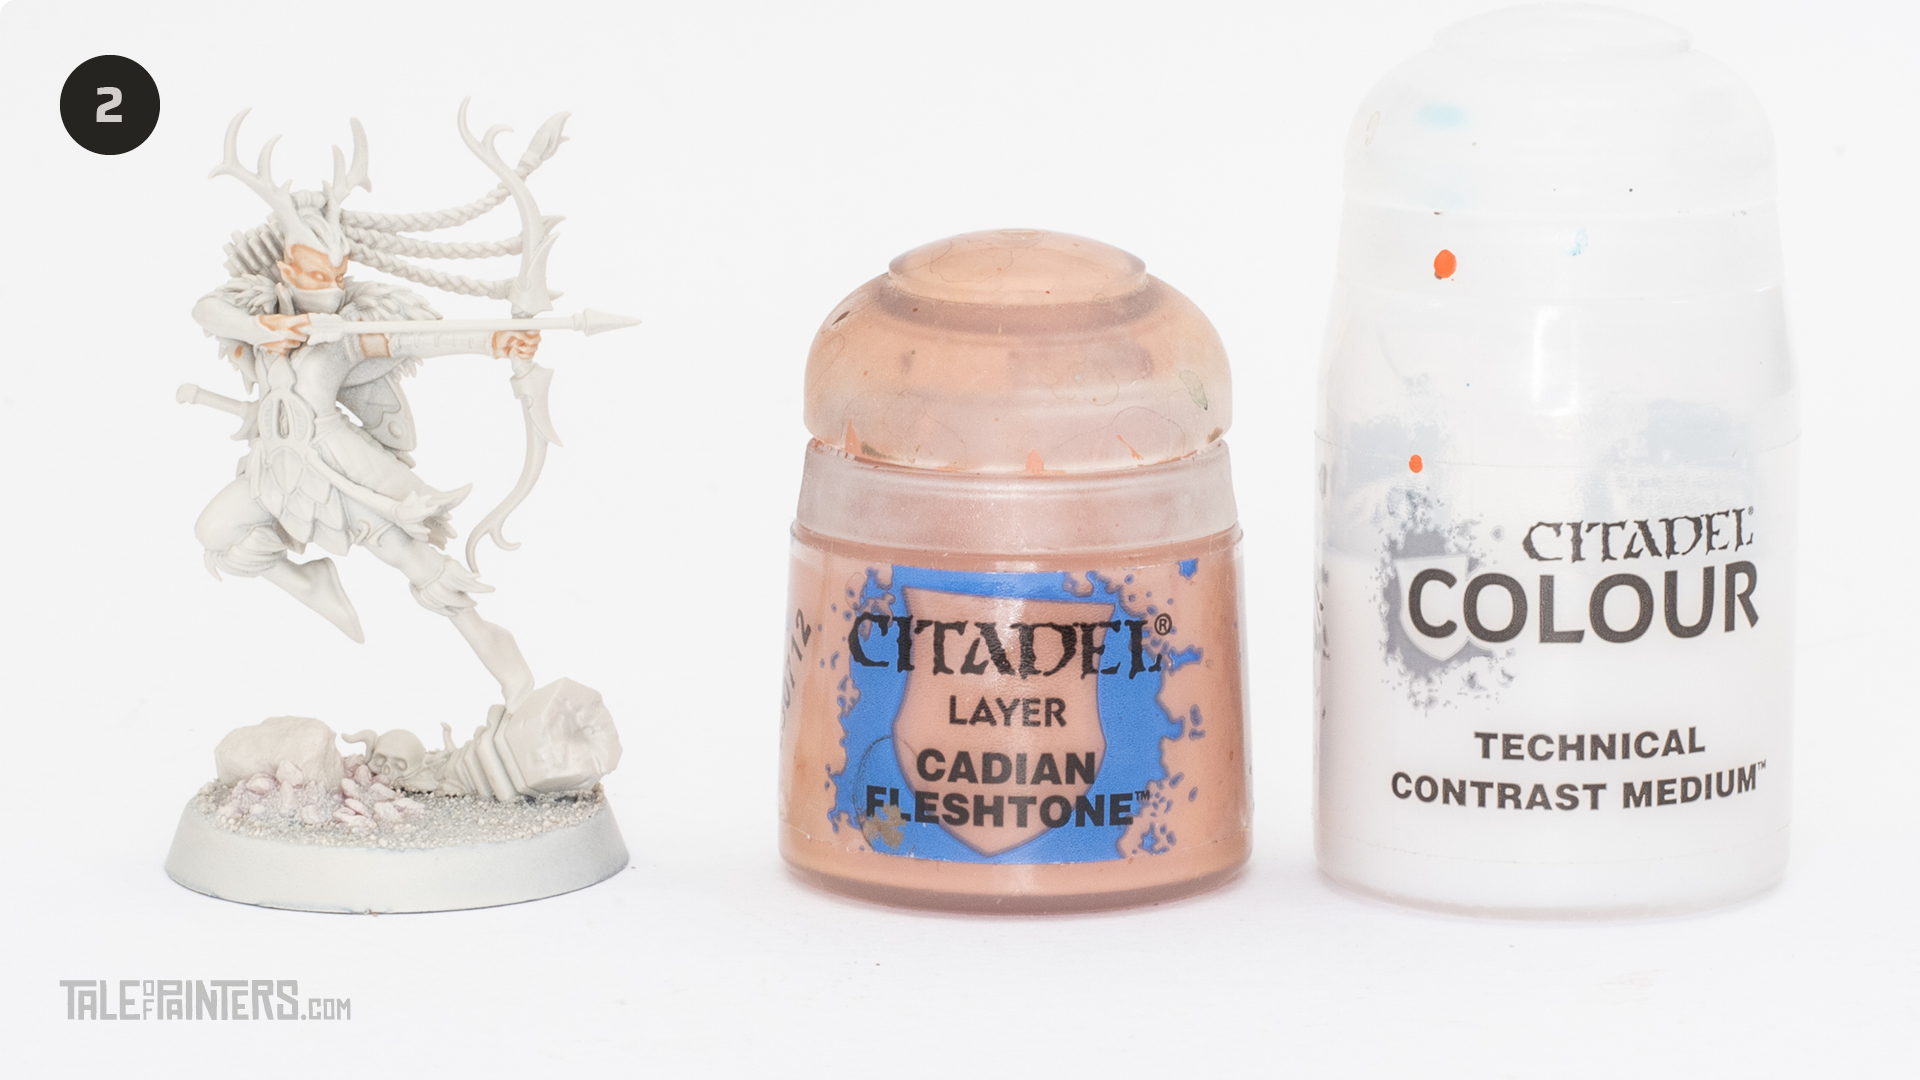

Mix Cadian Fleshtone with Contrast medium (1:3 ratio) on a paint palette and then paint it over all the skin areas. If it starts to pool in one area, wick it away with a spare brush.
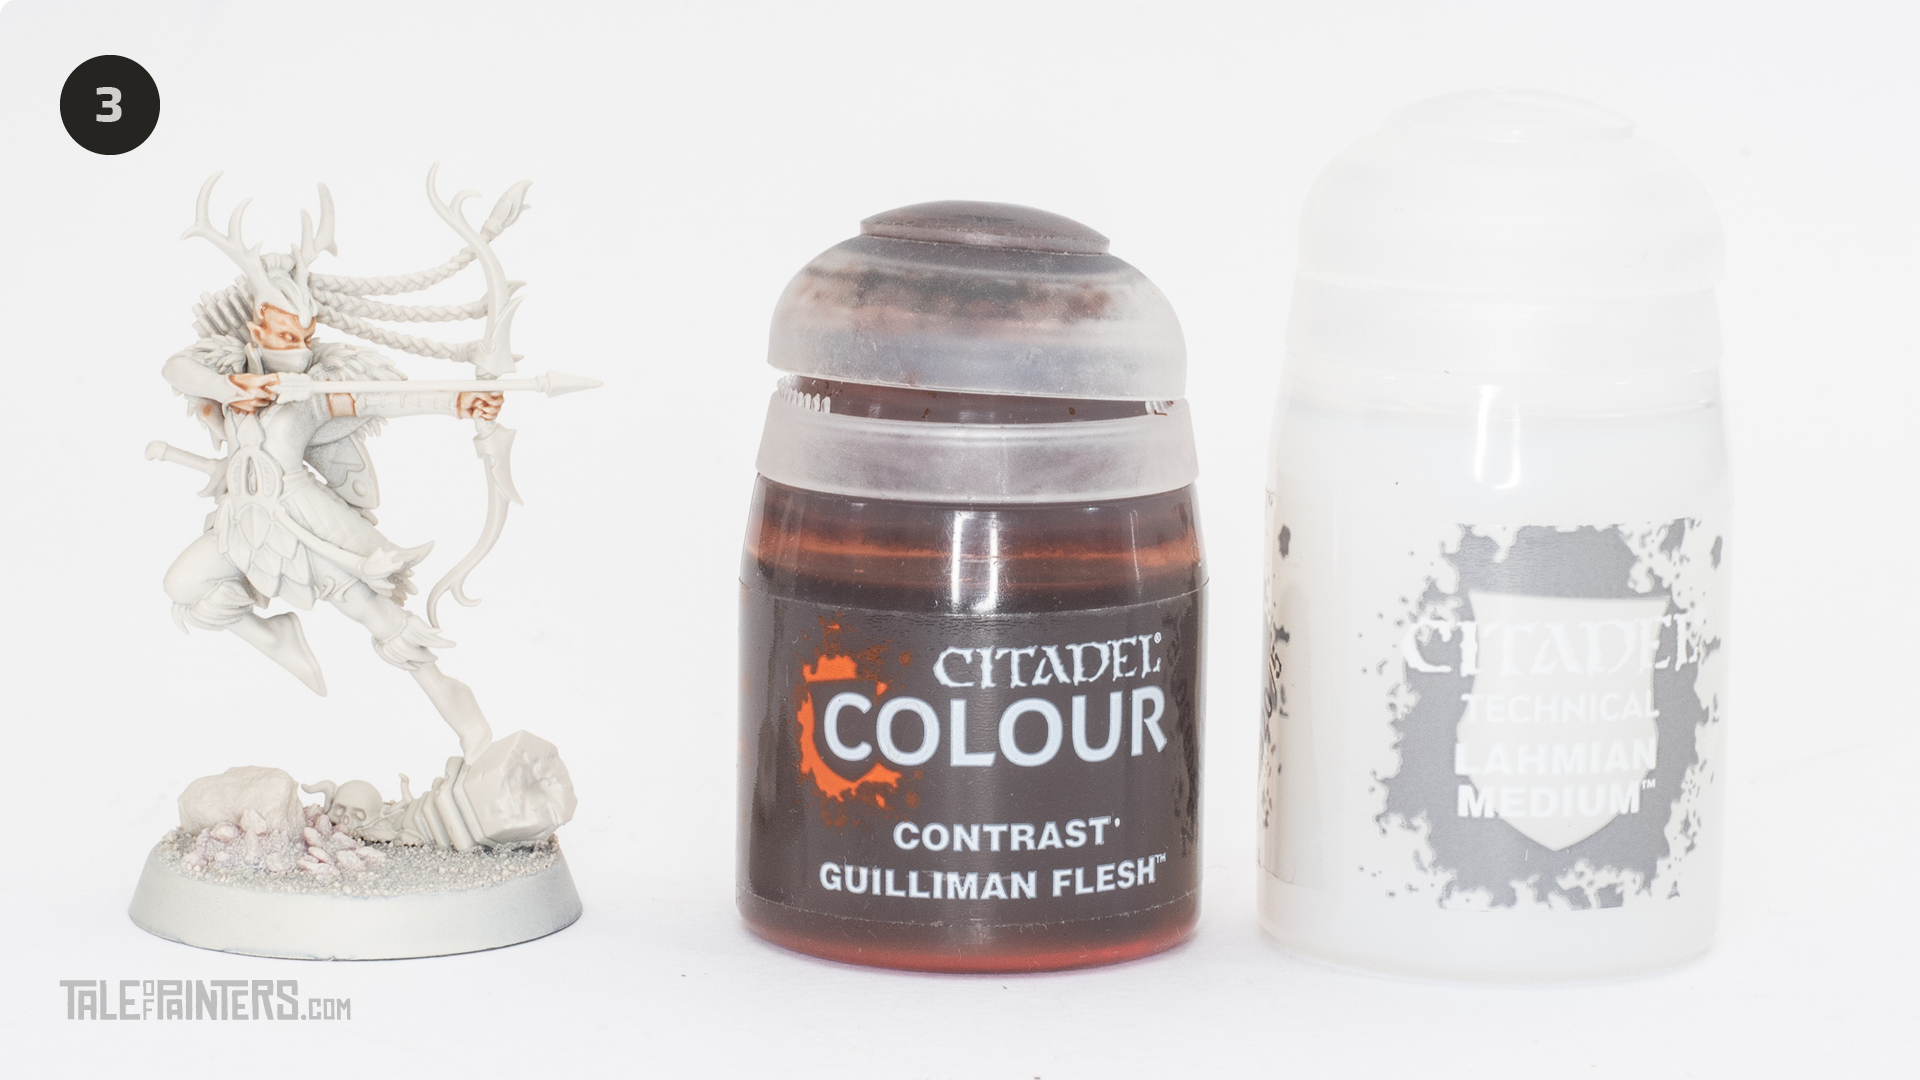

Mix Lahmian Medium with Guilliman Flesh (3:1 ratio) and apply this to the recesses
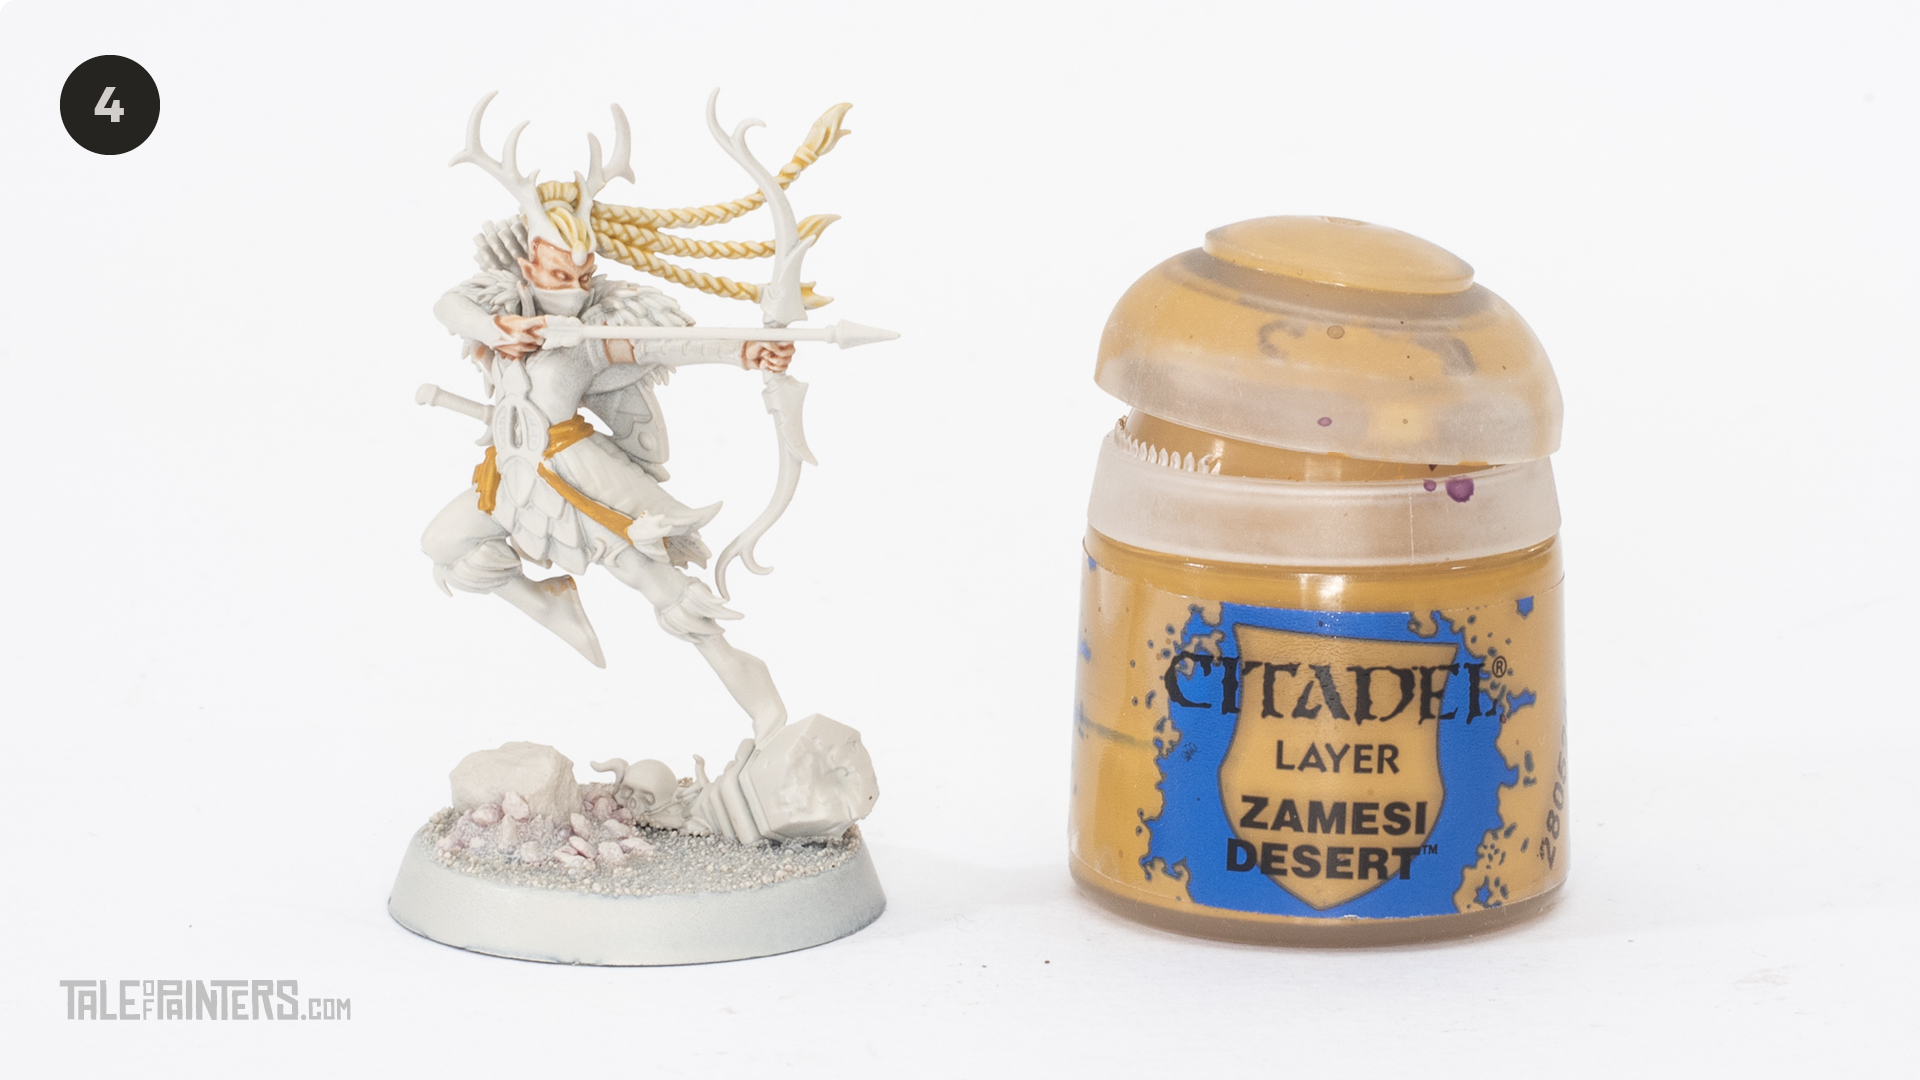

Mix 50:50 Contrast Medium with Zamesi Desert and paint this over the hair. Paint the belt and inside of the tunic with Zamesi Desert.
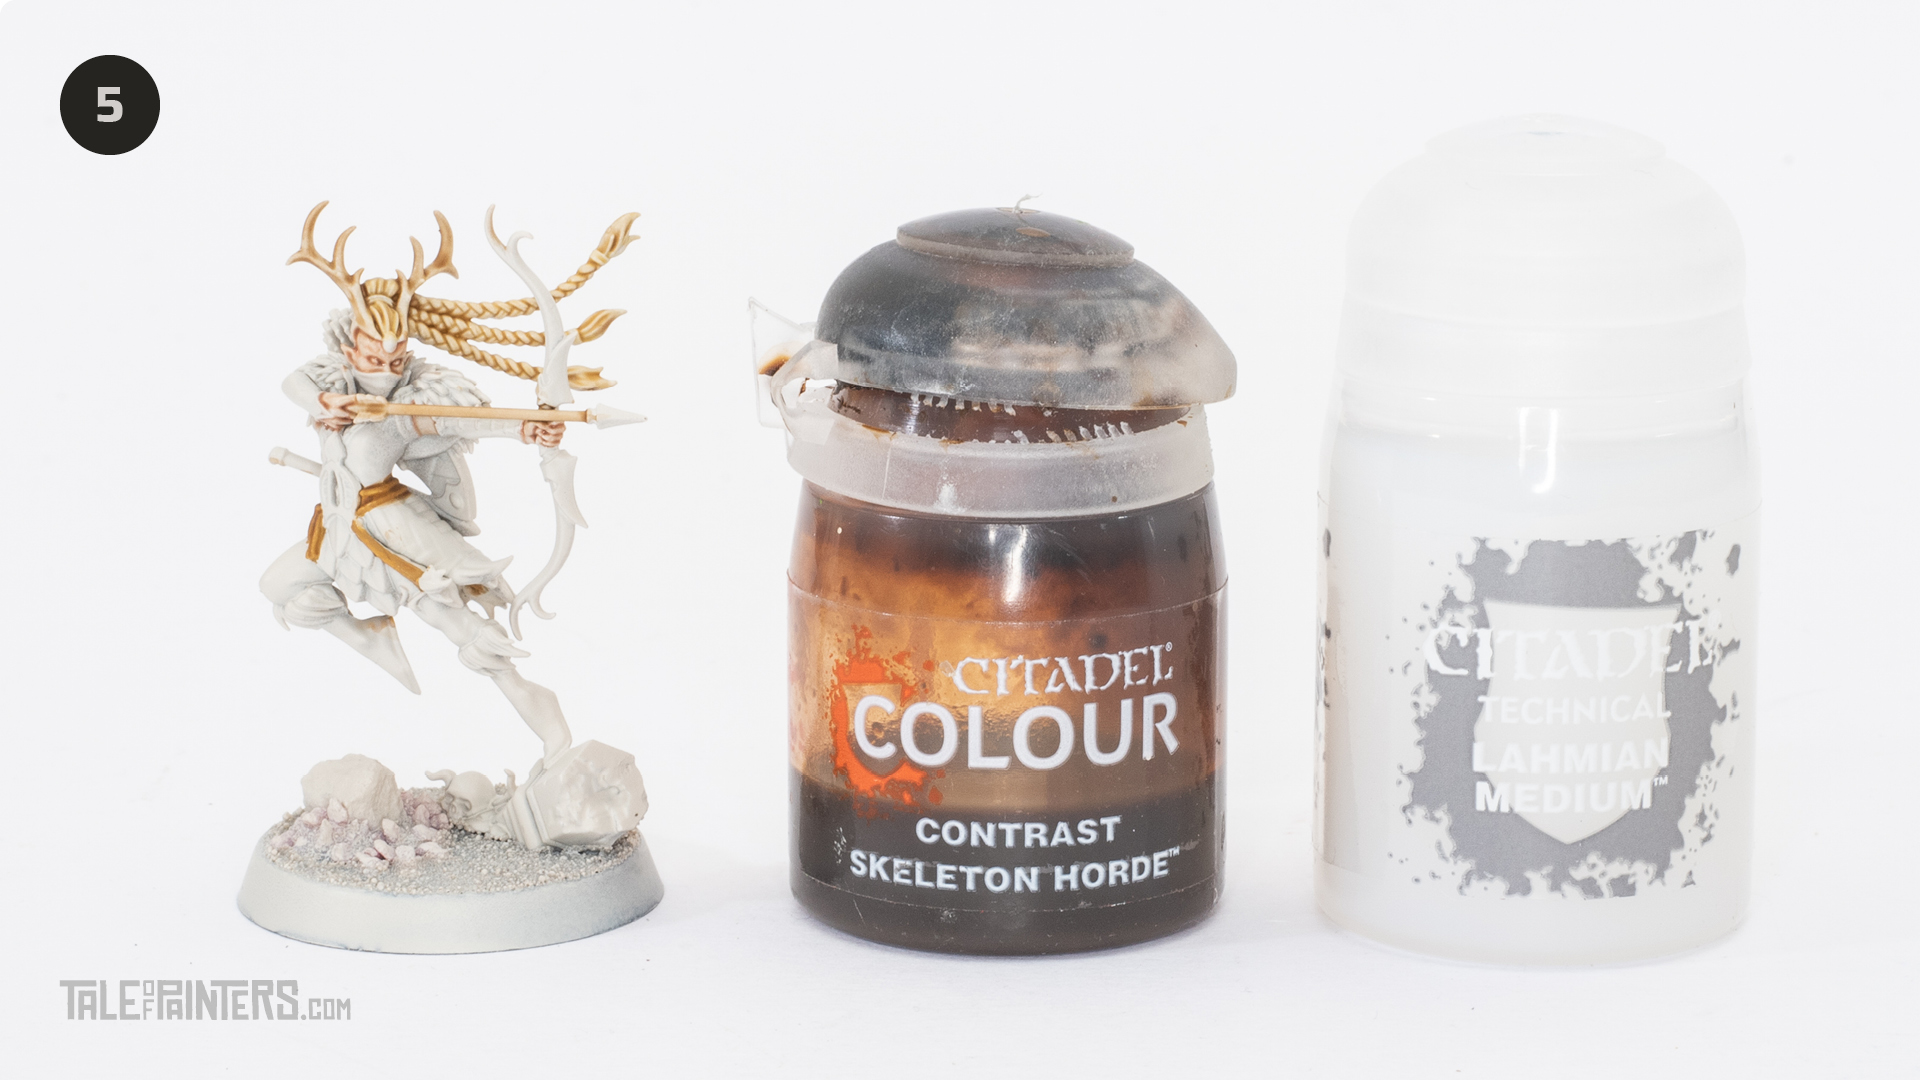

Mix 50:50 lahmian Medium with Skeleton Horde and paint this over the hair, belt, inside tunic, antlers and arrow shafts.
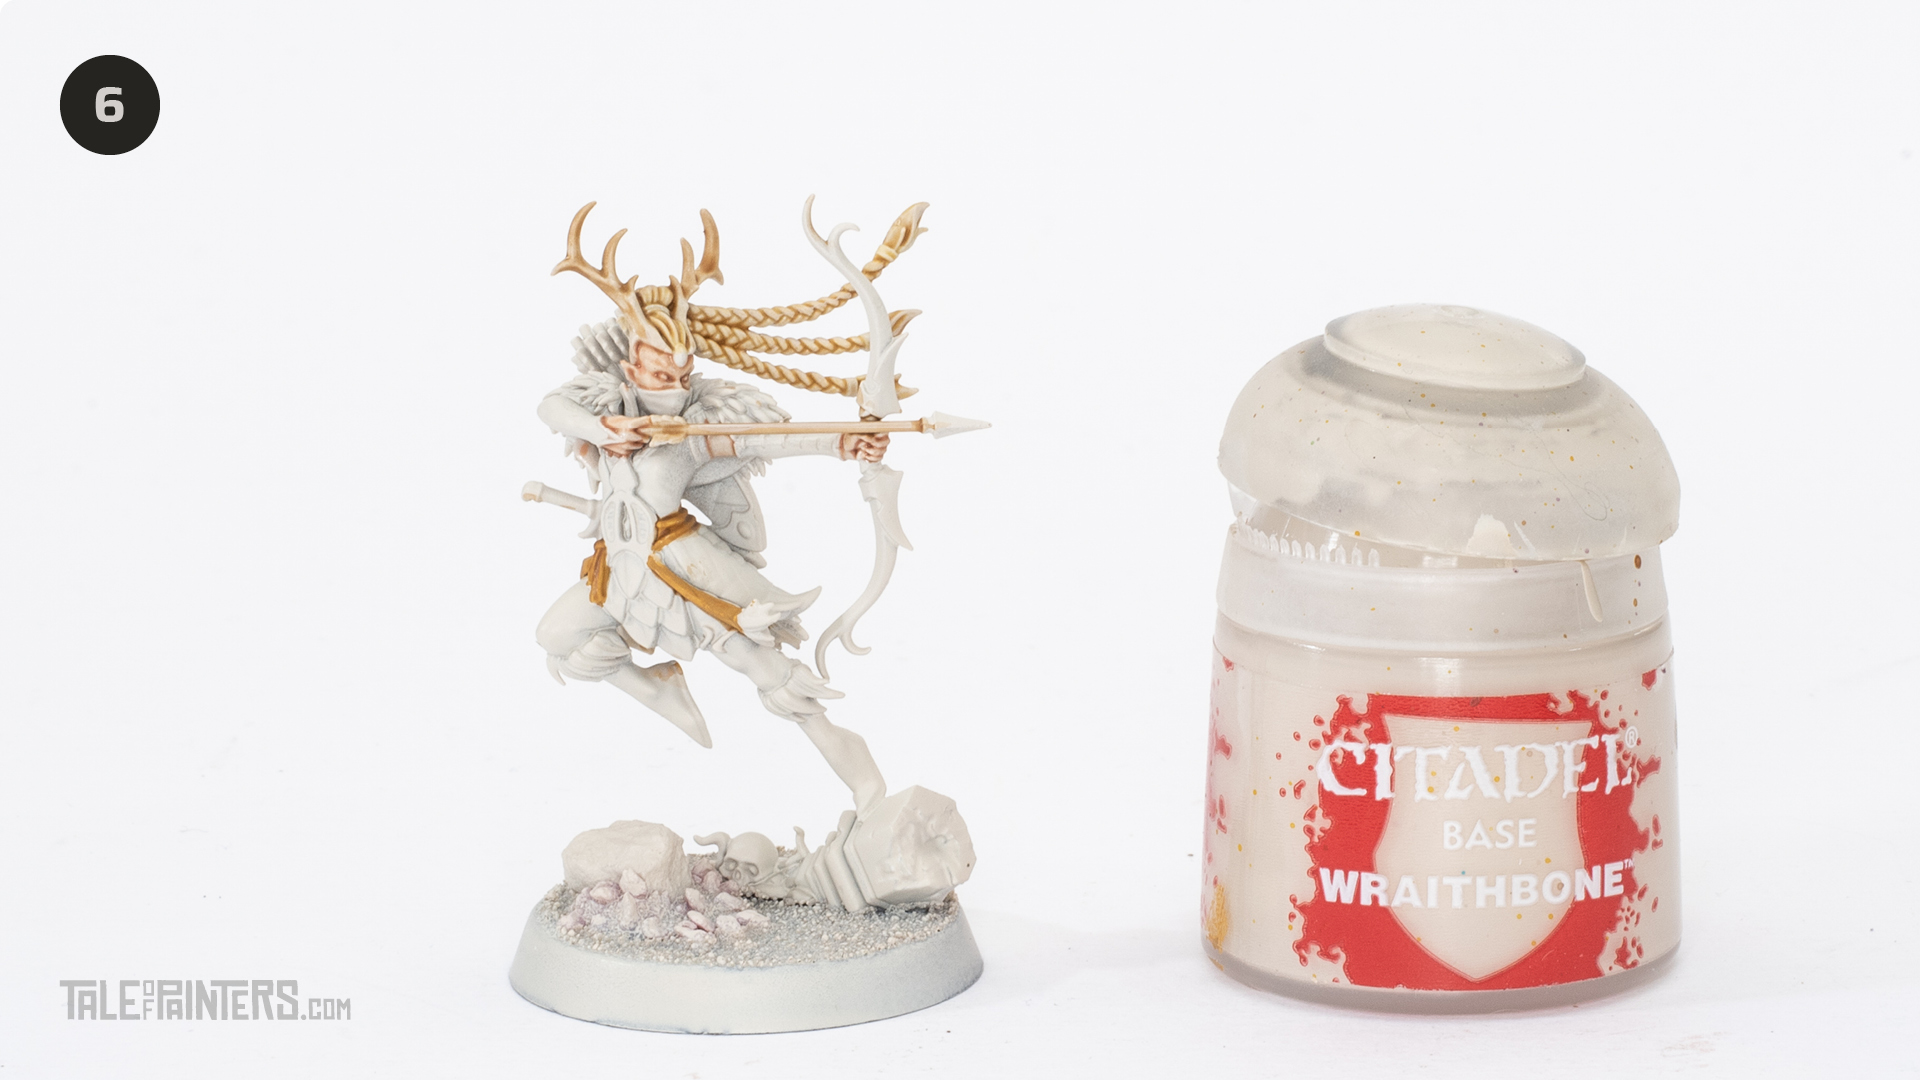

Highlight the hair, antlers and arrow shafts with Wraithbone.
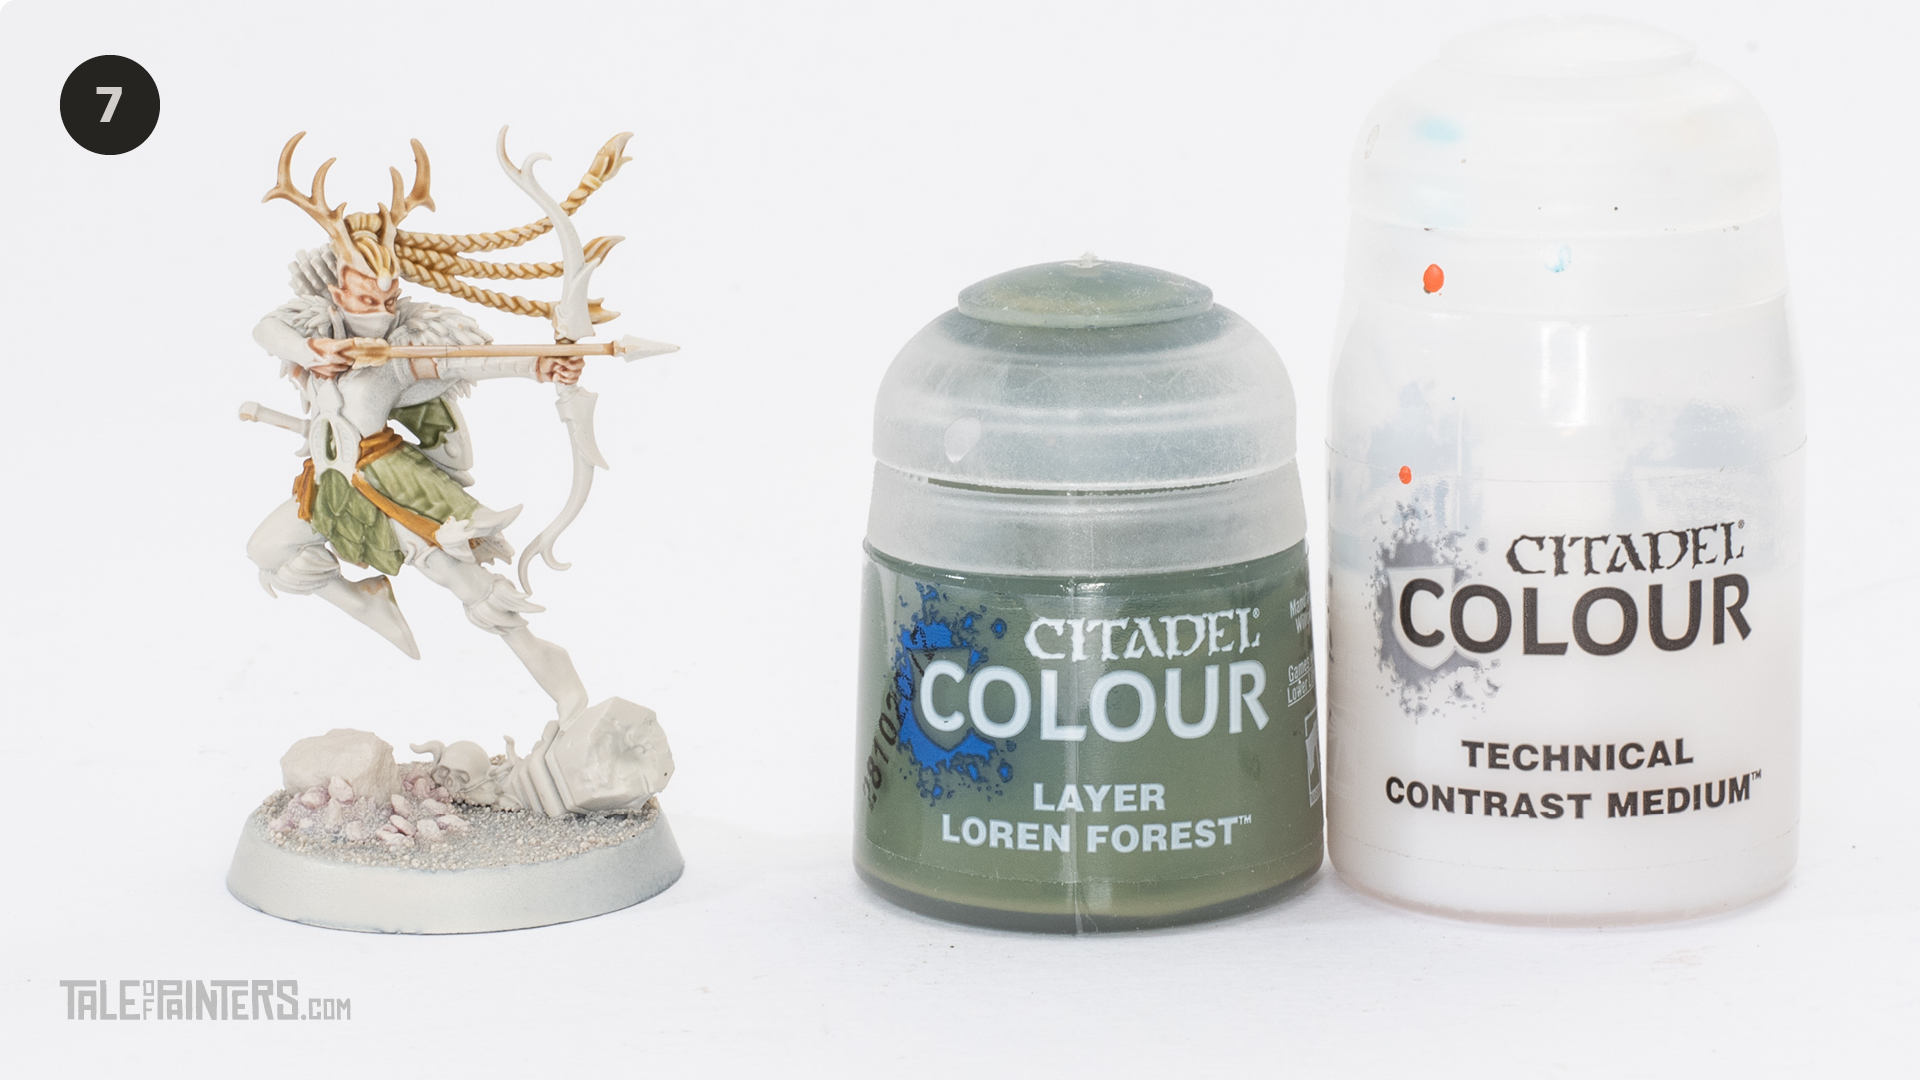

Mix 50:50 Contrast Medium with Loren Forest and paint this over the leaf loin armour, the woven armour panels and the centre of the belt buckle.
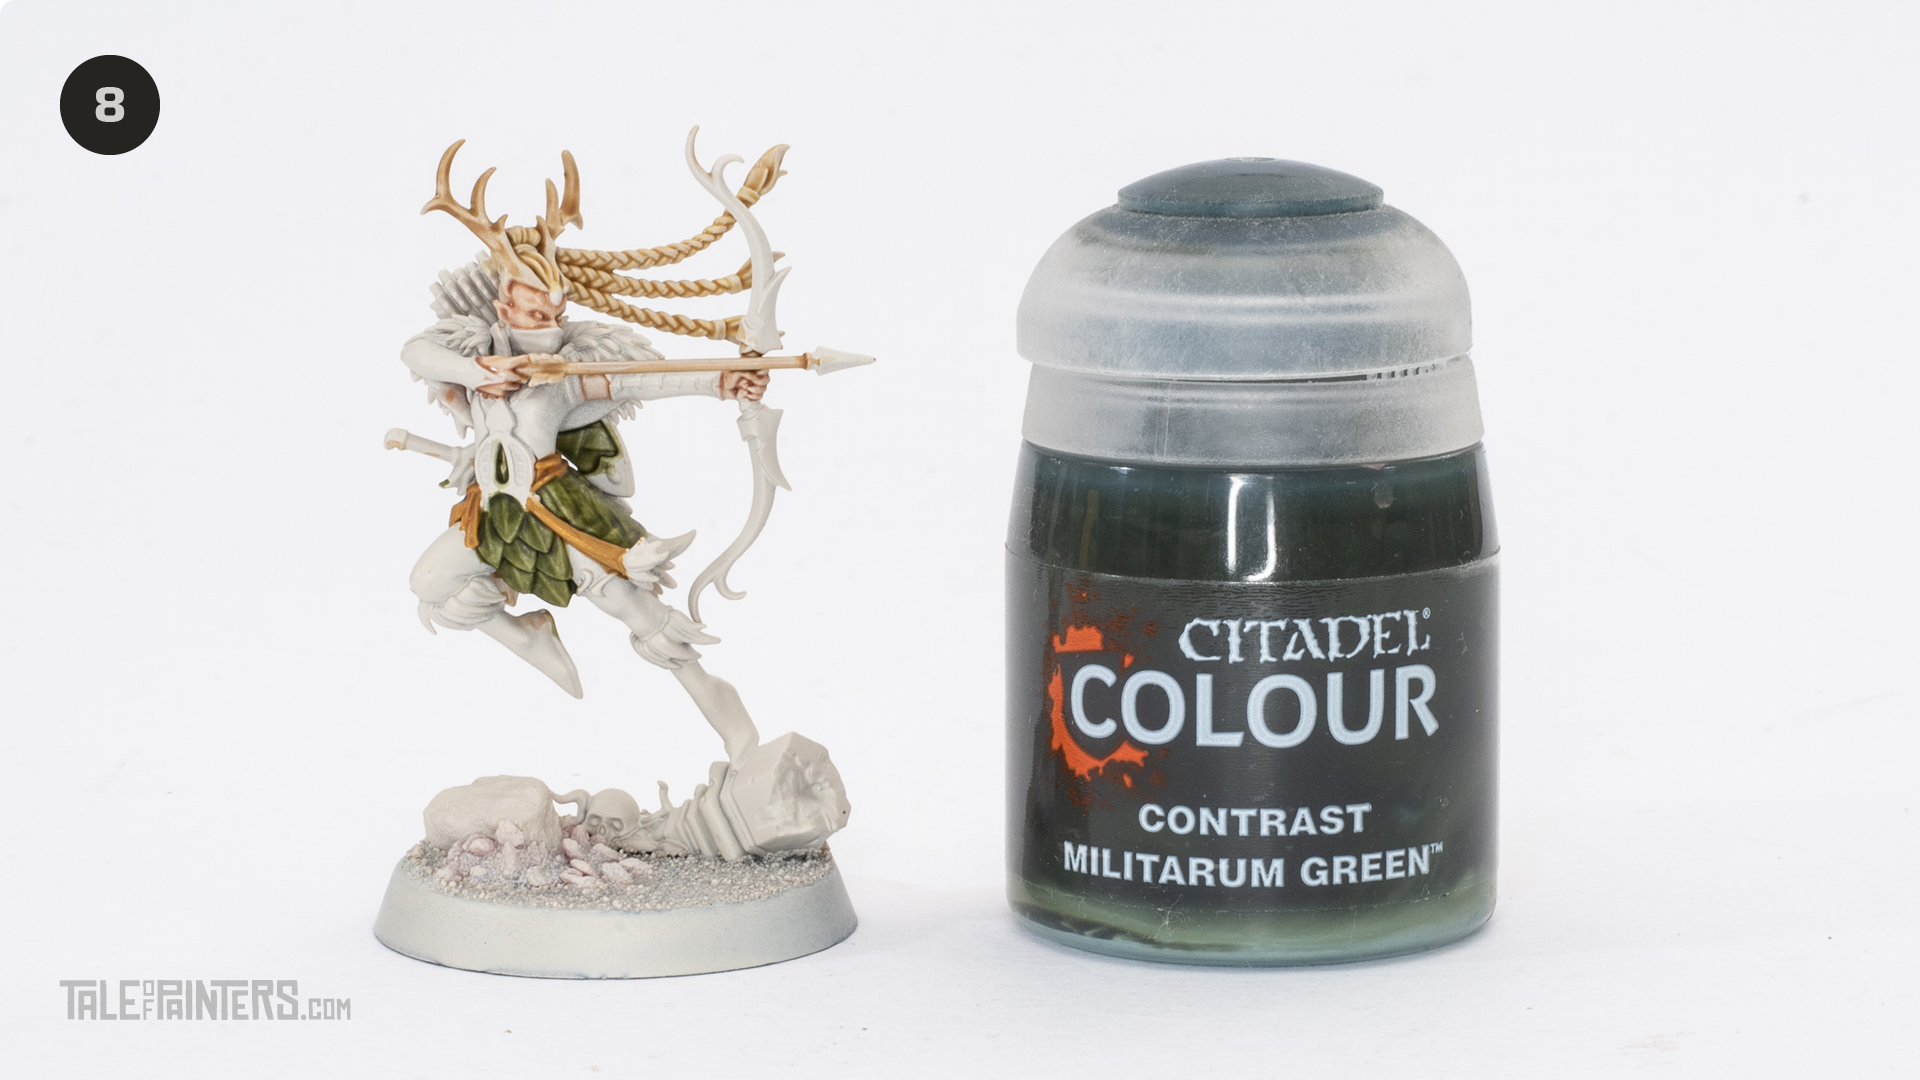

Paint Contrast Militarum Green over the leaf armour and the woven armour panels.
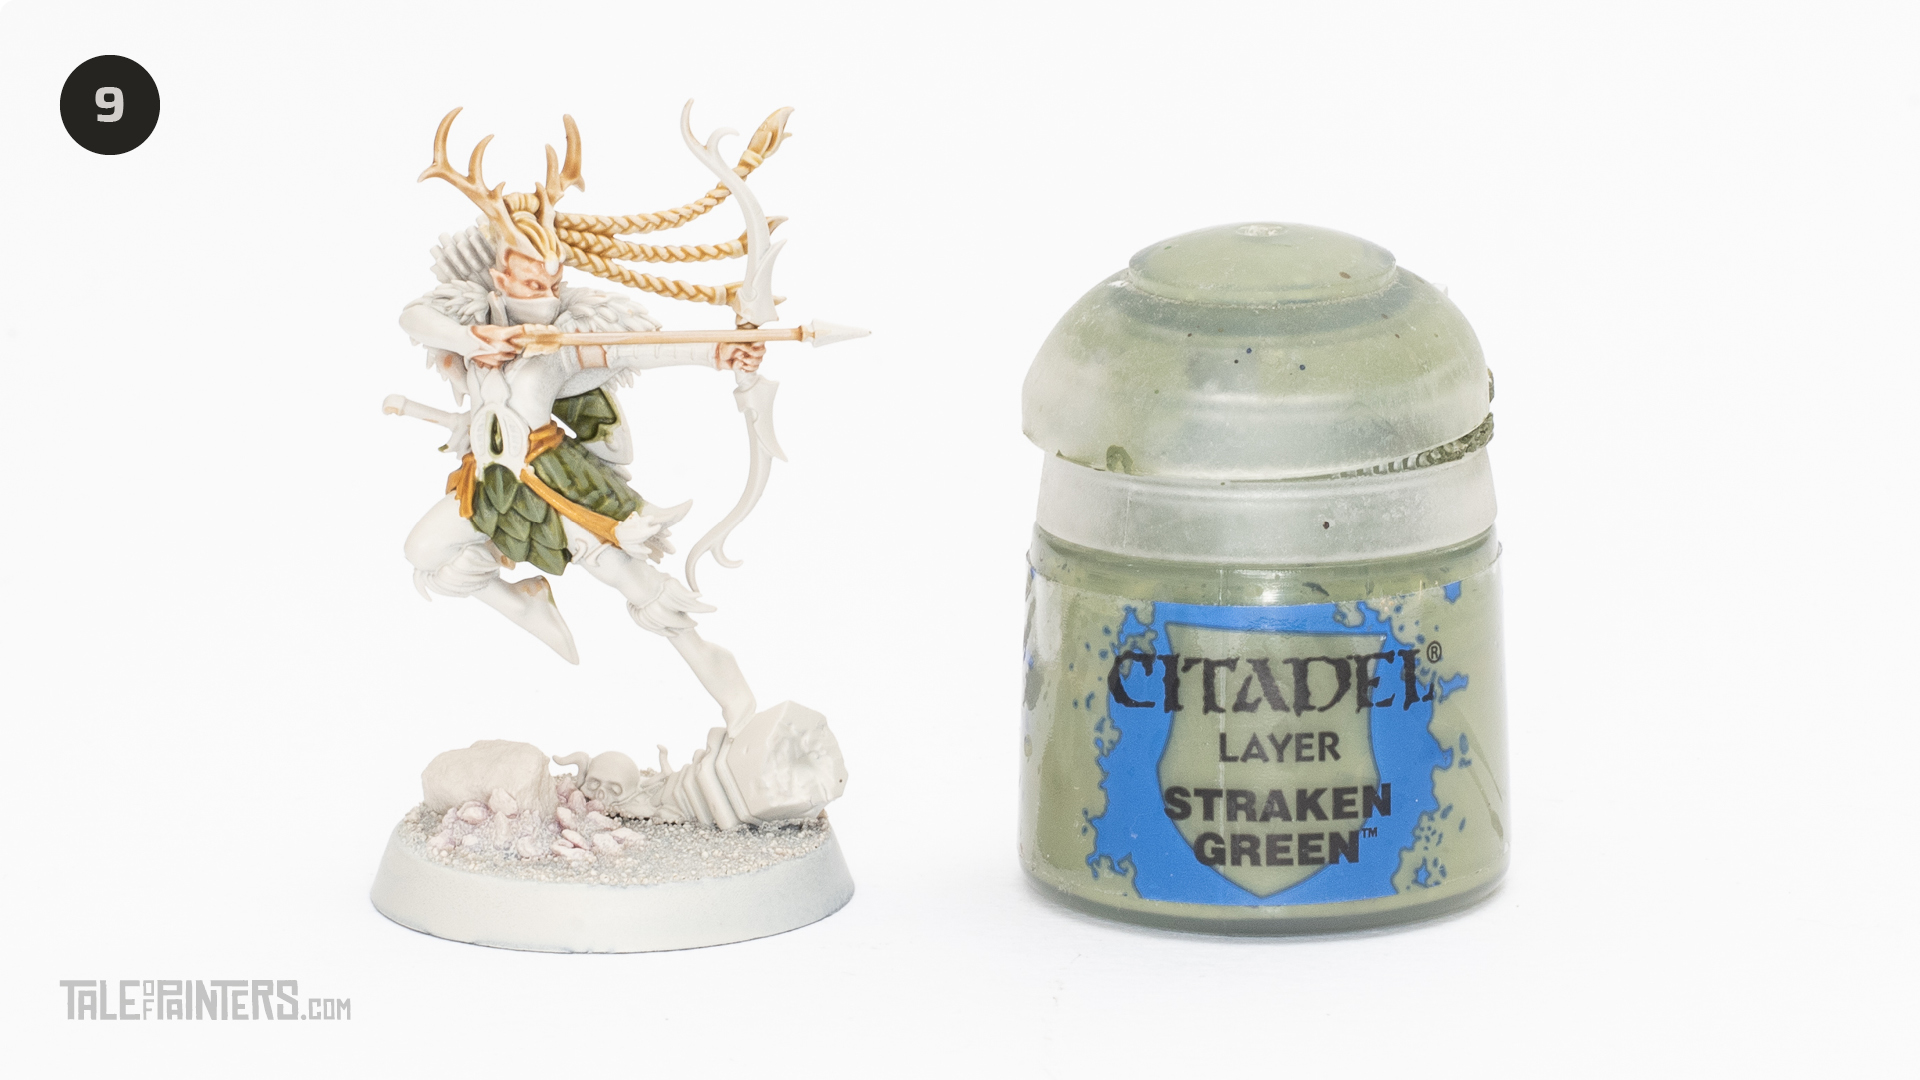

Highlight the leaf armour and woven armour panels with Straken Green.
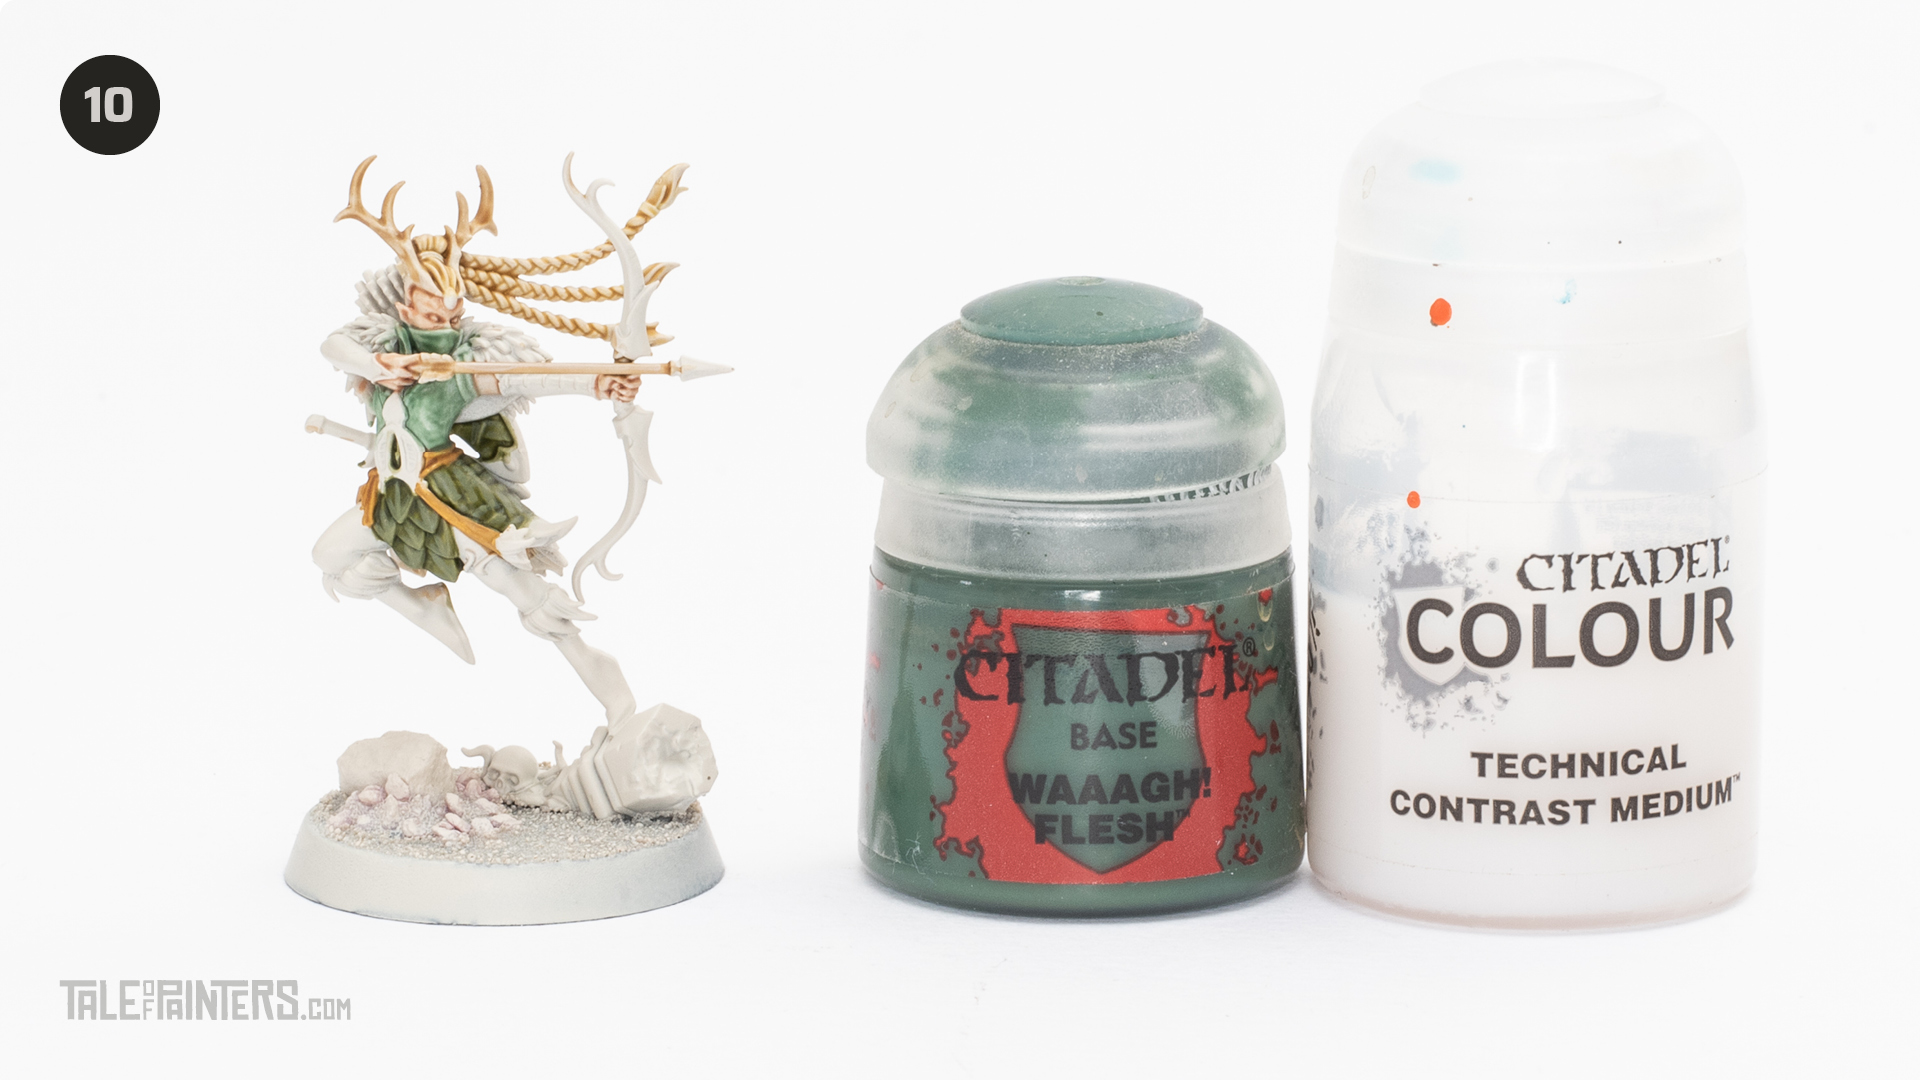

Paint the bodice, mask and scabbard with 50:50 Contrast Medium and Waaagh Flesh.
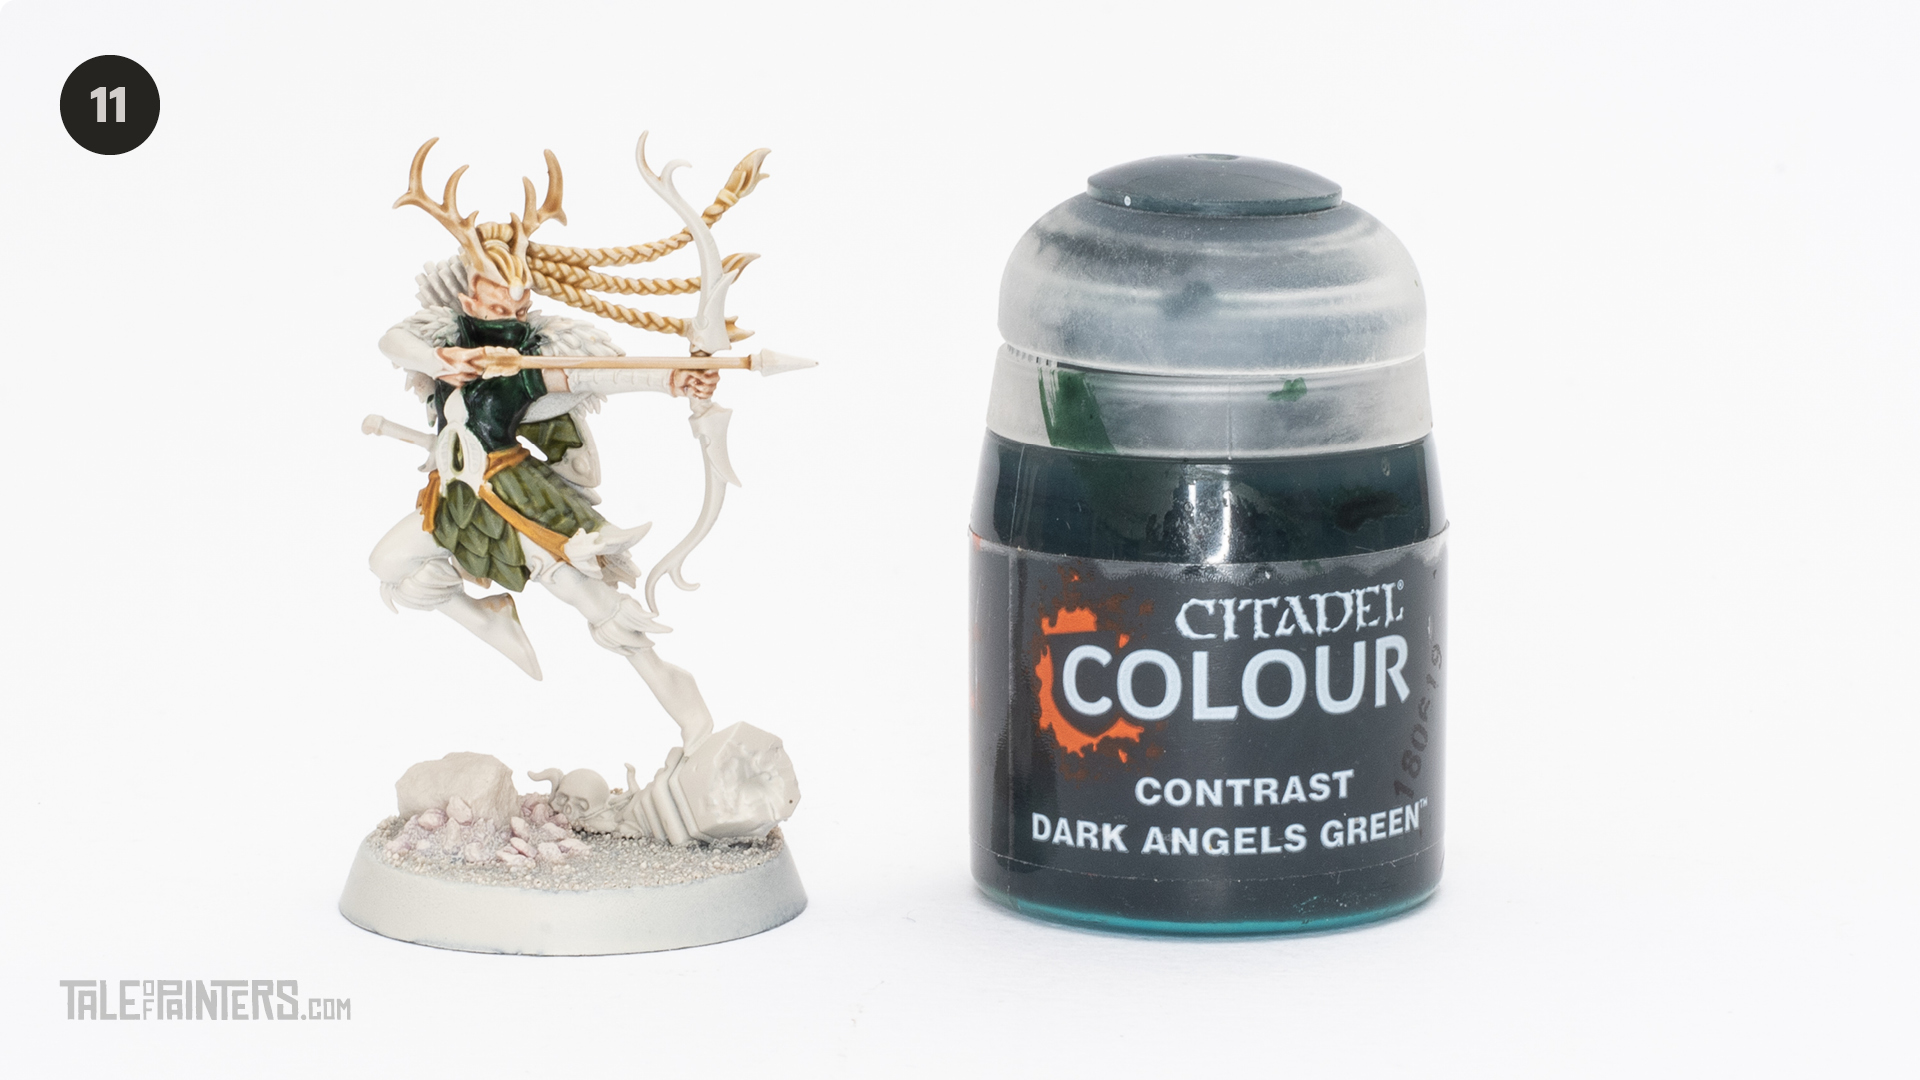

Wash the bodice, mask and scabbard with Dark Angels Green.
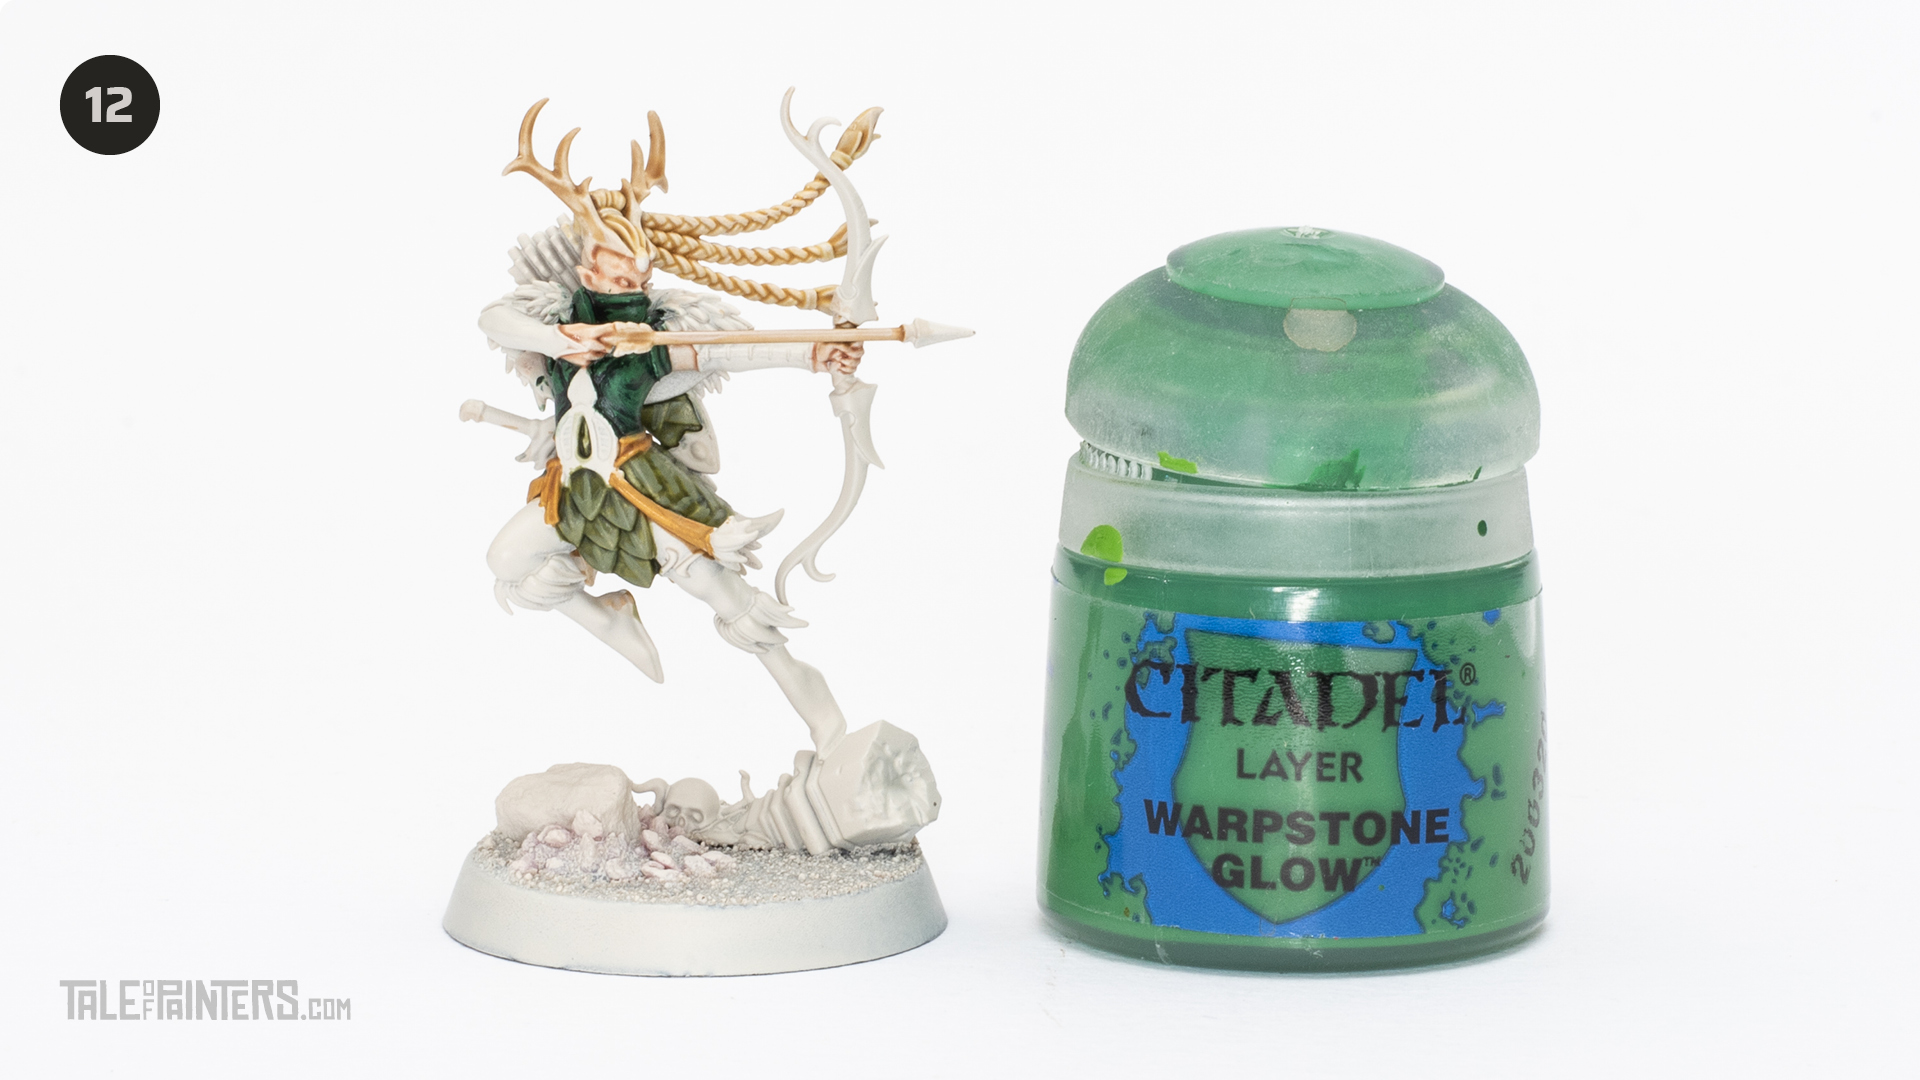

Highlight the bodice, mask and scabbard with Warpstone Glow.
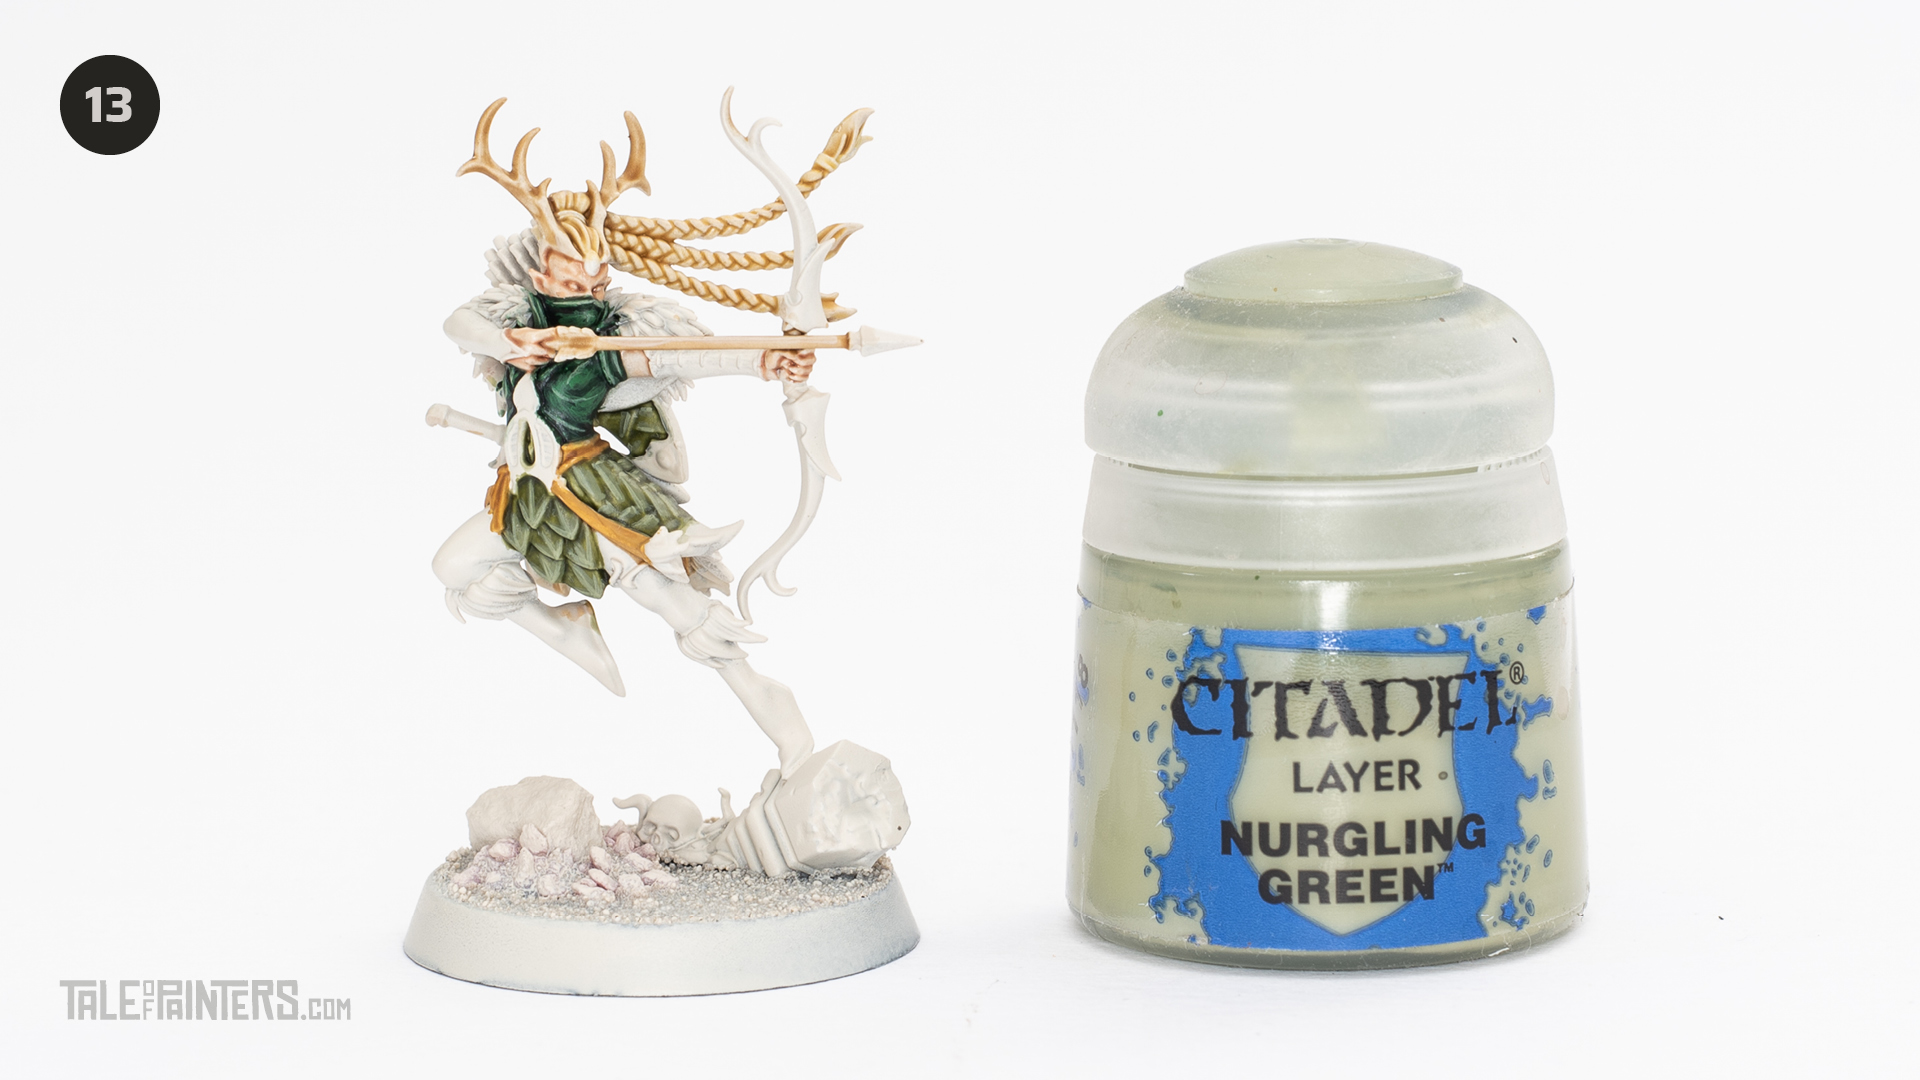

Edge highlight all the leaf armour, woven armour panels, bodice, mask and scabbard with Nurgling Green
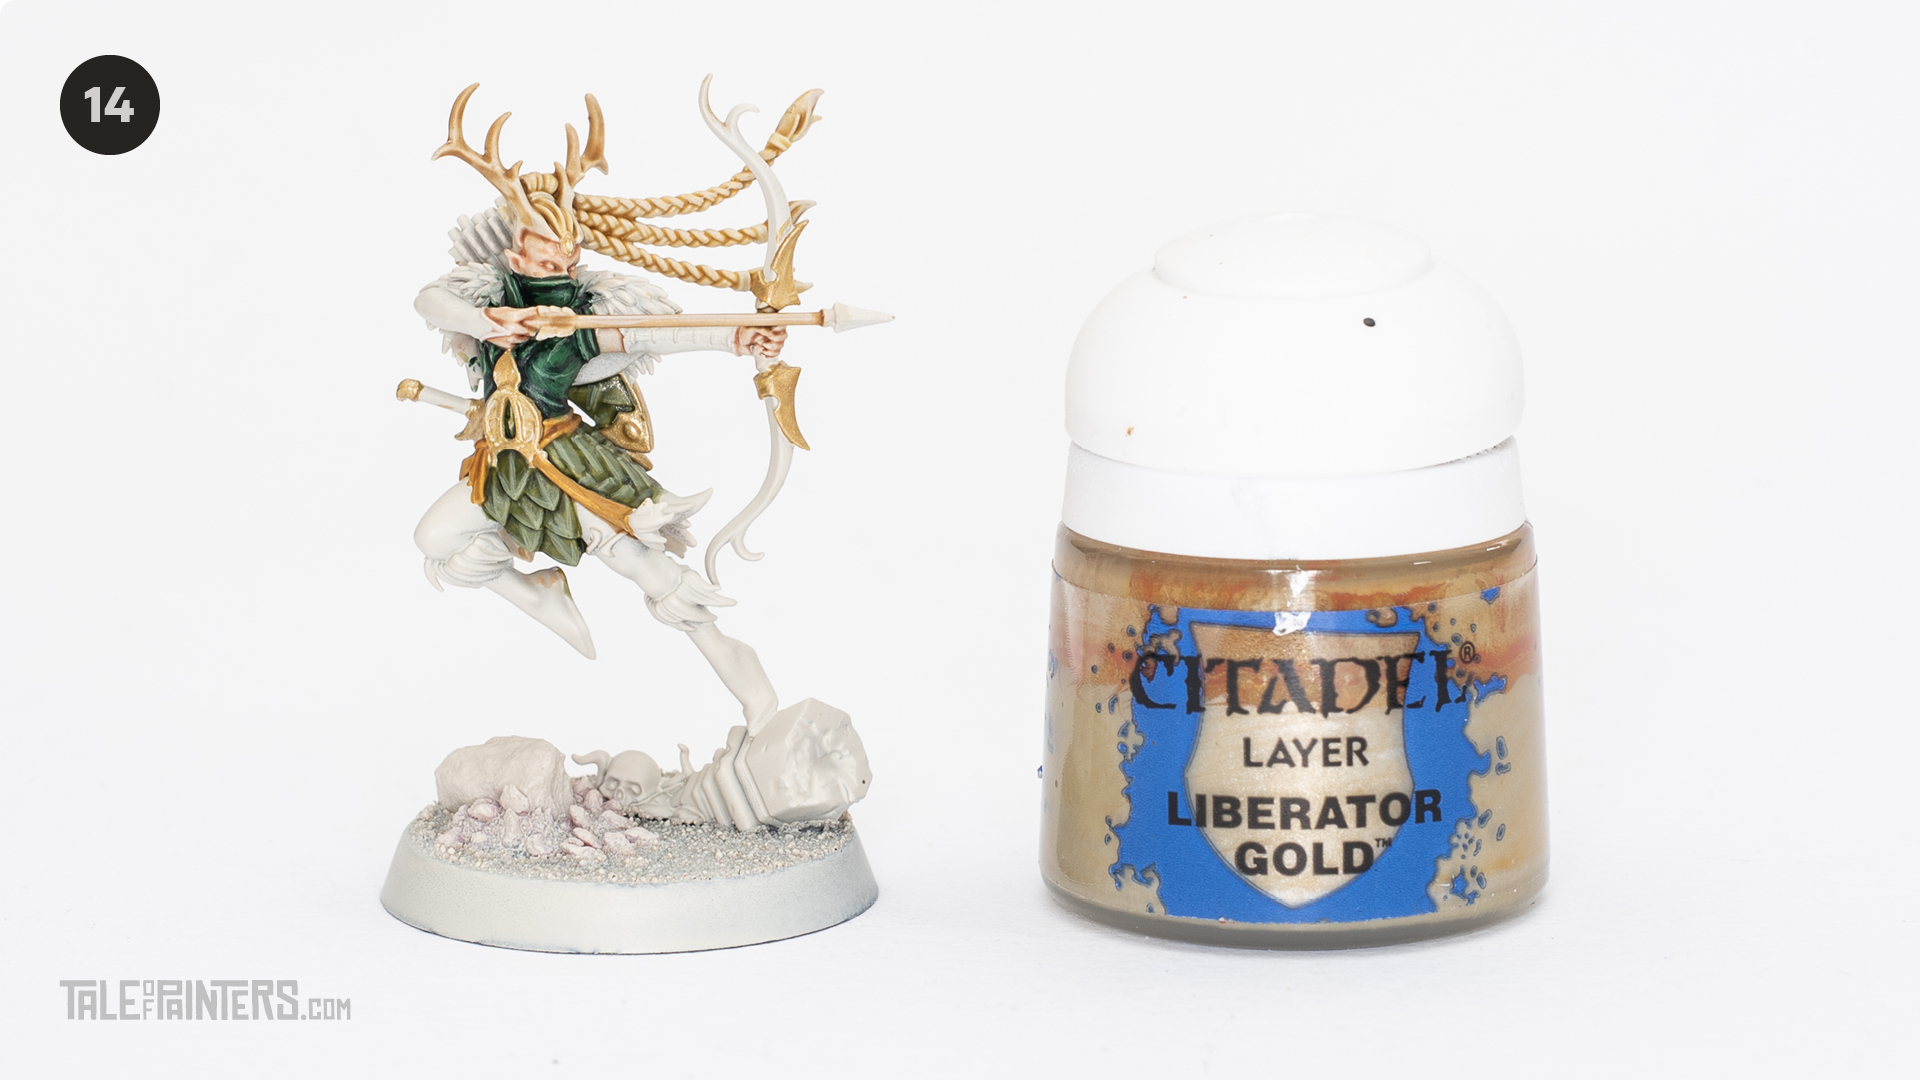

Paint the gold with Liberator Gold. A touch of Lahmian Medium can really help smooth out metallic paints.
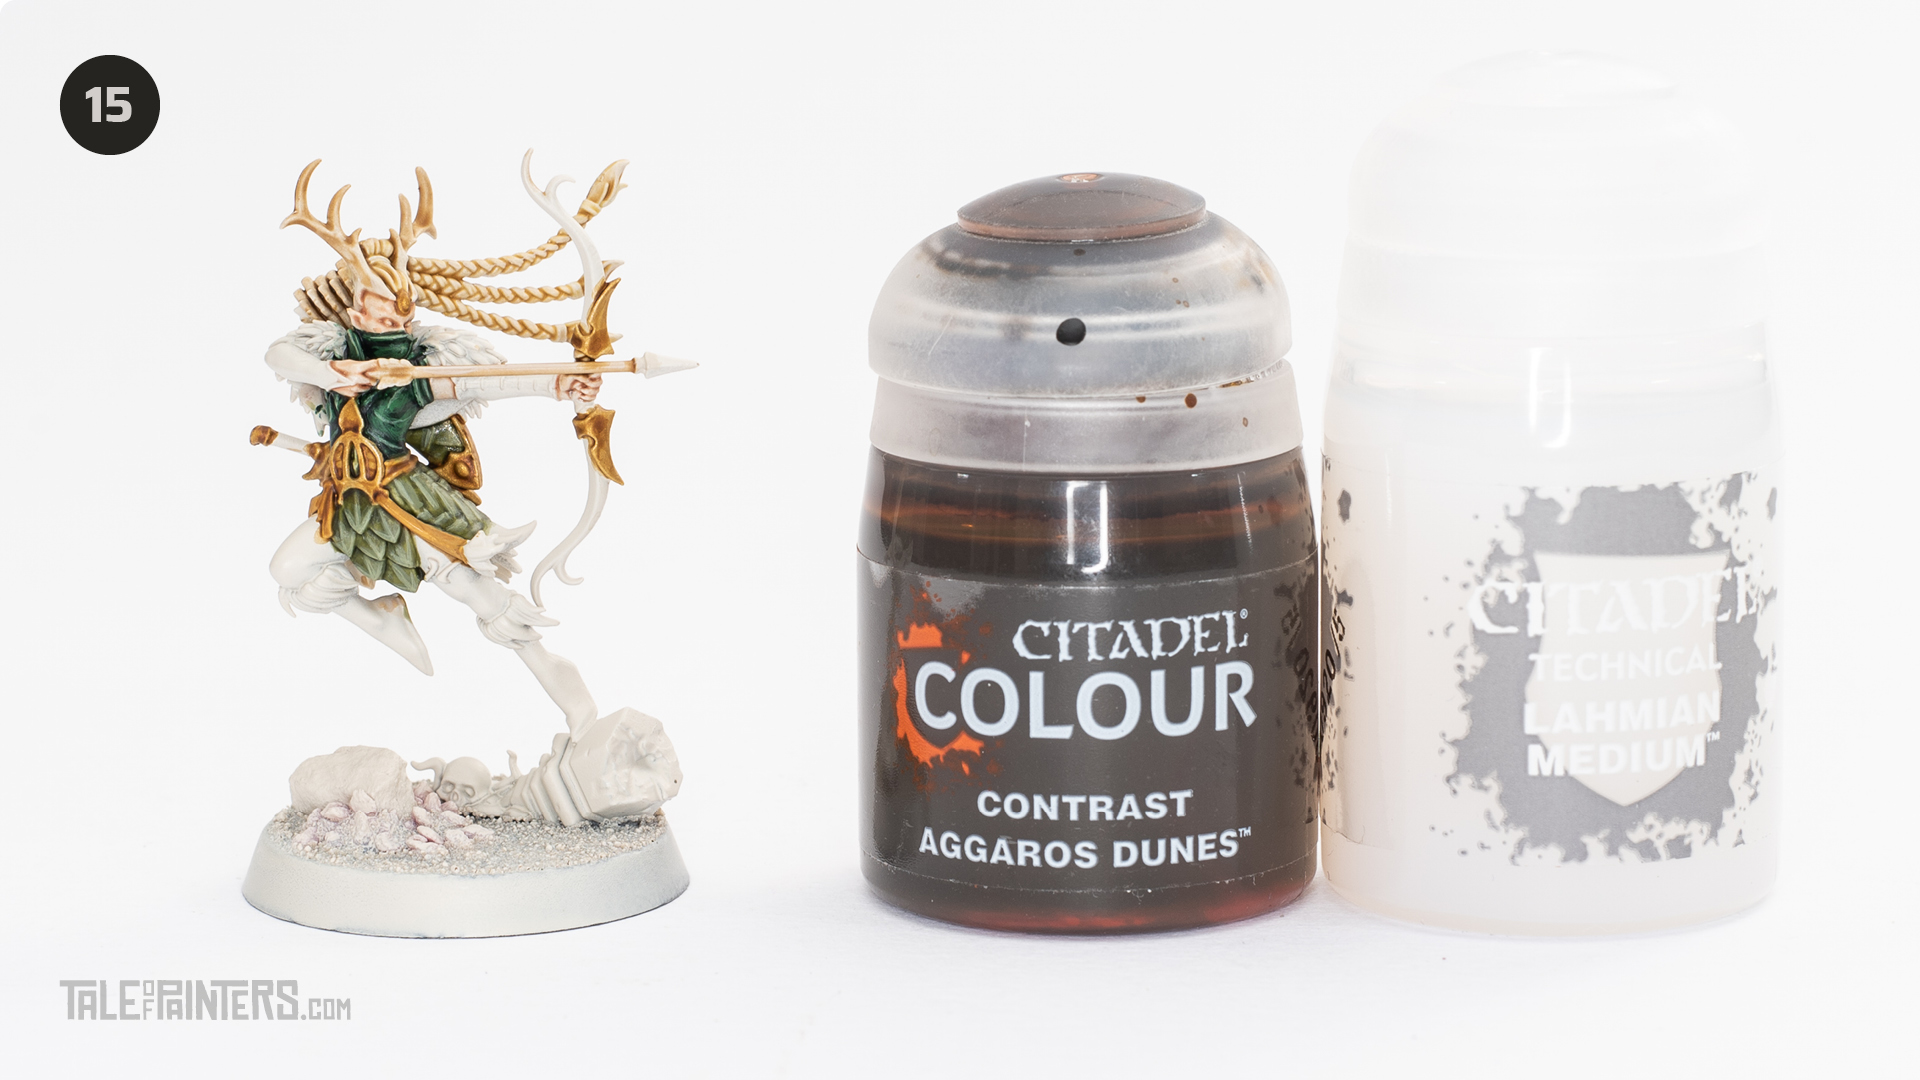

Mix 50:50 Lahmian Medium and Aggaros Dunes Contrast and paint it all over the gold areas.
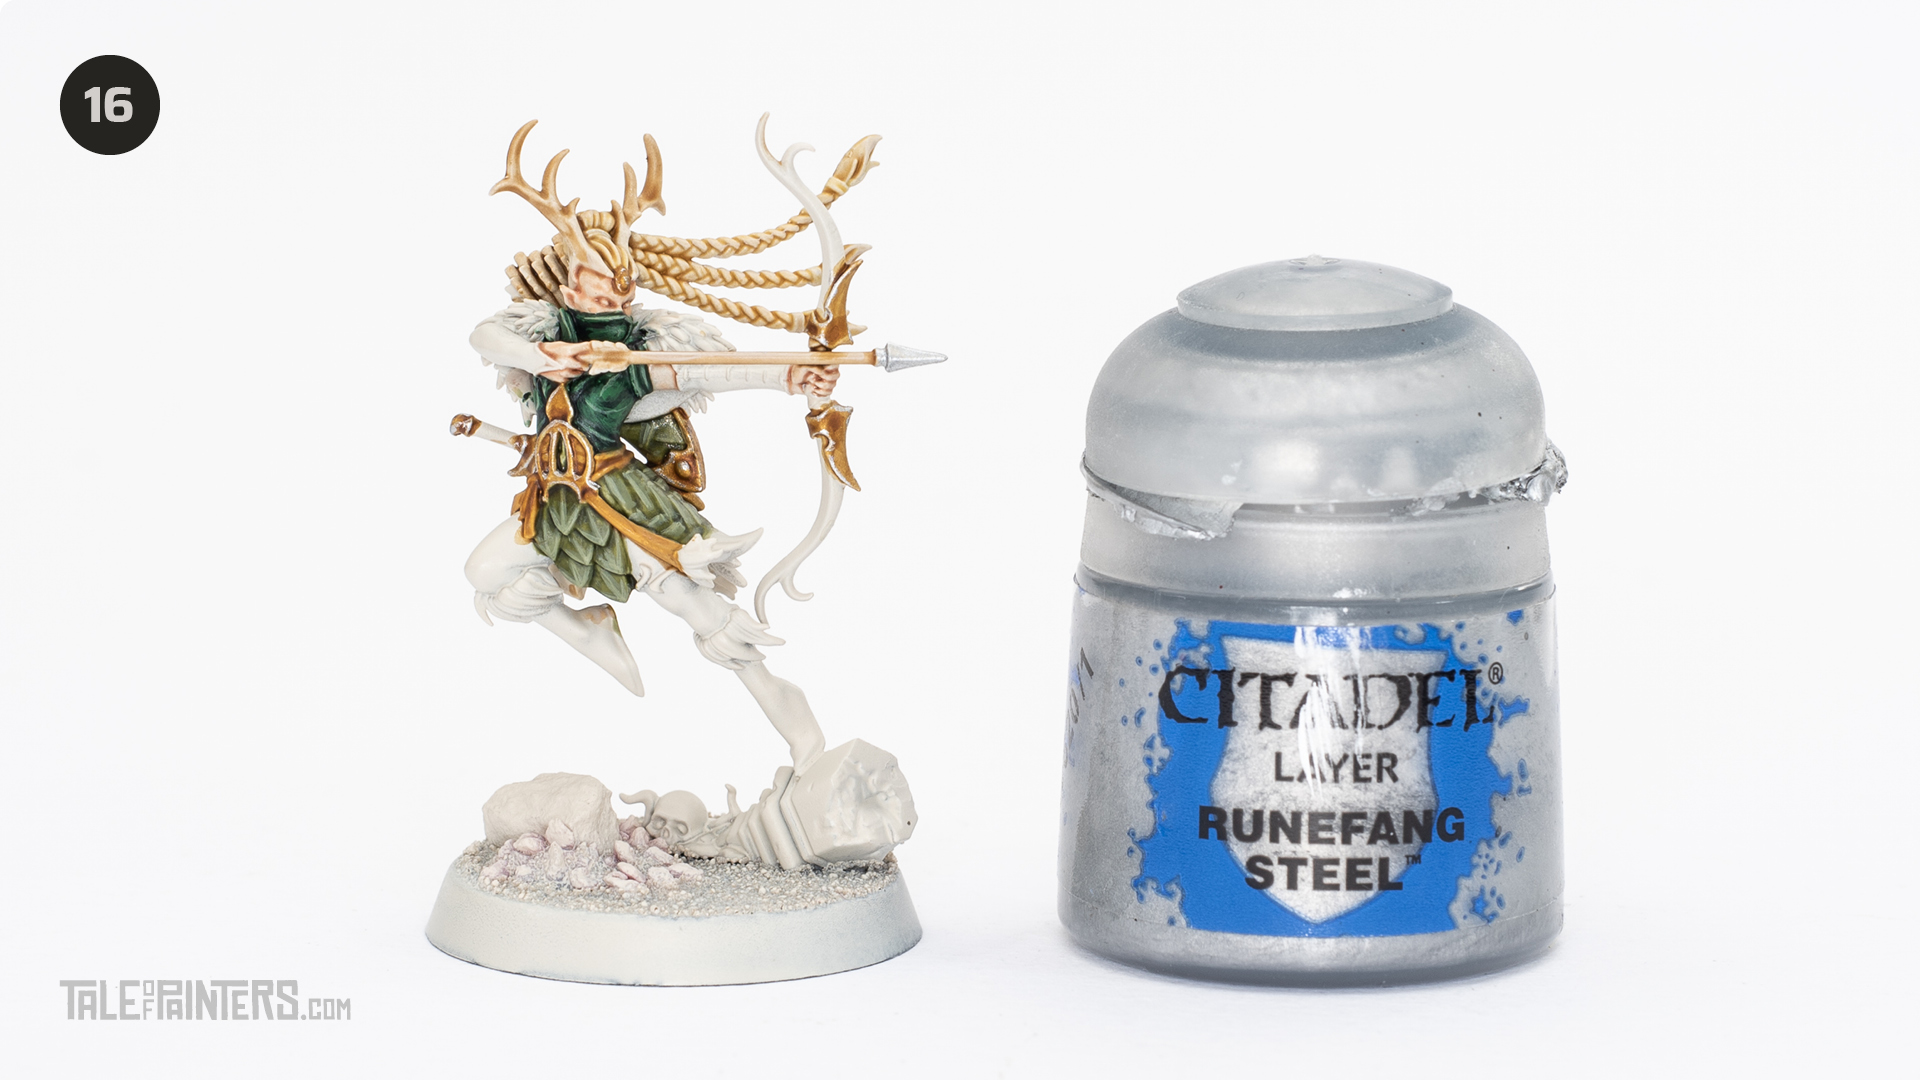

Paint thin highlight lines of Runefang Steel on the gold. Paint the arrow head with Runefang Steel.
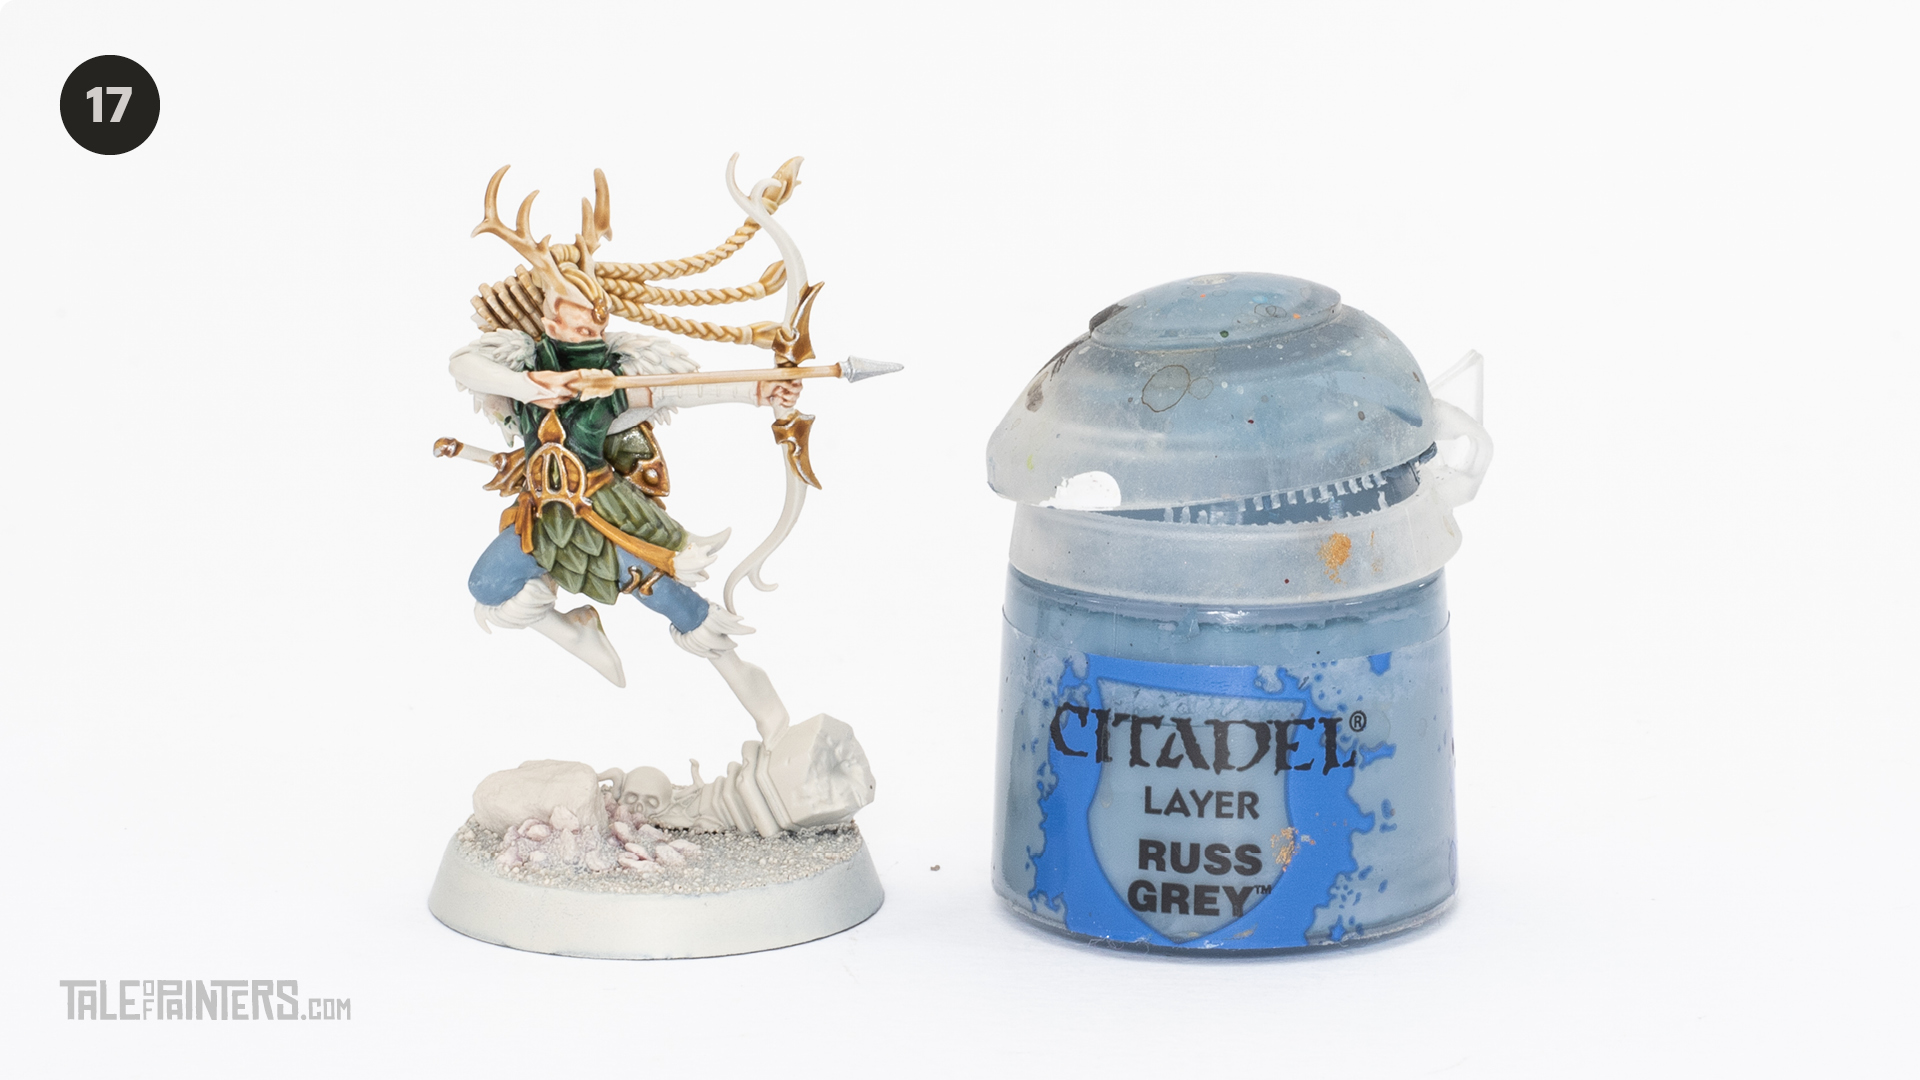

Paint the leggings with Russ Grey.
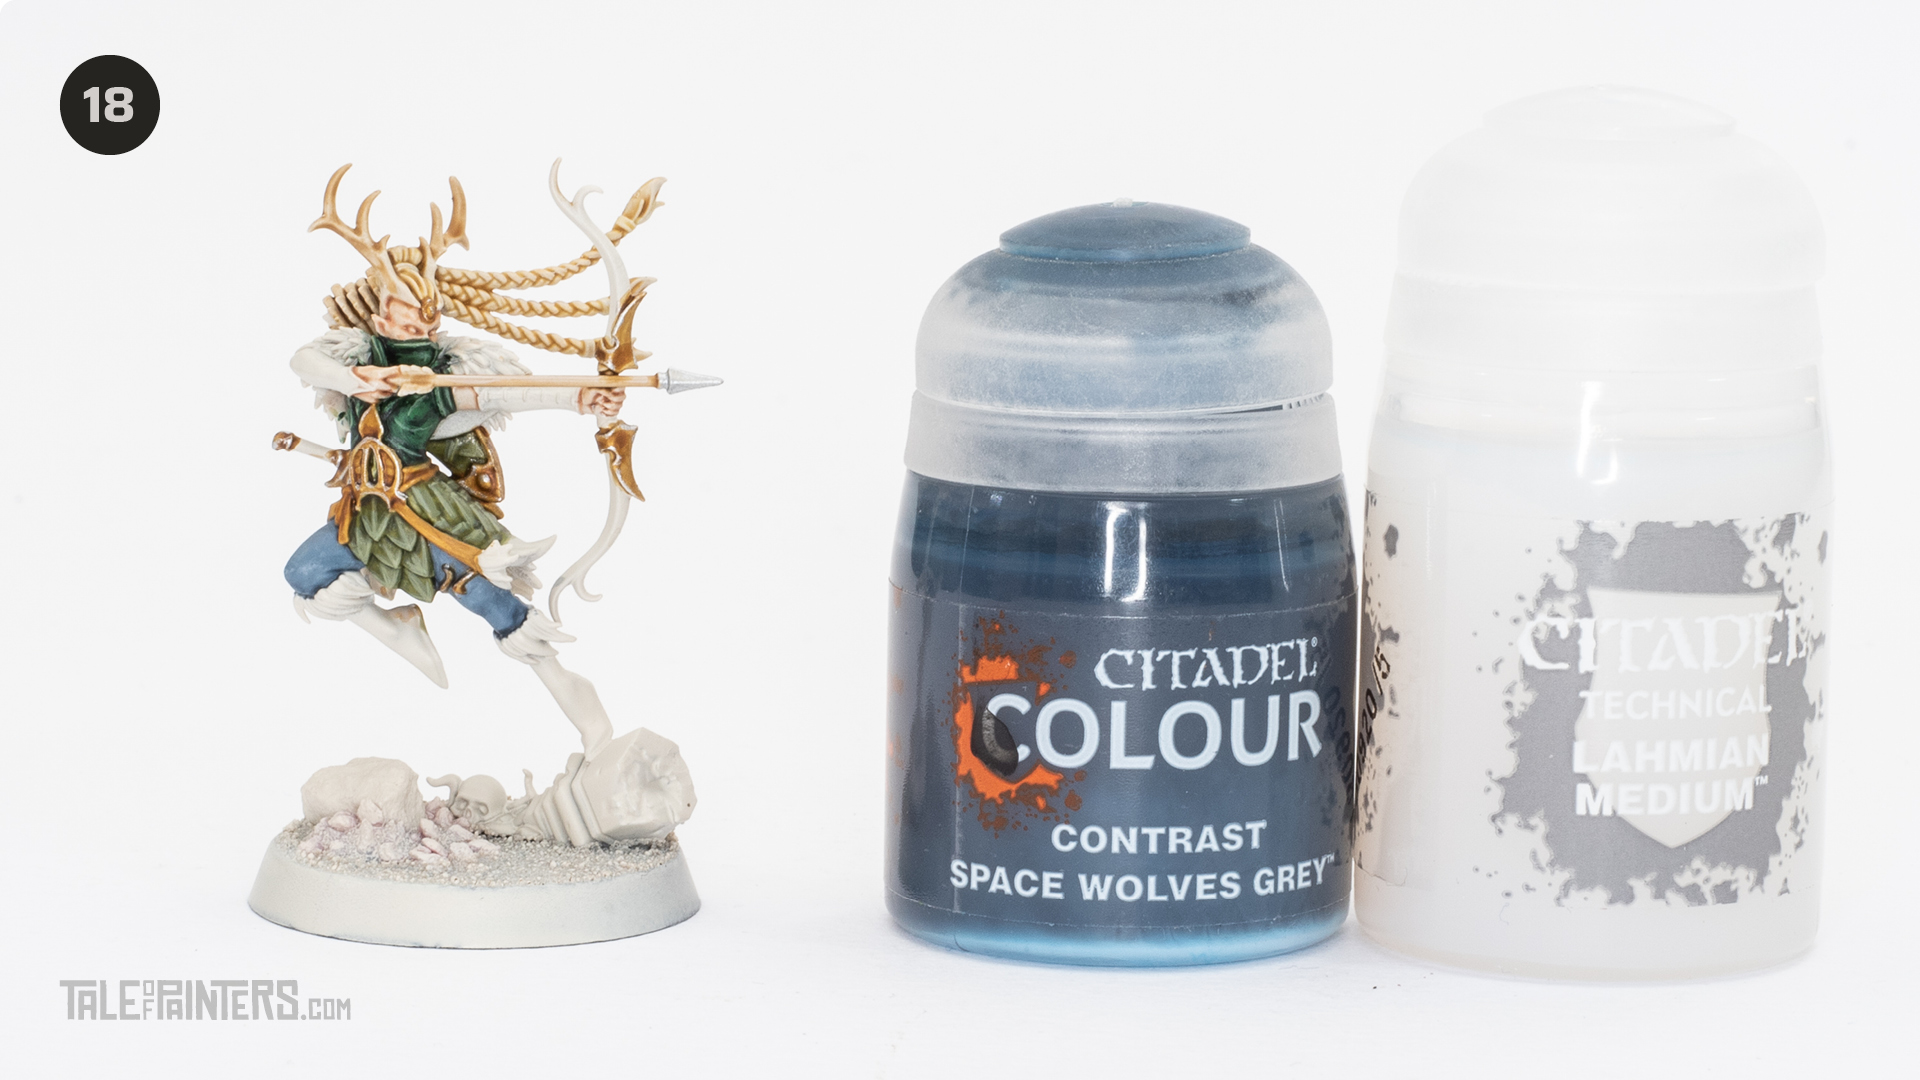

Shade the leggings with 50:50 mix of Contrast Space Wolves Grey and Lahmian Medium.
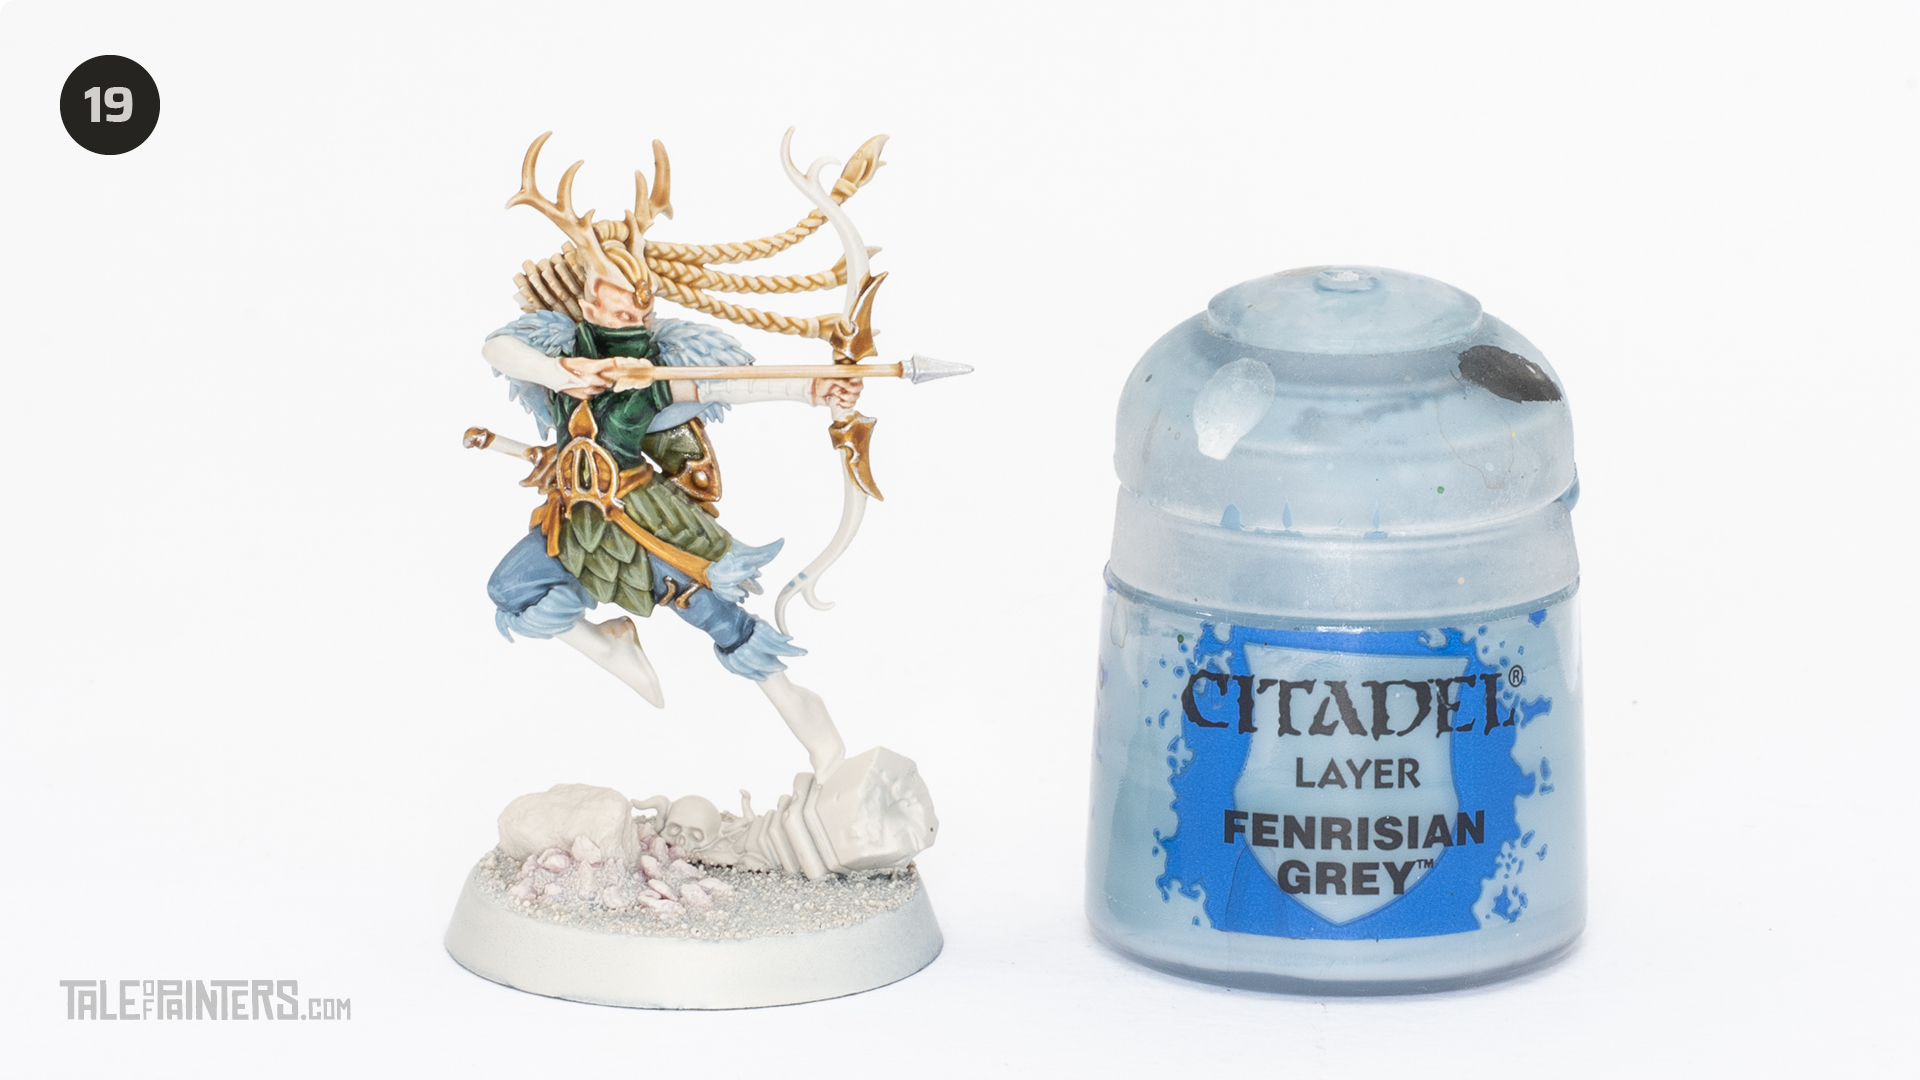

Highlight the leggings with Fenrisian Grey. Paint the fur with Fenrisian Grey.
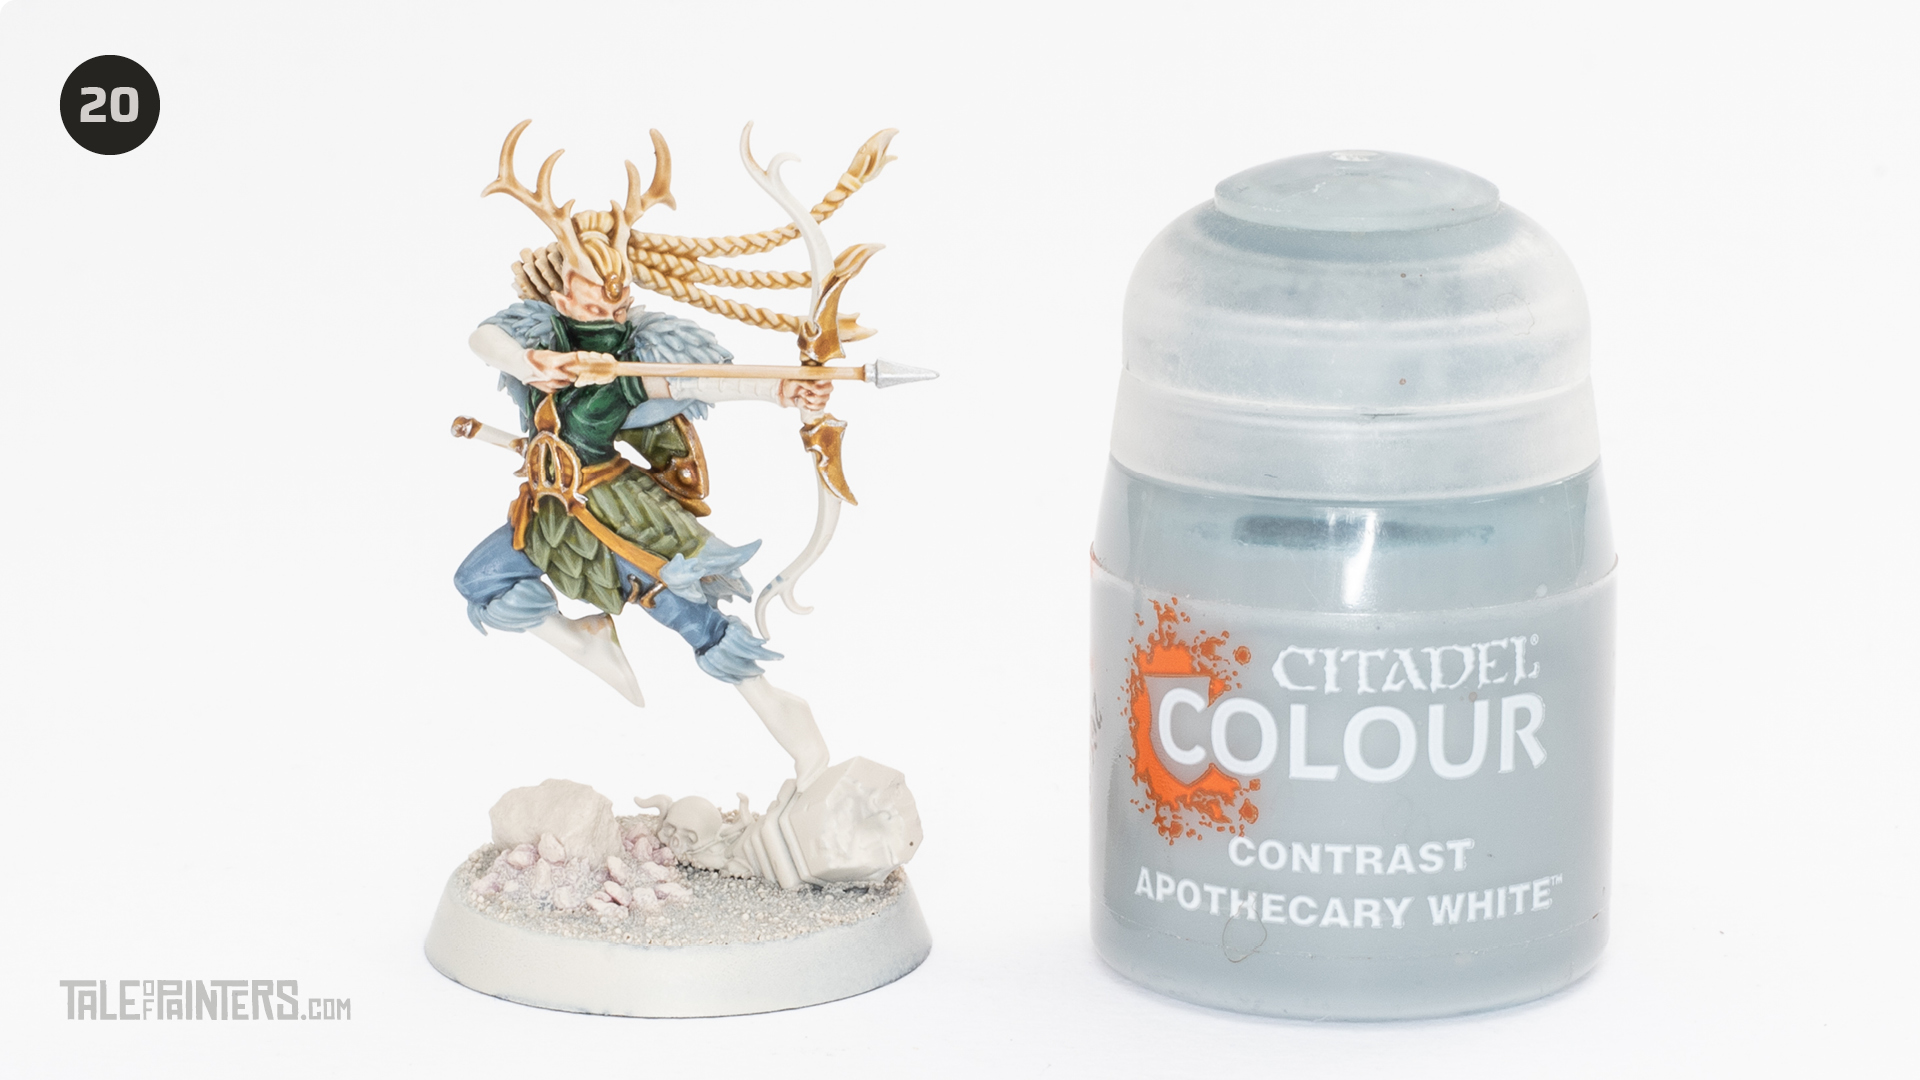

Wash the fur with Apothecary White Contrast.
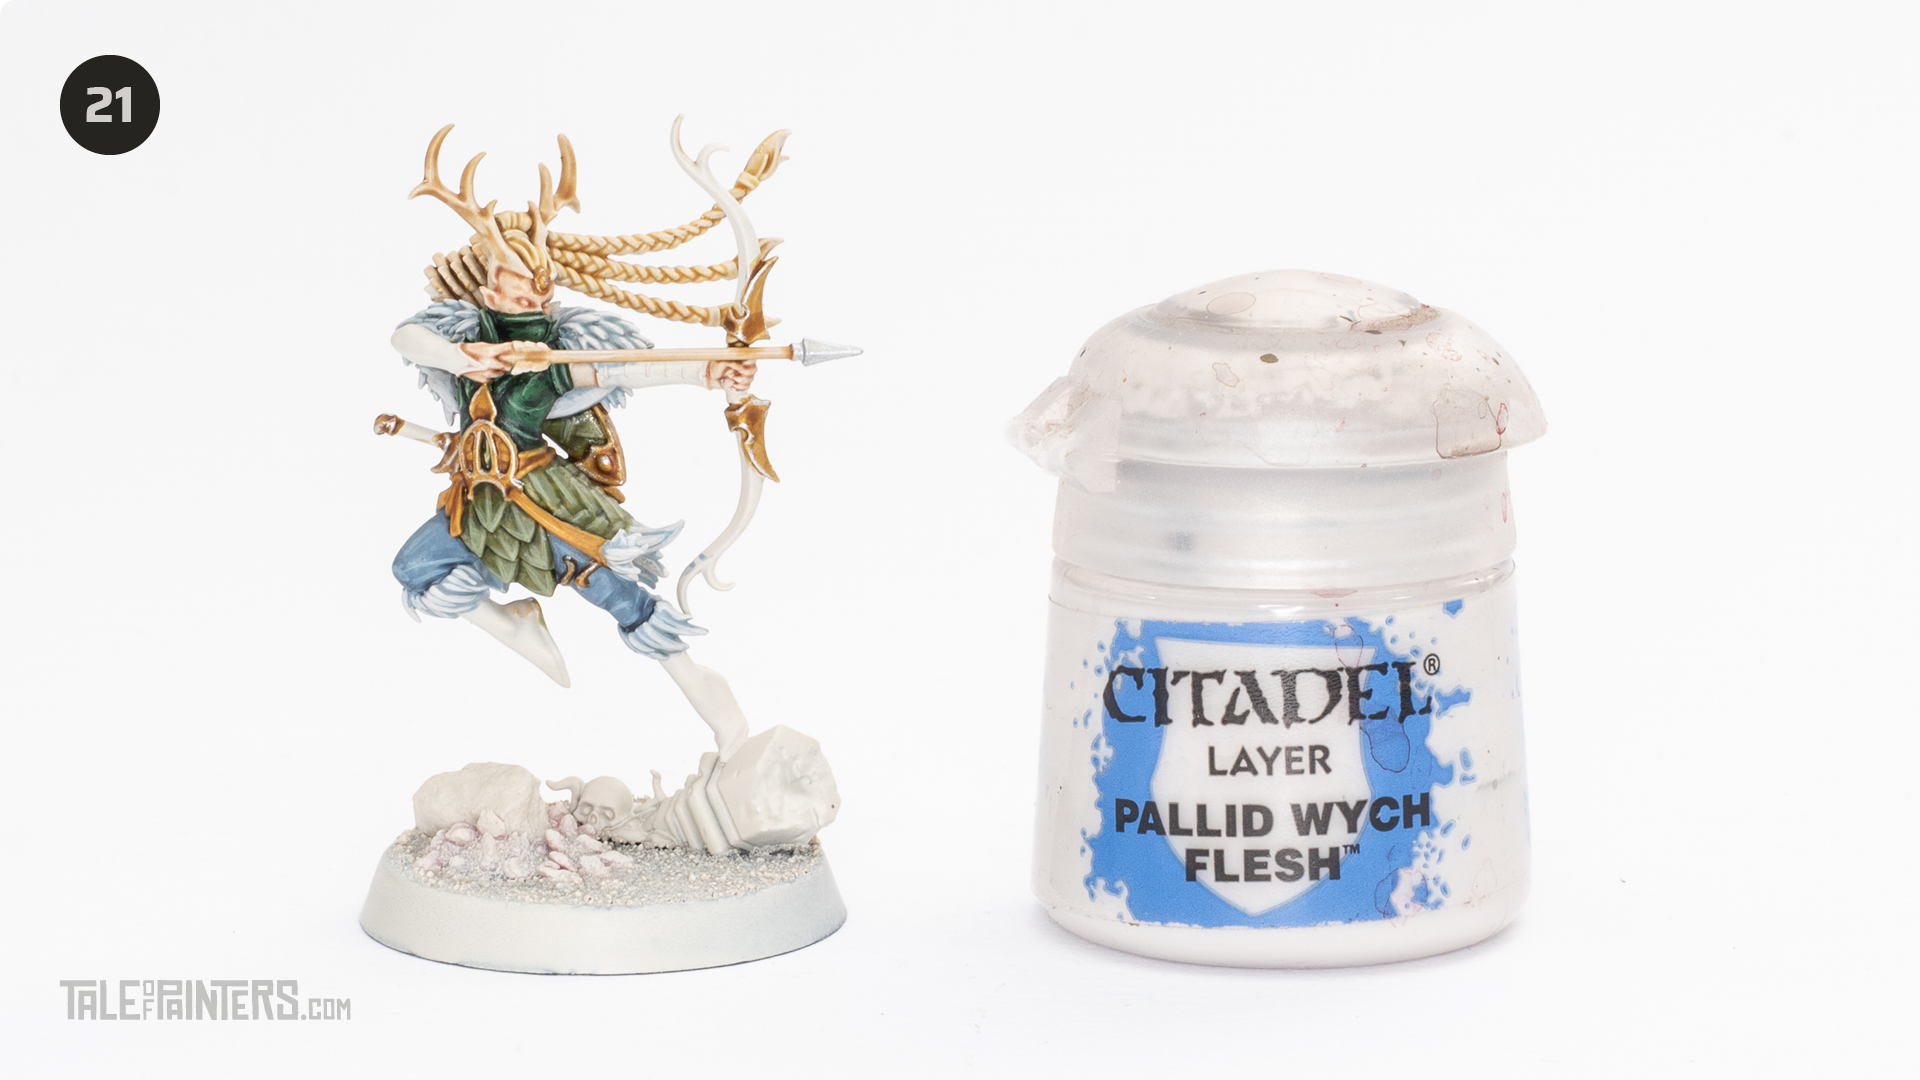

Highlight the fur with Pallid Wych Flesh. You can also add some tiny highlights to the skin with Pallid Wych Flesh.
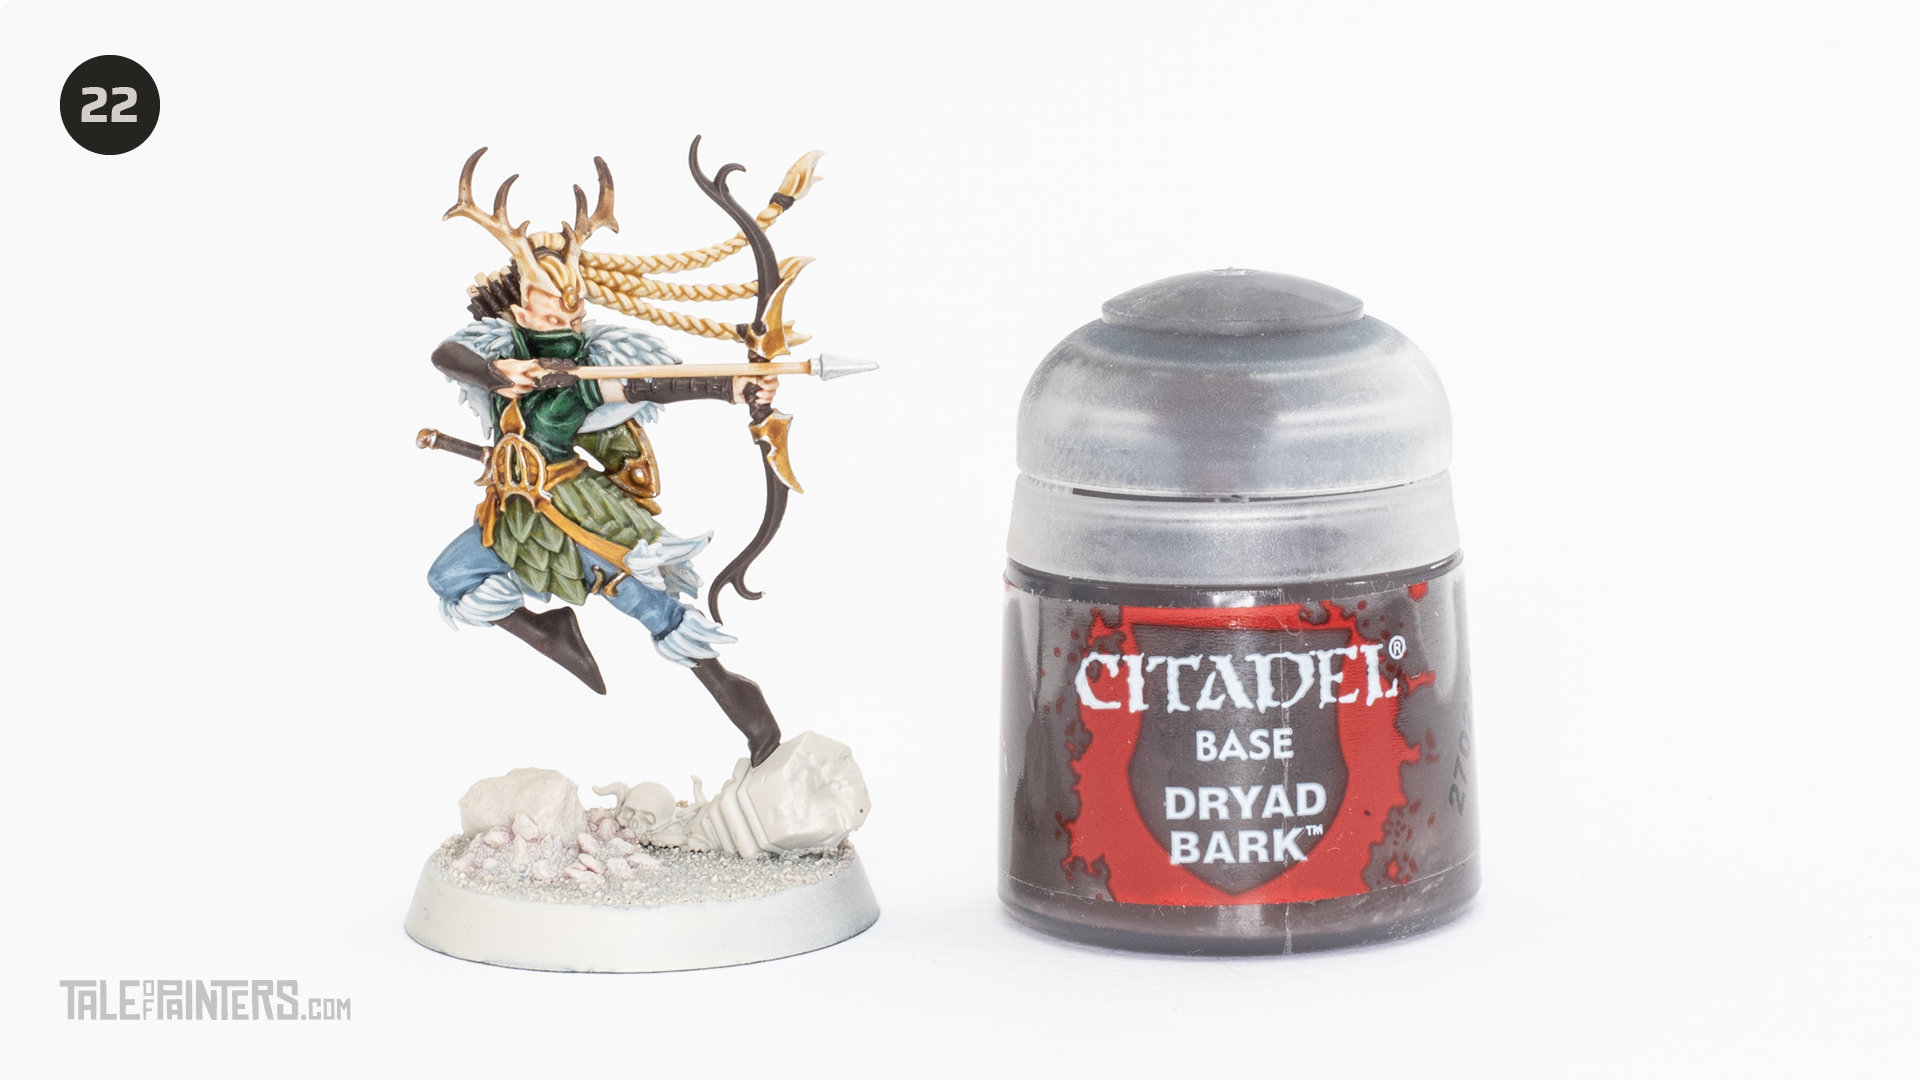

Paint the wooden bow, arm guard, boots, arrow fletchings, hair bands and antler tips with Dryad Bark.
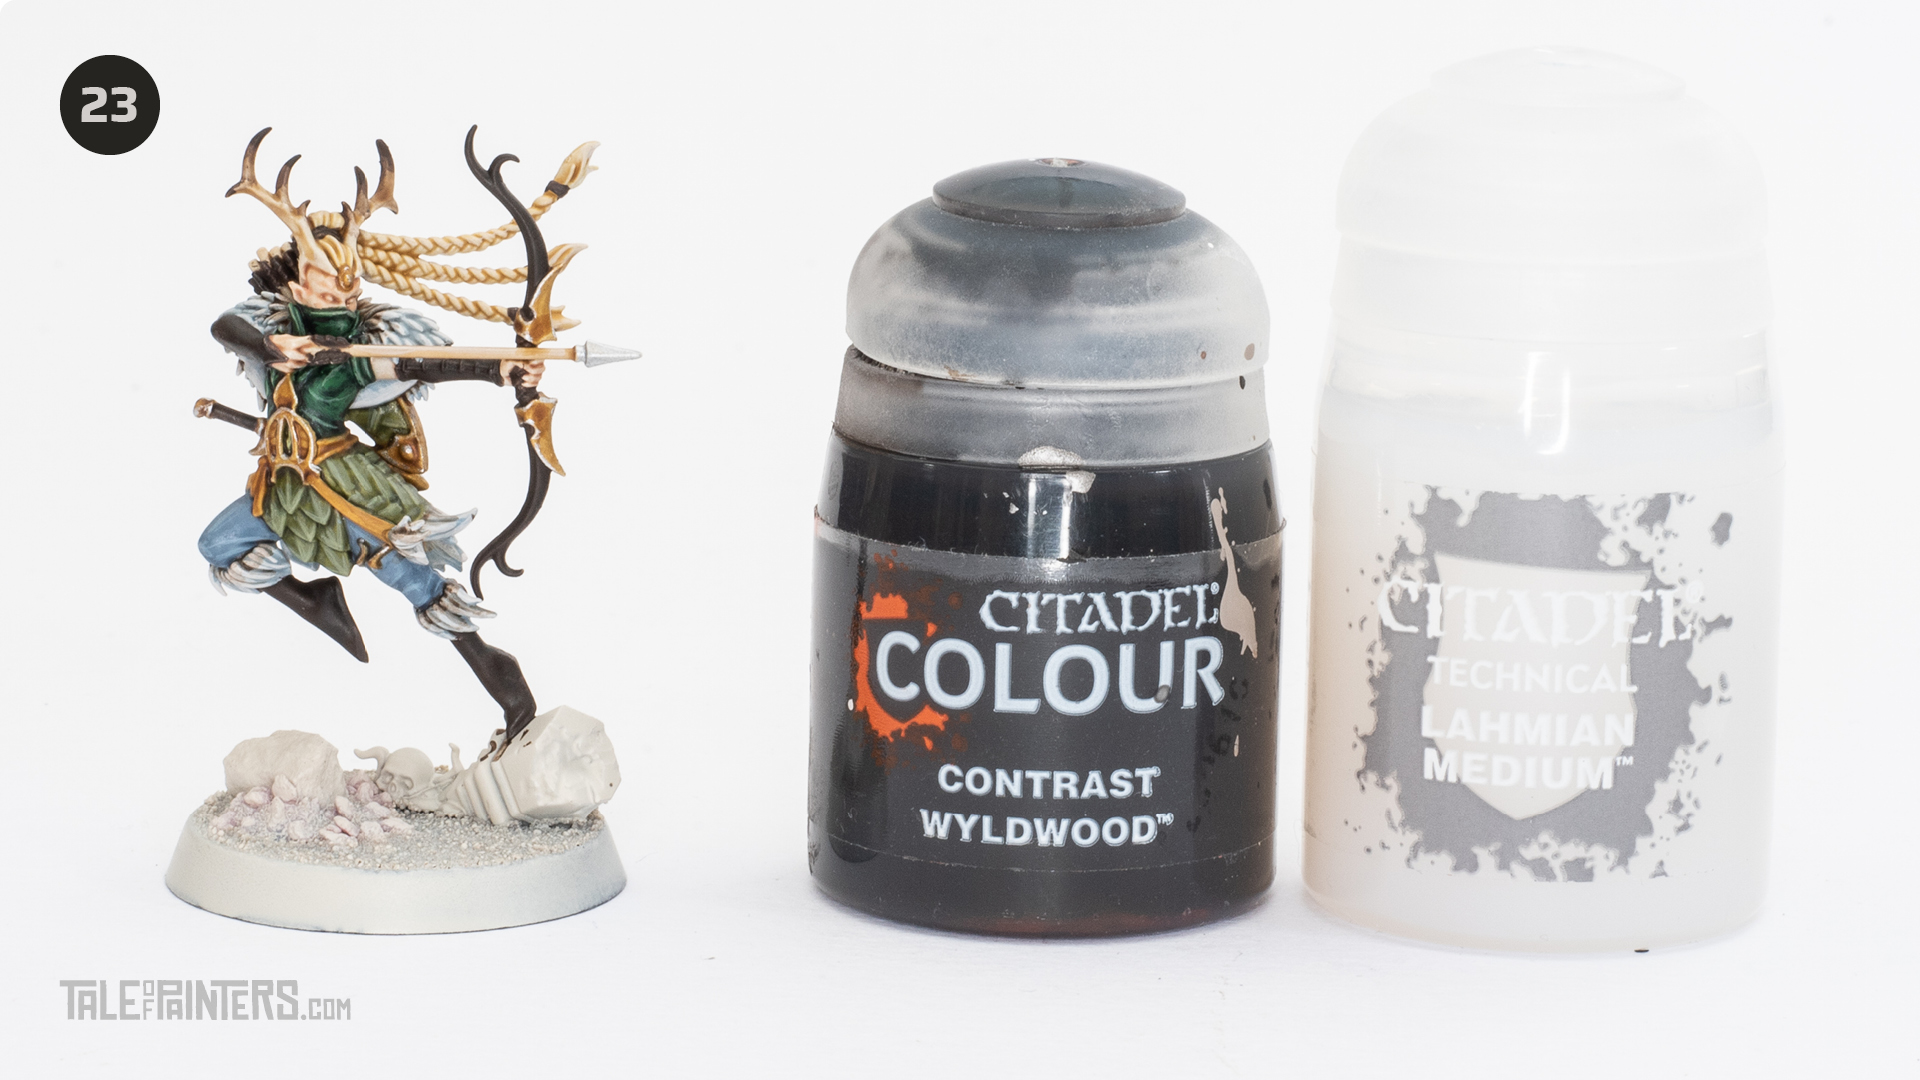

Wash the previous step with a 50:50 mix of Wyldwood Contrast and Lahmian Medium. You can also apply a small amount of this mix sparingly to the top of the fur.
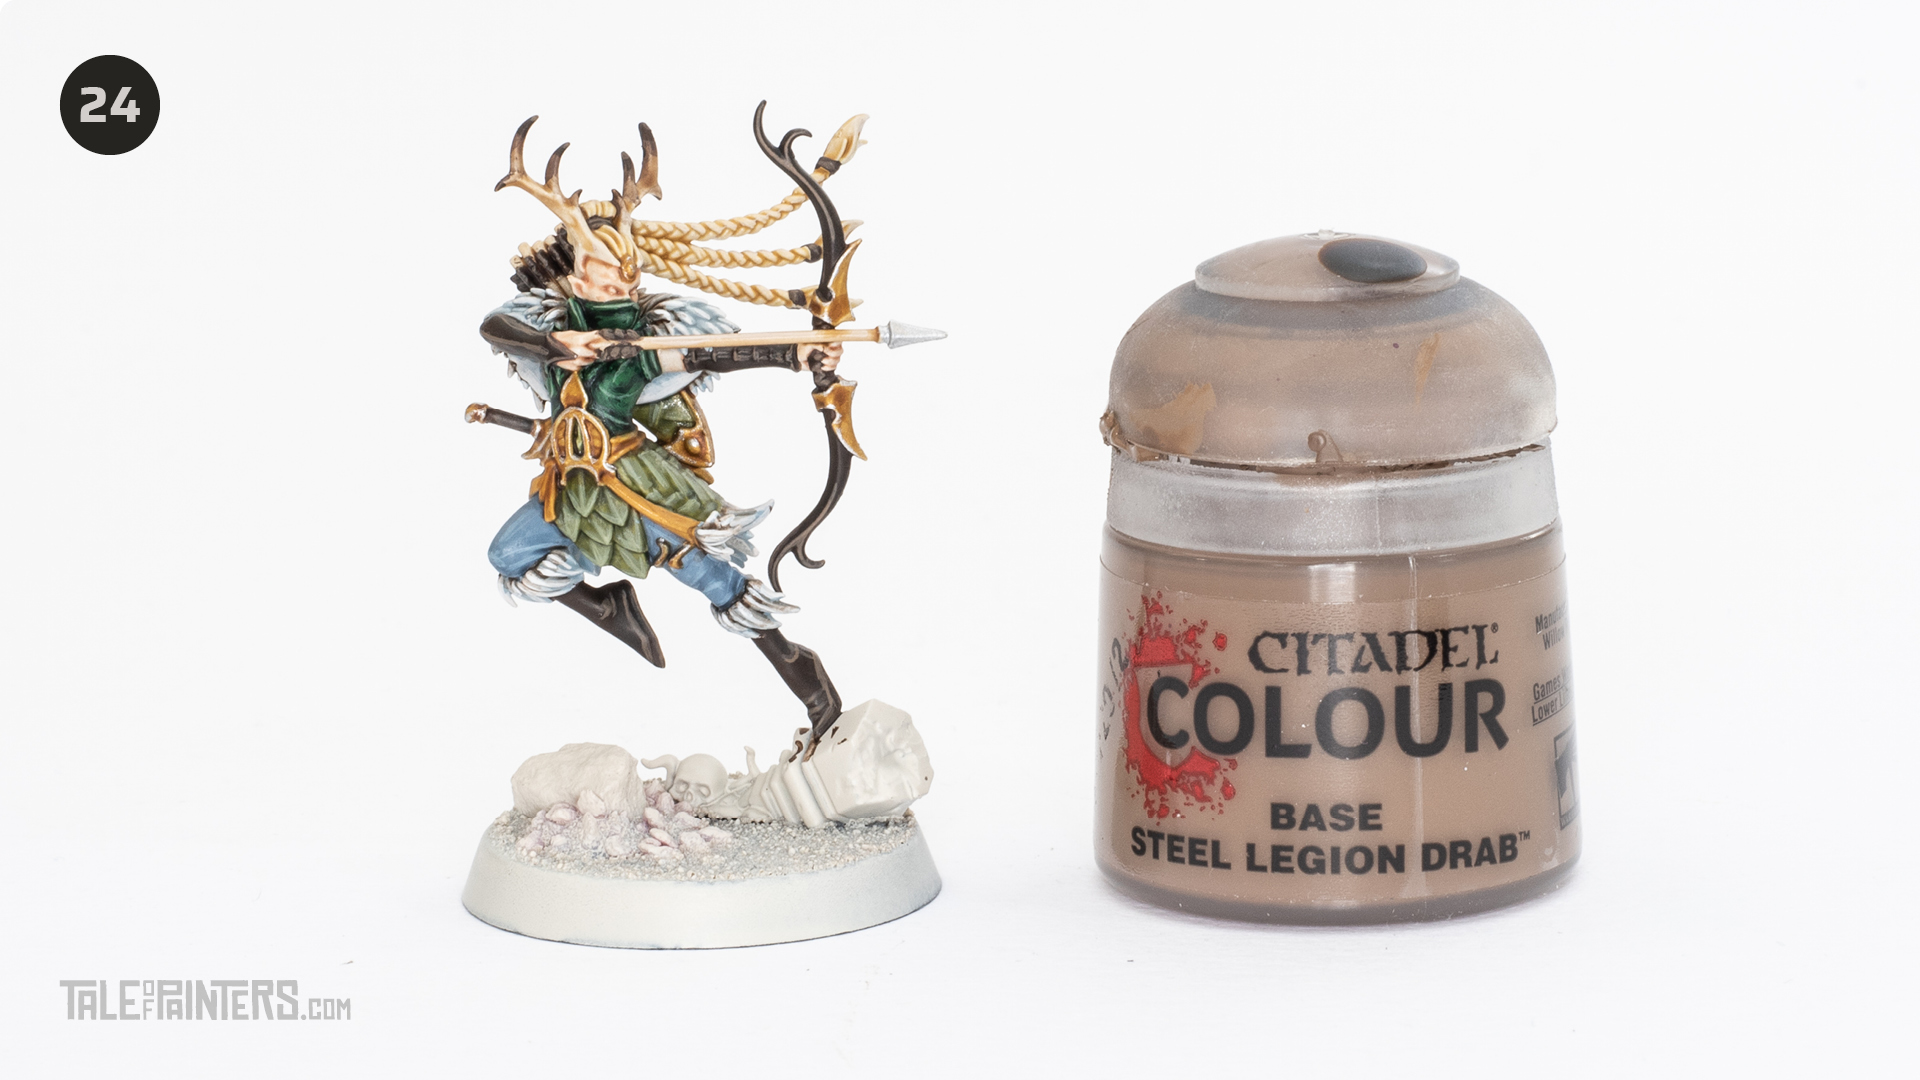

Edge highlight the wooden bow, arm guard, boots, arrow fletchings, hair bands and antler tips with Steel Legion Drab.
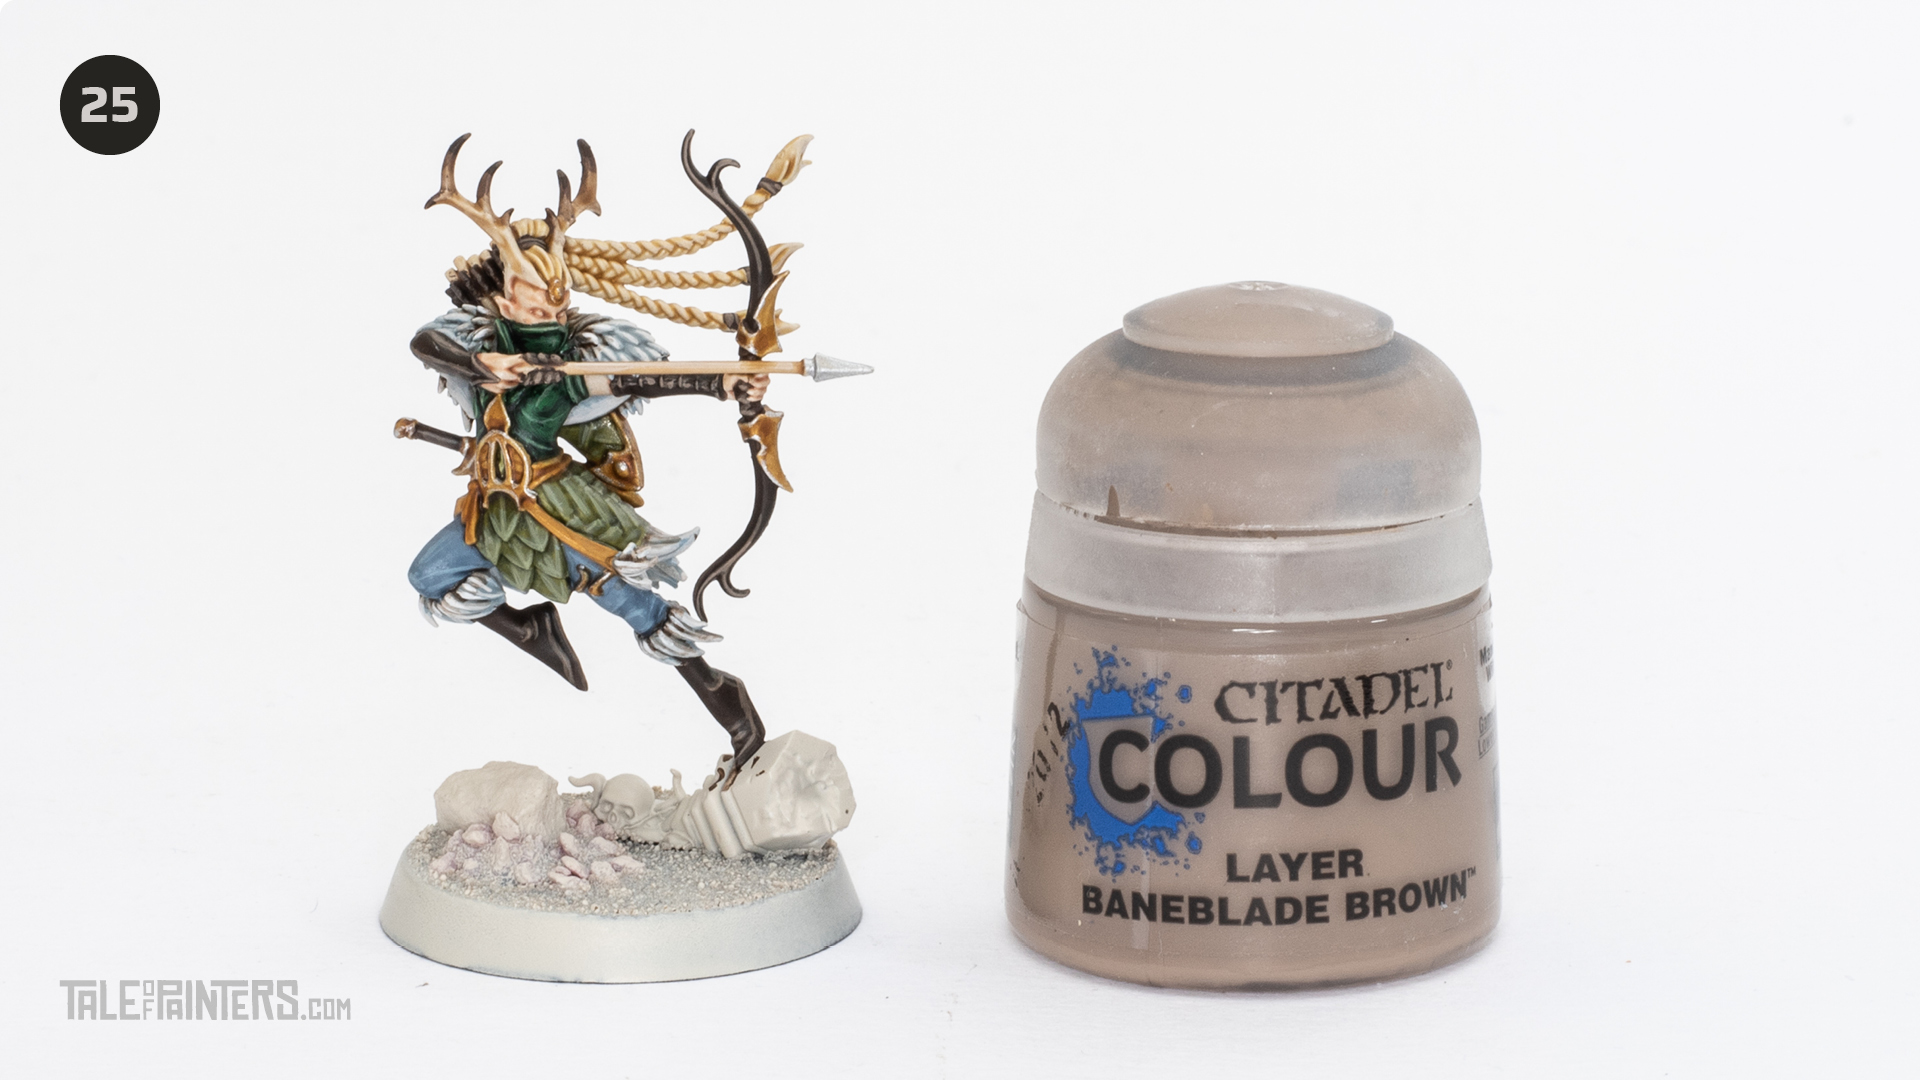

Apply some final edge highlights to the bow and antlers of Baneblade Brown.
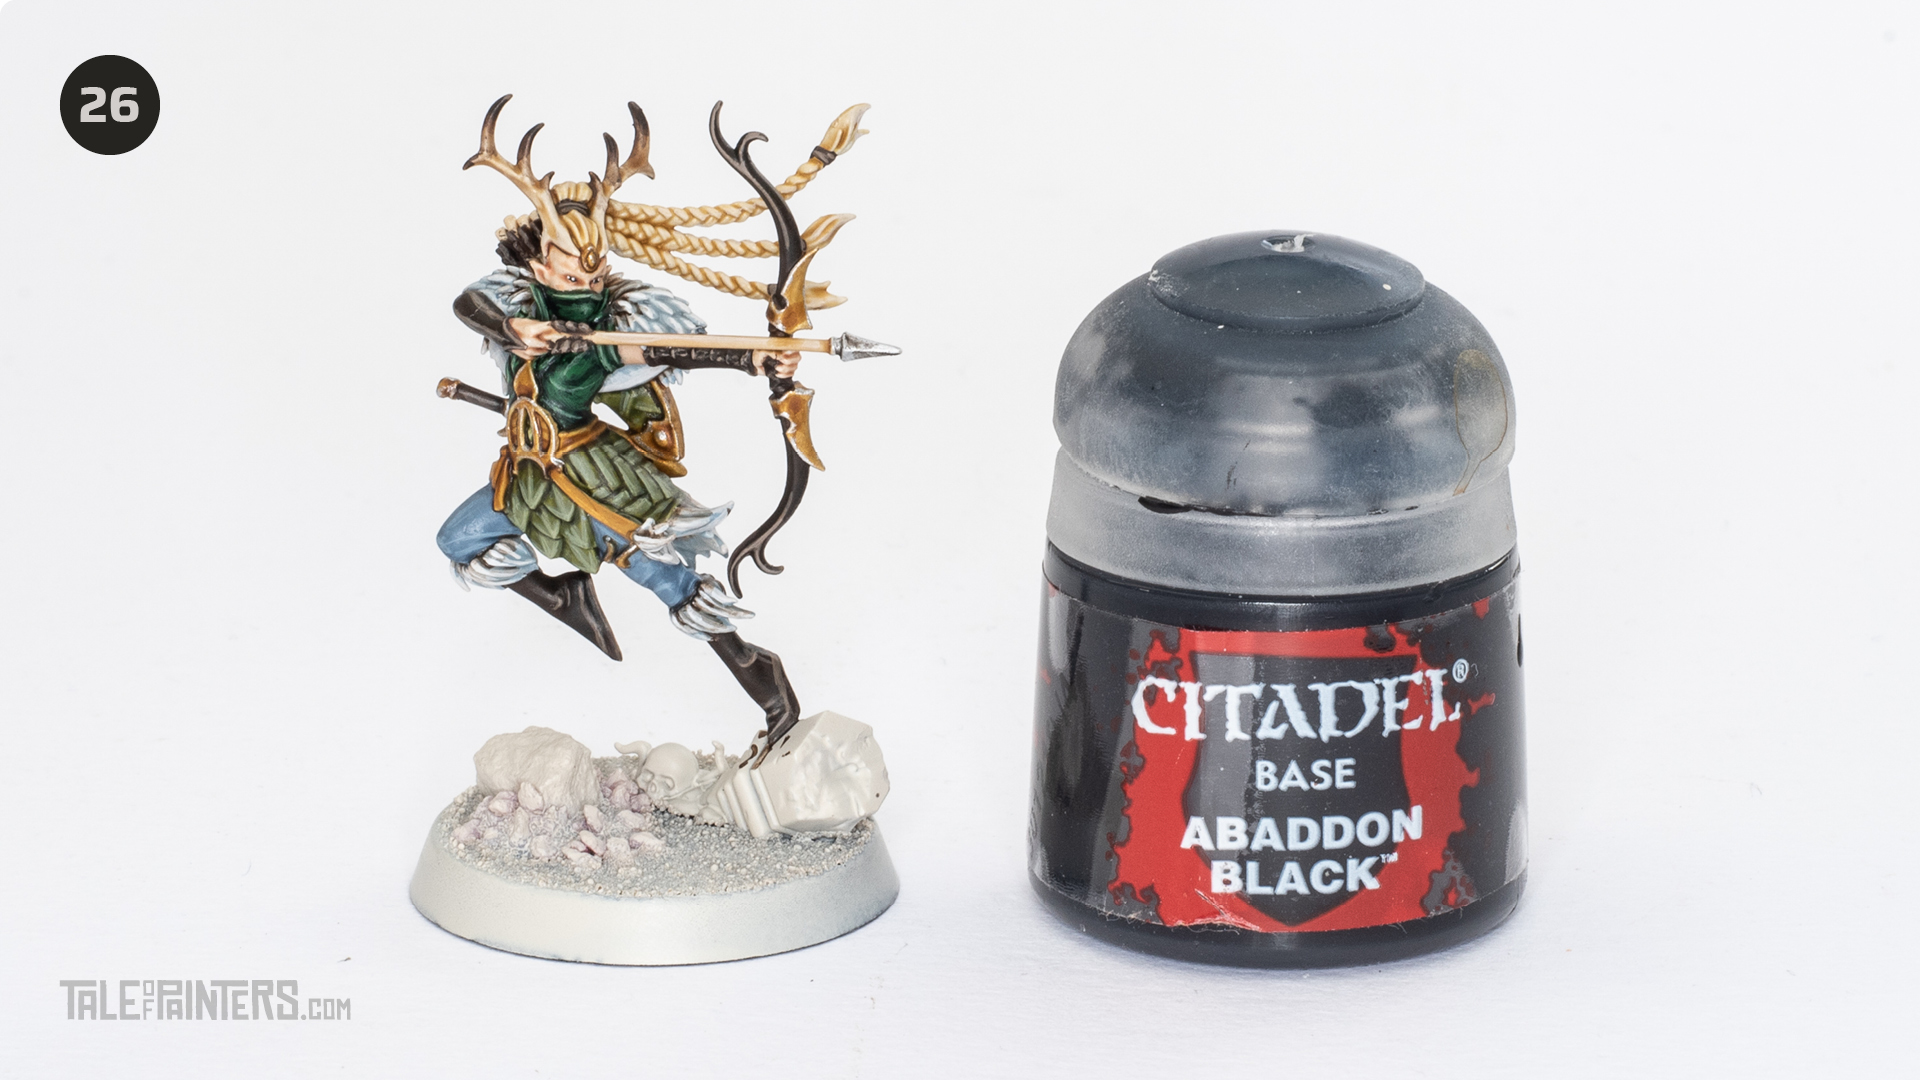

Paint the eyes with watered down Abaddon Black and then dot them with Pallid Wych Flesh.
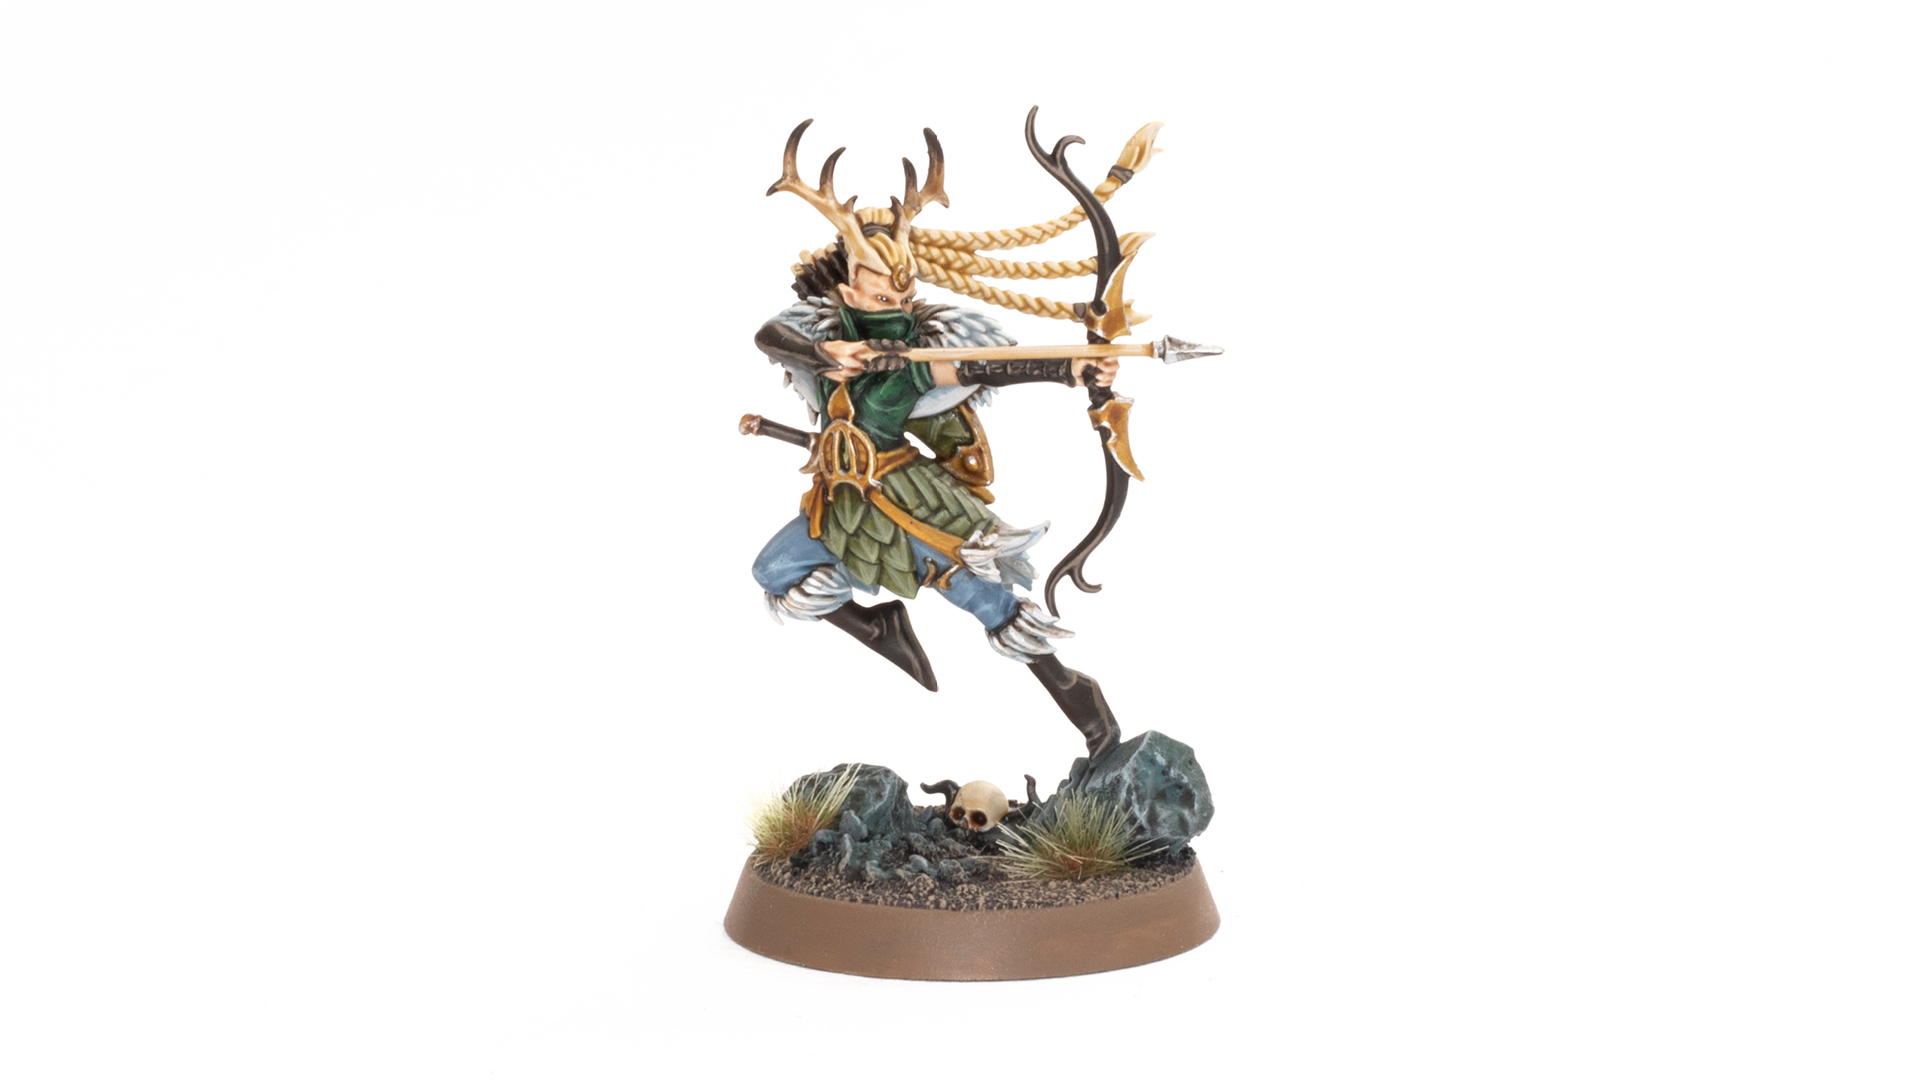

To paint the base I painted the rubble Sons of Horus Green, washed with Agrax Earthshade, drybrushed Dawnstone and edge highlighted Celestra Grey. The sand is painted with Dryad Bark, drybrushed with Steel Legion and then final drybrushed with Karak Stone.

Paints you will need for this tutorial:
- Wraithbone undercoat spray
- Cadian Fleshtone (layer)
- Contrast medium (technical)
- Lahmian Medium (technical)
- Guilliman Flesh (contrast)
- Zamesi Desert (layer)
- Skeleton Horde (contrast)
- Wraithbone (base)
- Loren Forest (layer)
- Militarum Green (contrast)
- Straken Green (layer)
- Waaagh Flesh (base)
- Dark Angels Green (contrast)
- Warpstone Glow (layer)
- Nurgling Green (layer)
- Liberator Gold (layer)
- Aggaros Dunes (contrast)
- Runefang Steel (layer)
- Russ Grey (layer)
- Space Wolves Grey (contrast)
- Fenrisian Grey (layer)
- Apothecary White (contrast)
- Pallid Wych Flesh (layer)
- Dryad Bark (base)
- Wyldwood (contrast)
- Steel Legion Drab (base)
- Baneblade Brown (layer)
- Abaddon Black (base)
Paints you’ll need for the base:
- Sons of Horus Green (layer)
- Agrax Earthshade (shade)
- Dawnstone (layer)
- Celestra Grey (base)
- Dryad Bark (base)
- Steel Legion Drab (base)
- Karak Stone Layer
If you need to expand your paint collection to follow the tutorial, check out our partner stores Wayland Games and Element Games, which offer an amazing range of paints at a discount.
Check out my previous tutorials on How to Paint Corpse Rats and Bat Swarms, Ulfenwatch Skeletons, Deadwalker Zombies, Kosargi Night Guard, Vargskyr, Vyrkos Blood-born, Gorslav the Gravekeeper and Torgillius the Chamberlain. Want to learn more about painting Warhammer Quest Cursed City models, stay tuned for more tutorials, in the mean time you can check out my review of Warhammer Quest Cursed City.
Hope you enjoyed this tutorial. If so, leave a comment or reaction below, and if you got any questions, leave them here so I can answer them for you.


[…] Vargskyr, Vyrkos Blood-born, Gorslav the Gravekeeper, Torgillius the Chamberlain, Radukar the Wolf, Qulathis the Exile, Brutogg Corpse-eater, Emelda Braskov, Jelson Darrock, Cleona Zeitengale, Octren Glimscry and […]
[…] Vargskyr, Vyrkos Blood-born, Gorslav the Gravekeeper, Torgillius the Chamberlain, Radukar the Wolf, Qulathis the Exile, Brutogg Corpse-eater, Emelda Braskov, Jelson Darrock, Cleona Zeitengale and Octren Glimscry. Want […]
[…] Vargskyr, Vyrkos Blood-born, Gorslav the Gravekeeper, Torgillius the Chamberlain, Radukar the Wolf, Qulathis the Exile, Brutogg Corpse-eater, Emelda Braskov and Jelson Darrock. Want to learn more about painting […]
Awesome tutorials as always. Very well described and explained. Keep going on for the next ones ^^
Absolutely loving this series of articles Grafy! Easy to follow for great results.
My wife will be very happy, she was waiting for this guide of yours ? thank you so much!