
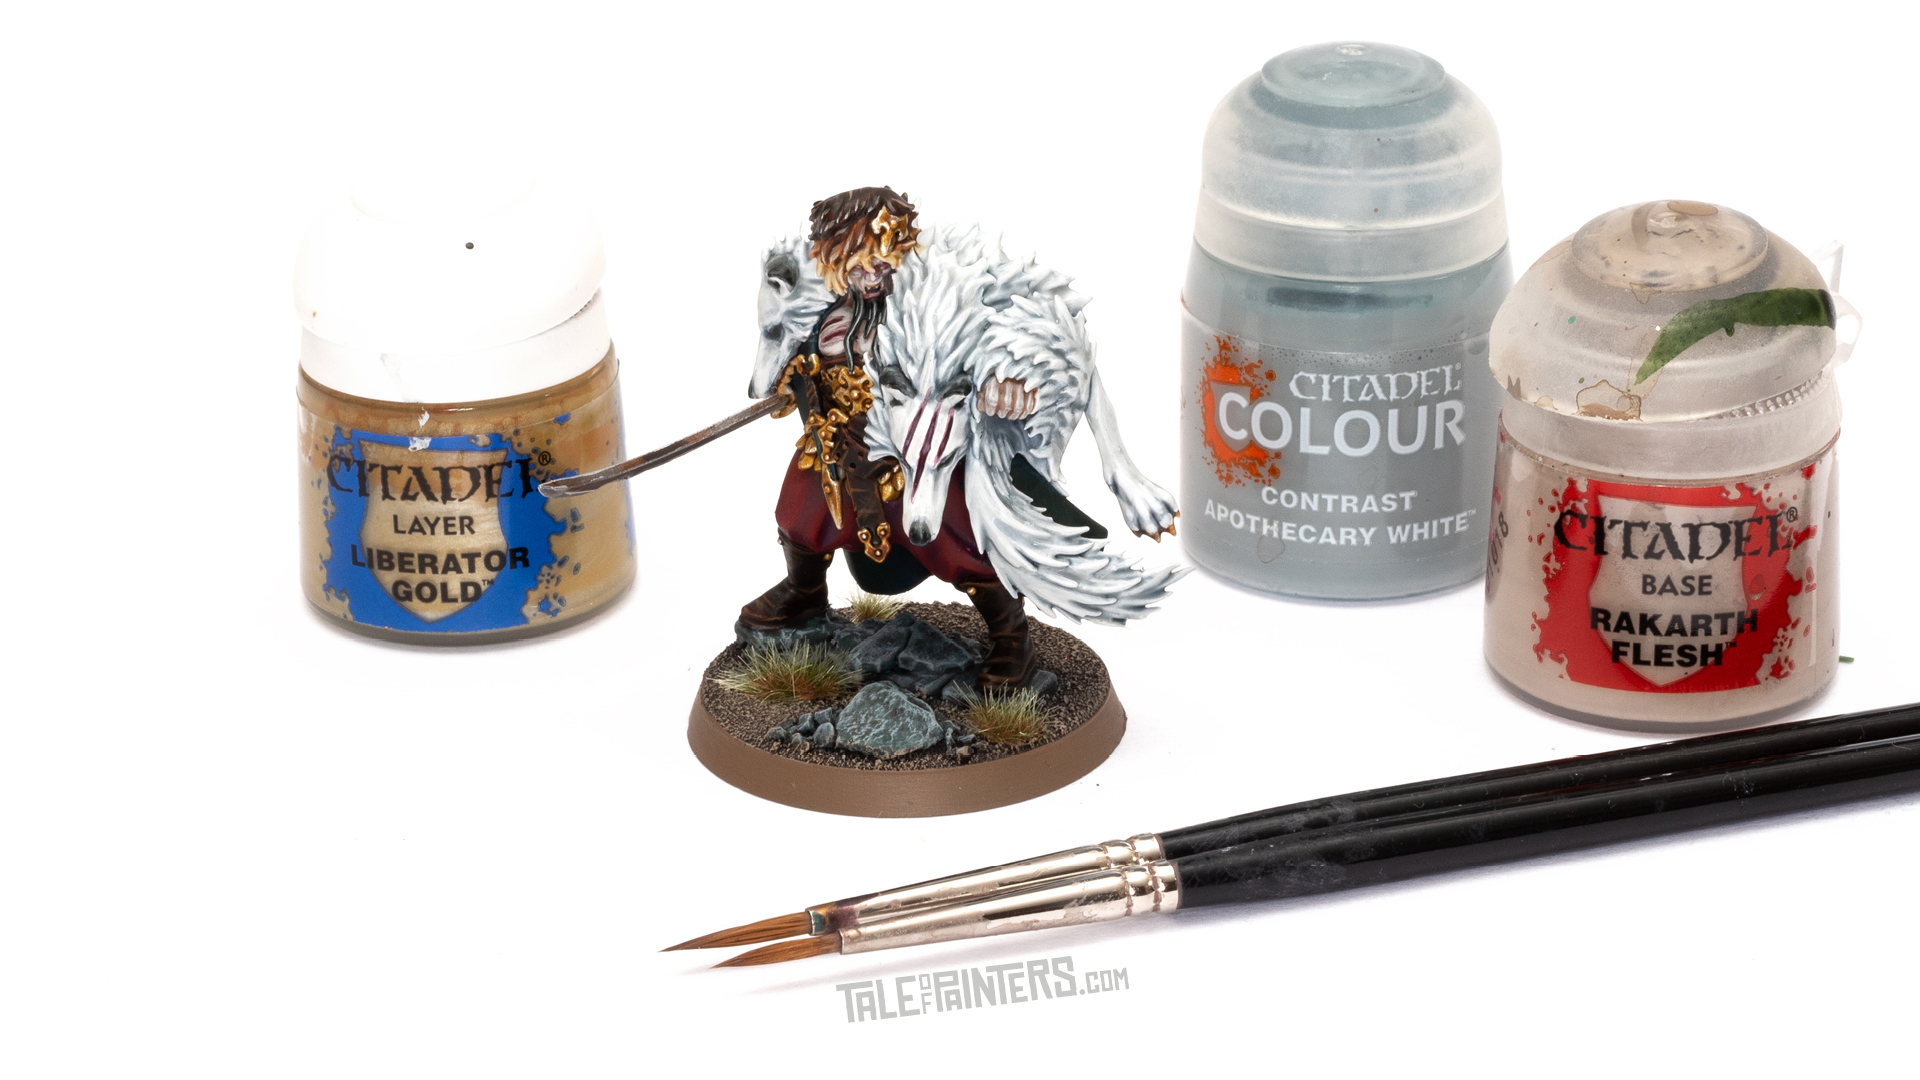
In this post, I’ll show you how to paint Radukar the Wolf from Warhammer Quest Cursed City in 30 easy to follow steps. You’ll learn how I paint pallid flesh, white wolf fur, warm golds and more. Find out how in this tutorial.
This tutorial assumes you have a good understanding of how to paint Warhammer miniatures. With each picture is the corresponding instruction. Each step shows the Citadel paint(s) I used. You’ll find a list of all the paints used in this tutorial at the end of the post.
How to paint Radukar the Wolf

Undercoat the model white.
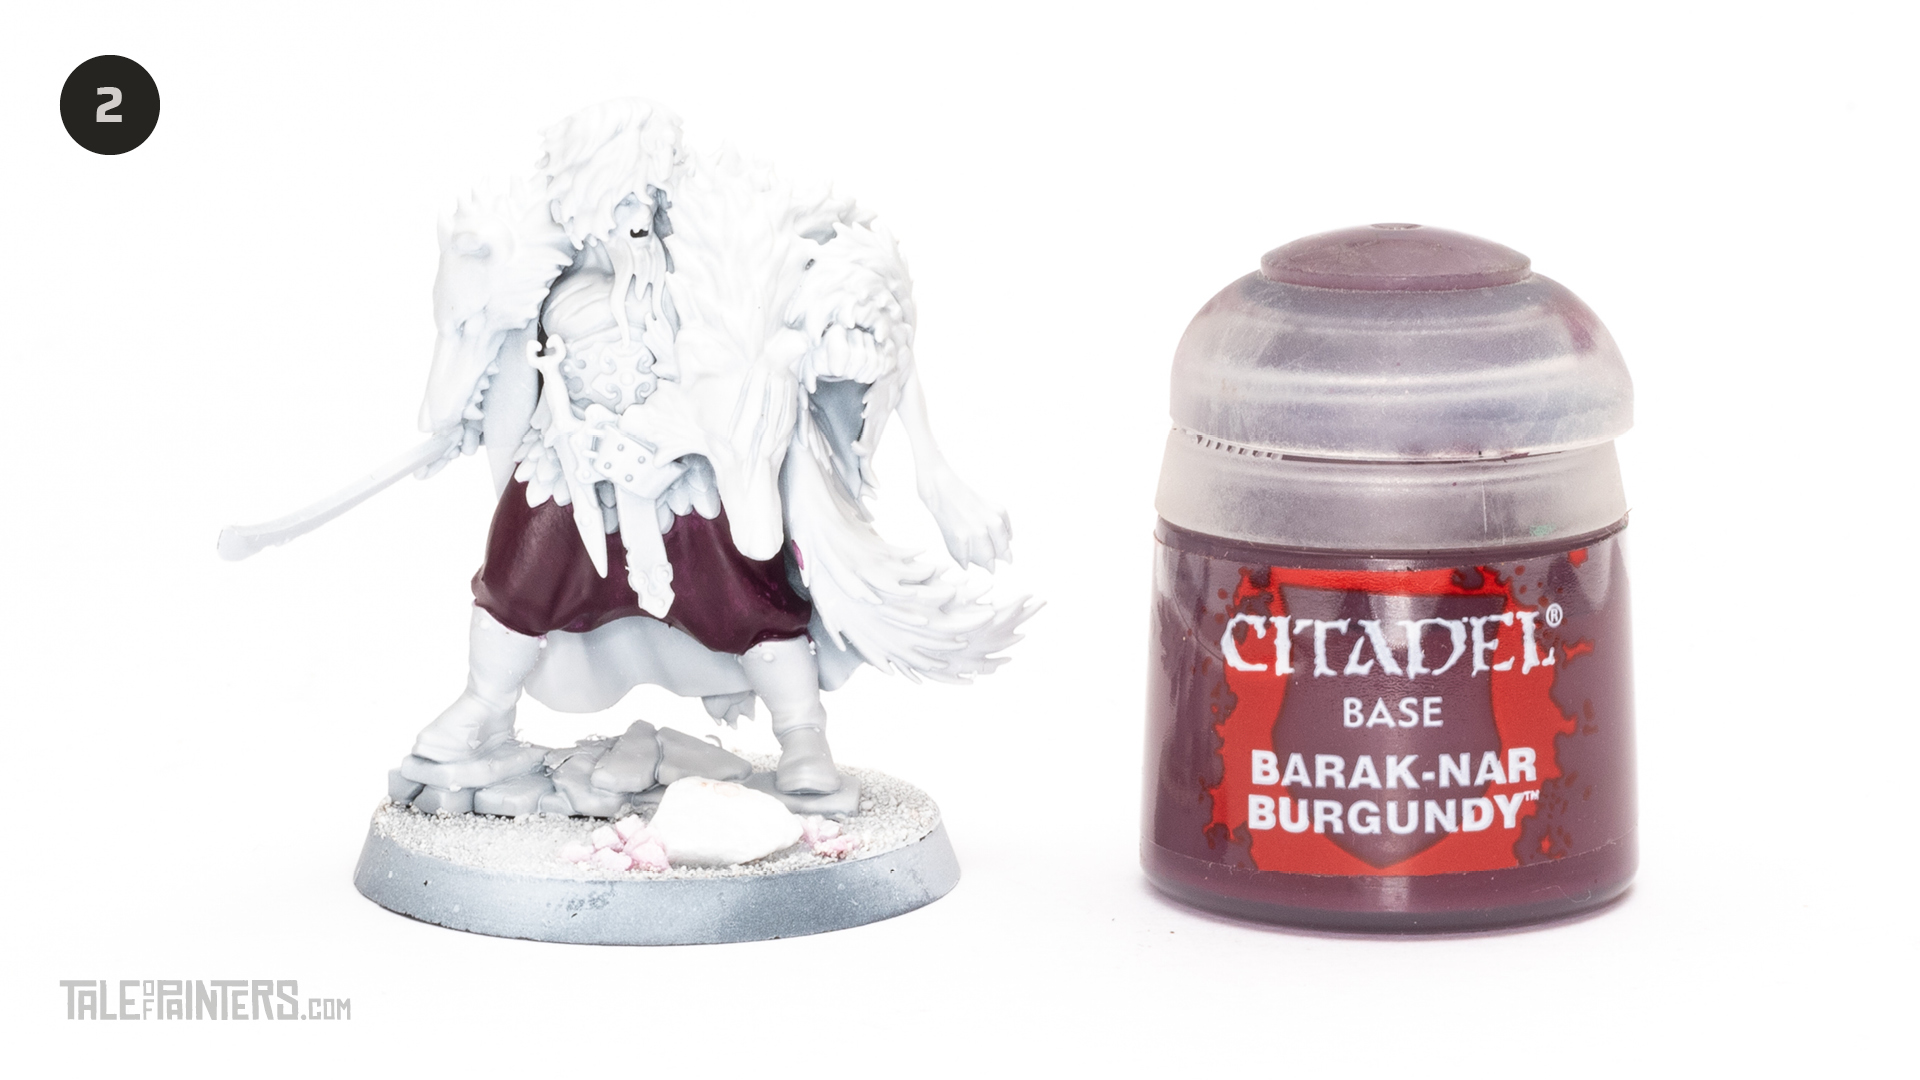
Basecoat inside of the trousers with Barack-Nar Burgundy, this will take a couple of coats.
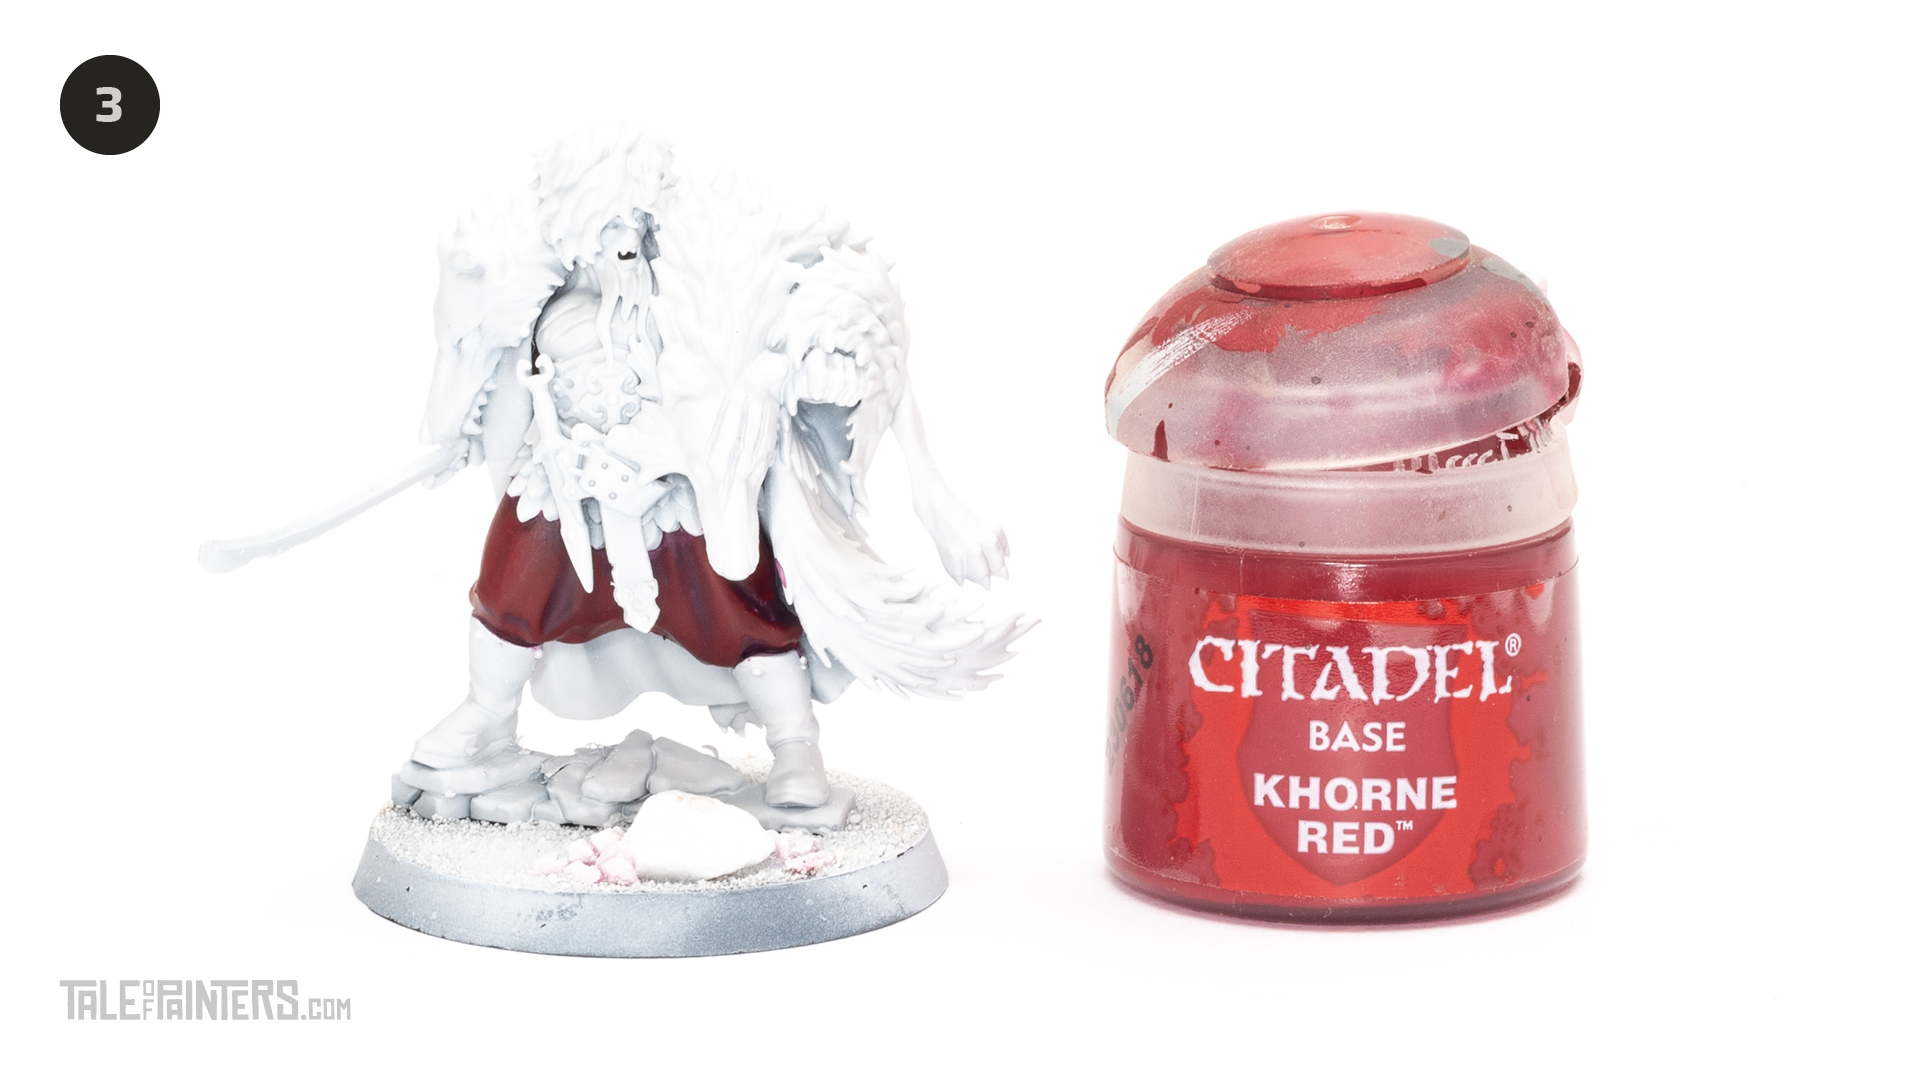
Highlight the trousers with Khorne Red leaving the previous layer showing through in the recesses.

Paint the sword blade with Leadbelcher.

Paint the cape, cuffs and dagger scabbard with a couple of coats of Incubi Darkness.

Repaint the cape, cuffs and dagger scabbard with Caliban Green leaving some of the previous layer showing through in the recesses.

Create a 50:50 mix of Basilcanum Grey and Lahmian Medium and wash the trousers, cape, scabbard and sword blade. .

Paint the fur hat, Radukar’s teeth, the wolf teeth and claws with Wraithbone.

Wash the fur hat, Radukar’s teeth, the wolf teeth and claws with 50:50 mix of Skeleton Horde and Lahmian Medium
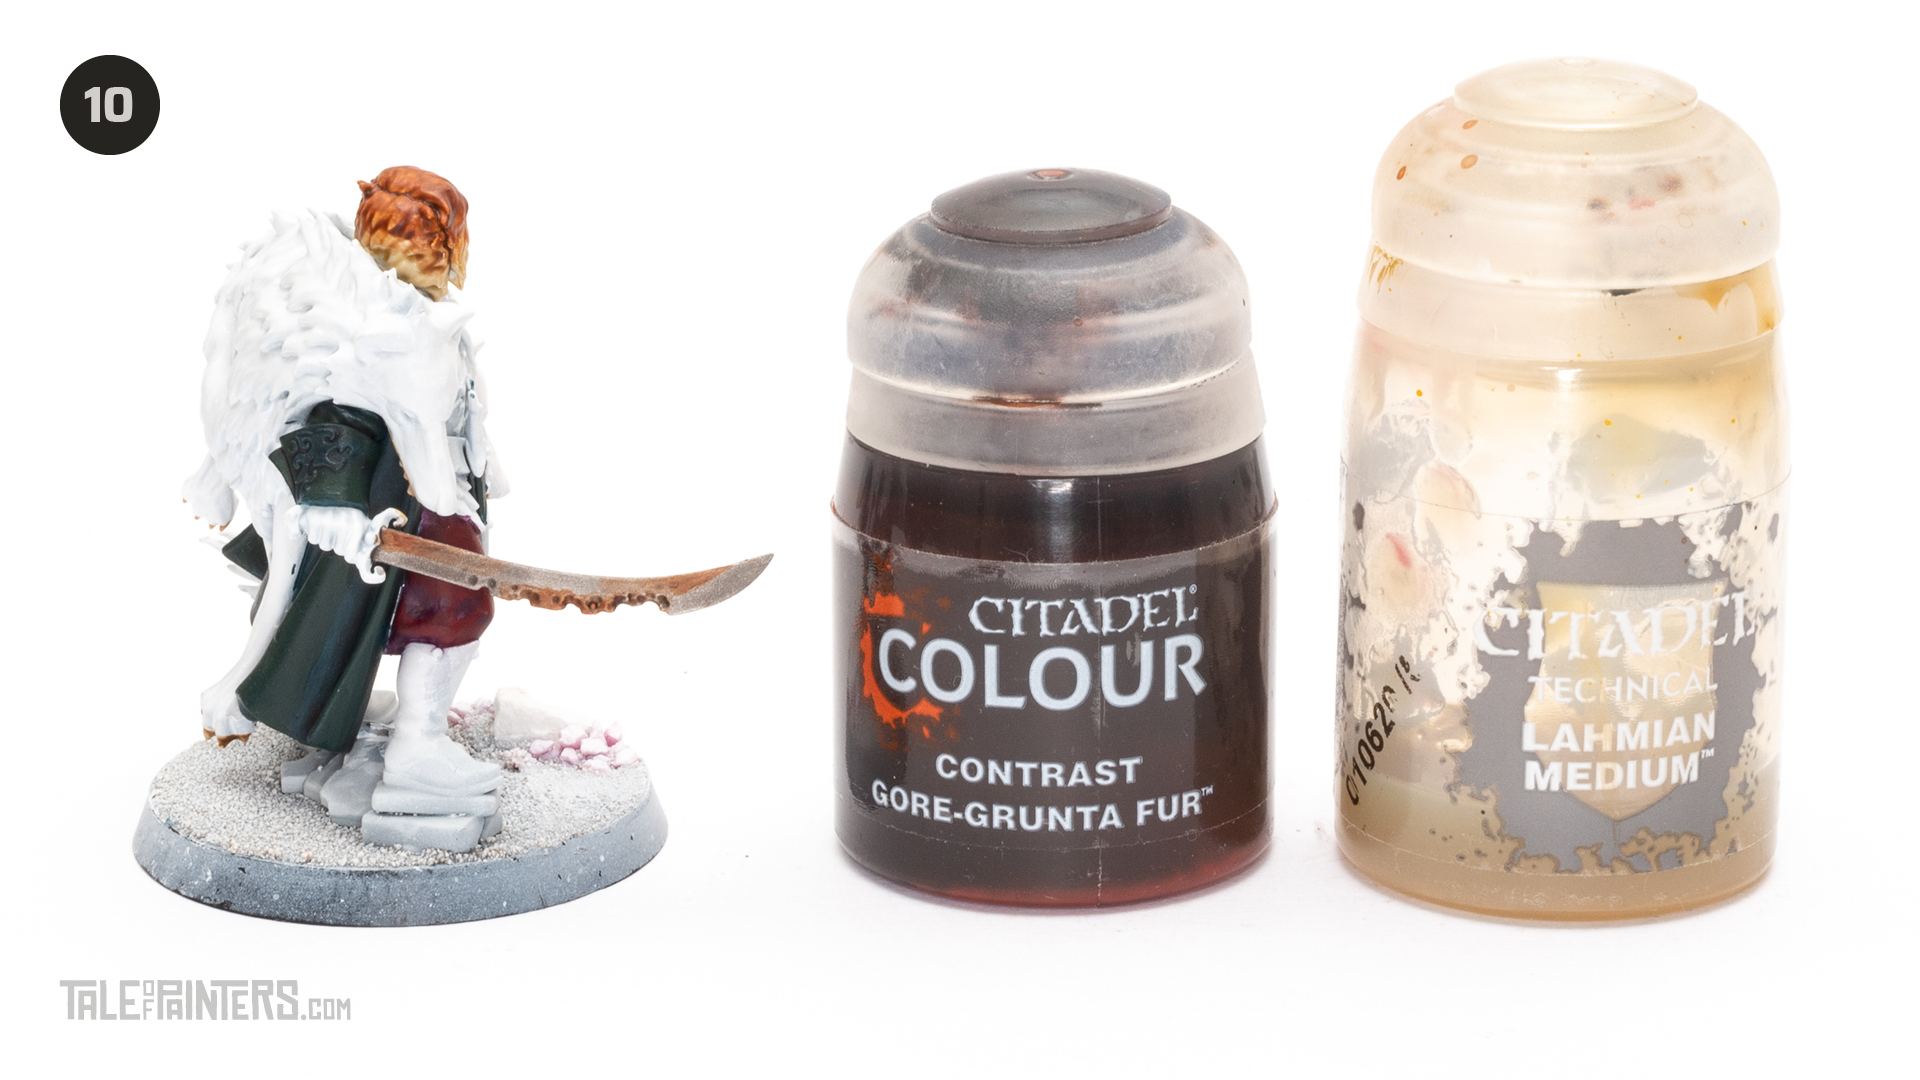
Paint Gore-Grunta Fur on the top of the fur hat. Shade the metals with Gore-Grunta Fur. Once dry repeat to increase the intensity of the shading on the blades.

Highlight the cape, cuffs and dagger scabbard with thin lines of Sons of Horus Green.


Paint the leather belt and boots with a couple of coats of Doombull Brown.


Edge highlight the leather belt and boots with thin lines of Skrag Brown.

Paint the skin with Rakarth Flesh. This might take a couple of thin coats to ensure it’s a solid coat.

Create a glaze of 1 part Knight-Quester Flesh and 3 parts Contrast Medium and wash the skin.


Edge highlight the skin with thinned Pallid Wych Flesh.

Wash the Wolf Fur with 50:50 mix of Contrast Apothecary White and Lahmian Medium.

Carefully shade the recesses of the fur with 50:50 mix of Contrast Space Wolves Grey and Lahmian Medium. Apply this just to the recesses not all over.

Highlight the fur with Ulthuan Grey.

Edge highlight the fur with White Scar.

Paint the wolf ear tips, nose, eyes, gums and Radukar’s beard with 50:50 mix of Contrast Black Templar and Lahmian Medium.

Apply a thin coat of Carroburg Crimson to the wounds on wolf head, Radukar’s chest and around the eyes of Radukar.

Paint the chainmail scales, metal parts of the belt, hat brooch, sword/dagger hilts, pommels and the cuff pattern with Liberator Gold. This will take a couple of coats.

Wash the gold areas with Aggaros Dunes.

Highlight the metals and gold with thin lines of Runefang Steel.

Add some edge highlights of Mephiston Red to the trousers.

Add some thin edge highlights Of Baneblade Brown to the dark brown fur of the hat.

Highlight the light colour fur on the hat with Wraithbone. Paint the teeth again with Wraithbone.

To paint the base, the sand is painted with Dryad Bark, drybrushed with Steel Legion and then final drybrushed with Karak Stone.

Paints you will need for this tutorial:
- White undercoat spray.
- Barack-Nar Burgundy (base)
- Khorne Red (base)
- Leadbelcher (base)
- Incubi Darkness (base)
- Caliban Green (base)
- Basilcanum Grey (contrast)
- Lahmian Medium (technical)
- Wraithbone (base)
- Skeleton Horde (contrast)
- Gore-Grunta Fur (contrast)
- Sons of Horus Green (layer)
- Doombull Brown (layer)
- Wyldwood (contrast)
- Skrag Brown (layer)
- Rakarth Flesh (base)
- Knight-Quester Flesh (layer)
- Contrast Medium (technical)
- Grey Seer (base)
- Pallid Wych Flesh (layer)
- Apothecary White (contrast)
- Space Wolves Grey (contrast)
- Ulthuan Grey (layer)
- White Scar (layer)
- Black Templar (contrast)
- Carroburg Crimson (shade)
- Liberator Gold (layer)
- Aggaros Dunes (contrast)
- Runefang Steel (layer)
Paints you’ll need for the base:
- Dryad Bark (base)
- Steel Legion Drab (base)
- Karak Stone Layer
If you need to expand your paint collection to follow the tutorial, check out our partner stores Wayland Games and Element Games, which offer an amazing range of paints at a discount.
Check out my previous tutorials on How to Paint Corpse Rats and Bat Swarms, Ulfenwatch Skeletons, Deadwalker Zombies, Kosargi Night Guard, Vargskyr, Vyrkos Blood-born, Gorslav the Gravekeeper and Torgillius the Chamberlain. Want to learn more about painting Warhammer Quest Cursed City models, stay tuned for more tutorials, in the mean time you can check out my review of Warhammer Quest Cursed City.
Hope you enjoyed this tutorial. If so, leave a comment or reaction below, and if you got any questions, leave them here so I can answer them for you.

6 Comments
Leave a Reply
Tale of Painters is the unofficial Warhammer hobby magazine run by hobbyists like you. Support our work by using the affiliate links from our partner stores for your next orders so we can continue to bring you fantastic FREE content every day:


![]()
![]()
Or support us directly:


[…] Cursed City Tutorial: How to paint Torgillius the Chamberlain from Warhammer Quest Cursed City Tutorial: How to paint Radukar the Wolf from Warhammer Quest Cursed City Tutorial: How to paint Qulathis the Exile from Warhammer Quest Cursed City Tutorial: How to […]
[…] Deadwalker Zombies, Kosargi Night Guard, Vargskyr, Vyrkos Blood-born, Gorslav the Gravekeeper, Torgillius the Chamberlain, Radukar the Wolf, Qulathis the Exile, Brutogg Corpse-eater, Emelda Braskov and Jelson Darrock. […]
[…] Deadwalker Zombies, Kosargi Night Guard, Vargskyr, Vyrkos Blood-born, Gorslav the Gravekeeper, Torgillius the Chamberlain, Radukar the Wolf and Emelda Braskov. Want to learn more about painting Warhammer Quest Cursed City […]
your website is extremely slow. Images take forever to load.,… just a heads up.
Hi Carl, thanks for the heads up. We’ll see what we can do.
Too many people “stealing” your recipes 😛