
Painting models one at a time is a laborious chore when it comes to painting armies. When I started painting my Tomb Kings of Khemri army I promised myself I would cut corners and use efficiencies to speed through the painting. One of those efficient ways of working is sub-assemblies. In today’s post I want to talk about how you can save time painting with a little planning.
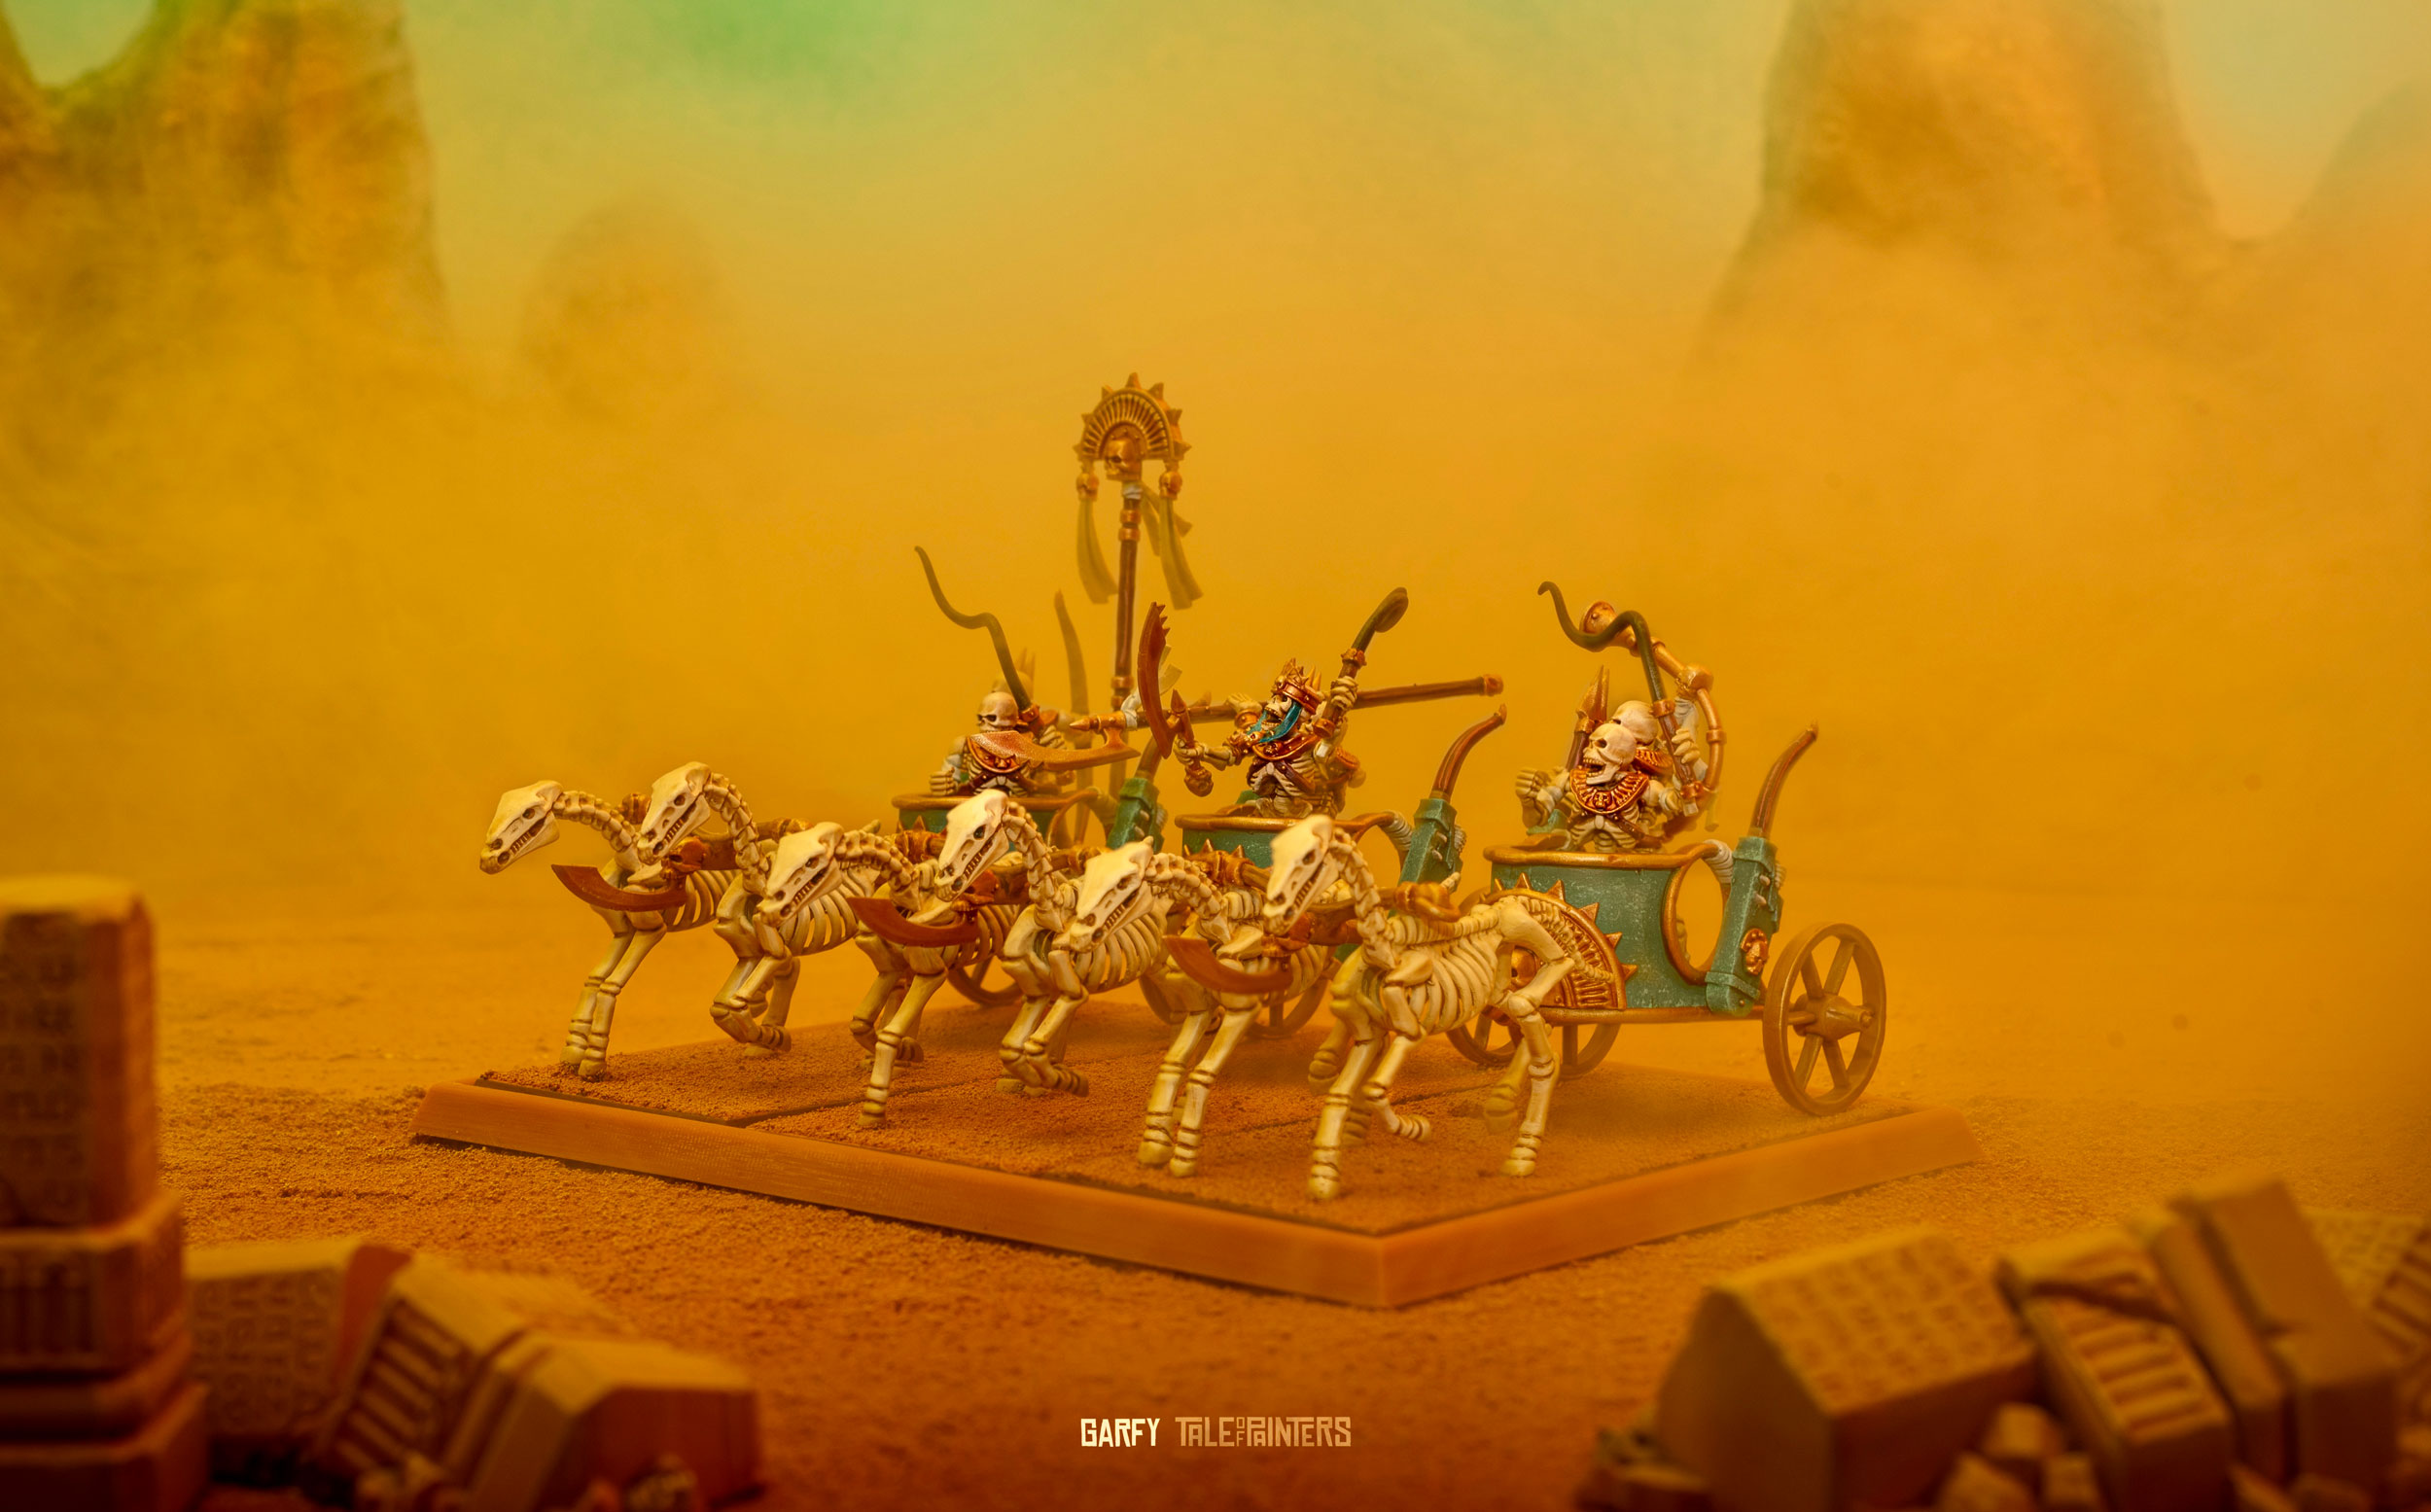
If you want to paint these Chariots neatly the only way to achieve this is to paint all the pieces separately. These sub-assemblies consist of pieces that will be similar colours and/or have hard to reach areas when assembled. For instance, keeping all the horses separate because they’re all bone and keeping the crew separate because you can’t paint their legs when they’re glued to the cockpit of the chariot.
Sub-assemblies speed up the painting because airbrushing all those different colours (gold, bone, turquoise etc) on individual pieces meant I didn’t have to go in and carefully paint the pieces by hand whilst it was all assembled. Working on three Chariots at the same time is another efficiency called batch painting. Painting all three Chariots took me around a week to complete.

If you missed my last post, you might not know I shared a link to Printables.com where you can download the digital files and print your own movement trays for the units included in the Tomb Kings of Khemri Army Core Set. Check out this link for your free movement tray files.
Paint recipes

The colours and techniques I used for the Chariots are covered by my Tomb Kings of Khemri recipe card. One thing I would like to expand on is the bone. I think a little more detail on the application of the Skeleton Horde paint is needed to help people achieve clean results like the above.
You’ll see in the recipe card I mention mixing Skeleton Horde with Contrast Medium. You’ll want a ratio of 1 part Skeleton Horde for 3 parts Contrast Medium. Because we already have a base of Screaming Skull on the model, we don’t want the Contrast paint to colourise the skeleton, just shade it. Contrast paint (and medium) is designed to contract and fill recesses, it’s perfect for shading rib cages, eye sockets etc. On larger flatter areas like the horses head or legs, the contrast light have no recesses to flow into so it’ll sit on the flat area and collate into a blob, this is called pooling. Acting fast whilst it’s pooling and still wet use a spare brush to wick away the access. That’s what I did and I don’t have any unsightly pooling on the models.
Thanks for checking out another post on The Old World, I’m excited to share more over the next few weeks.

Tale of Painters is the unofficial Warhammer hobby magazine run by hobbyists like you. Support our work by using the affiliate links from our partner stores for your next orders so we can continue to bring you fantastic FREE content every day:


![]()
![]()
Or support us directly:


