
If you’re about to undertake the challenge of building and painting a Forgeworld Thunderhawk Gunship then this post should prove useful.
I’ve documented the assembly and painting of the biggest model I have ever painted in 25 separate blog entries since October 2011. I thought I would use this opportunity to collate all that information into one overview and link to all the posts in chronological order. More after the jump.
I’ve split the posts into Assembly and Painting. Just click on the link to be transported to the relevant section you wish to read about.
Assembly
1 Unboxing the Thunderhawk – An over excited Garfy gets overwhelmed by large pieces of resin.
2 The Big Clean Up – Hacksawing off massive chunks of unwanted resin.
3 Early Dry fit – Discovering that a hairdryer can solve the problems of the warp.
4 Tools for the job – Playing with powertools, hacksaws and files.
5 Winging it – Heavy Metal wing support.
6 Interior design – Assembling the interior components.
7 Grinding the engines – Flush fitting resin.
8 Pin to win – Turbo Laser Destroyer pinning.
9 Wash your bits – No one likes paint flaking off their greasy bits. Clean them.
10 Landing Gear – part 1 – Cleaning up fiddly landing gear parts.
11 Landing Gear – part 2 – Assembling the landing gear.
12 Tail fin – Attaching the rear fin.
13 Front wings and aerilons – Pinning the front small wings and adding all the aerilons to the wings.
14 We need guns, lots of guns – part 1 – Cleaning up all the weapon systems.
15 We need guns, lots of guns – part 2 – Assembly and first paint to the model.
Painting
16 Painting WIP #1 – Basecoat – Airbrushed blue.
17 Painting WIP #2 – Shading – Airbrush shaded.
18 Painting WIP #3 – Misting – Shading softened with misting.
19 Painting WIP #4 – Masking off – Icons and stripe added.
20 Painting WIP #5 – Metallics – Engines and guns receive treatment from the hairy stick.
21 Painting WIP #6 – Details – Gold Aquillas and other details get painted.
22 Painting WIP #7 – Weathering – 7 hours of painting rust and chipping.
23 Painting WIP #8 – Interior – The gunship’s interior gets drybrushed and the pilots get painted.
24 Making a Thunderhawk Flying Stand – Detailed tutorial on how to construct a solid flying stand for your Thunderhawk.
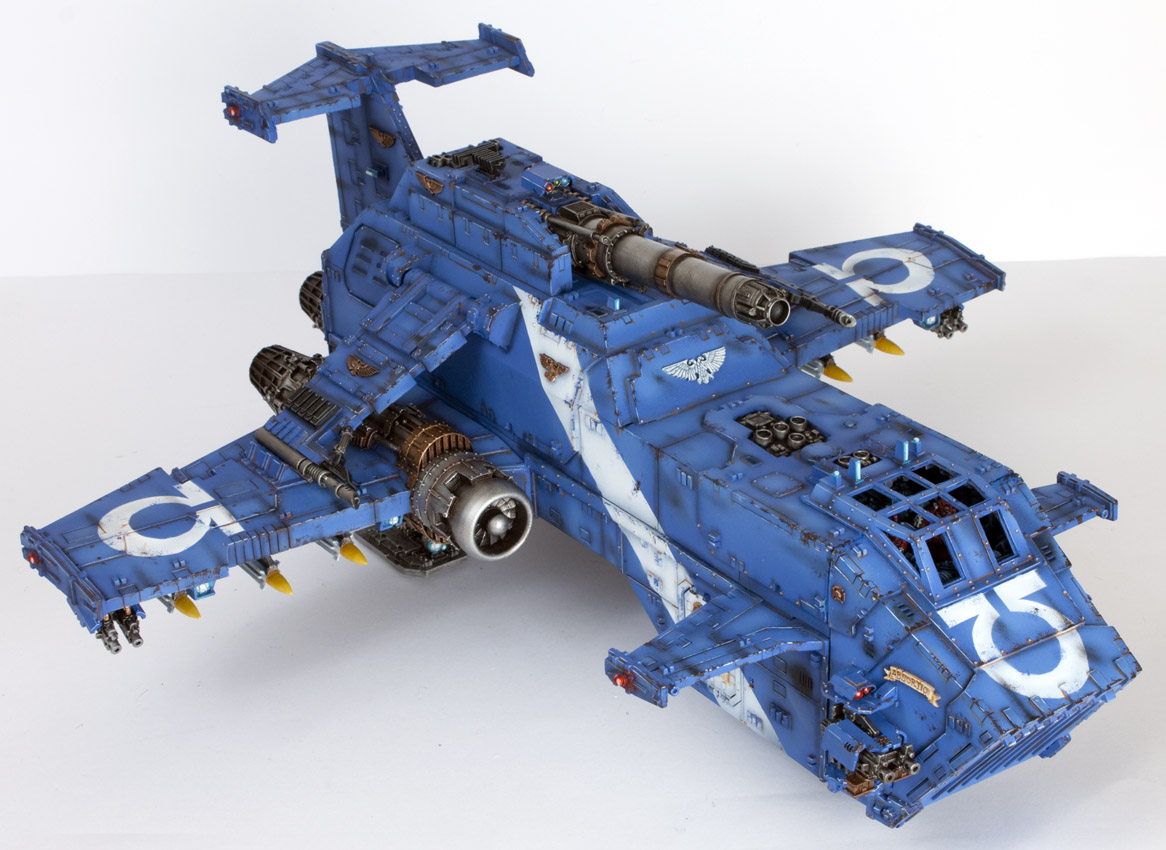
25 Showcase Completed Pictures – Final completed pictures including some scale shots with some other big FW models.
Thank you to everyone who has taken an interest in this project and offered ideas, support and asked questions. It’s kept me going all the way to completion.
Now then… shall I buy a reaver titan?

6 Comments
Leave a Reply
Tale of Painters is the unofficial Warhammer hobby magazine run by hobbyists like you. Support our work by using the affiliate links from our 🇺🇸 / 🇨🇦 partner stores for your next orders so we can continue to bring you fantastic FREE content every day:


Or support us directly:


These were very useful articles, thank you! I've linked your work in my article about the model: Thunderhawk Gunship #2
Really appreciate how thorough you have been with this build. I am about to commence one myself for my Iron Hands and I know I will be referring back to this site during my own Thunderhawk journey. Cheers, John
blood for large punchy blood god?
Yes to the titan, but maybe make a chaos one. Then you could have the mother of all scale photos with the thunderhawk fighting the titan.
yes, yes you should. i recommend two powerfists on it. Because who else would equip it in such a drastic way.
plus the idea of one actually charging across a battlefield to punch something is awesome
Agreed. That would be a face punch of titanic proportions!