
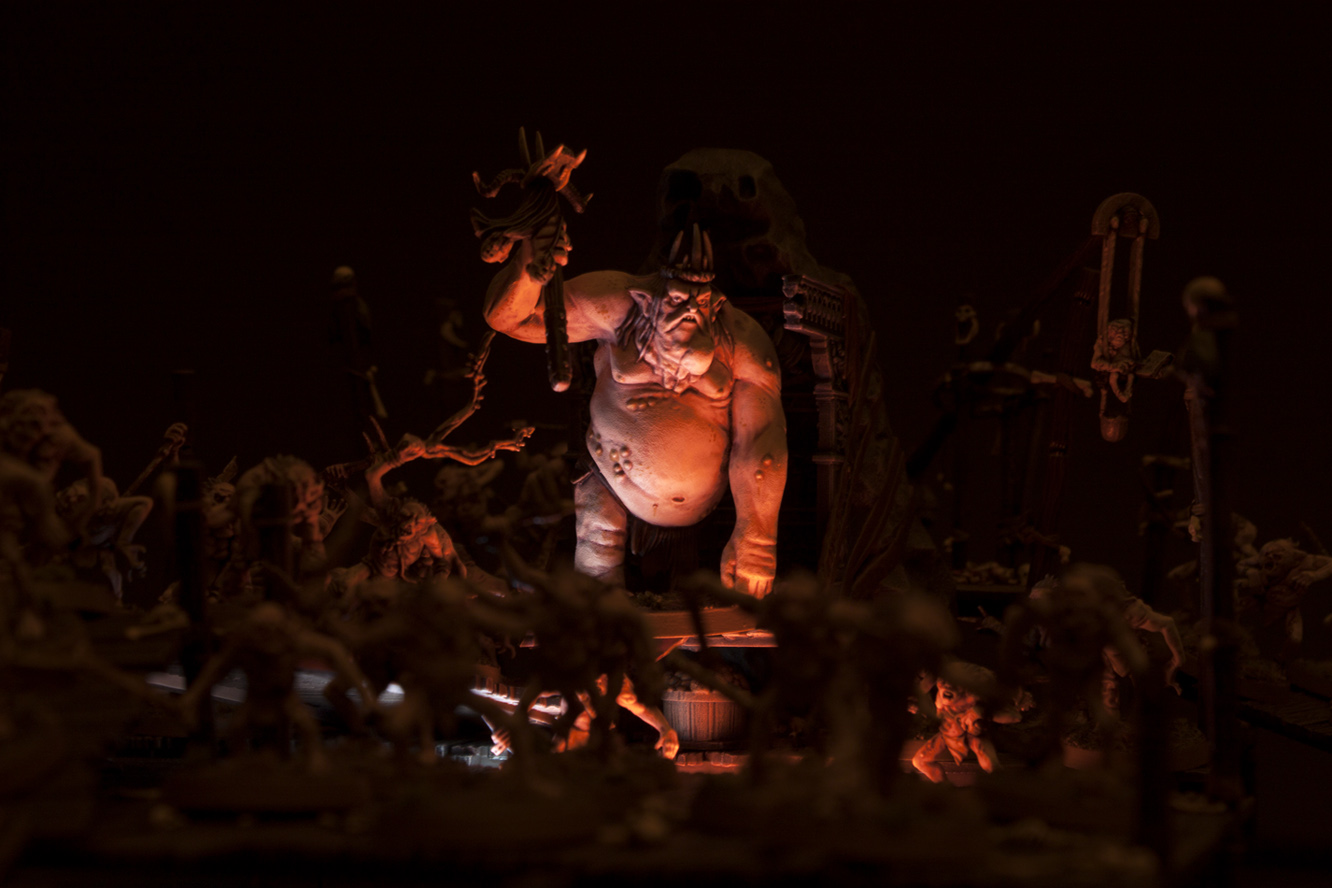
This isn’t a picture taken from White Dwarf or the new Hobbit rulebook. I took this picture on my Canon DSLR using a red torch app and 30 second exposure. Read on to see a couple of variant shots and some more angles of the completed Goblin King.
This snap was shot with my standard lighting set up.

The shot above was taken by turning off the flashes and turning the model lights right down low. I then opened the flashlight app on my iPhone and set the screen to red light. I used a tripod and a three second exposure to capture the red light. The flash heads would have washed out the colour.

This shot was the same set up as above, but I changed the flashlight app to blue. I really don’t like this shot, but it’s fun to show some of the non-successful experiments. The Goblin King is close enough to be lit up by the blue light, which creates a spot light on the subject.

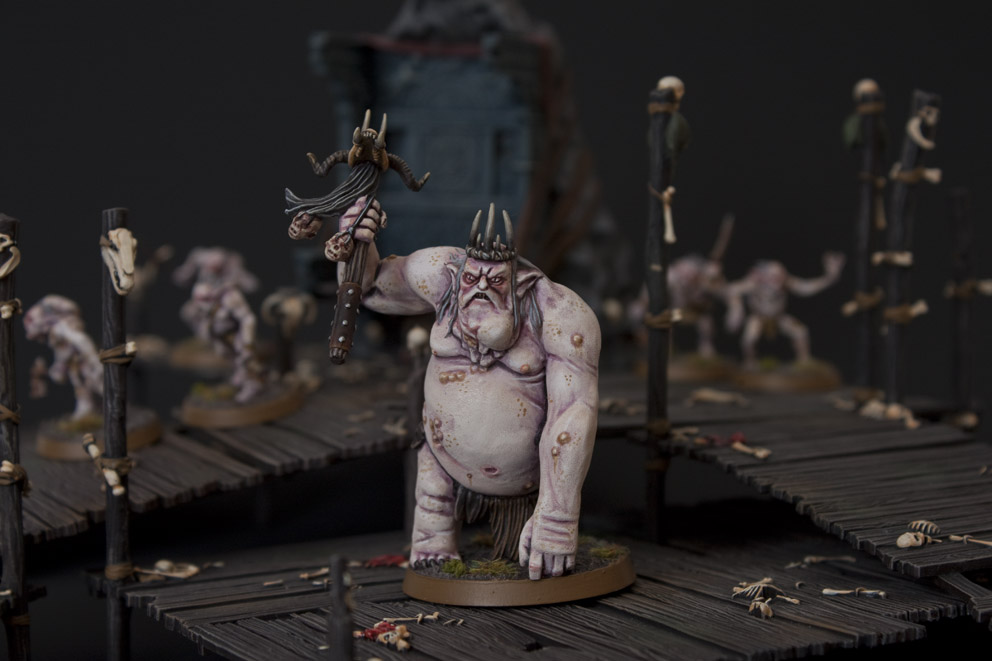
I’m really happy with how my photography is progressing. Even these shots of the Goblin King on a white background are clear and sharp and required very little tweaking in Photoshop (I just tweaked the levels and resized).

Anyway, I might be boring some of you with all this photography talk so let’s switch it back to modelling and painting. The Goblin King is a monster consisting of six components. The parts are push fit and don’t require any glue, so it’s really handy for beginners. However, I did glue the model together. It’s a good fit but the sides of the models left a gap so I used liquid greenstuff and a file to smooth it out. You can’t see it now (unlike in December’s White Dwarf).

I used the same techniques found in my Goblin tutorial to paint this larger model. I was slightly worried the drybrushing wouldn’t work on a larger smoother model. It actually came out ok. I was impressed to see how the drybrushing actually picked out details that I didn’t realise were there.

This is a great model, I really enjoyed painting it and shooting it on my camera. Next up either Dwalin or another batch of goblins.

24 Comments
Leave a Reply
Tale of Painters is the unofficial Warhammer hobby magazine run by hobbyists like you. Support our work by using the affiliate links from our partner stores for your next orders so we can continue to bring you fantastic FREE content every day:


![]()
![]()
Or support us directly:


Hi Garfy, I know it’s been a while but I just thought I’d follow up with a picture of my Goblin King, having followed your tutorial and painting recipes. I’m really thrilled with how it came out! Thanks so much!
https://flic.kr/p/2oFj2dL
Hey Garfy, thanks for the reply! I’ll give these colours a go when I get round to painting him up. Merry Christmas 🙂
No problem. Merry Christmas!
Sorry guys, no tutorial planned for the throne.
Hi Garfy, I know this was posted a long time ago, but is there any chance you remember the colours used to paint the different elements of the club? And also the nails, crown, horns?
Any help is much appreciated! And thank you for posting these wonderful showcases and tutorials and keeping them online years later.
I can only guess at this point as I painted this over 10 years ago.
Club wood: Steel Legion drab, agrax earth shade, steel legion, bane blade brown.
Club Handle: Rhinox Hide, mournfang brown, Runefang Steel studs.
Skull: Tau Ochre, Ubshanti Bone, Screaming skull.
Skull/Crown Horns: Rhinox Hide, Dryad Bark, Baneblade Brown, Karak Stone.
Skull Hair: Eshin Grey, Stormvermin Fur, Nuln Oil.
Has anyone done a tut on the great goblins throne?
can you plz give me a tutorial for his throne i cant find it anywhere :/
Great post again, and great work. I do like the photography talk, mine is terrible and I am looking forward to improve it, so all those comments are very welcome.
i come here daily for your painting tutorials please keep going!
Would love to hear more minature photographing talk! The king looks great and thank you for producing the best minature painting blog out there!
Very nice photos! I don't see how the second shot differs from the White Dwarf shots.
Great painting, too, although I am not sure if I like the drybrushing on the skin. It just gives a different effect but it's not really that obvious the more I look at it.
Great job overall, I have to step up my photography 🙂
Excellent work and excellent photography. You did a good job filling the gaps and seams all around, including the hand. Thanks for this. My 5-year-old spent an hour today playing with our half painted goblin King and the half painted Thorin & Co. on the workbench. Citadel paint bottles make surprisingly good terrain for his purposes.
That's awesome. 😀
When is the painting tut for this guy?
Been following your tuts for my own set 🙂
http://madfroghobbit.blogspot.co.nz/
Thank you very much for all your tuts.
No need for a separate tutorial for the goblin king. I used the same techniques for the goblins.
Oh okay thanks
When I'm using my flash heads my shutter speed is fixed at 1/60 so I play with the ISO and the aperture. ISO 100 is better so I don't get grain, but it creates short depth of field because my aperture is around 8 or lower. If I set the ISO to 400 I can go up to f.18 which gives me a bit more depth, which is much more useful for unit shots (like all the goblins I've been posting recently).
The first pic as I mentioned I didn't use my flash heads and had a red source light so it was all about the shutter speed.
I tend to use my 18-55mm lens for these shots and zoom in. My mate has just bought a macro extension tube and I'm interested to see his results and if it's worth getting one.
Nice. I like the photo talk. Are you going Marco and getting physically close or are you going AP and zooming in? Both have their uses and I flip flop myself.
Fantastic job =)
Great job! 🙂
Great mini photography and awesome painting!
Excellent work on both the photography and the painting!!
love it!! awesome work mate! and great photos!