

Today, I would like to not only share my progress on creating several terrain pieces with the Manufactorum from Cities of Death, but also tell you more about the materials and tools I’ve used. I’m by no means an expert in terrain making, but I would like to share my experiences nevertheless.

The Manufactorum kit, as all Cities of Death terrain pieces, isn’t that easy to work with. The fit isn’t great because the joint faces of the wall pieces aren’t completely flat but slightly concave. I recommend you use a coarse file to get them really flat, otherwise you might get a lot of gaps and it will be hard to properly align the pieces. Take your time to avoid skew structures.
The three scenery pieces above are made from a single Manufactorum box. I only added two more broken wall pieces and two struts from the Basilica kit. I built rather flat pieces that I can put in the back of my display board to create backgrounds for my photography. My aim was to get as much out of a single box as possible. I imagine the larger two-storey structure is an administration building, hence I added a couple more of the stately pieces. The two smaller structures could be the ruins of a large factory hall.
Materials and tools
The bases were made of 3 mm thick foamcore. These are thin sheets of high density foam covered with cardboard on both sides. It’s easy to cut but doesn’t warp easily. It can be difficult to obtain and isn’t exactly cheap, but you’ll find it in (web)shops for architecture and graphic design supplies.
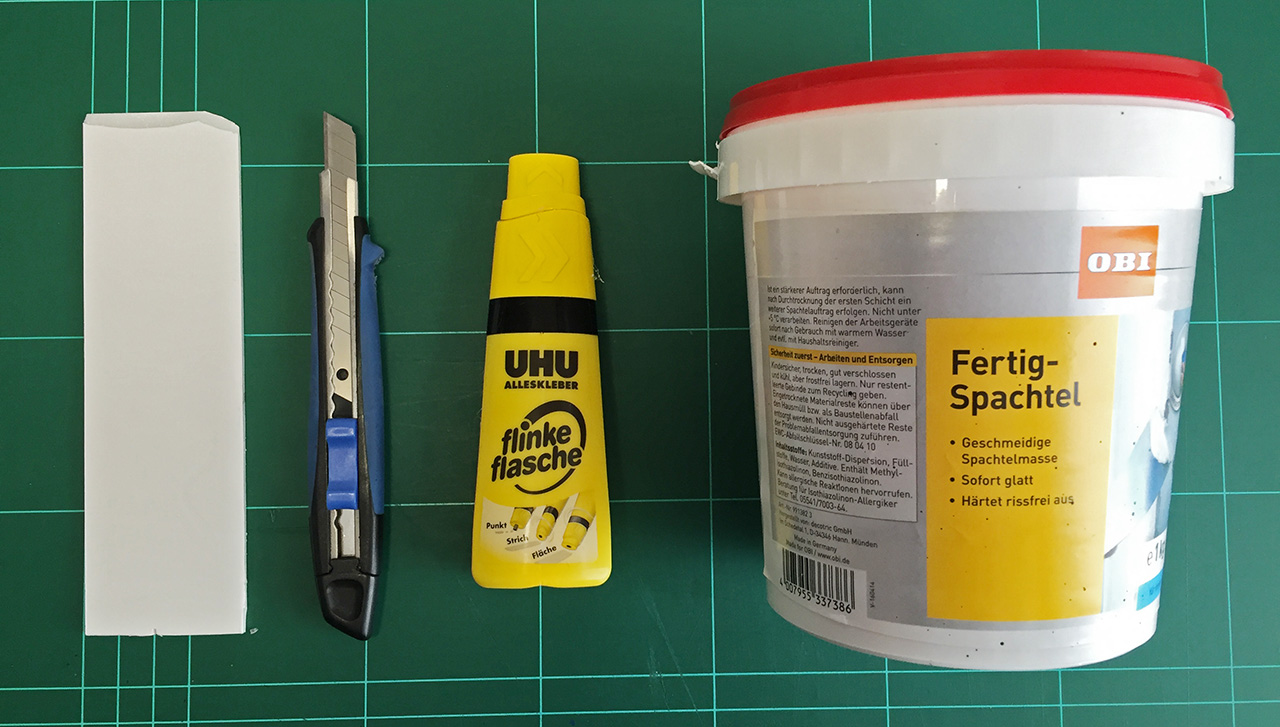
I assembled the Manufactorum pieces first and dry-fitted them on the foamcore. Then I sketched the shape of the base with a pencil, tracing around the buildings. With a hobby knife, I cut out the base. Then, I held the blade at an angle and bevelled the edges. in The plastic structures were attached with all-purpose glue.
Once the glue was dry, I covered the base with several coats of ready made spackle, applied in a stippling fashion to match the texture of my display board. When using foam or foamcore, you need to make sure the foam is completely covered if you want to use spray paint, as otherwise the aerosol will dissolve it.

With all-purpose glue I glued some large pieces of slate in place where I wanted to have rubble. Then I applied slightly thinned PVA glue and poured over my sand mix. In total, I applied three “coats” of sand to build up small piles of rubble. Make sure you let each layer dry completely before applying the next, and to gently brush off excess sand that didn’t stick. Finally, I used very thinned down PVA glue to seal the sand. This will prevent the sand from rubbing off when doing heavy drybrushing later.
To blend the rubble into the texture of the spackle, I used Black Lava texture paint from vallejo, which has a very fine grit. These are the black spots you can see in the picture below. Texture paints from GW might work the same, but are much more expensive.
The flooring was made with 4×1 mm plastic rods and thin textured plasticard. I purchased both from Greenstuff World. Both the rods and the plasticard are easy to work with and can be cut with a hobby knife or scissor.
Below you can see the finished base:

Hope you enjoyed my humble first attempts at creating terrain and found this post useful. Why not sharing your terrain making advice in the comments below?
I’m already working on a painting tutorial for these pieces, so stay tuned!
Do you like our tutorials and reviews? Here is what you can do to support us: Check out the websites of our sponsors, place your next orders at Wayland Games by clicking here or on the banner on the right. Thank you very much, we appreciate any help to keep us going.
6 Comments
Leave a Reply
Tale of Painters is the unofficial Warhammer hobby magazine run by hobbyists like you. Support our work by using the affiliate links from our 🇺🇸 / 🇨🇦 partner stores for your next orders so we can continue to bring you fantastic FREE content every day:


Or support us directly:


Great tutorial.
Tony
This is cool.
"I assembled the Manufactorum pieces first and dry-fitted them on the foamcore. Then I sketched the shape of the base with a pencil. With a hobby knife, I cut out the base. Then, I held the blade at an angle and bevelled the edges. in The plastic structures were attached with all-purpose glue."
So my question is, are the plastic buildings sunk into the foamcore base, because in some of the pictures it looks like the brown floor is under the plastic walls, and if the building is not sunk into the floor would you please clarify your paragraph for me as I do not understand what you are doing.
No, they aren't sunk in the foamcore. The buildings and the textured plastic sheets are on the same level.
I dryfitted the plastic structures on the foamcore to determine the size and shape of the base.
very nice
Nice. 4 necromunda.
Right when I'm planning to start some terrain, excellent.