
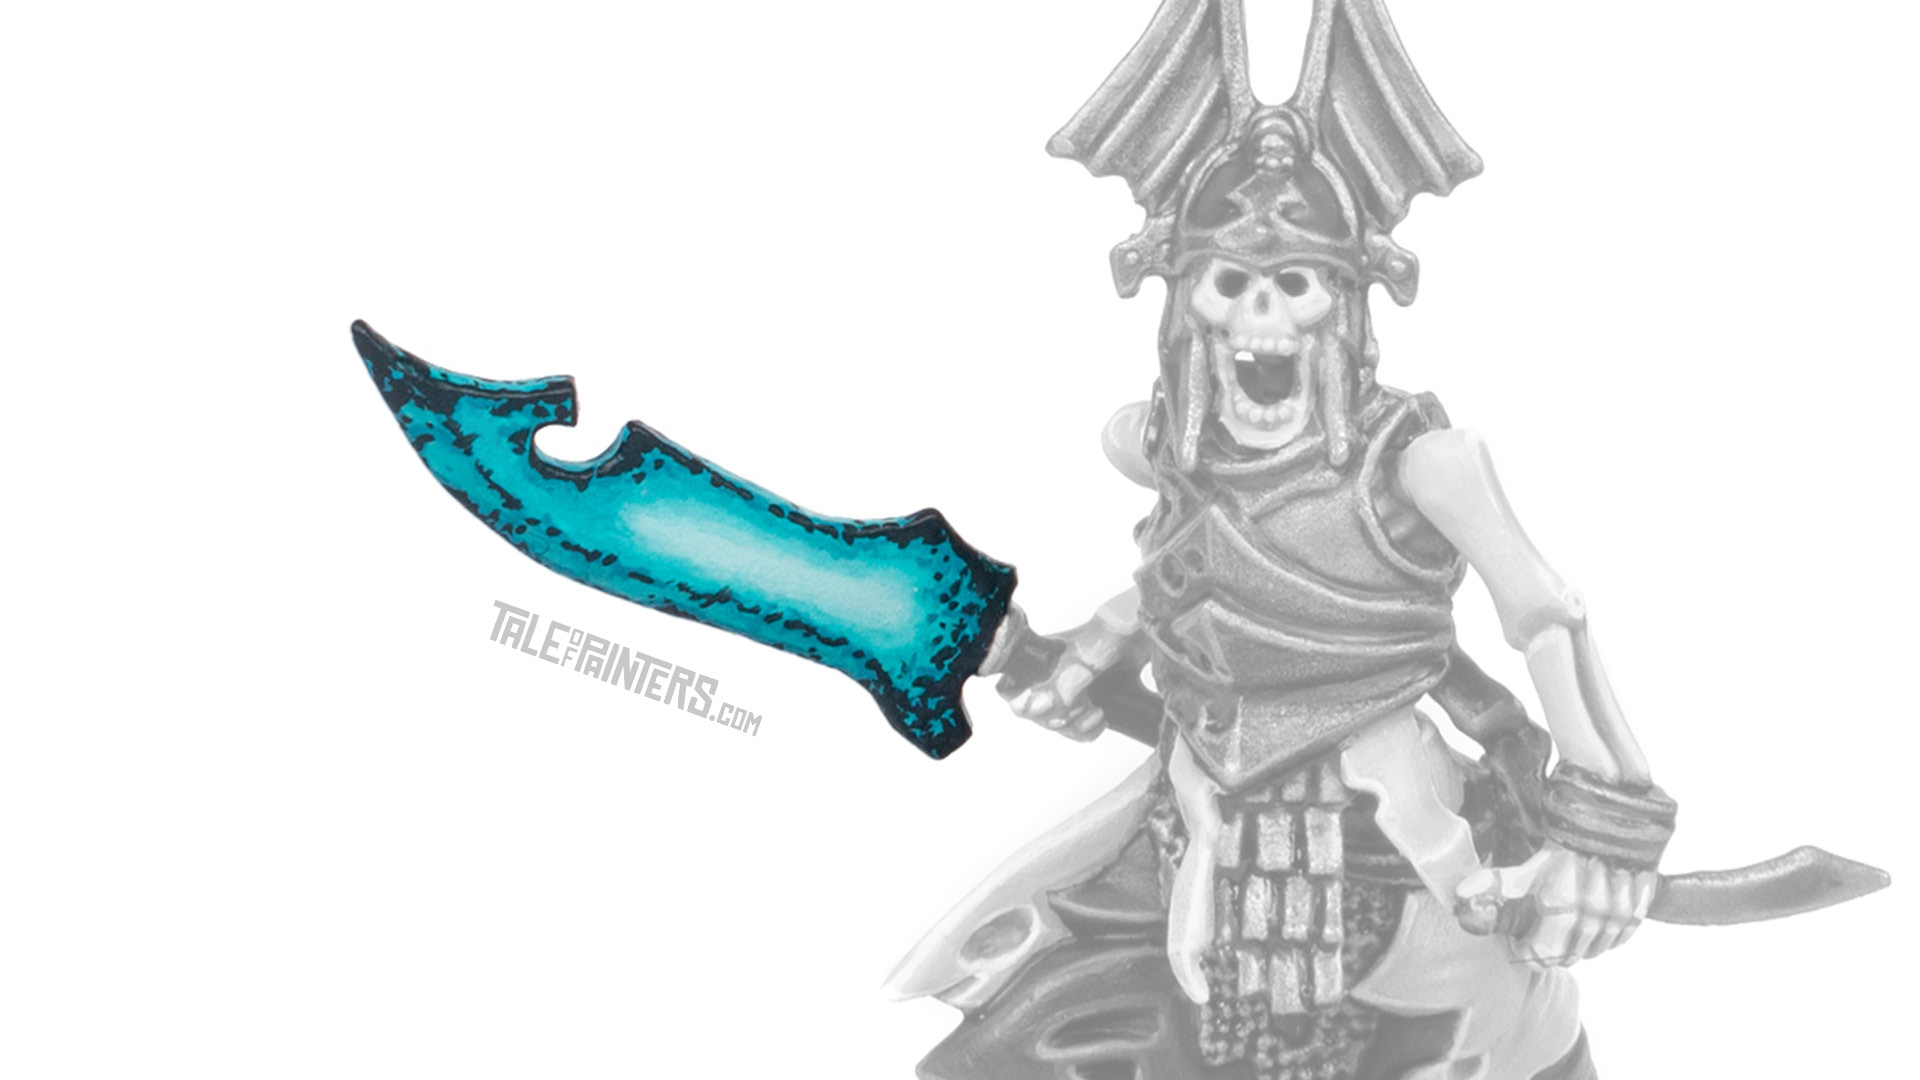
Looking for a cool magical effect to add to your weapons? Check out my tutorial for painting molting metal Wight blades… but in turquoise!
This tutorial assumes you know the basic grips of painting Warhammer miniatures. Step-by-step I explain all the paints and techniques I used. I have a rather eclectic paint collection, so when I use a paint that is not from Games Workshop (or out of production), I’ll try to provide you with suitable alternatives from the current Citadel paint range [in brackets]. However, if you want to achieve exactly the same result as shown, I recommend expanding your paint collection. You’ll find a list of all the paints used in this tutorial at the end of the post.
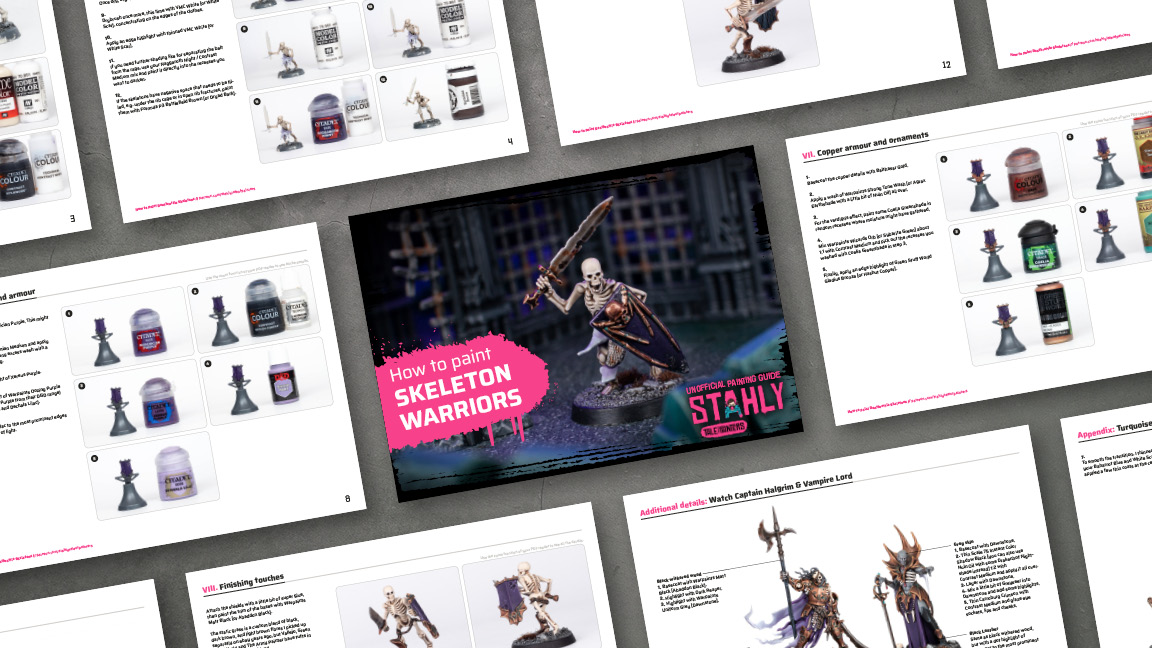
How to paint Grave Guard Wight Blades
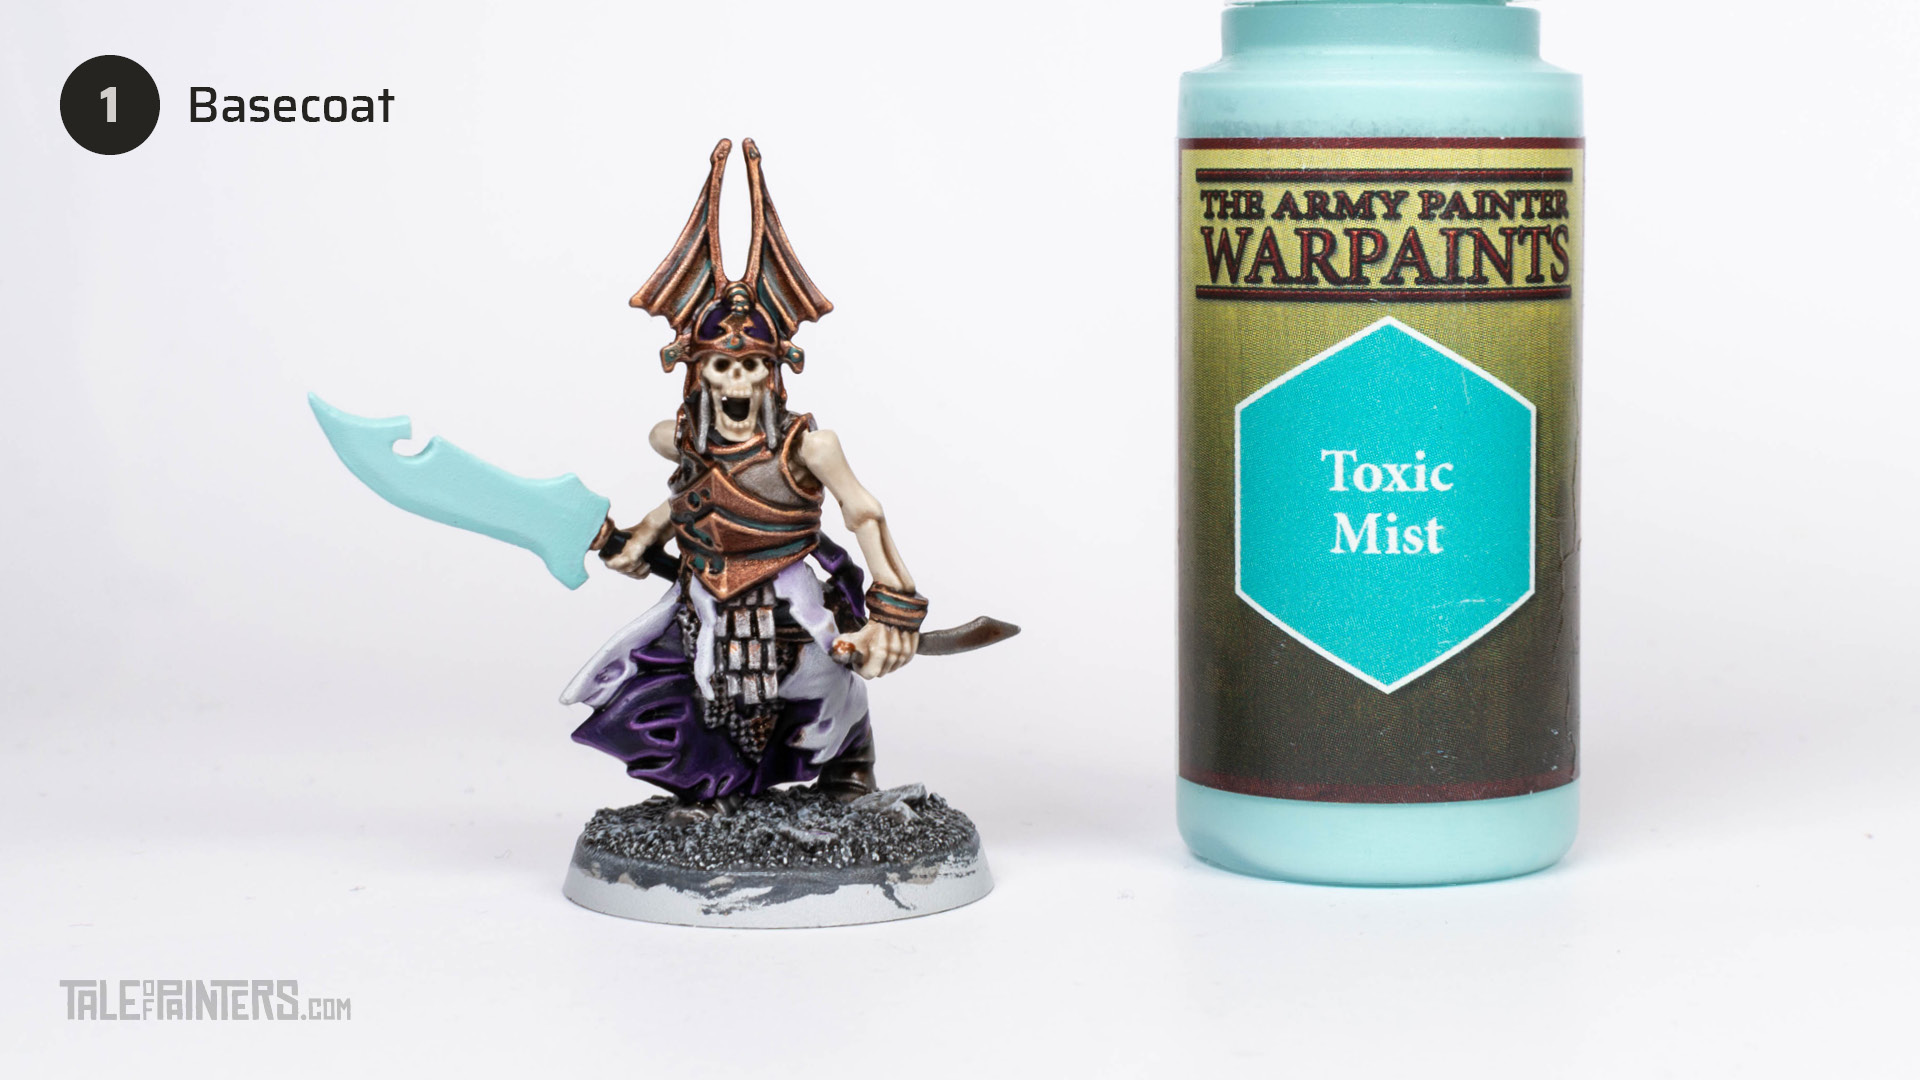
Basecoat the blade with Warpaints Toxic Mist [or a mix of Baharroth Blue and White Scar]. This will take a few thin coats for an even result.
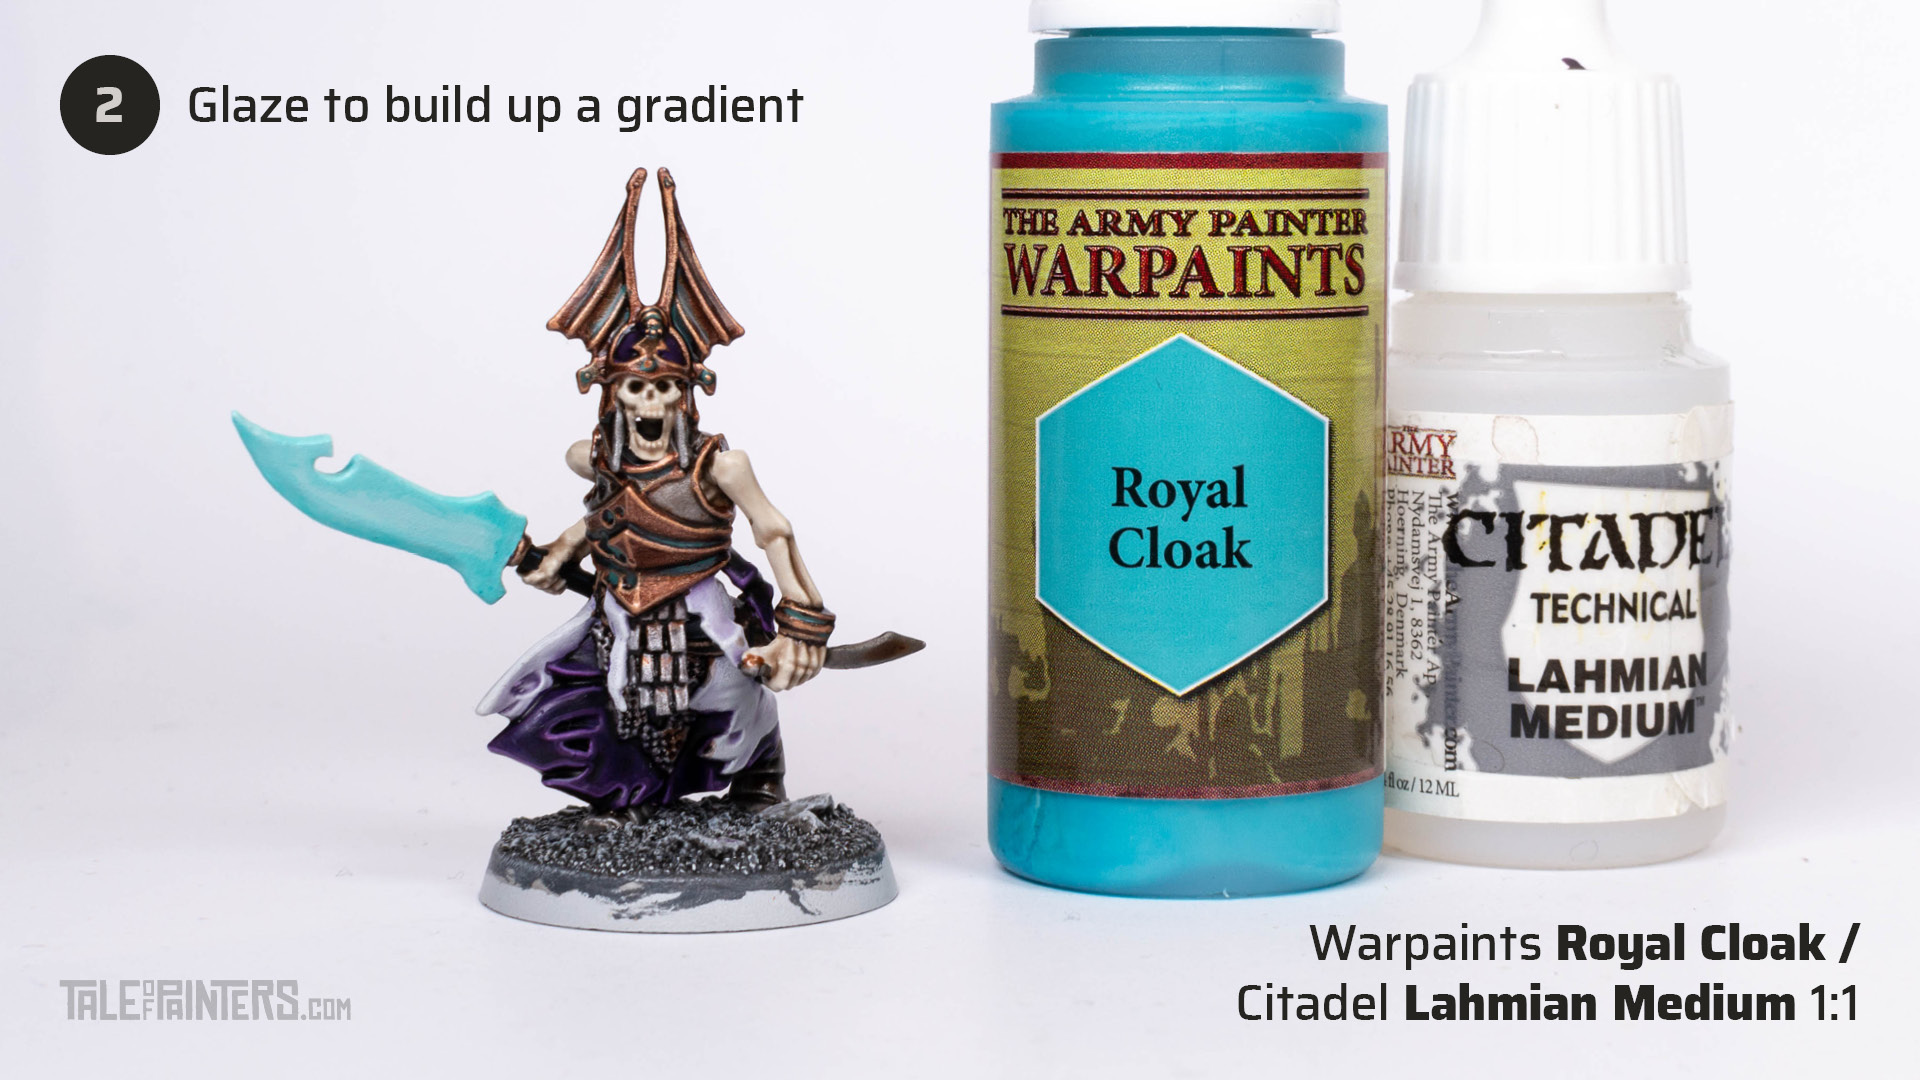
Thin Warpaints Royal Cloak [or Baharroth Blue] 1:1 with Lahmian Medium to a glaze-like consistency and apply a thin coat around the edges of the weapon.

Repeat this process one or two more times to build up a gradient.

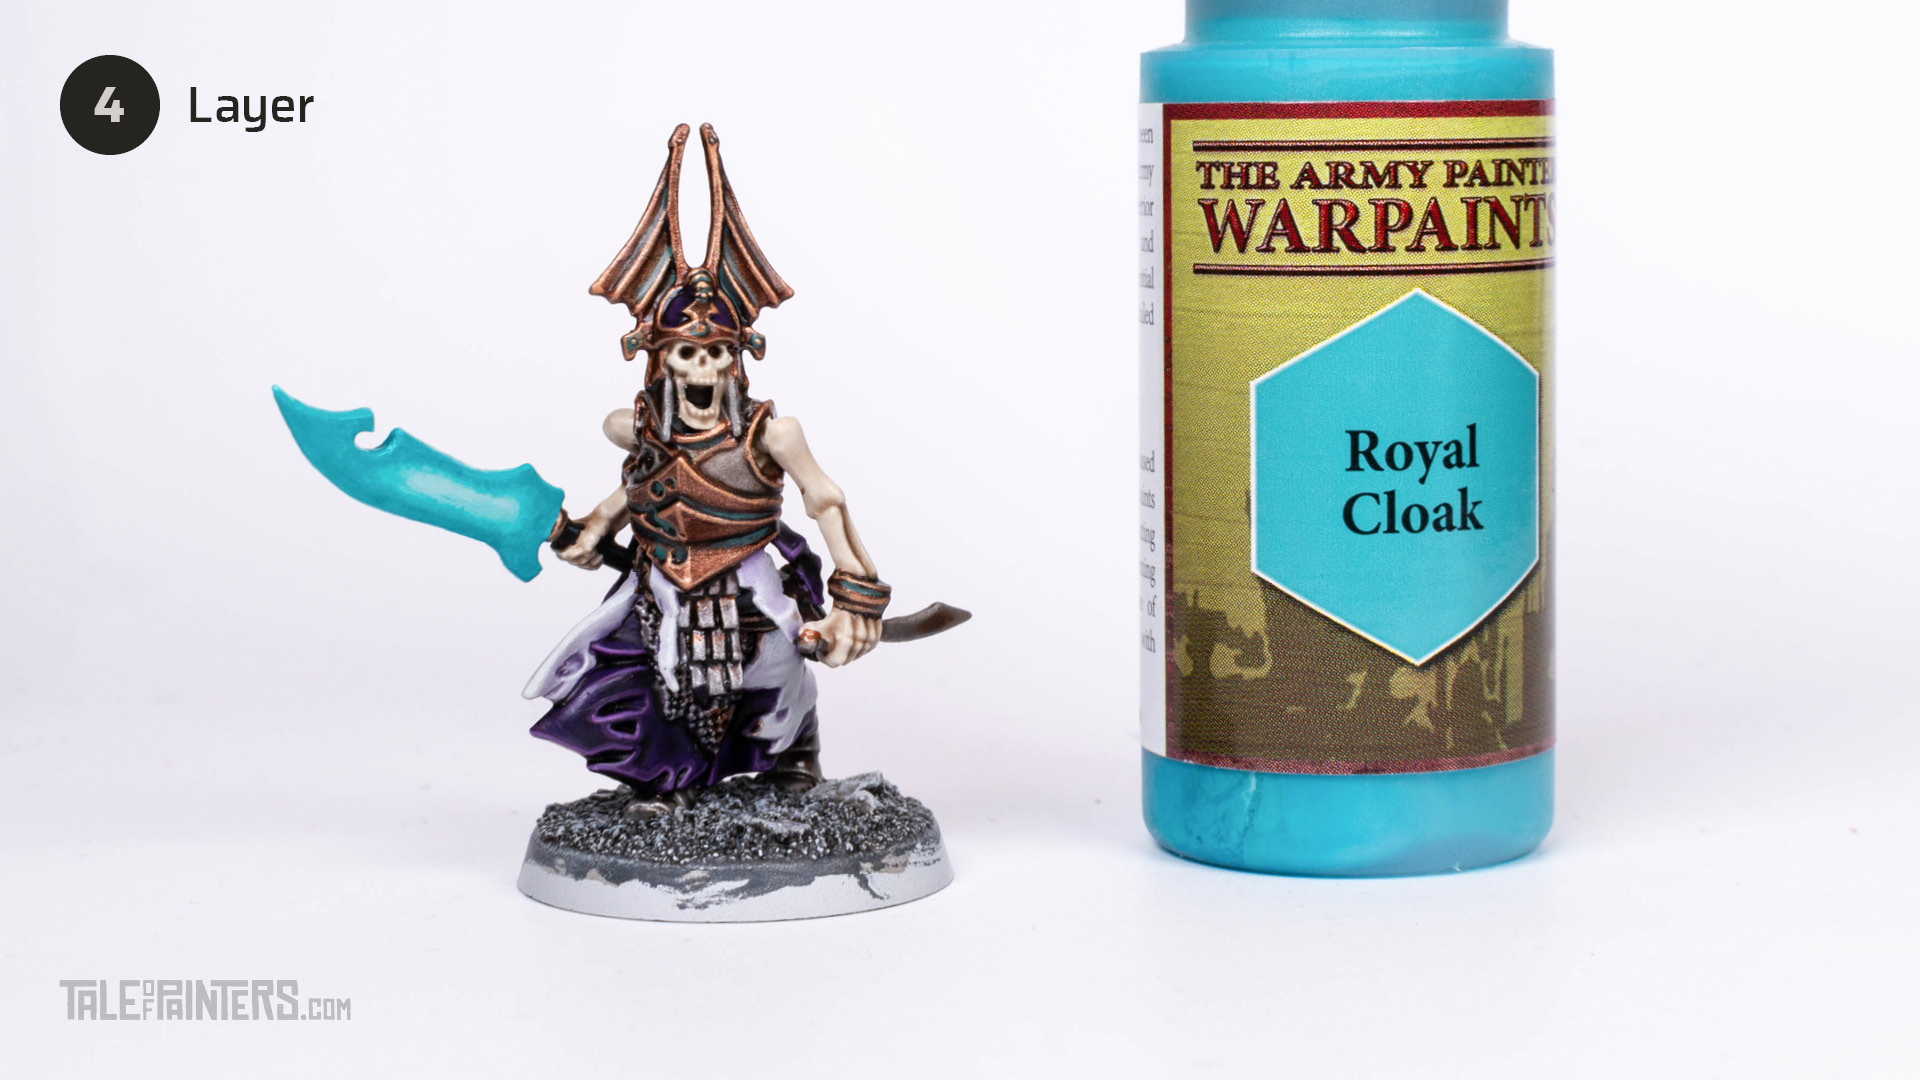
Use pure Royal Cloak [or Baharroth Blue], add a little bit of water and layer it around the edges to darken the gradient.
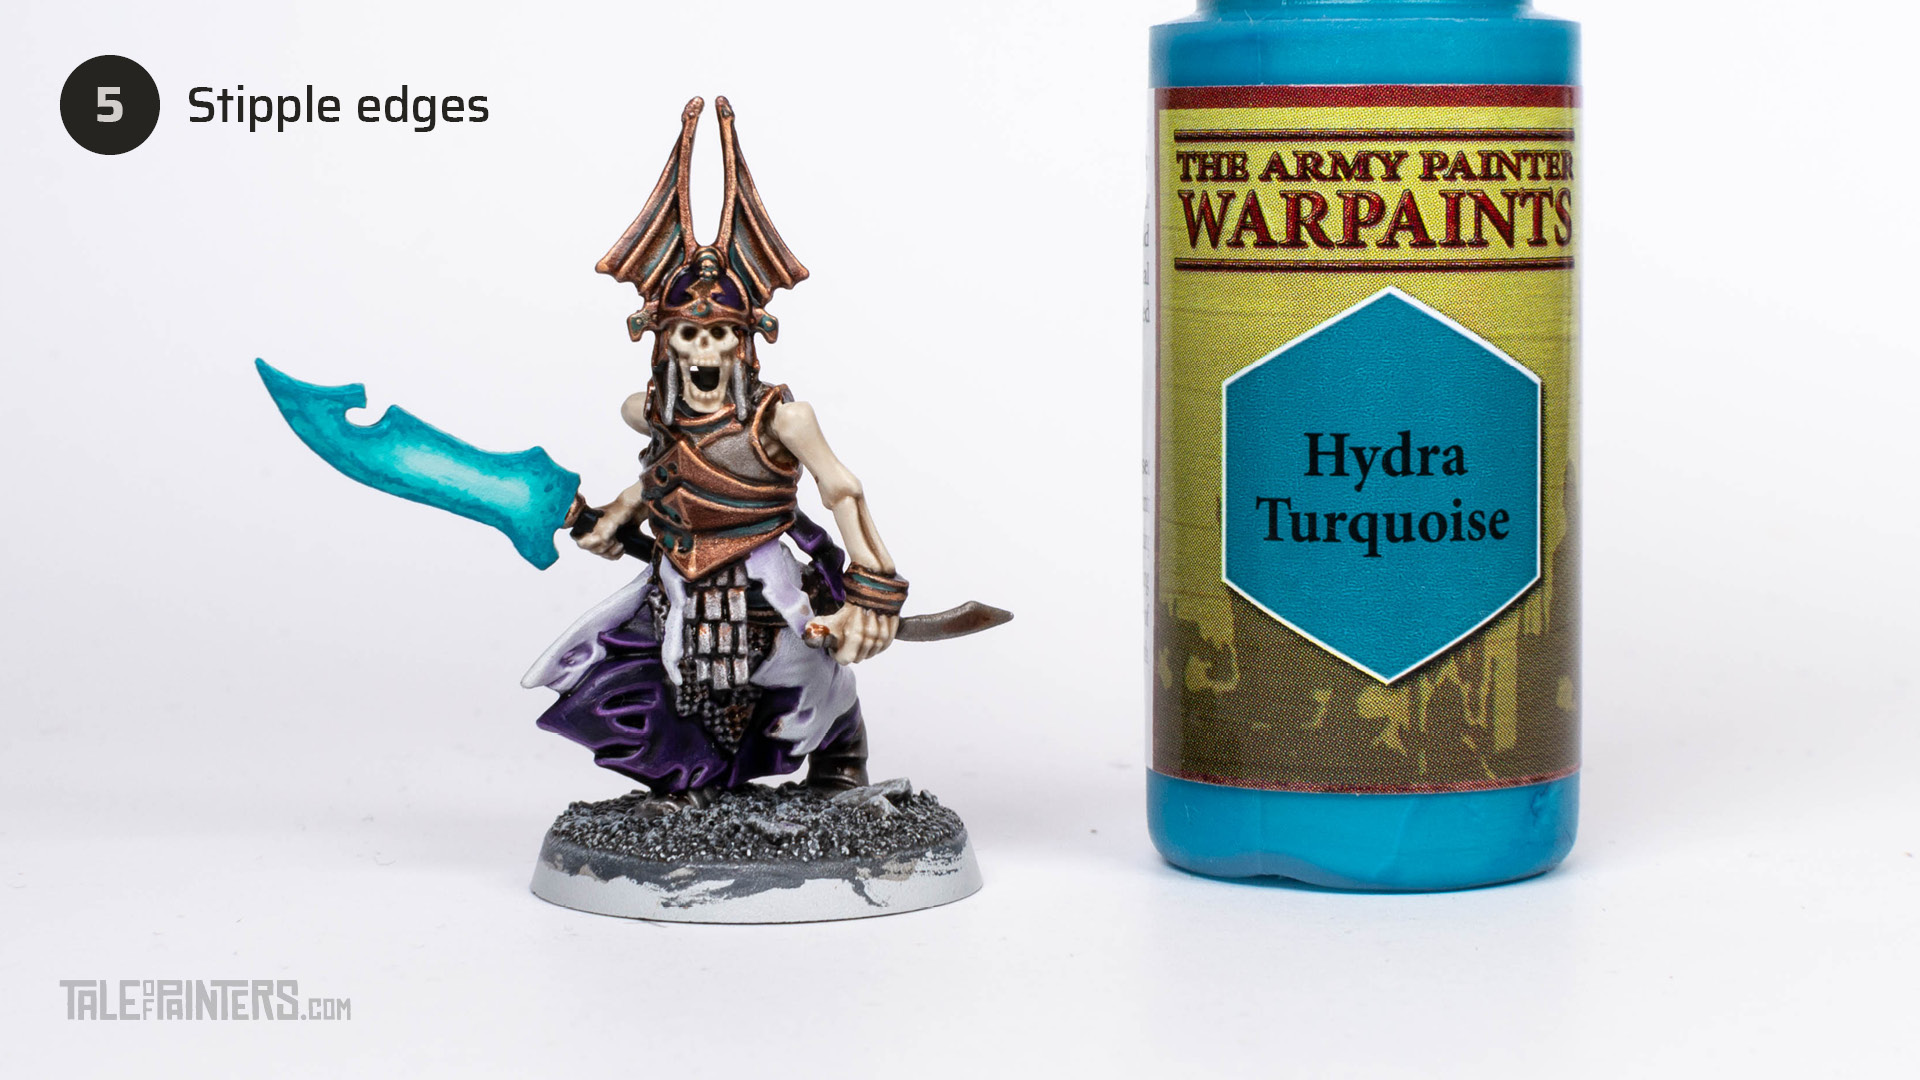
Build up a texture by stippling the edges with the tip of your brush and applying an irregular pattern of Warpaints Hydra Turquoise [or Temple Guard Blue].
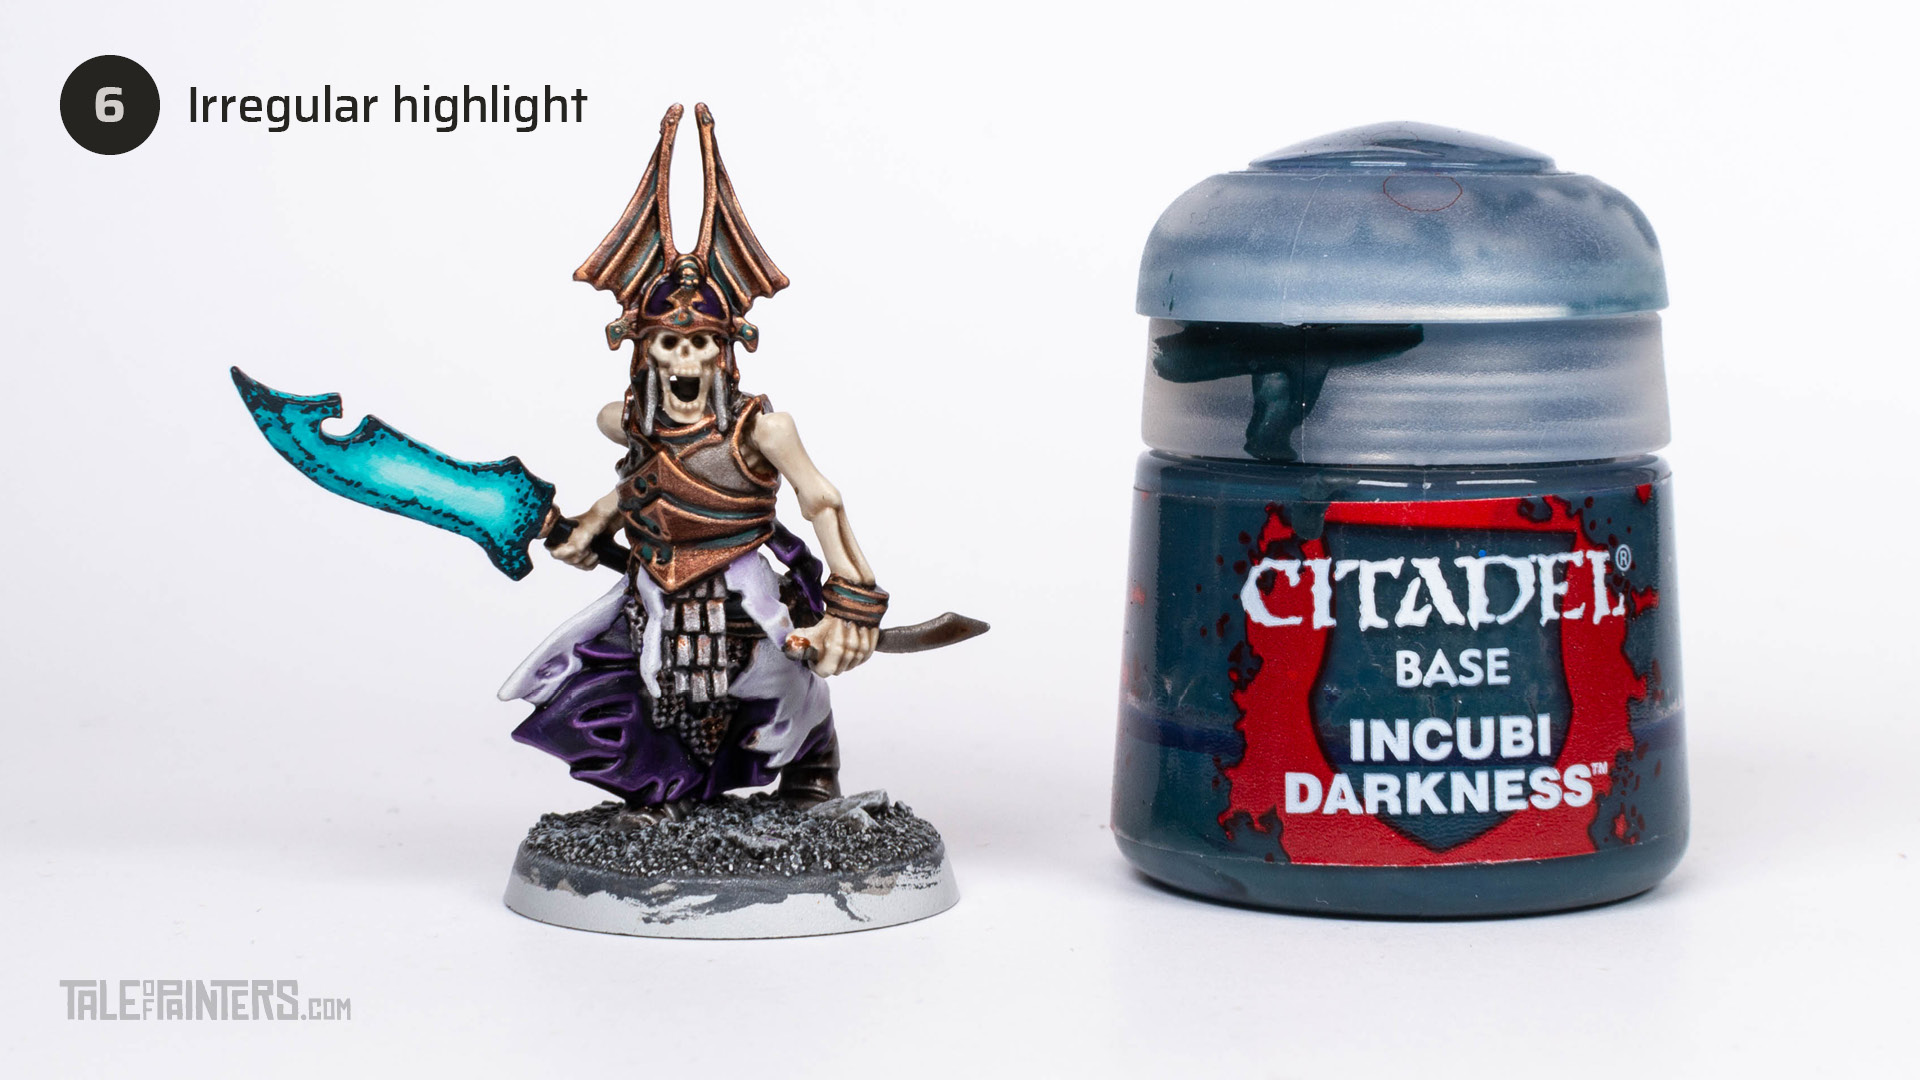
Complete the molten effect by applying an irregularly shaped highlight of Incubi Darkness around the most prominent edges of the blade.
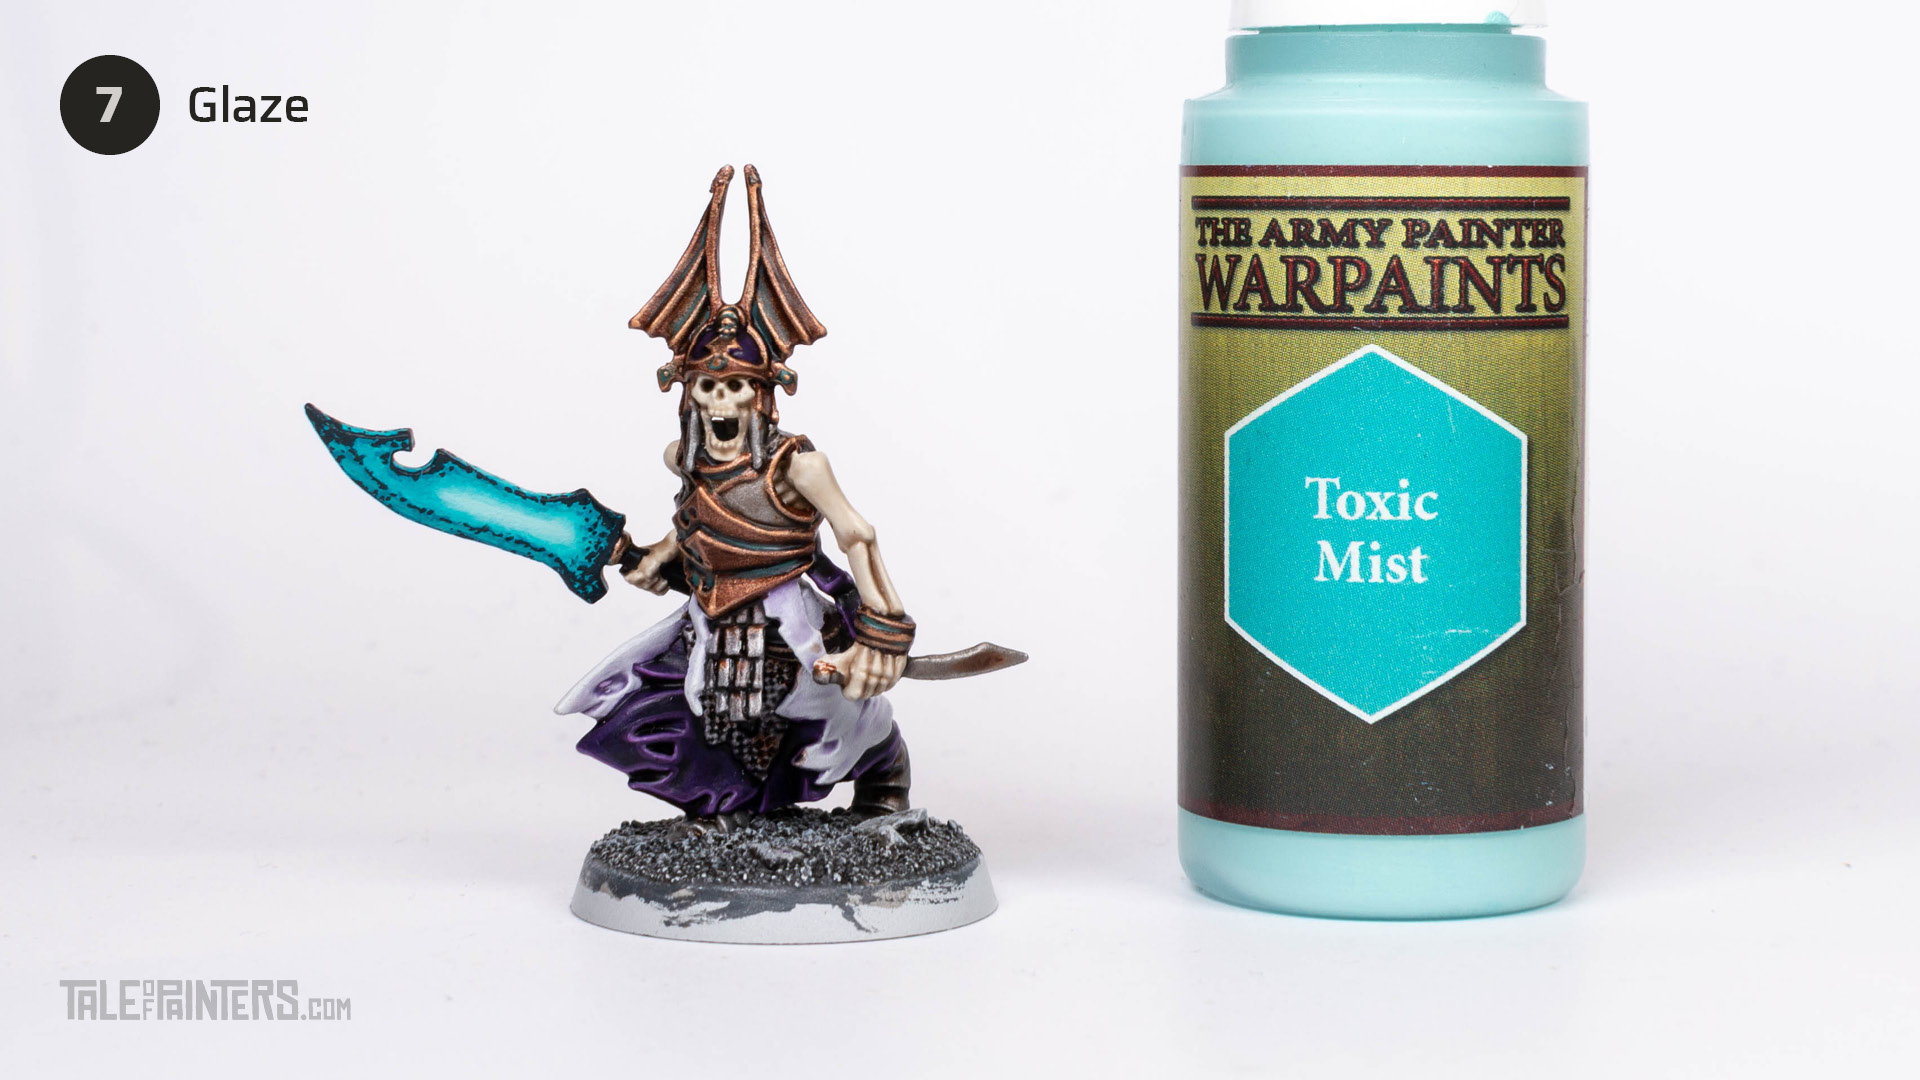
To smooth the transition, I thinned down Toxic Mist [or your Baharrot Blue and White Scar mix] with water and applied a few thin coats at the centre where needed.
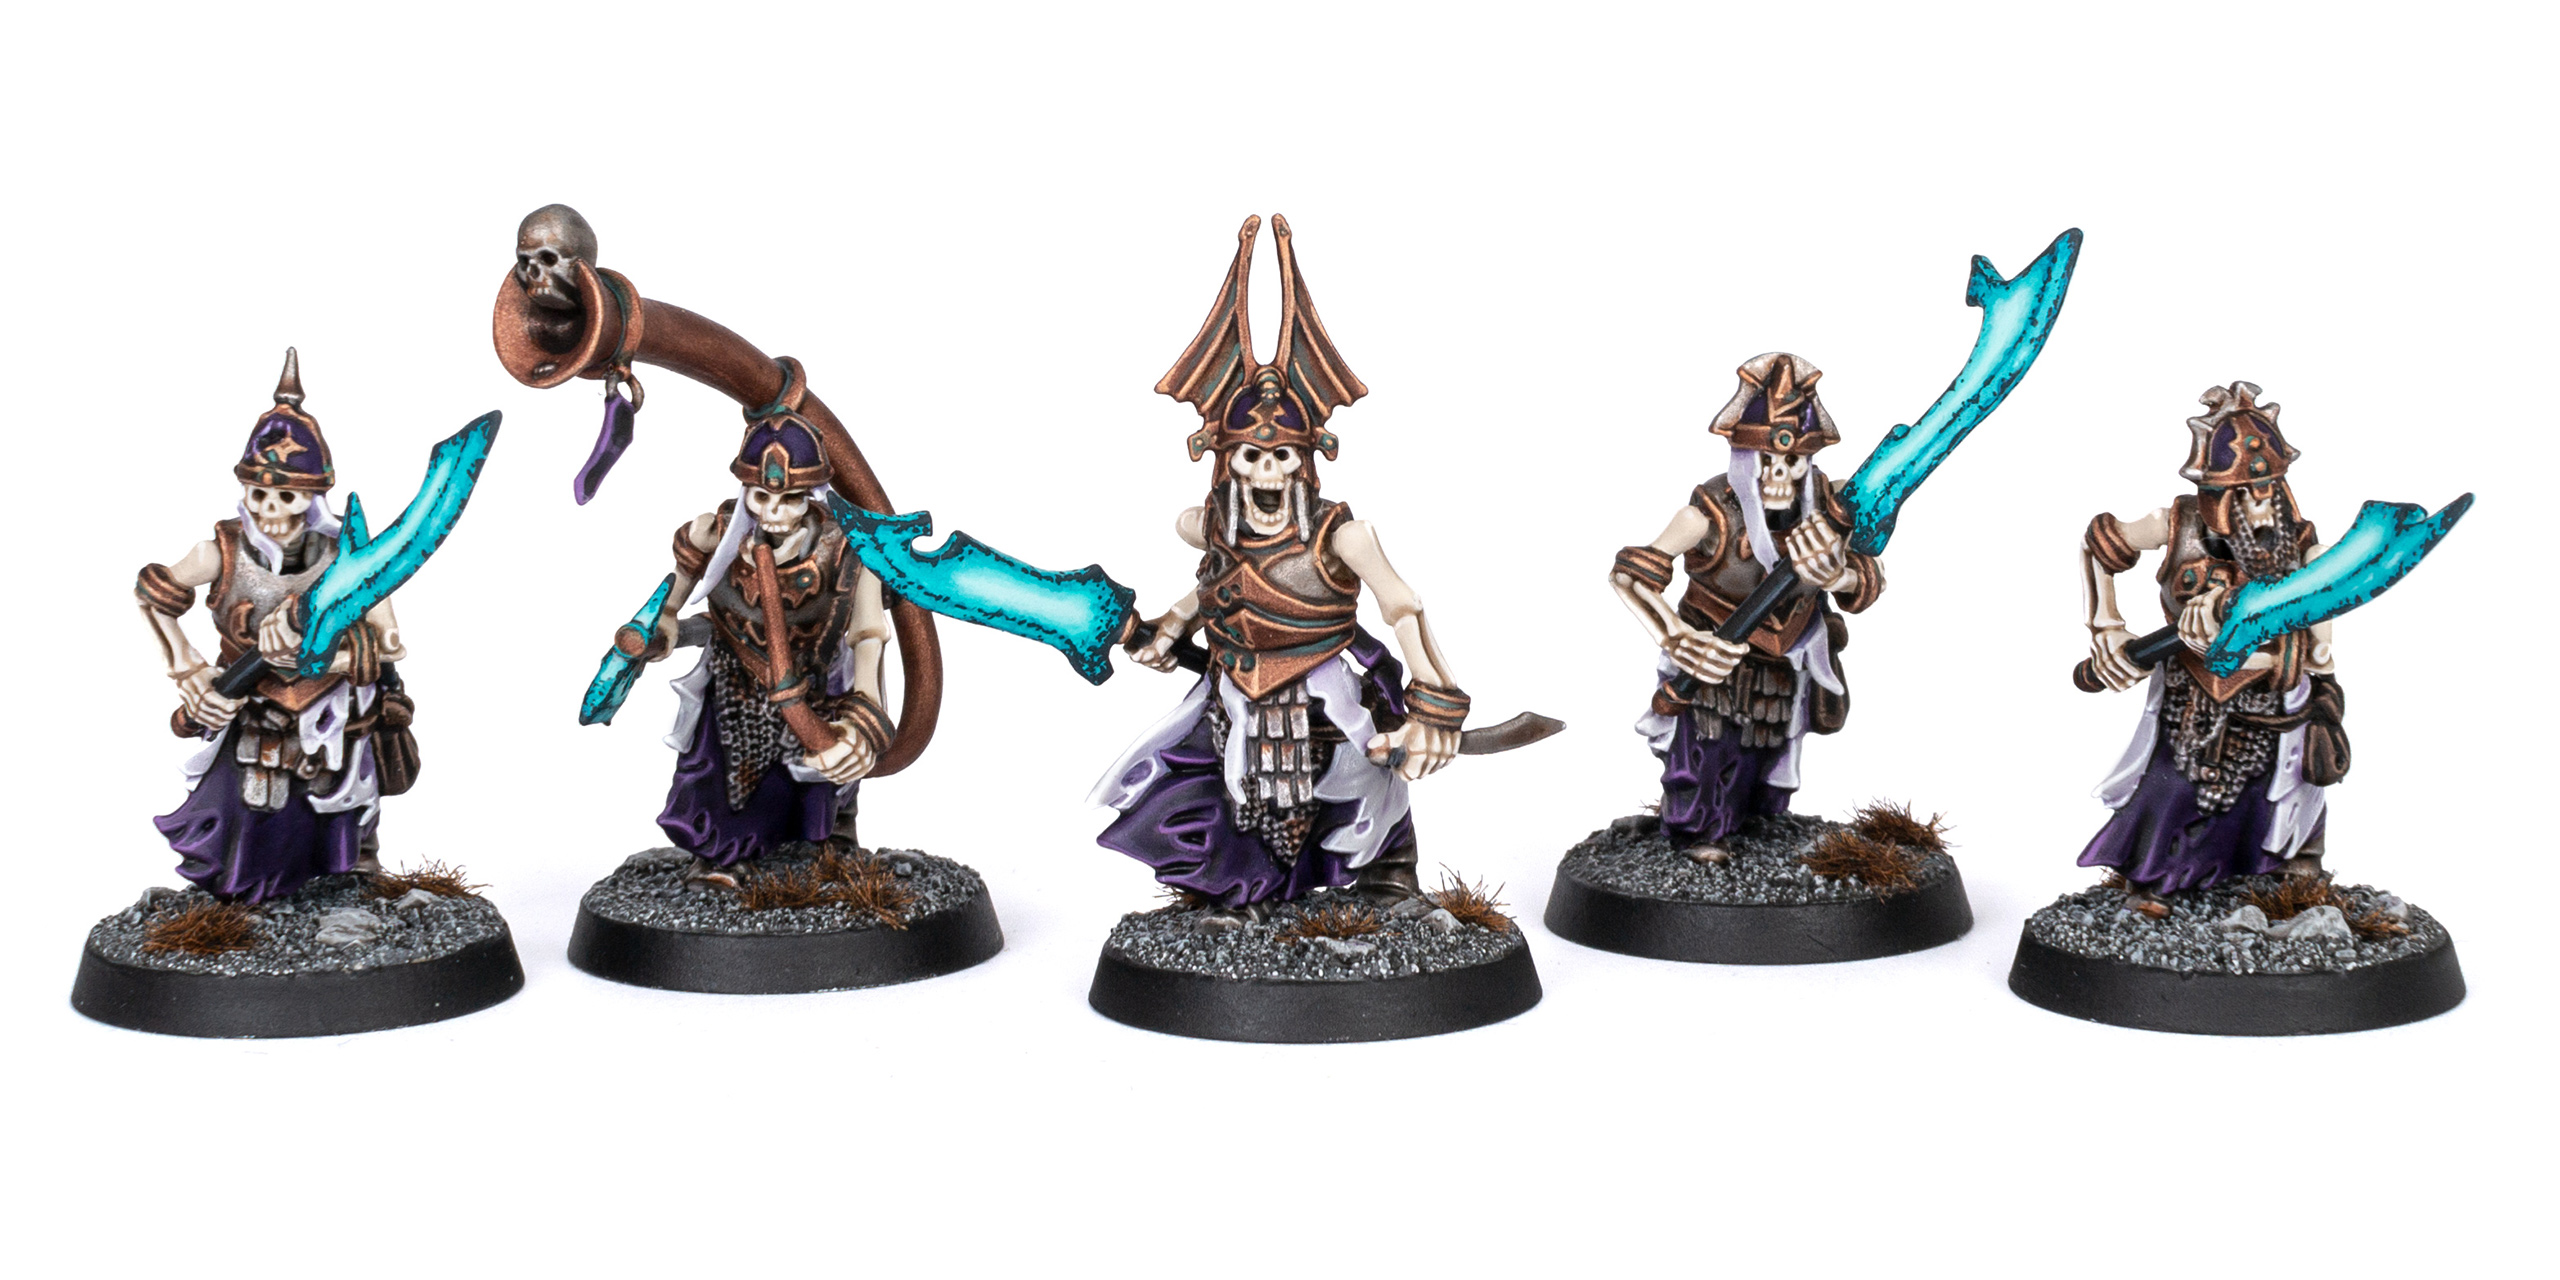
Here we have the finished Grave Guard. At an arms-length, the turquoise glow of the Wight blades looks very striking. If you want to know how I painted the rest of the models, check out this:
You can grab the complete step-by-step tutorial for my Skeleton Warriors here in my Patreon shop (or by becoming an Autarch tier member). Also includes additional guides for Grave Guard and Vampire Lords!
Paints you will need for this tutorial:
Citadel (Games Workshop)
Incubi Darkness
Lahmian Medium
The Army Painter
Toxic Mist [or Baharroth Blue and White Scar]
Royal Cloak [or Baharroth Blue]
Hydra Turquoise [or Temple Guard Blue]
If you need to expand your paint collection to follow the tutorial, check out our partner stores Wayland Games and Element Games, which offer an amazing range of paints at a discount.
Fancy a more traditional molten lava effect? Then check out Garfy’s tutorial for a slightly different approach:
Hope you enjoyed this tutorial. If so, leave a comment or reaction below, and if you got any questions, leave them here so I can answer them for you.
1 Comment
Leave a Reply
Tale of Painters is the unofficial Warhammer hobby magazine run by hobbyists like you. Support our work by using the affiliate links from our partner stores for your next orders so we can continue to bring you fantastic FREE content every day:


![]()
![]()
Or support us directly:


Hello,
I want to do something like this in purple. Would you have suggestions on a set of colors that would work?