
As a visual person, game accessories like dice, tokens and templates are important to me. Since I started to play Kill Team more often, this was a good opportunity to revise my set of combat gauges. Check out the result in this showcase post, and find out how I painted them.
I already painted a set of combat gauges when Kill Team: Octarius came out, but I wasn’t very happy with them, especially their metal trims and the shade of orange. I wanted to match the orange hue of the Kill Team tokens as close as possible. I also wanted to add more weathering this time, as if they’d seen quite a few combat encounters. Here is what I did:
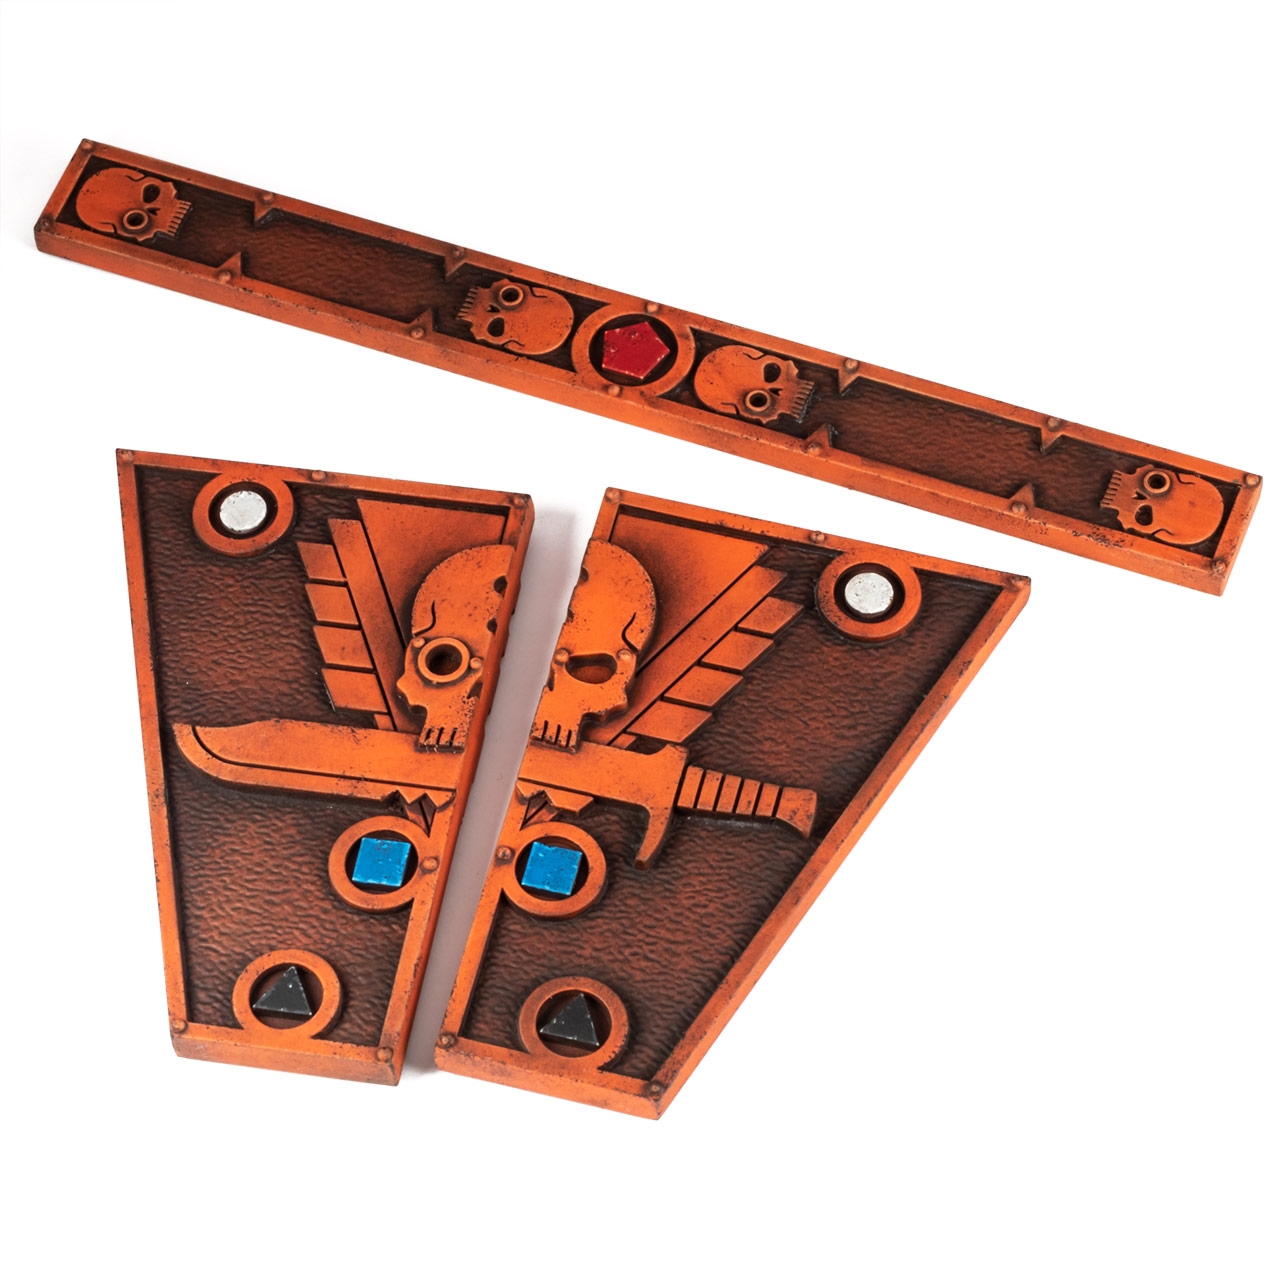
How to paint orange Kill Team Combat Gauges
- Prime the model with a primer of your choice, I used The Army Painter Colour Primer Leather Brown, but any midtone like grey is fine.
- Basecoat the model orange, I used Warpaints Air Lava Orange applied with an airbrush.
- Seal the model with a polyurethane satin varnish, I used Vallejo Polyurethane Satin Varnish again sprayed through my airbrush.
- Cover the model with AK Interactive Streaking Grime for Panzer Grey, I also used an airbrush for this. Let it dry for about 20 minutes until it is dry to touch, then use a glasses cleaning cloth or something similar lint free and remove most of the paint away, until only the recesses remain shaded.
- Drybrush the orange with Fire Dragon Bright.
- Apply some sponge weathering with Two Thin Coats Doom Death Black [or Abaddon Black or a black paint of your choice].
- To enhance the brown colour transitions on the recessed parts, I applied Ammo MIG Farm Dark Earth pigments into the recesses and blended them in with a brush.
- Basecoat the red symbol with Mephiston Red, then highlight with Evil Sunz Scarlet and add a dot highlights of Troll Slayer Orange.
- Basecoat the blue symbol with Caledor Sky, then highlight with Teclis Blue and add dot highlights of Blue Horror.
- Basecoat the blue symbol with Two Thin Coats Doom Death Black [or Abaddon Black or a black paint of your choice], then highlight with Mechanicus Standard Grey and add dot highlights of Grey Seer.
- Basecoat the white symbol with Corax White then highlight with Vallejo Model Color White [or White Scar].
- I also added some black sponge weathering to the symbols as well.
- The model was then given a coat of satin varnish again, then sprayed with Tamiya TS-80 Flat Clear for a super matt finish [Tamiya varnish can whiten enamel and oil paints, to prevent that I added a coat of satin varnish before].
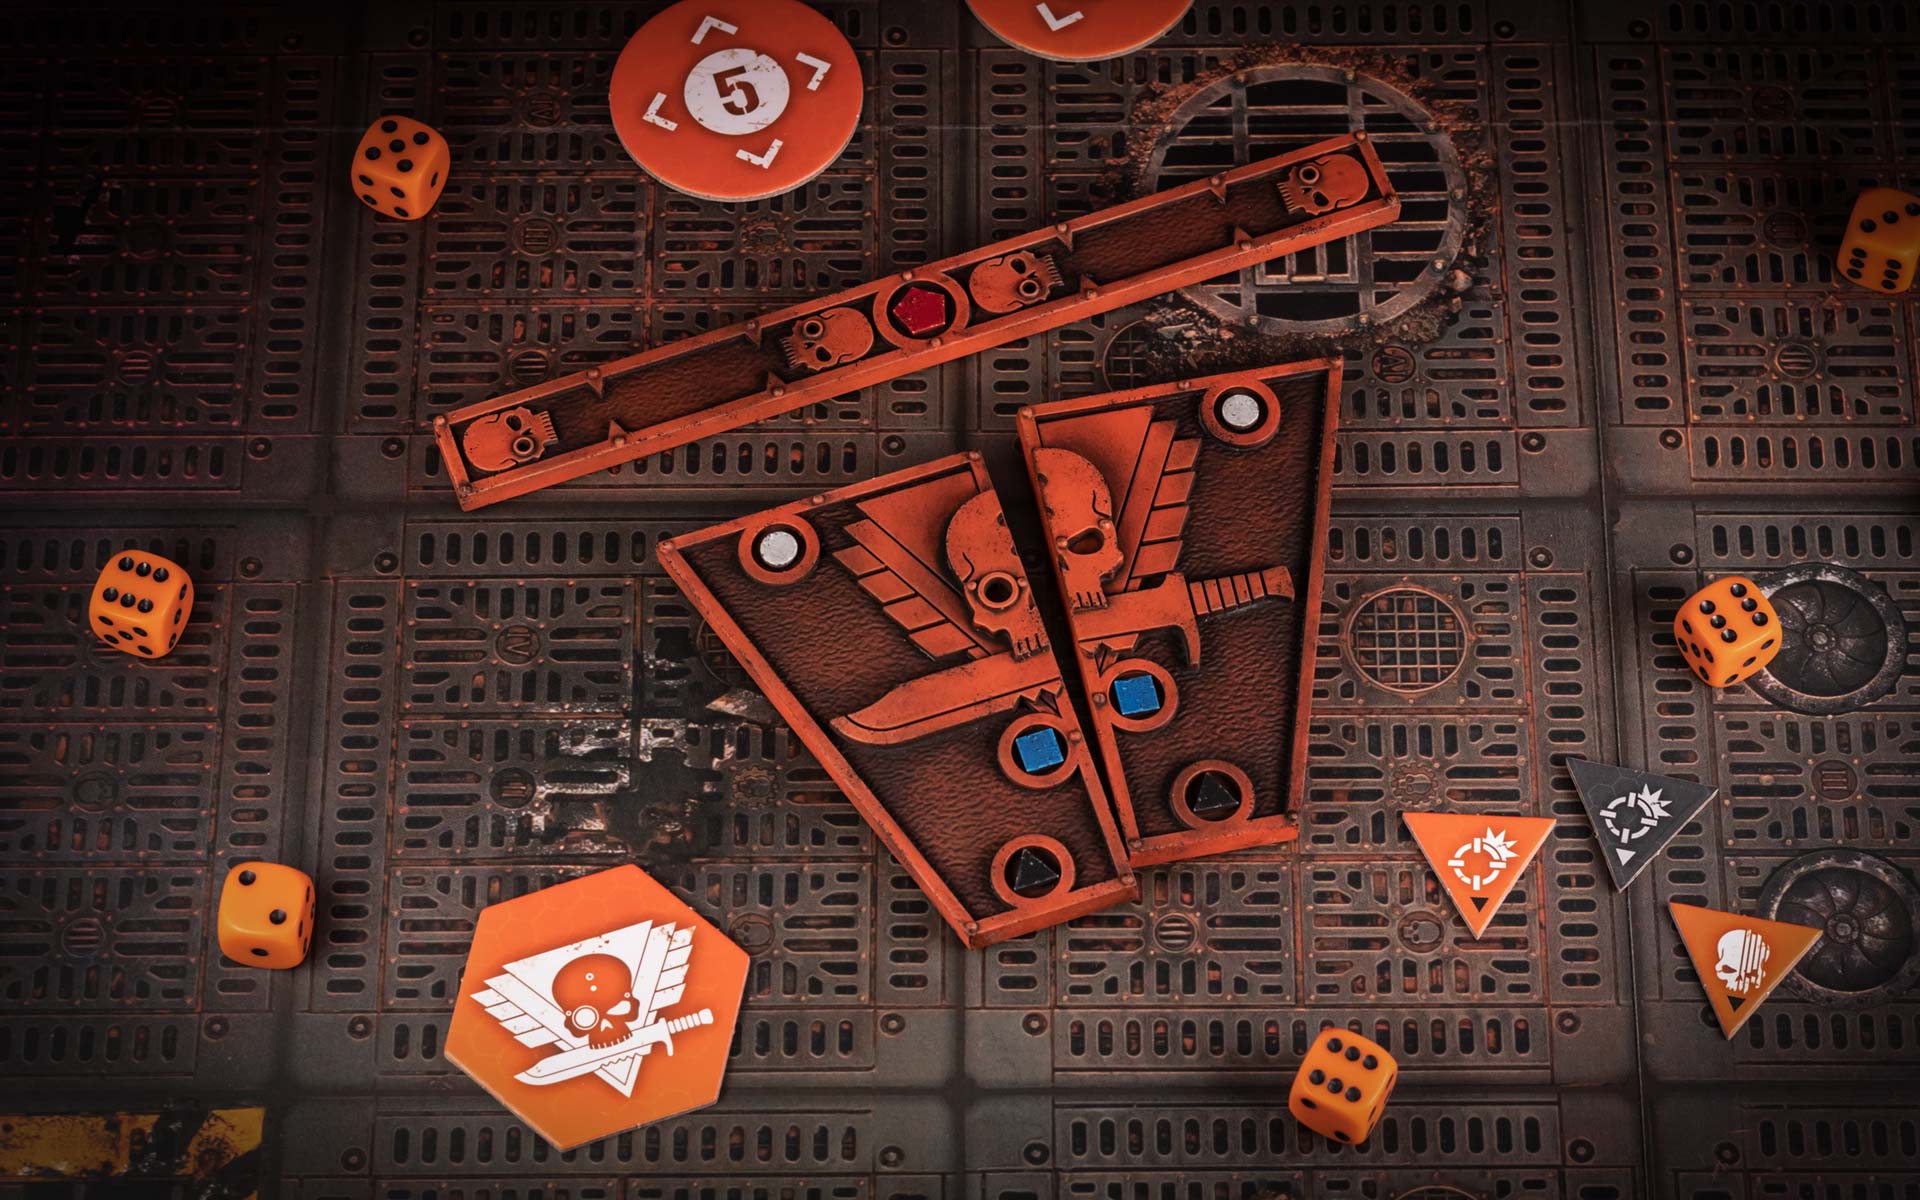
Painting the Kill Team combat gauges is a fun little painting project and adds so much atmosphere to your games, so I highly recommend it. Also, colouring the distance symbols helps me so much. I can’t really wrap my head around the abstract iconography, but associating the various differences with their respective colours is much easier for me. Maybe you’re the same as me.
Question is, which Kill Team do I want to paint next? I finished a Raven Guard Phobos Strike Team, and started an Alpha Legion Legionaries Kill Team, but a lower hanging fruit might be updating my 1st Edition Metalica Hunter Clade to make them a legal team for the current edition.
Let me know in the comments what you would like to see next, and ask any questions here or on our Tale of Painters hobby Discord server. See you soon, and happy hobbying!
Tale of Painters is the unofficial Warhammer hobby magazine run by hobbyists like you. Support our work by using the affiliate links from our 🇺🇸 / 🇨🇦 partner stores for your next orders so we can continue to bring you fantastic FREE content every day:


Or support us directly:


