
This is my second unit of Archers I’ve painted for my Tomb Kings. In today’s post I explain why it has two Champions, I share my free movement trays download link, explain a hack speed up painting your archers and to finish off a big group shot of everything I painted in January for the army.
These models were sent to me by Games Workshop for free. My thoughts are my own.
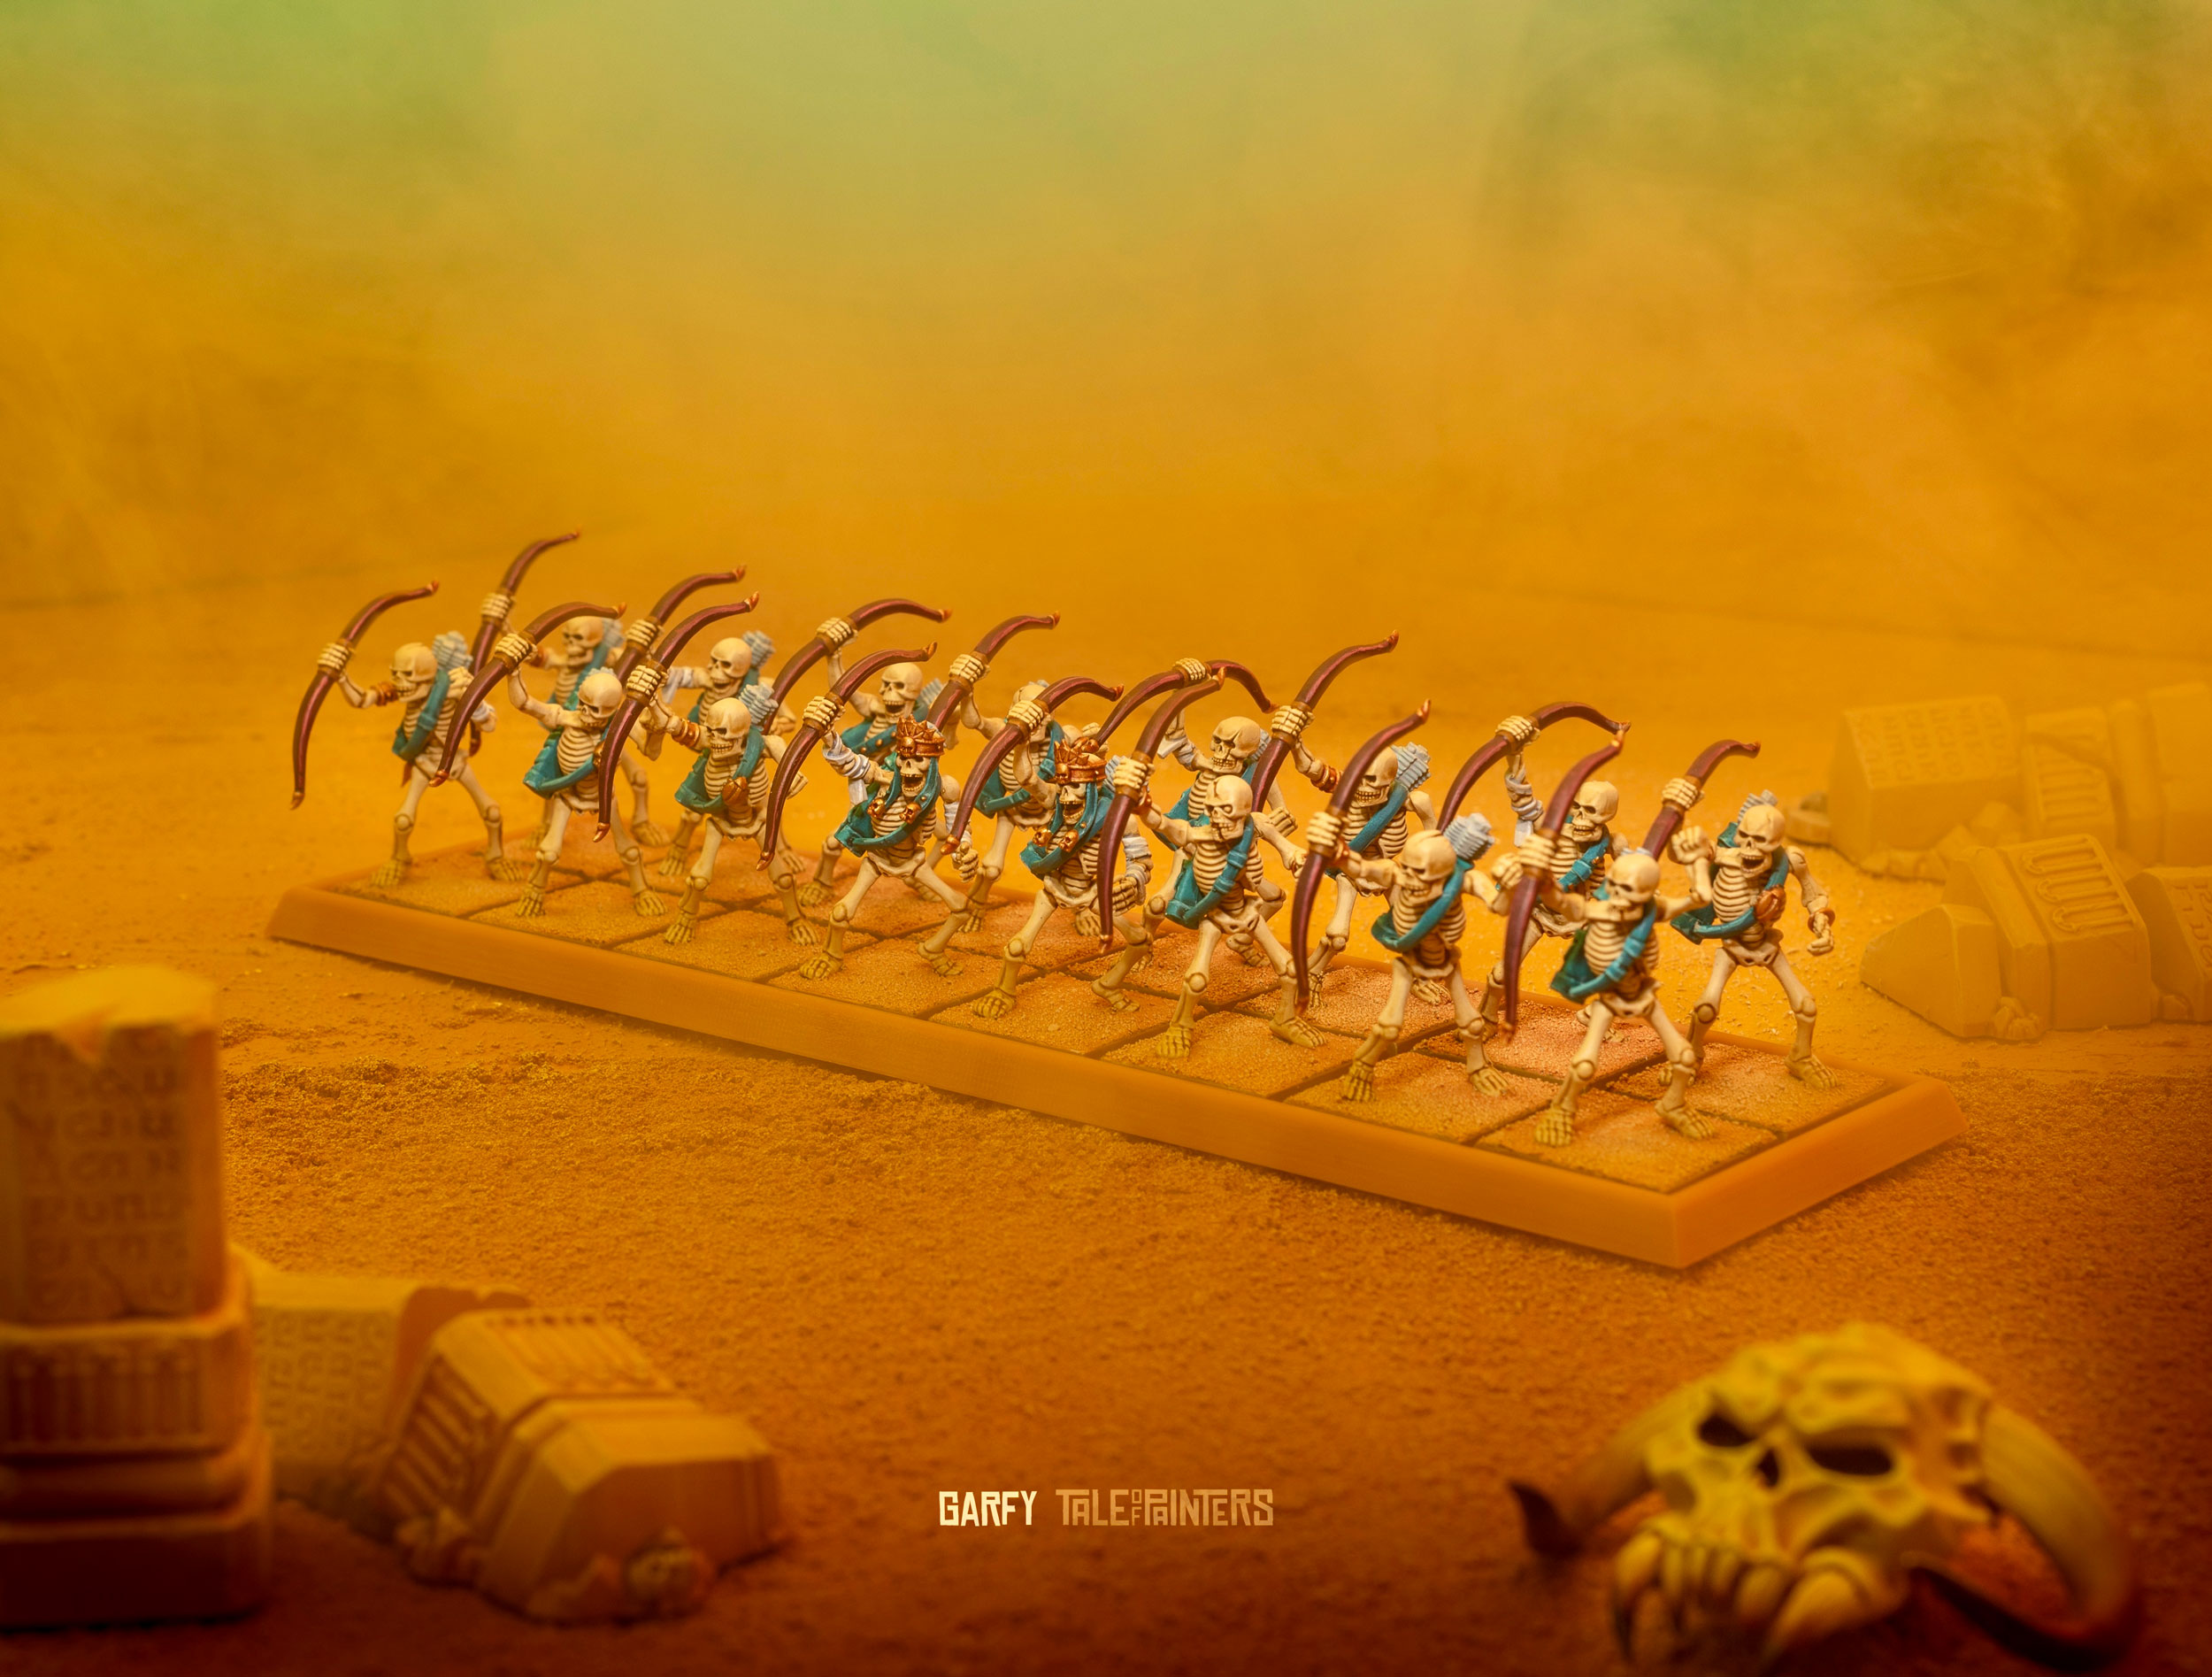
So, why did I paint two Champions? Simply, I forgot to paint one for the first unit, so I need to swap a model out. I kept all the archers basic with no head gear so the Champion gets the head gear and stands out. I think archers would be peasantry and shouldn’t have the headdresses anyway. You also don’t get enough headdress parts for every model in the box and I wanted to use a lot of them on my spearmen, so it works out for the best.


I’ve already shared this in a previous blog post but if you missed it. and you’re not a fan of the Games Workshop modular movement trays and own a 3D printer, then have I got a cool freebie for you. I took the modular movement trays and measured the angles and chamfers with digital calibers so these 3d printable ones match the official ones. I then 3d printed trays for the units included in the Tomb Kings of Khemri Army Core Set. The movement trays are as follows:
• 25mm square based models in 4 ranks of 5 models (spearmen)
• 25mm square based models in 2 ranks of 8 models (archers)
• 25mm x 50mm based models in 2 ranks of 4 models (heavy cavalry)
• 47mm x 100mm based models in 1 rank of 3 models (chariots)
Click this link to download the 3d printable files for your own movement trays.

When I painted my first unit of archers I assembled them with their quivers attached. You have to add these before the arms and head go on otherwise they won’t fit. This makes sub-assembly painting difficult? Do you leave the arms and head off and paint it all separately? That sounds like a faff and I wanted a simpler solution. So, what I did was cut the quivers strap where is meets the bottom of the bag. I could then assemble the skeletons completely and leave the bags off and use my airbrush to spray the Skeletons bone and the quivers Sotek Green. Once the models and quivers were completely painted I added a blob of superglue tot he shoulder the strap rests on and then, pulling the strap away from the bottom of the bag to create a gap pulled it over the model. A dab of superglue on the strap fixes it back in place. This saved me an incredible amount of time.

In my last post I went into a bit more detail about painting Skeleton Horde to ensure it’s clean and neat. You can check that out here. It’s worth checking out if you want to avoid unsightly pooling and tide marks with your washes.

As promised, I end the post with a group shot. Five units totalling 63 models must be a painting record for me. I’m really happy with how they look as well. Neat, tidy and organised, just how I like it.

Tale of Painters is the unofficial Warhammer hobby magazine run by hobbyists like you. Support our work by using the affiliate links from our 🇺🇸 / 🇨🇦 partner stores for your next orders so we can continue to bring you fantastic FREE content every day:


Or support us directly:


